#avatar-rigging
1 messages · Page 155 of 1
 fringe citrus
 opal river
https://i.imgur.com/dS0bUNY.png does this look right?

 fervent hornet
What looks right is kinda subjective, clipping isn't that big of a deal on that section imo
fringe citrus
I'd poke these vertices down a bit, but yeah basically it's gotta fold somewhere
looks pretty good
fervent hornet
Something to keep in mind is you're going to cover that area in clothing anyways so I personally wouldn't spend forever on it
fervent hornet
Fucks sake
opal river
xD
fervent hornet
Looks good though like Kung said
fringe citrus
My clothes are basically a leotard so I feel the strife of thigh weighting
fervent hornet
Yeah I avoid tight clothing tbh, honestly recently I've avoided human legs all together
fringe citrus
Don't be afraid to iterate on it too. Make it a bit better then come back to it later
I've seen some really awesome stuff with robot-style rigid parts legs, using constraints to make pistons connect up and stuff
@paper sparrow does really masterful work there
fervent hornet
His pistons are dynamic bones from what I'm aware and I still haven't tested the concept with overextended FABRIKs like I said it would
fringe citrus
Oh yeah they might have been inside collider dyn bones and not constraints
 paper sparrow
Exactly
Inverted collider and dynamic bones with the settings turned down so they dont jiggle
fringe citrus
They really do look awesome
fervent hornet
Hopefully stuff like pistons gets more mainstream once Final IK isn't so finicky
opal river
I feel like I'm also working a lot against my topology there
so either I'll try and fix it with this model or take notes for the next one
https://i.imgur.com/RP9EKQs.png feel like this could be done much better

but, that's a problem for tomorrow szena
but if anyone has any like reference on how this area could be done better don't hesitate to ping me
opal river
ok just noticed there's a bunch of issues that I don't think I could easily fix now so I guess that'll be something for the next model
 crisp tendon
How much did you smooth your weight paint ?
opal river
a bit
opal river
so how much does the shoulder bone actually get used when you for instance lift your arm straight up?
crisp tendon
Not very much, unless you pull hard or put them behind your head
so they definitely need a bit of weight, but not a lot
opal river
mkay
opal river
https://i.imgur.com/2GHNLIM.jpg why are the ears not being affected by the bone 😐

 gusty furnace
make sure it has armature modifier on ear object
 gusty furnace
is ears vertex group named exactly like its corresponding bone name?
opal river
yeah
gusty furnace
thats weird, does ear bone follow parent bones? for example head? in pose mode you can click with ctrl+left click on a bone to select the bone and its vertex group, so when you click this way on the ear its all red? if it is it should work.
and what about mirrored one?
opal river
it is parented properly, and the mirrored bone doesn't work either
gusty furnace
if nothing works try selecting mesh, then armature and CTRL+P and click armature deform with empty groups, this way you'll create vertex groups by bone names, then reclick on the ear and see if its still red or black
opal river
okay you might call me crazy
but even though I didn't do anything (that I can think of) and you saw it in the first screenshot how it was painted? apparently it lost the weight paint
repainted it and now it works
I'm just not gonna question this one...
gusty furnace
i'm not sure what caused it but sometimes you have to click anywhere with brush tool after selecting bone or vertex group to refresh vertex groups visualisation in viewport
glad it works now
opal river
well I'm having the same issues with the eyes now
this is so fucking annoying honestly
how did they mess up weight painting this much in 2.8
okay so
if I parent the mesh to the armature
then select the armature, then the mesh, then go into weight paint mode
then select the bone I want to paint, and paint over the mesh
I have to deselect the bone
select it again
and paint over the mesh again
and suddenly it shows up
WTF
gusty furnace
yup, thats how it is right now
So i have a question now. After thinking what @Kung said about distance from root DBone and its length point, which weight from bones actually matter for dynamic bone? Does root bone weight have influence over dynamic bone movement or can its weight be empty? By looking at Kungs screenshot it looks like only lengthpoint bone have weight that matter. So dynamic bone requires at least two bones - root, which doesnt move but sets origin/root and its child endpoint which weight actually matter and will sway/jiggle/rotate relative to its origin/root. Do i think right about this?
I always painted root bones actually, maybe thats why it never had a movement i thought it would have while weight painting
opal river
from what I've seen the root bone usually doesn't get weight
it's just there so you have one bone that requires a DB component, and then all its children get affected by the dynamic bone thing
after watching how @sour isle usually does his jiggles I'm also only using one tiny root bone in the upper part of the thighs and have the butt and thigh bones parented to that
 drowsy wharf
the "Root" bone for dynamic bones does not move at all, it is the basis for the rest of the settings and movement only
 finite pond
does anyone have the dynamic bone unity package i could use?
drowsy wharf
Don't ask for ripped paid assets here (illegal shit)
get it for $20 or wait on a sale
https://assetstore.unity.com/packages/tools/animation/dynamic-bone-16743

Dynamic Bone applies physics to character's bones or joints. With simple setup, your character's hair, cloth, breasts or any part will move realistically.
Features
- Very easy to setup, no programming required.
- Fast and stable physics simulation.
- Works with Mecanim ...
finite pond
alright true true. sorry. ill buys it.
 fresh bane
i'm currently struggling with avatar rigging but not because of the actual process
i'm having issues with the vrchat sdk not detecting that my avatar is properly rigged
properly rigged here, yet in the SDK
 turbid spear
set to generic, apply, then back to humanoid
fresh bane
ah
apparently it didn't like that and is still having issues with the rigging even though it's perfect 🤔
is it possibly the naming of the bones?
 glass panther
I've had that same issue
Really couldn't give you any help though I'm confused as well.
fresh bane
i've figured it out: selecting the "optimize game objects" option makes it so that the body and armature are one in the same, making the VRC SDK unable to find them
@glass panther this may be your issue idk
 reef wharf
my avatars aren't showing in VRChat after being uploaded but they show if I go to my VRChat home page on the website
 sly dragon
Hello! I think this is a rigging issue?
The breasts on this character are out of place in unity. but not in blender.
Ive tried applying all transforms and clearing the bone roll.
ive remade the bones for the breasts with new weights and made sure nothing else was weighted on the breasts. (with and without the weights of the parent bone)
Ive tried recreating the Humanoid rig after setting the rig to none and back.
and im not sure where to go from here. it seems like they are just higher than they should be?
Within blender everything deforms correctly. and the breasts are parented to the Chest bone (largest one) and moving that one moves the breasts with it just fine.
@reef wharf what version of unity are you using? that is usually the issue
Double check your version it should be 2017.4.28f1
fervent hornet
Are you using dynamic bones? If you are you'll need to remove the component, revert the transform section of the bone to prefab settings, and paste the component back on.
sly dragon
@fervent hornet Oh wow, yeah i am, and you just jogged my memory to a similar issue i had.
Ill give that a try, im sure that will likely work. Thanks so much XD
fervent hornet
Dynamic bones is ignorant to bone changes and greedy with the positions. You cant change the bone transform of a dynamic bone influenced bone without disabling the component before hand
sly dragon
gotcha. Thanks so much!
fresh bane
heyyy alright so i have a very important question that is not a follow up to my previous question
why is it that when unity/VRC attempts to force a tpose on my model that my bone weights are entirely messed up?
fervent hornet
Is that supposed to be a t pose or is it the aftermath?
fresh bane
i suppose it would be the aftermath
fervent hornet
What does your rig look like?
fresh bane
normally in its apose it looks like this, but when forced into a tpose in unity it looks like
... this
fervent hornet
Are your bone weights ok? It looks like you have extraneous weighting everywhere
fervent hornet
That looks like a very clear bone weight problem. In blender try to move bones around in pose mode to see if they move anything they arnt supposed to
sly dragon
Ive noticed when using gravity on dynamic bones they gravity doesnt "work" if the model is in the default position
but if i lets say roll it forward or backward slightly it kicks in?
fervent hornet
If you want a constant gravity use force instead
sly dragon
Oh fair!
thanks!
im curious. in the Rig configuration you can set maximum and minimum rotations and such. does that carry over if you are using full body?
or does it carry over into VRchat at all? i know it does with the eyes but i cant figure out if it works like im thinking
fervent hornet
I doubt it but havent personal tested it
sly dragon
welp ill give it a try and letcha know!
 fading verge
In blender
crisp tendon
wtf
fading verge
Something seems very clearly wrong there
crisp tendon
Did you do the other thing i suggested ?
crisp tendon
are the lines still there ?
crisp tendon
yep, you can try mixamo
 thorn willow
weight painting can be a pain sometimes
 tepid radish
Hey, this isn't really a call for help about avatars but I need help setting up Voice Meeter Banana so I can play music through my mic. I got it set up to where it would play music and people could hear it, but they could also hear themselves... If anyone can help here or point me to a group/person who can help me with step by step instructions, that would be awesome.


 steady patio
for the back hair to be fancy, about 3 per bundle of hair. to be optimized, bundle it all together with 4 chains with 3 or 4 bones each
for front hair / bangs, following the number of hair bundles is more important to look good, but i typically dont animate a lot of front bones since most of the time it doesnt play nice with clipping
try not to use more than 32
or at least according to the safety system, you can always check the profiler
safety system rates 16 or less dynb as good rating so thats a good number to aim for an avatar you intend to use in large or high-population worlds
opal river
mmmh I'm not sure I understand that first part
by bundle of hair do you mean the individual "strands" or multiple?
opal river
then what did you mean with bundle it all together with 4 chains? you mean the whole hair?
or all the 7 strands on the back side
opal river
so you mean like one chain for 2 strands?
opal river
okay so basically not more than 4 per chain for that length
opal river
thanks for the help ❤️
 half ravine
I'm having a few problems with making avatars right now, could anyone help me with them?
I'll leave them here for now if anyone knows what to do.
First, I don't really know how to fix that "melting" problem for avatars when I remove the bones and stuff like shoes melt together.
I don't know if there's a away to move the parts without armature, because I usually just replace it with a Mixamo created armature after removing it.
 golden zenith
do shoulders need to be present for an avatar to work as a humanoid rig?
half ravine
I don't think they do.
half ravine
It's alright! No need to apologize.
fading verge
VRChat
Unity will flag your humanoid rig configuration if it does not meet the Mecanim requirements for a humanoid. Please read and be familiar with this part of the Unity Manual when setting up your avatar: https://docs.unity3d.com/Manual/ConfiguringtheAvatar.html There...
half ravine
And second, when I try to remove stuff like extra face gestures it makes me unpack the prefab, but then it doesn't let me convert to a humanoid rig.
I used to just be able to do it without unpacking, but now it makes me do it.
And yeah, I'm not 100% sure but when I made avatars it didn't need shoulders.
golden zenith
well I was just making sure it didnt break the avatar like it does when you dont have middle fingers
I know the shoulders dont move anyways
so Im just gonna add weightless ones to be sure ig
half ravine
Alright, good luck with that.
fading verge
Got this error when I unmapped my shoulders so you probably do need them in some form
 teal badge
It might be. Try setting the bone visibility in the viewport display to In Front
 uneven onyx
Hey folks, I'm having an issue where my avatar won't lie down flat in full body
I sort of lean up extra at the hip
It also sort of seems like my waist/hip goes lower when I lie down
like If I put my hand right by my tracker, my hand is too high
 native shuttle
can anyone help me out on fixing the way her leg doesnt correspond to the mesh like it doesnt look right at all, everything is dislocated from the upper body as well , solutions?
 crisp tendon
What does the existing weight paint look like ?
native shuttle
for the legs ? @crisp tendon
crisp tendon
No the hair 
crisp tendon
ah yeah that's bad
native shuttle
D:
crisp tendon
Try automatic weight paint first
native shuttle
so seperate meshes and auto weight the pants
crisp tendon
nah, just directly like that
crisp tendon
That might help, now try smoothing it out a bit
native shuttle
smoothing out?
crisp tendon
Yeah, smooth is one of the option on the left
in the weights menu
you're also missing the T menu
turbid spear
I think you can use blur to smooth
native shuttle
i just realized
the meshes were seperated
i put them together and re did the auto weights thing and its telling me failed
crisp tendon
if it failed there's most like doubles
need to get rid of those
or holes in the mesh
native shuttle
with the mesh auto weighted with the pants itself there was a hole as i pose the leg up but im guessing cause of the weight paint not really a hole in mesh
how can i check if theres doubles
crisp tendon
select the mesh and do Merge by Distance
native shuttle
where do i find merge by distance
native shuttle
i did it said removed 0 vertices @crisp tendon
 rustic charm
You need to merge every vertices after you merged the Mesh that its connected
Edit Mode Select 2 vertices press w and select merge at center
Takes time but will work , after this you need to autoweight it again
Or manual idk
opal river
could someone be so kind and show me their weight painting for the upper and lower arm and wrists? I'm not sure how much of the lower arm the wrist should influence, if at all
realistically speaking if you supinate the wrist the whole lower arm also deforms, but should I also try and achieve that with the model?
 wind osprey
I think Unity tries to do that to an extent, results in robotic elbow joints moving incorrectly without workarounds
opal river
so... is that something to fix with weight painting or rigging?
wind osprey
Weight the wrist as you would so it can bend as it can normally (so not going far up the lower arm at all), the lower arm to the lower arm bone and so on, and unity should handle the rest
opal river
mkay


is the thumb okay like that?
and should the fingers be parallel or can they spread out a bit?
wind osprey
https://blogs.unity3d.com/2014/05/26/mecanim-humanoids/
Why this info is in a fucking blog post and not the docs is beyond me 😒
gusty furnace
does last dynamic bone in a chain require endlength bone? should that last bone have any weights on it?
drowsy wharf
Weight yes, you don't need endlength unless you need to fake the length for some reason, like a heavier end point...it's not commonly needed
each bone in the dynbone chain rotates with the exception of the root bone
@gusty furnace ⬆️
gusty furnace
Thanks, so practically there's no point to adding zero weight bone at the end of the chain in armature? Even if so, that's the same thing as setting End Length in settings?
drowsy wharf
@gusty furnace Yes, a zero weight bone is essentially the same as an End length of 1
 torn elk
Idk what happened
Looks fine when its in normal idle, guessing the bone was parented to the chest(?) idk
 north finch
hello i need help i cant upload my charecter to VRChat but my trust level is user
 next briar
Anyone know how to set up the VRIK?
drowsy wharf
@next briar what do you mean exactly?
@north finch Be aware you need to be using a VRChat account, not a steam account, otherwise more specifics what exactly your issue is would help. See below for starter links.
https://docs.vrchat.com/docs/setting-up-the-sdk
https://docs.vrchat.com/docs/creating-your-first-avatar
next briar
I'm mean the targeting, I'm trying to set up this thing, each set of legs has it's own armature
drowsy wharf
have you purchased FinalIK?
next briar
Yes
drowsy wharf
I haven't touched it at all yet so I can't help past that sadly, maybe someone else can though
next briar
At least you tried, thank you.
 sleek isle
If what i know each pair of leg need a full humanoid armature
 spiral zenith
having the big hard time with rigging my av x-x
Forgot i was working with 2 screens, despite conciously doing so
 warm oyster
probably a silly question but bones don't need to be connected, do they?
the example avatar's bones aren't all connected, just parented
just trying to keep bones straight in this weird robot arm and it'd be easier if their ends didn't have to touch
like this is the hand
 opal aurora
They need to be parented, but don't need to be directly connected
 novel thorn
does anyone mind helping me with unity, im relatively new and dont know how to put a walk animation on
 bleak halo
Hello everyone! I've figured out how to make my Avatar "ragdoll" out (making a duplicate copy that is a ragdoll and making my controlled avatar disappear), but I'm having issues with "resetting" my ragdoll avatar. It always stays on the ground after the initial drop. Any ideas how to easily reset the ragdoll to the initial position? I've tried using animations to set each piece of the body to an initial starting point, but it doesn't seem to fire correctly.
 tough robin
I have never done anything with ragdolls but I will try to help
is the ragdoll a component?
if so try disabling and enabling it with an animator
bleak halo
Well since it's a copy of my avatar, it has an armature and everything with rigidbodies and character joints. If I "disable" the armature and re-enable it, it stays where it initially falls if that makes sense
tough robin
yeah that happens with a lot of component
so are you sure animators can affect the rig ?
because the method you wanted to use originally should work
 echo nexus
yo can we use this for general rigging, not just avatar rigging?
i'm still new to modelling and rigging is stupid lol
tough robin
yeah
crisp tendon
It's pretty much the same
echo nexus
aight lit
bleak halo
So the way I had it was I start my initial animation that "enables" the armature to start the ragdoll effect. When I push play in unity, the model does not ragdoll out and will either be still or will start to float and rotate all weird. If I go to my "armature" while still in play mode, and move the animation between the frames to set the ragdoll position, it works. It's almost like the animator isn't firing correctly or unity doesn't know what it's supposed to do
tough robin
how important is it for the ragdoll to e a simulation?
bleak halo
not really that important
tough robin
you could just bake it in to an animation
that way it falls the same way each time but it will be easier to setup
bleak halo
I may have to look into it. I'd just like to know how the person who made the Tony Hawk avatar did it 😛
I'm so close, but yet so far away
tough robin
are you sure that one works with vrc?
bleak halo
Yeah, i've seen in work in game, but once the person runs the animation twice, the body just shows up where it initially landed.
Is it possible to toggle on and off just an animator on a component?
tough robin
yes
just tick the small checkbox next to the animator component while recording the animation
bleak halo
oooo, sweet thanks, I'm going to try that
tough robin
you will need another animator to disable that animator btw
bleak halo
It looks like when I try that, it states that the component is missing. What might that be about?
drowsy wharf
@bleak halo you CAN toggle the behavior of the animator, but it's a component unaccessible in the normal editor
bleak halo
Ah, is there an easy way around it or a tutorial you can recommend I follow?
bleak halo
Sounds good, I'll give it a go. Thank you very much!
bleak halo
@drowsy wharf thank you very much, I was able to get it to work! ❤️
 fierce carbon
Why am I getting this Bone message im trying to upload but it wont allow me to because of it. All of my bones appear to be perfectly fine in unity I've even tried to get rid of the upper chest option to see if that was it but it wasnt the solution
 worldly willow
re order the bones in the hierarchy (if there is a bone above the ones needed it also displays this error)
shoulder
bone1
upper arm
should be
shoulder
upper arm
bone 1
bleak halo
Could anyone explain how to make a sound play on a particle sub-emitter?
 heavy swift
so i've come to realization that "symmetrize" also affects the weights. does anyone know of a quick solution to this or can this only be fixed manually?
crisp tendon
there's videos on youtube explaining this step
 covert jay
why am I getting this error and cant even upload this avatar. IT HAS "Hips, Chest, Neck, and Left/Right Shoulders" in Hierarchy. It had bones in blender. When I click configure in rig (after setting to humanoid) everything looks as it should (aside from "spine has a bone length of zero") which I have been able to upload other avatars with that before.. I literally dont care if the model T poses, the entire time, I just wanted to add ONE emote to it (which isn't a dance, like I said idc if it just T poses there I want other models to appear and disappear around it as a song plays, but I cannot upload it as humanoid.... I can as generic.. but I cant add Emotes as generic apparently...
opal aurora
@covert jay set the rig type to generic, apply, back to humanoid, apply, enter configuration and confirm all bones are proper, try again
covert jay
did that, still doesnt give the option to upload, I would call myself a novice at this but I have uploaded atleast 30 avatars before this, this looks fine to me? hbu?
@opal aurora
opal aurora
Shoulders aren't mapped
covert jay
omfg I am an idiot, ty
opal aurora
No worries, we tend to overlook things at times when the error isn't specific or we think everything is proper
opal river
okay so for whatever reason when I'm in game the dynamic bones on the left breast of my model is freaking out, but in unity everything is fine and the weight painting seems to be fine too
apparently it's not even an issue with DB
fervent hornet
Make sure there's no arm/leg influence on that part of the model. Does it look like weight paint issue?
opal river
there's literally nothing influencing this bone that shouldn't be
it's only when I tilt my head up and down I noticed
novel thorn
anyone mind helping me rig a 3d model really quick
 twilit tartan
Yeah, I can help out @novel thorn , what do you need help with?
twilit tartan
Can I get a front or back view?
twilit tartan
Okay, I think you aligned the spine lower and spine upper to the wrong spots. You need to assign the pelvis to the hips, and move the two spine bones down a notch- lower spine to Spine, upper spine to Chest- I think anyway, it should work with this setup in mind.
Also, you forgot to assign the neck bone in the Head tab, remember to do that.
twilit tartan
Hold on, I have to go do some things, can someone else take over and help? I'll be back soon.
novel thorn
okay
twilit tartan
Alright, I'm back. This character has a pretty complex rig so I don't blame you for getting stuck, but... I will say that the two neck bones on the Head section are in the wrong spot. Move them both up a slot.
fervent hornet
If you have no eye bones leave the slots blank
fervent hornet
Left click the slot so its selected and press the delete key
fervent hornet
Does it move at all when you enforce tpose? Besides the arms moving
novel thorn
not sure what you mean sorry im relatively new
fervent hornet
Under the pose drop down bottom right of your pic there's two options. Reset and enforce tpose
novel thorn
no
fervent hornet
Reset and then enforce
novel thorn
reset?
fervent hornet
Dunno what the actual name is it's something like that
novel thorn
revert?
fervent hornet
What are the options again then
novel thorn
revert apply done
fervent hornet
No under the pose dropdown
novel thorn
it changes direction
fervent hornet
You need to stop it from doing that as that's what's making it look weird
What does your rig look like in blender
novel thorn
i dont have/use blender
fervent hornet
What are you using then?
novel thorn
unity
fervent hornet
That's not enough, you need a 3D modeling program like blender to fix issues like this
novel thorn
really? damn, alright ill download that, ill try another while its downloading
fervent hornet
Yeah just starting out it can be overwhelming because of all the needed tools and know how
The basic problem with your rig is it's probably good for dark souls but not for unity, so when unity tries to enforce a tpose it gets lost
novel thorn
its not from the actual game files i dont think i got it off of deviantart
fervent hornet
Depending on the software that originally got it it could have the original bones. Regardless it wasn't made for unity humanoid configuration
novel thorn
this is the second one i need to do
fervent hornet
Is there anything wrong with it?
glass panther
Only thing I can see is that the chest isn't mapped/assigned.
 upbeat pike
@crisp tendon so if i use weight painting it should make the tv become the head?
 minor lake
Hi! I've created an avatar from a 3D model in Blender. I'm trying to implement eye tracking with CATS. I've followed all the instructions and managed to get my avatar eyes to follow the camera. The problem is that several times the eyes enter into some kind of idle mode, and then they start looking down. Is there a way to disable this idle mode or to solve this strange behavior?
teal badge
Are you sure your eyes are set up correctly? Select them in Unity and ensure their rotation is set to zero.
In general, if the problem you have can't be fixed with playing with the bones and weights, there's nothing else you can do
I've written a guide on the eye tracking system's expectations
https://gitlab.com/s-ilent/SCSS/-/wikis/Other/Eye-Tracking

GitLab
A surface shader for Unity providing cel-shading. (Forward rendering only)
minor lake
@teal badge Thanks a lot! I'll test your instructions. 😃
fading verge
I have no Idea how to rig this model with bones. I’ve been trying for quite awhile. I’ve used mixamo but the bottom of his feet get meshed together when it plays an animation.
Could try to rig it in blender using automatic weights and then clean up the weight painting afterwards in weight paint mode.
That would be great but I’m very new to blender and I have most experience in unity
fading verge
Always a time to learn.
turbid spear
Stuff that's so close together's bound to have issues when auto weighting
Like those feet
upbeat pike
ive seen a video about weight painting but still a little confused. if im trying to get the head to move do i rig the weight paint to the neck or the head?
turbid spear
Yes, make the head all red
But if you want to put the whole thing onto head you can do it easier than painting
Altho if you're new to blender you should probably just go with the painting
Paint the whole head red with head bone selected
upbeat pike
apparently cats says i cant parent the head to the neck
turbid spear
Then you can click on the head bone in edit mode and see if it's parented to the neck https://puu.sh/F7iei/41bd30ac81.png

If not then just set the parent to neck yourself
upbeat pike
i dont see this screen
when i go through the bones on the right side it has head under the neck
like the spine > neck > head thing
turbid spear
 upbeat pike
your version of unity looks different
i found the relations tab
but i dont see the mmd part
when i click parent i only have body
turbid spear
This is blender
 upbeat pike
well im finally done with both. thanks you so much
fading verge
Bruh. I don't understand how my hand could have possibly portioned itself like this. and then while in edit mode it does this..
??? like waht. any solutions??
opal river
so if I have a root bone for my ears, and then 3 bones in each ear, and I want to limit the number of child bones the dynamic bones affect, how do I do that?
fervent hornet
Either exclusions or just merging the bones in blender
fervent hornet
It will use all children of the root you set. If you add an exclusion it will not influence the bone and the children of the excluded bone
fervent hornet
Np
 velvet copper
found what is wrong, the bones are no longer connected, just look under parented
if it's a finger, you do not want to connect it, but for the wrist, you want it connected
 atomic sage
hi guys
I recently commissioned a model and recieved a unity package
one thing I noticed is that none of the bones are rooted. is it possible to do this in unity or do I need a blender file
fading verge
Example?
 rich dew
I forget. Do leg bones have to be parented to the hips or spine for full body tracking to work?
atomic sage

this is the file name
by rooted I mean, the skirt bones are not all at the same root for efficient dynamic bone scripts
I know how to root them together in blender but not unity
 dense stump
ya ud have to do blender
but u could also put the dynamic bone script on the hips and then exclude legs, spine, etc
dense stump
welc!
atomic sage
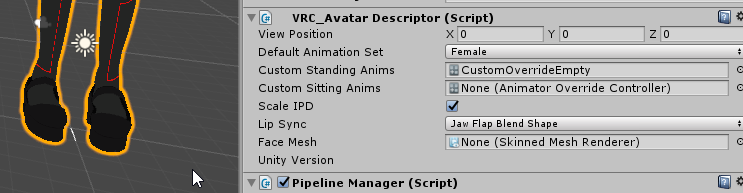
anyone know how to find the view position ball on the vrc descriptor
not sure where it is exactly
fading verge
@rich dew Hips, everything is parented to the hips eventually.
atomic sage
im adjusting the values but I dont see it
drowsy wharf
@atomic sage make certain you added your descriptor to the top level...then set the Y to 0 and it should be at the feet
 topaz vessel
my dynamic bones work in the play mode in unity, but they do not work in vrchat
 boreal oasis
Get a Pic of the entire window
topaz vessel
boreal oasis
When you mean don't work do you mean not work at all or they just don't look good
topaz vessel
no they dont work at all (also pls @ me)
boreal oasis
@topaz vessel hm sorry I don't really know what is causing the issue. Perhaps something is in the unity logs
topaz vessel
alright thanks
dense stump
@topaz vessel just to check, is ur dynamic bone limiter on in vrc?
topaz vessel
@dense stump whats that?
dense stump
@topaz vessel in the safety tab in vrc, at the top is a thing called performance settings. If u go in there, theres a thing called a dynamic bone limiter. If its checked. Then if theres more bones than the limit u wont be able to see those bones
However if its unchecked then u can see all dynamic bones
drowsy wharf
By default it limits dynamic bone HEAVILY, so much that it just disables most setups
dense stump
Very very true! Pr much never gonna see a dynamic bone with that baby on
drowsy wharf
really wish they gave us sliders for it
some setups really need to be limited when there are more than a few people as they're excessive in bone count and collisions...but the default is far too strict
dense stump
Same. Editing the doc or w/e is very annoyin but also kind of mandatory when everyone has 50 bone hair 10 colliders and duch
*such
opal river
so is there an easy way to remove all weights from a selection of vertices?
nevermind, found that ther is a button just for that
opal river
ok why the fuck is weight painting such a big pain in the ass in blender
turbid spear
It's a pain in the ass everywhere because it's weight painting
But it gets easier once you learn some things
opal river
I hope so
turbid spear
Like that you can limits weight painting to only selected, or you can change the bone you're painting for easily
Or that you can move your avatar in pose mode then in modifiers on armature tick the two buttons that will allow your pose to stay in weight paint and in edit mode
opal river
yeah, somehow for me it keeps messing up which vertices are weighted to which bones
somehow it made copies of the eye vertex groups
so the highlights of the eyes and the irises were parented to 2 different groups
shit like that
turbid spear
cats adds an eye bone each
But they're not weighted, just parented
Hide the bones you're not interested in painting
opal river
I'm not using cats
 novel prawn
hi, can someone tell why cant i change the distance between new eye bones to mesh, even if i apply vertex group of eyes to bones after i move them they are still going foward,
 naive dagger
need some help why does this happan
It's rigged right but the model ends up in the floor
?
 limpid flare
I've got a question >_> and I can't seem to understand why this keeps happening ever since the newest update. For certain avatars for whatever reason in full body after calibration the hip bone rotates slightly. And it's annoying the heck out of me. Has anyone else had this issue and how did you fix it.
The first image is in calibration where everything is straight. when done calibrating the hip bone juts out
fervent hornet
@naive dagger Make sure that when you configure the humanoid armature in unity that it does not shift up or down
@limpid flare Make sure your hip bone is pointed straight up and down
limpid flare
For sure not that.
fervent hornet
It should be directly above the hips or slightly behind, def not in front
limpid flare
alright ill give that a shot thanks
sleek isle
I kind of give up for that and apply the old fbt flip bone way.
In the dropdowm menu click add fbt fix
limpid flare
Do you mean the spine being in front of the hips or the hips being in front of the legs?
@fervent hornet ^^
 fervent hornet
Spine is ok, hip.should.be moved
atomic sage
the character is at 0,0,0 too
limpid flare
Thanks that worked perfectly. Don't know why this isnt in the documentation/ made more obvious. >_> I feel silly.
 candid quarry
when i try to rig my model, it doesnt automatically go to a t-pose, only a-pose
i also imported this same model to vrchat and got broken fingers and bad clothes clipping with the base model
although no clipping now
when i mess with the rotation with the rig
is my model just potato grade and i need to remake or is there a way i can fix this
limpid flare
@candid quarry When configuring humanoid there is a button on the bottom right where you can try to Enforce T-Pose
fervent hornet
@limpid flare Documentation is there but lacking which is what causes a lot of these questions
It's hard to cover literally everything that can go wrong
limpid flare
@candid quarry No problem.
@fervent hornet Well my issue is I'm making avatars for 2 years. Last update this problem started out of nowhere. And what's weird is that all my avatars have the hip bone in front and worked fine up until this point, and some models work fine, and some don't. But with how inconsistent the IK seems it's pretty much trial and error for now. Either way thanks for the advice, I will try to apply the hip-behind legs for a while and see if it fixes all avatars or if there is something more to it.
any documentation I have read is inconsistent at best, >_<
fervent hornet
They changed it semi recently to try to avoid the hip fix everyone was doing. All my avatars use the new way and they all work fine
limpid flare
Fair, well thanks a bunch >_<\
atomic sage
dumb question, but Im still not seeing the viewball anywhere https://i.imgur.com/rmYE5OJ.png
naive dagger
@fervent hornet thats how it looks like in unity
fervent hornet
The origin point in that view is way too high. You can see it's where the model is sunk to. The origin point should be between the feet
fervent hornet
Yeah move the origin of the armature and body mesh so that it is at the center of the of graph at the bottom
fervent hornet
Is the model fine in the configure menu before your enforce tpose
naive dagger
yes
fervent hornet
After you enforce drag the hip bone upwards until the feet are at the floor
It's a band-aid but it should work
naive dagger
i was thinking i could make a root bone so it doesnt use the hips for the root
@fervent hornet
fervent hornet
You could try that
naive dagger
ive just tryed and it hasnt done it
fervent hornet
Did you try what I said?
fervent hornet
I can't tell where the floor is if you are in orthographic, you should manually drag the hips up till the feet are touching where the floor would be
fervent hornet
So drag him up dude
naive dagger
@fervent hornet ok the origin of the armature is in the middle of the feet now
fervent hornet
See if it works in game
naive dagger
im just gonna scrap the avatar
ive still got the original avatar i just wanted to see if i could upgrade
but thank u for helping @fervent hornet
fervent hornet
It's a rigging issue if anything but there's a lot of things that could be causing it imo. If you keep fiddling with it you'll probably figure it out.
naive dagger
but still thank u
crisp tendon
Raise the hip bone
 frank palm
how do you make this kind of model work
when I T-Pose it to be all green it always goes back, no matter if I apply it
also how do I make the legs work in this shaped kind of way, if unity forces me to have them straight
opal aurora
Well i'd recommend firstly removing the extra set of bones on the legs (as only the leg/knee bones work in unity) and attempt to connect the knee bone to the feet bones, this way the section behind the knee should follow, however no extra bending will come off from it; unity should also accept your layout without needing to offset the bones for a perfect t-pose
Do keep in mind that it will assume your layout as being in T-Pose, so if your arms are in an A-Pose, it'll bend them further than it should
frank palm
do I have to jump back and forth between blender and unity, editing the rest pose until nothing is red anymore?
Or is it possible to do at least small adjustments in unity for the rest pose at all
opal aurora
Things can be red as far as i'm aware, but the current pose will be taken as an assumed T-Pose
But any major bone alterations should be done outside of unity
frank palm
but can I change the bone positioning at all in unity?
when I rotate them to be green and hit apply, they wont apply
when I open it again everything went back to default
opal aurora
Any changes in the rig config will not display on the normal view
frank palm
what I mean is that the rig config stays the same, even when I hit apply
opal aurora
However they will be applied to humanoid bones, and act as such in play mode
So the rig config always goes back to default?
frank palm
for example I enforce the t pose just for testing
then I hit apply
then I hit done
so I am in my scene window again
i click configure in the import settings again
and it is all as before
opal aurora
That doesn't feel right...
Do you have any other working models at hand?
I can't recall if this is normal behaviour but i find it highly unlikely
And do you have any import message errors under the humanoid setup? (on the same page as the configure button)
frank palm
yeah but I mean
it changes back even if I assigned it the right way
it shouldn't matter
opal aurora
Try to fix that and see if it finally sticks
If it doesn't, restart unity as that sounds like all kinds of wrong to me
opal aurora
On this specific model or different ones aswell?
opal aurora
How odd...
opal aurora
Probably incorrectly assigned bones
opal aurora
1 bone per hand
frank palm
for example this is set as head
opal aurora
3 bones per finger (joints) iirc
The spiky edges are pretty much what the head is parent of
They outstretch to other bones parented to it, such as ears, eyes, hair etc
But it's still a single bone
frank palm
hmmm alright
opal aurora
Check out the mapping window and make sure the hand is in the proper slot
If it's not then assigning it should turn a slot red somewhere, which is where it was erroneously
frank palm
for some reason it is working now. maybe it was the missing hand, not really sure though
opal aurora
Unity doesn't make sense sometimes sadly
frank palm
thanks for helping
 warm smelt
Is there a way of creating empties inside an armature in Blender like you can in Unity?
I want to separate FrontHair BackHair into their own groups without breaking the parenting, but also want it to work directly in Unity from the FBX...
Without having to break the prefab
wind osprey
Unity mixes the concepts of game objects and bones, whereas blender forcibly keeps them separate.
Just use a bone in blender where you'd think to use an empty in unity. Results should be the same.
warm smelt
ok
 keen mortar
Anyone got any ideas on why parts of the hair come into view like this? It's all weighted to the head bone.
drowsy wharf
it's probably not fully weighted to the head bone, another bone probably has some weight for it
keen mortar
@drowsy wharf I've tripple-checked but can't find any other bone that would be affecting the hair
drowsy wharf
it could be a vertex group improperly assigned to it that's causing it
go through your vertex groups in mesh edit mode, if you hit "select" under the vertex group it'll highlight what it affects
but the head bone (and so any child of it) is shrunk to 0 scale locally to hide it from your own view...so other than an improper bone weighting (or the vertex group assignment) it shouldn't even be visible
keen mortar
@drowsy wharf I've cleaned all vertex groups but the issue remains 🤔
opal aurora
Try to weight paint the head with auto normalize ticked in the weight paint options, doing such will make it so any outside weights get set to 0 if the head weight is 100
You must however, paint over the whole head so that such is applied
keen mortar
@opal aurora Already did that 😞
opal aurora
Then it's likely something else
keen mortar
Thanks for all the suggestions, but I shall take a break for now - if anyone has any more ideas feel free to send a msg!
 modern drift
@keen mortar not entirely sure whats causing it, but something is making your hair move quite a bit. The camera hides a certain amount of mesh from your view so some models dont have to try and see through hair.
It's definitely either your hair weight painted somewhere weird (or not weight painted at all?) or the dynamic bones are totally wild.
keen mortar
@modern drift I have no dynamic bones on it, and in the gif it had no separate hair bone what so ever. It was all part of the head, and should therefore not be visible even if it had crazy dyn bones.
Bug also only happens when moving. (I have not tried looking upwards in VR yet. tho'.)
I will keep fiddling with the weights again later.
modern drift
Hmmm yeah I would imagine somehow some weight painting from some part of the body may have snuck on there. Otherwise I have no clue
keen mortar
Yeah, it's weird, but thanks anyway 😄
 spare herald
@keen mortar it could be your viewball
might need to adjust it
how far is it into the head?
keen mortar
Currently like this
keen mortar
Hm, it's better now but still visible at times. I'll try stuffing it even further inwards
spare herald
models with big heads
need a weird setup for viewballs
they need to be a bit in the head if i recall correctly
keen mortar
Yeah it's better again but still sometimes visible. I'll keep fiddling some more with the view, thanks for the help!
 south condor
Hello, I was wondering if anybody here is taking avatar commissions. I already have a model, I just need to make sure it's rigged correctly, have facial animations added, and skirt physics.
Sorry if that's in the wrong channel. ^^'
 proven lintel
Hi guys, i have a question. Whenever i am standing still, my avatars hip leans forward quite a lot. While moving, all looks normal, but as soon as i stand still, his hips move forward and stays in that position. I would be so grateful for any help, i am clueless 😅
crisp tendon
You lean forward or your hips move forward ? There's a small difference
proven lintel
hips move forward, thanks, i will edit the comment!
crisp tendon
What does your model's tpose look like from the side in blender
proven lintel
crisp tendon
i'd suggest making your spine straight and connecting those bones
proven lintel
okay, i will try that. do you have any suspicion, why its only when standing still?
I have it like this right now, will this be better?
crisp tendon
is the hip bone straight up above your leg bones ?
Could try moving it forward slightly
proven lintel
so this is how it was
weird thing is, in the preview at the avatar selection windows everything seems fine
crisp tendon
@fringe citrus Might know, but i don't think there's a way to completely avoid that movement on desktop
proven lintel
oh okay, so in vr it will be gone?
i am waiting for my vr set anyways, so that would be good news anyways
fringe citrus
@proven lintel I can't say for sure, but I have a few guesses. The reason it only happens when you stand still is because that's when the desktop head-look IK takes over. This doesn't look like the usual spine problems with fbt. My guess is it's one of or a combination of your avatar view descriptor position having an issue (is it out in front of your face?) and /or your rest pose having a pronounced backwards lean. Specifically at the neck. It looks like the neck bone might be leaning backwards.
A screenshot of your avatar descriptor view ball from the side would help.
I think as Ruuubick said, funky behavior with head-look IK in desktop can't be completely avoided. Everyone's seen the crazy look desktop users can give when tilting thier head up.
But adjusting your rest pose to not lean back so much, having your neck bone lean forward, and possibly moving the view ball in closer might improve things
 dense crag
hi guys, i'm a bit new to blender, anyone knows how to merge both head and body together? Here hows my avatar's body look like.
Here's the avatar's head
and it become like this, both head and body have their own eyes and mouth bone... and also both body and head has different size 😮
crisp tendon
The cats plugin has a merge admat function
dense crag
@crisp tendon Okay found it! Thank you c:
 steady bridge
so not sure if i post here or 3dmodeling im having an issue that in blender my model has keyshapes that work and soon as i export it to fbx it looses all keyshape function in unity shows theres zero keyshapes even though when you bring back into blender they are there

any one plz like it only just started doing this and i realy annoyed i even made a new head for it same thing no visems in unity
drowsy wharf
make sure you apply modifiers before you export
steady bridge
they are
drowsy wharf
or check "apply modifiers" in the export settings
steady bridge
it is. if i do a new model it works just this model and a few others zero work on export
opal river
ok so I need help again. I have my naked base model that has all modifiers applied and is rigged and everything, and I now want to add clothes. can I just model the clothes and then transfer all the weight painting from the base to those?
opal river
nevermind, I think I figured it out. create the new mesh, parent it to armature with empty groups, select new mesh then base mesh in object mode, search for "transfer mesh data", vertex group(s), source layers selection "all layers" and destination layers "by name"
gusty furnace
also I would recommend Projected Face Interpolated method in Data Transfer modifier. Works best for clothes from my experience.
opal river
okay
fading verge
Hey! I'm a bit of newbie when it comes to rigging a model in blender, and i just a few days ago tried to rig the hands using a tutorial. Problem is, when i weight paint them they just shrink and grow in size and my mesh doesn't follow them correctly. Am i doing something wrong?
turbid spear
If it shrinks then you likely have it weighted to more bones and both are pulling the mesh
fading verge
Now that you say that, the main hand bone came weighted to the entire hand. Should I clear its weight on the fingers?
turbid spear
You can try
 sharp lily
is there a way to set up models to walk together like having a trio of characters walking together?
or is this the wrong section to ask that in?
worldly willow
Final IK is used to do that i believe @sharp lily
sharp lily
ok thanks
worldly willow
if it is the same model you could try silent’s cell shader duplication option (it can create multiples of your avatar using shader trickery)
sharp lily
its a trio of different models
sharp lily
-_-
 empty mirage
anyone know why this bone is just selecting a random other bones weightpaints?
turbid spear
You sure it's not just painted to the wrong bone?
To make sure the right bone is selected you can select it by selecting the vertex group with the same name
empty mirage
oh it doesnt show up in vertex groups
drowsy wharf
@native shuttle other than the default pose having the legs too widely spread it looks ok, can't tell proportions though which have a big impact
Fingers should also really be straightened out a bit into proper t-pose positions
native shuttle
are you saying to spread the legs a bit? @drowsy wharf
drowsy wharf
close them more, they're spread too far
Leg bones should be basically straight down (x axis wise at least)
 rose shard
My model has been properly weight painted but I think I missed something because the chest seems to go through the clothing.
drowsy wharf
best option is to remove the part under the clothing that won't be seen (saves on pointless polys too)
if the skin is moving through the clothing, it means they aren't painted the same, so they move differently
drowsy wharf
whether that's just because they weren't painted the same, or because auto-normalize was on for one painting, but not the other
rose shard
Most of it has been removed, but there are some parts I want to keep so it doesn't look weird.
I figured it out,
I accidentally painted it on the wrong bone.
im an idiot lol
 keen tiger
dw, we all make silly mistakes
 remote barn
So question about the hip bone placement cause I get a lot of mixed answers
Is the hip bone when using full body supposed to be rotated upside down like how the full body fix in CATS does it? Or should it just be how CATS normall fixes it?
Cause some people are saying that even after the IK update the hip bone still needs to be rotated 180 degrees in order to actually have your body bend at the hip instead of the lower stomach area
And I see various avatars that cave in at the stomach instead of bending at the hip
drowsy wharf
@remote barn The full body fix is no longer needed, even cats most recent version agrees.
Hip should point up, legs point straight down, then bend back at the knee slightly.
Spine should point backwards slightly, and chest forwards slightly. Both bones should be about the same size.
fading verge
when I make a cartoon avatar, I exaggerate visemes for lipsync However, when I use the avatar, it doesnt look as exaggerated when I talk. does vrc only bring the blendshape sliders to like 80% when talking, or am I imagining things?
turbid spear
Probably depends on the volume of the sound
 silver edge
anyone able to fix avatar's spine/hips bending in fbt? If so please dm me.
drowsy wharf
@silver edge Hip should be pointing straight up, upper legs straight down, and then a bend at the knee.
Hip should be above (and usually slightly behind) the leg bones.
Angle spine backwards slightly and chest forwards slightly, both bones should be about the same size
silver edge
sadly idk how to use Blender to fix that issue
turbid spear
it's real easy, just select the armature, go to edit mode and move the bones around
if you don't move stuff to much you won't need to mess with anything like weight painting
 unreal harness
@turbid spear when i go out of edit mode after hiding head+hair bones they come back, they're only hidden in edit mode
and i'm pretty sure i tried the method of selecting specific bones and automatic paint, it still made hair paint the shirt
opal aurora
I'm pretty sure you can both
A) Limit the amount of bones that can affect a mesh at any given time that would lessen the probability of the hair bones being picked for it
B) Disallow certain bones from being weighted to the mesh, but i sadly can't recall its name
unreal harness
@opal aurora how do i do any of the two
turbid spear
I'd just separate the bones to a different armature, auto weightpaint, then join them again with ctrl j
unreal harness
@turbid spear i did that and still causes some issues but less than what the hair would do
but what do i need to do to fix that after re joining them
opal aurora
Reparent the bones
unreal harness
got it thanks ^^
unreal harness
is there a way to copy the weight paint i'm doing on the right shoe to the left shoe
or will i have to do the same thing again
crisp tendon
@unreal harness If you haven't found out by now select your vertex group, copy it, then do mirror vertex group, and change its name
unreal harness
@crisp tendon uh how do u do that exactly p;
also my shoes are the same mesh, should i separate them?
unreal harness
@crisp tendon they're painted to toe, ankle and knee so i copy 3 groups right?
also i tried that but nothing happened when mirrored
error on the top says 6320 failed to mirror
crisp tendon
Are your shoes symmetrical ?
unreal harness
they do have the same scaling and same y,z coordinates so yea
crisp tendon
How did you do the first paint on the right shoe ?
You could do automated weight paint for both
unreal harness
i tried it just fully painted the knee paint to red
but nothing on the other bones
 unreal harness
uhm it transfers like half
transferring weights worked ok but idk how to make it so the bones on the other leg control it
instead of one leg moving both shoes
unreal harness
would that be easy or should i just manually paint again
i think i'll just paint again but thanks a lot
crisp tendon
Well, if you symmetrized then you could auto weight paint everything
up to you, both are good options
unreal harness
@crisp tendon sry again smth small, i finished 1 bone which was the hardest to paint and realized i was painting on the knee instead of ankle xD
is there an easy way to transfer from 1 bone to another?
unreal harness
tyty ^
 inland marsh
fading verge
inland marsh
fading verge
when i try to select my model to set it to humanoid i cant find the place to set it
fading verge
theres just nothing there
worldly willow
Click on the model (use the thumbnails to find it easier)
 lavish finch
just a quick question, do the shoulder bones move up when users move their arms up in the air or is it just the arm bones
fervent hornet
They move all the time just very slightly IIRC
lavish finch
guess i'll have to try weight shading both ways.
fervent hornet
Usually only weight the upper part of the shoulder about .2 or .5 but ive seen other methods
fading verge
Quick question about how VR chat handles rigs
steady patio
M?
fading verge
So say you have a character wearing high heels, or stilts
if the actual rig of the character is accurate to where the characters actual skeleton would be, e.g. raised above the origin point within the characters mesh
a person using that avatar, stood on the floor would still control it properly because presumably, the entire rigs animation is just offset upwards of the origin point, right?
rather than the rig touching the floorplane to match the user stood on the floor in their tracked space?
steady patio
thats the idea
fading verge
Ah great, thanks
fervent hornet
If anything the foot bone should start at the ankle and reach the floor. In heels the angle is just more steep
fading verge
Would that not offset the deformation of the foot though?
Although that said, I'm coming from a VFX background, so the rig that this uses is probably pretty different to what I'm used to
fervent hornet
Well it wouldn't offset the deformation since the head of the bone stays on the ankle joint
 worn summit
i feel like this is too "nsfw"
 naive tree
not really, there's way worse avatars
worn summit
oh lol-
opal river
what could be the reason that the rigging looks fine in blender but is broken in unity? I have separate pupil shapes that I hide and show via shape keys, by default they're hidden inside the head. they are weight painted the exact same way like the eyes and the eye shine (which work as they should) but when I move the eyes in unity the extra pupils are behaving as if they're not painted correctly

https://gfycat.com/PitifulIndolentBorer in blender
 crisp tendon
did you create eye tracking with it being disabled ?
opal river
no cats was used
opal river
it wasn't
crisp tendon
alright, i have no idea then sorry
opal river
it would help to export the FBX into the unity folder, not the blend file folder...
it was just as weight painting issue
unreal harness
is there a decent way to paint the front part of the shorts so it doesn't clip that way? i tried multiple ways to make it clip but not as much, nun work
crisp tendon
There's a good weight paint add-on for blender that does project weight paint from around
 marsh brook
So, just a question, how would one copy bone constraints from blender to unity
It's just transform constraints, pretty sure
 thorn minnow
this avatar im working on, when i load into a world the dynamic bones dont work until i switch out of the avatar and back into it. it's the same for people who see me. all people i tested with did not have the dynamic bone limit on.
opal river
could someone show me their rig and weight painting for the whole shoulder/upper arm region that's working with FBT? I'm never sure how big and how much influence the shoulder bone should be and have
turbid spear
Set the rig to humanoid in unity
drowsy wharf
@fading verge if you go into pose mode in Blender, does the mesh move with the bones?
If not, your mesh and armature are not joined so you're either exporting the bones or the mesh instead of them together as one
why do you have them separated?
and in that image it's pretty clear they aren't parented to the armature
drowsy wharf
to the armature not to a specific bone
drowsy wharf
you probably have doubles interfering with the auto weighting
mesh edit mode, "remove doubles" in the search
if it cannot weight paint it automatically you may have to do it manually, or try to use something like mixamo
@fading verge ⬆️
opal river
so I noticed with my avatar that if I move using the joysticks a second or two after I come to a stop my neck/chest seems to be tilting backwards and the hips/spine forwards, is that normal or an issue with my armature?
sleek isle
@opal river might be just local
 mild stratus
There are 2 problems I can think of: 1) one the rig isn't attached to the model and 2) The rig isn't in a t-pose and will not work.
Wait, does anything else move with the bones?
Then you need to put it in blender and do it there.
ok
I can dm you anyway.
crisp tendon
Did you enforce the t-pose ?
turbid spear
is there an armature modifier on your mesh after you parent
and does it have the armature assigned
no, modifiers is the wrench icon
yeah looks like it's assigned, i dunno
velvet copper
is it not weight painted then? did you parent with automatic weights?
opal river
https://i.imgur.com/WXRsHSX.png just so I know for the future, is that back arch too much where it could be causing issues in game? or can I leave the mesh as is and just straighten out the spine and chest bones?
 turbid spear
That can be caused by a bunch of reasons, and i'm not sure
Is your mesh properly connected tho? Try selecting everything with A and doing ctrl+M and by distance
Then try weighting a gain
Or just send me the blender file and let me take a look
turbid spear
i meant alt+m
 idle crystal
unreal harness
idle crystal
unreal harness
not so experienced with painting but is this a normal shoulder painting?
not sure if when a shoulder goes up it should clip the neck of the shirt
 cunning willow
Anyone know how to make a chain
 wary nest
Is there a limit to how many bones can affect 1 vertex during weight painting?
cunning willow
Hello
crisp tendon
@wary nest Well, the more bones the less effect, so there's probably a point where it's pointless
wary nest
I get that. Is there a limit though within Unity or VRChat? The most I see my character requiring is 3. Is that kool?
wait
maybe 4
Maybe nvm about my question lol. I'm currently laughing at myself for thinking that this may be an issue, but I've already got places where it uses 3 and that'll be ok. I was just worried if I needed more, whether there is a hard limit set anywhere that's all.
Thanks for your help! 🙂
cunning willow
A chain as in a rope-like since I’m making ghost rider
crisp tendon
Model one piece of the chain and then duplicate it and move it ?
cunning willow
Yeah but I need it to have slack
crisp tendon
What does that mean ?
cunning willow
It means that it is able to move freely
crisp tendon
well, make the chain, then create bones, weight paint it and give it dynamic bones
cunning willow
Yeah don’t know how
crisp tendon
Google it and try it 
cunning willow
I have
crisp tendon
If you have questions on specific steps we can help, but we can't do it for you
Did you find a tutorial that you didn't understand ?
cunning willow
No I mean there is no tutorial
crisp tendon
i found one in 5 seconds
what are you searching ?

http://www.LittleWebHut.com
This Blender video demonstrates how to make a realistic image of a chain. Blender's Rigid Body Tools are used during this video. Blender's cycles render engine is also used. Blender version 2.68a was used for this tutorial. This video shows many te...
cunning willow
Thanks
 main belfry
can someone point me towards a weight painting guide for humanoid objects? I need to redo the weights on an avatars arms and feet but the feet confuse me especially since it has a bunch of extra bones im not sure what to do with
turbid spear
Use CATS to merge the extra bones to parent
You only need leg, foot and toe
The other ones are probably ik bones that you need to get rid of
turbid spear
I think ik bones aren't weighted and you can just delete them, but I'd still merge them with cats just in case
main belfry
the ones on the arms are share half the weight with the regular arm bone
should i remove the weights? or is it fine to just merge them?
turbid spear
merge them
main belfry
i thought i had a weight problem but even setting the whole arm to red this still happens
ahhh nvm. Deleting the Ik bone instead of merging it seemed to be the fix
turbid spear
Look at the weights I guess, if it's also weighted to both bones merging it to one might cause this yeah
main belfry
ik bone was weighted to one half and arm bone to the other half. First time I've see this set up
turbid spear
Could be a bend bone of sorts
I've seen some games have that specifically for bending
opal river
https://i.imgur.com/WXRsHSX.png still looking for feedback on whether that back arch in the armature and/or model is too much where it could cause issues in game
crisp tendon
I was told that the arch should be the opposite from what you have
opal river
you mean of the armature?
 lone nacelle
Ok so bear with me here, not only is this my first time truly rigging but this is my first time making a VRchat avatar, and maybe I'm just dumb but while looking at instructions and examples does VRchat have it's own IK system using Unity's rigging system or is it on yourself to add proper IKs to the rig?
fervent hornet
Vrchat has IK, your rig should be a normal unity humanoid. IK twist bones and such are ignored
lone nacelle
So as long as Unity humanoid is satisfied then VRchat should be as well? and nothing else is needed for VR control over the arms, thats all VRchat?
fervent hornet
Yeah it has IK. If you want to set up your own IK you should look into Final IK but it's not in a great state atm.
Before upload you'll get errors if the IK will fail once in game
lone nacelle
Okay thank you I'll look out for that stuff
crisp tendon
@opal river Yep, spine should have the arch going the opposite way
opal river
okay, but it doesn't matter if the mesh has a "anatomically correct" arch?
crisp tendon
in your case it doesn't have anatomically proportionate shapes, so i don't think it'd matter much, more for weight paiting
sleek isle
my rig look like this. no problem of what I see
crisp tendon
in fbt ?
sleek isle
yes
can be far back like this
you can try the one that is like that in the quest church. The room on the left https://d348imysud55la.cloudfront.net/thumbnails/file_8c20d56a-7a6d-4896-a093-6003113f3613.652975703.1.thumbnail-256.png

 potent ermine

reddit
168 votes and 22 comments so far on Reddit
fringe citrus
@opal river If you go off the tpose-new.fbx in sdk you'd want the spine to bend the other way, but after some testing trying to film examples of the results of the reversed rig I couldn't get problems to appear consistently. I'd say leave it as it is unless you find problems with chest rotations or the direction the spine bends when IK tries to compress it. It might cause problems like that, but yeah was hard to reproduce
Something else you might want to think about though, often with character modeling the "standard" way is to go for a very appealing cinematic look. Usually ending up in a very heroic/sexy pose with an arched back or puffed out chest. Kinda like batman often stands
And though you're making a character, you're also kind of making a costume that you're gonna need to stand inside with your own real posture
Most of the stuff out there on modeling doesn't have any considerations for rest poses being realistic for stepping in like a costume, it's all about appealing look
You'd probably want to meet somewhere in the middle though, because if your IRL posture isn't that great you can look better in vr by having some of your character's bones not completely match
but you might want to think about how close your usual posture is to having angles like here in your mesh:
if you tone it down it'll look "worse" in a less appealing way when just static in blender, but closer matching your usual posture will allow for better fit in fbt. It's not something you have to do but something to at least think about.
Here's an example from my rig, it doesn't look appealing and also it's slightly leaned forward for other reasons, but it kind looks like someone just standing not looking especially heroic or sexy or anything.
sleek isle
for what you ask earlier, that's what my shoulder weight paint look like on a model https://gyazo.com/c1482a5ac87c4a9744fa3622b92b468a
opal river
@fringe citrus mkay, thanks for the explanation. so basically the spine bone should be more straight and chest bone should be tilting slightly forward and the back arch of the model should be slightly less extreme than what I did? I didn't really try to make it especially sexy or anything, just what observed is a mostly natural pose for women to stand in, ie pelvis tilting more forward and chest more backwards
but yeah I guess thinking about it more like a costume is a good guide
sleek isle
I am once again asking for your opinion about proportion. who look the best and why
opal river
personally i'd be leaning towards 2 or 4 cause they look the most "natural" for an anime styled character
1 has the "legs for days" syndrome, 3 feels like a "I wanna have dummy thicc anime thighs but realistically sized head"
5 is leaning more towards realistic proportions
opal river
yeah I think 3 and 4 have slightly too long arms
so maybe body from 4 and arms from 2
boreal oasis
The legs look massive and the waist seems a bit too hourglass shaped. But I would say 2 or 4
opal river
legs look healthy to me in terms of thigh size. yeah teh waist is very hourglass but nothing totally extreme
boreal oasis
It's just seems a bit extreme when a single thigh is the same size as her waist
opal river
yeah, the waist could, realistically speaking, use some meat and fat
but as long as it was a conscious design decision I think it's fine
sleek isle
Ok i will narrow to 2 tomorow and see
And yes. 4 and 5 are base of a female reference
I try to play with head size because I feel too big when am beside other people
remote barn
Does anyone else notice that the shoulder/upper arm rotation is way too extreme?
opal river
where?
opal river
yeah
remote barn
Idk if I'm just going crazy
opal river
I noticed that too but I thought maybe I did something wrong with my rigging
I still have no idea how big or small the shoulder bones should be and how much influence they should have
since there's not much documentation about that
at least that I could find
remote barn
It's morely the upper arm. Like if you move your hand while in full body the upper arm rotates way too much to compensate
remote barn
And it causes needless clipping and twistie-tieing
opal river
yeah some more transparency on how the IK and everything works would be nice
remote barn
i just looked at the open beta and from what i can see it actually completely fixes the issue
so it is an IK issue and not me being an idiot
fringe citrus
As far as I know, the way local IK is solved isn't changed between the live build and beta build. If it was an issue with how you looked to others though maybe the updates to networked IK could have fixed it
fringe citrus
@opal river Pretty much, (like I was saying not sure how much it actually matters but) spine bone should ideally be slightly tilted back and chest slightly tilted forward, you don't have to have quite as much forward lean as you see in my model, I'm testing that because it seems to improve stability when the chest wigs out under quick 360 spins (though that issue is already way better anyway since the sept 2019 update). You'd use the joint at the base of the spine bone to handle the pivot around the small of the back, and you'd use the joint at the base of the chest bone to handle the pivot that controls what moves with the ribcage vs the softer flesh below. And try to position the joint accordingly so the weights look good and keeping in mind that a biological spine runs towards the back of the back. If you want an example of that google term "lateral chest x ray" will give you good reference (if you don't mind seeing some real insides) And you don't have to try to totally remove the curve in your back, there's a natural one anyway, but as a rule of thumb I'd say if the model looks like it's waiting for a bus, probably it's good as a costume, if it looks like Batman or Catwoman it might be a bit too stylized.
Also about the shoulder sag ( @opal river ) if you're having trouble with that, you'll probably want to switch your rest pose from an A-pose into a T-pose. I have some example screenshots from the new version of my fbt tweaks tutorial I'm working on, just a sec
Ok, same avatar setup, only difference is above's rest pose is A-pose below is T-pose:
arms relaxed naturally at sides in both cases
fringe citrus
When you were saying above "I noticed that my shoulders are slumping very hard in game" is that on another avatar?
opal river
I didn't really check on other avatars, only on mine
fringe citrus
Ok, so I assume you've got it rigged enough to get in game right?
 fringe citrus
Ok cool, yeah so as long as it's rigged you can use your rigging to adjust the pose of your avatar. CATs plugin simplifies applying any pose you try in pose mode as your rest pose with a one click button
looks like your shoulders are already straight out
but arms are down at 45 degrees maybe?
opal river
yeah
fringe citrus
So you'd start pose mode and rotate your arms back up by 45 degrees so your avatar is in T-pose then apply as rest pose in cats
(of course keep backups etc)
if the weight painting is alright the mesh should still look good after the repose
opal river