#avatar-rigging
1 messages · Page 149 of 1
 opal aurora
The only issue one can face with a-pose is if they don't force a t-pose in unity, as vrc will take the pose in the rig config as a t-pose, so they lower the arm angle further than an a-pose model should, basically the arms would cave into the model and possibly cross
 drowsy wharf
you can also run into terribly broken fingers if you don't manually fix it in the unity config due to it not seeing the end of the finger bones
 onyx hull
I need to move my pupils outward a little bit (they tend to clip into the eye whites) Would I need to do this in blender?
 stark musk
@drowsy wharf I probably won't be weighting the finger bones to the mesh at all
Maybe just the index finger, not sure.
@onyx hull Yes
onyx hull
Gotchya, thanks!
drowsy wharf
@stark musk Good idea in your case, should also have very small sized shoulders
stark musk
Ah alright, I'll make them smaller.
drowsy wharf
shouldn't be connected btw, basically have just to exist near the upper arm
drowsy wharf
move your RL arm, shoulders don't rotate at the center.
stark musk
RL?
drowsy wharf
real life
stark musk
oh
drowsy wharf
sorry...cat stole other arm >.>
stark musk
lol
drowsy wharf
approx. 1/3 of the distance from chest to shoulder is where I usually have the head of the shoulder bone placed...just remember movements can seem extra pronounced in game, that distance tends to help calm it down...for yours I'd assume you wouldn't want it to move much, hence short suggestion
stark musk
Yeah I'll make them shorter
wait, should I be connecting the cape bones to a "root" cape bone? @drowsy wharf
this is what I mean
 fervent hornet
Yeah, even if you don't use the root it helps with organization in the hierarchy
Usually it's a good idea to use the root as a dynamic bone root but that doesn't always work
stark musk
yeah that's what I was hoping for in this case
is there a faster way to add bones instead of manually adding one bone at a time?
drowsy wharf
you should be able to use it for this...could always use curves that start off stiffer and fade from there to work better for the cape too
Always recommend a root bone for cape/hair/etc
have to head out atm, can't help with much for now
fervent hornet
It's pretty fast to add bones if you use extrusions, if that's what you're doing
stark musk
well the cape is all wavey, trying and I'm trying to place them as best as I can
drowsy wharf
E to extrude from end of bone...otherwise you could adjust the mesh to flatten it out to make it easier on you first
fervent hornet
Rigging from a pose is by definition really sucky so there's no real easy way out
stark musk
thought so @fervent hornet
the weight painting is going to be horrendous to deal with lol
drowsy wharf
good luck though
stark musk
ty!
drowsy wharf
it doesn't have to be positioned for anything....it could be sitting near the top vertically if you want. just make it a child of the chest for expected movement
 turbid spear
if stuff's spaced out it's not necessarily gonna be that hard
but the cape could cause issues
since it's a pretty simple model otherwise
stark musk
perhaps I'll remove the cape and add bones to it, then join it all together when I'm done
turbid spear
that could work
stark musk
ty all for the help!
 spice axle
Heyo, anyone notice a bug where the hips will sorta jutt out on their character? I have a feeling it's the bone placement but I've not changed it at all. Any ideas? Mostly seen on desktop and non-FB
 reef ether
^Happens to all my models and I dunno why, when i tried to move the hip bone around the rigging of lowerbody became terrible.
Literally squished their torsos around waist area
 fringe citrus
@spice axle & @reef ether that's probably due to the hip bone being too short. When the hip looks good in FBT but messes up in 3point VR or desktop, that's usually the cause
(and I know bone tail doesn't matter in unity, but I mean the distance between the hip and spine)
spice axle
Thank you! I also found, bringing it in front of the legs, but behind the spine helps a bit! @reef ether
 sage jasper
need help parenting 😦
 weak oar
Neck parents to chest, if that's what you're asking?
sage jasper
yes sir but I am trying and its not working
Bear with me im sort of new to blender but i have most of the basics down just not taking heads off bodies and putting them on another
weak oar
Select the neck bone, go into the Bones menu and set the parent to Chest.
 tough robin
If they arent a single armsture join them
weak oar
Ah, yeah they're still separate at the moment judging by the hierarchy in the top right. Use CATS to merge the two.
sage jasper
Okay thats done, but as soon as i parented the neck to the chest the head bones moved downward
 glass panther
 shadow mesa

 fading verge
okay; so basically I did the rig of springtrap v9 by failz
but here's the problem
once I got the rig, I noticed that the pelvis was moving in a direction I didn't want
 twilit geyser
I keep forgetting to take a picture of this: When using Index controllers my avatar's thumbs(The bone closest to the wrist bone) extend outwards turning into big gnarly looking hooks. This does not happen with Vive controllers. Is this a rigging issue or a scale relative to real life hands issue?
 crisp tendon
iirc that's a default pose issue with how the thumb is on the index
tupper posted in one of the docs a screenshot of his hand rig to get a good looking finger rotation/pose
twilit geyser
Thank you!
stark musk
Is there any way to weight paint while selecting vertexes?
stark musk
Right, but when I click on that it doesn't do anything.
That's what I meant, sorry should have been specific.
Unless I'm doing something wrong.
crisp tendon
Well then you select a vertex a vertex then assign strength manually on the vertex group you want
stark musk
Oh I see. I was trying to weight with the draw tool while having vertex's enabled lol*
ty!
 sleek isle
No pin or link for the tupper doc ? @crisp tendon
crisp tendon
i asked him and he said he didn't end up posting it, so i guess i just saw it internally
but it doesn't matter much, it comes down to trying and getting something reasonable looking
because it will most likely look janky for the vast majority of models
sleek isle
I end up have only 2 bone to in the thumb
Now
I have to move the bone and ignore the t pose warning
stark musk
Been asking a lot of questions lately (mainly bc 2.8 is annoying at changing nearly everything I knew about blender) but why is this happening whenever I switch modes? It's basically breaking my avatar rig.
crisp tendon
Apply pose through cats
stark musk
thanks!!
 rough cipher
is it fine if some bones that are normally horizontal are instead placed vertical?
turbid spear
those look like end bones
Which aren't needed I think
I think they won't be exported anyway
 teal badge
If you use the default FBX export you'll need to disable the end bones in the exporter options when you go to save it. If you use Cats's, it does it for you.
twilit geyser
I really hate weight painting.
 twilit geyser
I just did automatic and besides a little touch up on the shoulder it is perfect.
crisp tendon
yep, that's the best way to do it imo
twilit geyser
crisp tendon
not bad !
twilit geyser
I don't mind the intersecting since the texture will hide most of that.
crisp tendon
i don't think you can do better with that topology, so it's still great
twilit geyser
Oh, I had to remake the arms since they originally removed under the clothing.
 native shuttle
question, why cant i find the models maps for the hands? and also do i have to map the hair?
crisp tendon
It doesn't have hand bone because they didn't bother making them and no, you don't map the hair
crisp tendon
can't see in your screenshot
if you can find them in the list then apply them manually
native shuttle
tried that
crisp tendon
blender it is then !
crisp tendon
keep the hands
crisp tendon
yeah, it's possible it didn't have any weight paint so they got removed
you can remove that option in the fix
native shuttle
so how would i get my hands back
crisp tendon
ctrl + z ?
native shuttle
cant
crisp tendon
try to recover from auto save in blender then
native shuttle
removed the option to remove zero weight bones and it still deleted the hand bones
also how can i fix this situation on my other model the shoe is off the feet when moving the leg in pose mode
drowsy wharf
weight it fully to one foot, looks like it's currently weighted to both or a partial weighting
native shuttle
and how do i weight it to one foot and yeah it is connected to both feet i dunno why @drowsy wharf
opal aurora
Use auto normalize
drowsy wharf
^ and do a full paint on one, it'll remove the other when using auto normalize
native shuttle
so by auto normalize you mean click on nomalize in weight tools or normalize all? I currently only have the vertexes in the shoe selected only
@drowsy wharf @opal aurora
drowsy wharf
keep that on unless you're doing something specific and know you need it off for it
native shuttle
so after that what do i do next? just start clicking on the vertexes on the shoe?
drowsy wharf
paint the whole shoe for the correct foot
native shuttle
the shoe is currently red
drowsy wharf
you could set it to subtract blend mode, select the opposite foot and remove the painting from it that way, or you could paint over it with auto normalize on and the painting on the other foot should get removed
native shuttle
ill try painting the shoe with auto normalize first
what do i set the weight to?
or does it matter
its at 0
drowsy wharf
you want to fully paint it, so it should be at 1...
native shuttle
most of it is on the feet but these dots dont wanna move when i click on them
@drowsy wharf
opal aurora
Try to paint them at different angles, sometimes vertices are iffy to paint when they jag out like that
native shuttle
ooofs
native shuttle
hello peoples, ive come across another problem so the bones for the shoulder and the upper arms for both left and right wont show and when i try to enforce t pose it only t poses the lower arms up i dont understand why unity is getting rid of the bones? In blender it shows the bones are there but transferring to unity it removes them i dont get it? if anyone can please help out id appreciate it
stark musk
Probably the same issue when you select "fix model" with cats.
native shuttle
Didnt press fix model though :/
stark musk
Usually that's not an issue in the game, I've had a few models that had a similar issue that were fine in-game.
 languid briar
i am trying to apply the already made dance, taunt, laugh animations that league of legends has already made to models i am in blender is there anywhere online that would have the rigged animations as a file i could hopefully use anyone know where to find these animation files I have the models from modelresource.com was wondering if a similar website exists but for animations
 echo drift
Is there really any reason why the fix button makes the hip bone tiny on my armature?
in blender?
native shuttle
@stark musk i dont know, it looks like it wont track well in 3 point vr or fbt as i enforced t pose and only the lower arms were posing in t pose :(
drowsy wharf
@native shuttle the bones ARE there in unity though...you just have to assign them, they didn't assign correctly (probably due to the naming not being detected in Unity)
meant to make boxes...woops
the shoulder obviously shouldn't be listed as an elbow, the arm/and bones obviously shouldn't be fingers...drag the correct bone into the correct slot to assign them the way they should be
arm=upper arm, elbow=lower arm, wrist=hand, and set the hand rigs correctly as well.
make sure there's nothing in jaw in the head slot (often ends up with a hair bone or something)
native shuttle
alright ill try it
drowsy wharf
after it's all set, THAT'S when you enforce tpose
drowsy wharf
@fading verge "first child" means first in the hierarchy list, you can reorder it
if you screenshot the hierarchy near the leg area that'd help
the other is about the position of the hip and upper leg bones
fading verge
I'll do that later, I did something that fixed an issue
drowsy wharf
@native shuttle show me the body rig near the arms
drowsy wharf
it looks like the arm isn't weighted to the arm bone
drowsy wharf
always test things out in pose mode in blender 😛
native shuttle
drowsy wharf
it's all blue...no weighting
native shuttle
so what do i do
native shuttle
so auto normalize wont help it
fervent hornet
Weight painting is the best part of rigging, get to see the rig have an effect
native shuttle
im kinda scared
drowsy wharf
Good way to look at it there scion, positive thoughts 😛
make a save before you paint it if you're scared of messing things up
but keep auto normalize on, it'll prevent unexpected things
weight painting is basically telling the mesh what it should follow, and how much of an effect that bone has on each vertex
save your pre-weight paint model, and play with the painting...getting a feel for it helps a lot
not every part will have 100% weight for a bone the way a shoe would for example. Like near the elbow and shoulder you want a fading weight so it's not 100% rotated by the arm bone
drowsy wharf
from somewhere between 0 and 1
0 is none, 1 is all
you should go look up a tutorial on weight painting
native shuttle
link me pleasee
drowsy wharf
haven't looked at it in a while...think this is the right one though: https://www.youtube.com/watch?v=Tl4qTgwQwYw

Quick intro and guide to skinning/weight painting. this video is meant for those with a basic understanding of Blender
native shuttle
also what did u mean by no weight paint needed if its blue? I saw a tut of some dude fitting a sweater on a model and the chest of the sweater stood in one place so he painted it green and clicked on the vertexes and it was fixed , (the part of the sweater he painted was blue)
drowsy wharf
not no weight paint NEEDED
blue vertex means it has NO WEIGHT for the selected bone
native shuttle
ohhh
native shuttle
the red area looks fine but the area where the armpit is at looks scuffed im guessin i need to paint that in red? (also cant see how it looks outside of weightpaint since its a pink model and yes materials are in the same folder)
 wet hollow
There's something I've been wondering about. Does the VRC IK solution support twist bones in for example the arms?
I didn't want to test if that's the case as it would mean quite a bit of time thrown away if it doesn't work
native shuttle
anyone know how to fix this? In game it stretches and likes to move with the other shoe , the other shoe is fine is just the one highlighted that acts up. not sure why theres nothing connected to the other shoe
crisp tendon
no, the shoe
why would the left leg need to move the right shoe
once you remove the weight paint of that vertex group on the shoe, it'll just pop back in place
native shuttle
this is a nightmare @crisp tendon
is there a easier way where i can just highlight every vertex and press a button to put 0 weights on it
crisp tendon
Yep, select all with L, and on the right menu where it shows the Vertex groups just set the weight to 0 and click assign
@native shuttle
native shuttle
just pressing L or is is L + ? @crisp tendon
drowsy wharf
@native shuttle L selects anything Linked under your cursor (might not select everything without multiple tries)
native shuttle
it isnt selecting anything for me @drowsy wharf
stark musk
Also pro tip, hide bones when weight painting.
Makes it easier to see what you're doing.
 ionic sinew
Can someone help me figure out why my model is showing near 200 bones when I upload it to VRchat? It certainly doesn't look like it's got that many
fading verge
Show you armature.
Do you have a lot of gameobjects added to your model? Props? Anything like that?
ionic sinew
2 meshes I can toggle, otherwise no game objects or anything
I just counted and its roughly 100 bones on it's own. Which isn't great :(
Does it double up bones on separate meshes?
fading verge
What about in blender? Go into bone edit mode and see how many bones show up there.
fading verge
Do you have a doubled up armature on the meshes you toggle?
ionic sinew
Is there an easy way to tell? As far as I can see it's all one Armature, no bones sitting on top of eachother
fading verge
Simply hiding and seeing if there's one under it is the easiest way to tell.
I don't think there's enough screenshots to really let us know what's going on though
ionic sinew
Wellp. I reuploaded the new version into Unity (after deleting less than 10 useless bones) and it's showing correctly now.
Not sure what caused it in the first place :/
fading verge
Is there any way to rig tails without using the dynamic bone asset? I don't really want to have to pay 20 dollars for it, but right now the tail is just a rigid stick
drowsy wharf
You could animate it manually, but it wouldn't "flow" with your movements
drowsy wharf
basically yeah
fading verge
Also, this is just a quick question. My model doesn't really change under light, like in a dark room he looks like there's a light above him
drowsy wharf
that's all about the shaders you use
fading verge
Well, yeah, but last time this issue happened I did something and suddenly my dude was affected by light
drowsy wharf
currently you're using one that is self-lit instead of one that works based on world lighting
fading verge
Where could I get one based on world lightning?
drowsy wharf
you either changed the shader, or changed a setting in the shader to make it affected by lighting
xiexie's shaders, poiyomi's shaders, and plenty of others out there will work
fading verge
I didn't even realize I was using a shader. Where do I access it in unity?
drowsy wharf
give those names a quick google with "shaders" after them and you'll find them
fading verge
Maybe it's just a quick fix with the current shader?
drowsy wharf
you are always using a shader, if you haven't set it, you're likely using standard
fading verge
Ah
drowsy wharf
check the materials for your model, it'll be listed there
fading verge
Then yeah I'm using standard
Welp I fixed it
Thanks though, didn't know about this stuff
native shuttle
so i weighted the shoe to 0 and still not on the foot idk what to do?
drowsy wharf
@native shuttle it's still weighted to something other than the foot it belongs on then
check the other leg/foot bones, it's probably still weighted to them
or it just isn't normalized and/or a non-full weighting
@native shuttle hit normalize, if it's not fully red for the foot bone, paint it with a 1.0 weight (or set it for the vertices the same you removed weighting on it)
native shuttle
im confused
sleek isle
If you move the spine those the foot move? @native shuttle
sleek isle
Select a vertex and check in the N tab(the first top) you can see what vertex group that one is attach and how much
native shuttle
select a vertex on what part? @sleek isle
crisp tendon
the foot
native shuttle
can you circle where the n tab is? and selecting a vertex all i have to do is just right click on 1 dot correct? @crisp tendon @sleek isle
crisp tendon
the n tab appears when you press N
and no, you press L in edit mode to select one vertex and it will select the group
native shuttle
sorry for the late responses taking care of an upset friend anyways what do i do? Im here also thank you guys for the help @crisp tendon
crisp tendon
So did you fix it ?
crisp tendon
then refer to the gif i sent you yesterday
native shuttle
this is what it does if you look at it
 earnest idol
привет
 warm smelt
Im so close to having it not trash, whats the magic secret to making weighted skirts? https://raytracing-benchmarks.are-really.cool/95R6nKu.png
 stark musk
Well it'll always clip in blender when you reach a certain point. Dynamic bone colliders will help with that. @warm smelt Although, you can also make sure that the skirt doesn't have influence over the leg at all (and vice versa).
warm smelt
wdym by influence?
I was trying to copy from this model https://raytracing-benchmarks.are-really.cool/45EwKMp.png https://raytracing-benchmarks.are-really.cool/AcvLBXj.png


I use that model all the time ingame, and I lift my legs really high before it clips
stark musk
Like when the leg moves it shouldn't move the skirt automatically
warm smelt
but it is? Also, I don't wanna put dynamic bones on this avatar. The whole point of it is that it has an excellent rating
stark musk
Also I need some help. I've been trying to remove weights on this part of my mesh, but for some reason no matter what I do, the weights won't remove.
 warm smelt
in the weight paint brush settings
stark musk
ah
stark musk
Usually I'd make the legs independent from the skirt, and have dynamic bones do the job later, but since you want a excellent optimized model, I don't know.
Yeah
 steady patio
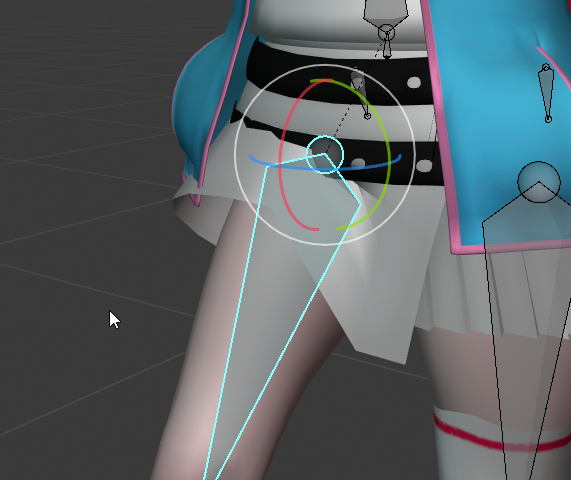
@warm smelt literally just weight everything in front of moving leg to 1
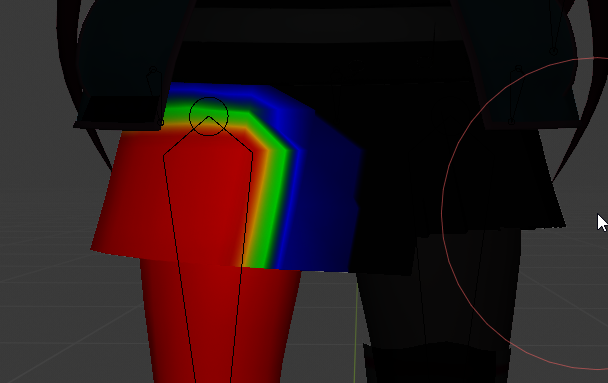
https://i.imgur.com/Qo3kA1I.png its incredibly scuffed but you get the idea
 final summit
do you have auto-normalize weights on?
It's usually good because it prevents you from having the vertices weighted too heavily to more than one bone
fading verge
is it better to rig the characters in unity?
fading verge
ok i just made a character in Autodesk Maya so i proably just rig it in here then
steady patio
@warm smelt maybe your skirt is weighted to something else like your hips?
warm smelt
solar wins again https://raytracing-benchmarks.are-really.cool/2yYHixg.png

Now, to figure out this whole normals garbage
twilit geyser
I just spent an hour fixing my skirt. I basically pinned the top portion and just slightly cleaned up automatic weights on the lower portion.
So the second tier rumples/folds into the first tier as the leg bends.(Similar to real life.)
twilit geyser
I also had to fix a lot of the leg weighting since it looked more light the upper leg was being snapped off when going that high.
warm smelt
Yeah, I already did that
crisp tendon
Looks great !
 muted jolt
So from screenshots I see of people you can actually rig models (before importing into Unity) in blender, right?
twilit geyser
Correct.
muted jolt
Nice, are there any additional steps to ensure Unity knows which bone is arm (before Blender export), which bone junction is leg and so on? Because from what I understand animation comes from Unity?
crisp tendon
Calling it arm helps
muted jolt
Ah so Unity will pick it up automatically?
crisp tendon
hopefully yes
twilit geyser
Yes, it will also walk the armature tree and attempt to assign bones.(It always detects the front hair bone near the jaw on my avatar as the mouth flap.) So you may have to fix a few assignments anyway.
muted jolt
Ahhhh, aight, so I'll be able to tweak after importing to unity. Nice.
crisp tendon
Look at the pinned items in this channel, it'll help
muted jolt
I'm learning blender through this thing https://upload.wikimedia.org/wikipedia/commons/b/b4/BlenderDocumentation4.pdf that someone from another discord threw at me, so much usefull information. And after I learn basics I'll try to learn everything related making models being compatible with vrchat.
twilit geyser
Any idea why my thumbs turn into hooks when using Index Controllers? They are fine with Vive Wands.
muted jolt
Ouch
twilit geyser
Windows Picture Viewer is really bad.
twilit geyser
Can do! I will report back.
crisp tendon
also thumbs generally only use two bones
So you could do away with the first bone in the chain
twilit geyser
Bone shrink helped a bit.
crisp tendon
I think you can check how it works in the muscle editor ?
crisp tendon
might wanna adjust the mesh as well
muted jolt
Did you try to remove one bone?
weak oar
I got around this by just mapping the end two bones as bone 1 and 2 (leaving 3 empty) in the Unity rigging.
twilit geyser
I will try the bone removal later. I have spent too much time in 3D land already today. :D
fading verge
Using Autodesk Maya, does anyone know how to fix this error "Unable to perform heatmap bind operation. Validate that hierarchy is inside mesh volume and that geometry "Mii_KunShapeOrig" does not contain non-manifold vertices or edges. Use Mesh > Cleanup to locate and remove irregularities. I've try the cleanup but nothing is working, does it when i try to bind the model to the rig
stark musk
Just wondering, but can't you just use blender? Many issues can be fixed with CATS.
Not saying that your issue can be fixed with CATS, but it's just for future issues.
 steel forum
I'm having a weird issue ever since i reverted the full body fixes on my avatars. My view sinks into my neck whenever i sit down in full body. On top of that, whenever i'm not in full body, my hips roll around weirdly when i move. Any ideas on what could be causing these issues? Heres a picture of my current rig
stark musk
Is there any way to negate this from happening?
No matter how I weight the arm, it always caves into the shoulder in a weird way.
 icy bear
whos good with making avatars?
 tired meteor
You might have weighted that part to another part of the body, or vice versa
icy bear
thats the thing, how do i add it
stark musk
@tired meteor replying to me?
fading verge
I recommend looking at other example models to see what they do for shoulder weights
stark musk
@tired meteor I did weight that part to the shoulder(s).
on both sides
so that may be it
tired meteor
Yep, its easy to accidentally weight paint things like the shoulder to say, the feet or other parts.
stark musk
Tried that actually and it didn't fix it at all.
I think the issue is the mesh itself.
 viscid grail
Sorry to sorta interrupt but I keep getting this one SDK error for my avatars telling me it's bones aren't mapped, yet everytime I go to config them, everything's fine
stark musk
Since the shoulders are angled like this:
tired meteor
Hmm, maybe
stark musk
In any case, the body is completely black and under a cloak for the most part, so that may not even be an issue.
viscid grail
This is what confuses me
stark musk
Ah I see two issues.
That's an easy fix.
First off get rid of the hair from your jaw bone, you don't need that.
then just close out of that window and save your project and your scene.
then try uploading
viscid grail
I already took that out and it still doesn't work for some reason
Is it maybe because I'm only using the default rigging options? And for whatever reason, I think I only get this issue on the android platform
drowsy wharf
@viscid grail first off, type "snipping tool" into windows, easy to use tool to take a screenshot of part of your screen. Camera images are crappy and often hard to read well.
Second, why are you showing the head rig config when the error states arms and feet aren't specified? Don't stop reading at the first word in the first error.
viscid grail
@drowsy wharf I already know about snipping, I was just lazy at the time since I was just sending it to other friends. Also, I do have another pic of the entire body rig and hands. Everything is using the basic vrc rigs and all is green. The only things not rigged are the jaw and the upper chest
drowsy wharf
@viscid grail are they rigged with the CORRECT bones though? The error specifically says arms/feet so that's almost certainly where the issue is.
Without info we can't really help either.
viscid grail
I assume it should be correct since it shows no errors for those areas. They're just mapped to what they're labeled as. Head is mapped to head, arms are mapped to arms, etc. @drowsy wharf
 worldly willow
let it auto map again and have it force t-pose
you can also try re importing the asset (fbx)
viscid grail
No luck with automapping either. I'll try to reimport it maybe
worldly willow
also check in the hierarchy if there are no bones between parent bones ( So no arm2 bone between upper and lower arm for instance in@the hierarchy)
viscid grail
I checked the hierarchy, everything's in their own correct sections as far as I can see
I went to the asset and reimported it and nothing happened for that either
worldly willow
did you put the avatar descriptor in the right spot (on the model not the hips (highest level of the hierarchy)
viscid grail
Alright, I fixed the issue. The descriptor was set on the Body in hierarchy instead of the model itself
Thanks
God I feel so stupid, I hope this was the problem for the other models too
worldly willow
good note to make 🙂 ,
the descriptor check in the sdk screen checks for bones below the spot it is on in the hierarchy
viscid grail
So ig it didn't detect any head, arm or foot rigging cause the descriptor was set on just the body itself, not the whole model?
Yep, this was the issue for my other avatars...Now I feel really dumb but you know what, I can at least publish them now
Well, now that I can actually upload my avatars now, the only things I'd need to do is learn more about animation and maybe recoloring certain parts of a avatar I guess
fading verge
Is there no automatic rigging that's good? in houdini fx, maya or something?
viscid grail
No, aside from vrc's default
For some reason I got trouble with this. When I hit select it highlights some of the body parts and hitting delete just breaks the whole avatar.
turbid spear
Are you trying to upload a quest avatar
viscid grail
Yeah, trying to import it to quest
 opal river
https://i.imgur.com/jRDCrxO.png so is it normal to have a hip bone this small?
 drowsy wharf
@viscid grail Quest has a LOT of limitations due to the lower capabilities, for a list and info see here:
https://docs.vrchat.com/docs/quest-content-limitations#section-components
This page will describe various limits in place for the Oculus Quest version of VRChat. These limitations are in place in the interest of performance, user safety, and discouraging malicious behavior. Find more information about limited components on our [Quest Content Optim...
viscid grail
@drowsy wharf I know quest can't handle too many bones and such but what I'm trying to figure out is how do I get the model to stay within those limitations without it breaking the entire model? In other words, how do I tone down the dynamic bones and such without it breaking the avatar, since simply deleting the bones doesn't help
drowsy wharf
not just bones...somethings aren't even ALLOWED on the avatar, hence the specific section I linked, since you have some things in it
viscid grail
Well, I'm unsure how to correctly delete or downgrade them
drowsy wharf
when you hit select it shows you which parts have a problem, don't delete the bones, delete the components listed in the error ON the bones
I'm not sure if the "fix" button will do it for you or not
viscid grail
No, autofix didn't work since it gave some error in the console which in other words said that I needed to fix it myself. Right now the avatar's publishing to PC so when I can switch to android platform I'll put it in more detail
drowsy wharf
Suggestion when you get it sorted out: Save two scenes with the same character, one with those things, one without...then if you have to update it in the future it's less work.
viscid grail
Thanks. It's swapping to android right now so when it finishes loading I'll do a screenshot of the things it wants me to get rid of, and that console error
viscid grail
Alright, I got it fixed. Delete the components that were ON the bones. That's all I needed to hear
Thanks for the help again
stark musk
How can I weight paint over a pre-existing armature in 2.8 (for example, I remove the head from an armature and replace it with another mesh and want to weight paint the new head that I added, how would I weight paint the existing "head" bone to the new "head" mesh)?
weak oar
Keep the bones from with the mesh, if you want to make it easier. That way there's no repainting.
stark musk
There's no bones with the new mesh actually.
opal aurora
If ye want to keep the exact same weights without additional bones, you can have both bones have the same exact name, that way you can just parent the head mesh to the other armature and it'll match weights
Renaming the vertex groups prior to parenting also works if no bones are present
fervent hornet
VRchat IK gets confused when your legs are not straight down, you should redo your Apose there so that the legs are not bowed out
 magic sonnet
how do i do that?
fervent hornet
Move em around in pose mode and then set pose as default, might get a little awkward buts its all you can do
fading verge
Pose mode, straighten legs, set as default rest pose
No need to mess around with shape keys
magic sonnet
the only way that works to apply a pose involves copying the armature modifer and applying it, which doesnt work with shapekeys on the model
weak oar
No?
fading verge
What are you talking about?
magic sonnet
if i just apply it the pose stays but the mesh go's back
magic sonnet
oh, when did they add that?
fading verge
It's been an option for ages
crisp tendon
Two years ago ?
stark musk
Is there any way to clearly see weight painting issues?
I've been here for over an hour trying to figure out what's causing these weight issues.
crisp tendon
move bones in all direction randomly
stark musk
lol actually that's a good idea...
Alright so I found the culprit bones, but when I look in WP mode, everything's blue.
There's no light blue/white anywhere.
and that's strange because it's apparently clipping really badly.
crisp tendon
select everything in edit mode, chose the bone in vertex group, set 0 strength and apply
stark musk
Well I have weights on these bones that I need & already edited though.
stark musk
ty I'll try that!
fading verge
Can someone help me out with my rigging? I want my lower tails of my coat to flow like cloth,
fervent hornet
Probably less to do with the rigging and more to do with the dynamic bone settings you use in unity, make sure you take advantage of the curves you can set
fading verge
Dynamic bones? I don't know how to use those.
fervent hornet
How were you planning on making it flow?
fading verge
I was hoping someone would be able to like..link me a tutorial or something.
for dynamic bones
fervent hornet
Well you need to either use dynamic bones (prefab from the unity store) or unity cloth, theres probably a tutorial somewhere. Its not very complicated really
fading verge
Unity cloth?
fervent hornet
Unity cloth is a non-bone version of making things move, much laggier and harder to use but gives a different look
Dynamic bones is much easier to use and get right, and doesnt suffer from desync
fading verge
Do I need to make any extra bones for dynamic bones?
fervent hornet
Not really, what you have seems fine
fading verge
How "open" is the rigging in VRChat? E.g. must all avatars use the same standardized rig? Or can it have extra joints etc?
And would it potentially be feasible to integrate eye tracking from a Vive Pro Eye?
 proven dragon
this is weird but, with the special animal-featured avatars, is the emotive ears/tails/face expression related to rigging?
or is that a separate thing entirely
fading verge
I imagine it'd need to be rigged?
But there'd be some level of animation involved too
proven dragon
i see all these custom rigs/avatars/etc. and im like "why cant i be that good"
i cant even bring myself to talk on mic confidently, let alone be good at stuff like this 😂
proven dragon
im not trying to do some big fancy thing
i just wanna upload an avatar to be unique
yknow?
just a nice, simple one
fading verge
You could always try kit-bashing stuff together and retexturing for now?
crisp tendon
it's hard to be unique if you start kitbashing though
fading verge
True, but you can get something a little different?


 fading verge
Might be a good way to learn your way around the software/workflow
Can always improve as you learn
turbid spear
Everyone has to start somewhere, kitbashing is fine
Even a recolor works if you do it yourself
fading verge
It's a good hobby if you can get into it too
crisp tendon
Better start modelling/sculpting then, you learn both the software and you make something unique
turbid spear
That's way past the average player's patience
 sharp pewter
Thats a bit of a tall order right away
crisp tendon
Something also tells me people who kitbash don't learn much 
proven dragon
well i mean, i already have an avatar that i love. the only thing that stops it from being perfect for me is a lack of tail
sharp pewter
Well thats a start
proven dragon
it has a hipster style like mine, ears, the face/ears are highly expressive with the keys,
turbid spear
Tons of people have gotten into blender because they had no other option with vrc
proven dragon
idk who made it tho
fading verge
You still learn your way around the software and engine
turbid spear
Even if you kitbash at first you still pick up on techniques from doing different stuff and eventually become more confident in modelling small accessories
fading verge
This^
turbid spear
And it goes on from there for some, others don't care and settle for less
proven dragon
my main concern for developing skill with this
crisp tendon
As long as you merge your meshes and atlas your textures, anything is good
proven dragon
the costs of buying models, animation sets, rigs, etc
turbid spear
Like with learning an instrument or doing anything, it's insanely discouraging being bad at something
And it's a lot of time investment if you want to learn to make everything from scratch
crisp tendon
Being bad is different from being new
turbid spear
Either one gives unsatisfying results for the time being
proven dragon
tbh the only reasons i havent given up yet; I have a past with technology in education (ICT specifically, received A-star in GCSE and B in A-Level), as well as ADHD so my brain sees patterns in its own way
fading verge
Don't need to buy anything! The rig is pretty standard for a basic humanoid
turbid spear
You can do almost everything for free in blender, unity and vrchat
proven dragon
yeah i noticed that
fading verge
Yep 👍
fading verge
Yeah, joints haha
proven dragon
armature?
fading verge
Armature?
turbid spear
armature aka skeleton is the whole thing
fading verge
That's referring more to old stop motion models tbh
turbid spear
the whole bone hierarchy
fading verge
Most software will just say joints or bones tbh
proven dragon
brb sorry
turbid spear
i feel joints are a bit different
fading verge
Ahh, might be a Maya thing
turbid spear
In unity joints are components that can link rigid bodies
But they aren't bones
And i'm pretty sure blender should have some joint modifiers as well
fading verge
Ah yeah, maya thing then 😅 bones are joints in Maya
turbid spear
It's almost always bones when I hear them mentioned, so yeah
And armature for the whole hierarchy of bones
Though I remember it being called a skeleton a long time ago
fading verge
Ahh heard both for the whole thing
Although most of my stuff is animation/vfx, so.. different workflow I guess
Have built and rigged an actual skeleton to go inside a model before 😅
turbid spear
Yeah, there's a lot of different parts to working with 3D software
fading verge
Yeah, tbh this is why I think kitbashing is fine to start with
It's just such a huge field
Going from having never used 3D software before to modeling, texturing and rigging an entire character from scratch is a pretty huge project
fading verge
And whatever 3d package you're using.. it WILL go wrong and break everything at least 2-3 times 😂
crisp tendon
I feel like kitbashing is a cul de sac, you learn a lot of surface stuff, but it's adding onto a pile continuously, but if you ever were to learn how to do more, most if not all of what you've learned won't be of much use
opal aurora
I'd say that's wishful thinking at times
turbid spear
I've never modelled an avatar from scratch, and I wouldn't want to even try
It would take a lot of time to get good at it
fading verge
Oh yeah I mean you only learn so much from it, but...
opal aurora
Since things are outta order, my comment was towards nerf
fading verge
It's a start
turbid spear
I've modelled accessories before tho
crisp tendon
also there's kitbashing and there's dropping downloaded objects onto your model in unity
and people tend to confuse the two
fading verge
Its enough to learn your way around
turbid spear
I'm more referring to blender "frankensteining"
Or whatever people used to call it, awful term
fading verge
@opal aurora haha yeah, I was being conservative there tbh 😂
turbid spear
But anything is a start because even with dropping objects in unity you get a taste for customization with shaders and texture edits
But you quickly hit the obvious limitations where you need blender
opal aurora
I mostly just call ehm mashups myself
crisp tendon
If he already has a model he's happy with, he should start the more interesting thing imo
because he can still use something in the meantime
proven dragon
back
also if you meant me, yeah i nalready have 16 models favourited
i just wanted to try my hand at a new skill
fading verge
I mean the moment you want to start making an avatar from scratch you gotta know about edge flow, poly counts, etc.
crisp tendon
then i'd suggest modelling/sculpting
fading verge
It takes time to learn, so any way to ease into it is good
crisp tendon
it's not too difficult, it just takes time
proven dragon
i dont think i'd ever be able to make one from scratch
opal aurora
Uv unwrapping, texturing, hell even different texture formats can affect the actual look of the texture on a model
turbid spear
Nothing is difficulty but just takes variable amount of time
fading verge
Get home and do it some more for fun
proven dragon
tbh the thing i wanna learn the most is to add extra bodyparts
turbid spear
It doesn't really make it any easier to end up with a good result tho
proven dragon
(i.e. the tails, ears, etc)
turbid spear
That's fairly straight forward
proven dragon
cuz they seem to be the most simple but also deceptively complex
crisp tendon
yeah that's dropping stuff in unity, not difficult thankfully
turbid spear
Wouldn't do that in unity tbh
proven dragon
i wanna edit my main model but that's probably a rulebreak, isnt it?
turbid spear
This is something i'd go to blender for even if i don't know what i'm doing
You can't edit favorited models if that's what you mean
opal aurora
I'd say always try to do what you're most interested in first, that will enable you to seamlessly transition into the medium whilst having fun doing so, you will both broaden your knowledge in it and feel more intrigued about other topics surrounding it
fading verge
Tbh 90% of the models you see are probably lifted straight out of MMD
proven dragon
right
fading verge
Does VRChat allow for additional bones over the standard rig?
Have an idea on how to drive some more complex looking stuff using the default rig as a proxy
opal aurora
Yes, but they aren't necessarily interacted with on a humanoid level, they will of course follow their parents
fading verge
Ah awesome.
opal aurora
That's how dynamic bones are used afterall, bones do exist for hair and whatnot, but the humanoid rig itself is technically separate from it, if that makes any sense
fading verge
Ahh cool okay- wasn't sure how far we can push stuff, but that's good to know
Is there any way of importing eye tracking data? 🤔
opal aurora
As far as i'm aware, eyetracking simply works on the basis of how your humanoid is layed out (Hips-Spine-Chest-Neck-Head-LeftEye/RightEye) and not necessarily triggered by any external data inputs
fading verge
Oh sorry I mean, is there any way of bringing in external eye tracking data and using it to push the rig?
I.e. from a Pro Eye?
opal aurora
Oh that i'm not sure about, pretty much detecting your eye coords and telling the eye to follow said movements much like VR limb tracking?
I kinda doubt that is currently possible
fading verge
Basically that, yeah
magic sonnet
so i just discovered that the weight paints on my head bone got merged to my neck at some point, ive already gone through with everything else and it would take to long to start over, i still have the original model, which has an identical mesh, ive tried searching for how to transfer vertex groups, but no matter what i do, it just wont work, is there anyway of doing this?
magic sonnet
Actually. Seems like I found a solution. Not the best but it will work.
 heavy swift
ok, so i got the old skeleton back onto the model
it's just that whenever i actually link the armature to the model, it throws off the positioning of everything
and for some reason scales the head down a bit
stark musk
is there already weighting on the model from an old armature or something?
heavy swift
well this rig was taken from the source model i worked off of
which looked like this
heavy swift
i hate everything about this
heavy swift
drowsy wharf
@heavy swift It isn't weight painted properly
heavy swift
dang
drowsy wharf
it should only be a single mesh, but that doesn't mean it has to move as one...weight painting assigns a "weight" of how much movement ratio the mesh should follow a specific bone...
Currently it looks like your left arm bone has weighting for the right side as well
heavy swift
it's not weighted at all lmao
stark musk
It looks mirrored to me
heavy swift
nothing's mirrored
stark musk
Are there any modifiers then?
drowsy wharf
if you rotate the arm and it moves the other arm, then it's weighted...if you move ONE bone and everything moves, it's all bound to it
stark musk
^
drowsy wharf
it's hard to see in a still image
stark musk
it's weight painting for sure.
heavy swift
well it's all the same in weight paint mode
question is: what areas need weighted?
just everywhere that isn't a joint?
drowsy wharf
blue is no weight, red is FULL weight, and other colors are the inbetween
Make sure you have "Auto Normalize" checked when you start weighting...it helps a lot.
weight is set for each individual bone
for example, most of the head would be red for the headbone, but blue for everything else
heavy swift
so
drowsy wharf
the neck might have a bit of the head weighted with a fading weight near the base of the head
example image (pulled from a quick google search)
heavy swift
so i would just paint the base of the head?
drowsy wharf
the image example is a neck painting
You should look up a tutorial, weight painting takes getting used to
And yes...when starting out I HIGHLY recommend auto weighting and playing with it...helps to understand when you try things out
heavy swift
well i parented the elements under the armature with automatic weights but that didn't really do anything
drowsy wharf
look up a guide, just setting auto weight doesn't always work...there are steps to assign it that you have to follow instead of just clicking "auto weight"
heavy swift
gotcha
drowsy wharf
I definitely can't help with new blender either, I just went back down to the last version to not re-learn everything >.>
fringe citrus
@heavy swift I see that you're using armature modifiers, you don't need to use those to set up a rig
Just to keep it clean slate, I'd say, save a backup then go on your mesh, under the vertex groups there's a little triangle menu button and from there you can click delete all groups
Then in object mode with your mesh selected ctrl+click on your armature and with the mouse over the 3d view, type Ctrl + P to make the armature the parent (even if it's already the parent you can do this again to get the weights) and select automatic weights
If you have multiple meshes that need rigging you'll have to do this for each one
heavy swift
they're all already parented all of the elements under the armature with that method
fringe citrus
Did you remove your armature modifiers? And make sure you redid it with the meshes having no vertex groups?
heavy swift
you mean remove these?
fringe citrus
Yeah
heavy swift
what
fringe citrus
What were you using them for? Did they have a purpose?
heavy swift
that's what's linking the mesh up to the armature, is it not?
fringe citrus
You added them after the fact manually right?
heavy swift
oh
fringe citrus
I guess they should get replaced when you redo the parenting anyway
heavy swift
well that's no longer the case
fringe citrus
ok, was just trying to troubleshoot back to a clean slate
trying to figure out why you're not getting auto weights
heavy swift
i already gave 'em a fresh rig and whatnot, now all i really need to do is properly weight it along with trying to figure out why it has a mirror effect on the mesh when modifying the right side of the skeleton in pose mode
nothing changes when i modify the left half, it seems to only be the right
fringe citrus
Oh ok, so I misunderstood I guess, you've got auto weights working then, but it's a mirroring problem?
fringe citrus
When you did auto weights, there's an x-mirror checkbox option, maybe make sure that's unchecked
it's unchecked by default though I think
fringe citrus
yeah it should work then in the bottom left it'll show the options of the last action performed
And there's an option for x mirror there, though I'm just guessing, I haven't had your problem with inverted x-axis weights
Maybe your mesh has unapplied transforms or something? It should still work anyway though
I've gotta go, sorry I couldn't solve your inverted weight issue, but once you get good automatic weights if you need a tutorial for cleaning up the weights I have one here: https://www.youtube.com/watch?v=zVIFbqQAykk

This tutorial first goes over my method for weight painting in Blender 2.8 (relevant to everyone, not just VRChat users) using a simple example of tweaking a...
 arctic wren
so im trying to follow your tutorial there but for some reason my avatar when in the weight painting menu its all blue and i cannot select bones
 solid adder
@arctic wren make sure bones are set in pose mode and the mesh is set in weight paint mode.
arctic wren
i cant select the mesh while in pose mode. i need to be in object mode
either way im starting to think that video might not be what im looking for anyway. my avatars body seems to move whenever i move my head. like if i tilt my head up or down my body will move as well. if i look left or right my body will lean the opposite direction
solid adder
Sounds like the head has the entirety of the weight. An easier way my opinion is to check vertex groups instead of weight paint.
Locate your shape keys, there will be a box that says vertex groups above the shape key box, same tab. Open that box and put the mesh into edit mode. You should see the list of bones in the vertex group box.
While the mesh is in edit mode, you can select individual bones and the following buttons should be available; Assign, Unassign, Select, and Unselect. If you press select on one, then it will show all vertices that are influenced by that bone.
Any vertices highlighted can be assigned and unassigned to and from other bones
arctic wren
if i click on the body and go into edit mode i can no longer click on the bones
if im in object mode and select the armature then go into edit mode then i can select bones but the buttons i see arent like that. its mostly movement stuff
solid adder
You are technically selecting the "bones" in the vertex groups
The vertex group box will/should show you each bone named accordingly. When you press select on one of those names while the mesh is in edit mode it will highlight the part that will move.
arctic wren
okay i think i found it
solid adder
So if you were to locate the head or whatever name the head bone is and press the select button. It should highlight the vertices that is only the head.
Now for your situation if the whole body is moving with the head, the avatar should light up orange.
arctic wren
so i checked the neck and head and its all good it seems
the body isnt orange
im still testing minor parts
solid adder
Good
arctic wren
okay i found a small part that is controlling part of the body
but it really is only a small part
i think i did it properly and removed that
thank you
but it was really only a small part
maybe like 5 vertices on an arm
could that really cause such a dramatic body movement?
solid adder
The further away the vertices are from the head of the bone, the more noticeable you will see the mesh pull and stretch.
arctic wren
ill upload this and test this. thank you very much
solid adder
The head of the bone is what is going to be twisting and turning
Pretty much head of the bone is the bigger circle, the tail of the bone would be the smaller circle
solid adder
Yep, but I mean bones specifically. How one side is thicker than the other.
The thicker side of the bone is the "head", the thinner side is the "tail"
The head of the bone controls the twist and turns of the mesh, the tail points in the direction which is read by Unity. This is the reason in some cases why you my see fingers jutting in a 90° angle and looks broken
arctic wren
blender just crashed....
turbid spear
it autosaves
solid adder
So you didn't really lose much fortunately
turbid spear
If it's blender 2.8 you can restore it from the file menu i think
solid adder
Yep
arctic wren
i just found that out
turbid spear
if not there's a folder somewhere
arctic wren
i havent closed blender in 5 days since i started this project
i have no idea where half the files are
solid adder
despite auto-saving, always save your progress religiously
arctic wren
i have no idea where the materials and such are for this project or the textures. im sure i could get the model back. i have loads of saves of that
solid adder
Well not too difficult at least, just a pain
arctic wren
real quick. if i export the model from blender over the model in unity it will just overwrite it in the scene right?
sharp pewter
So i cant open a fbx file in blender with 2.81 thats an older file problem right?
Never had this happen on 2.79a
Does one just need two blenders now days?
arctic wren
i love it. i just tried to redo the avatar from scratch because i have no idea how i messed up the eyes
and its even worse
sharp pewter

drowsy wharf
@arctic wren when you import over current model, set it to generic rig and apply, then back to humanoid. Should properly update the models that way (unless you moved bones, scene keeps it over imported model)
arctic wren
ill try that thanks. although i think im going to leave this alone for a while. i spent about 8 hours on this today and made no progress. im a bit salty right now
 steel kindle
Does anyone know why I'm unable to properly parent bones in blender? I'm trying to add a blank shoulder bone to export the model but every time I try to parent those bones it completely breaks the rig in unity
steel kindle
I'm having some problems mapping
 inland sparrow
Hi! just uploaded my first avatar and her shoes broke 😦 anyone know how to fix this?
in unity it works just fine 🤔
tough robin
@inland sparrow incorrect height settings and the shoes are not weighted to the feet poperly
- if this is the model that I think it is, it has some scary detailed private parts which you HAVE to get rid of before using it publically
inland sparrow
yup, already deleted them when decimated it 👌
fading verge
Are there any alternatives to humanoid rigs, besides the generic rig? I'm making an avatar that has a hunched back, and I am unsure whether a humanoid rig would mess it up or not]
stark musk
Should be fine for a humanoid rig @fading verge
Just make sure you weight it well in the back, and make sure you follow the IK.
 muted epoch
hi can someone help me to make my avatar ? im trying to make like for 4 months a dinosaur avatar, but i dont know how to rigg, but every video and every image i see on the youtube, i see people with dinosaurs models
arctic wren
so i made some massive progress on my avatar today and im pretty happy with it. although my issue from last night still persists. i am unable to move my head without it also affecting my body. i think its a weight painting issue but i have no idea how to fix it
fading verge
I'm working on a model, and the rig it is using currently is insane. I've only been able to port it into VRChat once, and when I did it was like I was witnessing a multi limbed abomination begging to be killed
So I decided I'll just try to make a new "rig" for the mesh of the character, myself. Does anyone know where to start? I've never dealt with bones or weight painting before but I'll be darned if I won't at least try
 rose shard
My avatar's hip sticks out, in turn making it so the skirt is essentially useless since it's so lifted. I checked the rigging and it seems perfectly fine, tips?
fading verge
When that happened to me it was because the hip was too high up
I just lowered it in Blender. You could try that, though I can’t guarantee it’ll work
stark musk
https://youtu.be/GiV-0FPj8GQ @fading verge this video series really helped me grasp how to properly rig (besides the end of video 1, don't follow after 17 minutes, you'll see why).

Hello all! The much requested beginner rigging tutorial is finally here! This is one of the videos requested beyond all others, and I've finally gotten aroun...
 final cave
So if your character has a straight tail is there a way to fix it in unity or do i have to take it back to blender bc i want to put dynamic bones in it so it moves but it just stays straight
weak oar
it needs to be weighted to those bones
final cave
so how would i go about fixing it?
fading verge
Alrighty, I've rigged a basic skelly and it seems to work fine, but when I hit the "configure" button for the humanoid rig, the rig changes and looks deformed on the new screen where you assign stuff like jaw, index finger, etc. Is there any way to directly copy the pose on the regular screen (the way it looks normally) to the rig configure screen? I am trying to manually do it atm but it is very tedious
opal aurora
@fading verge you can click on the pose button in the rig config menu and click reset pose to reset it, but your model should inherently be in T-Pose in the rig config for proper humanoid animations and tracking
fading verge
I'll try that
I reset it to a T pose, since originally it was in a t pose, but laying back and more like a crucifix
But now it looks like a normal T Pose
I did it and it looks better, but not perfect
He's a hunchback with a flat tail so I need to move the body a bit
heavy swift
for some reason after parenting the meshes under the metarig/armature, they still aren't linking to the skeleton at all, even with the modifiers that link the meshes to the skeleton
heavy swift
also, for some reason, when applying automatic weights, any weight that is applied to the left is ALSO applied to the right, even though no symmetry was active during the process.
getting this model rigged is much more tedious than it needs to be. especially when nothing works at all
fading verge
I tried to pose the model into a T Pose with the pose button, and it worked, but the t pose seems weird, and in game the legs are wobbly+the arms merge into the ground. I plan to tweak around with it until I get a desirable effect, but I figured I'd post images of what's happening in here in case anyone can help
Here's the weird T Pose
And here's how he is supposed to look when standing still, at least what I want him to look like.
heavy swift
great
 wintry rover
Can anyone plug me with the bones setup for good FBT? I appreciate it.
I've been trying a bunch of combinations but still get the weird legs bend when crouching.
fading verge
Could you post images? I don't really know what you're describing but I might have simply forgotten it and need a reminder
wintry rover
I don't have any pic atm. But imagine the upper legs feel shorter so they kind of collapse inward when crouching.
 naive tree
@wintry rover check tpose fbx in sdk, it has an armature example
you might have your calibration off, or height
wintry rover
no it's just the position of the bones
namely spine, hip and upper legs
I got it working once then I messed it up
fading verge
It might just be a rotation issue, happened to me once. I rotated the hips 90 degrees and it disappeared
If not the hips, maybe the spine or legs.
tough robin
Adjust bone possition and weight it better
fading verge
@wintry rover Did the rotation work or did you just change calibration? Also, that's likely just the bone position rigged weirdly., try rerigging it or inspecting any differences between both feet in rig
 drowsy fossil

What causes this ridiculous thing
 fading verge
If by thing you mean the "tail suddenly becomes a Viagra commercial", it happens to me to. The way I fixed it was by adjusting the hip's position in blender to be lower/higher. Can't remember which but I think lower
You could first try lowering it in rigging though
Might save you time from going back to Blender
drowsy fossil
Alright. I shall try. Thanks
fading verge
Actually now that I recall you can't really lower the hip relative to the rest of the model in Unity. At least, no way I know of. So it might be best to go right to Blender
drowsy fossil
Yea that fixed it. Thanks a lot. Now I have to fix weight painting that causes shoulders to deform tits
fading verge
Can't help you there, sadly. I know jack about weight painting.
All I know is that, generally, you want full weight on the bone in question, with the weight cycling through the "colors" towards each vertices. So like blue-red-blue, with the colors in between as the dashes, as the average bone
Then again I may be horribly wrong so take my words with a grain of salt. Plus that's just for bones, not sure if it applies to meshwork
wintry rover
Thanks I moved the bone position around to match the sample blue man
it's still there but fixed somewhat
 floral glade
Can someone share how to place Eye bone for VRC rig (anime style flat eyes)? It seems very weird since it has to face upwards instead of forward.
Last time I had time to touch avatars I remember it could move a little weird depending on placement
fading verge
Anyone here had to deal with an issue where your avatar's legs won't stay still? Like they're always tapdancing? I don't know what's causing it or how to fix it
 tulip granite
u can stop it from tapping by lowering yourself
 median cargo
So I have a problem with weight paints, and I can't figure out what part I need to change in order to fix it
Avatar as is:
It has those jarring lines by the neck and the front chest
Chest
Shoulders
head
I thought reducing the sides of the shoulders would make it less wonky, but it doesn't seem to have the right effect
tired meteor
You might want to use the blur tool and blur it out just a little more
fading verge
@tulip granite Lowering myself? In Blender or in Unity?
tulip granite
uhhh in vrchat
unless you are a desktop user having that issue
fading verge
Desktop user, not using VR.
It's the same issue I assume you think of, with the legs sorta tapdancing
tulip granite
aww
then i might not be able to help
but do you notice your avatar tip toeing and such
fading verge
Sorta. It's not standing on its toes but it definitely looks like it would
It's like he really wants to pee, or he's nervous. That's the way I'd describe the leg movement.
 warm oyster
Don't suppose anyone magically knows what this is, huh?
If not it's cool, trying to figure it out myself over here.
Idly wondering if the fact that I haven't bought the Unity dynamic bones is interfering with things. I'd think so, but I'm not confident enough to throw $20 at it.
teal badge
Nothing to do with that.
If you edited the model rig and saved over the model, Unity is telling you the rig is different now.
If you want you can make Unity dump and reconfigure the rig by changing it from Humanoid to Genetic and back.
warm oyster
i should've mentioned this is a first-time import from blender but noted, yeah, it's just what it said when i moved it from generic to humanoid
but thank you, ye
 rugged thicket
I've exported some FFXI files, model and skeleton, is there anyone that could guide me through making it work for a VRC avatar?
warm oyster
if you try googling "ffxiv models into vrchat" you should find a lot of stuff about it, as far as i'm aware ffxi and ffxiv are technologically the same anyway
rugged thicket
Thats great info thanks @warm oyster
Im mostly havijg trouble with the skeleton
Its a little more odd than your average humanoid even tho it is a humanoid character
Any tips for that?
warm oyster
not particularly, sorry. i'm new too and i've been working on my avatar for like a week straight :T
i did find https://www.youtube.com/watch?v=O1vhlTGP1-o to be helpful but i haven't got that far yet myself

Welcome to the 2nd Blender 2.8 speed tutorial! Today I'll show you how to create your character rig in less than 5 minutes! Hope you guys enjoy and learn a l...
rugged thicket
So close yet so far
rugged thicket
How do i rotate a bone around a joint without warping its scale and position? Does anyone know?
warm oyster
i hate to say it but you're gonna run into a lot of questions rigging
i'm brand new too so i get to say "try google first" without seeming rude :x
i've just found there's a literal ton of blender questions/answers online already which is such a relief honestly
but there's probably constraints you can set on the transformation so it doesn't move it ways you don't want (but i don't know how for that specifically)
rugged thicket
ive found a tsunami of answers when googling that q, but none of them are useful sadly
otherwise i wouldnt post here
take this selected bone, i want to rotate it around the red marked joint, but it seems the program doesn't support this ?
warm oyster
well that's fair
ohhh
try zooming in real close and grabbing the ball on the small tip of the bone
you can grab those and manipulate them without moving the other end
yes i realize that's probably frustratingly simple
that keeps happening to me too
it's why it's taken me a week to make, like
and it's going okay but oh my god i've learned so much this week my head hurts
so i feel for you lmao
rugged thicket
this is what that ends up in
all of the accuracy and detail is out of the window as soon as you grab those p much
and itll just start arbitrarily throwing it into random 3d space based on what it guesses your mouse movement does
warm oyster
hmm, well, i noticed once you click something with a transform tool (just click, don't drag) you can then type a number and hit enter to apply the transformation, which for rotation by default is a spin based on your camera angle
rugged thicket
considering the model was made and rigged by FF studio i really want to leave it in tact as much as possible to enjoy their artisan work lol
warm oyster
oh that's not a rotation
rugged thicket
ah okay sweet ill see if i ca nfind that
warm oyster
well i see, uh, try this
click the white circle in the middle of the handles
that should open a little window in the bottom left if you're using 2.8 that lets you enter numerical values for the transform you want
and use the number pad keys to change camera angles a lot if you haven't, that helps make sure you're looking at things at perfect angles
rugged thicket
the Translate window?
warm oyster
this thing
you can open it and get settings for another movement option
i hope it works out tho, sorry i'm not more help
rugged thicket
ah ok, should get blender 2.8 then i guess thanks for the tip
warm oyster
it's more streamlined and works with all the relevant plugins that i'm aware of
rugged thicket
yeah i went back to .79 because all tutorials yo ucan find about VRC use it
warm oyster
yeah that's fair
rugged thicket
the interface is so different that they dont apply to .80 anymore
i think they even redid the way it deals with textures as a whole, not sure
warm oyster
yeah i encountered that
formerly shaders and stuff were just in the compositing menu, now they're all in their own shading node editor
it took me like a solid hour to realize that
i was literally just trying to make her eyes glow
hhhh
rugged thicket
lol
i dont wanna be a HADER but i think blender never had a great reputation anyway
warm oyster
it didn't, but it's getting really robust
tough robin
.8 jcust changes way too mecu for no reason. Changes shortcuts or outright removes them
I dont get why they made it like this but .8 is a pain to use
sleek isle
F9 open the window where you cursor is
rugged thicket
@warm oyster looks like they addressed the rotation issue very well in .80 and on
having the smoothest time ever doing these rotations now, thanks for the tip
warm oyster
ye i guess, i hope i helped lol
it's just that when you didn't already know blender, 2.8 seems comfier
to me anyway
rugged thicket
i agree, for me it was solely the tutorial issue
its a lot prettier too
oh but it doesnt highlight selected bones like .79 did.... christ almighty this is giving me the one headache after the other
rugged thicket
imma take a break and try again later, thanks for the help! will get there eventually
warm oyster
yeah understandable lol
tough robin
Thats probably just your theme
tough robin
Tummy rig?!
rugged thicket
he's a chunky boy
warm oyster
do i need to keep rotation bones
i don't, right? not for vrchat
trying to clean up my bone count, merging weights into major bones
Humanoid avatar must have head, hands and feet bones mapped.
oh lmao nvm
turbid spear
Don't delete bones
Use cats to merge them to parent if you want to get rid of them
That'll make sure you don't have vertices without weights on them
warm oyster

GitHub
:smiley_cat: A tool designed to shorten steps needed to import and optimize models into VRChat. Compatible models are: MMD, XNALara, Mixamo, DAZ/Poser, Blender Rigify, Sims 2, Motion Builder, 3DS M...
rugged thicket
thanks
warm oyster
yeah there's a button that only deletes bones without any weights
i'm trying to prepare to use it but
having a stroke trying to weight paint this thumb
does this even look normal? i can't test it in-game, i don't have a headset yet
rugged thicket
is there a way to carry over the names of bones from one file to another?
turbid spear
Why, what are you trying to do
turbid spear
Delete the armature and import it again
Delete the newly imported mesh and combine new armature with old mesh
warm oyster
and save a lot
turbid spear
Bone weights are stored in vertex groups on the mesh so even if you delete a bone it still remembers what it was weighted to
But honestly in your case you should be able to just weight paint those stray vertices
Since it looks like only 2 small bits stick out
rugged thicket
the FFXI file has no actual bone names
so just after deleting those bones i went on to rename everything properly, now i find out i shouldnt have done that and im looking for a way to avoid having to redo all the names lol
rugged thicket
i renamed like 60 bones
turbid spear
You could just weight paint those stray vertices
warm oyster
probably doesn't know how, no offense
weight painting is arcane when you're brand new
rugged thicket
i dont know anything about blender really and im trying to avoid having to weight paint
turbid spear
I know, but considering it's only 2 vertices, it should be the best way to go
warm oyster
yeah, that's true
rugged thicket
trying to make the most of all of the work done by FFXI creators
warm oyster
well it's just repairing some import damage at this point
rugged thicket
i think ive seen before how to get into the weight painting interface, will try to figure it out
turbid spear
Hold on
rugged thicket
i think ive found the two vertex groups that were affected by my fuckup
warm oyster
it might just seems to be individual vertices
rugged thicket
they seem to be properly weight painted too