#avatar-rigging
1 messages · Page 137 of 1
 wild owl
Thank you for the kind offer 💗 I’ll try asking around more, and if I can’t find anything I will send it to you to look at, hope am not being too much of a bother! ^~^”
 high nova
Send a screenshot of the model in vrc and it's armature
I don't mind anyway, shouldn't be much work
wild owl
okie..!
 heavy parcel
Put an avatar into Blender so I could optimize it through the CATS plugin. However the legs get screwed up and I'm not quite sure what to do to fix it. https://imgur.com/a/PzaJ4Gr
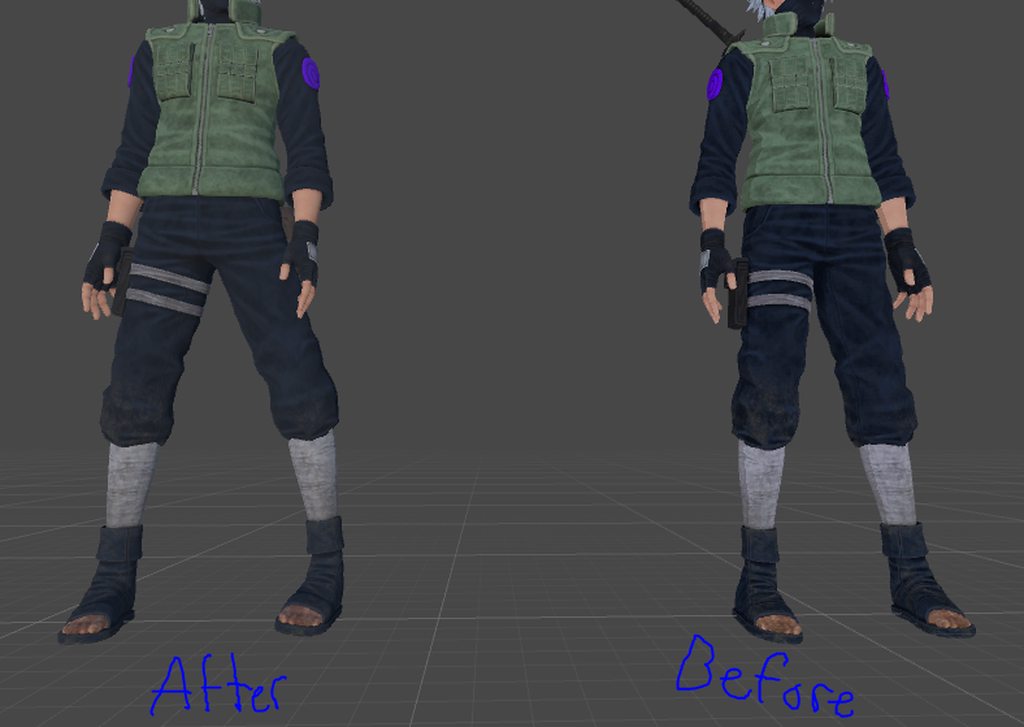
 gritty nest
Probably the humanoid rig config
heavy parcel
@gritty nest Thank you. Forgot you can move the rig in Unity lol
 ruby anvil
Hey could someone help me add a sound to my characters emote? Im trying to get it to do the sound when i press the squeeze button on the vive. Just not sure the name of the file to add it to
Still pretty new to unity 😅
 warm shale
I've been trying to scrap together a pikmin model for a long ass time and having some trouble, one of the assets I'm trying to use though the model will only lay down and I'm not sure what I'm supposed to be doing https://gyazo.com/3db616d196c2a36285ed1c831db6ed80

 rocky grotto
So I got this really common issue: lower arm is not first child of upper arm or hand is not first child of lower arm
 opal aurora
Rotate the armature by 90°, ctrl+A, apply rotation @warm shale
rocky grotto
Trying to find the body mapping window in Unity. But can't find it lol
opal aurora
You fix that in the hierarchy
Armature -> Hips -> Spine -> Chest -> L/R Shoulders -> make sure upper arm (etc) are the first of each row
opal aurora
Eyup
rocky grotto
This should be good right?
opal aurora
That should be it
gritty nest
@rocky grotto that's not really an error, more like a warning
You have a hierarchy like
- Left Arm
-- Not Left Elbow
-- Left Elbow
Swap the latter two
warm shale
thank you! I just started using a different model which is needing a whole remapping of the skeleton
gritty nest
If you get warnings about breaking the prefab instance, cancel and try again
rocky grotto
And this: The following component types are found on the Avatar and will be removed by the client: SpatialMappingCollider
opal aurora
A component on your model is called that and must be removed before you can upload
rocky grotto
Got it
warm shale
one last thing about the model
it just appears to lay down and only lays down
I'm not sure how to wake him up ;-;
opal aurora
It needs to be rotated, i mentioned it before o:
warm shale
oof, I'm still having some trouble, mostly with the skeletons of the models being too small or having some weird stuff about them kinda
opal aurora
The odd bone directions?
warm shale
not that persay, but I'm just having trouble with the models that I'm using being there's very few pikmin models the ones that I do have all have something about the bones that's making this difficult. The one I usually use I'll try and get a picture of at it's base is just a few lines that dictate the bones but they will not work for vrchat's standards of bones
opal aurora
Oh, it's using lines to render the bones?
warm shale

those black lines going through the body are basically the bones
I've managed to delete it a few times, but whenever I do the whole model will just flop over onto the ground kinda
and I've tried to use mixamo on both this and the other model but it won't take
I can kind of render bones off of them, because the edges will allow bones to come out of them but trying to make a skeleton has proved kind of like a really weird puzzle where putting bones together have to fit perfectly to be of vrchat's standards ie chest to spine to hips have to connect properly
it's a bit confusing
opal aurora
Oh the bones seem like they're just really tiny, the dotted lines are just dictating the connections, also, you can have dummy bones that don't move anything and just use them as placeholders
Unity doesn't really care if they do anything as long as they exist
warm shale
the thing is they don't properly add up when I try and put it through the control panel
let me see if I can get a pic of if trying to just use this

I've tried rearranging the bones and personally I think I'm going to try it again using this
opal aurora
Oh no no, you do need the rest of the bones, i'm saying you can create dummy bones to fill in the blanks, renaming bones will probably also help in terms of organization
warm shale
alright I think I see what you mean
kind of like filling in small pieces?
because what I was tying to do was making an entire set of bones around the rest of it hah
opal aurora
Although it may be tedious and require some trial and error
Having them in the right spots isn't necessary (in terms of position), unless they move a bone that moves the model, essentially
warm shale
yeah I keep getting a tad bit close
earlier I was trying to just rig the entire skeleton but I can see by what you're saying that's probably not necessary in the long term
opal aurora
Parenting however, is important, otherwise unity will yell at you
 ivory radish
i dont understand y u would need only that many bones
character seems to have arms legs and hands
warm shale
you need 15 bones in total
the first problem is this model not having that so adding bones is necessary
opal aurora
Rigging it in its entirety is entirely plausible of course, just giving an idea incase it gets too frustrating
warm shale
yeah it just is kinda like putting the right pieces where they need to go for me
this is mostly me testing and learning from each thing I'm doing
I didn't even know how to make a bone or move the camera two days ago ;w;
https://gyazo.com/ce84cacdc40e71fac22a458e114b5575 looks for the most part like thatt worked out

 sleek isle
you need to put the chest bone to the chest and create a dummy for the spine
of what I see
and 3 dummy bones on each and and put them in thumb index middle
warm shale
I'll need to try and understand that one I'm trying to find the bone that is being used as the spine
it's one of the mini bones
warm shale
yes I got my first test to finally be accepted by vrchat
now I just need to learn how to connect the flower
(and hopefully not have to work any further on the skeleton past the flower)
 lost hollow
What could be the issue if the legs start to cross as soon you start to crouch down, I have tried to position the bones straight and reset the bone rotation.
 versed vine
Hey, all. I'm trying to import a Smash Ultimate model. Zelda to be exact. I'm getting the "Make sure that the parent of both shoulders and the neck is the chest" message, but as you can see, this is the case in my setup... Isn't it?
Is it yelling at me because the shoulders aren't the immediate children of the chest?
They are children in the literal sense
warm shale
it should b e something like that if I'm right
have you fully connected them as parents?
versed vine
Depends on what you mean
The avatar is showing all green in the image here
That means it's all connected yeah?
warm shale
yeah should be
I'm pretty new to this but I've been messing with it literally all day so I cannot give you anymore input other than my trial and errors
versed vine
I'm betting it's that Clavicle_C that has both Clavicle's_R and _L under it..
But seeing as I didn't make this rig, I don't know where to go from here
 storm oracle
any idea on how long it takes before you can upload a model to vr chat?
 glad ore
Hey, any tips on how to rig pincers for hands?
glad ore
claws
Im trying to make the hands of a model like crab claws
so when I use one finger gesture it will open the claws
ivory radish
i mean u don't rlly have 2 do any extra rigging but
if u rlly wanted 2 u could override every single gesture animation
but that would require:
- for claws to be finger bones in the mapper
- for u 2 remake every opposite hand gesture
unless both hands are claws
but u would just put them in slots in the animator override
warm shale
Alright so I got the model to go through, now though the bones will not move, the body just hobbles, and the camera is broken and will not move away from the floor. I can get a gif of what's happening and the bones once I'm out of work if someone might have an idea what I broke this time.
 west thorn
The model that never made it through the polygon limit laws...
ivory radish
looks like it could perfectly make it
just turn a lot of those polgyons to normal maps and reduce the amount of interior detailing and/or reduce poly counts for flat areas and problems solved
west thorn
There were too many parts that could not be deleted or decimated D:
Most surface imperfections are normals already..
ivory radish
well im sure 70k should be more than enough for at least after u do a lot of optimizations
ivory radish
i have a few robot avatars that ive gotten to around 65k even with all those 'wires'
gritty nest
They look hella cool though
ivory radish
could use more optimization but theres a point where its either render ready or vr ready
 lofty topaz
How can I make this work for full body tracking?
CATS does this to the model in the fbt fix, but it is still scuffed
ivory radish
make sure the legs are completely straight
lofty topaz
you say like this?
 naive tree
straight from front, bent from side
numpad 5 + nmpd 1, nmpd3


also DO NOT overwrite the fbx
import as new
 wind osprey
Also the only thing I can see you'd actually need to fix is the root of the hip bone being lower or equal to the roots of the thigh bones
and maybe the weird spine bone placements
lofty topaz
Gotcha. So I'll export as a new file and make sure all the bones are properly aligned
Also the root of the hip bone should be where, you say?
ivory radish
import new if u dont know 2 fix the config only or u change bone hierarchy
naive tree
the biggest thing for full body is doing neck fix so your viewpoint is as scuffed
wind osprey
For fullbody if the root (thick end when using octahedral view in blender) of the hip bone is lower than the roots of the thigh bones the hips will flip
There's no 100% fix for the view point thing
wind osprey
And you'll have to undo the neck 'fix' if they change the FBTIK config later
naive tree
feels good to keep remaking avatars cuz we can't have proper working stuff 🙂
wind osprey
The neck 'fix' is changing the neck bone to 0 size, right?
naive tree
trasnfers all neck weight to head, and resize neck+head bottom bone to very small
wind osprey
In that case, when doing that always pull the neck bone up into the head bone and not the other way around, because changing the head bone position will alter your floor alignment (SteamVR-VRChat floor)
 gritty nest
@naive tree why not overwrite the FBX?
If you pose->Reset and Pose->Enforce T-pose in the humanoid rig it'll be fine
naive tree
hmm
naive tree
messing with bones always scuffs stuff for me
and with pumkins tools its easy to copy paste stuff
wind osprey
I do what Rokk said and haven't had problems
ivory radish
it 'scuffs' if u move them around and change bones
if u move any bones u need 2 make sure 2 check if its ok in the configurator
if u add or remove bones u might need 2 re-import / change from none to humanoid again
wind osprey
Generally if there's any import warnings you'll need to reset some things
gritty nest
Dynamic bone can also mess up some stuff
ivory radish
ye
gritty nest
It holds on to the previous transform values so I disable the components before import, or disable the components and revert the bone's transforms to prefab.
 faint trellis
Trying to upload a bird avatar and the shoulder height is too short
How can I fix this?
 vast hedge
hey guys I need help with my avatar. So the problem is the eyes, in unity they're fine but in the game they pop out of their sockets and im pretty new to this so I'd appreaciate any help
high nova
@faint trellis Non-Humanoid armatures have to rig as generic, else you'd need to add custom animations.
faint trellis
thank you
 deft crown

Does anyone know how to stop the third arm from rotating, every time I unappear and reappear the arm it just breaks and turns a different angle
deft crown
Thank you!
glad ore
I cant seem to figure out how to rig this. The model has two of these heads but I want to rig them as arms. If I want the mouth to open and close when do a hand gesture should the upper jaw be assigned to the thumb, and should weight be only on the base of the finger? Or should I set up the skeleton in a Tpose and weight paint the parts I want to move?
rigging is hard
ivory radish
?
glad ore
dang, ok
 mortal raven
first time replacing the arms of an avatar, first time using blender in years...anyone got any tips on weight painting? i cant seem to get my head around it
 crisp tendon
There's not much to it, it's a multiple iteration process, you try weight, you look at how it moves with the bone, but you should use gradients on either side to make it cleaner
There's good videos that explain the principle, but the more parts you've got, the more difficult it'll be
mortal raven
problem is, there can either be one or hundreds of pieces to weight paint
crisp tendon
Yep, hence the "the more parts you've got the harder it'll be"
And by harder i mean a pain in the ass
mortal raven
yea and i doubt im anywhere near novice enough yet to know all the controls etc
lost all train of thought when it comes to blender
used to be able to do basic stuffs at least
crisp tendon
You can also create additional bones to move very specific parts if you need to
mortal raven
what part? part 1 or 200? 😄
crisp tendon
If whatever your character has around its arms doesn't stop around the elbow, you'll have a horrible time with it
crisp tendon
You can also assign weight paint in edit mode for the mesh, you select all the pieces using L on a vertex, it'll select the piece, then on the right menu you'll be able to assign them to a specific bone
crisp tendon
and you'll have to assign full weight, since it's metal
mortal raven
yes hence my "attempt"
is there a way to select all meshes you need and just give the a straight number?, ie all in that arm section a weight of 1
hey shotariya
long time no see
 pseudo sedge
:)
at the vertex group tab after you select verices are apply button and scroller of a weight you apply on selected group
crisp tendon
Yep, the thing i described above in edit mode
mortal raven
oh ok thanks again, thats hella helpful
crisp tendon
Select them in edit mode through whatever way you chose, then assign them to a specific bone
mortal raven
today was hectic in the fact that i had to re learn unity and some of blender again, for now im satisfied with making bones :D, ill leave the rest for tomorrow
making notes of what your saying though
crisp tendon
feel free to ping me tomorrow if you still have trouble with it
mortal raven
alright thanks again
 fading verge
Is there a way to fix this issue?
 wooden pecan
tracking problem!? vive trackers?
fading verge
I have vive trackers and don't think its a tracking problem.
 brave canopy
It's the arm length, your irl arms are longer than the avatar's arms.
high nova
@fading verge looks like your headset is losing tracking
or your hands are pulling your head
fading verge
It happens anywhere I go and other fullbody models work
brave canopy
You can fix it by editing your player height to make your irl arms shorter or change the length of the arms in blender
brave canopy
Irl arms has to be shorter than the model's arms. You can fake it doing the player height but it's better editing the actual model arms.
high nova
else just keep your hands close to your chest
fading verge
Okay I'll try that thanks
Also the bones are different lengths on each arms can that be affecting it to
brave canopy
Vrchat uses the arms to measure world space size, so the arms being different size can affect how it is setup.
fading verge
Okay I'll try to make the arms the same length
brave canopy
Basically the wing span of your arms is used a lot to measure stuff in vrchat
fading verge
Okay Ill use that
mortal raven
@crisp tendon so when you say use L to select the individual meshes then to the right you can allocate them to a bone, what do you mean to the right? im struggling to find this option
crisp tendon
You select a bone in the list of vertex group, then you set the weight to 1 and click assign
mortal raven
so once mesh is selected with l you do that? but when i select said mesh the entire section of vertext groups etc vanishes, ill provide a screenshot
wait nevermind it re appeared 🤔
crisp tendon
all your meshes are joined right ?
mortal raven
no
had to separate
or else i couldnt get the specifics
this is its current state atm
and heres what i mean by the section disappearing
mortal raven
should i parent them ? since if i merge them all i cant access the certain points i need to paint
oh that seemed to work
oh nope never mind, its still painting the one section, needa find the option to allocate them all a weight of 1
crisp tendon
You can select multiple pieces with L
mortal raven
what i mean is that the option is not appearing
crisp tendon
Ok, in that case you might wanna try giving it automatic weight paint, if that works without warnings at the top, you'll have to fix a few things
if you do get a warning, you'll probably need to make it with empty groups
and then you can manually assign
crisp tendon
Yeah it doesn't work 100% of the time
mortal raven
where can i find this option ?
crisp tendon
Shift click your mesh, then sift click your armature, CTRL + P, Automatic weight paint
mortal raven
join meshes first?
crisp tendon
yep
mortal raven
doubles? as in bones yea?
crisp tendon
Double vertices
mortal raven
am confused to say the least 😄
crisp tendon
Two vertices at the same location is called a double
crisp tendon
which confusesthe fuck out of blender trying to weight paint something
usually a lot of those yeah
mortal raven
do you want to hop into a call so i can screen share? if it makes it easier that is
crisp tendon
Currently working so can't do, but i'll answer any question you have
mortal raven
alright
in that case, if i were to somehow group selected meshes into one for each section of the arm (ie hand, wrist, elbow and arm) i presume painting would be easier?
crisp tendon
Well it's just visual fidelity, you don't want metallic parts to bend, so you need to chose clearly what moves with each bone, then assign the paint to it
What you could also do is put the model without the metal parts in Mixamo, get a regular weight paint for that and then weight paint the additional stuff on top
crisp tendon
Cool, then it's easy for the rest
If you look at the picture you sent above, there's a clear outline between the arm and forearm
So you can do that without much trouble
crisp tendon
No you can select multiple pieces in edit mode
mortal raven
but then i cant assign weight or a bone
crisp tendon
Because you need to merge your meshes first
mortal raven
then they are all one and i cant individually select the ones i need 😐
crisp tendon
You can, through L, that's what it does
mortal raven
l doesnt work for me then 😄 heres all the parts i got selected
another screenshot after pressing L
no option to assign unfortunately
crisp tendon
But they're still not part of the body mesh
mortal raven
alright ima start from the beginning since i dont want to make you loose your mind 😄
all one mesh now
and now i cant select anything
mortal raven
@crisp tendon sorry about all that confusion there, i have found a way to get past the errors of auto painting, L sadly doesnt work so i simple use box select to select an area then unselect anything i do not want, auto paint then test in pose mode, so far it seems to work but ima hope for the best regardless, as i still havent been able to assign bones to meshes yet 🤔
mortal raven
nope cant select things
that is sadly what i was trying to explain the whole time but i guess it never came out right
if i knew how to make a gif of me messing with pose mode i would 😄
just gotta make it all 1 now, it gave them soft weights
crisp tendon
Sounds like a bug, you should be able to select at least something in edit mode
Are you in vertex mode for the selection ?
mortal raven
can assure you i was, but i have it sorted now so im oging to be testing it out
oh dear, could this be a result of removing the arms?
fine in blender though?
pseudo sedge
@mortal raven try to use double sided shader, or make it to be double sided, or try to invert normals in blender
mortal raven
another challenge approaches
how i do dat 😄
i remember doing it a while back when i made a few shaders within shader forge but i dont have that anymore 😄
pseudo sedge
add Cull Off to SubShader{} under Tags{} (if i remember proper)
mortal raven
hmm 🤔 alright ill give it a shot
@pseudo sedge is the an option for that with poiyomis shaders?
pseudo sedge
@mortal raven i think it has something like this, not remember
mortal raven
ah ok
mortal raven
@pseudo sedge so it wasnt shaders but rather normals, i have fixed them all except one which doesnt seem to be
this is what it looks like when i take a closer look, seems like patchwork 😄
any clue?
pseudo sedge
@mortal raven select 3 verts/edges and press F to fill
pseudo sedge
you need to edit uv/or unwrap and edit uv, for this face, according to position of faces around that face 🤔 it's not right unwrapped actually after the fill
mortal raven
more foreign language am afraid
pseudo sedge
@mortal raven add another window/hm in blender and change from 3d view(etc) to uv/image editor, then select that face in 3d view and you'll see uv for it, you can move vertices of uv in image editor window (and to see where to move them you need to select faces around to highlight them in uv/image editor)
mortal raven
and how do i open another window might i ask
pseudo sedge
@mortal raven on 3d view you have at the right top corner triangle of lines (🤔)
mortal raven
like so @pseudo sedge
pseudo sedge
yes but select face (i.e. 3 verts)
pseudo sedge
@mortal raven view? you can't (if i got what you mean), you just need to move unwrapping of that face to the right place according to faces around (by pressing G)
mortal raven
this is what i mean
crisp tendon
You could also make normals consistent, it's an option in blender and Cats
mortal raven
oh it is?
pseudo sedge
@mortal raven if you are about to make left bottom corner be right, you need to rotate in in uv/image editor
mortal raven
i should download cats tbh
forgot about that
oof cant figure this out
@pseudo sedge i have no clue what is going on but does this seem right for now?
pseudo sedge
it's right but you still need to change vertexes in uv/image editor to have properly applied texture on the face (you can select at the bottom of that window texture your clothes texture to see better what's going on heh)
mortal raven
thats the part i dont get sadly
i was fine with having that little colour differance but even though its facing the right way its still invisible in unity? 😐 too late for this
fading verge
does anyone have a beard for avatars that i can have?
...
 trail torrent
having issues with the upload - any fixes?
crisp tendon
Fix your humanoid configuration
 coral plover
sorry
trail torrent
Sorry, the last message did not send -
Its all attached, is what I meant to show as well . . . - And it keeps sending me that error form the last message -
trail torrent
It has everything - descriptor - rig, and mesh -
yet keeps saying errors/ t -pose -
high nova
@trail torrent pm me and screen share
 torn latch
where exactly are the hand trackers placed on a model?
would it just be directly on the wrist bone?
 viral stag
can anybody explain how I can fix the weight painting looking completely broken in Unity? https://i.imgur.com/18OKsaS.gifv
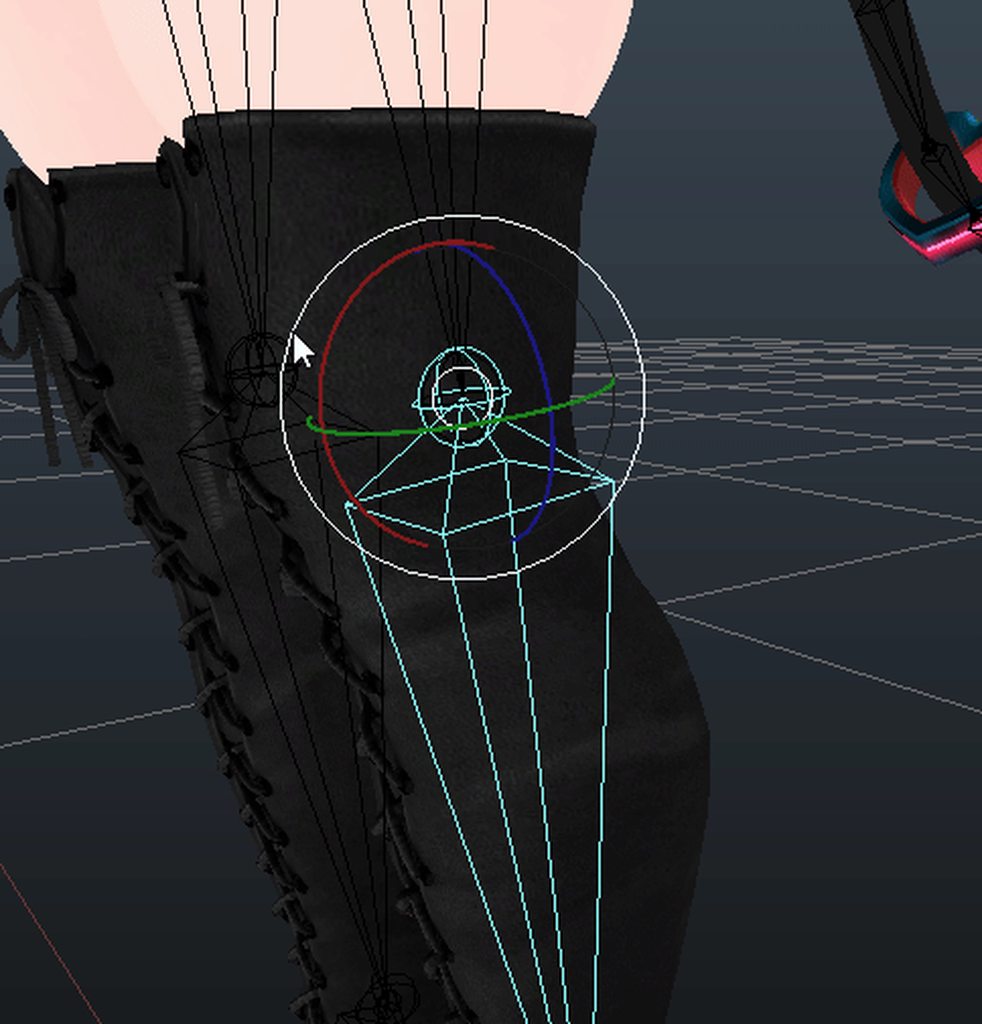
it's doing it with other parts of the body as well
and all my other models
which just occurred today..
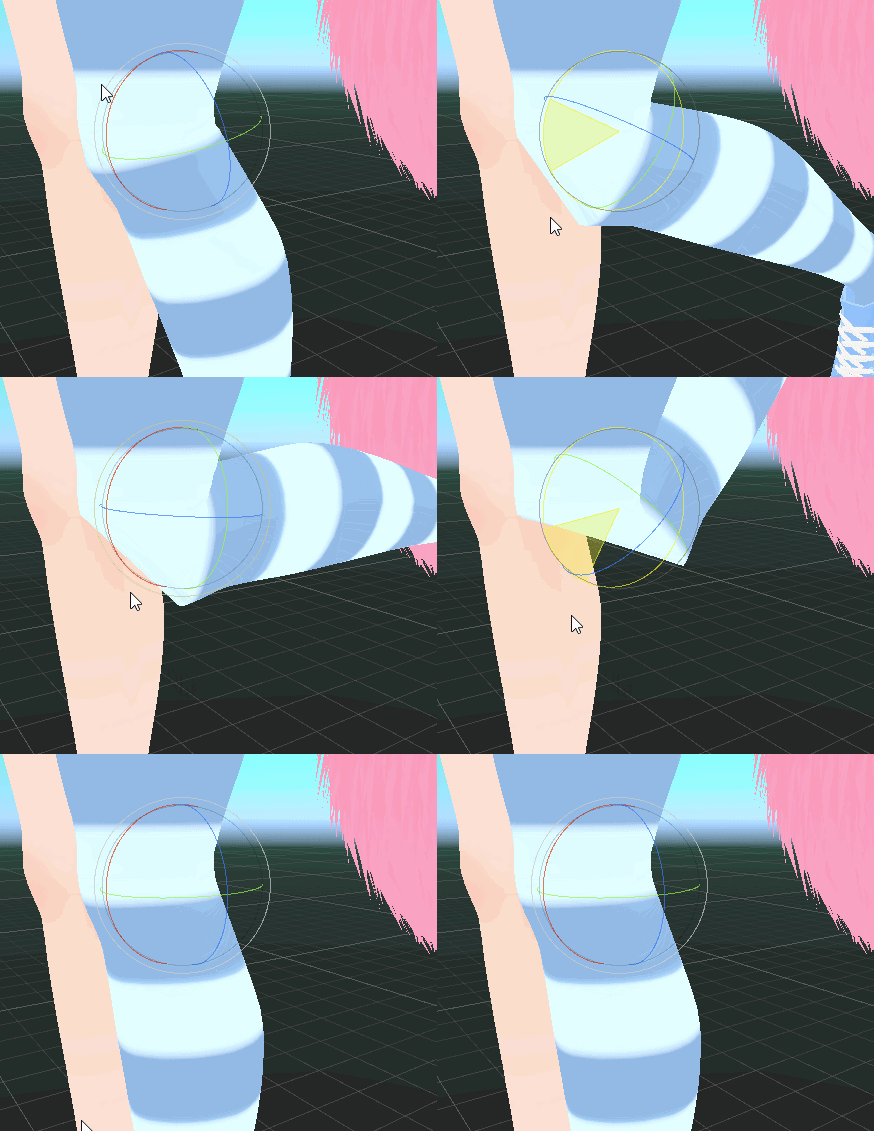
It's like it just erased all the smoothing in the weight painting, and it's only doing it in Unity
fading verge
Random question
How do i go about doing Texture based expressions
rather than 3D ones
i remember there being a video on it, but cant recall where it is
 opal river
I think I know which one you mean... one sec
https://www.youtube.com/watch?v=ZB2aXKkwXuA was it this one @fading verge ?

EDIT: If you are using an MMD model please read below! In this video I will show you how to make your 2D eyes/mouth type avatar have a blinking animation and...
opal river
that I do not know, I haven't gotten to that part yet 😄
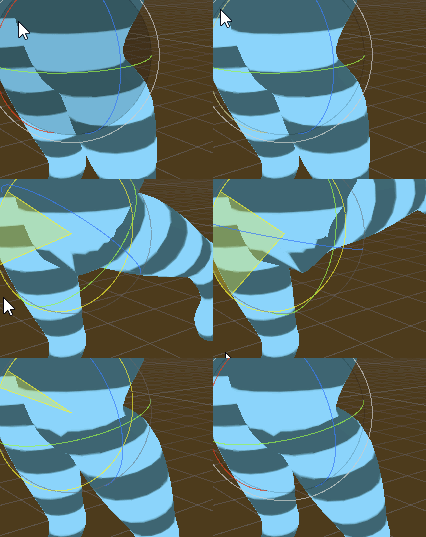
fading verge
Or if it's the same method
 solar ravine
is there a way to merge two complete armatures including common bones without losing all the weight painting?
I got some ear and tail accessories but after merging stuff together and exporting none of the bones move the body anymore. everything else seems totally fine though
maybe the weight painting isn't lost... but it definitely doesn't work in unity anymore 😐
naive tree
@solar ravine if you merge, the vertex groups will still stay. I would translate all bones and vertex groups, then merge, there shouldn't be any vertex group loss
check if the bones get renamed to different ones after merge
that could cause the issue, as the bones do not match vertex groups
solar ravine
hmm, ok. the bone names did match all the way down so it renamed a ton of this
I then merged those...
and renamed the main body ones back to their original names
naive tree
when your ears have vertex groups named like Ear_L, and there's a matching bone with same name - the bone will move that mesh part, but if the ear bone is Ear_L.01 then it's not going to move
so only issue I can see is that the bones are not matching vertex group names
or the mesh parts are not parented to armature
solar ravine
there is something odd going on with the hierarchy too. once I get into Unity, Body is under Armature
in Blender it didn't look particularly different to usual
naive tree
if it still gives issues, can send me the model and I can look into it
solar ravine
hah, I'll be damned .. cats' "fix model" actually fixed this
solar ravine
I still back up out of fear every time lol
at least where manual work was already done
naive tree
you shouldn't, it works very well
and ppl who talk about cats breaking their shit, is msot of the time user error
Ive been using cats since the release, and now there's basically no issues with it
 forest igloo
Did you just tell people to not do backups? 🤔
 slow gyro
Was directed to Yuumi's response 🤔
solar ravine
now everything works in unity but hips flip upside-down in game 🤔
naive tree
did you do anything to bones after cats fix?
solar ravine
negative, but I figured it out, somehow the humanoid rig had the hips upside-down
naive tree
overwrote the fbx?
gritty nest
@viral stag is the pivot point set to Center or Pivot?
In the top left of the Unity window
Also, make sure you don't have duplicate vertex groups
 brisk rampart
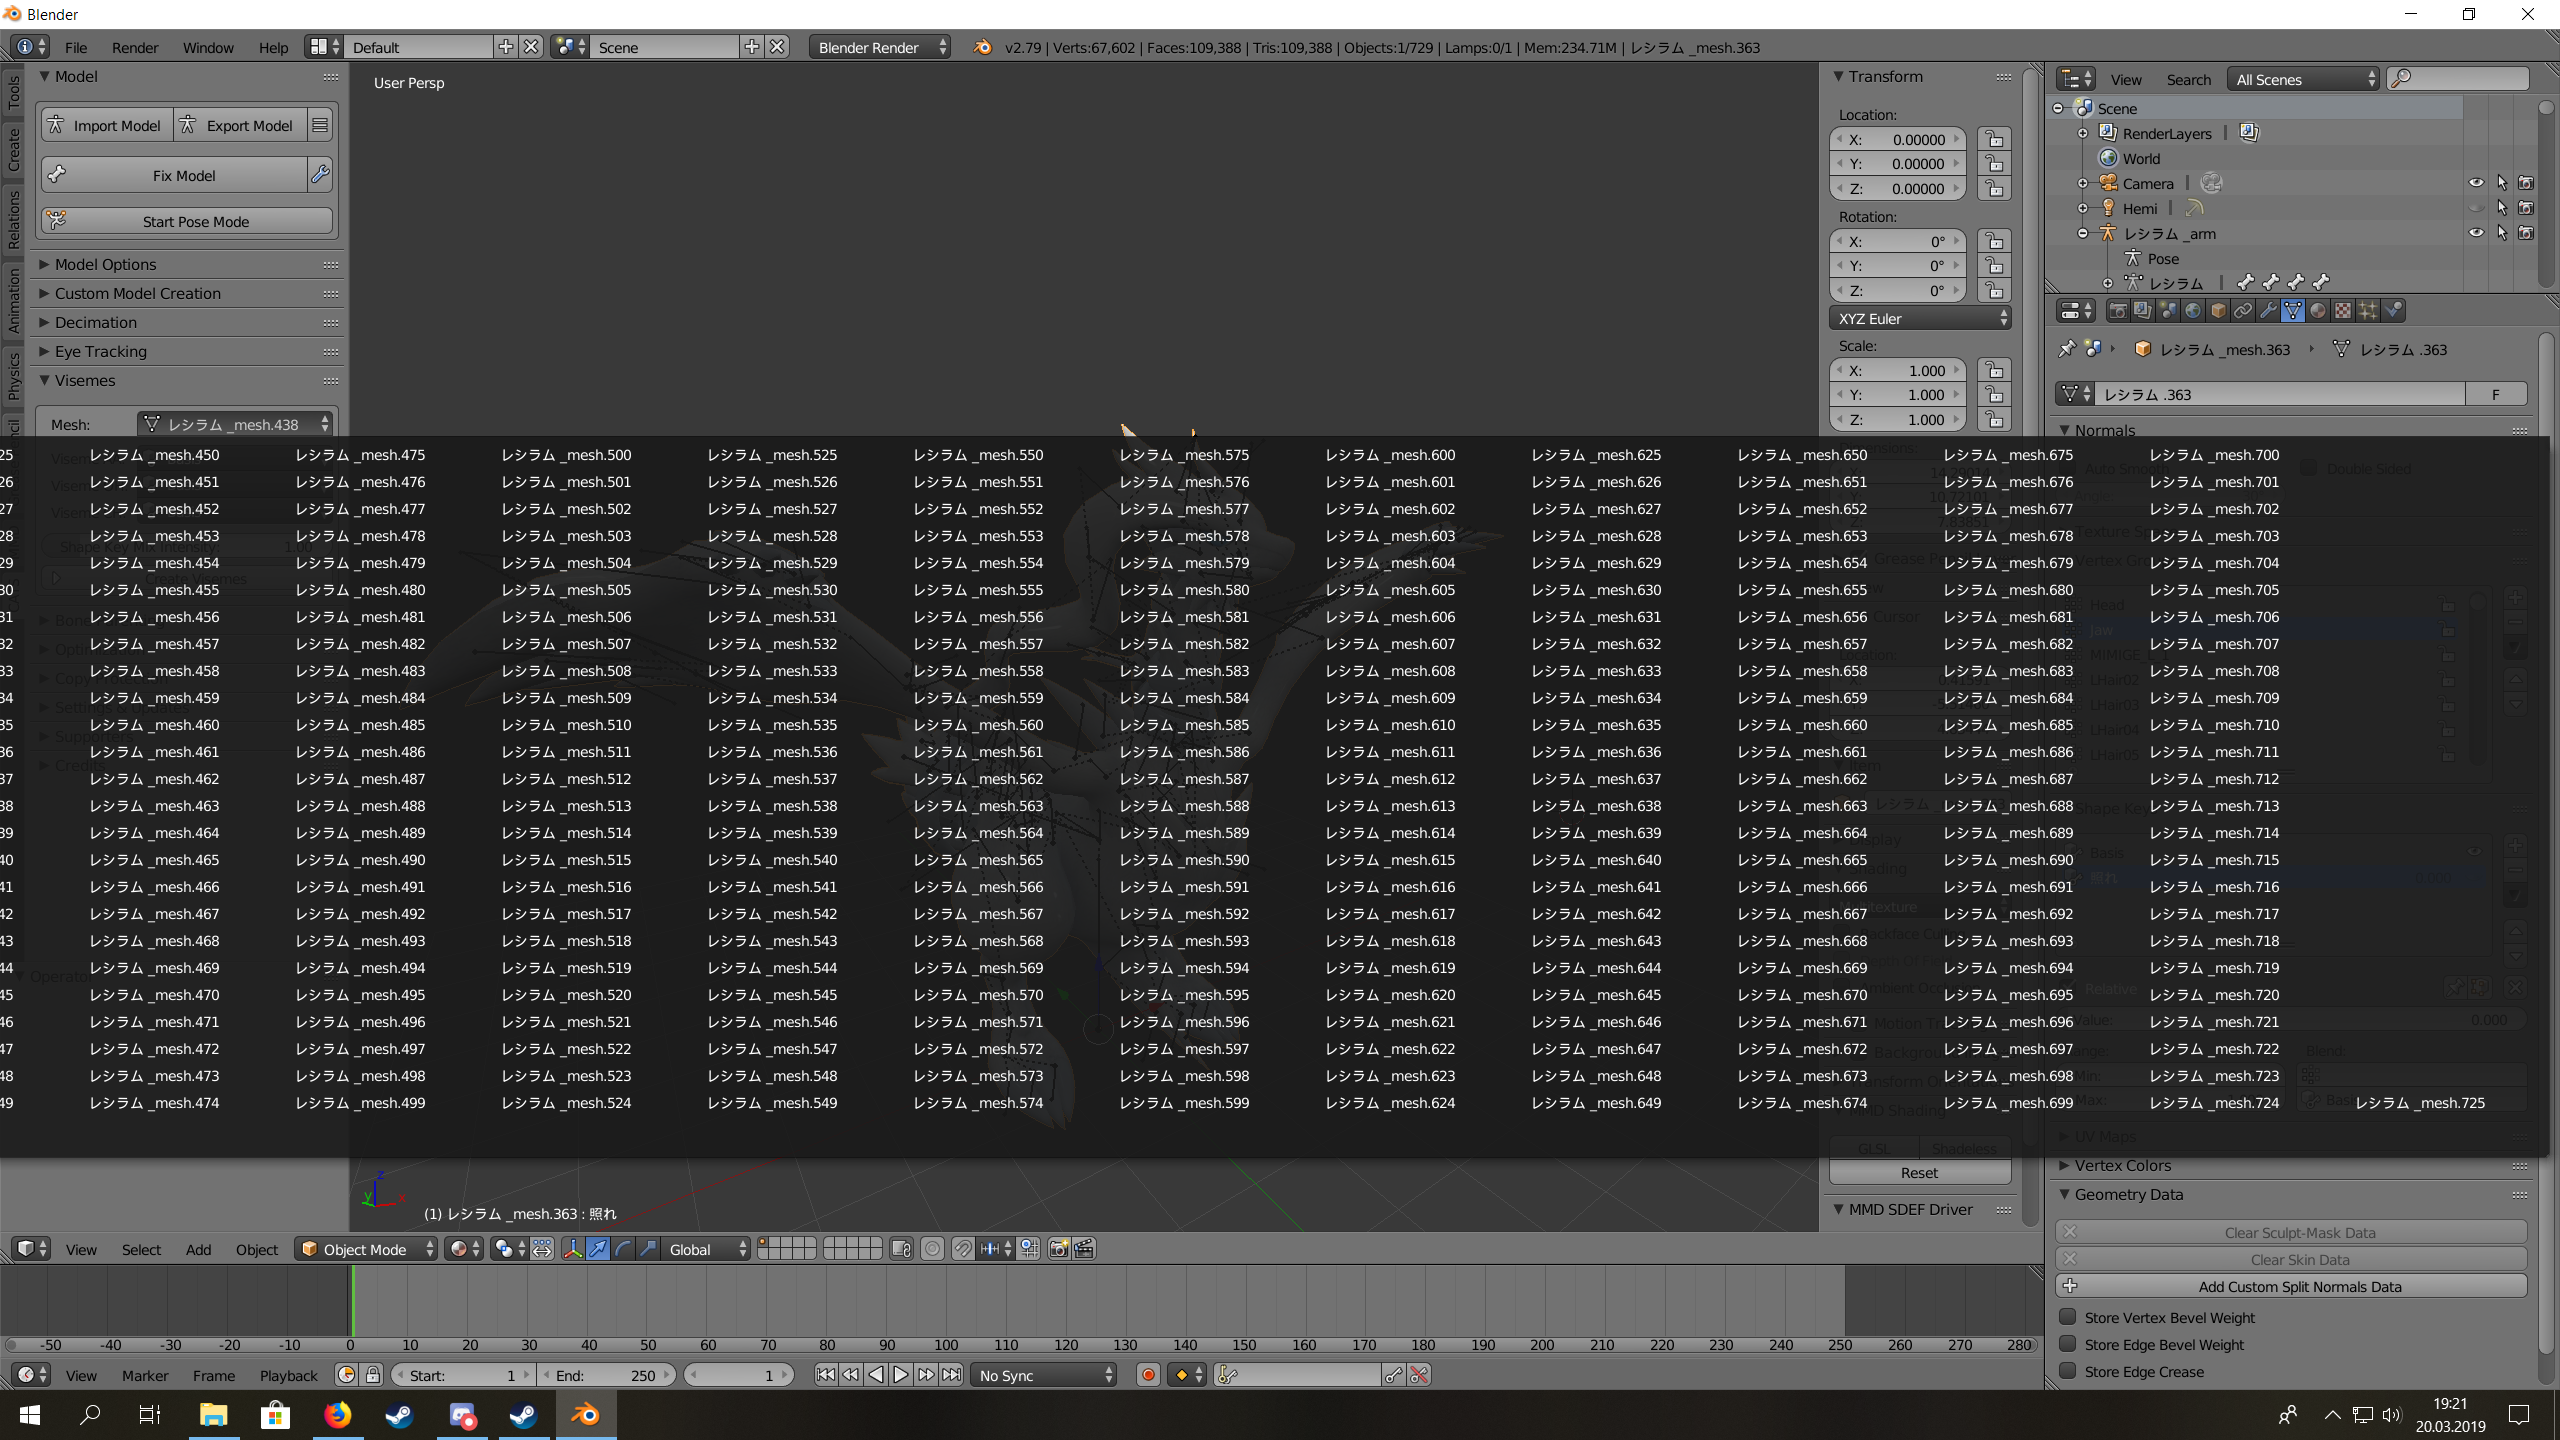
I'm trying to use Cats blender plugin to add lipsync to a model, but it has like so many meshes I can't select the main mesh https://i.gyazo.com/f4ee6ca4cdba914ebbfb60b1838963b7.png
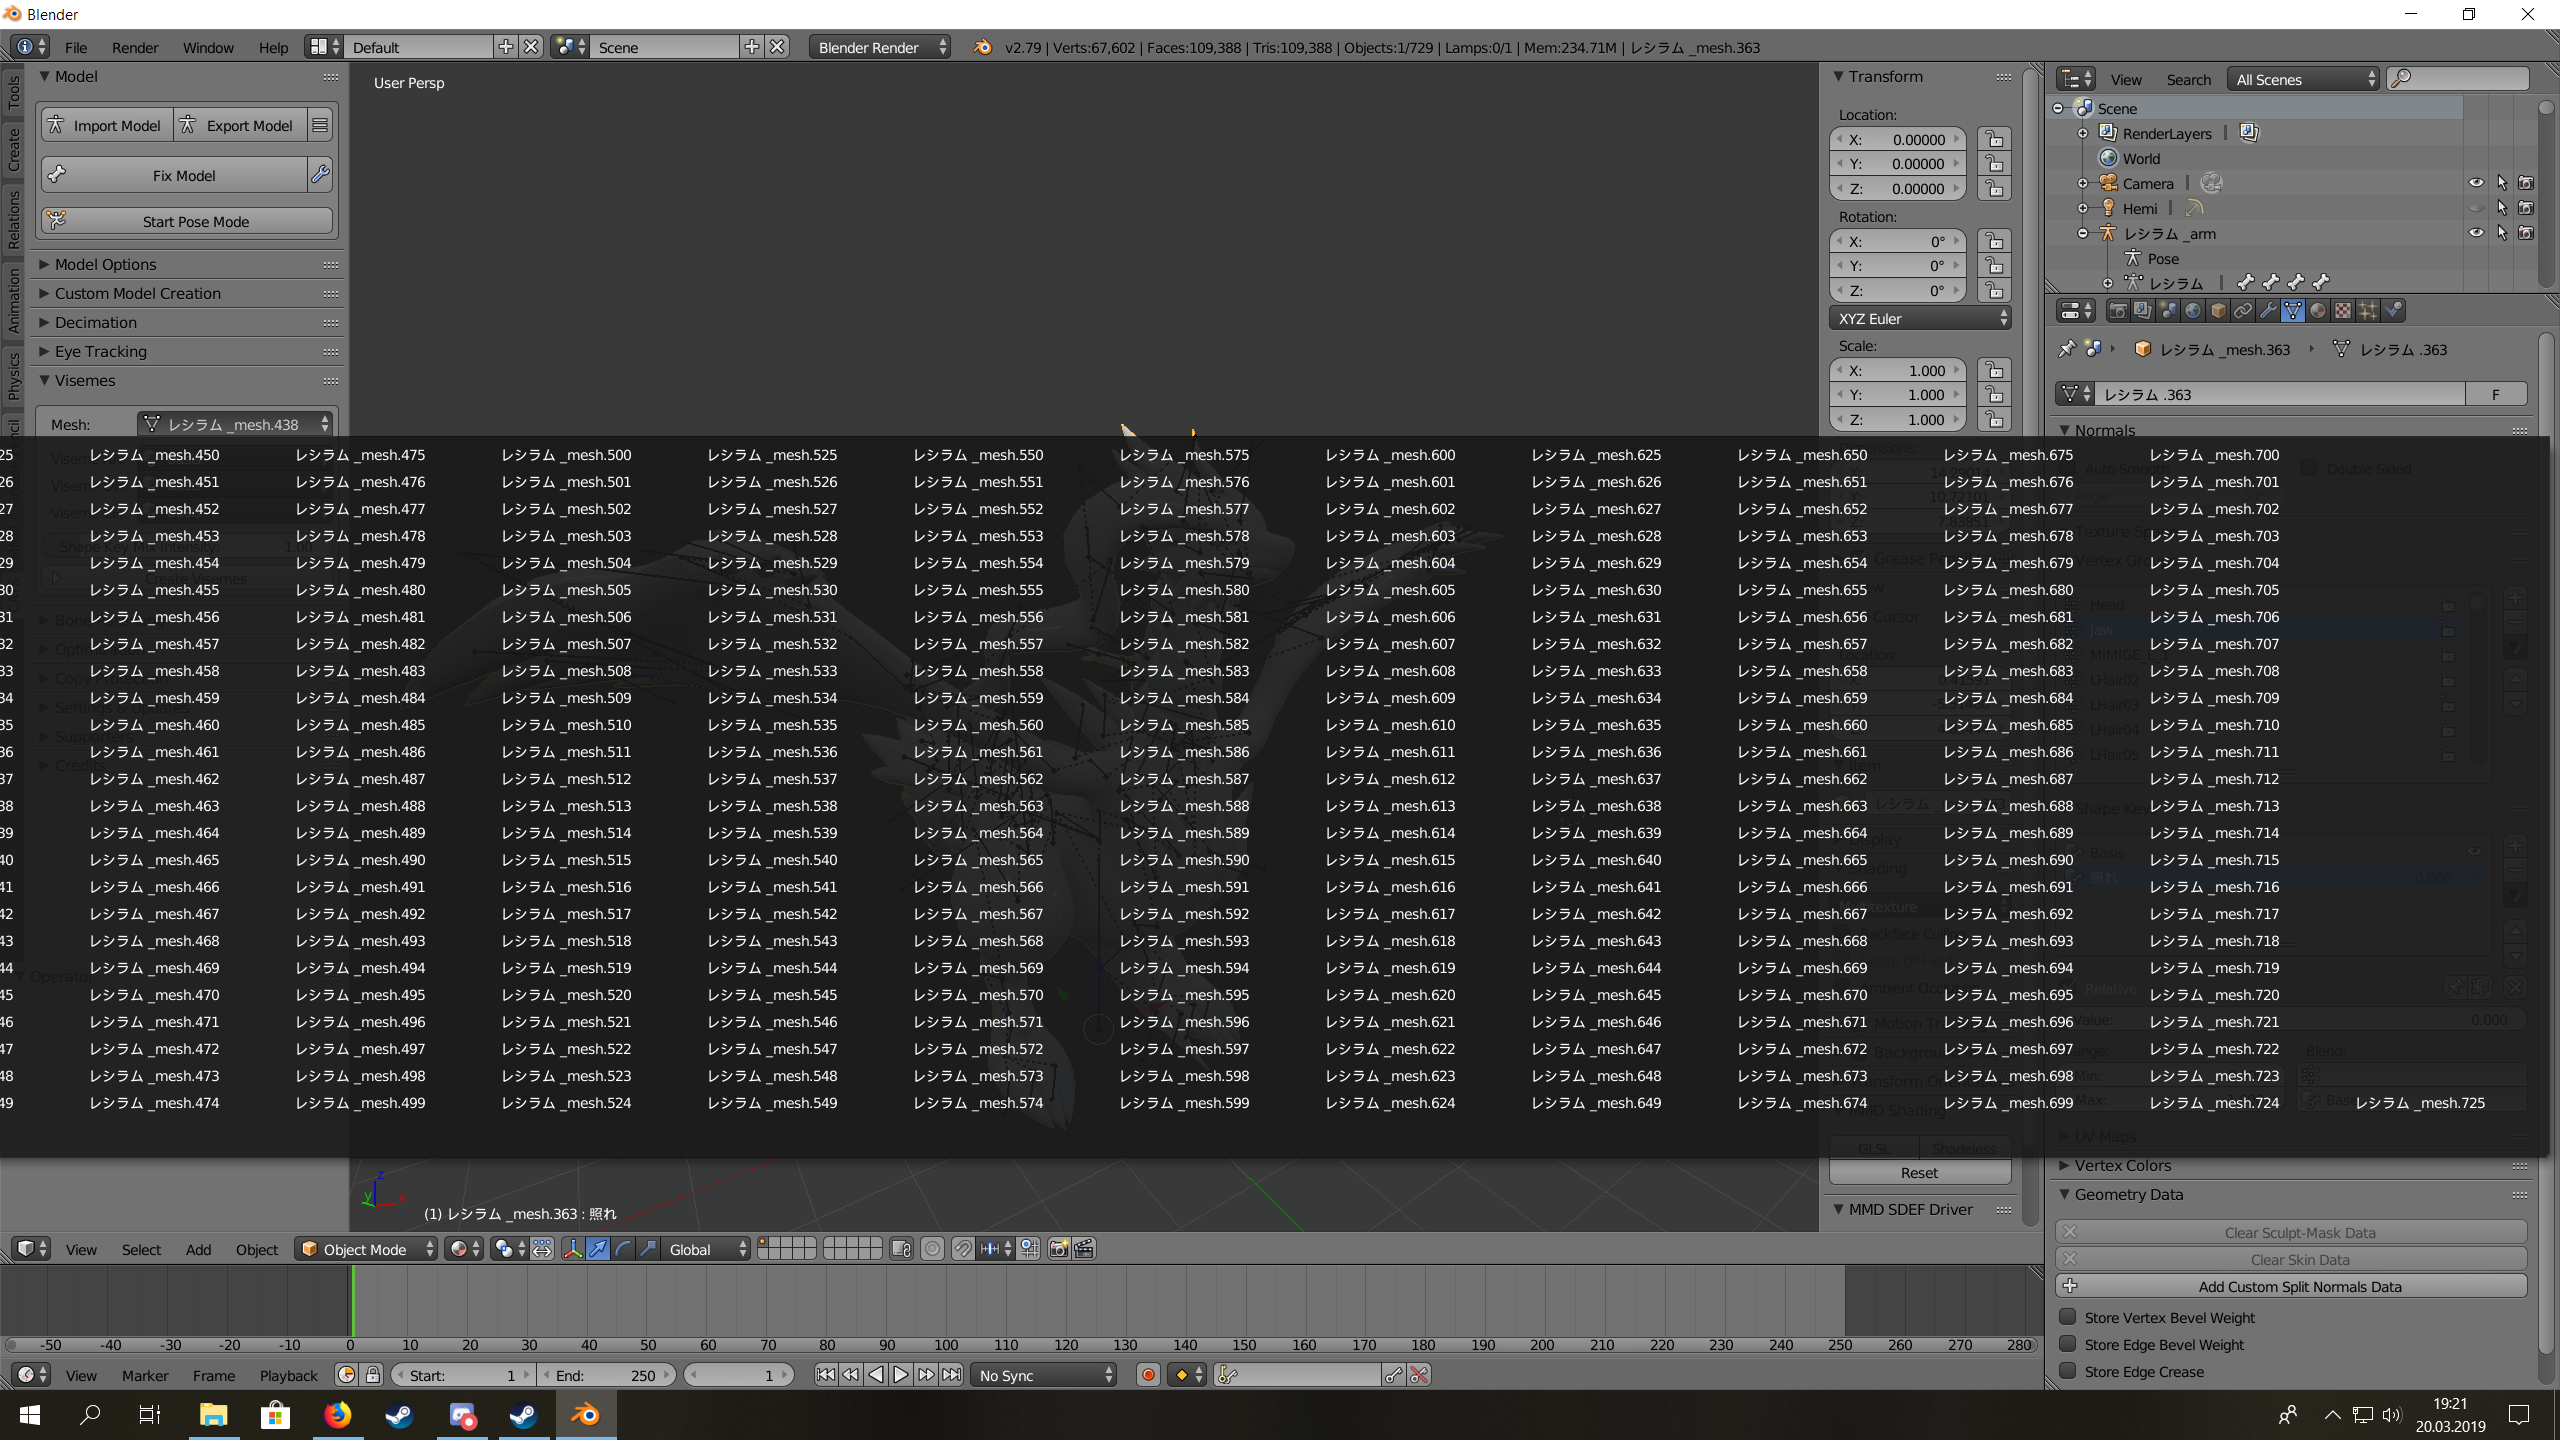 gritty nest
You don't wanna leave those meshes unmerged lol
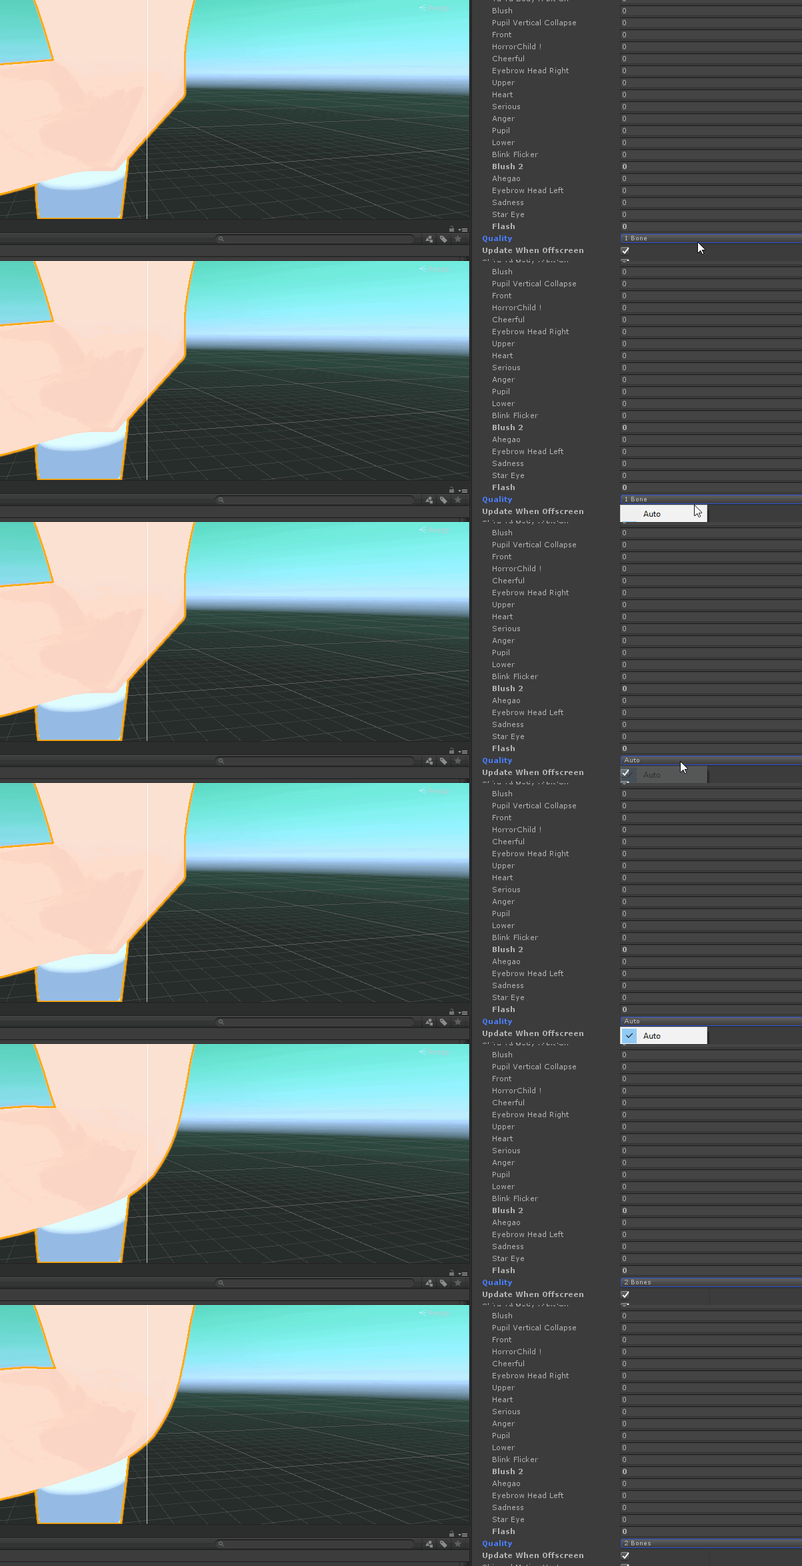
viral stag
@gritty nest it had nothing to do with either. my unity decided that it should use a lower quality setting for the skinned mesh render, so I just had to change the setting back to high.
 woeful spear
aaahh hey guys. Im new to making vrchat avatars and i joined this server bc i need some help ;o;
idk if this is the right channel but what i wanna do does involve rigging so i think it would still fit here??
i have some 3d models i got online that i'd like to use for avatars but i cant figure out how to get them to that point. i was using a tutorial and it was going well until i realized the model i was using wouldnt work unless i added some bones, but i didnt wanna risk that atm so i went to try another one but then the textures on it wouldnt appear aaah
if this isnt the right channel for this i apologize just direct me where i would need to go instead
oh wait okay nvm i found what chat i should go to instead, im sorry just ignore me agh unless you wanna dm me to help or something
 olive thunder
Confused about Bone parenting in Blender, help! I have a bone for a "hairlock" and a bone for a "hair accessory" that I dont want to be children of the "HairRoot" I tried to Reparent to the "Head" but that was a very bad idea apparently it messed up my rig in Unity! What should I set as the Parent if I don't want to mess up my rig? Some bone in the face or what? its so confusing T__T
gritty nest
Reparenting in Blender works fine. If it gets messed up in Unity, disable the dynamic bone component affecting it and revert the transform to prefab
Or just reconfigure the humanoid rig
 alpine raft
There is a trick where you don’t need to add a parent bone in blender and instead just make a game object on the head (if it’s hair) and apply dynamic bones to that after dragging the hair bones under that game object.
Also everyone should set up elasticity curves that exclude the first bone transform (Basically make it completely stiff) because you don’t want the first bone of the hair to transform, just rotate.
When using a parent bone, that is
gritty nest
You don't want to use that "trick" as it will break your prefab instance.
@alpine raft
alpine raft
True, I forgot about that!
olive thunder
Thank you @gritty nest I think I messed up in blender or I just had to reconfigure humanoid, unsure, anyway it's fine now ^^
opal aurora
Using endlenght would work in that regard without needing a parent root/leaf bones per se
ivory radish
if onli i culd get it 2 work rite
cuz sometime not point right direction
evn if de bone in blender do
opal aurora
That's why i personally use specific bone root locations for better pivoting
Bone location, orientation and parent location and orientation all contribute to how the bones move
 gloomy pollen
is there an easy way to add eye bones to an mmd model ? xD
gritty nest
Most MMD's already have one
gloomy pollen
this one doesnt 😭
gritty nest
Otherwise you'll have to rig them yourself. Eye bones are generally the easiest
Since the left eye has 100% weight on the left eye bone etc
gloomy pollen
it has blink visemes and such
but no eye bones
yeah but positioning the eye bone...
gritty nest
You can select the entire eye or eyeball and snap the cursor to selected
To snap it to the center
Make one eye bone and mirror it
gloomy pollen
just the iris?
gritty nest
Usually yes
gritty nest
Press space and type snap cursor to selected
gritty nest
With the 3D cursor in place you'll have to select the armature, go into edit mode, and create a new bone, reposition it from there.
gloomy pollen
hmm its not letting me swap to object mode, strange
err edit
ah got it
snapping the cursor doesnt create the bone at that point?
gritty nest
No, it only places the cursor there so you can create the bone at that specific location.
It should place the base of the bone at the cursor.
gritty nest
Otherwise you'll have to snap the bone to cursor
Snap Selection To Cursor in spacebar menu
gloomy pollen
yeah that pushed it into the floor hmmm
did it again and it just vanished xD
I wonder if there isn't a way to do it in pmx editor 🤔
like an automatic button xD
 dense widget
I have a stupid question
Why does my character's head act this way? Should I have a jaw bone to fix this?
gloomy pollen
what is it doing wrong?
dense widget
The jaw, when I look down or above it stretches or causes the head to flatten
gloomy pollen
sounds like weight painting issue
make sure the whole head is painted to the head vertex
ivory radish
no
check neck paint to see if it blends properly
if theres too much neck weight on the mouth it look bad
dense widget
the neck is all color blue
dense widget
oh, yeah that was the problem
fading verge
@dense widget To give a basic explanation, think of weight painting in blender as a heat gradient.
The hotter it is (the more red), the more that the mesh is affected by the bones, kind of like a muscle if you were to think of it that way.
So if something is blue, it won't be influenced at all. just incase you don't exactly understand what your issue actually was
 foggy stone
I was wondering If anyone knew how to make avatars? if you can dm me if you want, thx.
 sick epoch
like what 3D modelling or rigging or animating?
dense widget
thanks cappy
So in the case of a human head, should I color it red so it does not deform?
fading verge
Is the head losing shape as you move it?
dense widget
yes
fading verge
Hm
Usually I'd say yes, but blender's weight painting is a bit.. buggy sometimes
But the auto-tools they have generally fix a lot of the problems
While you're on weight-painting, navigate to the tools tab on the left side, usually where cats sits.
Inside of there are a bunch of buttons and tools to manipulate how weightpainting works. One of those has a button called "Fix Deforms" or something along those lines, give that a go
dense widget
Yes, it seems to be fixed, thanks for the help
gloomy pollen
urggg!! EYE BONEESSS
fading verge
I have a problem of opening mouth when my avatar walks around.
 calm needle
did you set up eye tracking and if so do you have all 4 eye blend shapes as the first 4?
fading verge
I set eye tracking up, but shape keys don't seem to be in the right order. Let me check.
 crystal vector
Recreating eye tracking usually fixes this. You need to make sure that all 4 blink shapekeys actually get exported into Unity
fading verge
I made eye tracking again and solved the problem. Thank you.
fading verge
Something's gone wrong with the rigging when trying to import this model from pmx over blender (CATS) to Unity, and I have no idea what or how to fix it. It looks like the index and ring finger are swapped or something. In PMXEditor and even in Unity when in neutral position it looks just fine, but as soon as I apply any animation they act like in the picture. It just affects the left hand, the right hand is completely fine
gritty nest
Check all the mappings
And more importantly, make sure the bone names are correct
Check that the index finger and ring finger are actually named
Index and ring
So make sure ring finger is in the ring finger slot, and make sure it is actually the ring finger. Repeat for all other fingers.
fading verge
Huh. I guess at some point the bones may have had their names swapped. Anyhow, renamed them in unity and now it looks fine. Thank you!
 worldly willow
So the issue i have with a model is that the neck in game is 2 times longer then in blender and Unity ... not sure how to fix this (shoulders are also raised up)
crisp tendon
Fix the arms in blender 
 rustic hearth
they're fixed
btw the rig is broke
im trying another one and the bones when i export to fbx, from .3ds , the bones go crazy
bones are good in 3ds max
but in blender....
 thorn willow
its better to...
I hate saying this but
rig it yourself
Mixamo is often questionable when it comes to rigging
rustic hearth
well, i dont have any idea to rig xD
big oof
but why blender broke my bones, i dont understand that
opal aurora
Tick these options on import
Import User Properties
Import Enums As Strings
Ignore Leaf Bones
Automatic Bone Orientation
on blender?
opal aurora
Yeah
I legit thought it was a blender issue, but that should import FBX bones properly
rustic hearth
for now it worked thx :*
 glass panther
Mixamo is okay when you have low poly characters or something with little to no detail. Anything else it will become a mess
brisk rampart

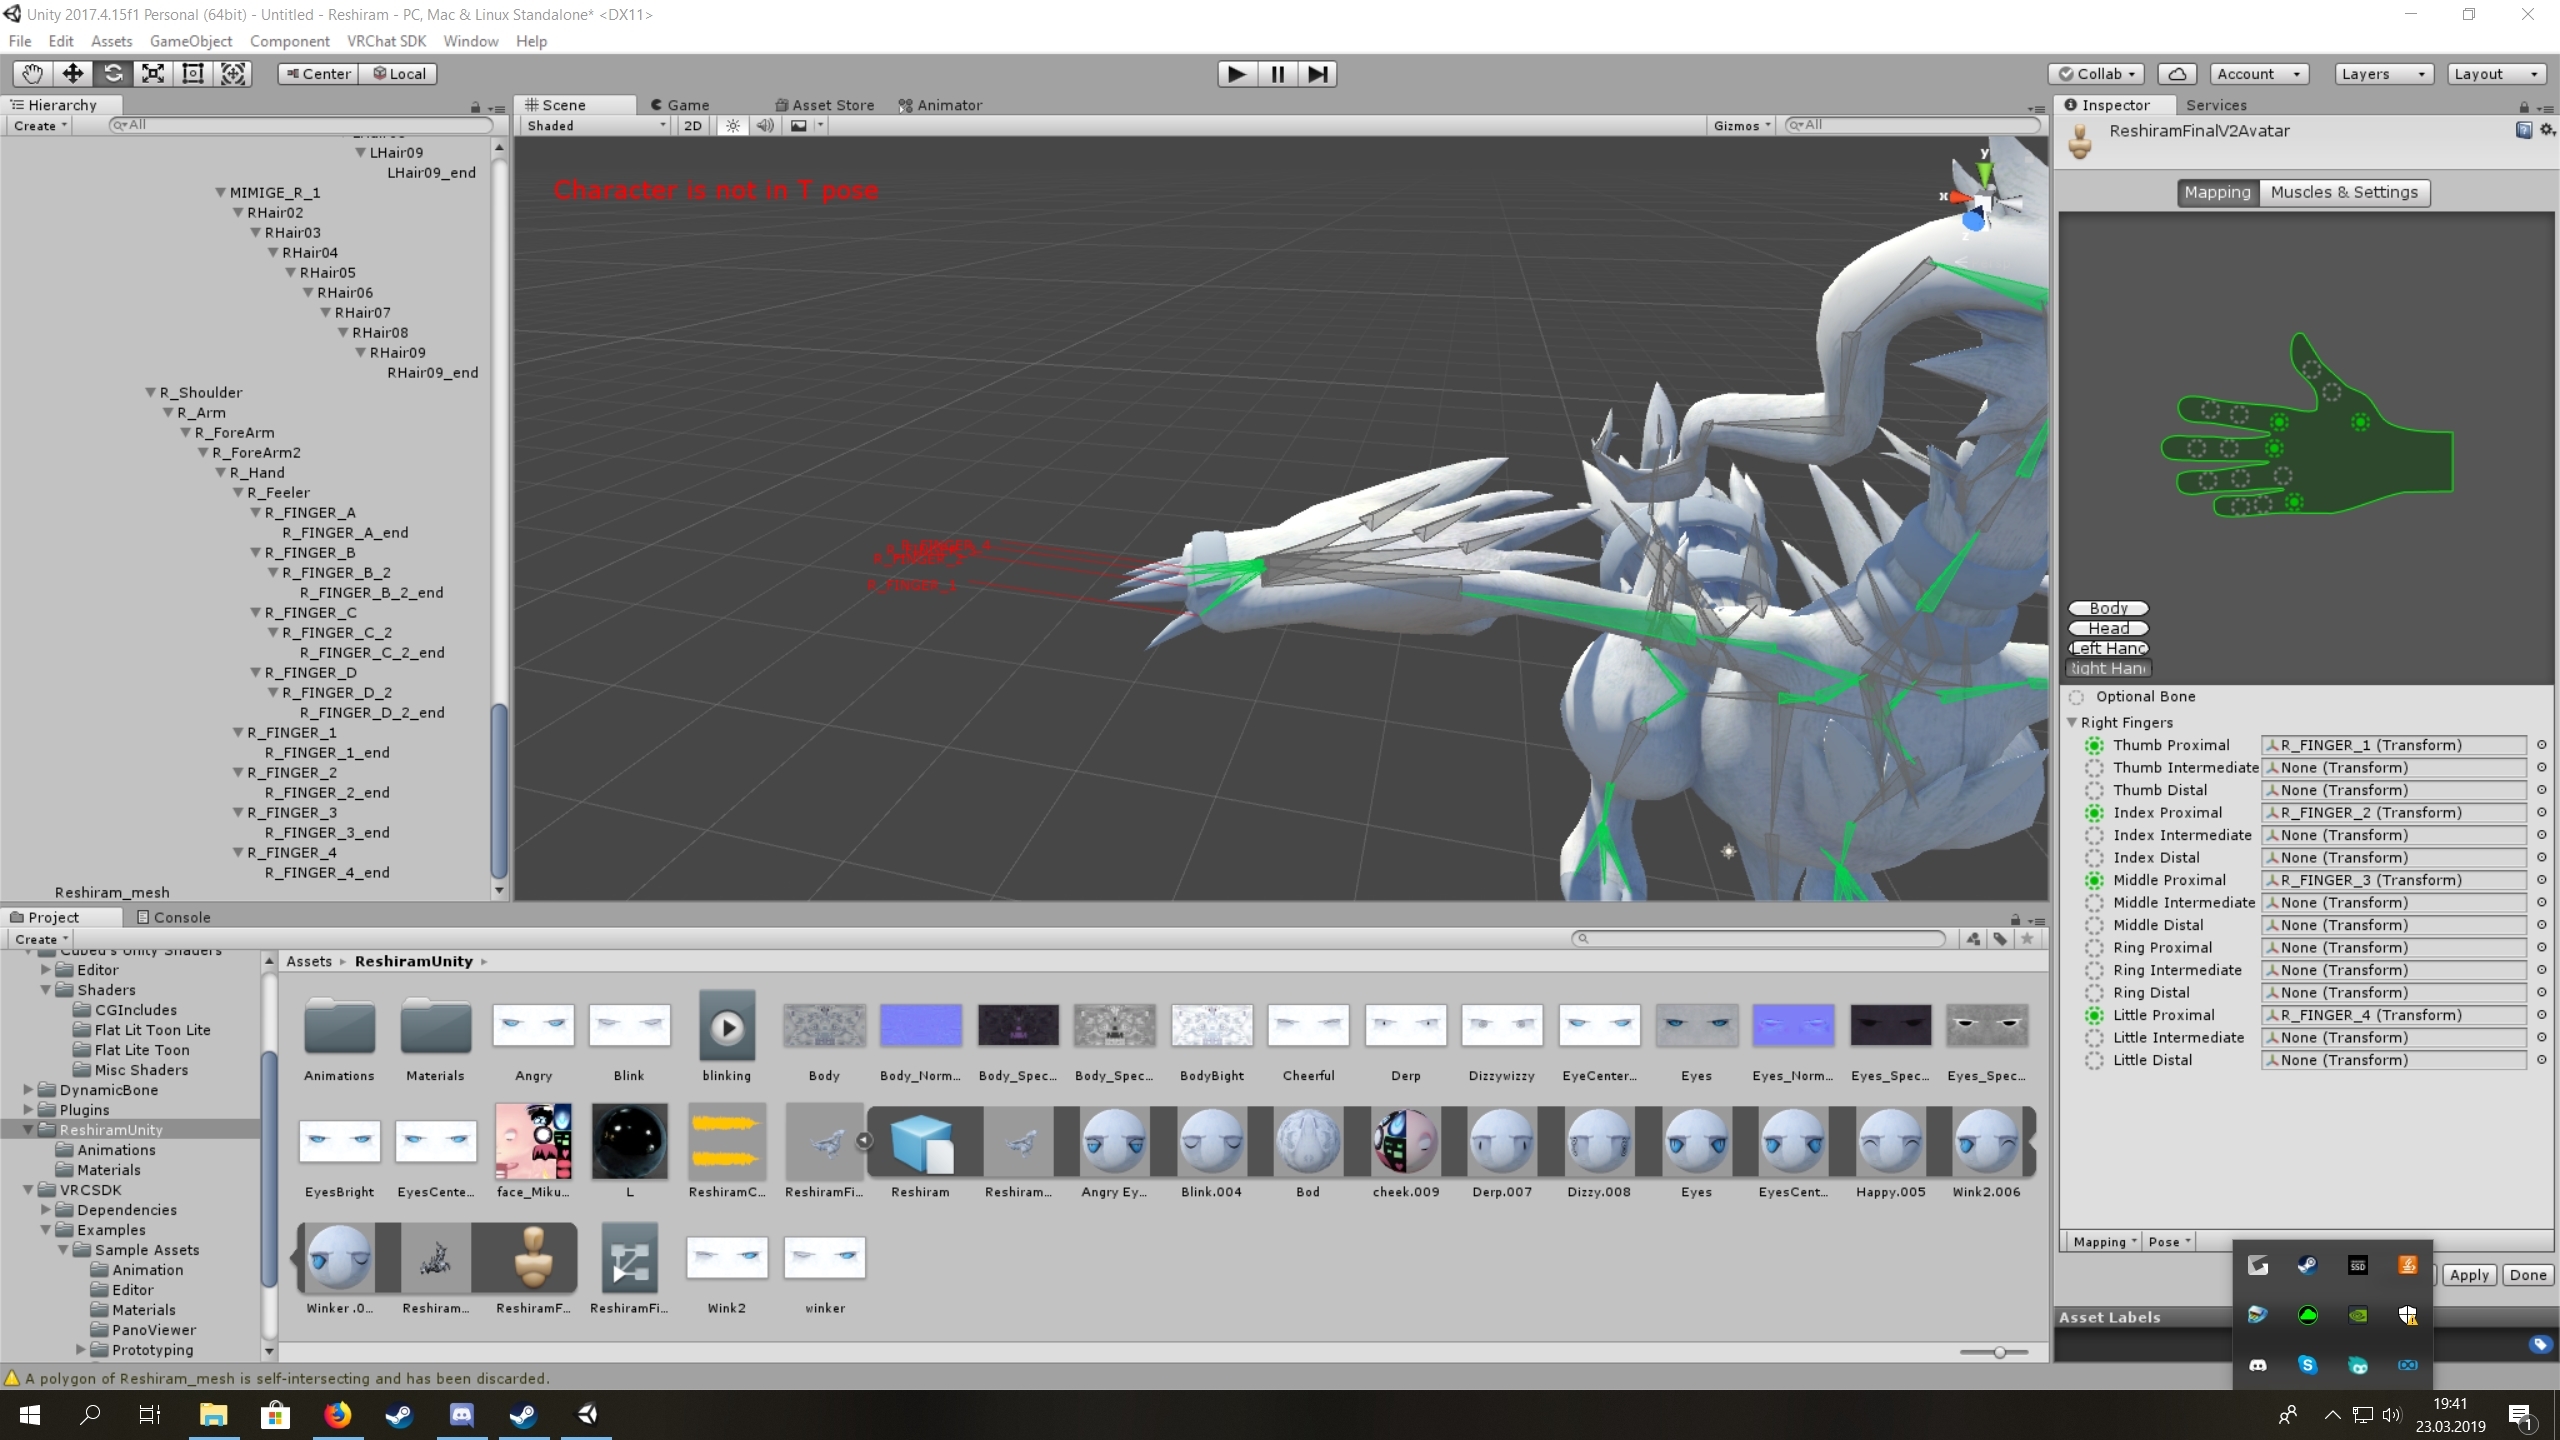
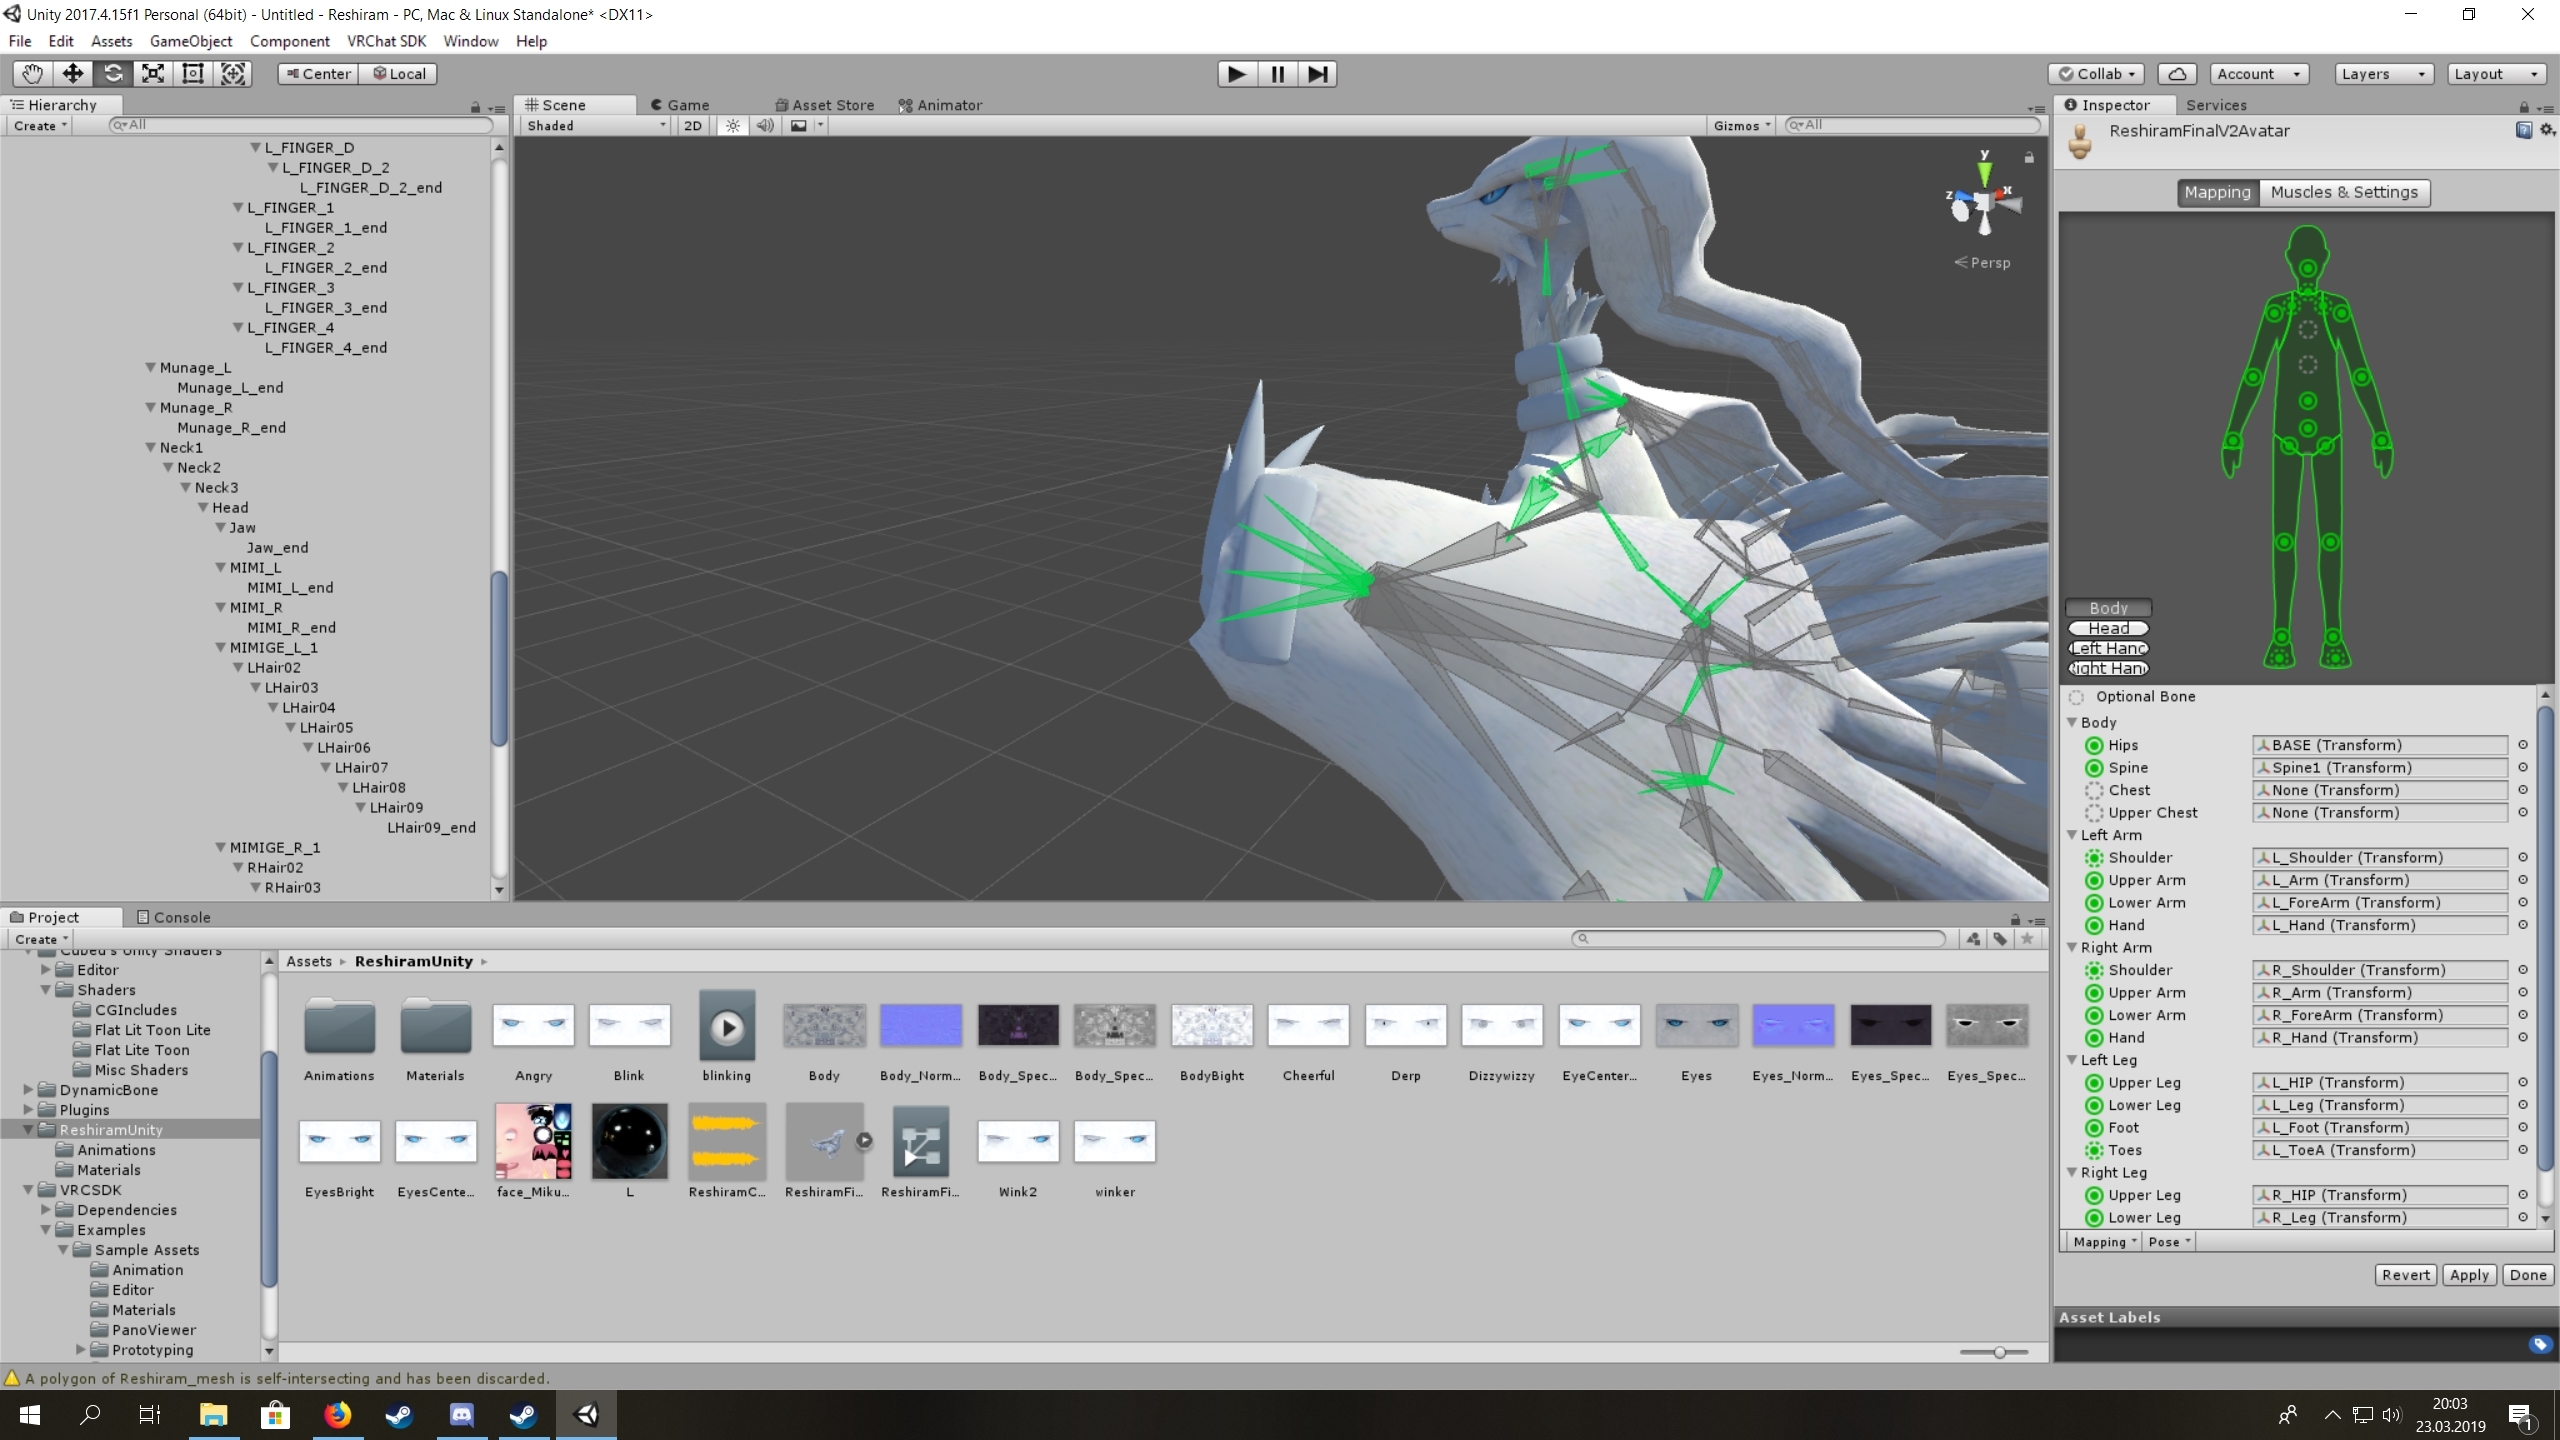
The fingers that are put into the map or whatever the green hand thingy is called are the claws which have only one joint. When I started out, the claws were a scrambled mess and unity somehow interpreted that as a proper t pose. When I do a proper t pose unity argues it's not a t pose
How is that not a T pose?
 queen mural
map your fingers
queen mural
map it all properly and enforce T-pose if that doesn't work then just apply and give it a shot ingame
brisk rampart
Unity really doesn't know how to T-pose a reshiram :/ https://i.gyazo.com/9b3f11a52687ea31b8a30cb6a56870a7.jpg
 opal aurora
@brisk rampart exit the rig config, set the rig type to generic, apply, set rig type to humanoid, apply, re-configure the bones properly and it should be better, also make sure your bone rolls are 0 in blender (alt +R in edit mode will make every selected bone have a roll of 0)
After every change in your armature in terms of bone structure, you must re-apply the humanoid rig, as it'll be using the old configuration otherwise
 wispy flare
Anyone willing to put visemes on a model for me? plllz
 stone relic
ok, I'm having a problem with a model i've been wanting to get rigged up for a while, but i have no clue what is happening to it.
it fixes itself in edit mode, but breaks itself in pose mode. when I try to fix it by resetting the bone positions/rotations/scaling in pose mode nothing happens and I think a bunch of the bones are straight up gone in pose mode, but I don't know for sure.
I'm actually slightly terrified of this model
CATS might sorta fix it, but I want to know what's causing this problem and how to fix it normally first
fading verge
can someone teach me to re-rig an avatar so its optimised for fullbody? or if someone can do it for me id be greatful
crisp tendon

A guide for scaling and tweaking VRChat avatars for fullbody tracking. Covers information on in-game, blender, and unity. It also has a fix for that bending ...
fading verge
tyvm
 misty plaza
does vrchat require a specific rig to follow?
i want to rig a character myself i'm thinking. i'm not sure what is super required.
crisp tendon
Open the pinned items of the channel and you'll see it
misty plaza
thank
 south ivy
Is there any tutorials for 3ds max rig and import to vrchat?
crisp tendon
There might be, but very few people use 3DS max for rigging.
 hard wraith
How do u add music to an emote?
Ive tried for several hours
and i cant get it to work
crisp tendon
Wrong channel 
 open hull
hello riggers 😄 I have an issue
my head moves with my headset but my face and hair doesn't
crisp tendon
weight paint all to your head bone
 grim ibex
I need help with this it has too many small parts sticking out so blender is unable to auto-weightpaint it and i cant do it properly without that 😦 (mixamo didnt work either)
glass panther
That detailed model you won't get away with automatic weight painting. If you want it to work properly you're gonna have to go in and fix things manually.
I've seen these in vrchat before shouldn't be impossible.
calm needle
on the upside, robots tend to be quite a bit easier to manually weightpaint than fleshy bits
 old mantle
So I'm trying to rig an escanor model but I dont know how to get the bones for it
fading verge
Shift A In Blender < Armature < Bone @old mantle
old mantle
Tysm :o
gloomy pollen
can anyone tell me why if I add ears to the head heirarchy in unity it makes unity think the neck and head are where the ears are?
and it completely fudges up posing/stretches the neck
the ears are just bunny ears with no bones, just an fbx model with a texture applied, zero armature or body mesh
it only affects the model if its parented to the head or neck
oh it does it if you attach ANY object to the neck or head
wtf?
i know for a fact it didnt used to act this way
this is on 2 PCs as well
looks like attaching anything to the head or neck on any model completely screws up the neck/head in general
 rocky scaffold
How does the new dynbone max collion checks are getting limited. Are they just dont collide anymore for everyone who is using it? Like it only allows to show collision for 8 bones at a time? Or does it randomly choose 8 collisions that will work and the rest isnt?
gritty nest
@gloomy pollen this question gets asked a lot
First of all, this is not a problem because manual neck/head rotations don't stick anyway. You're never gonna touch those bone rotations.
Second, this "issue" is caused by the pivot point being set to "center" in the top left of your Unity window
Set it to "Pivot" instead and the issue will go away
You should be adding ears in Blender anyway. Don't put parts together in Unity, that's less optimized.
gloomy pollen
I know its less optimized but its just a throwaway one time use avatar for a gag
so I can't be assed 😉
thanks for the pivot solution
I'm curious about that guys dynamic bone question also
gritty nest
Didn't even see that one
If the collision limit is breached, all collisions will be disabled. Collisions only, so the dynamic bone will still work fine otherwise. @rocky scaffold
If the transforms limit is breached, the update rate of the dynamic bone is set to 0 until you're under the limit again
This means that activating a prop with dynamic bone on an animation can suddenly break it
Time to rework my purification rod to use cloth I guess
Because people will just see a minecraft pickaxe now
gloomy pollen
lol
 grim spear
Iae guys
 sonic forge
Hey guys, looking for some help with weight painting my avatar. Im fairly new to Blender and im having some troubles with the weight painting not effecting the pants mesh. To me it looks like it should work fine and its parented to the armature correctly but no luck. The lower half of the pants mesh work fine but the upper half are being a bother. Any help? https://cdn.discordapp.com/attachments/527951373686407178/560761267518963713/unknown.png

 manic marsh
Wait is that 2 upper bones?
sonic forge
Sorry about the bad perspective heres a better one https://cdn.discordapp.com/attachments/527951373686407178/560777655662673921/unknown.png
 calm needle
@sonic forge i'm not sure if i'm looking at your picture right but did you accidnetly weight paint that upprleg to multiple bones?
sonic forge
I might have done actually, as of 5 mins ago i reloaded to backup and did the exact same thing but it works this time
So i messed up somewhere along the way
 cursive pelican
Hey doods. So I’ve watched a few rigging guides and think I understand the basic concept behind get a skeletal structure set up. How would I go about rigging things that aren’t part of the skeleton tho? Ex. Hair. Breast. Clothes.
gritty nest
Roughly the same way, although with much more freedom. Keep the bone count low
You only need one bone per breast
cursive pelican
Should I just parent them to the chest?
gritty nest
Yeah, you parent breast bones to the chest
Hair bones are parented to the head
But in case of dynamic bone, you can also make a weightless bone in-between to act as a "root" bone
gritty nest
That's really up to you. Normally I'd point to examples but I don't have any good ones.
The more clothing you can weight to the main armature, the better
Short skirts can often be weighted to the hips and legs for example
cursive pelican
Gotcha.
gritty nest
If you do want dynamic bone on long hair for example, you can use smooth gradients to get very good results with just a small amount of bones
cursive pelican
That’s above my head but I’ll look into how that works in blender.
Making models is almost more entertaining than the game itself haha
Kinda like modding Skyrim. Spend more time modding Skyrim than I do playing Skyrim.
Thanks for the info @gritty nest
 stark musk
Is this alright for the feet bones or should I add some bones to the back as well?
The model also has three legs so.
also is this too many bones?
crisp tendon
You may not need that many when the arm is going in the same direction
You usually want one where there's going to be a rotation or a stretch
stark musk
Oh that's hard to tell then
I'm working with this
I'm guessing the "lasers" would be considered the arms
crisp tendon
I'm sure you already know what kind of movement the legs will have, from that you can say if they're going to need a lot of rotation or not
stark musk
Guess I'll delete more bones then
crisp tendon
that's from war of the worlds btw right ?
stark musk
yes
crisp tendon
yeah so it should be fairly mechanical
stark musk
so then let's say, 5 bones per leg?



 crisp tendon
You can also substitute bones for gradient weightpainting
stark musk
I'm not sure what that is actually
crisp tendon
Same thing with fingers, one can be enough, two to be safe
crisp tendon
Instead of having three bones, there's two with gradient weight paint between them that creates a rotation in the middle
stark musk
oh
crisp tendon
In the end it's up to you. If you plan on animating all these bones, you can go with as many as you want
personally i chose to go with as lower as i could
because animating scares me
stark musk
haha true
This is my very first time rigging a model so
I'm going to do less
you think this is better? @crisp tendon
crisp tendon
You want it to be humanoid ?
stark musk
alright
one more small question too
should I just add a bone to the front "foot" in this case?
honestly not sure what to do here
crisp tendon
Do you want those individual fingers to bend ?
crisp tendon
So 1 bone is enough
stark musk
Alrighty
stark musk
What's an IK Handle?
crisp tendon
you're working in maya ?
ik handle is for moving bones in relation to another
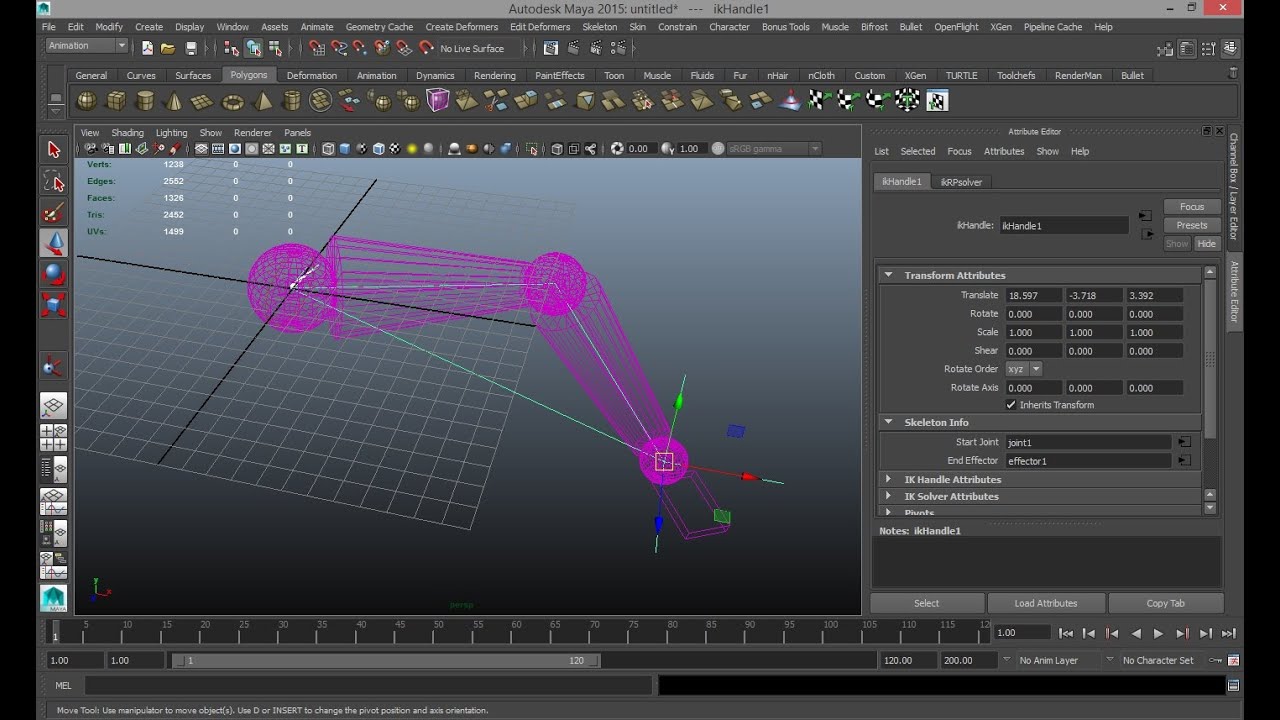
In this Autodesk Maya rigging video I will explain the basic function of the IK Handle also known as Inverse Kinematics handle. Link to part 1 Parenting : ht...
cursive pelican
hey guys
Is there a easier way to rig hands? Whenenver I extend the bone is goes off in some weird direction and I have to pull it back in
its aggravating
stark musk
https://youtu.be/GiV-0FPj8GQ?list=LLrNyLUS4iakLFo64D0H6xTA&t=704 @cursive pelican

Hello all! The much requested beginner rigging tutorial is finally here! This is one of the videos requested beyond all others, and I've finally gotten aroun...
This is a great tut.
stark musk
Does it matter if the bones aren't the same length?
due to how the model is placed I just put the bones in the same position, not sure if it matters though.
 warm lintel
ok so i have no idea how to make character riggs or skeletons
but i really want to make this master kogah model
so if anyone can send me a link to a video or help i would apriciate it
opal aurora
Oh you made quite alot of progress blank, the tutorial's been doing well for ye?
Try the video i recommended for blank @warm lintel https://www.youtube.com/watch?v=GiV-0FPj8GQ
Hello all! The much requested beginner rigging tutorial is finally here! This is one of the videos requested beyond all others, and I've finally gotten aroun...
warm lintel
thanks
stark musk
@opal aurora I really need to thank you for that man 😃
also I did the IK setup anyways lol
didn't know it wasn't needed but eh
was easy
can always revert if it's going to break my model or something
opal aurora
I mean, it can still work well, it's more-so the fact that you need a concise bone parenting system, for humanoids atleast
opal aurora
So you wouldn't like, parent the foot to the IK but instead to the leg
stark musk
oh?
opal aurora
Well then there ye go
stark musk
well anyways
I still don't really know if it's okay for the bones to be different sizes
the shoulder bones in that model are different sizes
opal aurora
I mean, it's okay, but normally you'd want them the same size, especially if you're using blender's autoweighting system, so that it's more-or-less symmetrical
opal aurora
On her tutorial she shows how to mirror bones, you can call that specific bone ending with a _L or _R, or if you'd prefer .L or .R and then you can mirror it symmetricaly
stark musk
oh I did that already
crisp tendon

stark musk
No the model is in a weird position
opal aurora
Unless for some odd reason the model is off-center
stark musk
well the arms and legs are all in their own direction
opal aurora
Oh, so they aren't directly symmetrical
stark musk
https://sketchfab.com/3d-models/war-of-the-worlds-tripod-3291e0fbfbe34baaa3eb924d89e490dc this is what I'm using

Model of the martian Tripod from the movie “War of the Worlds” of Steven Spielberg.
The Fighting Machine (also known as a Tripod) is one of the fictional machines used by the Martians in H. G. Wells’ classic science fiction novel The War of the Worlds. - War of the Worl...
right
And I want to know if that will affect the outcome
opal aurora
Yeah that requires some more direct input instead of mirroring
I mean, it might, it really depends, since if you're going for generic, you're going to be animating it
crisp tendon
odd that it isn't already rigged
stark musk
Yeah I was thinking the same
but it's alright
gives me a chance to learn how to do this
crisp tendon
It's making you learn some odd things 😄
stark musk
wait animating it how? @opal aurora
opal aurora
I mean, generics don't really animate like standard humanoids as far as i recall
crisp tendon
they don't
opal aurora
Probably using animators of some kind
stark musk
Oh jeez
cursive pelican
what bone do I want to attach breast to?
opal aurora
Chest
stark musk
could I make it a humanoid then? @opal aurora
cursive pelican
1 being the top
crisp tendon
check the pinned messages Lightning
you don't have the correct bone configuration to begin with
opal aurora
You could possibly makeshift it into a humanoid, but that back leg would... yeah...
opal aurora
Pretty much
Since it'd try to use a standard humanoid as the basis for all of the animations
stark musk
someone said I could with rigidbodies and fixed joints
crisp tendon
You'd still have to animate that
crisp tendon
Honestly in blender that wouldn't be that bad I think
opal aurora
Since you made IK for it, you can probably animate it far more easily than normally
stark musk
I honestly didn't expect all of this but since I've made it this far I might as well continue lol
yeah I did
opal aurora
I tried to get a humanoid to work on a 4 legged creature, it did not end well
cursive pelican
ok ruubick changed my names
opal aurora
It works, but it's like something out of a bootleg horror movie
cursive pelican
attaching it to chest
stark musk
lol
crisp tendon
If you have 4 spine bones you'll still be in trouble
stark musk
how long does animating usually take then @opal aurora
opal aurora
Depends on complexity
cursive pelican
spine upper, chest, and spine lower
stark musk
I mean I don't mind how long, but since this is my first time
cursive pelican
is that alright?
crisp tendon
A lot 
cursive pelican
well spine lower is just spine now
crisp tendon
We use hips spine chest and neck
stark musk
what exactly should I be animating then @opal aurora
crisp tendon
Look at the pinned messages
opal aurora
If you aim too high and complex, alot, if you aim for simple and straightforward, not so long
cursive pelican
opal aurora
I mean, that's really up to you there
crisp tendon
You don't need to animate the top very much
The legs do the movement
The rest is also fluid movement
But it's separate stuff
stark musk
Oh so then this means I can try my part at the animation like it is in the movie 😛
crisp tendon
If you have frame references from the movie, use that
stark musk
I do!
cursive pelican
thats currently what i'm rocking
opal aurora
Keep in mind, blender works much like unity in terms of keyframes, it will translate from location X to location Y with the use of 2 keyframes, although when exported to unity those keyframes will grow exponentially to compensate for complexity
crisp tendon
@cursive pelican you have too many bones, please check the pinned messages
You can bake those keyframes, and clean them up nicely, export also has a few options
Unity will do the soothing
cursive pelican
is there a easy way to merge 2 bones into one?
cursive pelican
gonna save real quick, delete upper spine, make chest longer, and reparent to shoulders. hope this works haha
cursive pelican
I have no weight paint
crisp tendon
Feel free to delete then
opal aurora
If you have no weight paint, then go ahead
cursive pelican
I made this armature from scratch
😄
video guides are very misleading, especially when they have VRChat in the title
opal aurora
General concensus is, Chest, Spine and Hips
Those are the ones used for VRChat, Upperchest is available as a choice in unity but vrchat does not support it
cursive pelican

Players in VRChat seem distraught on how difficult this may be so here's a short video demonstation not a GUIDE for impatient people like me. (updated info...
Followed this guide for most of it
He has all those chest bones haha
opal aurora
Ah i see
They simply didn't merge the bones
They replaced the chest bone with the one that's used for the upperchest, which in it of itself is the chest bone
Bones inbetween the chest and hips can be skipped, and that's what they went for
It'll most likely look clunky due to an unmoving bone (that follows the parent) but it works
cursive pelican
nah I don't want clunky, if I put the time into making a armature I want it to be good
i'm trying to figure out how to reparent this chest bone to my neck bone, I just did and it freaked out on me and pushed everything up
opal aurora
Also, not all optional bones are actually optional, you need shoulder bones and a neck bone for it to be considered a humanoid in vrchat
opal aurora
Neck and Shoulders should be parented to chest
Chest to Spine and Spine to Hips
Legs to Hips and Arms to Shoulders
Hips has no parent
cursive pelican
yep thats what it was
i tried doing chest to neck
needed to do neck to chest
opal aurora
You have 3 hip bones i think
gritty nest
Did you rig this one yourself?
cursive pelican
yeah first attempt at rigging
gritty nest
Ah, I see. This kinda looks like how Unity draws the bones
You don't need your bones to be connected. There's a bone between the hips and the legs that you can probably get rid of.
Lemme get a screenshot
opal aurora
gritty nest
Yeah that part is a little iffy
opal aurora
Nah, you can have them as add bones, but they're unnecessary
gritty nest
Normally it's more like
opal aurora
VRC won't use ehm
gritty nest
gritty nest
Deleting the bones there is probably good
The ones between upper leg and hips
You can untick "connected" if that snaps any other bones wrongly
 surreal copper
the structure that you must have is
@hips -> spine, left leg, right leg
'left leg' -> left knee
'left knee' -> left ankle
'left ankle' -> left toe
- - -
'right leg' -> right knee
'right knee' -> right ankle
'right ankle' - right toe
@spine -> chest -> neck, left shoulder, right shoulder
'left shoulder' -> left arm -> left elbow -> left wrist
- - -
'right shoulder' -> right arm -> right elbow -> right wrist
@neck -> head
https://media.discordapp.net/attachments/361742235525709825/369248474123993109/unknown.png

 cursive pelican
I have a extra thing at teh start of my armature
nvm
its just named armature.002.r for some reason
w/e
fixed
I think its mostly good now
just want to add breast and some hair bones
need to move legs up to hips
stark musk
getting this error when trying to weight paint?
crisp tendon
No doubles allowed
stark musk
doubles?
crisp tendon
vertices
stark musk
Ah
gritty nest
Remove doubles first and see if that works
Unfortunately even then, that error may not go away
stark musk
Yes it worked
crisp tendon
Your project almost makes me want to go back to trying to weight paint my own giant tentacle alien
cursive pelican
@gritty nest do you mean double bones, I Just got that error as well
stark musk
Tbh it was painted quite nicely, only a few things need to be manually done IIRC.
Do it though @crisp tendon
Then when I finish we can both have giant alien tentacle battles in VRC
err well maybe without the tentacle parts lol
crisp tendon
auto weight paint doesn't work on mine, so that'd be a lot of manual repetitive work
stark musk
Oh 😦
cursive pelican
If i'm weight painting, do i only want to get the flesh, or include clothes in the bone too?
 static jackal
Depends if you want the clothes to move with that bone or not @cursive pelican
cursive pelican
in this example i am weight painting her femur, and she has a skirt
static jackal
Then no you wouldn't the skirt should be on its own set of bones
cursive pelican
don't have bones in the skirt cuz i rigged myself but ok i think I understand. thank you
static jackal
No prob
stark musk
Is it possible to add more bones after you've weight painted?
static jackal
Yeah but you'll have to adjust your weight painting unless you're adding more to where it's not painted @stark musk
crisp tendon
You can do auto weight paint on a single bone
stark musk
Ok
 timid haven
uwu
fading verge
?
ok...
i am trying to make a monster hunter avatar to where it plays animations from the model but is humanoid. once i make it humanoid its like i cant animate it with the simple avatar controller. any advice on what to do?
there we go
 fleet spire
what would be the best way to rig a chain? i've created it and added bones but it ends up deforming the chain links when the bones move 😦
stark musk
I added a ton of new bones to the legs and after re-doing virtually everything, including automatic weight painting. And now the two front feet seem to move on their own whenever I move the model up and down, as you can see in the gif.
@crisp tendon thoughts on what went wrong?
I'm completely stumped tbh
crisp tendon
are the tiny bones at the bottom correctly parented ?
and did you check if they actually received weight paint
sometimes the automation goes through but doesn't create any
stark musk
I didn't how can I check?
crisp tendon
only select one bone
stark musk
like this?
crisp tendon
yep, seems correct
opal aurora
Red - Full Influence
Dark Blue - No Influence
Any Gradient Inbetweem - Some Influence
Purple - No Vertex Group/No Weight Data
Pink - Weights Went Bonkers
stark musk
so then the other two "feet" shouldn't be moving at all
opal aurora
Check other bones for discrepancies
stark musk
What should I look for?
opal aurora
There's also an option to limit the number of bones that can affect any one portion of the mesh, can't remember what it was called but it was in the weight paint menu...
You'd want to look for anything that shouldn't have influence over something else
Say, back leg bone 3 affecting front leg tripod feet
stark musk
I did notice when I go into pose mode the legs move, then snap back when I enter edit mode
not sure if this is why
nvm
that's not it
opal aurora
That's probably due to it being posed, poses are temporary unless applied, and as such, edit mode snaps the model to its current default, ignoring the pose
fading verge
hey, if anyone can help me get a humanoid avatar with a meta rig parented to the main skeleton of the animal do an animation that will be swell ^-^
-cough-
crisp tendon
For commissions please check the VRC Traders discord in #community-servers-old
fading verge
oh, this isnt a commission, im asking for help 😄
crisp tendon
Asking for help or for someone to make an entire rig for you ?
crisp tendon
What do you need help with precisely ?
fading verge
uhh, hard to put in words exactly what i need...
i basically want the animations from the model to play through my parented humanoid
opal aurora
I'll take a wild guess, use humanoid rig whilst animating a separate rig of the animal
fading verge
exactly!
Make a entire fake skeleton that's the minumum req for a humanoid skeleton then put Fixed and rigid bodies on the corresponding parts such as legs to legs head to head chest to head etc
then that should work
oh,
like this?
Make the Skeleton big enough until the leg bones in blender are just as big as the non humanoid's legs
ok,
done?
thne in unity make the skeleton have Fixed joints
and rigid bodies
then assign them to the actual rig
ohhhhh
 median thunder
Hey guys, does anyone know how to fix a problem with dyn bones that make the hair flickering even when u are not moving at all?
fading verge
What's your setting's @median thunder ?
median thunder
0.8 / 0.1 / 0.1 / 0.9
fading verge
Your Damping is too high
also your inertia as well
put damping at like 0.4
then put inertia at like 0.3
that should do it @median thunder
median thunder
Hmm I'll try, ty vm
median thunder
@fading verge didn fix it, but ty for the try
opal aurora
Do you have any colliders on it?
median thunder
nop
fading verge
can you gyazo gif it?
opal aurora
Also, try disabling the new dynamic bone restriction system
fading verge
@loud fjord what's the rig your trying to do
opal aurora
I saw somebody with the same issue prior, but i can't recall what the issue was exactly
 loud fjord
@fading verge I’ve been trying for ages to get this model going but I’m having some troubles with it. I’m new to blender and unity so I don’t know some things.
fading verge
Take a screenshot of the model in blender and i'll tell you how difficult it will be
loud fjord
The WiFi on my computer is busted so sry i can only take a screenshot with my phone
It’s candyman from lethal league btw
fading verge
It already has a rig
opal aurora
Those look like source bones
fading verge
have you tried just CAT'S fixing it
fading verge
try doing that
but before you do
Rename all the bones to be like a mmd model's rig
opal aurora
Uh... don't actually do that, CATS does have some source support and doing that can well... unexpected results to say the least
loud fjord
I let CATS fix it and I got this
opal aurora
Eyup, das rigged
fading verge
looks good
fading verge
well then they don't know about blender
loud fjord
Hm
fading verge
