#avatar-rigging
1 messages · Page 118 of 1
 peak warren

 gritty nest
@hard delta post a screenshot of your rig configuration
You're probably missing some bones, as the error message literally tells you
 hard delta
unity or blender pic?
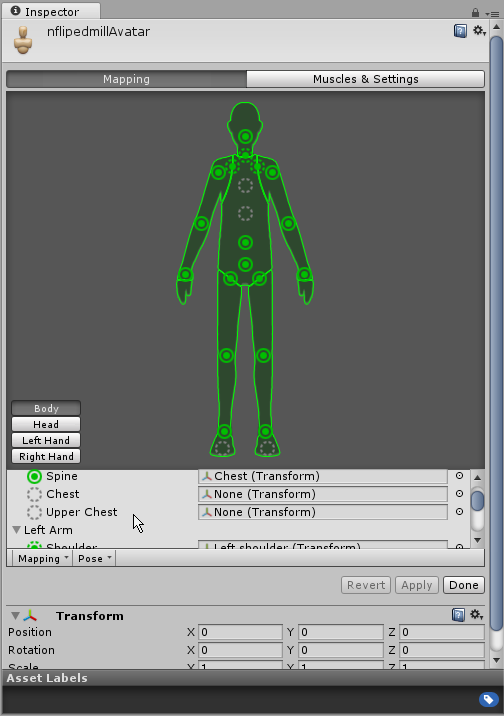
 fading verge
you are missing a chest bone
hard delta
it shows in the hierarchy that i do have a chest bone
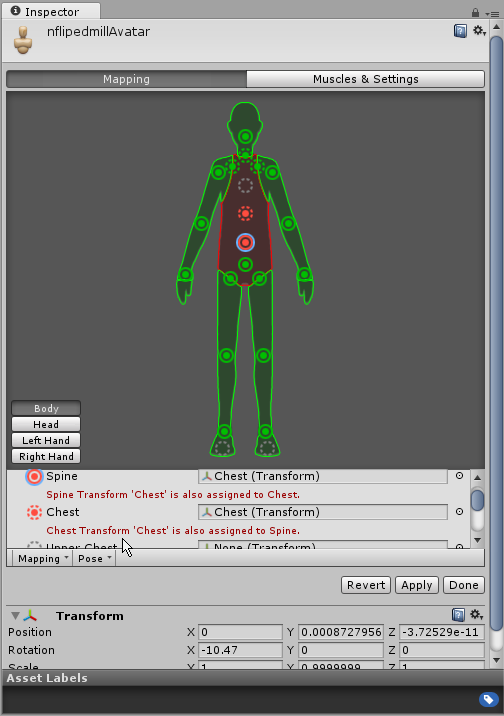 fading verge
your chest bone is already assigned to spine
you dont have a spine bone in your hierarchy?
hard delta
 fading verge
then you know what you have to do
hard delta
ah, i see now. Thxs for the help @fading verge
peak warren
viewpoint is right now, but I still can't reach the floor, it stops about a foot above. Making the arms longer just lets them bend when fully extended. Through what is the scaling of the character even determined? has the height I specified during rift setup significance?
 obtuse gazelle
I don't think it does, cat. Some of my avatars have that problem but others do not.
All the avatars I had put together by converting an MMD have had that issue where the handful of XNALaras I have converted did not have that issue
In fact I think they bend too much sometimes, where those avatars turn into little gremlins if I sit on the floor.
peak warren
or maybe legs too long, body too short?
obtuse gazelle
My impression is that somehow some rigs can simply bend down further than others and I don't know why or how.
So I wind up with some that will happily reach the floor and others that won't go below knee high yet they have very similar proportions and size
Problem is I did nothing special to their respective rigs
When I get home I should look at them again
Too many things I wonder if it relates to
 echo drift
for the armature's hip bone, which way is upside down or rightside up? the tail or head? the example avatar has the tail up
peak warren
on mine the head is up
echo drift
@peak warren and it works without the legs collapsing in the ribcage?
peak warren
when should they do that? when crouching? could test that
 random lotus
does anyone know why when i try to weight my models arm the part i altered the weights on becomes distorted? https://cdn.discordapp.com/attachments/404764301325369365/456560854071246849/unknown
 calm needle
bad link, doesnt show anything
random lotus
 calm needle
you 100% sure that is the only bone being weighted?
and is the bone currently being posed at all?
random lotus
i nearly got it to work with the bone between the arm and upper arm bones but it still distorts a bit'

 calm needle
is it only doing that when you pose the bone or just weghting it in general?
echo drift
@peak warren well my rig ISN'T supposed to do that but it does
peak warren
I'm pretty sure the pose isn't reset properly, so the position of the vertices is adjusted by the new weighting
yeah, flip the bone and try again
echo drift
ok 🐱
random lotus
but i managed to get it to weight properly without a ton of distortion
 dense galleon
I got an avatar that seems to work fine with default animations, but in vr my arms are constantly forward and the avatar's body follows my head way too much
Would this be related to the rigging in any way?
random lotus
i got the arm to no distort
but now the sleeve of the shirt is

https://cdn.discordapp.com/attachments/404764301325369365/456571094539829258/unknown.png thing is that while its distorted it moves flawlessley

like nothing detatches and the shirt moves like it should
calm needle
why is the whole arm and hand weight painted to the upper arm?
gritty nest
Increase radius is the only advice I can give
 magic sonnet
you again
gritty nest
Lol
magic sonnet
i figured it belonged here
some people stick to certain chat rooms
oh your kidding me
i
i
i forgot to add the collider to the collider list in the dynamic bone component
🤦
echo drift
ok, there's got to be a better way to copy all shape keys to a duplicate model
gritty nest
Lol
echo drift
😐
magic sonnet
besides
i only know of one way to copy shape keys to models
and you probably know it already
echo drift
I'm doing that trick where I properly change the rest pose to a new position, but part of the process involves deleting all the shape keys first
magic sonnet
og
oh
yeah i had to do that with my model
it was a pain in the butt to figure out how to do it but i got it
how many shape keys do you have
gritty nest
@echo drift dev version of CATS has "apply pose as rest pose" though
And it preserves shape keys
echo drift
normal visemes and blink animations
magic sonnet
all i did was have both
then delete the shape keys from one
then do the posing
then i clicked on the mesh of the other while highlighting a shape key
and clicking on the first mesh
then click the grey arrow
and click transfer shape key
then rinse and repeat till all are restored
echo drift
@magic sonnet 'preciate the help but that's what I was doing, Rokk's method sounds like something I want
magic sonnet
figured you knew
echo drift
oh ok
 crisp tendon
Ok, got a challenge, i want to keep a skeleton (humanoid) with an animation that moves the entire body. My thought was making another skeleton inside the mesh, copy the bones location from the first armature, copy the weight paint, fix the bone rotation/position, and hopefully i should be able to use the second skeleton for VR purpose while also retaining the animation on the other skeleton ?
Since arm and head movement is supposed to override animations, i would hope it works
But maybe it would look stupid because torso wouldn't move with the head and arms
 faint anvil
Hey so I'm having an issue with uploading my avatar, it says there's something wrong with the rig hierarchy but I can't tell whats wrong.
crisp tendon
The error should be more specific
faint anvil
How do I upload images to show
crisp tendon
imgur, but usually copying the error text is enough
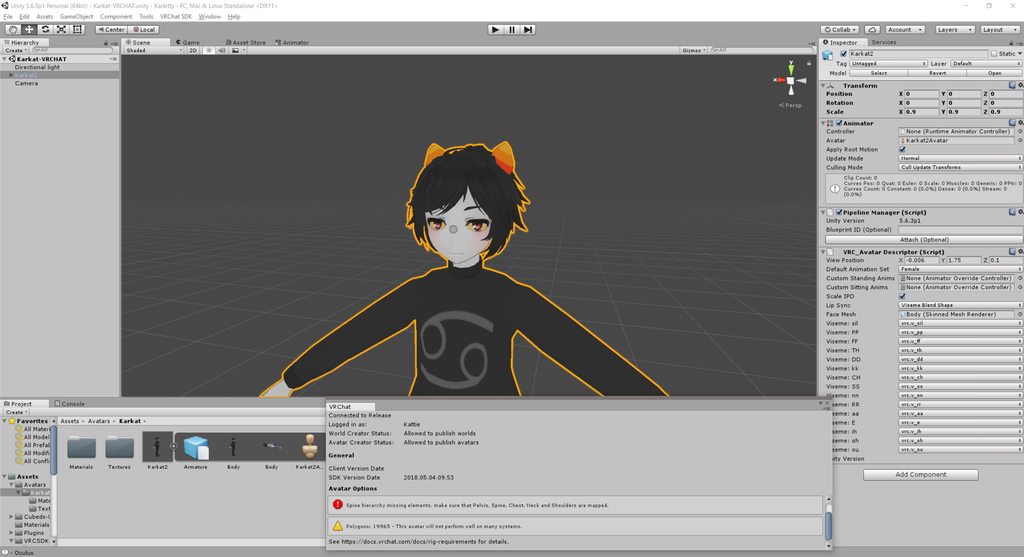
 crisp tendon
You're missing a neck
faint anvil
There isn't a head bone so the neck is assigned as the head bone
crisp tendon
Can't have a humanoid then
faint anvil
hm can I just add a head bone and parent it to all the face stuffs?
When I pull it up in blender it does have a head bone. But for some reason it isn't importing properly.
crisp tendon
What do you mean by not importing correctly ?
faint anvil
Like when I export it as FBX and Import it into unity it goes missing.
crisp tendon
What are your export settings for the fbx ?

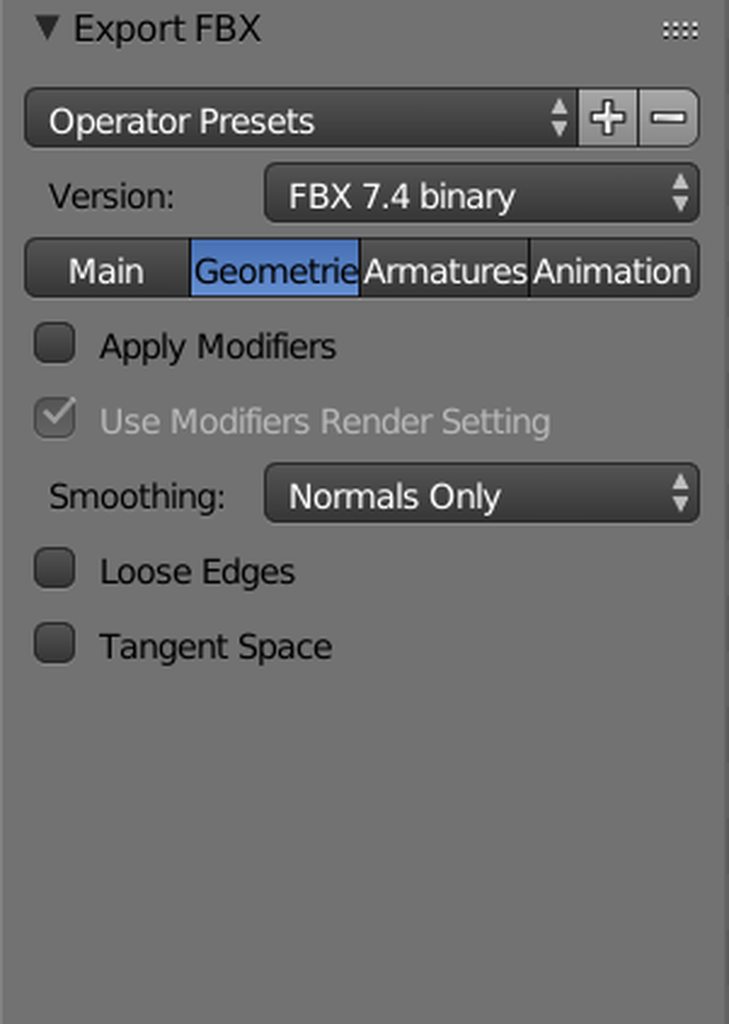
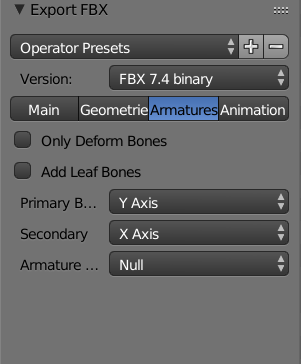
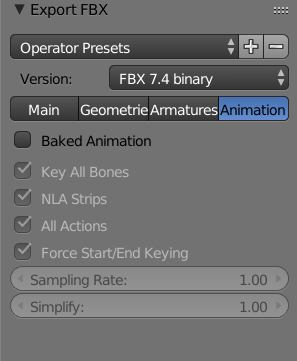 crisp tendon
Try exporting as an obj then and see if it disappears again.
 orchid frost
anyone by chance able to help me with applying a Armature to my 3d model on blender?
crisp tendon
@faint anvil Should retain rig information afaik
@orchid frost Which tutorial did you follow already ?
echo drift
@gritty nest just letting you know the dev mode is working with my shape keys so far 😄
orchid frost
@crisp tendon never mind. I just kinda spent a good hour trying everything and just found out how
 solemn inlet
Helping a friend with an avatar: Head being defaulted to the neck, and vrc requires neck to be mapped. the two listings for "head" on the bones are part of bows on the shoes. Any easy fix without going back to blender (importing the .fbx file from unity fucks it up)
 round abyss
so what is REQUIRED for eye tracking to work
is the naming convention optional or mandatory and does the hip rotation affect it
do the eye end joints need to be there to determine the eyeballs size?
 crystal vector
@round abyss Important are the names of the bones up to the eyes, the name of the mesh and armature and that the eye bones are mapped.
The end joints are not needed
round abyss
ok
im using maya
we dont do armatures
_<
but ill rename everything
what about the eye bones themselves?
I guess ill just add a group called armature
crisp tendon
@solemn inlet No easy fix, you need a bone
solemn inlet
damn
crystal vector
@round abyss The eyebones have to be called LeftEye and RightEye
The Hierarchie has to be Hips>Spine>Chest>Neck>Head>Left and RightEye
The Mesh has to be called Body and the armature Armature.
You can rename the armature later in Unity
Eyes and head bone have to be standing straight up
crisp tendon
With the technique of using an empty game object for flying avatars, is it possible to have two models under the same game object without conflict ?
calm needle
i dont see not, depends on how you have your collision. I know the mirros making a copy causes some funny collision shenanigans though when trying to fly
crisp tendon
Worked out well for me, but i need to find a way to link child/parent Y axis to copy the movement of one to another
 static parcel
Is it best to rig a flag with just one bonechain or could I get away with two for top and bottom?
static parcel
I was thinking of tinkering with dynamic bones to make it flap in one direction
 viral umbra
Goodevening guys, ive been working on my new avatar by shortening his legs en increasing his arms. The bones are also moved to the right positions. When uploading my new avatar to VRchat it looks like a monster :( extreme long fingers and crouching legs. Does that happen because i only changed the main key in Blender? (This is my first time editing the bones and mesh to match my body size) greetings RSilience
echo drift
I'm at my wits end, could I have someone just screenshare with me and just point out what I did wrong? https://i.imgur.com/fwtOcEh.jpg
 crisp tendon
Did you apply the armature modifier before deleting all your shape keys and applying as a new rest pose ?
viral umbra
Ok, new words: Armature modifier, new rest pose. If i delete all shape keys do i need to create all of them 1 by 1 again by hand? Sorry, im a newb :(
gritty nest
If you apply pose as rest pose with the CATS dev version, shape keys should still work
If you're just shortening the body you could separate the head first and keep the shape keys on that
viral umbra
Thx Rokk. Ill be checking that out
viral umbra
@gritty nest rokI searched a bit in this discord and found out you are Dutch and this video here is great to solve my problem :) https://youtu.be/YHd-8cDdnQc

Fix for legs being too long in VRChat. Also a guide for general proportion tweaking.
viral umbra
I do, thats why I need need do alot of work to make my avatars work correctly :)
echo drift
I was trying to fix it but it's not working what so ever, I have full body tracking and when I select the model to load, my tracking balls are clipped inside the ground. why is that?
at least the feet ones
 plush garnet
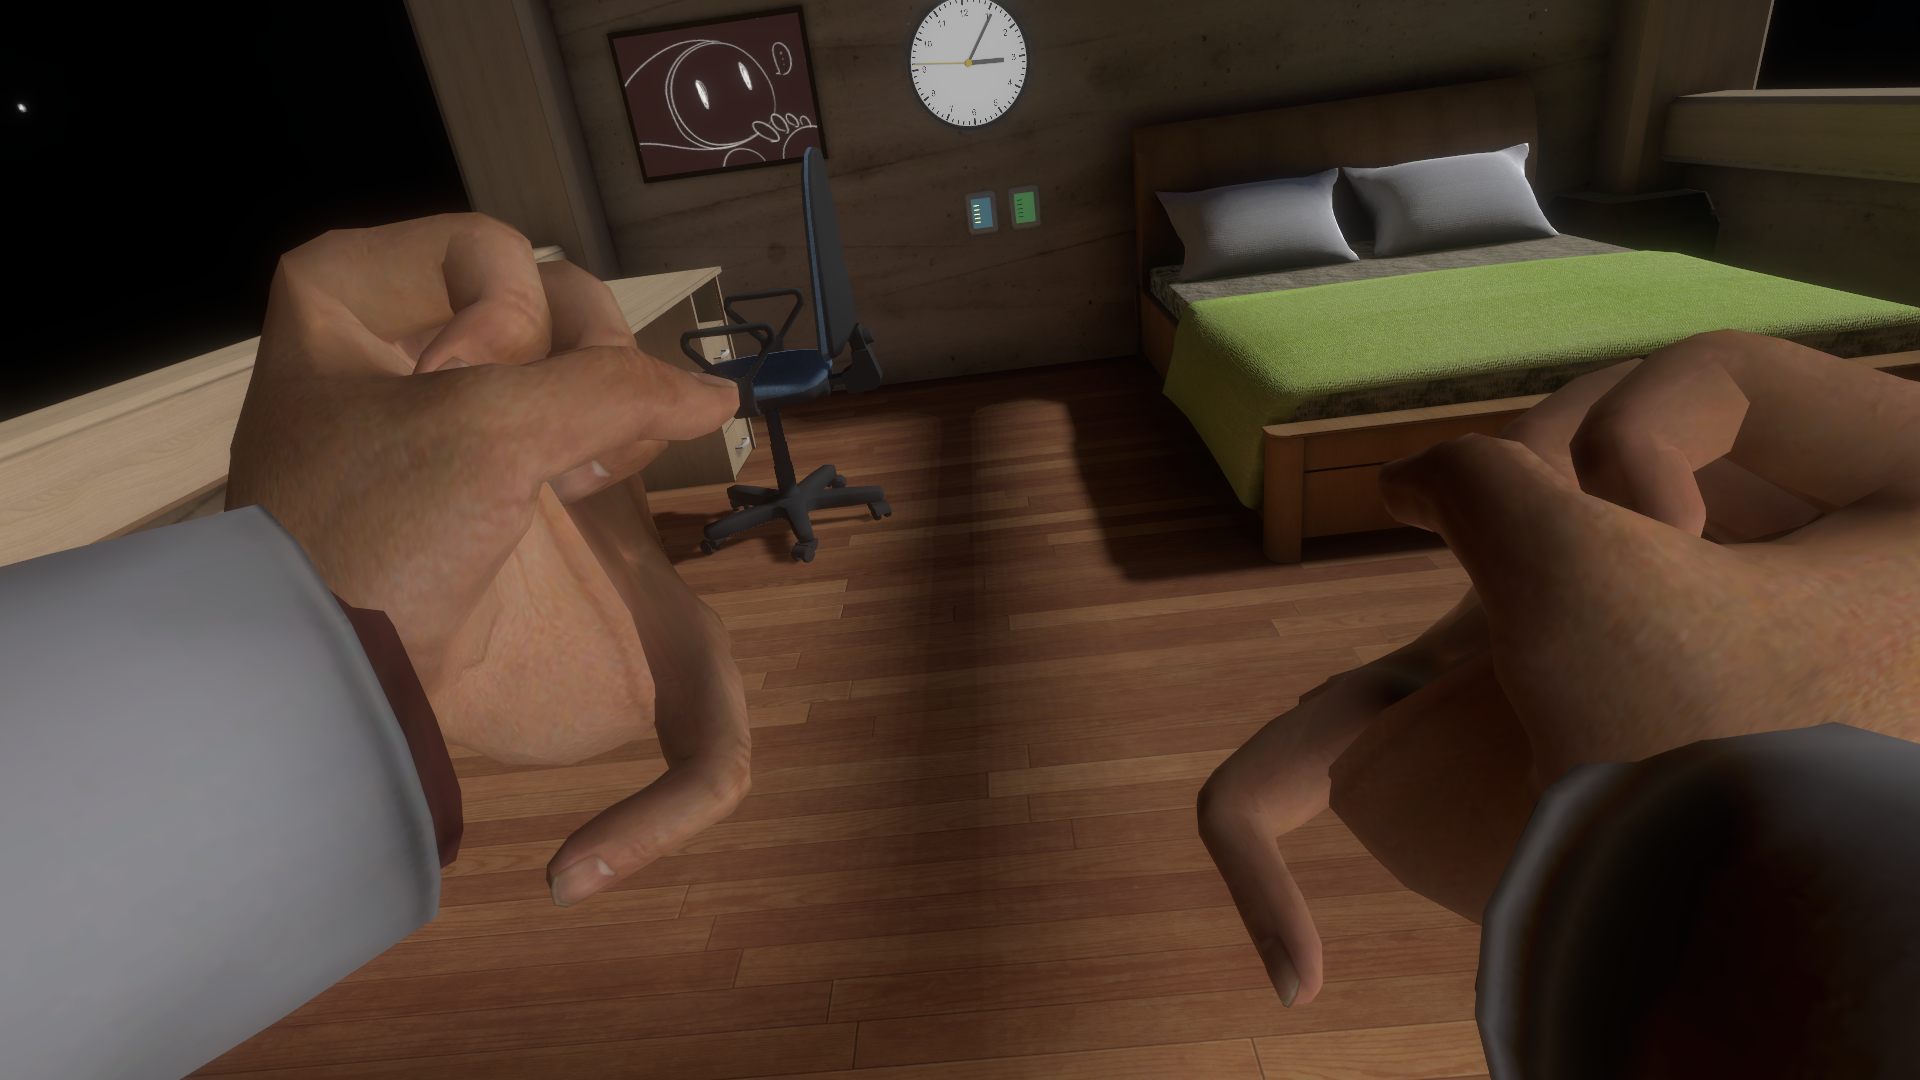
Is this a rigging issue or a weight paint issue? https://imgur.com/7ujkV1M
No matter how much I mess around with the rigging for the fingers, I can't seem to fix them
 echo drift
@plush garnet Well from what I can see from myself, it might be a little bit of column a, little bit of column b
 pale hull
Looks like the fingers are wrongly assigned in unity
plush garnet
Yup, a bone was wrongly assigned for the fingers despite it being the actual bone you'd think is meant to be rigged
thanks, I managed to fix it
round abyss
so
I got the eye tracking working
someone mentioned they need to be pointing straight up
so no rotations at all?
or just zero out the joint orient

ill assume this is correct
crisp tendon
you're doing it in maya ?
crisp tendon
oh boi
round abyss
this is what I leanred to use in college
_<
on the bright side its working
just oriented incorrectly
ding dong pass the bong it works https://puu.sh/AFyZQ.png
 crisp tendon
Nice !
round abyss
one question tho
@crisp tendon are they supposed to be looking down like this half the time?
 crisp tendon
If the eye bone is in the middle of your eye sphere, nope
round abyss
hmm
sometimes its normal sometimes its like this this seems to be the "default"
10.657 hold this float for me
crisp tendon
That's one of your reference ?
The good thing with blender is that we have the cats plugin which does all the work for you
round abyss
nah thats my non bindpose pelvis position
crisp tendon
🤔
round abyss
since the bindpose is different and to rotate the joints without affecting the skin I need to unbind the skin while keeping the meshes history then edit the joints and rebind it
ye u lucky >_<
crisp tendon
Just reading that sentence made me feel exhausted
honestly blender is super easy to get into
even more so if you have maya experience
for what the cats plugin does, it's worth it imo

 crisp tendon
interesting
round abyss
is it because of how the bones look?
😮

I guess what imma try is offsetting the joint orient by 15 degrees
cause that seems to be whats happening ingame
crisp tendon

Google Docs
Name the armature “Armature”. Name the mesh containing both eyeballs “Body”. If possible, make the whole head or avatar a single mesh. Name the bone hierarchy like this. Bones not mentioned can be named whatever. IMPORTANT: You cannot have any bones interrupting the h...
round abyss
yus
OH
vrc lowerlid
I need to make those
wait does the eyetracking look for those shapes?
split left and right too?

_<
crisp tendon
lowerlid only needs to have one vertex moved slightly
round abyss
yeah but would lacking that shape be why the eyes look down like that?
because it needs the flex to lower the lid too?
crisp tendon
I have no idea, but i believe the sdk looks for those to make it, so i'd say yes
round abyss
mm
crisp tendon
if there's none, might mess up the rest
round abyss
right now im using an animator controller to get blinking
crisp tendon
but again, both lowerlid only need to be the basis with a tiny tiny change
crisp tendon
with cats plugin yes, i'm not sure if it does it automatically otherwise
round abyss
hmm
crisp tendon
with the plugin you can create both separately
and try both separately in blender too
round abyss
If I perfect this teechnique I could write a maya plugin to automate it
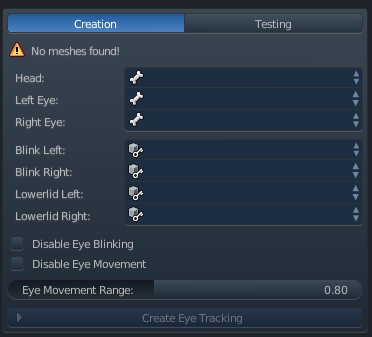 round abyss
but I wouldent be able to translate stuff like in cats because autodesk has separate builds for separate languages
for maya
hmmm
mk

I can split em like dis
crisp tendon
your lowerlid moves the upper lid ?
round abyss
fingers crossed

sucess
had to use positive 15 to get -15 in unity
cause why not
 naive tree
if your eyelids are missing the next shapekeys (which are visemes) will get used, it's hardcoded from what i know
yourmouth opens when u look down, moving or blinking
fading verge
I need help yall
Got an AV im working on, in blender and unity it looks good, but when I go to put it on in game, it looks like a jumbled mess
 earnest brook
I'm trying to get eye tracking working, got a vertex group and bone for each eye and eyelid but when I try to use CATS to do it, the shape key just moves the eyelid in a straight line through the eyes
The eyelids are rounded and more than just a few faces because it's a cartoony look
crystal vector
@earnest brook Cats doesn't modify the shape keys so it's a problem with that model. But I'm not sure how this could be fixed. You could disable blinking
earnest brook
I disabled blinking just to make it easier
now the eye movement for CATS moves the eyes in and out of the head for up/down movement instead of looking up or down
 marble root

need some help here, does anyone know why the head literally goes thru the hairs, the colliders seems like nonexistent for the top part of the hairs
marble root
so you mean that the hair should be attached to the head at all times?
what about the hair bangs, they would look weird if are connected with the main hair mesh
 dark pollen
Anyone know how to fix this? As in that part of the mesh doesn't move with the leg correct https://gyazo.com/69a9a4769bd36bf2111573b87eda0074

This is after weightpainting it as well https://gyazo.com/1f8c8eb504342c51b461ca69e03dae75
 fading verge
in edit mode, is there an extra bone in there ?
dark pollen
Seems to be the regular leg bones
marble root
uhh @dark pollen i think the socks (idk what's called but that brown mesh over there)has to be settled with weight paint
fading verge
find which bone is moving that weird part
marble root
in pose mode, click the selected bone, then click the mesh, then in the mesh go to weight paint mode
dark pollen
Can't really describe it but the right leg is the weight paint I added and it still doesn't work right https://gyazo.com/42c71a3da5b65aba504678ee1b0cad14
It moves with the leg bones but not the knee bones
marble root
look, the knee (i think?) has to be added lots of weight, until you gotthe same color as in the feet
 dark pollen
Damn I found the bone, Didn't see it as it was hidden by the knee bone
fading verge
dunno
check other hairs
usually they have a part that's just weight painted directly to the head bone
and you usually don't put dynamic bones on them
marble root
huh
dark pollen
Thanks for helping me figure out that mesh issue, that was the biggest problem >_>
marble root
i checked a few tutorials and most of them applied dynamic bones for the hairs
 unique frigate
for hair bones with dynamic bones people typically make a "hair parent" in order to not put dynamic bones on the head bone
 gritty nest
No, they make a root bone for the hair as described in Tupper's megatutorial
It's a duplicate of the head bone that's parented to the head, and has all the hair bones under it.
So you can apply dynamic bones to that root bone and it'll work straight away with just 1 script. No exclusions required
 gritty nest

VRChat Community Discord: https://discord.gg/VRChat Download VRChat! http://store.steampowered.com/app/438100/VRChat/ mmd_tools GitHub: https://github.com/po...
Actually, I think people using dynamic bones on hips with exclusions is the reason the viewpoint is above the head
I remember such a thing happening
 woven vine
oof
marble root
spent a year on those thanks to life
woven vine
oh no
marble root
now i will have to scrap every single animations and do the whole thing again
woven vine
jeez
marble root
well tbh the animations are meant for my own game so i kinda made a ton of animations
woven vine
hm
fading verge
Dynamic Bones... how does one do?
woven vine
idk i cant help
fading verge
no i meant how can i make them
fading verge
wait... what
woven vine
on the unity asset store
marble root
ok, i really need help from one of you tbh, i can't waste my time on rigging for like 1.5 years for pointless results
just to see my hair and rigs not working properly
woven vine
ok well idk crap about rigging, but you can go to mixamo.com i guess
marble root
unfortunately mixamo refused to map my models
that leaves rigging animations manually in blender
marble root
well are there any ways aside on forcing me to remake those animations?
i mean if i added a bone then the whole model needs to be re-rigged again just to accommodate a duplicate head bone
fading verge
I'm literally at the end of rigging a model; I just need someone to tell me why setting the UPPERCHEST bone causes problems, but leaving it blank tells me it needs to be mapped. It's driving me nuts.
 main sage
is there a way to resize the armature / every bone without changing the mesh size in Blender? upon importing a model the bones of the armature are way too big, so they float outside the person itself
@fading verge ...? idk why youd get an error for not setting upperchest, never happens to me or most others
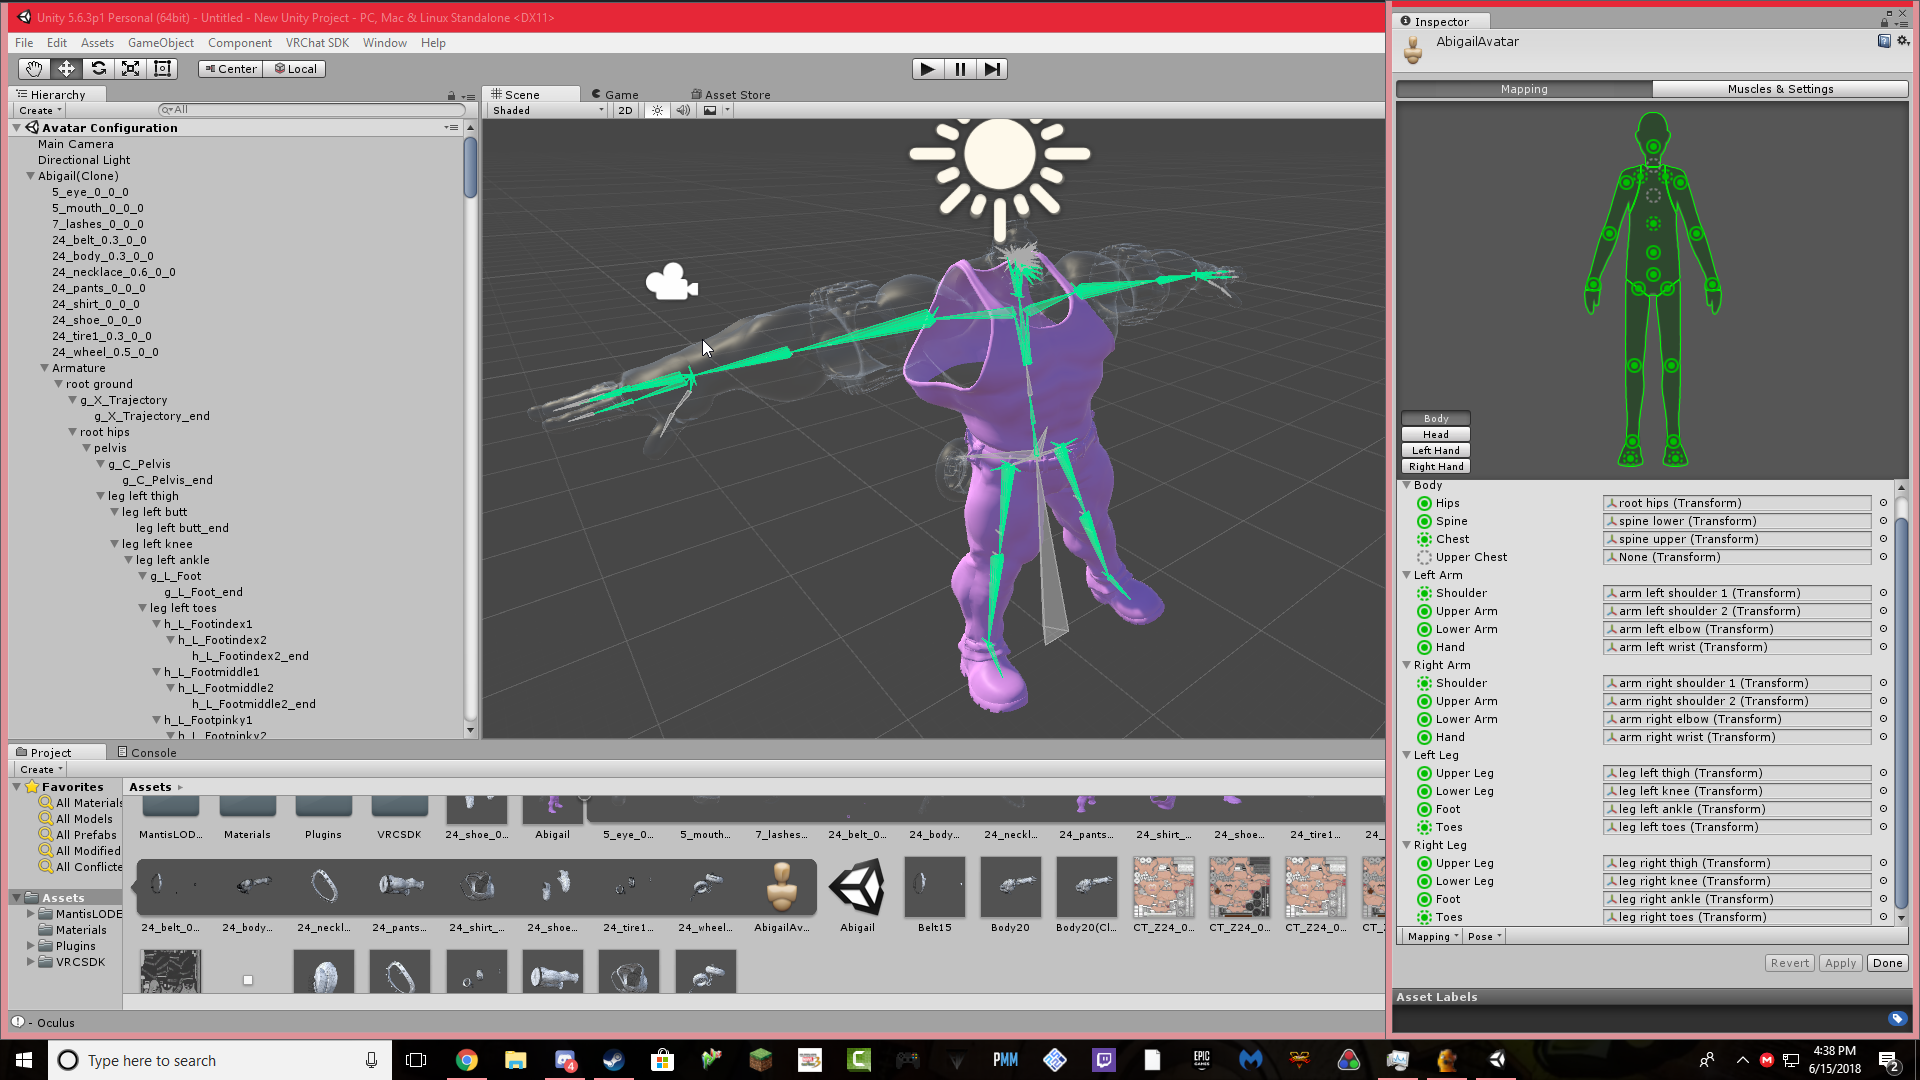 crisp tendon
no neck
main sage
^
fading verge
How do I make that happen
main sage
the Head tab of that thing on the right
fading verge
what bone do I give it? All of them cause conflicts
crisp tendon
If it's creating conflict you might need to fix the model beforehand
crisp tendon
If you want a humanoid and animation, that won't work
If you need to fix it, better start learning how
Cats plugin in blender is your new best friend
fading verge
But if I change the model in blender I have to throw away all the work I've already done.
crisp tendon
Yep, that's why we usually recommend making sure the skeleton is perfect before moving on to other things, because it's a back and forth process
fading verge
Three days of work in the trash and I have no idea how to mess with bones in Blender.
I'm at the end of my rope.
fading verge
Learning everything, porting over the model from XNALara, adding textures, lowering polycount, etc
I had to lower the polycount of every individual piece of the model
crisp tendon
Why didn't you do the decimation in blender ?
Using the cats plugin that shouldn't take too much time since it's automated
and the textures should be applied automatically again in Unity
fading verge
Because:
A) It was harder.
B) It looked worse with the built-in tools.
C) I have no idea what the cats plugin is. Please don't act like I do.
The textures weren't even applied in the first place to the model because I ported it over from XNALara.
It came with texture files for each part of the model, which I applied.
crisp tendon
Time to learn what it is then, because it'll save you three days of work
Once you drop the fixed model in unity, it'll reapply everything like you did
crisp tendon
Get yourself the cats plugin for blender
fading verge
I have the DL link, how do I integrate it?
Nvm, got it
Alright, it's up now; what should I do?
fading verge
done
crisp tendon
Now you have all the tools available, decimation, fixing the bones if needs be, optimization, eye tracking
It does pretty much everything automatically
And when you're done, click again on top for XNALara and export it
fading verge
How do I move around in Blender without moving the model?
fading verge
Quick decimation doesn't work.
I can do decimation in Unity. My only concern atm is fixing the bones
crisp tendon
have you tried clicking on "fix model" ?
You can revert with ctrl z after if that does something you don't want
crisp tendon
textures are fixed, but not auto applied in blender, depends on the type of model afaik
fading verge
Alright, so I reduced the polys to 18500, now how can i make sure the rig works bonewise?
crisp tendon
Look at the overall skeleton, you also have your armature on top right
But if it said "Model fixed" at the top when you hit the button, should be good
crisp tendon
That's probably because it used the neck bone from earlier and use it as a head, you have to figure out why your model doesn't have a head/neck
crisp tendon
Import the model again from 0, select the armature, on the right there's a tiny body icon, click on it so you can enable x-ray

You can see the menu selected on the far right
and x-ray at the bottom right
crisp tendon
You can see the skeleton, which bone do you see, neck or head ?
fading verge
How can I tell which is which, or spot the bone when it's unlabeled?
crisp tendon
right click the armature, and press tab to go into edit mode
where you enabled x-ray you can also enable names
 weary condor
Are there any tips for rigging characters that are suposed to move on all fours?
I currently seem to only have a Spine problem.
crisp tendon
Which spine ? Horse part or human part ?
weary condor
uhhh, i suppose i can send a screenshot.
fading verge
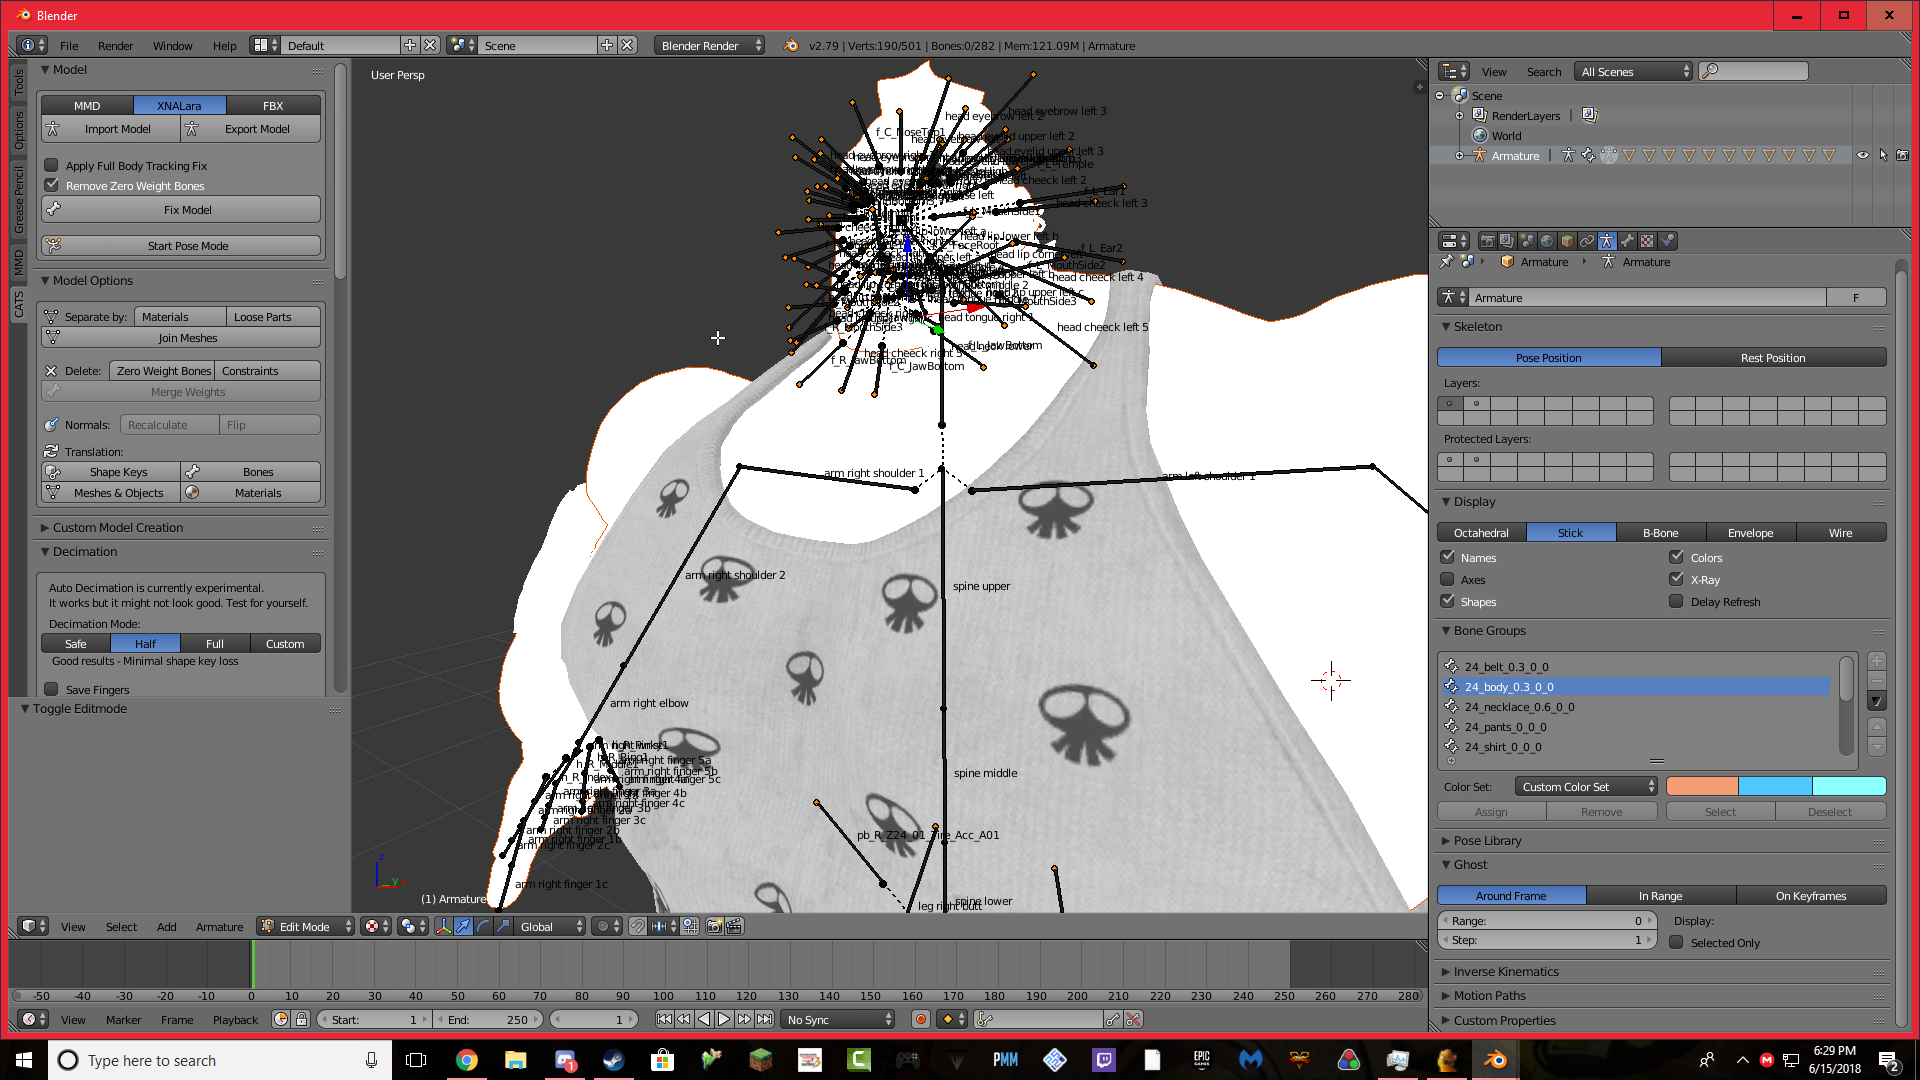 crisp tendon
you can hide them individually by selecting them and pressing h
weary condor
First non-human character i'm attempting to import, but probably the only one. https://i.imgur.com/f2z6S3b.png
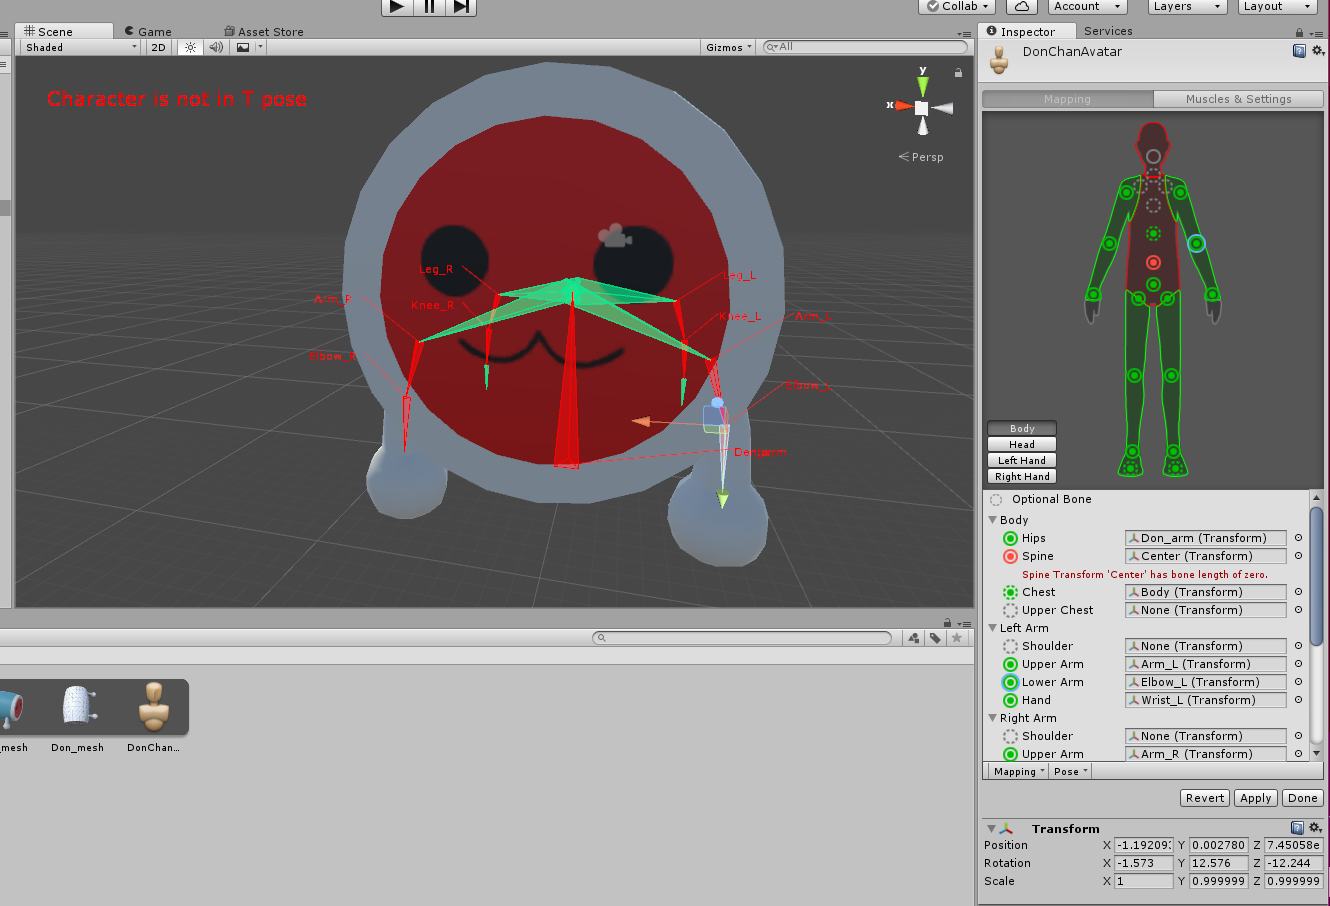 crisp tendon
Oh, you want it to be humanoid ?
weary condor
i'm not sure if i'm supposed to change the setup, i want to make it walk as is.
on all fours.
crisp tendon
that would probably be much easier to make it generic and to create your own walk animation
fading verge
How can I select each bone individually
fading verge
How can I see the name of what I select
weary condor
Creating an own animation, ouch. 😨
crisp tendon
quadruped and humanoid probably only works for centaurs and dryades
bottom left, in orange/yellow, it should tell you the name of the bone
Creating a walking animation for that shouldn't be too difficult, move front left leg and back right leg at the same time, then the opposite, make it loop and voilà
weary condor
Uhh, must this be done in blender again?
crisp tendon
and the override sample in the SDK will automatically reverse the animation for the backward walk
You can also do it in unity
weary condor
I've reset the model so it has no things applied yet, set to Generic. Where to start next.. 
crisp tendon
Youtube tutorials 😄
fading verge
I found a FaceRoot.
crisp tendon
You're in luck, the community created a ton of amazing tutorials over the past year
Ok, so if you've found the face, you need to set the rig in Pose mode
on the bottom left you can see the button that says edit mode
click on it to change to pose mode
weary condor
it's getting late, but i suppose i'll watch Remington's tutorial tomorrow.
fading verge
K, now what
crisp tendon
now right click the mesh once, you'll see the button change to object mode
fading verge
Wait, what mesh? The model?
crisp tendon
yep
crisp tendon
now switch it to weight paint mode
fading verge
Done!
crisp tendon
Cool, now find the head root bone from earlier
fading verge
Found it, how do I select it?
crisp tendon
right click it once
fading verge
Now wot
crisp tendon
What do you see ?
fading verge
A Cyan-outlined black line?
crisp tendon
screenshot pls
fading verge
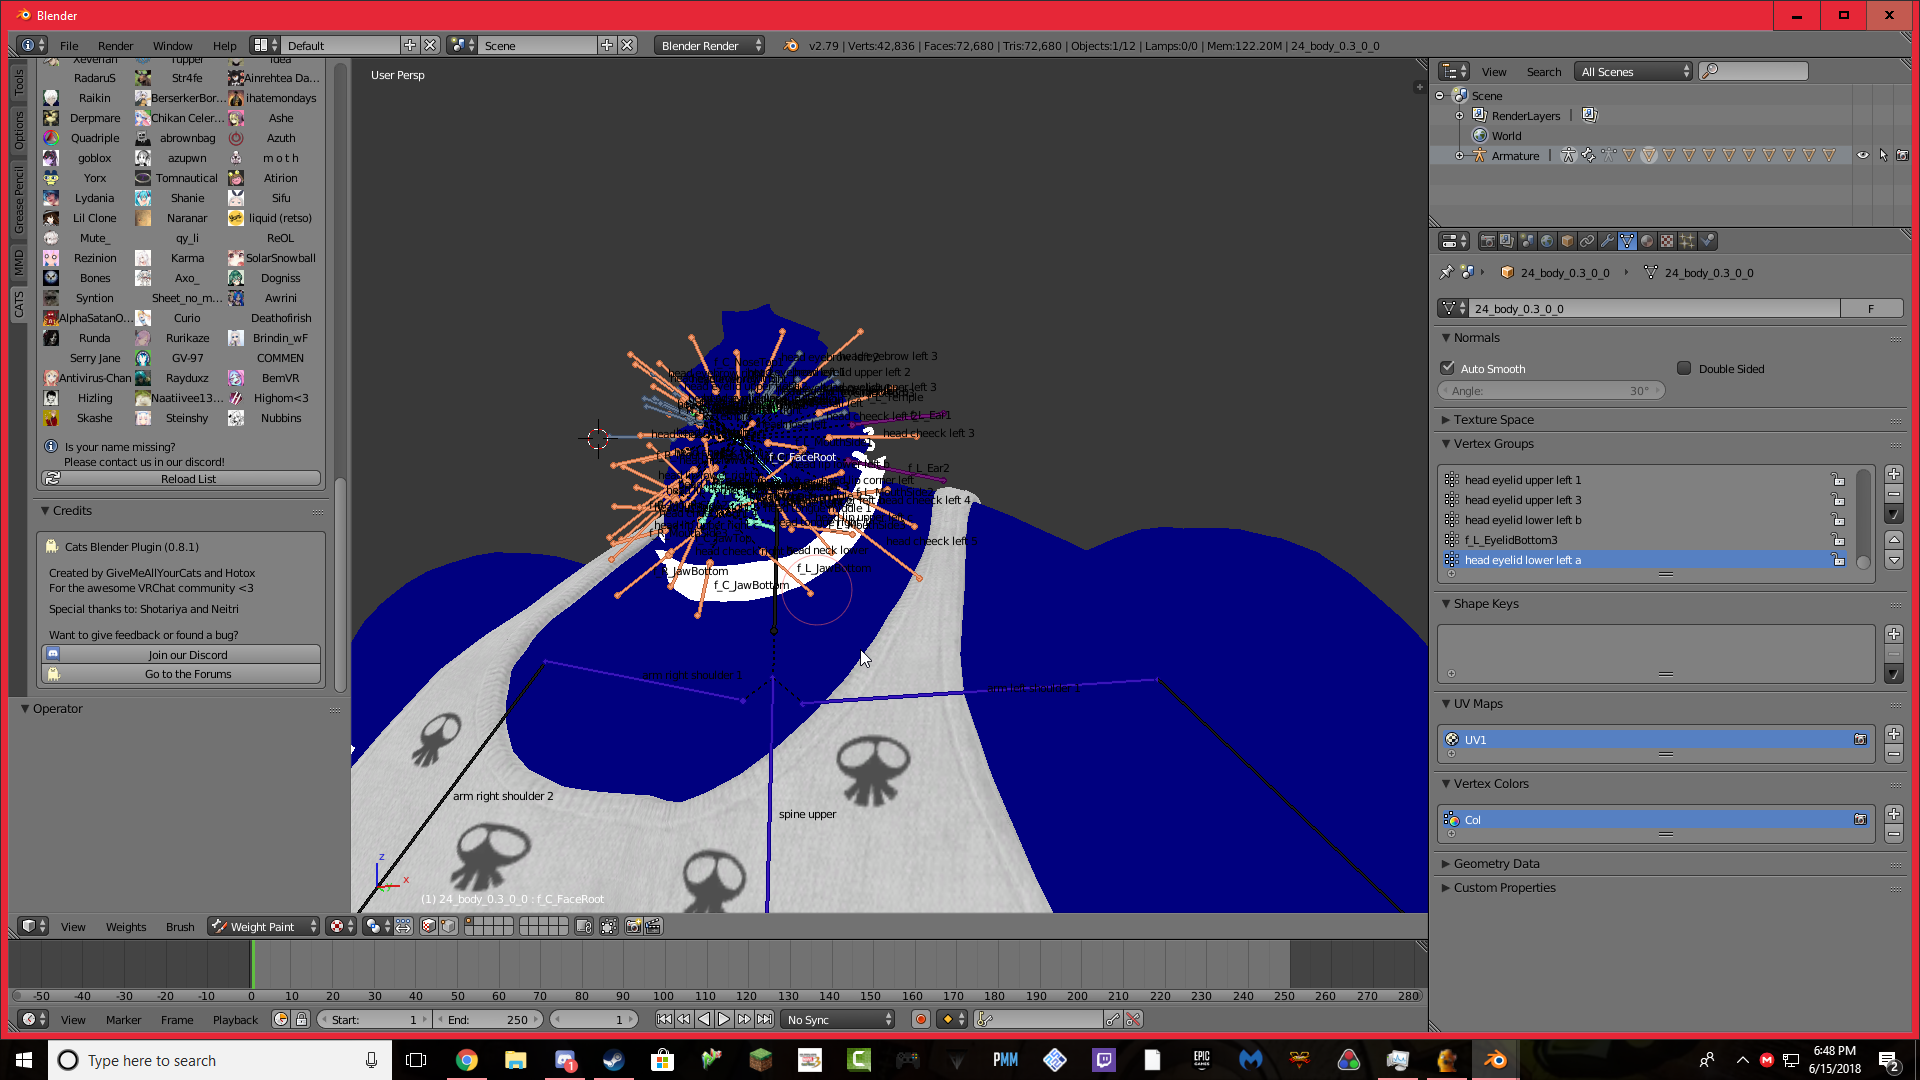 crisp tendon
cool, now select the neck one you mentioned earlier
fading verge
Head_neck_lower?
crisp tendon
yep
fading verge
Done.
crisp tendon
Is it red now ?
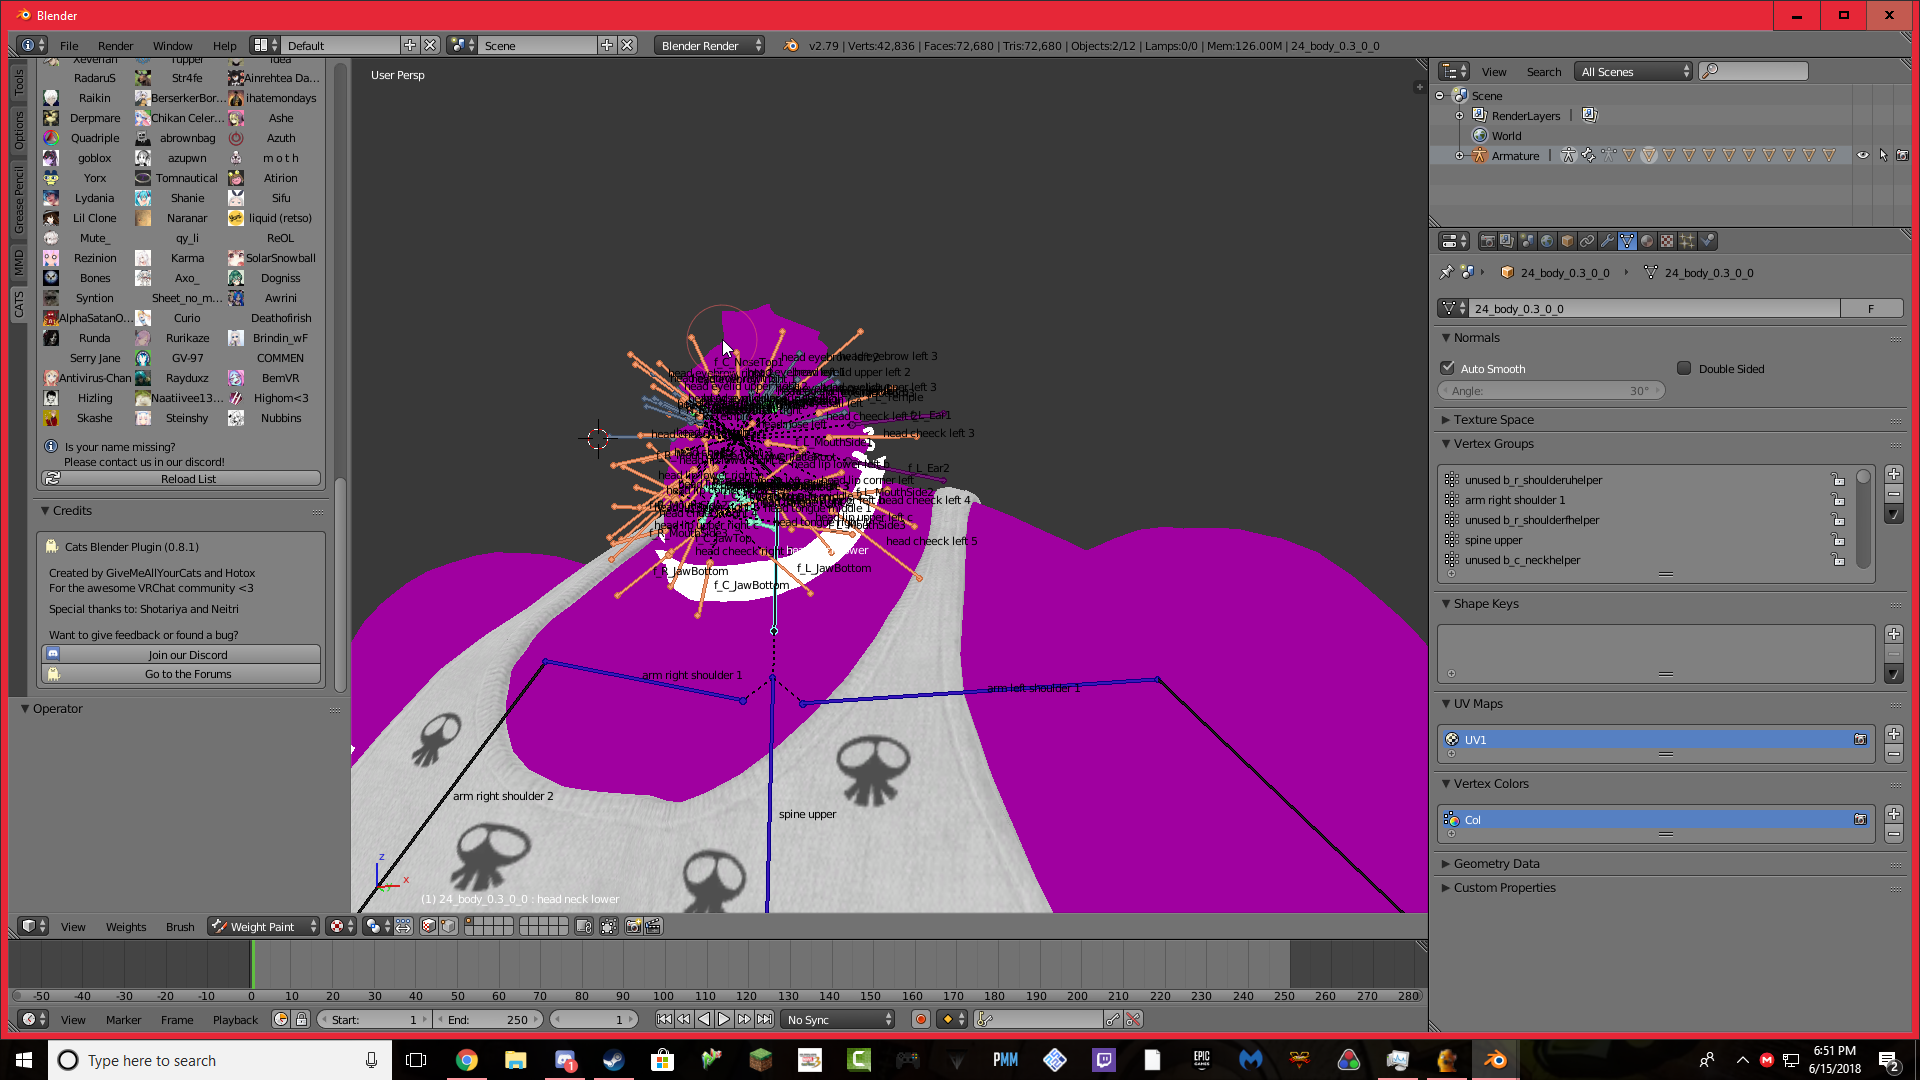 crisp tendon
Ok, then click in the list on the right side, go down one by one, and look for one that makes the head turn red
fading verge
The vertex groups?
crisp tendon
yep
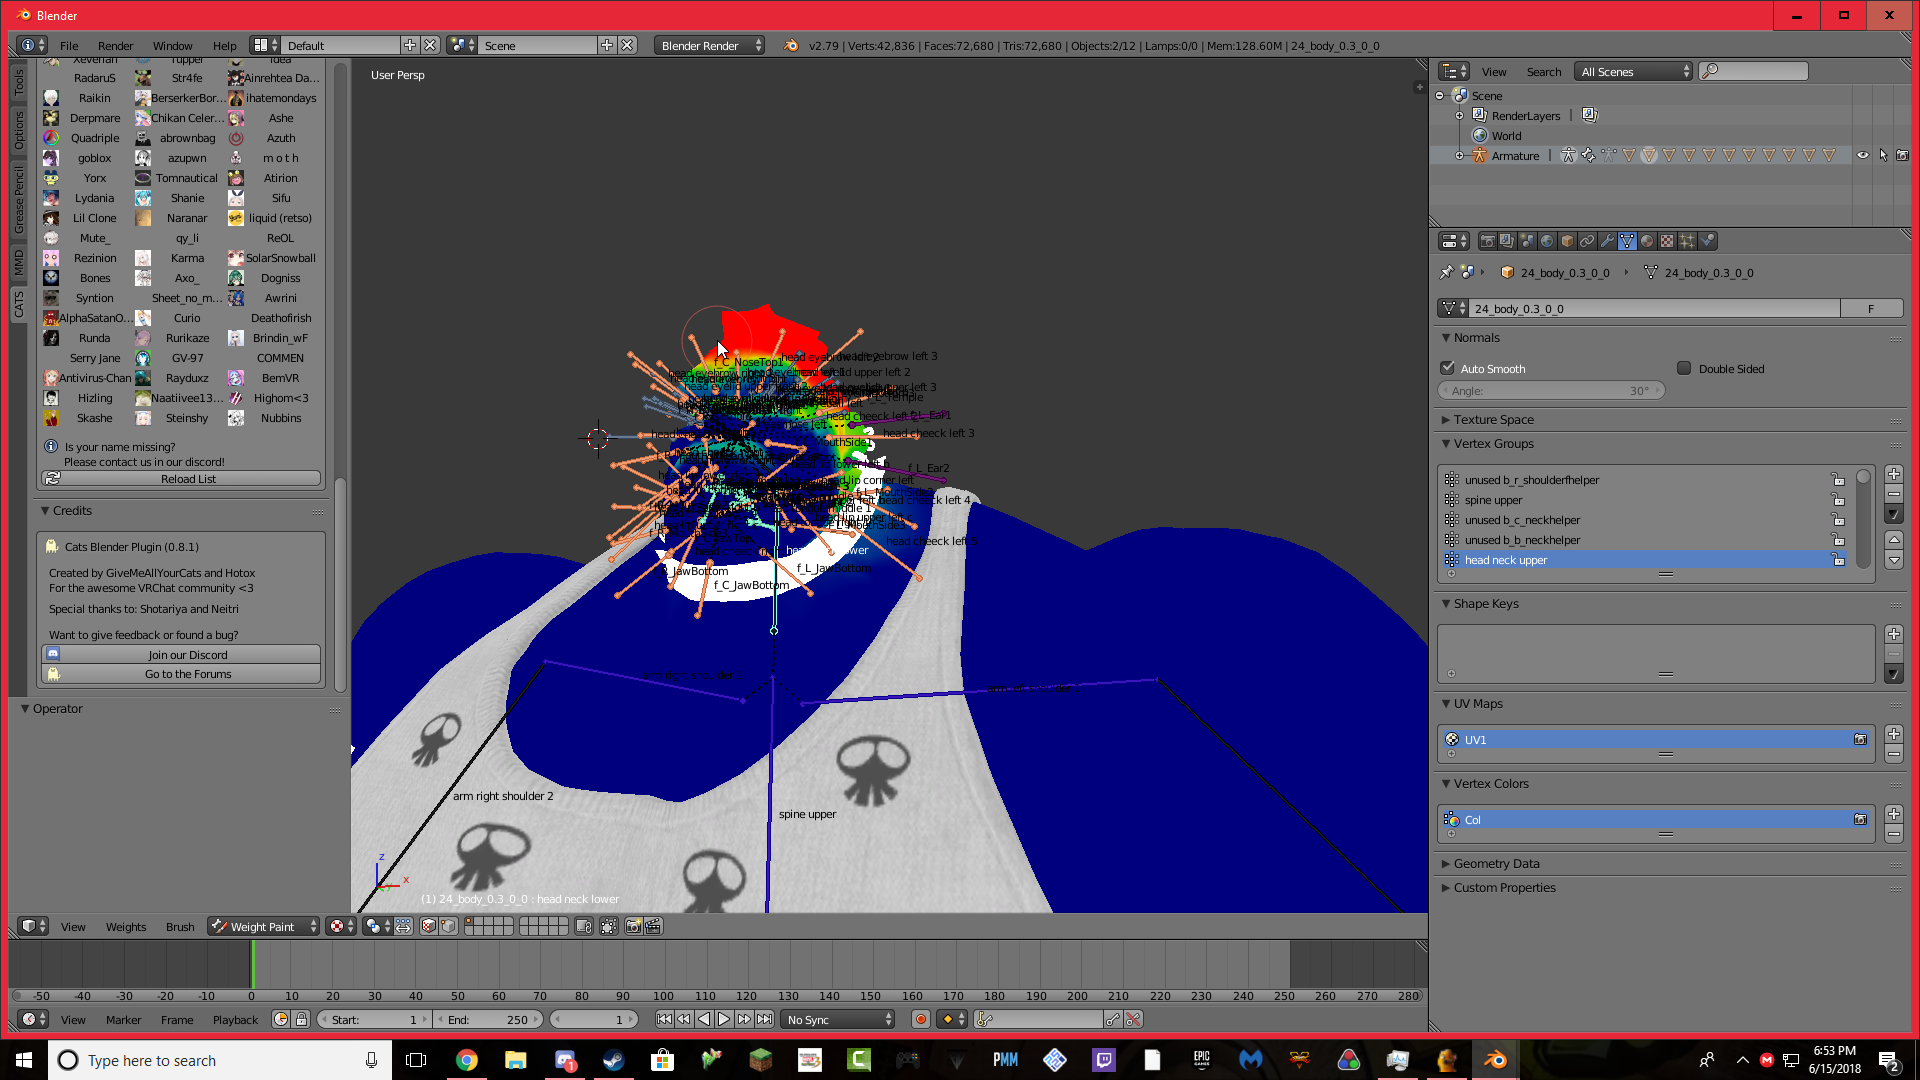 crisp tendon
So the front of the face doesn't turn red, ever ?
fading verge
Nope...
fading verge
Yes, but every single piece of the face moves
crisp tendon
And you want to keep those ?
fading verge
Well, I mean, this is how the facial model moves in game:
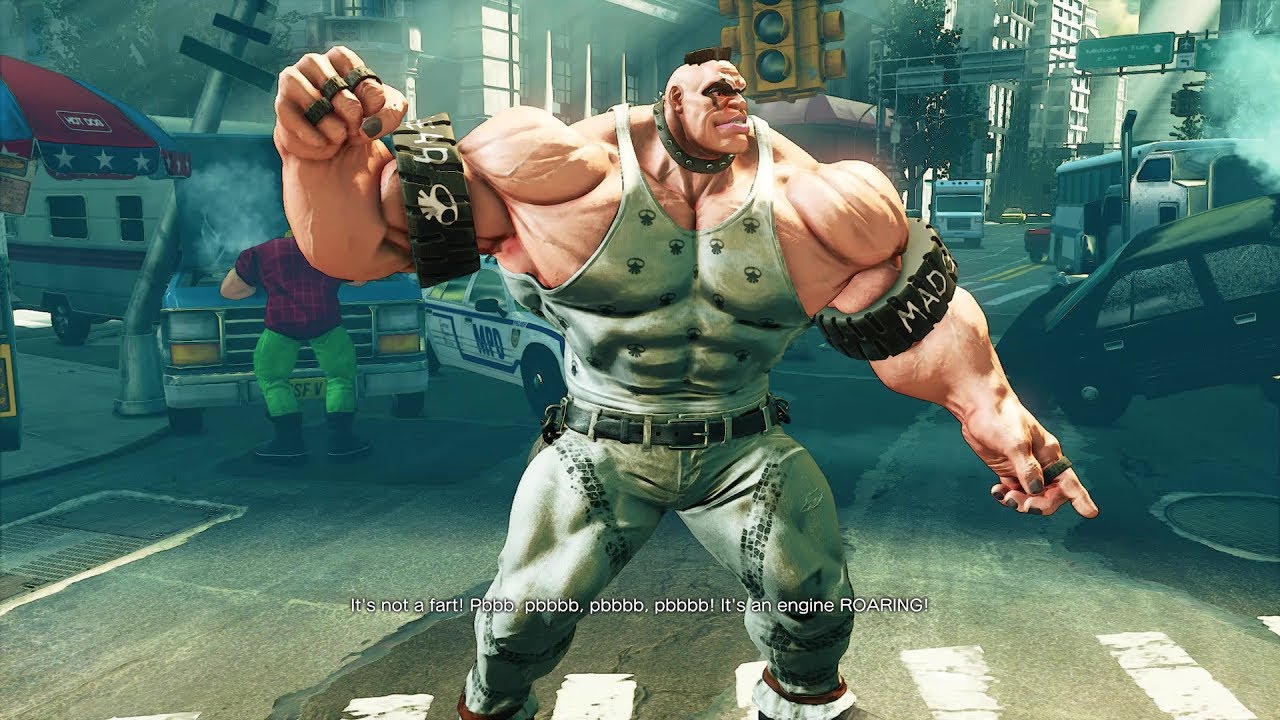
Street Fighter 5 - Abigail's Story Mode Like, Share, and Subscribe Follow me on Twitter - https://www.twitter.com/King_HenryXIII Live Streams at - https://ww...
Timestamped already
I'm just trying to get the thing working tbh
I don't need a billion things on it
crisp tendon
Yeah, so no head bone, just a neck rotation
fading verge
Seems like it
crisp tendon
What you can do is paint the head red on face_root
fading verge
Will eye and face movement still function?
I just want basic mouth movement and eye movement. I don't play on taking this into VR
crisp tendon
Oh, in that case you can make a dummy bone for the neck
select the armature, edit mode, select the head_neck_lower, select the upward point and extrude it (press e) a bit, left click and use that bone instead
that way the neck is used for the head, and neck will use that bone and won't move
or you can use the face_root for the head
fading verge
Will I still be able to look left and right? Or does that rotate the whole model when you aren't in VR?
fading verge
k
So I just right clicked the point, pressed e and moved it up
A very small amount
How can I make sure it's parallel with the other one
Because it came out crooked
crisp tendon
doesn't matter since it's a dummy bone
fading verge
Okay, so what now
crisp tendon
export it, and check if it lets you use that in unity
fading verge
I still have to "left click and use whatever bone"
crisp tendon
in the unity configuration window ?
fading verge
"select the armature, edit mode, select the head_neck_lower, select the upward point and extrude it (press e) a bit, left click and use that bone instead"
I'm on the last step you listed
crisp tendon
oh yeah, use that bone for the head in unity
crisp tendon
Yes sorry, should have made that clearer
fading verge
exported to fbx
I didn't deimate the model or use cats yet
Did I need to do those things?
crisp tendon
Not before you're sure that the armature is good
fading verge
How do I import it to unity again?
crisp tendon
drop it in your assets
i'm fixing my own mess, so might as well
Well, "fixing"
More like smashing my head against my keyboard hoping that Unity will stop putting me in a headlock
crisp tendon
what investigator ?
fading verge
The one to let me see skeletons and rigs
crisp tendon
You mean the humanoid configuration ?
fading verge
I don't have the right panel, I have to create it
crisp tendon
it's the inspector
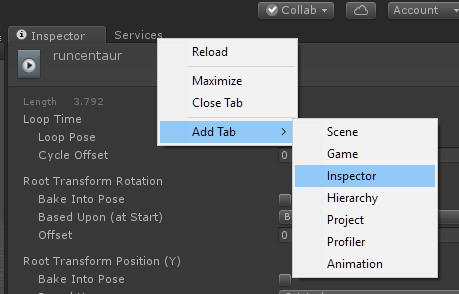 fading verge
What do I set the neck bone as
crisp tendon
the one that worked earlier
crisp tendon
Then setting the head bone first, then go down the list for the neck and see when the error doesn't appear
fading verge
I'm gonna do this later
echo drift
am I not asking my question in the right place? Is it because it's an easy fix and it's something I can find on my own?
 uneven wind
How can i save the mesh transformation after pose mode?
 late shale
Go to mesh modifiers and click apply
Might mess up the rig though, I forget
@uneven wind ^
marble root
well tbh idk if this is already horrendous to look at
must be a mesh problem i think
fading verge
Does the "full-body fix" in CATS account for the Hip to Thigh angle error? That is to say, if I still receive that error, can I safely ignore it as with the spine length of 0 error?
crystal vector
@fading verge You shouldn't get the angle error 🤔 but just test it out, it might work fine
fading verge
I'm more future-proofing for when I get my own Full-body, but I guess I could see if a buddy could test it for me.
Thanks for replying!
@crystal vector
crystal vector
Np!
In case it really messes the hips up, just rotate the hips bone so it points straight up
In Blender
 wide berry
if i want to use the same hand gestures as another avatar would i just put the custom overrides on the avatar i want to put them on or what would i have to do?
fading verge
if you have the same bone name and hierarchy, yeah
wide berry
and if its different?
fading verge
then you either redo it or press F2 and change the hierarchy to the correct path
wide berry
coolio thanks again
 rugged latch
If I rig new eye bones from scratch to models that originally don't have any and use cat's plugin to create those vertical eye-bones for vrc, eye-tracking doesn't work ingame. is there something I'll have to configure to make it work? maybe something about the bone hierarchy?
like, basically, I'd like to know the basic requirements to create eye-tracking from scratch for models that come without eye-bones, so mostly non-mmd models
gritty nest
Yeah, you need a specific bone hierarchy
Armature has to be called "Armature"
Then the hierarchy is as follows:
Hips-Spine-Chest-Neck-Head-LeftEye/RightEye
The bones must be called that
And there must not be any bones in-between
So no Hips/Spine/Spine2/Chest
@rugged latch
Head bone and eye bone both have to point up
rugged latch
I guess the hierarchy has to be like that in unity? because I don't know of a way to change it in blender itself. it seems to always sort after order of creation
gritty nest
Bone order doesn't matter, hierarchy matters
You could technically move it around in Unity but that isn't necessary
You just need to make sure that the shortest path from Hips to LeftEye is as I described
rugged latch
in unity or blender?
so, the eyes have to be on the head, but it doesn't have to be the first item under the head?
gritty nest
In both
No, it doesn't have to be the first item
It just has to be there in the hierarchy
So if you go up the spine hierarchy, it has to be Hips-Spine-Chest-Neck-Head-LeftEye/RightEye etc
If you have extra spine bones you need to merge those for example
rugged latch
ok, it's configured like that. but it still doesn't work, what could be other issues? I can turn the eyes manually in unity with the LeftEye/RightEye bones btw, so the weight painting works
gritty nest
Show a screenshot of your avatar's hierarchy in Unity
With the path to the eye bones expanded
And also the mesh itself visible in the hierarchy
Not the rigging window, but the hierarchy in your scene
rugged latch
I really don't know anymore at this point... my eye-tracking only seems to work on MMD models I converted, but not on models that I add my own eye-bones plus weight-painting to
gritty nest
@rugged latch your hierarchy looks fine here
You have the finger bones, right? No warnings about full-body IK being disabled?
And the first four blend shapes on Body are blinking and lowerlid, right?
Oh, and stupid question maybe
But make sure LeftEye and RightEye are actually mapped in the Unity rig
Not Eye_L or Eye_R
rugged latch
wait... the blendshapes matter?
gritty nest
Yes
I mean
They need to be there at least
If other shape keys such as lipsync are there instead, it'll break. Eyes will track but weird stuff happens.
rugged latch
hm... yeah, they're not there, cause my model is kinda split up for animation reasons...
gritty nest
The game's builtin eye tracking looks at the first four blend shapes and assumes they'll be used for blink and lower eyelid
Lower eyelid needs to be left blank
Well
I mean, you should leave lower eyelid blank. The shape keys should exist but do nothing. Unity won't import empty shape keys so move one vertice a tiny bit
Lower eyelid looks bad is all
The first two are blink, the two after that are lower eyelid
The mesh with the eyes on it needs to be called Body
And this is also where the blinking shape keys need to be
rugged latch
yeah, that explains a lot... I usually rename a face mesh to "face" for clarity for example...
those are also the models the eyetracking never works on... I should have figured... oh well, thanks for your help. I'll try that
gritty nest
Why don't you have joined meshes, anyway?
Multiple meshes are bad for performance (and so are lots of materials, on a related note), and they make lighting inconsistent
rugged latch
because of turning off and on stuff via mesh renderes
 empty flame
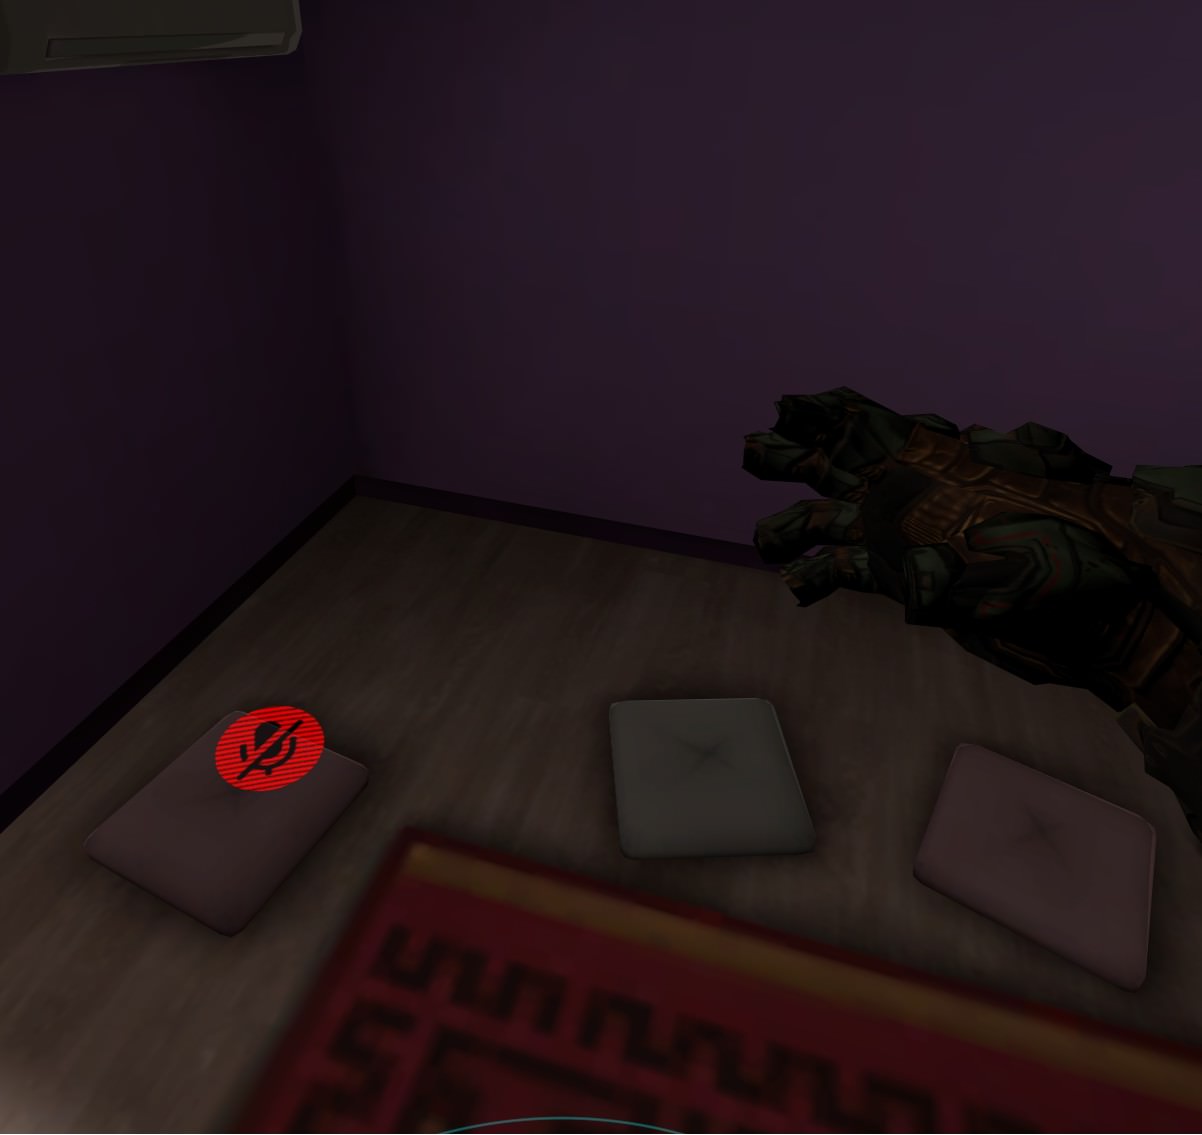
so i'm having issues with this Doomslayer avatar I've been working on
so far every other aspect of the avatar works almost flawlessly, but for whatever reason the right hand specifically, (left hand is perfectly fine), has an issue where the tips of the fingers are sorta folded in on themselves in game
mind you that in Unity they appear perfectly fine when looking at the rig
any idea as to what is happening here?
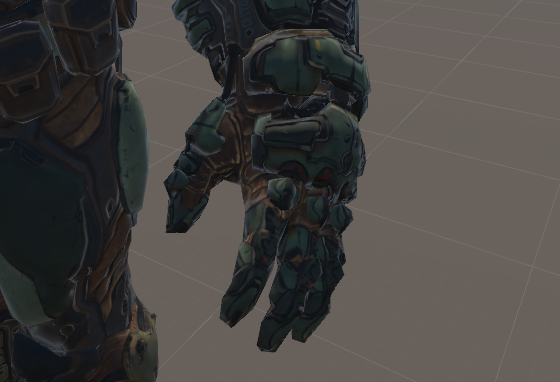
just in case reference helps this is what the hands should look like
calm needle
check the bone rotations in blender. if its doing what i think it is, they are inverted on one side
empty flame
where would i go to see the rotations?
apologies, still relatively new with blender
i've got the armature showing, just not sure where i need to go to see rotations
from checking more myself, it appears to happen when i enforce t-pose in unity
it's fine until then
and for whatever reason, it only happens to the right hand, the left hand stays fine
if that helps at all
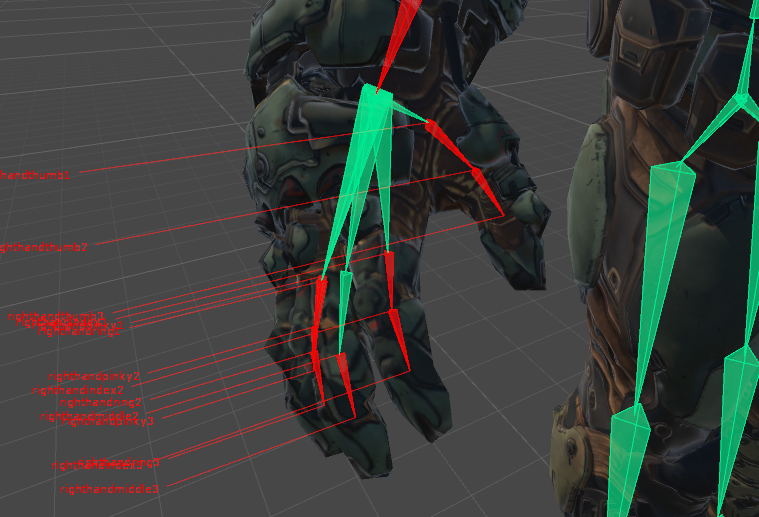
right hand in basic pose
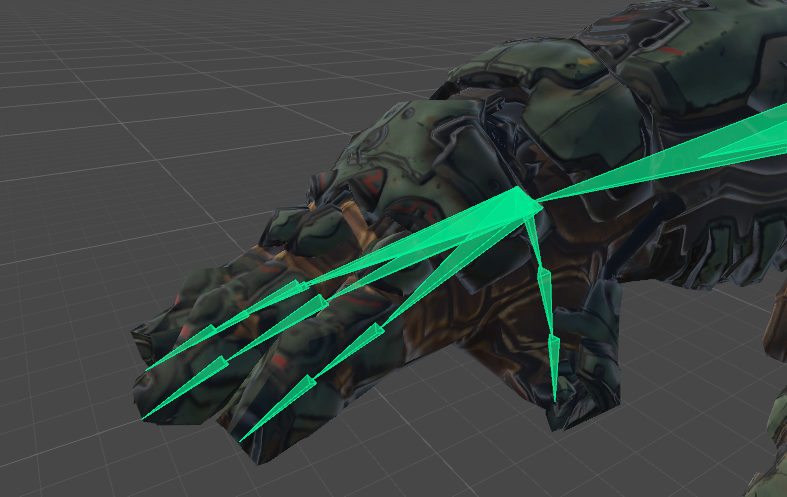
right hand when tpose is enforced
it seems that the fingertip bone, which isn't mapped, inverts itself
yet the fingertip bones on the left hand stay normal
 thorn willow
@empty flame funny, I have a similar experience with Unity fucking up finger bones when using Valve rigged models
by chance you either using an XNALara version or you ported it on your own
?
empty flame
ported it on my own from the SFM model
i've tried manually t-posing the limbs since it seems to stay the same when i do that, ill have to see how that works in-game
thorn willow
Unity is really a meme engine
at times it works perfectly other times it can destroy your work
empty flame
yeah
this came right off of me effortlessly porting an mmd built model
everything went smooth all the way through
and this model has been giving me hell
but i think i've got it working well now
gotta test the limbs in game
thorn willow
it sure does hell hate Valve rigged models judging from how much they fuck up finger bones
 opal aurora
Enforcing t-pose can make or break your models sadly... for starters, make sure your bone rolls are all set to 0, that's normally one of the major issues
thorn willow
@empty flame at least it gave you less hell than the Zero Two/Yuudachi work I did, which Unity royalty destroyed the textures
and have to redo it all over again
plush garnet
If my avatar has a base armature with a jaw bone while the head is a mesh, if I switch over to another mesh which has it's own armature for the head (Jaw, Eyes, etc) is it possible to get Jaw Flap to work with the alternative mesh instead of the original?
 lament shoal
Does anyone know how to fix this?
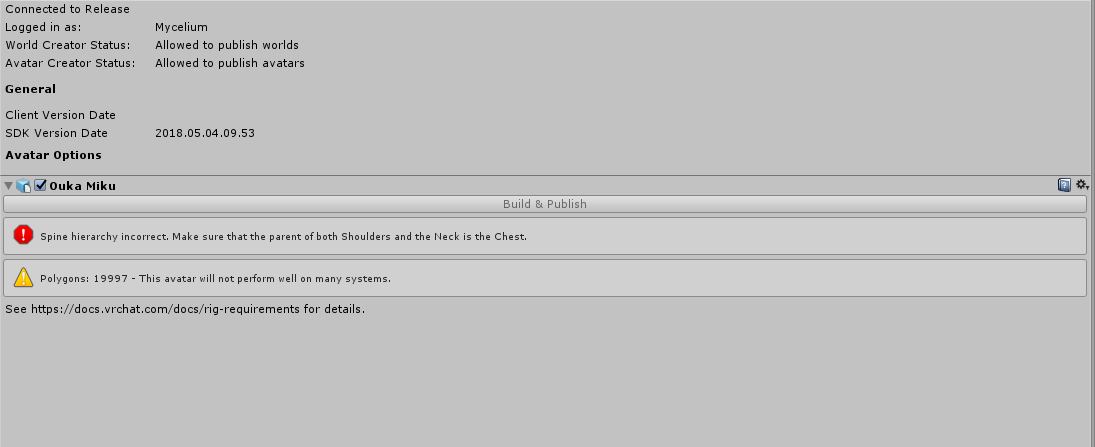
It says Spine Hierarchy Incorrect. Make sure that the parent of both Shoulders and Neck is the Chest.
I'm not sure how to fix it
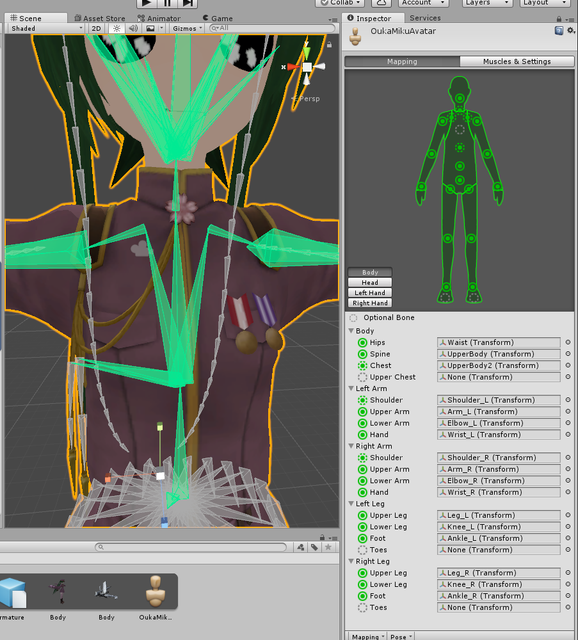 plush garnet
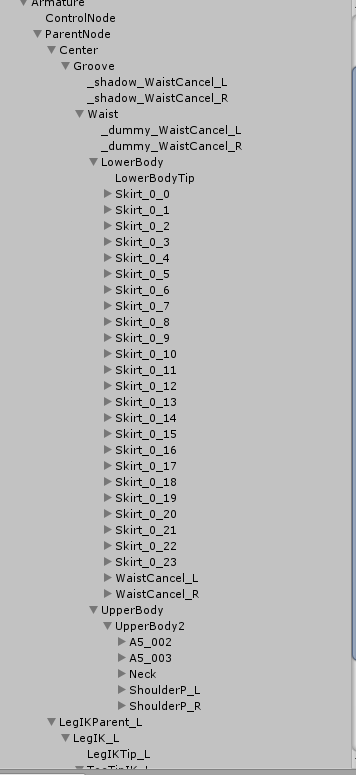
@lament shoal Did you by chance set your chest to Upperbody2 while your shoulder and hips are parented to Upperbody?
 ripe flare
Can somebody help what's going on to my project?https://media.discordapp.net/attachments/456948618587406336/457781953777893376/unknown.png?width=880&height=495
 plush garnet
You rigged your shoulders to "Shoulder_L" and "Shoulder_R" while the ones who are parented to the chest are ShoulderP_L and ShoulderP_R @lament shoal are Shoulder_L and Shoulder_R children of ShoulderP_L and ShoulderP_R?
ripe flare
When I just imported particle effect bundle, I can't enter playmode
earnest brook
I'm trying to enable eye tracking on a model with non-flat eyes (they're just spheres so they only need to be rotated really), when I preview in CATS and in-game the left/right works alright but up/down movement just moves the eyes in and out of the head completely
There's no movement range setting that makes it work reasonably for both up/down and left/right
For reference: https://my.mixtape.moe/eydvvl.png
 fading verge
maybe the bones are painted wrong
try checking how they rotate manually in pose mode
earnest brook
@fading verge When I rotate them in pose mode they rotate around their centres, as you'd expect
fading verge
oh
strange
cats rotated them around the y axis I remember so idk about this issue
earnest brook
For some reason the armature is rotated 90 degrees in x-axis
Changing that doesn't fix the problem though
main sage
CHEESE GROMMIT, CHEESE
earnest brook
I do like a nice bit of gorgonzola
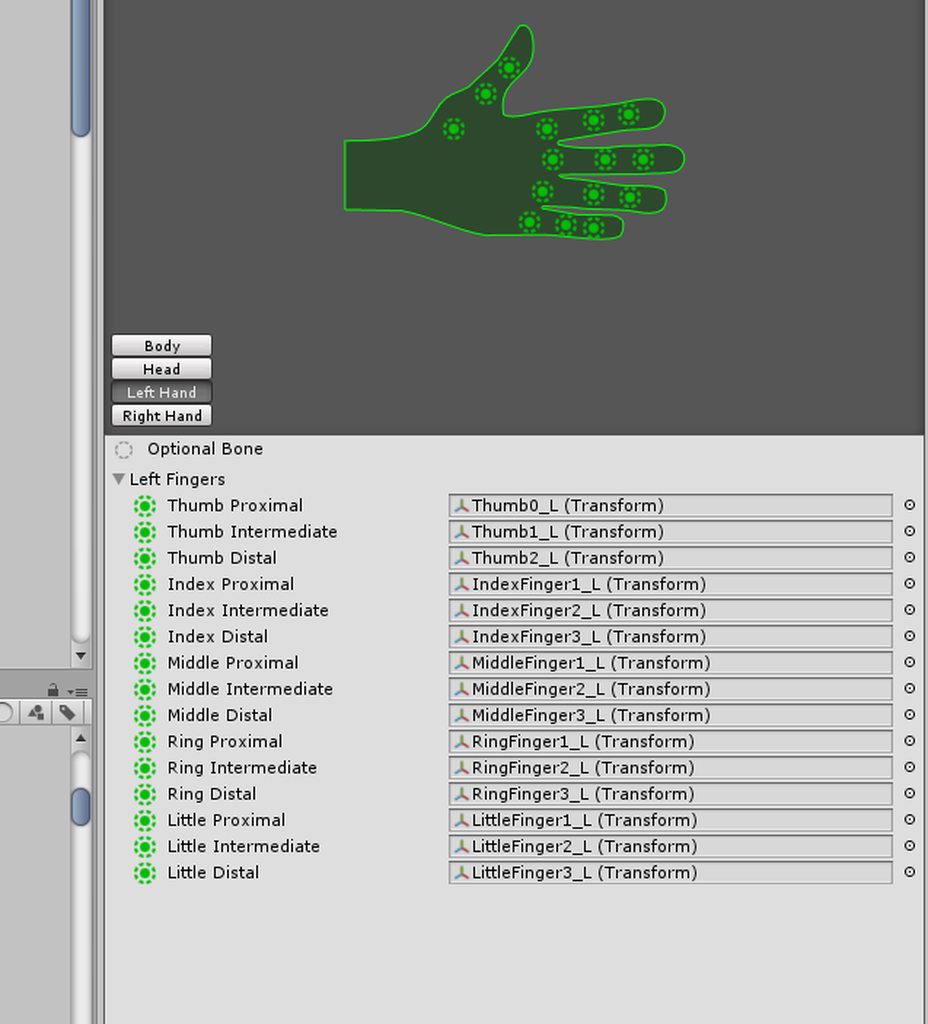
 subtle moth
in unity she looks like this, no messages saying sth about disabling fullbody tracking or anything like that but ingame i cant move the fingers

 fading verge
did you check if they move in blender ?
fading verge
are they properly assigned in unity ?
 gritty nest
Nah, the parenting is fine
It's VRC complaining because Final IK is stupid
His hierarchy is probably:
- Hips
-- Left Leg
--- LegAccessory_L
--- Left Knee
You can easily fix that by swapping the bones
In Unity
Seriously though, Final IK is like super expensive
And it still can't figure out which way a knee is supposed to bend
Sometimes it needs assistance
fading verge
i still didnt manage to fix my knee bending problem
tried to rotate
still the same
 late shale
Bend the knees forward a bit so it knows which way to go
 fluid zodiac
in the avatar definition, or the original model itself?
late shale
Either way. Probably the avatar definition because it'd be faster, but on the file would be more permanent ¯_(ツ)_/¯
fluid zodiac
didn't work :/
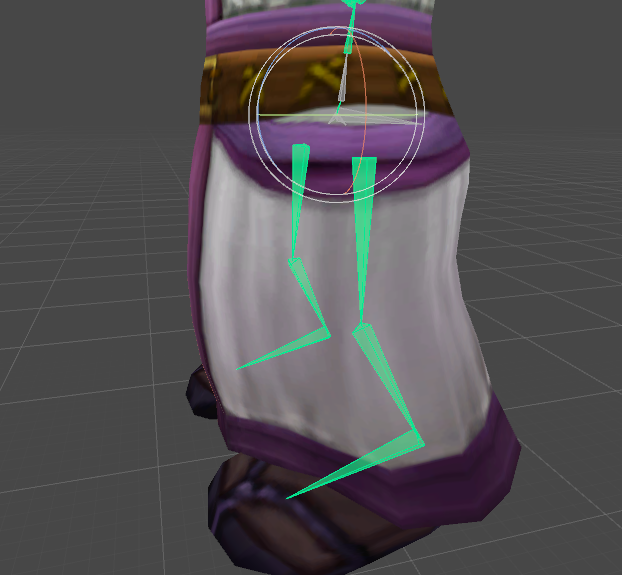
it's like the model has almost zero feet spacing in-game
and I know i'm facing the correct axis
late shale
Try removing the toe bones
 late shale
they're not required, and usually they end up causing problems so it's recommended to not use them
But if you know what you're doing, you can get them to work. And that means better interaction and feet bending when you stand up on your tip toes or jump

 rigid stratus
I've been trying for the past few hours, but I'd like to know how to add bones to a pre-existing MMD for extra dynamic bones (such as breasts that exists on the mesh but don't have any bones). Could anyone help me please and thank you?!
crystal vector
@rigid stratus Look up some weight paint tutorial
rigid stratus
@crystal vector I'm still having difficulties with Weight Painting. I tried following a few tutorials and couldn't even get the part of blender to open for weight painting =_=
crystal vector
Select the mesh and then switch to weight paint mode
rigid stratus
Thank you for that!
Now my only issue, is that weight painting this only affects the skin and part of the bra, not the whole side (same issue with other side as well)
https://gyazo.com/9e36de9ccc3775b942087f0f6812c25c
 main sage
ogod, i legit know nothing about weighting stuff besides like fixing some stuff / un-weighting
like all ik is 0 and 100 #-#
empty flame
i learned how to do weight painting in 3DSMax, in fact I know the ins and outs of 3DSMax really well, I'm just lost as hell with Blender's UI since i'm new to the program
late shale
Other than cats, is there any reason you can't just use 3dsmax then?
I know several people who do
empty flame
In general stuff just seems to be catered towards blender
It's a program I've been meaning to learn anyways so oh well
crystal vector
@rigid stratus
Are the meshes joined?
rigid stratus
yes they are
calm needle
@mystic sparrow You would use a system of rigid bodys and fixed joints. 😉 i setup that same character if you need any assistance

 mystic sparrow
@calm needle yeah I might need some help with that but it’s 3am so I’ll yell at you later
calm needle
textures are all there if you need them
 mossy dew
I'm having a really weird problem with my avatar's arms looking normal when I rig it, but when used the avatar's arm is too long for me to extend it out fully.


I really don't get what I'm doing wrong.
gritty nest
That's a proportions issue
mossy dew
So I should reduce the overall size of the model?
gritty nest
I think you need to shorten the arms or legs, forgot which
 gritty nest
Oh, I think you need to put the viewpoint way closer to your head
And uh
Your model is facing the wrong way lmao
The white line should extend forward
Maybe the model is fine ingame but you essentially put the viewpoint behind your head if the model turns around properly ingame @mossy dew
That would be the reason for not being able to stretch arms
plush garnet
If my avatar has a base armature with a jaw bone while the head is a mesh, if I switch over to another mesh which has it's own armature for the head (Jaw, Eyes, etc) is it possible to get Jaw Flap to work with the alternative mesh instead of the base one?
plush garnet
As in, it needs to be assigned via the rigging skeleton?
Because my mesh doesn't appear on it
gritty nest
The head mesh must be affected by your "main" armature
Whether it's enabled by default or not
plush garnet
Hmm, let me see if I can clarify how it is
gritty nest
I've put multiple meshes/materials on the same armature before and it worked fine
If the head has its own armature, it won't work unless you joint the two jaws to each other
plush garnet
Yeah, that's whats confusing me, so lemme throw in some pictures so you can understand how it looks like and explain to me how to get to doing it
So my entire model is rigged to a single skeleton, and it's parts are meshes, including the head: http://prntscr.com/jwd45t
this is the head it has by default: http://prntscr.com/jwd51l
but it also has an alternative head as meshes: http://prntscr.com/jwd5iu


The alternative head is a seperate mesh which in Blender before I put it in unity I placed it inside it's armature
Just setting the alternative head to active doesn't make the jaw bone move, but the jaw bone moves on the original mesh
gritty nest
Then the alternative head probably isn't rigged to the jaw
Oh, and
This mesh needs to be a sibling of Armature, not inside of it
plush garnet
I still have the files necessary in blender, how would I make it a sibling of the armature and have it grouped to the head so it doesn't stay static while the rest of the armature moves?
gritty nest
Weight it to the head
Which should already be done
So the hierarchy should look like this (example)
- Avatar
-- Armature
-- Body
-- Head1
-- Head2
plush garnet
I don't have much experience with blender, the head is weightpainted as I transfered weights from the original head which is the working one into the alternative head on the mesh in blender, it looks like this: http://prntscr.com/jwd8wb
but how will I make sure that it's actually weight painted into the head bone? for clarification I put the model into pose mode, then selected the head_bone and then the head mesh, but in unity the head is still static while the body moves

so the result I get is this: http://prntscr.com/jwdana

The vertex group of the mesh are different than the vertex group of the original head in blender, could this be the issue?
gritty nest
Yes
Obviously
They need to have matching vertex groups
That's the thing that defines which bone affects what part of the mesh @plush garnet
plush garnet
oof, that's kind of a problem, because I'm not sure if it's possible assigning a different vertex group to a mesh with a different vertex group
when they're completely different
gritty nest
Just name the vertex groups the same
plush garnet
oh, they're named the same though
gritty nest
Then it should be fine if they're siblings
It almost looks like the secondary mesh is parented to the armature
Or you forgot to Apply the rotation
plush garnet
I'd think it's a rotation issue but since I've already had an idle animation set for the original model, the body actually moves since they share the same body minus the head, but while the body moves the head is static in the air
naturally it is meant to turn when I press play and the animator override for it is on
And I think it is
hold up

The original is assigned to the parent of the armature while the head and hair are children of the armature, I have no clue how to fix it because in blender they're all parented the same
plush garnet
Larian studios made their models nigh impossible to work with outside the divinity 2 engine
It's a miracle I got the original to even work right in VRChat
fading verge
ripped model ? 
plush garnet
They have their own engine modding tools that you use to export their models
I don't think I'm smart enough to rip them out myself
I have no idea what I did
but I somehow managed to fix it by just changing "Object" to Armature in the mesh modifiers, without pressing apply
it was empty for some reason
gritty nest
Ah, yeah
That would do it lol
Please do merge your meshes though
If the two heads have separate materials, you can set one of the materials invisible in an animation @plush garnet
Or use stencils to do the same thing
plush garnet
It's okay, I already took care of it, everything works as it should now, and It makes me happy
earnest brook
How do I into mouth rigging
all the attempts I've made at using bones to control the mouth just make the lips go crazy whenever one moves
wide berry
https://gyazo.com/95bf9c47097533b9f1d227d394a79e8a dynamic bone number for this kinda hair?
 wide berry
uhmm, also a scarf and a short skirt numbers too if possible.
main sage
how would i see the bones through the meshes? need to do so if im to rig efficiently
gritty nest
@main sage select armature, go to the armature properties and tick x-ray
 jaunty schooner
Could someone point me to the procedure for reimporting an armature in unity? I've added some bones in blender and want to see the new bones in my hierarchy in unity
I tried right clicking my assets and choosing "Reimport" but it didnt seem to show anything changing
crystal vector
@jaunty schooner Replace the fbx in the unity project folder
jaunty schooner
Thanks, I assume reimport might be a quicker alternative. I wasn't exporting the fbx file after doing my changes in blender like an idiot
 hybrid furnace
Is there a way around the Shoulder Height limit
 noble jetty
I can't upload my model because it says " spine heirarchy incorrect, please make sure that pelvis, spine, chest, neck and shoulders are mapped."
opal aurora
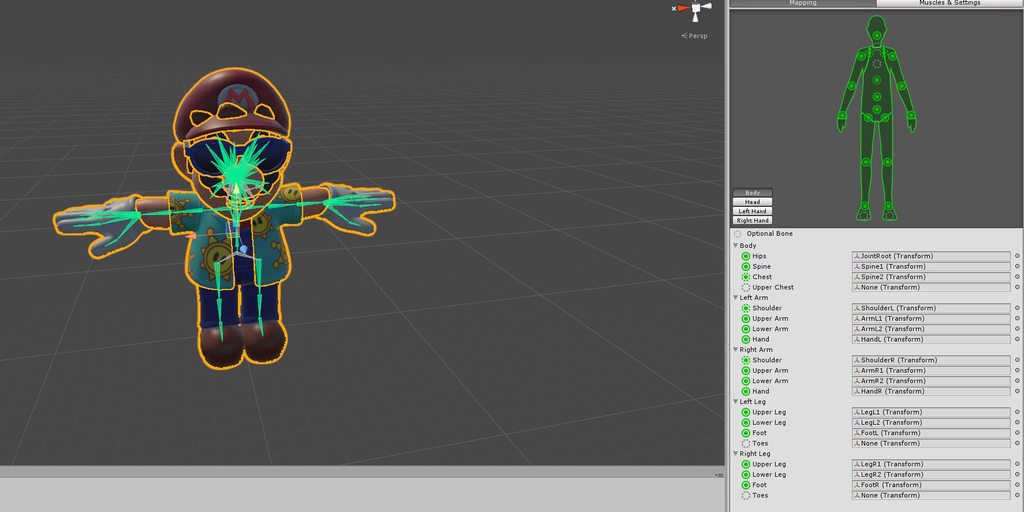
Check the rig configuration in unity, make sure everything except upperchest is mapped properly
 opal aurora
The hip bone (that connects to the legs) does not seem to be mapped correctly
 noble jetty
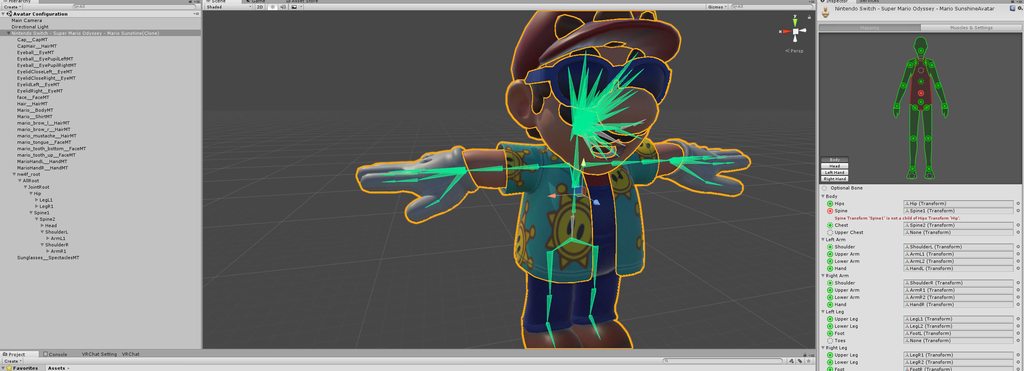
I did that and it says "Spine Transform 'Spine1' is not a child of Hips Transform 'Hip""
so do I drag Spine1 under Hip? (Sorry for so many questions, I am new to this)
 rugged vale
So what could cause issues where legs rotate inward in full body? It happens of some models others it doesn't same bones same names, same settings etc. http://prntscr.com/jwk32t

 opal aurora
@noble jetty don't move any of the bones around in the hierarchy, just map and unmap them from the list on the right side
 safe gate
Within Unity how do you rotate two sides of a body at the same time? i.e. both hands
noble jetty
I don't know what that means but I'll try to figure it out.
HOLY ASS IT WORKED
Thank you @opal aurora
opal aurora
No worries
noble jetty
❤
My new fave
fuck
I was able to upload
but it is stuck in t pose
I want to die
 hidden nymph
Quick question: How do I get the arrows to show up again during hierarchy configuration? http://prntscr.com/jwkkng

 placid sage
@rugged vale let me guess, if you move, your lower legs move forwards?
Instead of lifting backwards like a normal human walking
rugged vale
@placid sage kinda they flap to the sides. Cleared rolls from the whole model and will upload when I can. Net went out. Just wish I knew why it happens. Some models have eye tracking that flats the eyes but works
Cats test works fine.
placid sage
Could you screenshot the lower legs bones from left or right side in Blender
Want to see the joint where Left Leg and Left Knee are connected
^when your internet comes back xD
safe gate
Is it possible to have gravity with hair? I know about dynamic bones. But I've only seen a "floating" effect where it slowly moves into a static position. I'm talking about rotation your head on the side and have the hair aim to the ground.
placid sage
@safe gate Ofc it's possible. I apply minus gravity on my avatar's hair and it works decently.
safe gate
So if your head is on a 90 degree angle the hair points to the floor?
placid sage
Yes
safe gate
huh
placid sage
And goes back when head turns back
The value should be low like -0.02. Try and find what value suits your preference.
safe gate
huh cool, thanks
gritty nest
@safe gate use force and not gravity
noble jetty
My character was rigged with mixamo, but it seemed to be prerigged so it didn't take manual setup. I set everything to what it is supposed to be, and it seems to be rigged correctly, but it is stuck in t pose.
 noble jetty
new question, can I remove rig from a 3d model so I can rig it in mixamo
 safe bluff
Yeah just remove the armature in Blender
noble jetty
I do not know how to open it in blender @safe bluff
safe bluff
File > Import > .extension of your model
safe bluff
Just delete everything except the mesh
late shale
You'll need to unparent the mesh first. Select it and hit alt p then keep transformation
Then you can safely delete the armature(s)
noble jetty
@late shale When I put it into blender the whole thing is called armature
@late shale is this something I do in unity?
late shale
No, it's in blender. That's why you have to unparent it first. Right click on the mesh itself to select it
noble jetty
@late shale There isn't really a mesh, a lot of different pieces that aren't together
jaunty schooner
Could someone point me in the right direction for assigning a bone to a vertex group? I deleted some bones that I believed weren't necessary and I've ran into an issue. I'd like to try and repair it myself instead of just starting over, was just curious to know how to do it

 late shale
@jaunty schooner they just need to be the exact same name, that's it
jaunty schooner
The bone in question looks like Left elbow. There is also a vertex group named Left elbow
of course blender won't let me select the Left elbow vertex group to verify lol
late shale
Looks like most of it is moving fine, it's just a small portion that isn't weighted at sll
Go to pose mode on the armature then weight paint mode on the mesh, and it will allow you to select bones by clicking them while in weight paint mode
 late shale
Yeah that would do it
jaunty schooner
that red spot is on the arm that works alright
not sure why thats the only part painted
late shale
So select the brush and paint it
jaunty schooner
can I verify fi its fixed in blender, or do I need to export the fbx and preview it in unity
late shale
Yeah just move the bones around a bit
jaunty schooner
in armature pose mode right?
late shale
Yeah
jaunty schooner
hmm, looks like I didn't paint it correctly
I've never weight painted before so
not entirely surprised
late shale
Here, this is a nice video that goes over the basics https://youtu.be/lWKw0v25KUY

Tutorial on weight painting and how to fix weight painting issues. Usually when a material moves with the wrong bone. Links: Model: https://mooniiiiichan-lov...
jaunty schooner
I made a successful version of this the first time, but I wanted to go back and try something different
so I'm just gonna leave those "extra" bones
 urban quest
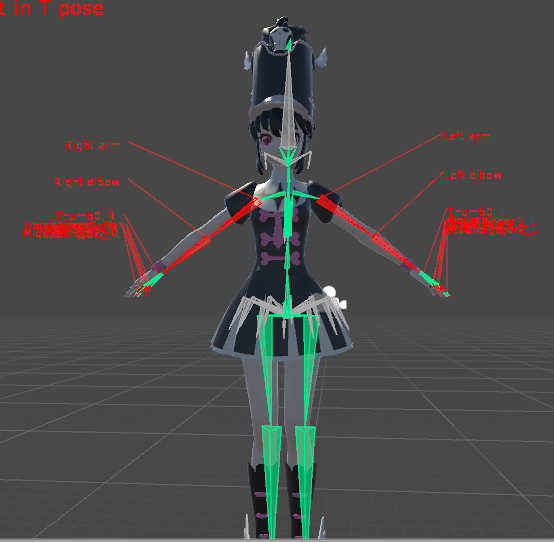
hello, I'm having an issue with my avatar where all of my bones are shifted slightly to one side, causing some bad animation problems. I tried moving the rig in blender, but every time I export it into unity, it ends up like this. does anyone know how I can go about solving this? https://i.imgur.com/8XOgZWB.png
 late shale
There should be a force tpose button, it's on a drop-down next to all the bone assignment stuff
urban quest
yeah, I had it in t-pose, but I just had it like this to show how the rig isn't quite in place. https://i.imgur.com/ITv7snv.png
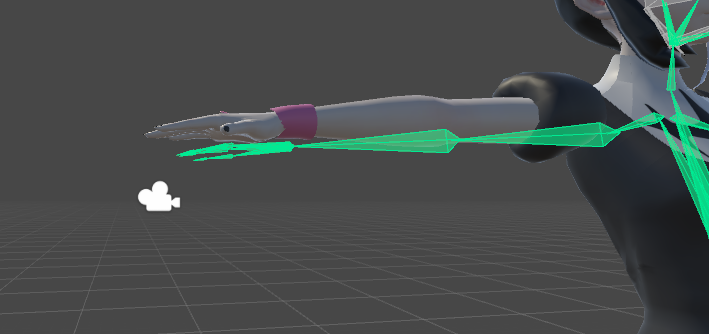
I'm not quite sure how to do it, but I need to move the bones separately from the avatar to put them in the proper place
late shale
You need to do that in armature edit mode in blender
urban quest
oooohhh okay
late shale
Pose mode will move bones and mesh attached, edit will just move the bones
urban quest
okay thank you!
 slate finch
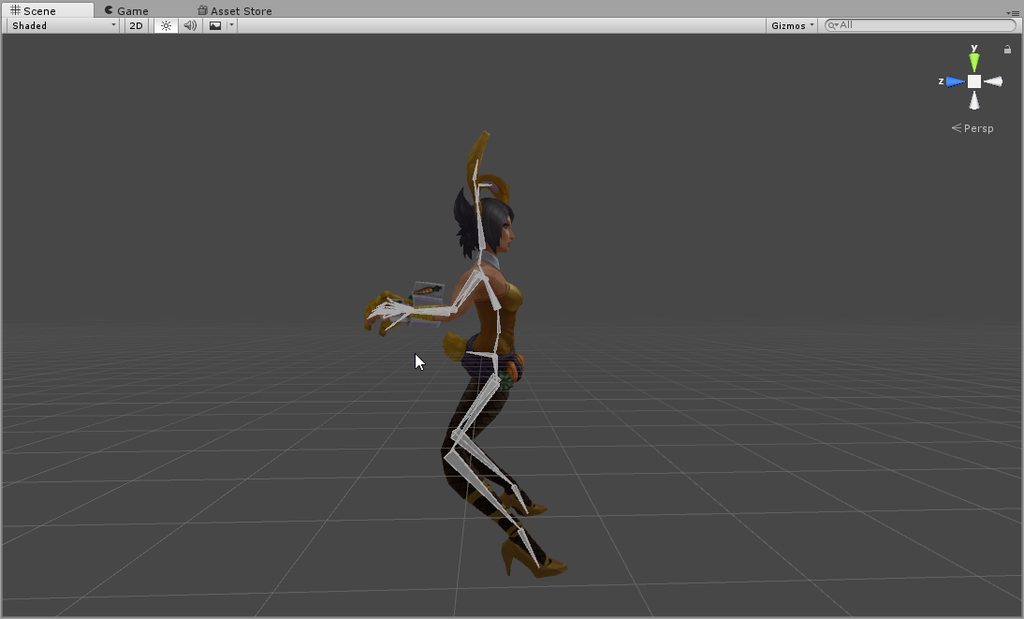
Hello, I rigged a model in unity and everything seems fine till i go to the muscles and settings tab. The arms and legs of the model are flipped backwards. Does anyone knows how to solve this issue?
 opal aurora
You rigged a model in... unity?
slate finch
i meant set up
opal aurora
Ah alright
slate finch
mb
opal aurora
It may be that your model has incorrect bone rolls, which then unity flips it "properly", messing up the mesh in the process
opal aurora
In blender, you need to go into edit mode on the bones, select them all and hit alt+r, that will set all the rolls to 0
Remember to reset the humanoid config, by simply changing the rig type to none, applying and then back to humanoid and apply
slate finch
Well, now it looks even more broken https://imgur.com/a/r43fV8J
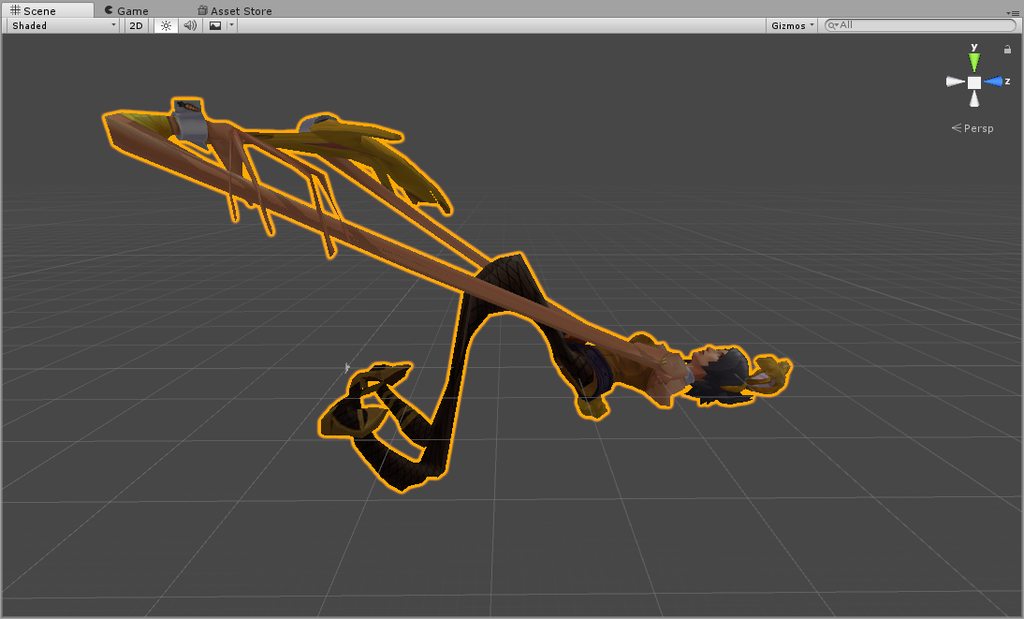
this is in Mapping https://imgur.com/a/cRw1aUk
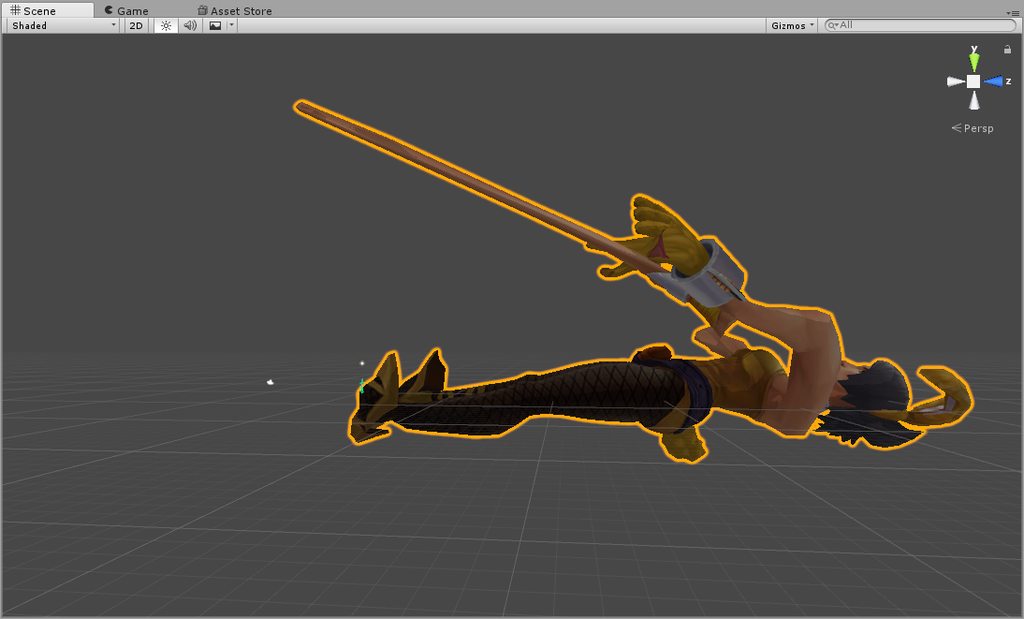
Now the bones are standing straight and the model is laying down https://imgur.com/a/3bfpkLS
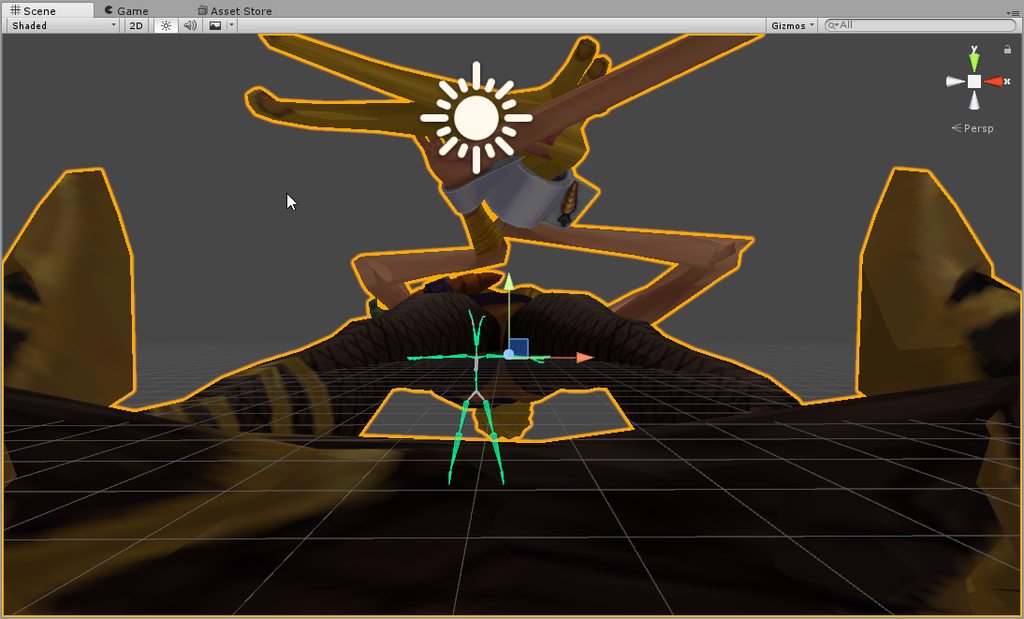
 summer bramble
rig it again with left and right on the actual left and right this time, looks like you messed up on that
 sleek isle
How can i fix my character to not act like Michael Jackson? (45 degree)
 restive flame
i am trying to do a head swop but for some reson it gos in to the gut of the other model i am doing this on blender
 abstract shore
Hi, I'm having a bit of an issue with an avatar I created. It's done but for some reason the legs keeps spreading out whenever I jump or look around to where they'd have to move and take the same spread position. Been trying to fix this for five days. Tried looking for fixes/solutions and nothing worked from the few solutions I've found. Any suggestions or help would be appreciated.
https://i.gyazo.com/a3a9d574adfc1e1871632e078ed35f40.mp4
summer bramble
has nothing to do with your size in game?
abstract shore
Nope. The avatar is a little over 6'6
 tardy harbor
Could anyone tell me how i can fix my finger tips? https://gyazo.com/37f81e8564e9d84252f825522c6c050c

 quasi mauve
im wondering
I added shoes to this model and i was wondering how I can like connect the bones?
slate finch
hay, for some reason when i connect these 2 bones it ends up connecting at the other end of the bone i want to connect. https://imgur.com/a/voVkxjB https://imgur.com/a/23cVwcx
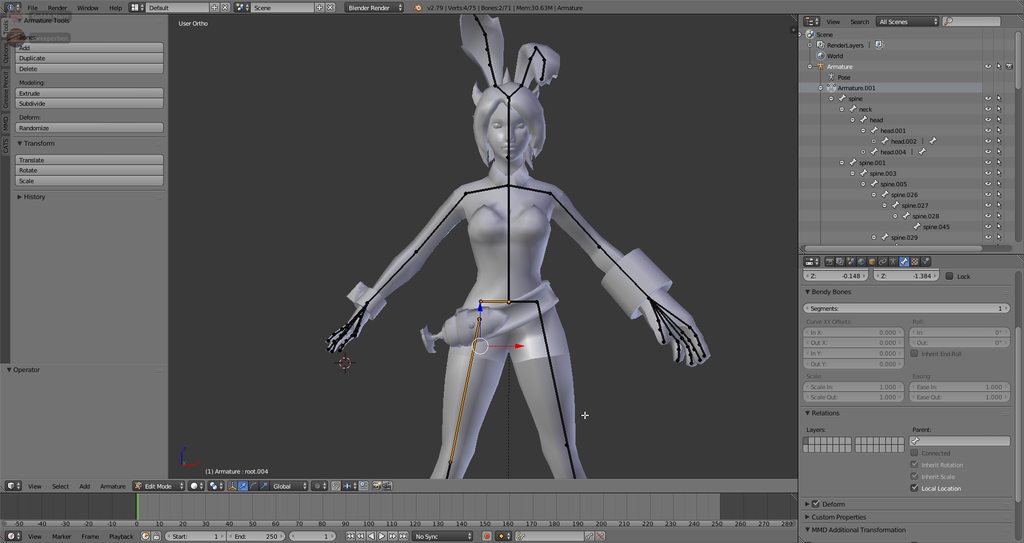
 slate finch
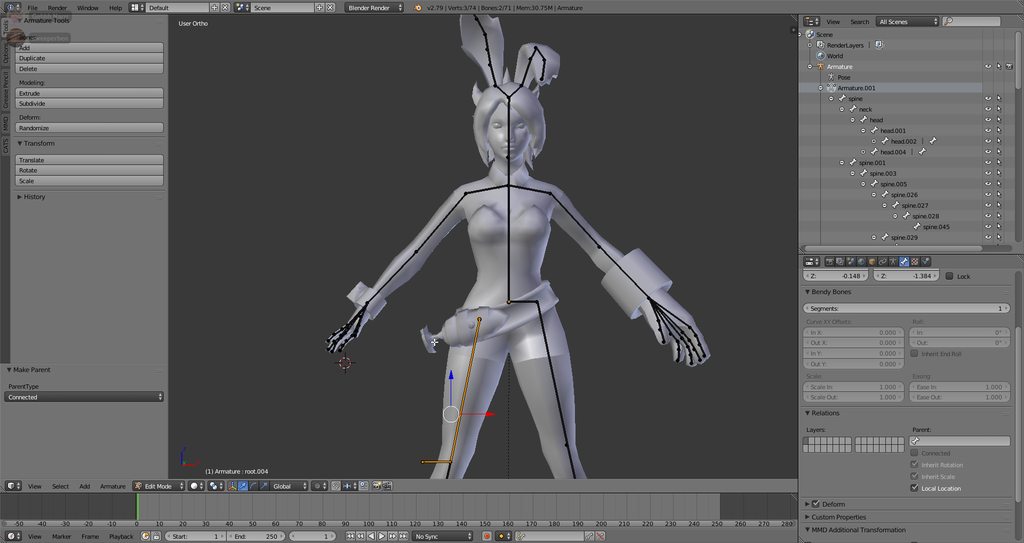
^anyway to fix
fading verge
@urban quest apply scale and rotation in blender and set origin
@slate finch open your bone inspector in blender and select the proper bone as the parent in edit mode
Or rotate the bone
slate finch
it is connected to the wrong part of the bone
fading verge
@abstract shore have you tried using miximo
abstract shore
@fading verge That's what I used to rig it. Somewhere along the way while I was editing the model something must have went wrong. I just started over and re-rigged it with miximo.
The legs were fixed but I had to redo the face visimes, fingers and a lot of other things. I just finished and am now uploading it into vrc again. Hopefully everything is fixed.
urban quest
@fading verge I figured out how to fix my issues last night, but thank you!
abstract shore
@fading verge Just tested the model in-game and it did it again..
I went into pose mode and the legs are positioned just like they'd be in the game when I jump.
https://orig00.deviantart.net/4ab9/f/2018/171/5/5/screencap_by_kingjion-dceypca.png
 crystal vector
@abstract shore Are there shapekeys moving the legs maybe?
abstract shore
@crystal vector I checked all my shapekeys and nothing looks like they're affecting the legs. Also when I try to fix the pose it keeps going back to the one before in my screenshot for some reason.
crystal vector
@abstract shore Maybe try to apply the transforms to the armature
slate finch
@fading verge it keeps connecting to the wrong end of the bone even if i change the parent
abstract shore
@crystal vector Okay so I set it back in the t-pose and did that and it didn't work. Cleared the transformations of the armature so that it's in the default t-pose and applied the pose and that didn't work either. After I fix the pose and export it to an fbx file for some reason it goes back into that pose specifically after I export it. 🤔
noble jetty
My hands are fucked up, I've tried rigging, weight painting, bone rotating and the hands won't work.
should I restart?
fluid zodiac
I would
I just usually throw humanIK on my models, then clean up with weight painting
unless you're a weightmap artist, weight painting significant parts for your rig can turn into a mess
noble jetty
oh
well the fingers and stuff were already weight painted
and in blender I can move the fingers in pose mode and they are perfectly normal
fluid zodiac
did you completely configure the avatar definition in Unity?
including finger proximal and intermediate
noble jetty
do you mean the bone rigging or something else that I do not know of because I am a noob


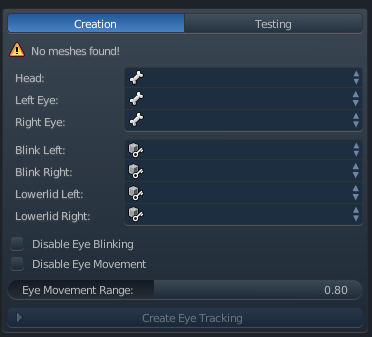


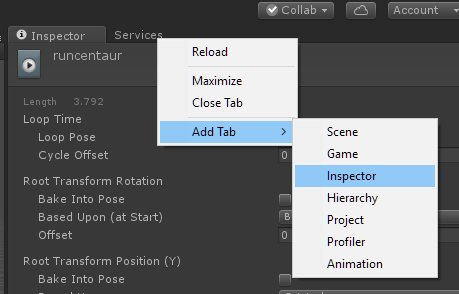


 noble jetty
yes, I completely configured it. @fluid zodiac
fluid zodiac
do you have a copy of motionbuilder?
unity and motionbuilder are like best buddies when it comes to animating/testing rigs
fluid zodiac
Download a free trial of Autodesk MotionBuilder 3D character animation and virtual production software.
in motionbuilder, you can also retarget mocap files onto your rig using humanik and it will transfer to unity as an animation
 finite forum
I did not know about this either, thanks
fluid zodiac
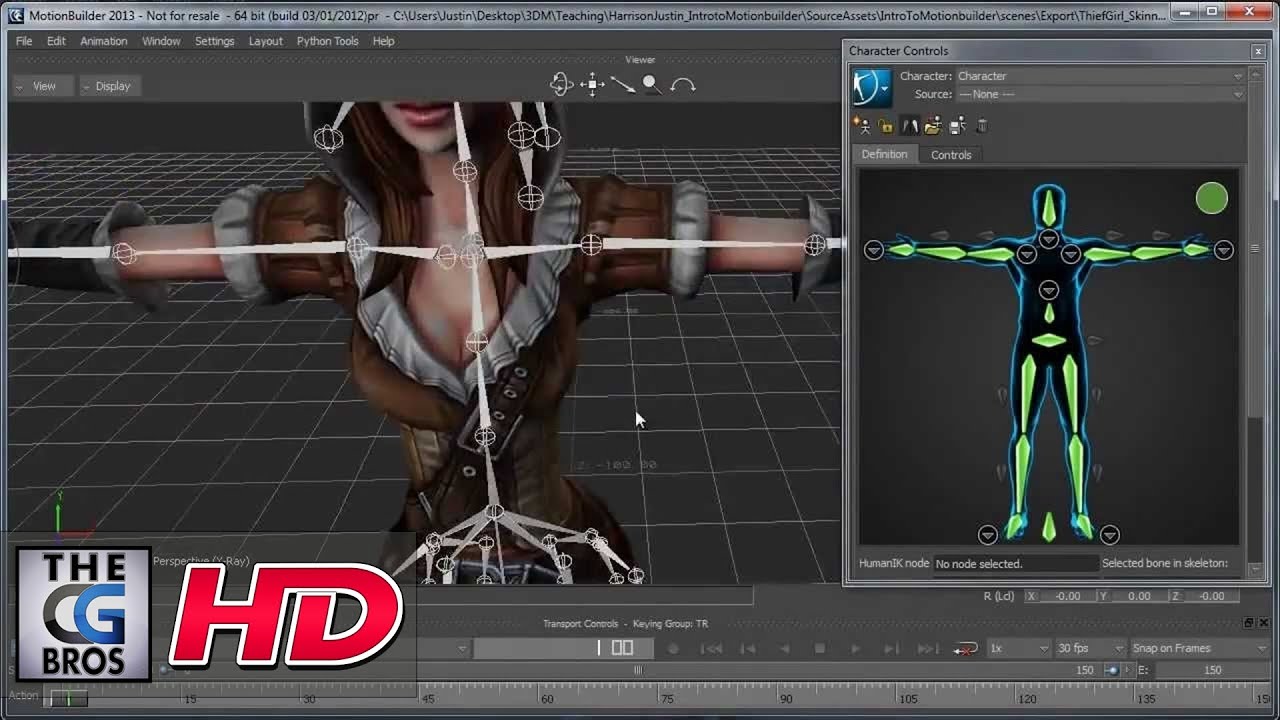
Check out this great MotionBuilder tutorial as it covers how to characterize a skeleton created by our good friends over at 3dmotive!. Some pretty cool tips ...
noble jetty
@fluid zodiac I do not understand how or why I use this
fluid zodiac
a benchmark