#visual-fx
1 messages · Page 21 of 1
Of course you can just use a mesh. It'll look crap but it'll be cheap
This example isn't from Unreal but it's the most recent waterfall I've made. It's using both mesh and particles. It's the bottom one in the video.

Here's a cinematic comparison of Endor from Battlefront 2015 vs Endor from Battlefront II 2017. Sunny Endor Mod By: Cosmic Dreams Download: https://discord.g...
does anyone know how to get visual effects or maybe a program that can make them because when i use the effects there 2d for some reason when you look down at them or from a angle it goes invisible because its so thin
maybe show a gif/video/image of what you're trying to do then we can see what you're trying to do
if you don't have particles set to "camera facing" you'll have that issue, but sometimes that's what you WANT - depends on situation
well i have a tank and i want it to shoot a big flame out of the end of it
just use a mix of Camera Facing + Velocity Facing particles
the camera facing stuff will fill in where the velocity stuff looks bad
you could even use ribbons
its annoying i want to try the tank out but i cant because the collision on it i dont understand
ribbons for the streamy bits and fire-clumps that lead the head
that's one way it could be done
have the fire clumps be camera facing
particle collision or?
no for my tank to be complex collision
what you set on the static mesh
because it keeps doing a capsule for some reason
oh um just go to the top of static mesh viewer where it says Collision
and click the various options
ye i can do that but when i try to do it to the actual tank skeletal mesh i select get collision from static mesh and it doesnt do anything it just keeps the capsule collision
it looks like from your screen that you're in a blueprint though, so it's possibly having its collision done with a different override
you'll probably need to go over like a full vehicle setup tutorial
since this is likely the tip of the iceberg so to speak
i think the other problems that will crop up will be even more troublesome
and i could lead you down terrible path if we just stop here
ya i think using a bunch of smaller collision shapes is more normal
complex collision on vehicle/character doesn't sound familiar
but what i don't understand is the person that made that buggy made it so its not a preview mesh but mine is a preview mesh as you can see in the tank picture
How to setup the art assets for a vehicle in Unreal Engine 4.
this part seems to cover the collision issues you're describing
and how to replace them
have physics got anything to do with collision?
usually each Skeletal Mesh has a "physics asset" that has its own specific collision
i'd just follow that doc there, it looks like how to do things right
it gets right to business
ok man thanks a lot man
i did it thanks so much man
i had to make a new physics asset and attach it to the tank
sweet! good work
been in this channel for the past couple days, there is a lot of good answers and stuff coming up, would be cool if they didnt get lost in the discord channel void
Anyone here that's got some expertise with True Sky? I've sent the devs over at Simul a mail regarding this issue already, but I was wondering if anyone could help me out with the godrays part of the plugin. Having a hard time setting up godrays that actually illuminate the cloud shadows, as shown in True Sky's set-up tutorial on Youtube. Could it be because I'm using the Free Trial and the effect is limited?
Got some better results with the godrays now - just gotta combine True Sky with Volumetric fog now for the foliage rays aswell.
ah yeah i used it a bit. it's pretty hard on performance
it's only acceptable if you have some sort of game that involves literally flying above the clouds
or if you don't mind taking a 10-30 fps hit on some user systems whenever they look up
maybe good for cinematics
Hmm yeah... I do get a good framerate when looking at the sky though, gotta profile it hehe
Got any tips on how to achieve good godrays? Im using Extinction and the Godrays sliders, along with the Haze density. The extinction adds some artifacts if the value is too high though
Im gonna have flying characters in my game so it's a definite win-win for me. Just gotta figure out how to make it look as nice as some screens I've seen, and the tutorial video (which gets nice looking rays out of the box, even though I followed step by step - that versions UI and functions is a bit outdated hehe)
honestly i couldn't get reasonably shaped clouds without seeing an FPS impact that was unacceptable. uninstalled and switched to the cheaper ultra dynamic sky
maybe it's better now? i was using it 2 years ago
but keep in mind, this was in a large, fully fleshed out open world survival game populated with foliage and the works
so it was easier to see FPS spikes
when you only have ONE thing in scene, that thing will often not do much to dent performance
no idea on god rays
I've got a 20x20km^2 map with dense foliage pretty much everywhere. Looking up at the sky, I get 120 FPS, but I'm on a 1080 TI, 32 rams etc. Functionality-wise it's improved a lot the last years apparently
Got something going, but the godrays are not accurate at all, and the shadows are too strong - finding it difficult to set a balance in the godrays.
Thanks 😃 The foliage billboards are pretty bad though haha, and quickly placed for profiling mainly. I think the godrays need more accuracy, so if I upped that somewhere the black shadows wouldnt look so pixelated
Is this for like an actual game or you are just doing it for fun
Making an RPG, but mainly for fun and as a hobby
@spare hare Yeah I'm very aware of that. The tree billboards got an issue where they dither and look absolutely horrible, and Im unable to find a solution. They flicker intensely when I move the camera (and when still), and look blurry as hell. The issue persists in Unlit mode aswell. Got some billboard work to do though, for sure
The water looks like a pile of concrete haha
How do you pass arbitrary data from Niagara to material?
nevermind, dynamic parameters work
Did anyone else get crashes when adding a niagara component to an actor and trying to compile?
Why would one change from cascade to Niagara?
@celest birch i would not use niagara for production yet
Ok
@celest birch i'm using it for some testing purposes, and because the system is a bit faster at runtime than cascade particles
@wanton vector looks cool man. once you fix the tree LODs it will look even better , i like the layout and mountains a lot
@celest birch Hey, that's nice to hear. Gotta fix up the tree LODs for sure!
did you use niagara in the fog stuff?
Nope, True Sky. Been playing around with it for the last two days, getting happy with the result so far.
When talking about tree LODs, I was wondering if anyone has any experience with this issue: tree leaves flicker when I move the camera - intensely. It looks like the issue is in the skylight's Cast Shadows, but then it persists in Unlit mode aswell. I need the Skylight to Cast Shadows to get proper lighting on the trees.

When I disable the Cast Shadow of the Skylight there's still a slight flicker.
hello
is it possible to import reflection maps (aka environment maps) to ue4
thx
Is your first name Atlassian?
sure
UE4.20より、アーリーアクセスとなったNiagaraのチュートリアルです。そのため、正式版では、動作が異なる可能性があります。 今回作成しているものは、SkeletalMesh_Aから、SkeletalMesh_BへのMorphを作成していま...
really great tutorial
was able to follow along even though not in english
Anyone been using global vector fields a lot? Is there a limit to the amount of GVFs that can be active at a time?
It was 4, wasn't it ?
Really? I have 15 that's working, but maybe they increased the number. If there's a limit then that would explain why my system is not working.
Anyone got any ideas why some Global Vector Fields would not be working? Here, I have a base class with a vector field component, values Intensity and Thoughness initially set to 0. https://media.giphy.com/media/pjYVrQnNvQBgqxbsDS/giphy.gif

Picture elements: blue arrows display the direction. When they are updated, the vector fields rotation and intensity and thoughness are set. The numbers displays each cells Intensity And Thoughness.
The yellow arrow (and the boxes) display the vector field rotations.
They do get updated with the correct values, but some are not responding.
Used to be 4, at least around 4.16ish
afaik 4 is a hardcoded limit
Well I had another test grid with more cells, and there 18 was working.
Note, that 4 is not a global limit, but a limit of 1 particle system being affected by a max of 4.
Oh. I guess I'm doing something here that just wouldn't work then.
I think I realized what the problem is. So the PS seems to only respond to the 4 first volumes within their bounds. And because the PS had bounds of -300 to 300, and my cells have a size of 100, most cells would be too far away from ever react with the 4 first volumes that "overlapped" them, as they were created.
So the particles a cell created, wouldn't react to that cells vector field volume. But then that means that the PS of a cell can only react to 4 out of 9 cells, including itself.. ..
Do you know if it will be the same for Niagara, or if that might change how many vector fields can affect a PS?
@harsh sentinel Niagara vector fields need some work before you can play around with them but I don't remember seeing any internal limitation on total numbers of fields sampled.
Sounds good. Was just messing with Niagara and couldn't get them to work. I'll just work on something else in the meantime then.
Anyone know why lights aren’t playing when spawning one of the Paragon emitters through BP, but the lights play fine when dragging the same emitter out into the world?
Tried fiddling with a bunch of quality settings etc but no luck
the BP might have some sort of "disable emitter" node planted in there or something so it doesn't go off all the time
ie - waits for right time
gonna have to scan through it carefully to find it
@indigo jolt it’s a blank new BP with no other logic, will have a scan through nonetheless thanks!

^ posted a tutorial on how to create this type of stuff in my channel. Shadertoy -> Niagara
trippy and cool!
All, I am using an asset that produces this weird effect: https://gyazo.com/2910b34f9e9561e56ae6c44cfac9c979

the standard sun with the same foliage does not have this effect.
anyone know what I should be looking at?
look into the Directional Light of your scene
There you will find something like "Light Shaft Occlusion" turn it on/off depending on what you want
thank you raildex will try this asap
@honest sable subscribed 😃
@spare hare that doesn't change anything unfortunately
I'm trying to make an fx with cascade to be a square shaped emitter that is on the ground to show that space is interactive (examples could be a mission start/end, or a zone that a player has to capture)
I've been trying to create this using a beam and then setting locations from one beam to another. What's the appropriate method to do this?
How its going so far... Not so good.
@restive birch I think better to
create box geometry, but if you want beam set double sided material on beam, and turn off orientation to camera
I figured if I start with a particle system I can expand upon it later to something really special
How do I do both of those things? I tried to find the options in the cascade editor and I couldn't find either
for orientation try to look in emitter setting Screen Alignment. for double side look to root nose in material editor
I think huge part of learning niagara is understanding the inputs/outputs and how you can use nodes like lerp to switch to completely different outputs, thus giving a different sim. I barely understand this myself, but think mastering this is key.
Thanks! I am on 4.20 so I could do it on niagra but other than epics tutorials there isn't too many tutorials. Thanks for the help
hey guys! random vfx question, how would i go about making an effect like this https://www.youtube.com/watch?v=G-B1xUe9TK4 but where the panning texture doesn't appear on the whole mesh when it first appears but "travels" from the beginning of the mesh to the end... not familiar with vfx terminology, i'm not sure how else i can explain it, i've got the texture, i can make the mesh, but i don't know how i'd make it work in cascade, what i'm looking for is more of a projectile effect than a beam effect but with the same look, something like the effect at 1:15 in this reel https://www.youtube.com/watch?v=PcTs-ssSlWo (just the projectiles, not the on collision effect), that's the basic idea, i know what i've explained very poorly what i'm trying to make but i hope somebody understands :p trying to get into vfx, please excuse my noobiness

Just showing it off because I couldnt make it during a livestream. Might be doing something cool later.
wow i'm surprised you actually understood what i was trying to achieve with my terrible description 😄 but that's exactly what i was looking for, thanks very much, i think i got it (also, big fan of your work)
Hehe, I speak fluent VFXlish. It's mostly handsignals and noises, so yours was easy
haha, yeah surprisingly i think it would've been easier for me to explain with handsignals ^^
can we start using #ue4niagara on twitter? i'd love to see a nice stream of niagara content from around the world
💯
In need of a tech art council, gents. I want to expand ocean shader to support foam streaking under strong wind. Earlier I just used a texture, but it does not cut it anymore.

Desired: https://prnt.sc/kjh0gs

Current state of foam simulation: https://prnt.sc/kjgtis
Up to this point, I've tried overlaying a noise texture over the foam simulation, and at texels, where certain threshold was achieved, greatly increasing blur kernel along the wind direction.
Not feasible. Primary, because the noise, that drives origin of the streaks just does not correlate with existing blobs of foam.
Anyone got ideas on the subject ?
jesus
good luck finding anyone with more expertise at water than yourself. Anyone from Rockstar here???
@analog onyx What is the wind effect simulation looking like? 🤔
@obtuse seal Applicable to the foam, foam is advected in direction of the wind, dissipated in space, and reduced in intensity with time.
this is how foam data looks:
How is the initial foam introduced?
Using surface vertical acceleration as criteria.
vert acceleration map is multiplied by a factor and frame time and added to foam accumulation map.
And the issue arises from irregular foam movement/streaking due to noise. What is the noise generated/sampled from? I'm also curious what it looks like at the current stage *in motion.
I've rolled back that commit. It looks anything, but viable, in its previous state. Noise is a just sparse white pixels on black background. First of all, the issue is that streak is too straight and regular. Perphas blur direction can be modulated with vector noise, but the resolution of foam sim is kinda not friendly towards. But the biggest issue, those streaks are not appearing, where they should be, that is trailing a breaking crest. And yet the most challenging part. In reality, all the small foam patches get clumped up into large streaks, hence you are not seeing high whitecap coverage during storm. This kinda implies, that I need foam intensity transfered from smaller cascades into larger cascades, and that is a problem, because a smaller cascade is not guaranteed to tile integer number of times within larger cascade.
Clearly you have some familiarity with the issue already. I'll try some ideas of mine on the side and see whether or not they work. 🤔
So far, the ideas revolve around advecting foam quantity, in a such way that each texel quantity would be transferred to the nearest texel in the direction, perpendicular to the wind, towards origin of the streak, and then the result would be advected with the wind direction. But... how to define that texel, that would be the origin of a streak? Like, in a group of texels, how to define initial advection direction to form the streak ?
Hey Guys! Have been trying out Niagara and noticed that in the animation sequence, there is no notification for triggering Niagara Particle Systems. (Currently there is only support for Cascade) I understand that Niagara is currently just in Beta but was wondering if anyone knows if this feature has an ETA on it?
Our game teams have gotten away from using anim notifies directly and instead use gameplay cues almost exclusively
That will be our first path
Thanks for the direction! Will look into it.
hello 😃 i have a something like going on, but its a bit more basic question only due to me not knowing where to find any documentation for niagara ... its not clear to me how that i can link the position of a point attractor force to a position from a blueprint in worldspace, im trying to get particles to move from my spawned blueprint to another blueprintactor in the world
the feel when u found it and want to test it and crash unreal engine with it
probably is because this is not a fresh project (small tough) that was ported from 4.18 but the engine crashes every time i start it with a niagara system
after having a blunt i realised it was because i made it a gpu system , its actually an improvement over when i last tried then then the editor crashed when i tried switching it to gpu now only when i press play with gpu thats progress keep it up 😄 am excited for the niagara gpu systems to be more resilient
the more i am able to use it , the more impressed i am
Hey guys, wondering if what i am trying to do here should work? i have mesh init/update in stack and when i turn off add velocity module i can lerp between the above values just fine.
when i keep add velocity, i get the result on the left.
tried moving add velocity above and below update mesh module
FU
lerp curve needed to be normalize loop age
works now
hahaha
🦆
This is cool! @jagged crane
Thanks! Gonna use this basic concept for a bunch of effects (spawning, teleporting, etc)
Are the particles moving the mesh verteicies?
that is my next test
to see if i can assign a skeletal mesh in a moving pawn
to see if the particles will lerp to the world position
Hey guys. Im having some problems with applying material to a skeletal mesh I imported. I have absolutely no experience with UVs, textures, materials and that side of UE. If anyone can give some input on this that would be 🙏 🙏
https://answers.unrealengine.com/questions/819026/material-not-applying-properly-to-skeletal-mesh.html
this is some basic stuff - might be more of a thing for Graphics channel, but regardless i'd share screens of the following: Material nodes AND Skeletal Mesh window with the material input slots shown so we know how many material slots there are and if they're all being used or not
my first impression based on what i'm seeing is - your material is working fine, but it's missing Emissive inputs AND it's missing Roughness inputs
and possibly metallic inputs as well
ie - there's likely a texture or textures that should be getting plugged into those slots. It could be that the Roughness, Metallic, and Emissive are all packed into ONE texture in the R, G, and B channels and you'd have to look at that texture to find out which is which - then plug them in accordingly - R output on texture to one, G to another, B to another
you're also missing your Normal map it appears
i assume based on what i'm seeing that you've taken ONE texture map (color) and plugged it into the Color input and done nothing else with material
@quick silo see above
well ive done all my animations and mesh editing in Blender. Ive been looking around the last hour and it might have something to do with the UV maps and Normals exporting form blender
which if I have to redo the Normal maps on this mesh. Im completely devastated and screwed with this
i just dont have the time to do that right now
I think adding those 2 katanas and the sai completely jumbled the normal map and the old ones from the original mesh arent matching up properly
that second picture is the material that was meant for his arms
Element 1 in his mesh
hopefully this was what you were asking for
I think i just figured it out 😵
I had more than 1 UV map on the mesh in Blender. The one called UVDiffuse was the original and i deleted all others except that
@quick silo this is a layered material?
I dont really know honestly. Im a total noob when it comes to the Material system in UE. Im a gameplay/animation guy
I figured it out though. It had to do with settings in Blender. It wasnt a UE thing
Thanks for the help guys
I see materials combined into one. I'm curious about that ha
yeah its layered then. Theres different metals combined and it has a lighting effect that pulses by itself
that tall node in the middle even says "10 layer blend" or something l ike that
On mobile so hard to see but awesome
Have been thinking about making one but my several materials are super light
@wanton cairn You can download that asset (TwinBlast paragon asset) to check out how the materials are laid out
They use material layers (material functions) and blend them nicely in master shaders
Nice to keep layers clean and easy to work with
And is nice to have the "infinite" resolution it brings. It does significantly raise the cost of the materials though vs a traditional texturing approach that brings in a few final maps
Ah mkay thx
holy lord that's 10 material slots
no wait 16
so now that we know what you have, i think this is not just a "kinda complicated character material". this appears to literally be the MOST complicated character material - a full tech demo of layered materials
something so new that the lowest number of people possible will even be familiar with it
yeah I got it from the paragon assets on the marketplace. Twin Blast.
Top notch work for sure
i think your best bet is going to be finding an "intact" version of the asset, like perhaps open a 2nd project with the original asset in there unchanged or something
trying to re-create things from scratch on this would be devastatingly difficult for an amateur with materials and actually a high challenge even for advanced users
if you have 2 monitors and 2 projects - one with the original asset in its native state, then you might be able to cherry-pick the differences
that's best case scenario imo
I literally fixed it though. I had 1 too many UV channels on the mesh in blender.
thanks so much for the responses and input though. much appreciated
Can any one help me with this issue please, when the emitter is 1st moved it seems to spawn to much and I'm not to sure how to fix this issue? I have tried a few things which none worked. https://i.gyazo.com/d147173a40ee012eb12599cbddd40c14.mp4
Hi.
Is there any shaders / vfx programmers or artists?
I need such effect and I will pay for the work - https://dropmefiles.com/HEohz
Please dm me.
I uploaded files on DropMeFiles
Share your pictures, send large videos, exchange music or transfer big files. No registration required. Unlimited upload/download speed.
@frigid fable Check your spawn settings
@wanton cairn what would i be looking for?
Check to see if your emitter is bursting or not. Check the spawn rate.
Hey guys, how do i get a particle effect to play at the location of an object when a bullet collides with it? I've been trying to use event hit to no avail.
@wanton cairn none of these seem to do anything, changing the Unit Scalar change how long it does it for but thats about it https://i.gyazo.com/12a174894940dddcd671b117cdb297c5.png

@lofty gate use the hit location
Hmmm
@frigid fable doesn't seem to be working
then you mite be spawning it wrong debug the location using a draw debugger
The emitter, or the bullet?
the hit location so the bullet
dont need spawn per unit if its playing on hit
just needs a burst if its a few particles, or play for a few moments trough making sure the required module loops once for an amount of time.
spawn on hit
@fossil swan That screen shot i posted there is for my emitter I'm using for a trail for a plane, so it does spawn per unit but the issue is at the start it spawns more for some reason.


hmm, should work just fine O_o
yeah I can't work it out heres the issue https://i.gyazo.com/b6ab8a3aecfd3a1e5cd933906718494c.png
what's the lifetime of the emitter?
its set on 60 as the trail needs to last awhile
you are hitting the limit of amount spawned probably
i'd suggest to lower lifetime for a test for now see if that changes anything
Ill test it out thanks for the help
you might want to change it to gpu particles, which has a much higher spawn limit, or use trails for the long lines and just have a few smoke plumes burst at the beginning
Thanks thats a good idea
Wasnt there in 4.19 a TAA update where one can change the upsampling and sharpness?
@frigid fable I would recommend doing this kind of effect as a material instead of particles. For a detail way up in the sky you’re paying a premium to render hundreds or thousands of particles.
On top of the cpu cost to spawn / update them
ya i'd also do this as like a ribbon but set tessellation to the lowest possible amount so it's not too pricey
or even just a single quad dragging behind would work if you had the cloud puffs handled in World Position
really long one
So, Ive been working on a way to make a wormhole vortex, example: doctor whos tardis traveling space effect thing, and i want to make a hollow stream of that, how would u guys recommend going about that 🤔 should i take a big cylinder into cascade and make the effects? or is there an easier way? im not a big artist but i can do some things here and there 😛
You could generate a cylinder along a spline, then use textures and particles for the effects @silver pendant
uh cylinder with no horizontal edges along sides, grab one end of it, scale it down to a pin-prick, then add edge loops, then grab all verts except the biggest circle and rotate 15 degrees, deselect the 2nd biggest circle....rotate it all another 15 degrees....deselect the 3rd biggest cicle, rotate another 15 degrees
and keep going
until you have plenty of spiral action built into the UVs
and a nice funnel shape
then just add a panning material in unreal and you're done
that's rather pretty
how does that look in material nodes?
i'm not even sure what that math means
is that like a custom node with that math or what?
Nah, I just have a more HLSL background and tend to state things with it
easier to do text than take a screenshot
The actual bubble/vortex patter is way more complex
But ultimately all you really do is use a texture sample
No picture 😦
Huh?
The first or second one?
the second
@acoustic widget yup that works
wew!
Its funny, i click on it it shows, but otherwise i get a turd image
Anyway, this is the simplest set up Ive seen for a spiral material
Strange
Yeah
it also doesn't have vertex resolution problems like the traditional spiral UVs
for 3 instructions more per pixel it is pretty handy
Thats damn awesome, I'll have to borrow and use this
@terse wraith Youd probably use a post processing effect
Yeah, I did that one minute ago 😂
NP
hello,
has anyone tried burst spawn in niagara?
it seems to produce no particles for me (while the spawn-rate produces visible particles)
thanks
hey peeps
I want to make a metaballs effect in UE4
Announce Post: https://forums.unrealengine.com/showthread.php?105615 In this week's live stream Ryan Brucks and Sam Deiter will cover the various uses of the...
there is this video where they demonstrate how to create the effect as a material, but the shape and interactionsa re kinda limited
anyone know if it is possible to do using Niagara or the procedural mesh tools?
@surreal willow If you want to write some C++ code you could probably do it. There's no out of the box solution with the default tools though.
hmm ok
hey i'm new here. is this a board where i can ask about something?
check the channels, there is always one related to your catagory
each channel also has a description in case you arent sure
well other people use this for asking about the topic so i guess that means yes
this is my problem
the white line in the middle is the direct line
the beam texture is rotating around the wrong point
the emitter is placed where the white line is
might be a pivot offset, cant tell really
where can i find the pivot offset option?
if its a mesh, do it in your 3d program, if its a beam check innitial location, pivot offset, or any other location related module.
I've looked online and in the editer I can't find pivot offset options. Where are the pivot offset options in the editer? Also I think It's a material or texture issue, not a blueprint issue.
i looked back over a lot of stuff and noticed this
the source is not in the middle of the texture. how do i fix that?
can anyone here confirm or deny my bias against Light Functions form a performance standpoint?
i'm trying to figure out if a VERY LARGE decal might actually be done cheaper as a light function
is this plausible or fantasy?
A light function adds a fairly flat instruction cost + overhead to a light's normal pixel cost
dbuffer decals add draw calls too, plus they wrote to multiple buffers
generally cheaper to use a light function, but they have a lot of limitations
try both ways and profile
Light function is considerably slower than a decal.
Anyone aware of a solution to kill particles with an orthographic camera?? thanks in advance
kill on collision
there is a killbox/kill plane module thing, but not sure how that works in ortho
uhh let me check
hmm cant really see it luos
i cant use the collision module
on scene depth
not sure you can use anything collision related stuff properly in ortho. but there is a kill module, which lets you set a box or planearea that when touched kills the particle
¯_(ツ)_/¯
😃 Thanks anyway
hey i know whats wrong on my end i just don't know how to fix it. i've tried pivot offset and it doesn't work.
@frank epoch whats wrong on your end? still talking about that laser right?
ya
the problem is the origin axis is in the wrong place and i cant move it.
pivot offdet does not work with beams
is there any reason it needs to be a beam?
is there another way the do a laser effect?
unless very specific, i'd just use a mesh plane or three
and use a laser-like material
ok ill look into mesh emitters. its just this is my first time working with particles so im not all caught up on the ins and outs
no worries.
i do have some tutorials for meshes & vfx but they are somewhat lengthy
i finally got it to work! i used a new material and now its centered correctly! 😄
does anyone know how to get the noise on a beam to scale properly so that its the same regardless of the length

@dim musk You need to change the noise wavelength based on the length of the beam through a particle parameter
which particle parameter should i set? i cant find anything that affects the frequency that can also be set as a parameter
You want the "Noise Scale" and "Noise Range Scale" Change those to parameters instead of constants and drive those values based on the length of the beam ie: Beamlength/NoiseScale
Hi guys i just getting acquanted with the particle system. My question is this effect or something howachivable easily. A beam emitter with specific curves or i dont know what other solution is the best. Thanks for helping
Anyone know how they added this emitter sinewave parameter?
https://i.imgur.com/vMIZaRc.png

There's a "Sine" Niagara Dynamic Input script, but it doesn't show up when I search for it in the Add New Module to "Emitter Update" search box on a NEW emitter or system. It does, however, show up when I search for it in the same box on the Simple_GPU_System "Emitter Update" search box.
@calm plinth i don't see an actual "attack" coming out of that gun. those are sort of the passive "pre-states" that would be on gun to complement the main attack sorta like a muzzle flash. to do those rings you'd just use mesh emitters with panning materials
i came to this solution. thank you for confirming my idea
nice! good job
btw if those rings never change scale, then i'd go even more simple and literally drag and drop the ring meshes into the character BP and have them parented to the gun
and let the animating materials do the movement
there's a small but real cost to simply having emitters exist
thanks
@fresh harness The "Sine" dynamic input outputs a float, so first you need to select "Add New Parameter -> Float" then you can click the drop-down arrow at the right and select "Sine"
@calm plinth is use a cylinder plane mesh with a emissive map on it.
hi guys
I have an emitter with limited emitter duration
it loops only one and spawns particles
I would like the particles to have less start alpha colour if they are spawned later
like if the emitter duration is 1 sec then particle spawned at start has 1 alpha color, particle spawned at 0.5 has 0.5 start alpha
is there a way to do this?
change the innitial color alpha to a constant curve and tweak it there.
at 0 with a value of 1 it starts with alpha 1
and afaik its not 0-1 but just time
so if at two seconds you want to start with alpha 0
end the curve at 2 seconds with a value of 0
ok thx, problem was I thought 0-1 scales to emitter duration
now it works but I still have troubles combining it with a colour over life
is it possible that colour over life rewrites initial colour?
yup
afaik if innitial color is 1/1/1 you can adjust it with color over life, or scale color over life
ok, I try scale color over life thx
it scales the innitial color, so it might need some thorrough tweaking to get right
glad it worked :)
thanks for letting me know, I am always a bit worried that the pack might not be the most useful for people, as it contains quite a chaotic amount of random things.
do you recognise your flower? 😄
barely hehe, good work
thx I learnt a lot from that pack already :D
the blue laser is based on Thisle Beam, the end stuff is one of the sepals iirc
I like that sorta stuff, outside of the box thinking to get what you want/need
Guys I want to create a type of ghost that looks like a glitch. I want to create a sphere that moves around so that players can see the glitch effect outside of the volume. Any pointers on how I might go about this?
Enjoy the videos and music you love, upload original content, and share it all with friends, family, and the world on YouTube.
I am just about to give a first try to Niagara, I believe it will be a good time. Curious though, would this be possible to recreate?
yeah. the default emitter with spawn burst and a mesh cube renderer will get you close to that
Was testing similar effect in Cascade, but I had an issue with the actual movement of the particles.
How does it work in Niagara, any improvements in terms of that? Like an animation or movement to tell particle where should it go.
you can write scripts to control particles explicitly. or apply forces for dynamics
Does someone know how to correct normals on a curved spline? Im using worldaligned texturecoordinates (planar from above) to make sure my dirt road spline is aligned to the terrain layer beneath it, but the normals seem to vary along the curvature of the spline. The track normal itself uses uv projection for the spline and does not show the same artefact.
Starting out with Niagara too. Having trouble passing info from code to the System.
I'm thinking I'm just messing up the namespaces. I'm trying to use this node, but I don't think it's affecting the named variable at all
okay. never mind. it's been working all along, but I was setting the parameters on ym test object on BeginPlay and expecting to see the results in the Editor Window without hitting play. /facepalm
anyone know what the #include is to get access to Niagara classes in C++? I can't find it anywhere online... there doesn't seem to be C++ API pages for Niagara yet
There's not a single header include, but Engine\Plugins\FX\Niagara\Source\Niagara\Classes\NiagaraSystem.h is a good header to start with
Hmm... Not working. It can't find it.
Engine/Plugins doesn't seem to be part of the included directories in the VC Project... I wonder if that would fix it?
It seems to be able to find the files using a relative path like this
#include "../../../Engine/Plugins/FX/Niagara/Source/Niagara/Classes/NiagaraSystem.h"
but then it can't find the Generated.h file afterwards.
Solved it - Gotta add Niagara to the modules in the project's Build.cs first... then you can #include anything from the Niagara plugin Source folder... so just going #include "Niagara/Classes/NiagaraSystem.h" works now.
Hey, how can I change the Size By Life of a sprite in Niagara?
Set Specific Parameter -> Particles.SpriteSize in Particle Update script
add a Vector2D from Curve dynamic input using the dropdown to the right of the value editor
animate the curve as you wish
it should auto-populate with the Particles.NormalizedAge value (0 to 1 over lifetime of particle)
Ahh okay, thank you 😃
i'm struggling to make a simple particle system of dust around a central point (helicopter landing)
anyone has a good pointer to start from?
@delicate depot in the next engine version release we have some modules for sprite scaling included by default. For now, just set spritesize directly like Shaun recommended!
okay, nice to know, thanks 😄

@bright panther truesky?
Its my own custom system
For now its just a series of planes with a custom remap function for mapping noise to my desired cloud heights. @barren raven
Very nice stuff, looks great for a bunch of planes!
Lots of fiddling with parameters to get it right. I'd like to do raymarched ones next or something .We'll see 😃
And thanks 😃
@bright panther looks üretty good 😃
How can I degrease the speed? 🤔
https://i.gyazo.com/5c978ec418130d65ccc5fab1b2aface4.gif

I think with the gravity or force or something but I don't know where I can change it
lower innitial velocity, add drag
Can you use Post Process to single out and blur just one object in a scene?
general Niagara question: has anyone been able to get a Dynamic Input script to work? my UE won’t compile any, even if I open a built-in one and try to compile it without changes
hey gus
what is the general opinion on using niagara for production?
is there a thread you can recommend that has latest info?
@fickle helm niagara isn't meant for production yet to my knowledge.
Alright cheers guys
How do you like Niagara so far? Couldn't find much chat about it on the forums
@fossil swan the velocity is set correctly and the drag don´t helpt 😦
I haven't tried it yet but there is tons of discussion about it here and another discord that shall not be named.
oh a secret sauce discord? hehe
Yeah, which is this discord? If its full only with professionals I am very very interested! 😄
Ever heard of VFX conspiracy?
Hmm, I am not sure. What is it about this conspiracy?
Hmm, what about pm then? XD
^
@cold sorrel I sent you a pm. 😉
Can i get a pm with the name too :)?
Really cool flames, russus. Like the shape and color
Thanks 😃
I might be biased, but directing fellow vfx people to the vfx channel is not something I'd be against :p
You are an admin there...
Ping me and I'll invite you. Now, let's talk about something a bit further from the rules edge.
and here :p
yo, do you happen to know how to parse a customexpression function in material editor to another customexpression as an input node in 4.20?
it worked in earlier versions, now shader thinks that every input of custom expression is a variable
legal-ish workaround :p
https://realtimevfx.com/
search > discord > first post > scroll down

:p
also a great website for vfx resources, discussions, tips, tricks
thank you luos, much appreciated 😃
Is anyone aware of a way to use a world aligned mask to control particle emission? Looking at masking out the high points in my ocean and using that mask to spawn splash particles. Niagara preferably.
https://www.youtube.com/watch?v=GA9fQIgNJ8I Brand new tutorial for brute force Volumetrics that I've created 😃

--Links in Description-- In this tutorial, we go over how to create brute force volumetrics by layering meshes on top of one another. I'm sure this has been ...
ok the first 5 seconds looking good... i think i watch that ~ thanks for sharing!
hope i learn something new. thanks!~
I'm certain you will enjoy it! @fading pike
this is cool, it reminds me of how they did the moss for example in Ryse Son of Rome with the layers
I think they did something similar with the fur in shadow of the colossus - neat idea using a similar approach for volumetric fog, I might try it out myself! 😃
Sounds like it could be useful for something like fur.
ya it's a neat fog technique - you could probably take it to the next level by influencing it by the Distance Fields of other objects
so it kinda "bumps up" against boxes
hey gang, i have a cascade GPU question
i've got an emitter shooting some particles into an "energy shield" that is a piece of geometry with a material on it
i want the shield to 'stop' (collide) with the particles, and it does when i put an opaque material (defaultwhite for example) on it
but when i put a cool translucent 'energy' material on it, the particles now pass through....how can i get the shield to stop the particles even WITH the translucent (alpha <> 1) materials on there?
You can't.
GPU particles collide with the depth buffer
translucent objects don't write to it
any known workaround?
Seems distance field collision is a thing these days
thanks Glad
Is it possible to use size by speed but in relation to the emitters speed rather than the particles'?
never tried but dont think so, though you can perhaps set on of the size modules their distribution to use blueprints, and control their size trough that + emitter speed
@pliant carbon
Any way of excluding weapons in FPS from depth of field effect? I would like to blur very close objects - like the walls if player approaches them - but it also blurs weapons 😦
@prime moth It's common in FPS to render the weapon with it's own camera. That way you can also change FOV and things to make it "look better" without messing with the rest of the game.
is that possible in UE4 now? last i read, a long time ago, what that was not supported because of deferred rendering or something
was*
@pliant carbon speaking about my answer?
nah sorry was answering Arcade
Ah, ok. Not sure to be honest. You're probably right. Too bad.
thanks @fossil swan thats probably what ill have to do
you should be able to draw weapons seperately, its done loads
cant say ive ever seen it done in ue4
Ah, you are correct. It's not supported, because it's custom to only some games.
people discussed it loads here
Cool. I'll shut up then. Nothing to see here. 😄
cant remember how or what though, something with custom render pass/custom depth
Hey guys
Anybody know if this city bending effect is possible in stock UE4

The Crew 2 Gameplay Walkthrough Part 1 of the Crew 2 Story Campaign including a Review, Intro and Story Mission 1 for PS4 Pro, Xbox One X and PC. My The Crew...
not easily, and not accurately and easily
wow thats crazy, never seen it before, could it be implemented as vertex shader?
oh god that's nuts.....i can only assume they're doing some sort of sampling from more than 1 camera and blending the visuals somehow
that's my first inclination......use a big curved piece of geometry like a huge Half Pipe and draw a Render Target from another camera on it
then have it soft blend with flat surface....
if this is dumbest way to do it hmmm probably smartest way to do it is "get programmer to figure it out in custom game engine" is probably how they did it
Here's a unity asset which mentions a mesh shader: https://forum.unity.com/threads/curved-world-old-screen-space-curvature-shader.281186/
Unity Forum
Curved World - Screen Space Curvature Shader
[MEDIA]
Purchase Curved World on the Asset Store
Curved World offers effect known as
• Horizon...
there is a shader like that on the mp, but its crap (to saythe least) since shadows are still where they would be if the curve was not applied.
so floating shadows and what not
if its done in screenspace thats interesting
@bright panther i made something like that but my material domain was volume had a flowmap go into albedo, inversed it and pluggged that into extinction... or something along those lines
prolly watch the vid later just scrolled trough it a bit for now 😛
I'd like to see your version @tardy dome 😉
Hello there, I am trying to build something, with custom textures but when I start and click on play it makes a weird flickering effect. Anybody any ideas?

it was more a fire smoke kinda thing, it looked kinda cool, posted some pics but sequencer didnt record it correctly so no movin stuff
it makes movin godrays, pretty dope
Possible bug in 4.20 UE Can another fx td confirm? Movement tolerance within spawn per unit not functioning.
Hey dogs
i has probs
Trying out my new local volumetric fog particle sys

Seems that not many people know that UE4 supports not only global but also local volumetric Fog. So I am showing in this tutorial video 1 of 3 how to create ...
based on above tutorial
Im getting a slightly different result though im following his tut to a T
which is, that im setting my Lifetime of particle sys to 1 Float Uniform as mentioned
but my fog sphere will then appear and disappear
so I tried 0 and then im getting a stable sphere
that works fairly well
wondering the difference?
If I have a texture object, how can I mask out all colors that are below a certain brightness value? I'd like to pump that masked texture object into a blur function to create a sort-of fake bloom effect for my UI.
actually, I just realized. there's a custom HLSL node...
anyway, anyone know what would be wrong with this code?
float3 CurColor=0;
float2 NewUV = UV;
int i=0;
float StepSize = Distance / (int) DistanceSteps;
float CurDistance=0;
float2 CurOffset=0;
float SubOffset = 0;
float TwoPi = 6.283185;
float accumdist=0;

if (DistanceSteps < 1)
{
    return Texture2DSample(Tex,TexSampler,UV);
}
else
{
    if (Texture2DSample(Tex,TexSampler,UV) < BloomThreshold)
    {
        return 0;
    }

    while ( i < (int) DistanceSteps)
    {
        CurDistance += StepSize;
        for (int j = 0; j < (int) RadialSteps; j++)
        {
            SubOffset +=1;
            CurOffset.x = cos(TwoPi*(SubOffset / RadialSteps));
            CurOffset.y = sin(TwoPi*(SubOffset / RadialSteps));
            NewUV.x = UV.x + CurOffset.x * CurDistance;
            NewUV.y = UV.y + CurOffset.y * CurDistance;
            float distpow = pow(CurDistance, KernelPower);
            CurColor += Texture2DSample(Tex,TexSampler,NewUV)*distpow;
            accumdist += distpow;
        }
        SubOffset +=RadialOffset;
        i++;
    }
    CurColor = CurColor;
    CurColor /=accumdist;
    return CurColor;
}
It's the code for SpiralBlur_Texture, just taking in an extra BloomThreshold parameter (float3), and returning black if the texture sample returns a color below the threshold
I have the threshold set to pure black - so nothing should be below the threshold
but, even then, this code is returning black for everything
I presume it's a syntax error somewhere, because even with DistanceSteps equal to 0 (which makes it just return the original color), it's still going black on me
Niagara question: Is it possible to spawn particles at mesh vertexes that have been displaced using displacement / world position offset?
@ocean hedge do you guys have in plans exposing control over particle spawning ? Ie, I'd like to have emitter around (for bullet tracers) and tell it to spawn particle when I shoot (and before spawning set paremeters like direction and velocity).
Hi can you guys recommend any reading materials / examples, if I want to make dynamic low / high frequency wave pattern like the top-left?
@winged imp Simulating Ocean Surfaces by Jerry Tessendorf
@analog onyx looks awesome! thanks. I'm getting right into it
instant result! sweeeeeeet
UE4 have some way to get the shadows channel only or the scene color without shadows on post process ?
Maybe with the "Scene texture" node 🤔
there is a "scene color" node... i don't know how it work but it could be a solution
scene color can't be used on post process
and diffuse color just return the diffuse of the whole scene
textures
when bored: https://www.youtube.com/watch?v=wV_NJDVnGRc

just goofing off after I explained how to start orbit halfway down the life of a particle.
nice! 😄
Do particles that are completely masked out (invisible, masked rendering mode) still cost? Looking to mask splash particles to high points in my ocean. Can't seem to mask their emission in any way, so thought I'd just mask the particles in the material in world space instead, but it tanks performance as I expected 😦
Damn, okay. Doesn't seem to be an easy way around this issue then haha 😛
how are they emitted? per high point?
My intention would be to have a world-aligned mask that takes my wave displacement, finds anything above a certain height, and emits particles only in those areas. The wave displacement is applied to the particles too, so their vertical position matches the waves.
The frequency of emission doesn't have to be specifically one particle per high point, just a certain set density
how many emitters are active at one time?
At the minute I just have one attached to the player which covers a certain radius around the player, so it's just the one particle system
you could have one with a close radius with more particles (gpu i hope) one that covers a medium radius minus close radius with less particles, and perhaps one that does the far range with only a handful of particles
Ahh okay, and then just mask them in the material as before?
no, dont emit them entirely.
masking does not reduce its costs
but having control over how many you spawn depending on radius already helps
Ahh okay, I guess the issue I'm struggling here is how to determine where to emit particles based on that original mask 😃
though this is a very specific thing, never tried it before. I am not sure if I'd use one emitter, or one per wave in a certain radius around player
or ask a coder to come up with a better cheaper solution
I'll have a go at something like this, thanks Luos 😃
@fleet vault Collapse them to degenerates in vertex shader.
Oh interesting, that seems so obvious now that you mention it!
Not free, but better, than taking overdraw
I suppose they wouldn't be completely cost-less, but much better than overdraw
yeah
I'll try that out and report back 😄
Might as well bypass particles all together and do splashes on gpu only.
Mostly depends on if you need them sorted or no.
Not really, they're unlit at the minute, and I'm thinking I'll use dithering to fake translucency
depth tested is fine too. You might use a grid of instanced meshes, where each instance is collapsed and expanded only when whatever map you use to control emission dictates it.
Won't be particles technically
That's smart, thanks for the help! 😃
How's the foam simulation going? Saw your stuff a few days back, looks awesome!
guys, probably simple question:
emitter bumps with may stay in world despite never spawning particles after burst spawning is over. error, where to look to fix this?
Thanks. I've put it on hold. Haven't found reasonable way to simulate streaks without several extra passes. Working on wakes and interaction atm.
Ahh cool 😄
are you destroying it trough bp?
let me check..
yes?
no other ways of destroying at the moment
what else could possibly check?
there is a destroy node in bp, but I often let my client their coder/blueprint person take care of that backend stuff
well if I'll add destroy for spawned emitter, it will be destroyed immidiately, as far as I understand
or I need to add a timer to delay the destroy
but.. it's weird that it doesn't destroys on it's own
i generally add a timer and kill it off
lol gotta be careful with that auto destroy, if it's part of the wrong blueprint it'll destroy more than just particle system
i've had that checked on a "spawn particle emitter" node in a blueprint - it caused entire CHARACTER to get destroyed too
hi, so i'm running into a small issue and i'm not sure how to fix it
i have a cable component that's meant to be hooked up to a projectile fired from a gun
the cable component goes crazy for a few frames though
after the gun is fired
is there a way of fixing that?
it looks bad in general
that seems to suggest to not use a cable component...interesting
might be what i wind up using. thanks!
hope it helps!
ye i think so ^^
the only thing is that the cable mesh would need to have collision
and i'm not sure immediately how to make that happen

Impact player on the ribbons
Looks like a VR app?
Hey guys, I've been really enjoying Niagara so far.
Is there a way to generate a Niagara system and populate it with Emitters at runtime?
Ideally I want to also populate the emitters with modules at runtime as well
I can't find a node to create a Niagara system at runtime or a node to add an emitter to an existing system at runtime
Does that functionality exist or is it on the roadmap?
@thorn apex Creating emitters at runtime would not be feasible as the shaders that drive them are compiled from the modules they include. Generating Systems at runtime is a different question, it would require that there not be any interdependence of the included Emitters and that Systems don't have any precompile requirements, I'll look into it.
Having looked at it, I don't think runtime generation of Systems is plausible as Systems contain their own scripts that trickle down data to included Emitters.
The RealTimeVFX forum monthly sketch for September is themed "Shield" - anyone else thinking of taking part? 😃

Real Time VFX
A fun effect with a lot of room to play with different styles and ways of executing, we’re excited to bring this months next Sketch. The Challenge: (create an effect based on the following): “Shield” Submitting: Create a new topic in the “Events > 16 - Shield” c...
Has anyone ran into an issue getting the particle position at the end of a loop or on death to generate an event in niagara. I cant find one like on cascade where you just specify on death as the event type.
Hey guys, anyone know what's causing this flame's smoke to change color, and how do I prevent it?

if I had to guess I'd say the billboards of the particles are facing downwards the more you look up, so they face away from your light and become darker
yup Seirei gt that right. One solution is simply to have your smoke particles using Unlit Materials - if you need do use smoke indoors vs outdoors have 2 variants
a darker one for indoors that is only lit up orange from fire and goes black. a lighter one for outdoors that acts like it's getting lit by sun
look at a lot of the smoke/dust stuff in Grand Theft Auto 5 - most of it is Unlit
i think they made the right call
i think they may have also used some sort of material parameter collection type deal wired into materials and getting data from daytime
that's the smartest, most efficient method
I thought about suggesting unit materials, but I'm not an expert and wasn't sure if it's the right call, good to know that it was tough. 😅
mmmh. anyone got an idea why my depth buffer's messed up in 4.20?
only happens after entering VR, and only since the 4.20 release build. I'm worried it's a hardware issue.

Has anyone figured out how to change in real time skeletal mesh in Niagara?
@green harbor it should do it on it's own. I've seen a lot of people trying to change the mesh to not visible under render settings, but all you need is a fully transparent glass material and your mesh will update the particles on every tick
hm... what I'm trying to achieve is to use the same NS on different skeletal meshes. Right now I have to create multiple the same exact NS, instead of changing parameter
I tried to place it to User parameters, but I can't figure out if I have an access to change it in realtime
@viral wadi Well, this is interesting
Materials are unable to be used in both Niagara and Cascade
Surprised nobody else has run into this
It's cascade
i didnt dump either of em O_o
you said it was buggy XD
it is buggy
iunno, havent seen the issue before.
It happens pretty immediately for me, any material used by a cascade particle sys will be unable to render correctly if also compiled with niagara shaders
@green harbor https://niagara-vfx.herokuapp.com/meshes-and-skinned-mesh-data-interfaces-source-data/
Niagara Blog
Both regular and skinned mesh data interfaces have three ways to set the source mesh data that they use for their operations. Option 1: Auto-discover based on attachment While this isn't previewable in the Niagara system or emitter editor, this is the simplest path at runtim...
It's not production ready yet, but it will be. If you dump every feature that's not perfect immediately, boy gamedevelopment is going to be a nasty surprise for you.
well dumping doesnt mean killing
i dumped it
but i will pick it up once people said it was cool
I haven't touched it yet as it doesn't serve a purpose for me yet. That'll change.
I prefer to touch it once its more stable and a tad more finalized.
And, I prefer to have more learning resources since I am a slow learner.
@boreal echo I'm having trouble repro'ing your issue with materials in cascade and Niagara in 4.21. We do this precise thing all the time in our test content. Can you DM me some assets showing off the problem?
@boreal echo I fixed a bunch of issues with material nodes and Niagara which could cause the inconsistency you're seeing since using some of them (e.g. relative time) would cause the vertex factory shader to fail to compile. This was compounded by the fact that a bug in the shader compiler was not printing relevant information to the log. In the mean time can you double check the output log for material warnings? Also if you have time time/disk space you could try this in the Dev-Niagara stream which has the material node fixes
It's not a huge issue, I just unchecked the niagara usage and it rendered fine. More curious than anything if this is more widespread
Ah, so looks like it was the ParticleRelativeTime node in my material
ok great, thanks for investigating that for us
Frank has fixes for those issues forthcoming in 4.21
yeah, it was what frank predicted
the shader compile error reporting was accidentally broken in 4.20
those two problems combined together led to the confusion

朝起きた瞬間思いついたものを大体形にしてみたけど「んんー何だこれ?」って感じ
#Houdini #HFXJP #3DCG https://t.co/fAMDEkmY5y
Check out our backend - we won't judge.
@fossil swan that houdini thing is actually really easy to do
i think i could do myself without much issue. There is a node that can "grow" a selection, you could use that to mark stuff at the start
the rest is turning mesh into volumes, wich is emitting particles from the mesh and then booleaning that mesh out (or just planar cut)
Don't use the grow selection hda for something like that. It's superhacky and slow.
Just do an infection or even a straight up pointbased noise
@cold sorrel also possible to do something like iterate over the neighbours of each pixel, and grab the max value
ah so thats what you meant with infection lol
@ocean hedge , thanks! that worked! Would be better to have it changed dynamically though (may be in 4.21?)
Only because that's what it is 😃
@green harbor I think that it will change if you change what the attachment is
or may be have a check box to obtain mesh dynamically overwriting default mesh setting. Like that we don't need to set/clear a default mesh when we look into effect in the editor.
yeah I think that is a good idea
it makes that feature more discoverable
there was a mention earlier about cooked content not working in Niagara... does anyone have example art they can send my way? we routinely do this as part of our testing on consoles, so I'm surprised to hear that
packaging my project. It will take few hours though (compiling from sources)
@obtuse seal re: NiagaraEmitters, what do you think about the feasibility of adding pre-defined Emitters to pre-defined systems at runtime?
Say the base system asset exists already, could you spawn multiple referrences of it and add different emitters to each of them?
Also how / is it possible to customize the static mesh in the mesh renderer at runtime?
@ocean hedge, I did a shipping build - whatever effect I was working on works fine.
@thorn apex we are likely going to split out the compiled emitter and system scripts in the future, which would bring us closer to what you want. Do you have a motivating use case?
It is not possible to customize the static mesh at runtime currently. All of this data is shared across all instances.
in 4.19 I need to span cascade over three monitors to see all the emitters since the horizontal slider is broken :/

株式会社アプリボット制作「神式一閃 カムライトライブ」のゲーム内エフェクト動画です。弊社で制作を担当させて頂いたエフェクトの一部を許可を頂き公開させて頂きました。 (注:画面はエフェクト...
I'm trying to make a black color in Niagara - all pixels come out transparent. If I put any other values than 0,0,0 I see it, but 0,0,0 makes it totally transparent, even though my alpha is 1. Any ideas, @ocean hedge ?
is it an additive material?
it is default sprite material
it is additive
ok, fixed! Thanks!
@ocean hedge BTW, I noticed, that in my set up where I have a skeletal mesh set to none and after changing parameters (in particular color curve), in order to run PIE I have to close Niagara editor window (to stop spamming in the log windows that mesh is not valid). After few iterations like that, the editor and PIE become very slow. I have to restart the editor.
ok, we can look into that
I have a recursive event (in Niagara) where I would like to keep track of the emitter in the hierarchy (the level). Does anyone have any suggestions on how to do this?
with POM ?
@ocean hedge Regarding use-case for being able to dynamically add emitters to a Niagara system, we're building a "particle lab" which lets you drag and drop different particle systems into a single system, and the system is populated with a 20+ live particle params which change on every tick which are then used to animate the system. In the process of playing there are potentially hundreds of systems in the world which are each being pushed those particle params on tick, causing potentially thousands of calls of the Set Particle Param method per frame. Currently the only way to manage the situation is by creating our own "system" wrapper which contains several Niagara systems which each contain just one emitter which are are all being pushed the same params with a single method. It would be optimal to be able to use the native Niagara system architecture to do this without needing to roll our own wrapper.
Regarding changing static meshes at runtime, within the particle lab system we want to be able to cross-pollinate meshes from other particles it's mixed with, so that you could mix a strawberry particle system and a kiwi particle system, and the kiwi particle system inherets and strawberry mesh, and the strawberry particle system inherets the kiwi mesh, for instance, inverting the behaviors / meshes and child emitters of each one respectively.
Be being able to change meshes at runtime and dynamically generate the systems based on component emitters would make it much more efficient, and allow for the desired behaviors. If it requires compiling the emitters / systems at runtime after editing them, that's understandable, it doesn't need to change all the time, just when you mix new ones together.
That crack is a stencil, but it could be done with POM
@celest birch you can make some quite complex decals with POM
If it's geometry then you might be able to tinker with the depth offset in the material. basically have the mesh above ground and then just push it back so that it's depth is just above it. But of the top of my head I already could think of a few limitations and issues with that approach
but that follow up tweet is where stuff gets interesting: https://twitter.com/godsgreg/status/1028024282155241475

And just to make things trickier, I can actually put geometry inside the crack. And here you can see that I`m not panning the whole floor, haha :D https://t.co/30tUgpz0UN
Likes
134
It's a stencil. That's what they do.
Well, me thinks using stencil is a bit of a luxury for such effects, unless it is a hero cutscene.
does anyone know if its possible to dissolve everything in a sphere collision around you
like this door but instead its EVERYthing
make a dissolve material function and plug it into every shader?
at least that's how I did it in a past project
but if there's a more efficient way I'm all ears
I don't know how to post on the chanel for looking for talent. If someone could help me that would be awesome.
check pinned messages for instructions.
#looking-for-talent @hollow crypt
haha makes sense. Sorry @mortal lily
np 😄
*bending
XD

Keith Guerrette advised on learning materials for VFX production and gathered a large list of awesome artists who you can get useful tips and inspiration from!
3 of the guys roaming here
just shows that there arent many really active on social media/chat tools :p
Hey I know those people!
if you combine all their powers you get captain kapewpewpew
More like Capatin Micheal Bay ;p

How do you set emitter time directly through blueprint ?
woo
Do beam emitters respond to lifetime? In other words can I use color over lifetime on a beam emitter and have it die like a standard emitter say after 1 or 2 seconds because I've been trying for way too long. This beam just won't die.
I'm prepared to do it in the blueprint but I feel like that's a little messy since the modules already exists the beam just doesn't seem to respond to them
¯_(ツ)_/¯
Any idea if there's a way to make particles less visible in a dark environment?

The room here is almost pitch black but the mist particles are completely visible even with the lights off
@tender sentinel are they unlit? perhaps blend mode additive or modulate would fix the issue?

The content of Luos in the UE4 marketplace: https://www.unrealengine.com/marketplace/profile/Luos Infernium: https://store.steampowered.com/app/789950/INFERN...
he has made the game by himself
even on switch and ps4
the game is guetto as hell, he has so many cheap tricks to get a decent result with minimum effort
for example, the enemies are using the mannequin skeleton and default mannequin animations XD
if it works, it works
yup
that makes the channel and his stuff fun to watch
its the only way you can do a game like that with such a limited manpower
be smart instead of getting more art/etc
yea, I am trying to make a big game with very limited resources so I am spending quite a long time designing methods on how to reuse as much as possible, without it all looking the same.
with some bought assets as you can tell by the incoherence in art tho 😛 But yeah not much else you can do as mostly single dev.
Does anyone have any idea why Niagara's emitter is not rendering with Sim Target set to GPU Compute sim ?
In CPU Sim it shows the fx just fine
but when I switch to GPU it doesn't show anything
It actually says simulation invalid
It seems Skeletal Mesh are not compartible with GPU sim
I now have a new problem when trying out Niagara. The Spawn System (regardless of attached or at location) always place the system at 0-0-0
all, in my game the footsteps are an important part of the game since they allow to track down players. however, for obvious reasons i cannot simply create decals like there’s no tomorrow
so i was thinking to have decal actors that have an overlapping sphere component: when entered they become visible, when exited invisible
this is a mp so a quick computation is 30 steps x minute x 12 players = 360 a minute
on normal scenarios
can easily double if everyone just runs like crazy
... can this system work?
Hey guys! Have a question about Niagara. Anyone knows how realised LODs in Niagara? (Level of details) In Cascade we must create some LODs for each emitter and tweak distance, but how to setup it in Niagara?
using a local aligned kill plane, but for some reason it doesnt work when the effect is placed and rotated
(cascade)
@buoyant arch make sure you have a System Location module in your stack to spawn where the system is at. Skeletal meshes are not yet supported on the GPU.
@vivid nebula scalability is still something we are working on, ideally you will drive performance via Niagara parameter collections and scaling up/down the features rather than explicitly creating different versions of the system
@ocean hedge Thx
@ocean hedge How do I add a new module into the stack? I was going through all the + icon and couldn't find the System Location module mentioned. Thanks in advance!
Ooh I found it
in the Particle Spawn
Hmm, it's now spawn somewhere else now. I will do some print out on the niagara actor location
The location of the spawned niagara actor is way off from what I'm specifying in the input node.
^ above is my blueprint code to spawn a system and attach it into my mesh @ocean hedge
output on screen:
Thanks in advance!
looks like you are doing a double translation
if it is attached to the mesh, it will inherit it's transforms since the mesh is the new parent
you don't also need to set its transform to the mesh transform
@ocean hedge I found the problem. It's in my module script where I used Get Tri Position instead of Get Tri Position WS
Now it's working
Thanks so much for the help
Is there a way to use a Niagara trail effect in an animation as a notify state? 🤔
Cuz currently you can only use cascade 😭
i'd kill for muuuuch more control over niagara than cascade currently has in persona
heey
how does one not render VFX as long as the player doesnt see it?
talking about VFX inside a room
this is the default behavior, except when your particle bounding box is slightly bigger than your visuals
@golden hamlet
not in this case, its behind walls inside a room, standing a bit further from the room results in lag
So it does render it
@celest jasper
or it compuets it i guess?
can you make a screenshot of your bounds in the level you are talking about?
because occlusion culling is enabled by default and should work
@golden hamlet
we are using the default flame vfx from ue4 as testing, we are going to implement our own, so i tried the bound scale in the standard settings here
Early wip for the RealtimeVFX monthly sketch: https://www.youtube.com/watch?v=opfIEi0GzDg

did anyone mess with epics realistic character hair shader?
my shaders comes up very bright
and shiny
why are none of these working?
or any form of collision on the other vfx even tough the vfx is clearly destroyed by a blocking volume, but no overlap or hit event on that object is triggered
what..
Do the particles have a trigger with collide all on? It needs something to use to trigger itself.
But you have a blueprint. In the editor for the particles blueprint add a trigger and then base your print strings off that trigger instead of the particle itself.

Hey guys. Just started toying with Niagara. I'm looking to add some sort of Wind Effector to all my particle systems. The wind value would be set with a blueprint. Currently I'm feeding all my Niagara particle system the wind value through blueprint (via Set Niagara Variable) but I'm hoping to bypass blueprints entirely. Ideally I'd like a way to get this variable directly via a Niagara module or something like that (kinda like materials accessing global variables via material collections). Is it possible? Thanks
well.. I kinda missed Add New > FX > Niagara Parameter Collection lol. Sounds like exactly what I need x_x
@pale ivy that's exactly what I was going to suggest
@small bolt animation binding not yet supported
@fossil swan what kind of things would you want to drive in Niagara through persona?
@ocean hedge I don't know about Yoeri, but having access to animation curves for use in Niagara would be awesome
niagara parameter collection? is that...a collection of niagara parameters? bulk set?
Just like material parameter collections
Properties that are set once and accessible anywhere
is Niagara going to work on Android in 4.21 ?
globals. got it. thx
@ocean hedge basically any value you could adjust in blueprint, but trough persona.
spawnrate, color, location, as much as possible.
materials can somewhat be controlled trough graph/anim curves (which still works tedious and occasionally borks) but the more control we could get in persona the better.
i.e. I have an impact effect which is always identical but its color, size, lifetime depend on its usage.
atm I can convolutely set the color trough a graph in persona, but thats it. having direct access to whatever niagara has for variables/parameters would open up a lot of possibilities and increases workflow quite a bit
@pseudo skiff we're still looking into it, lots of last minute Vulkan changes to take into account
if I may ask @ocean hedge what has been the most tedious part of getting niagara up to snuff?
@fossil swan honestly trying to decide what parts of cascade to carry onward and which ones should die in a fire. Cascade has 10+ years of feature development put into it and some features are buggy/not well defined/have a lot of innate tribal knowledge needed to use properly. Given the structure of Niagara, we need to effectively re-implement anything that we want to carry forwards, which is both good and bad. Good in that we revisit the features and can try and make them work better / be more flexible/ etc, but bad in the sense that there's just a mammoth amount of interactions and features to rework.
I bet, the people who went trough the cascade part of the source code told me a lot of features where unfinished, taken out, are outdated, or just very convoluted in their workings.
I'm sure you & the team will find a good solution for it all though 😃
the nice thing about Niagara is that even if we make mistakes, you guys won't be so beholden to us to add functionality. It should really enable far more creativity in the future.
yea, thats an aspect I really like, no more need for weird workarounds.. or well.. they'd still be considered workarounds
but in this case, probably much more reusable and reliable hehe
Hey guys, is there a way to assign material to mesh particle emitter with blueprints in 4.19?
I'm not 100% sure, but Set Material on the particle system component with the ID as it shows up in the material list of the component details should work

yes @hushed vortex i have both a trigger on the thing thats hit, the particle and the emitter, no triggering at all possible
seems at its bugged in 4.20 or im doing something wrong, but i have recreated the problem in a blank project as well
doesnt seem to be working for me at all
@round fog Are you going to do a tutorial on that effect? Are you using the system or the old? Looks very cool!
There are several tutorials explaining how it's done out there already
@brazen galleon no tutorial, but probably a breakdown when it's finished
And this is all still with Cascade
how do I make my Particles spawn instantly at the same time ?
This here but I need them to spawn at the same time

Ive messed with the Spawn tab but get no results of improvement.
Use burst instead of spawn rate
I.e. add an entry to the burst list, and put however many you want spawned in there
In the spawn module
@round fog Thanks man 😃
@round fog I would love to see the breakdown ❤
Hey guys! Have a question about Niagara. How to add random image changes to sprite particles?
use a uniform dynamic input in your particle update script to select from the subuv index every frame
@ocean hedge thx ill try
@round fog Yeah ithat would be great, it looks to me like you are using some of the samethings you do when creating a rain effect, but I am not a VFX artist or how to make good pro effects.

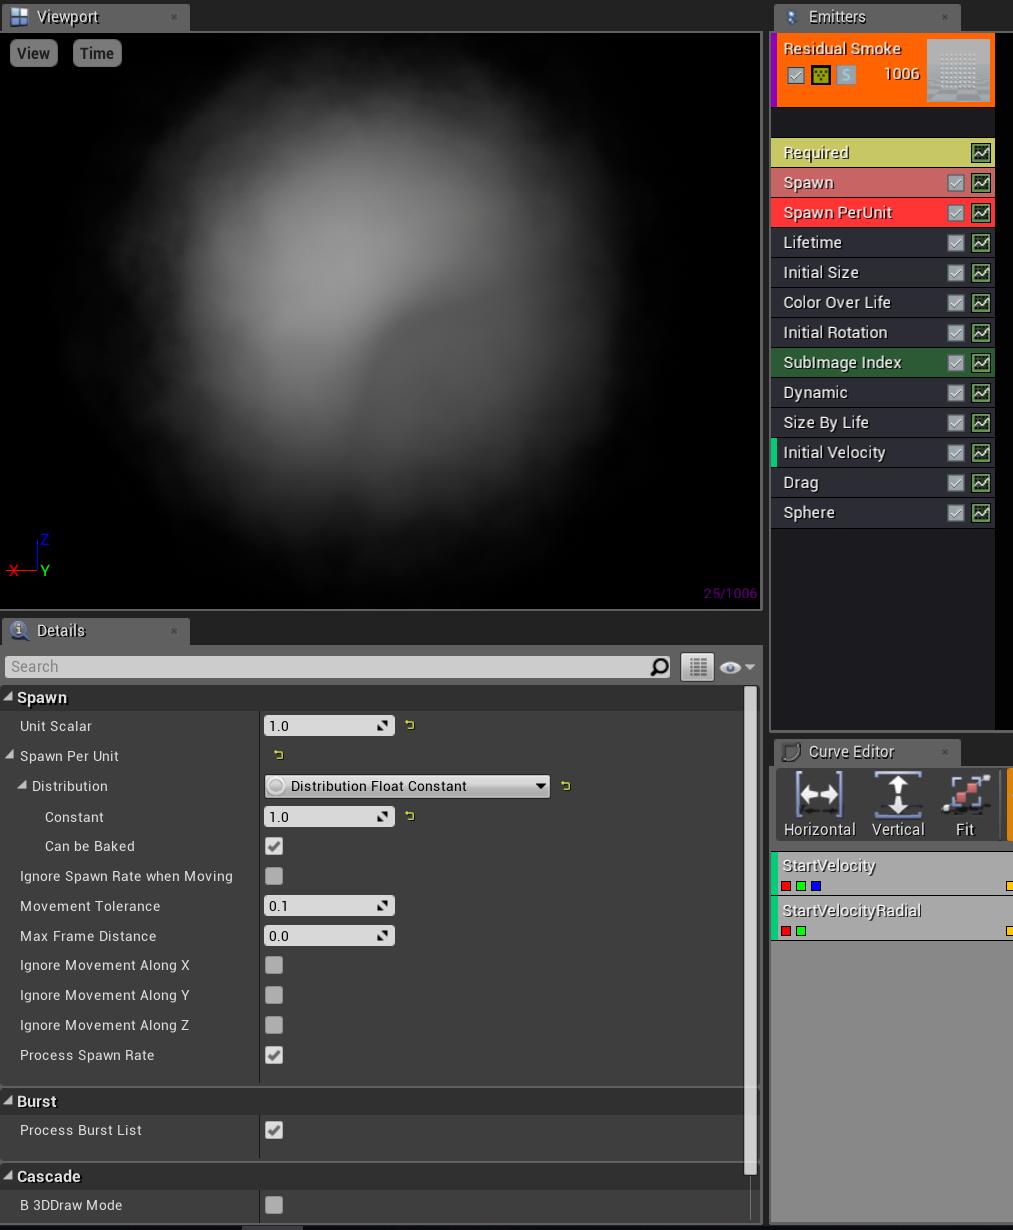
@golden hamlet definitely odd. Did you say it was with niagra? Because im currently triggering particle effects in 4.20 with the normal editor.
@round fog are you using Render Target for that shield stuff?
Wild guess, it's this method: https://www.youtube.com/watch?v=hQeJETEUzE4

Force field and an impact effect tutorial on the force field in ue4. Basically whenever we hit the forcefield with a projectile it will shake , create a hots...
clicking!
The endresult of the tutorial is horrible but it does show the impactlocation ripple stuff. I did the same a few months back. Using the ripple for vertex position offset makes for awesome bubbleshield behaviours.
ah world position on a sphere mask getting data from the blueprint
that's kinda neat
hmmm i currently use a system that does full body hit-reactions to character skins....takes ages to compile the material function, but maybe it would be worth adding this....kinda wary about how that might affect shader costs by tacking this on top
it's likely cheaper and visually better looking than spawning decals on characters, which i rarely do
@cold sorrel haven't seen that one yet, will check it out! What I'm doing is using particle events to spawn individual mesh particles at the impacts using the same mesh as the shield shape, and then offsetting them in the vertex shader to put them back where they should be. Ripple then via standard time/location mask shenanigans
ya i'm still kinda confused how the mesh particles would work on the character mesh
like are you spawning an entire character mesh each time with a world-position-parameter determining hit location in the material on it?
That technique in the video looks way too convoluted... Can't have sound atm, so just skimmed it, but is that spawning an emitter for every impact?
no, that video is just updating an animating sphere mask that's built into the original mesh
so wherever you hit, the sphere mask moves
is it?
But it means you can only have one impact at a time
no
i mean your technique looks awesome, i just can't tell how expensive yours is
Well, one or N fixed amount of concurrent impacts
wait, Glad you just said "no" how could it do more than one impact at a time?
watch the tutorial
hmmm i need to stop skimming i guess
N fixed numbers
to be honest it may not have been the right tutorial but you can feed a few in
Will have to do when I'm back at a PC and not in the room with a sleeping person ;) I'll do a breakdown of mine when it's finished, but in terms of cost, it's one mesh particle per impact, only one single emitter for all the impacts
Planning to optimize it using vertex collapsing
yeah i want to see how you got the mesh particle to sort of "wrap" around the character mesh like that
not just a depth-fade check right?
I mean, you already have the mesh
I have a shield mesh, which is based on the character mesh, pushed and retopoed
That's the mesh for the mesh particle
It's a good technique. I just didn't expect it 😃
well i'm going to stay riveted to this topic honestly
it's pretty valuable stuff
thanks for sharing
Hehe, hopefully all will be clearer when I've made a breakdown afterwards
This part to me is not that exciting because I've kind of done it before, but the things I want to learn are more in the area of aesthetics, timing, etc
ya that's hard stuff to get right. i usually get timing best when i isolate out color and fancy shader work, and i can tell aesthetics can be improved if i try painting over a screenshot of my own work
but still, i don't always follow those steps 😦
ya sometimes i just like staring at something for 5 hours as it goes on repeat, and just tweaking over and over
i dunno if that's stupid or not
maybe i just like doing that
It's your inner art director trying to micromanage your inner artist :p
Yeah, that is kinda one of approaches that gives you technically N scaling.
Can't wait to see it on a spaceship
The only problem with this technique is that you have to pay for N* the shader cost for the hit effect for the whole character
how do i spawn a rain particle effect in the whole level?
@hushed vortex Yes, i have activated actor collison and properly as the picture above showed. Then i have all the possible hit events on both the particle emitter inside the blueprint and the other blueprint that it hits. There is no trigger what so ever anywhere EXPECT that the particle destroy it self. I have on destroy, hit anything possible and i get no respons what so ever on any events
Anyone knows of a possibility to keep particles orientation after driving a VF through it?
right, so damage display system
widgets, or particles with material instances
I would imagine particles would be cheaper
I guess rendering text to material isn't exactly cheap either
afaik, fortnite uses meshes
🤔