#visual-fx
1 messages · Page 15 of 1
I had a grass material instance which I had used to play around with the dividing number two days ago. It was way too high. Working now! 😃
Awesome 😃
To make the render target show a wider area, I just increase it's values right? And those values I multiply to get the scene ortho width?
To increase the area, you need to increase ortho width and use the same value for the division
You might want to store the ortho width in a parameter collection so you can easily reference it in the material
I found an issue where if I stand in one place for too long, the particle stops looping and the rendering stops as a result
Oh nevermind, it's the lifetime of the particles probably.
Or not
As in they stop spawning?
Yeah
The render still shows the particles where I've been walking up till that moment
So those particles are still alive and well
Might want to check your loop settings. Required module > Duration > Emitter Loops
Should be set to 0 for infinite looping
Yeah, all that's set, but I'll play around with some values and see if it changes
Maybe uncheck Auto Destroy when you spawn the emitter in BP. I would just attach a particle system component though instead of spawning one
I've got that unchecked, but I'll attach the system to the actor instead 😃
Feels so good though, to run around and see the trail actually working. Hats off to you, Tommy!
How can you use Owner No See in a multiplayer set-up? If only the actor can't see it, then other actors can
Unsure about that one. Don't have any experience with multiplayer
Since you'll need to do a Get All Actors anyway, maybe get each actor's particle system and set owner to current player
Yeah
Something in that direction, but yeah! I took the time now, the particles stop after 40 seconds
So now to find that value somewhere 😉
Might be that you're hitting the particle limit. What happens if you wait some more until the visible particles despawn?
Yeah, was just looking at that 😃
I wonder if GPU particles would work here. Might be worth it to give those a shot
Yeah that's where the issue is laying.
I'll try that when I'm back from walking my dogs. Thanks a ton for the help Tommy, if I get GPU particles to work I'll just move on to the bending part. Hopefully the logic I have in place already works haha
@wanton vector Don't attach scene capture to the player, or you will have discrepancies between its position in game and render thread
Instead, have world as parent to scene capture, and have a function that gets player position and moves scene capture. Run it per tick or at any custom rate
Okay, I'll have a look into that, @analog onyx. What did you do in order to not spawn a bunch of particles in the same spot while standing still? I need to drive the particle through an event that calculates if the character is standing still, and tell it to deactivate, and activate when I begin moving again? Having issues combining the WPO bending logic with the render masking hmm
@wanton vector You can control spawn via direct parameter, or just use spawn per distance of the particle system
Okay, sweet, I'll check that out 😃
Hey @analog onyx, could you share some info on how you made your grass bend? The math I had for my grass's WPO is acting all crazy when I multiply it with the render target.
@wanton vector Nothing fancy, just a placeholder. Push top vertices in the 2d direction of the vector stored in render target. Push the same vertices downwards, depending on how large was the first vector. Control both offset with scalars.
@analog onyx Hmm, okay. How did you combine it with the render target logic? When I used the render target logic with the base color, I get an accurate result, but when I multiply the render target set-up with the setup of the bending, the grass goes haywire and the mask isn't doing it's job anymore.
Storing the player's position, dividing by ortho width.
When I multiply that with the base color the line is colored by the particles.
Why would you store player's position in a render target, if you can just pass as material vector parameter or as a part of material parameter collection ?
Not entirely sure, but the position is a material parameter collection. The tutorial I followed for the WPO bending used this method
Well, you should decide, what you are actually storing in render target. Without it, you can't decide, what you need to do in WPO with it.
Hmm, okay. I'll play around with it
@wanton vector Hint: remember that the particle texture only goes from 0 to 1. This means you can only represent one quadrant of directions. To represent all four quadrants, you need to convert the range to -1 to 1
@celest birch Hmm okay, but I'm not entirely sure how that would affect the WPO combination. Haha, I'm not entirely sure how to proceed to make the grass meshes bend. Fixed the particles spawning rapidly while standing still by grabbing player movement and deactivating the particle system if the speed == 0, and when false I reactivated it. Anyhow, I'm simply multiplying the render target logic with the base color logic and BAM I get the color trail. When I try to do the same with the WPO logic it just goes wonky, I'll show you in a gif. Gotta get the pro version of Gyazo haha
Here's the bending math, which I got from a tutorial on interactive grass (https://www.youtube.com/watch?v=vMX5qiWd18w)

Interactive grass , like the one in breath of the wild.This tutorial is based on a forum post that I saw(link below).So this can be used for creating interac...
Oh dear a tutorial where they don't show you the result at the beginning or end and explain what you're doing
Yeah, it's just "Do this, and this, and then you get this" 😃
So I dont really understand the logic of the bending math at all, which is why I'm lost at sea
@analog onyx I'm assuming your grass mesh is made of multiple planes. Are you storing plane pivots anywhere?
@celest birch Sampling using instance position, instead of vertex position
But for larger clusters, you would need to store pivot somewhere, yes
Welp this makes it a bit more complicated
Uhoh
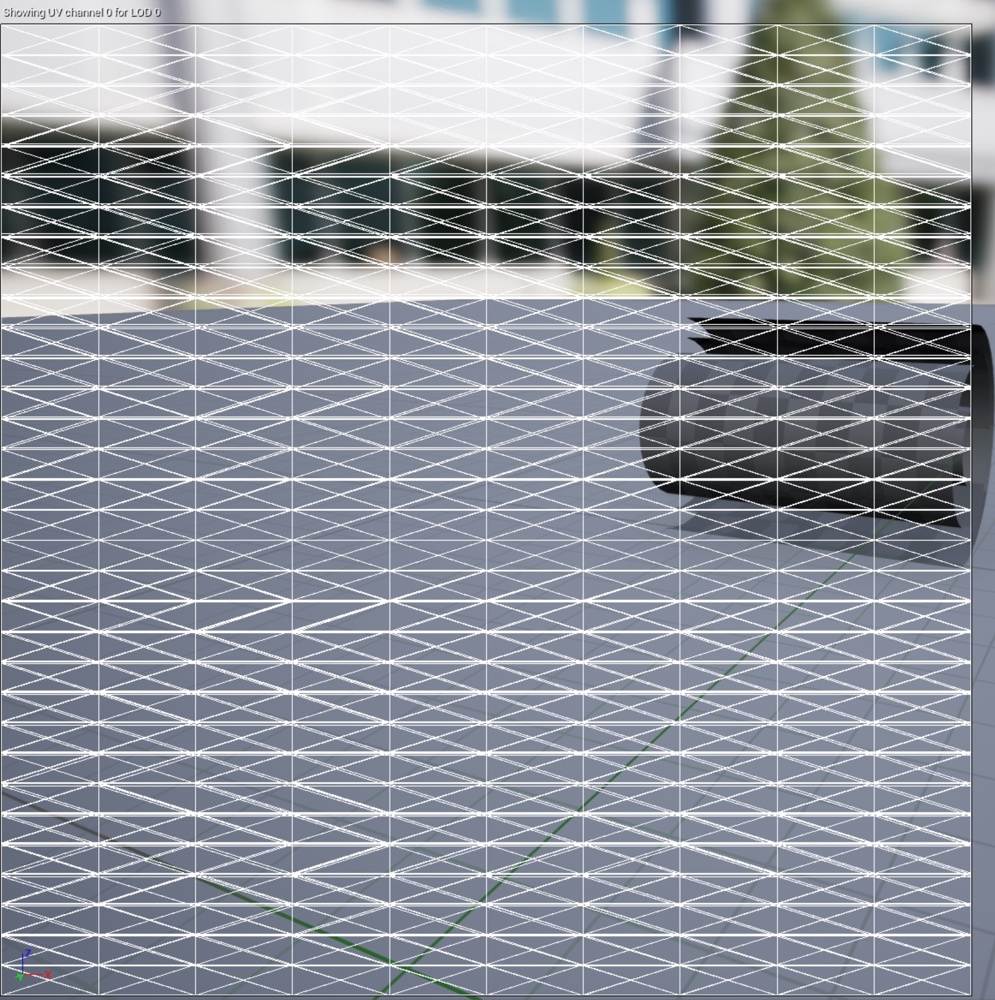
Can you click UV and select the second channel and then screenshot?
I wonder if Epic already stored pivot in UVs
Ah okay nvm they're not storing it
Basically, you need the pivot point for each plane so you know what to rotate it around
But that information isn't readily available so you have to create it yourself. I store mine in the UVs using Maya
There's no way to bend the meshes just using the math logic I've got? How would I see if the pivot point is in there? I got some other grass meshes from the marketplace
You can move the top vertices down but I don't think you can use the current logic to do any bending
At least, not correctly
Highly doubt other grass meshes would have the pivot as it's a pretty specific thing to make
If the other grass meshes are a single plane, that could work. Got any like that?
Double-planes :/
Well, I got one mesh, but it would look absolutely horrible. The kite grass is beautiful haha
@analog onyx Are you just rendering (0.5, 0.5, 0) color to render target for the background?
@celest birch I must admit, I slapped an object with this color under the scene capture ><
Omg lol
busted
@wanton vector For testing purposes, an approximation of the pivot point might be fine here. First step is to do what Deathrey just said
Goal is to get the render target looking something like this: https://streamable.com/kdma6

If you remember this image: https://developer.valvesoftware.com/w/thumb.php?f=Water_flow_test.png&w=800, no movement is 50% red and 50% green. In other words, the color for no movement is (0.5, 0.5, 0)
Which is why you want the background of your render target to be that color
Oh okay!
It's not rendering the color, and the plane is rendered above the particles although it's below in the actor
@celest birch Not sure how to make the rendertarget render that color
Did you add it to the showlist?
Here's the material stuff for the bending since I'm a bit too lazy to explain it: https://gyazo.com/76bdfcb66a6f0b21b1a05336c0a7c022

Note that this is approximating the pivot point. Will probably fall apart once you have grass that doesn't point straight up
You should be able to feed the result directly into WPO
It's ticked to show. I just added a plane under the scene component under the character / scene capture, like Deathrey
Wow, thanks for sharing that man 😃
I'll try to wrap my head around that code
How do you know plane is rendered above particles?
It's showing the plane mesh without it's material, and before I made the plane bigger, it showed the particles underneath
Try adding the plane into the world, not attached to the character
Same result
Hmm not sure then. Might have to play around with it or maybe set Primitive Render Mode to Use ShowOnly List and add your character and plane to the showlist
I set the render target to Base Color RGB
But that introduced some nasty masking to the grass meshes, totally horrible
Ive got an issue with the Show Only, which is why I havent used it. It's not allowing me to pick anything

I actually had a few flipping issues like that on 4.19. Set showlist from the blueprint, it will work properly.
Do something like on BeginPlay, character adds itself to the scene capture's show list
Just to make things easier, re attach the plane back to the character
Then add particle component and plane component using Show Only Component
I'm not sure if using Show Only Actors will render the character mesh in the scene capture
So might need to use Show Only Component instead
Is there a way to disable specular Highlights with a Post Process?
Don't think so. Anything you do will be a hack and will screw up fog if you have any
Hmmm. Any other way to simulate underwater PP?
This doesn't show the plane either
Things don't look "shiny" (wet) when they are underwater.
@wanton vector Does it show the particles at least?
@spare hare Could add some sort of depth check to your materials to check if it's under water. If it is, just set specular to 0. Lot of work to add it to all materials though
Yeah it shows the particles, but it's doing that without the showlist
@celest birch
Definitely got it set to Use ShowOnly List right?
Enter Deathrey the wizard
@spare hare Detect, when camera is underwater, and suppress secular input on all materials globally.
<
Unfortunately he was answering another question
With the scene captures, you can really add actors to, that have particle systems attached, to the showlist via get all actors of class
while setting the capture itself to render nothing else, but particles
So should work for the plane too and setting scene capture to capture static meshes as well, right?
Yep. But the object underneath, can be a particle too ><
Oh yeah that's true
@wanton vector Yeah so try setting Show Only Actors. Will have to detach plane again and place into world. Or could just spawn giant particle with (0.5, 0.5, 0) color
@spare hare alternatively, if you know approximate water level in advance, just fade specular gently from water to underwater.
Man, maybe I should just update to the latest version, 4.19.2
It's not showing up
Ohh okay
@analog onyx Sounds all like dirty hacks :/
Overriding GBuffers or disabling single GBuffers would be necessary 😦
Eeeh...
Well this is how the code is looking right now. Im unable to add it manually in the Scene Capture
@spare hare Why? Just do it in mesh's material.
@wanton vector Maybe try the particle method and attach it to the player. With Owner NoSee as well
@analog onyx I don't know the Water Level in Advance,
Vertex paint dampened specular, where needed
It is pretty strange, that you do not know water level in advance though. Unless you have a slanted river or really large multitude of small lakes, you should.
Hmm... now its not showing the particles, and with the WPO setup you showed the grass goes crazy in one direction
Maybe try lowering the plane like 1000 units or something
Tested the WPO setup on my end so you might've set up something incorrectly
Still the same
I'm outta ideas lol
Its weird that I cant see the particles on the render target though
I gotta sleep now. Hopefully you can get it working!
Yeah thanks for the help Tommy, really appreciate it!
need a wire version that only does 45 degree angles
Yeah that looks awesome
Such clean wires. Reminds me of my water material, proudly flying on blueprintsfromhell
Reroute Nodes in Material Editor are garbage 😦
I've been actively requesting reroute nodes since release. I haven't used not a single one, since they were implemented.
im fine with em
they do not align to anything lol
@analog onyx 4.19.2 didn't resolve the ability to select Show Only Actors, and so if I have a giant particle system far below the character, it takes up the whole render target and I don't see the same rendering as Tommy had, where the particles are still rendered on top of the plane. Is there another way to do this?
I managed to bend the grass by one-minusing the math you sent me @celest birch and increasing the Rotation Max value to 0.9. It's all rotating in one direction so I'd love to get the Scene capture 2d background color to work so the direction actually works, but it's nice to get a half-decent result 😃
All the grass that is being bended is flickering insanely while moving though
Managed to make the plane render 😃
https://gyazo.com/be0b709c799ae16e25ac99de45e7965a - flickering stops when I stop moving, and you see the grass bends only in one direction.
But yeah, tomorrow I'll be working to around this time when you go to bed, but if you have any suggestions on how to make the grass bend in the direction I'm moving and not the same uniform direction, and stop the flickering, I'll read that when I'm home
https://gyazo.com/b05910467d3456f43a61e5537554db9a Here's the rendertarget while running. I'm guessing the reason it's pointing the set direction is because of the color the particles are releasing? Also, when I opened my main level, the particles did not render the same way as on the testmap (I'll check tomorrow if they render at all), and the effect was pulling the grass up rather than down. I'll show you tomorrow eve.
But yeah, the main issues now are:
-
The direction the grass mesh bends is currently only in one direction and I want it to bend the direction I'm moving.
-
Bended grass meshes flicker when I'm moving.
-
Works differently in another level with the same set-up; could it be that the world location is interferring? The main map varies a lot in height, I'll troubleshoot this tomorrow.
Thanks again for all the help and patience :)

@brittle steppe Are you using static or dynamic lighting?
I have no idea 😅 @visual hazel
Is your directional light set to Moveable, Stationary, or Static?
stationary
Okay, so either set the light to moveable or increase the lightmap resolution on your floor.
Stationary means it's using static lighting btw.
Oh, I had no idea xD
Thanks :)
What would be a good resolution for the lightmap?
Bigger than it is now XD
It really depends on how much detail you want in your scene.
But for now just try doubling it and see if that works.
Just enough for those weird things to go away
Also you need to build the lighting for it to work.
It still looks kinda weird
I tried doing both
wait no it just updated
Thanks :)\
@wanton vector
- The particle color looks strange. That's probably why it's not bending correctly. Color should be as how you had it in this: https://cdn.discordapp.com/attachments/375020523240816640/442741596434333706/unknown.png
- Flicker might be because of the rotation angle you set. Ideally, it should be less than 0.25 which is a max of 90 degrees of rotation. Fixing particle color would probably fix this too.
- This is probably because of the approximation of the pivot point. Currently, it only works for grass pointing straight up. Any grass on a slope won't work properly.

Is there a way to make particles move into the shape of a mesh? I can do it with Blender, but I don't know if it's possible with UE4.
yes, just don't ask me how
But I know it's possible
some of the content examples from paragon have them
Okay.
Also I have this glitch with the point attractor. I'm using it to make the particles attracted to the center of the particle emitter. However, if there is any frame hitching, the particles get a bigger orbit radius. Why is this happening and how can I fix it?
@brittle steppe a rule I follow is:
Where shadows are clearly visible : High Resolution (Floors, Flat Walls,Tables etc)
Objects with lots of cavities and concavities: Low Resolution (Statues, Rocks)
The optimal resolution is as small as possible with as much detail as you need.
you have to test this a lot
anyone know why my particles aren't showing up when I press play?
@desert sage Could be any number of reasons
You mean play in game or play in the editor?
Like when you hit the play button, or inside the VFX editor
play in editor
also simulate
I assume when you say play in game you mean in a build
@celest birch Hey man! Thanks for the feedback!
- I haven't changed the color since that picture, but is this how you've setup your particle material? My particle system is spawning one big particle.
- Well the issue has to be in the particle material color then, as the grass is lowered insanely when dropped to 0.25. I find it weird that I had to oneminus the logic that worked for you. But other than that, if I have the value of rot max angle at 0.9 the grass is tall and the grass that bends is touching the ground, any other value and I can barely see a track or it bends upwards more than downwards (lower values)
I also tested the grass on slopes in my testing level and it all bends just as fine as on flat ground, so I'm not sure what the issue is, maybe it's just that the particles aren't rendering for some reason in the actual map. Strange behavior though
@wanton vector I haven't used the particle method myself but I imagine that's all you need for the material
Oh, what method did you use?
Draw Material method
Oh okay
Fixing the particle color should be first step
Hmm yeah
@celest birch Just confirmed. The particle color is the same, it was just the 0.5,0.5 background that made it look like it wasn't. @analog onyx you made this system work, do you have any inputs on what I could do with my particle system/color to prevent the same-direction bending & flickering?
https://gyazo.com/4c6e9915f2894c9ea742a8a30aa3dae4 - maxrotation value at .25
https://gyazo.com/0145c40cc86f23bea3af8d5dbdf04afc - maxrotation value at .9, it bends the grass down so right now this is the best result I'm getting; it flickers just the same when moving at any value
"...and the particles render fine, albeit with inverted alpha so you need a OneMinus in the material..." one dev wrote, so thats why I needed the oneminus 😃 ... then he wrote "Note that in 4.13 (possibly the later 4.12 builds too) there have been changes to the rendering that un-inverted the alpha (but only on PC, iOS is still inverted, which is a little annoying)", but that part works atleast.
@wanton vector mind the additive blend of the particles, that I have seen on one of your screenshots
How would you do particles on curves? Vectorfields are kinda inaccurate if you don't go full out and make them super large. Do you know someone who coded a solution with particles on splines?
I feel like I would need to throw something up with Spline Components, some Instanced meshes and more magic in material node.
@analog onyx Oh, I used Additive since the Brush mat from the GDC talk used it, and I thought it was needed to add the material to the track, aswell as the current position. Resetting the material to opaque, default lit, etc, didn't alter the effect though
But maybe the particle is always resulting in the same color (considering it's dependant on a color sheet where the direction is decided by the colors) since the particle is attached to the character, so the particle will always return 0.5,0.5? As shown here:
It's showing the same color repeatedly, not rotating dependent on any rotation, so it wouldn't know what color it would return?
@wanton vector Not sure what problem you're having. Particle won't ever change color since there's no logic to do so.
Yeah... Im just brainstorming haha.
But the direction the meshes bend is decided by the particle material using the color direction sheet you shared, so if it's always returning the same color (direction value) then I thought that would be the cause of the grass meshes bending in only one direction.
@celest birch
The particle is not just one color though
But like you said, I dont have any logic for the particle mat, so I thought I could rotate the particles depending on the characters rotation. The emitter is attached to the actor with a rotation of 0,0,0 - since it'll never rotate the color for the particles will always be the same direction? I'll debug this after work
True, but how would the render target know which color value to use? Is it simply detected by character's movement?
The render target just captures the entire particle. It's supposed to use all of the values
Hmm, okay
If thats not the issue, then Im pretty unsure haha. Deathrey hinted at the additive blend of the particles material, I researched the matter and still quite unsure of what to make of it @analog onyx
Reason you can't use additive is because texture is in 0 to 1 range. Remember that (0.5, 0.5, 0) means no movement. If you were to add that color onto the background which is also the same color, you would get (1, 1, 0) which means movement to the bottom right
Obviously this is wrong because adding no movement to no movement should also result in no movement
Oh, it would add to the texture value! Whew, thanks for explaining that, now that you say it it's indeed obvious :)
It works in that GDC one because it's just a grayscale value and he's accumulating it
Okay. I guess the way to go would be a simple opaque into base color then. Thing is, I tried that yesterday and still bended in one direction, but I'll give it another shot. Gotta go over the material math for the 10th time aswell haha. Break's over, thanks man
You'll get there soon! 😉
Hahaha I hope, feeling pretty bad having to ask you guys constantly about this haha
I wouldn't worry about it. This will be a good reference I can point people back to if they want to achieve the same thing
Okay, great to know :)
Diagram of converting the ranges:
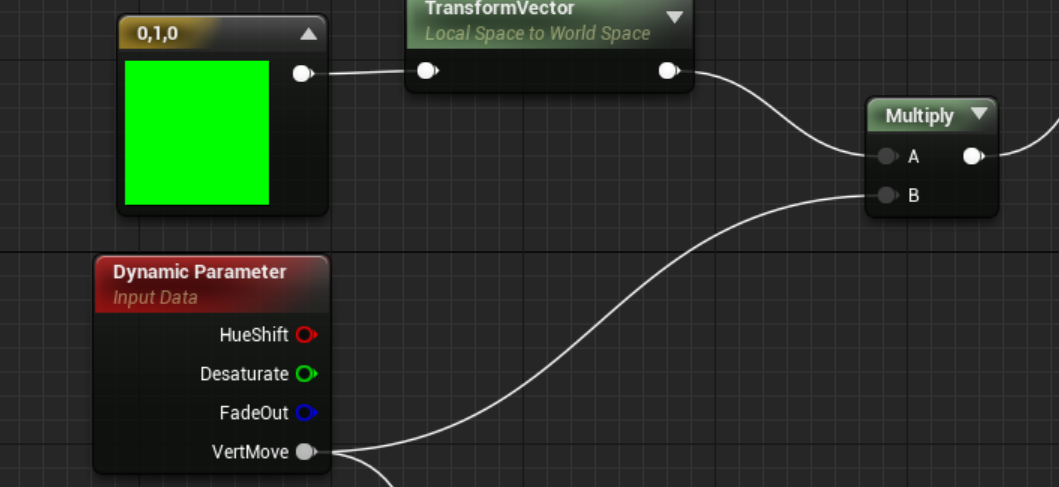
so I have a small setup that moves the vertices of a mesh on Y-axis trough World Position Offset, but this is obviously world pos. how can I make sure this is done locally
so no matter the rotation, its offset is still local y-axis
I think you transform (0, 1, 0) from local space to world space
i can tell its hot hehe, yea trans-vector
sorry was trying it, but cant get it to work hehe.
cant show it either because nda
:/

allright one sec

hehe odd,
ok give me another minute.
hmm it gives everything a massive offset in my case.

You're not setting VertMove to something massive are ya? 😅
nah. one sec.
DM
^ solved it
had to set waaaaay lower values in the dyn. param. after the vec-transform
hello everyone!
I got a bit of an odd question that I can't seem to find the solution to
would it be possible to apply a world position offset to the vertices of a billboard particle
that would place each vertex in a corner of the screen? making it a full screen quad?
@grim kiln Should be possible yeah.
@analog onyx do you have any idea where I could start with this?
@grim kiln Think about like this; Your particle is a quad, with know dimensions in known location. It is UVed to a full quad. You can use UV channel one to identify vertices. From particle's distance and position to the camera, knowing vertical and horizontal FOV, you can calculate required offset from the vertex to its intended position.
@fossil swan

Granblue Fantasy Project Re:Link is another game that I'm really looking forward to this year. Here's what you need to know about it. If you enjoyed the vide...
check the FX
look at those tweens on the boss attacks
Platinum games doing a coop weeb game
@sullen forge will check it after dinner. did see the anime a while back
@analog onyx yeah that makes sense to me, I just don't know what kind of math I'd need to do to put all of those together
I just saw that there's a FOV material function, I've never noticed that one before
@grim kiln Draw a task in 2d for yourself. Usually becomes much easier to develop approach in 2d, and only after that expand it to 3d
@celest birch Hmm, I multiplied the color with 2, to no effect of the rendering. I still believe the issue is somewhere with the render target not drawing the particles before the plane, when I hide the plane the particles are still being drawn behind the plane. On the testing level it's being drawn on top.
@analog onyx thanks! I'll put this on the backburner because it seems more complicated than I'm currently able to handle, but I'll come back to it eventually. the FOV idea is great though and I might be able to do it that way
@analog onyx @celest birch What I don't understand is that the grass meshes deform in such a different manner than on my test map. Sloped areas on the test level displaces correctly. Sloped and flat surfaces on the actual map bends really weird. And I still got the flickering issue. I'll upload gifs, one sec.
https://gyazo.com/cc0e0202774c14849e990f73822902e3 - game map. Not bending properly at all, max rot at value 0.9.
Well, it's all semi-bending nicely. Still got ways to go, but like I said earlier that's the best result I'm getting at the moment. 😃 - it's clearly bending a bit less in the slopes, but still a definite better result than on the production map. What do you guys think could be the cause of this, and how should I fix it?
https://gyazo.com/e8ccd53bf21710ded775a50b9d066c61 Test map where it bends properly, value at 0.9
i'm a bit of a noobie here, but does anyone know if you can tell Mesh particles to NOT participate in full depth prepass?
@Simen Haadi#7530 Make sure plane is well below the landscape otherwise plane will be on top in areas landscape goes under the plane
@Simen Haadi#7530 Uncheck Owner No See for particles and plane to see if the particles are actually under the plane
@celest birch Oh yeah I fixed the particles issue, I had to tick on and off the Show tick boxes. The plane is Z -1000 already :)
The particles spawn on the character's feet. I could increase its Z a,bit maybe it goes under the lqndscape at times
I don't have any ideas on why it works differently on two maps 🤔
Make sure grass for both maps is using the same material
Yeah :)
@naive thorn 🤔 Are they really rendered in early z pass ?
They appear to be, the real problem is that they're masked, so it has to use a pixel shader which ends up being quite costly while all other draw calls here are generally lightning fast because they render w/o requiring a pixel shader into the depth pass.
@naive thorn What is the reason depth pre pass? (When you find depth pre pass in GPU profiler, what is DDM_ string reading? )
When zPassMode is set to DDM_NonMaskedOnly, Use As Occluder checkbox should control if an object is participating in pre pass or not.
It should be reported as a feature request to be fair. With DDM_AllOccluders, Pre pass will be run for all masked and opaque materials, including particles, so your best bet is to use non-masked only, or change depth drawing code yourself @naive thorn
@celest birch The scene is composed of the same types of actors even, but Ill try to make a new level today and see if its the same. Could be some outline-boxes etc are interferring with the render, I find it a low chance though since theyre not visible in pie
Hi all! I'd like to simulate wind that works with particles for an effect I'm working on, and I was wondering if anyone had any suggestions/tutorials on how to get started? I'm thinking at the most basic I could probably use a blueprint along with particle parameters to manipulate their acceleration

Hey, I have been doing some reasearch out of curiosity, I am not building anything atm, but afaik there is no way to use Emissive lights on movable objects
say a character with emmisive material, in a dark maze, will be able to light up the area as he moves
@bright panther Is that using Niagara?
Nope it's using our software, VectorayGen
Vector field generated around the level mesh
Looks pretty! So the particles avoid all meshes? They only fly through the air?
That's the goal 😃
You import a mesh, set the wind direction and it'll calculate a flow around that mesh
Is it possible to add global vector fields to further influence the flow in specific areas?

That's one single VF?
yep
The scene was a singular mesh, so I imported that as a whole. The mesh loads in the center of our software, so the vector field and the prop/level you want to have a flow around need to have the same exact location.

This is My final assignment for the game graphics course at DAE Howest.
Got greatly inspired by the tower of the movie tangled, like so i wanted to go quit simple on the textures, to get a nice clean but still old looking building.
First time usi...
Does it work with dynamic actors? Is it possible to manually adjust wind direction and force at specific locations?
Not yet
Right now it's just static flows. But we're looking into making it work for rotating meshes and such.
Got it. So the leaves are textures, and that's why there're rays going through them yeah? I'd imagine dynamic could get costly. Looks cool nevertheless, what's the official name of the plugin?
VectorayGen. https://jangafx.com/vectoraygen-sales/
JangaFX
Everything you need to create and edit vector fields for the use in your visual effects. Join our growing community of artists who use our software!
that page tells you about it
Sweet!
The mesh flow stuff should be in within the next week or so
And you "could" have it go around the leaves and such, but I removed them from the sim model.
but not on a per leaf basis, it would just be simming around the plane that the leaves are on
@analog onyx we've got full depth pre on and it looks like participation by default? I will check out these strings thanks very much! Ideally we move away from masked so we can do no pixel shader for depth on it
full depth pre for decals
@bright panther whoa! looking neat!
Is it possible to tie a particle system (desert wind in this case) to a material's noise mask (a panning noise texture which acts like the sand is moving)? So that wherever the noise mask is, I'd like a dusty particle to flow along. Is that even possible?
I need to add some depth to the panning noise texture at least, so it's not just a flat color that's moving along.
@celest birch Okay, I figured out the flickering issue: it's the particles that are moving when I'm running. I also looked up the math of your set-up and figured that the constant 3 vector controls the direction the mesh bends; is there a way to make that constant 3 vector use the player's direction so it would bend in the direction of the player's movement? Still haven't figured out the issue of why the effect is different on my game map. 🤔

In the gif above you can see that the particles rendered on the target are moving when I'm moving, as if they're flickering. It's only noticable when moving at slow motion, but it's annoyingly obvious at regular runtime aswell.
When the actual particles are viewable they're not really flickering, but the render is capturing a flicker. Hmm...
@wanton vector If you were an absolute madman for your desert scene you could project the "dusty wind" particles onto a rendertarget that masks the material of the desert floor 🤔
Actually it reminds me of this Gerstner Wave shader Ryan Brucks did, specifically the way this water shader handles the intersection of waves with rocks is to project animated decals onto them https://www.youtube.com/watch?v=OQ3D0Q5BlOs

A test from summer of 2016 of a gerstner wave shader, utilizing distance fields for analytical splashes. All splashes are a single mesh here, using a masked ...
Yeah that shader is absolutely stunning
It would probably be possible to use the same decal method to get flowing sand appearance
very technically challenging scene
I would look at Uncharted 3's open desert scene and try to pick apart how they render it
If I were to go with the rendertarget technique I would need to have moving particles across the whole desert, which is rather huge, wont I? I'll go into the thinking box on this one. Now that you say it it would be very challenging for a guy like me to make this look more realistic; I'll do some more research and if I'm still a madman about it I'll come back here with this issue 😉
hi everyone, I'm trying to port this unity shader to Unreal https://www.patreon.com/posts/quick-game-art-18701684

Patreon
Official Post from Minions Art: Using normals and noise textures to create a foam edge and down flowing waterShader has some extra bells and whistles, depth edge detection like the "stylized water" shader, and option for either WorldNormal or Ver...
could anyone help :/
?
@wanton vector I think you would fake further away dust clouds with cheaper billboards, as well you could probably use a relatively low res rendertarget since the interaction of wind on the desert floor is pretty noisy, but altogether seems tricky as I haven't heard of anyone else trying anything like it 🤔
Hmmm, yeah... it would look pretty awesome though. Check this out, @obtuse seal https://www.youtube.com/watch?v=ItbrCoyTjqM

Created some effect for my current environment.
I'm pretty sure that's a static blueprint, but it adds some very nice depth to the moving sand.
I think that's just a flat material panning over the surface, it looks great
This one is pretty awesome aswell: https://www.youtube.com/watch?v=zja__sOjyjg

probably a much more reasonable target for appearance than doing anything overly complicated with render targets and projected decals lol
I like that one pretty well, I'm guessing it's just smearing the UVs?
Yeah, right? I don't wanna sacrifice too much worktime on this
He says he's faking the depth with normals, which is what I'm doing aswell
Yeah that's a good approach to getting the sand to look like it has some volume
The guy from the first video: "Wind stuff is pretty simple, in the final version I'm using detail normal map for the landscape material that kinda animates the sand grain with the wind + some meshes with splines with the sand cloud/dust material."
The splines is shown in another video of his where the dust is flying off the ground, so I guess I just gotta work on my normal maps 😃
Ah yeah the meshes and splines must be how they have gotten the dust to travel neatly over the surface. Some 2d plane that's conforming to a spline placed by hand to be right above the surface I guess
Well I would strive to get something like the first video working before breaking my butt with more complicated approaches like video 2 or render target shenanigans
In-game the effect I have already looks decent, but not as good as the ones in the vids I shared
Yeah haha
I'm already breaking my butt on bending grass meshes with render targets haha, 100% the most advanced stuff I've had to climb over since I started making my game haha
@obtuse seal Changed the moving sand color and used a more wavy-noise mask. Got a result I'm satisfied with for now, although a lot can be done to it. I'll look into adding particles when the panner hits a crest or something, that would add some depth to it for sure. I'll update the material when I feel able to take on a more advanced approach: https://gyazo.com/ac63cf26004fc07ae88f22669ae15779
@wanton vector It's looking pretty good already, nice work 👍
@wanton vector Constant 3 vector is used to determine the rotation axis. You shouldn't really be changing it
Have you made sure all particles have no velocity?
Post your particle system setup too
You didn't post a question
indeed, I just asked for help
Watcha need help with specifically?
Well, I got the triplanar movement working but I can't understand how I'm supposed to do the foam and color it
I'll make a gif
this is what I have now https://gyazo.com/f159a2c261a88f4799ec143c39ee4712

@obtuse seal Thanks man, got some work to do on it though haha
Hmm nothing looks off to me. Not sure I can really give you any further help 😅
Do you have any idea why the grass meshes are only bending one direction? Is it because they don't have a proper pivot point set-up?
That's the set-up. I've checked it quite a few times, I'm pretty sure it's copied properly. Is your Parameter collection 0,0,0?
Looking at your render target, it is overly yellow which will bend it towards positive X and Y
Parameter collection is probably 0, 0, 0. I overwrite it immediately anyway so doesn't really matter
Can I see your scene capture settings?
Try changing it to final color and make all your particle materials unlit
Check this though:
The particles are rotating
Maybe thats causing the flicerking
flickering*
Yeah the particles are camera facing but I'm not sure that should affect anything
Not too sure how to make particles face directly up. Still a Cascade noob
Holy. The ground is bouncing up and down now, that didn't work. 😃
@wanton vector Use lock axis module to lock particle facing world up
Hmm, that didn't solve the flickering. Darn
Thanks though @analog onyx
Locked it on the Z axis
Now the particles should be completely still, but they're still flickering in the render target
still trying to adapt a unity shader to unreal, anyone know what node would be equivalent to WorldNormalVector?
pixel normal ws?
I'm using VertexNormalWS but it doesn't seem right
let me see with pixel...
doesn't seem to change anything
Is the grass render target thing still going on?
Yups hehe @cerulean pecan
@celest birch @analog onyx https://gyazo.com/a9ab7171d5ad7280fe11aee7f9ab36c0 I've been using Additive for the particle system's material, which gave me the result you've been seeing in the last gifs (the best result so far). I set it to Opaque instead, and now I see "waves" moving through the grass. Man, could I call & share screen with one of you guys, or Teamviewer if you got time? Maybe you spot something I'm missing? I'm clueless at the moment on how to proceed with this. I thought it could be they were fighting over space between background/foreground particles as I was spawning quite a bit of particles that would overlap eachother, but that was not the case. The flickering continues 😓
So the current problems that remain are:
- Flickering of bent grass mesh when actor moves.
- Grass is not bending in the direction I'm moving
- The effect is different in the game map; same mesh and materials.
@wanton vector Let me try to whip up a quick project
@wanton vector I'm gonna DM you the zipped project
Oh wait nvm it's over file limit. I'll upload somewhere and DM you link
@celest birch Thanks a lot man, I'll have a look before I go to bed! 😃 Much appreciated!
@wanton vector Forget about the grass. Set up render target with proper data first.
Yeah gotta fix your scene capture/particles/whatever it is
You added a 0.5,0.5,0 plane underneath the particle in the actual particle system, troubleshooted the setup now and it seems like that was the only thing I was missing
That shouldn't have been the fix, at least the not main fix 🤔
Yeah, I'll keep looking 😃
@celest birch The particle color & the Color Over Life module definately had something to do with it aswell.
That... also shouldn't have been the fix lol
Those are just to fade out the particles
Anyway I gotta sleep now. If you have questions, I'll try to answer them when I wake up
guys, when you are finished with that particles grass, can I get the summarization, in .pdf with the .uproject file?

Hmm... strange though. As fast as I added your particle to my set-up everything worked fine. Minimal flickering, and it works in the production map. Sleep well! 😄
I'm only getting one issue, and that is that the mesh is not bending entirely well. But I bet that's because the mesh doesn't have a pivot point? It's like one part of the mesh wants to stay up no matter how many times I walk across it.
Edit: Playing with the MaxRot value again, I see that it's consistent. This is probably mesh related, don't you think? I'm going to bed now, but thanks again for the help! 😃

@cold sorrel hey whenever you're around, do you think you could let me know what i'm doing that's keeping me from seeing the velocity field preview like in video?
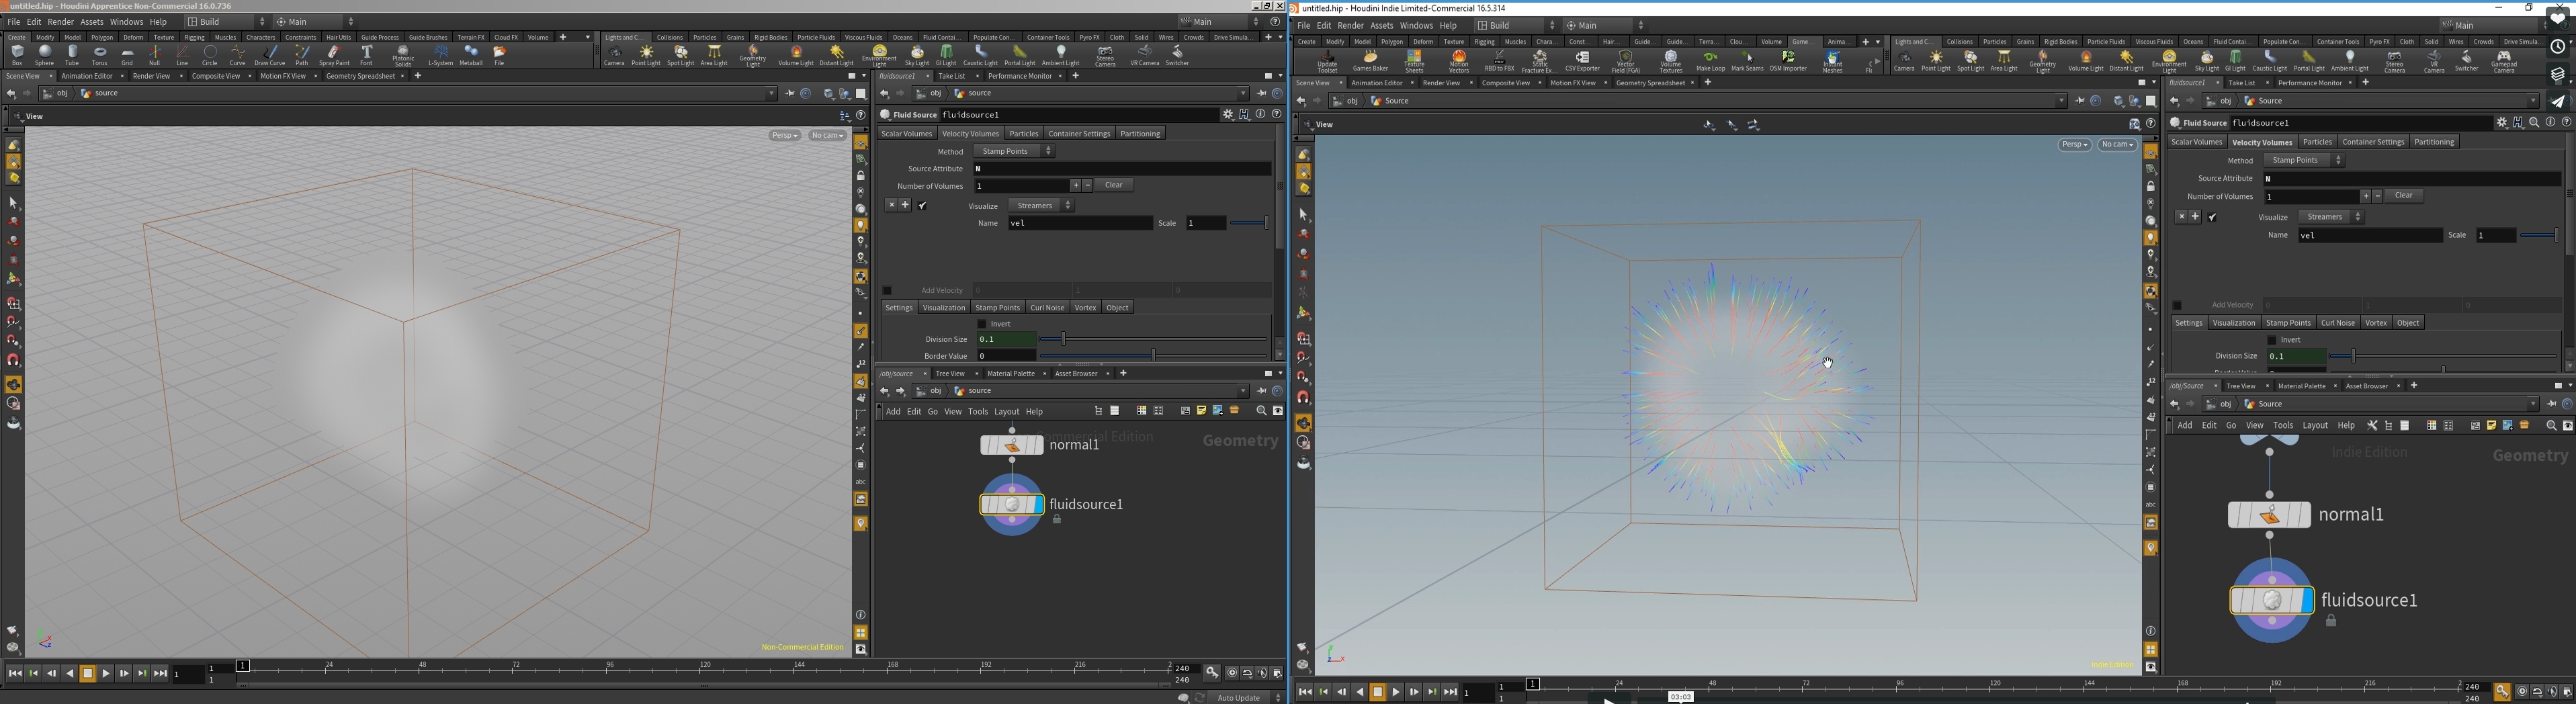
is this because i'm in older version?
Hmm, could be. If you middle mouse the node, do you have a very field?
@wanton vector Does the middle stay up? Try increasing particle size. While you're there, set Sort Mode to PSORTMODE Age Newest First to get rid of most of the flickering
@celest jasper I can send you the project but no summary 😛
Yeah I cant make no summary until I understand the code haha
Just read the discussions weve had
And yes @celest birch , the middle stays up. When I increase particle size the problem persists just at a smaller rate which looks worse. :)
I'll take the project, can't be that complicated, right?
@wanton vector Sorry I meant increase particle spawn rate
if you are discussing this for like a week 😅
it's pretty simple. Just a few places that you can easily go wrong
Yeah the spawn rate is what Ive been playing around with :P
Is the mesh you used mapped with a uv pivot point? Cant see anything in the Uv channels
Yeah it has the XY pivot point in the UV
But I'm not using it in that project
Still need to derive the Z position for the pivot
that grass project is pretty neat, the only thing I thought about replacing was the brush texture
should be possible to generate the pattern mathematically
Yeah that's a better way. I already have the texture on hand though so I just used it
And it's only 8 bit 😅
I'm about to go sleep, might be me, but T_Brush is a 2k texture, right?
I thought that's the one used by the particles to write on the render target
so wait, what exactly is 8 bit here or should I go to sleep and read the conversation later?
would it make sense to inherit Hierarchichal Instanced Static Mesh Component and check for Overlaps to create Foliage Reaction (bend etc) or should I do something else?
Why not use what we've been discussing with the grass?
it may work for grass, but not for bushes or other foliage
Depends on how accurate you want it to be. Uncharted does their foliage using the same method
Obviously HISM replaced with a physics version will be the best but it's not scalable
Render target method can easily support a bunch of actors
why is it not scalable? Keep track of actors that touch an Instance , replace Instance with a Skeletal Version, once Actor is far away, replace again with Instance.
that would be my idea
Less scalable than render target method is more accurate. You have to replace all foliage around actors you want to affect foliage
Render target method, you only need to pay for some extra particles
You can use a mix of both methods. Render target for small foliage like grass and bushes. HISM for larger foliage
I can imagine some issues with RTs, especially with an environment I am planning
But yeah, HISM is still a feasible option
how about a RT for this
Ah yeah that'd be a bit more difficult. HISM would probably be better for that
If only one actor is going to affect foliage, Might be able to only use one RT and do some sort of depth check
I wonder if it would be possible to create a solution based on Landscape Components? Like each Landscape Component stores a RT for active Actors on it
Landscape Component without actors just clear/delete their RT
Not sure what you mean. Would that solve the issue in your picture?
A little bit, since the RT would affect the lower floor and not the upper floor
Yeah something like that could work I think
I wonder, since the Landscape stores a RT, you could reuse it for stuff like footprints and stuff
I guess I'll just need to do some R&D
hello guys
is there a way to stop particles to face the camera?
@manic mantle Yes, by chancing screen alignment mode and adding lock axis module.
hmmm I tried that but couldn't figure out how I can set the rotation manually later
I would like to place and rotate those particles manually
wow cool
use local space solved the problem
thx
@celest birch Had some spare time this morning, and tested how simulating spring would work, if done in grass vertex shader, using particle-driven time
Not much different from a sim to be fair
Looks great! Changing the deflection in the texture was dubious right?
@analog onyx Looks pretty dope
Tests I did with particle method seem great so I'll probably start using it
@celest birch So, after having at hand sim, particle-driven deflection, and particle-driven time variants I think I'm approaching the conclusion that latter two are not deployable in their default state
It sounded so promising though... 😩
Yep.
What was the hand sim method?
Hmm. Could you relist the issues with the latter two again?
I spent about 5 minutes on particle-driven deflection and it did not look great
Yep. The core issue is amount of particles you need to draw. For a trail of 30 seconds, you will be hitting thousand particles per emitter cap
If you go lower, the pop between individual particles is noticable
Looks cool! I wonder how you get particles to interact with the grass ... 0.0
@analog onyx Perhaps some way to capture particles once and keep them in render target
@drowsy lynx Gotta comb back through the last week of messages here 😛
@celest birch Yep, needs persistence buffer. That is a perfectly valid conclusion.
But that one wont work with particle-driven deflection
With time, however, it will
Oh right I totally forgot about the whole sim part
Time-driven deflection has another underwater stone. For a more of a complex animation, (transition from trampled state, into springing state with attenuation sine like motion is actually quite some resources, when applied to a million or two of foliage vertices)
I think you can bake animation curve into a texture, but it would not be smooth enough. Needs 1x2048 at least.
Right, and the initial idea for the particle method was to fake sim for better performance
🤔
Performance and control. And I have doubts at this point.
It is still at least better for non-sim bending
@celest birch Hm, then I hope for a summary as soon as you figured everything out 😄
@drowsy lynx Oh I can provide at least a short summary:
- Attach scene capture to player that looks down
- Attach emitter to player that will spawn particles with deflection texture. The particle system has Owner No see enabled, so they are only visible in capture
- Capture particles to render target
- Use render target in grass material
Deflection texture looks something like this:
Is there a dedicated stat particles command or something ?
Render target basically functions in the same way as a flow map
Sounds like something @fossil swan would know
@analog onyx Btw trail of 30 seconds is quite long so should still be usable for shorter trails, yes?
Short lifetime and high spawn rate
Well, the GPU costs of rendering 1024 cascade is 0.14 ms with 10k particles on screen
it is mostly about CPU-related load
That sounds reasonable for any projects I'd use it for
It won't go above 0.2ms if you make it 100k
@celest birch thank you! nice idea. and since the particles are fading out, the defelction gets less over time. love it 😃
Since the RT is moving with the player, do you have problems where grass suddenly stops moving as soon as it leaves the RT area?
Yeah you might want to fade out edges or something so it's not so abrupt. If render target covers a large enough area, player probably won't even see it
If particles are still alive when coming back into view, grass will move again
@drowsy lynx You fade the effect, before it reaches the bounds. You are also snapping capture locations to avoid disparities, when bi linear filtering the texture lookup in grass shader.
Whole effect is cascadable, so you can actually cover any range with it, and see the effect from explosions on a distant foliage impostors in sub-levels kilometers away
uhhww nice! 😃 so you guys are already finished with it? 😃
The basic bending is already working. @analog onyx has been working on doing spring simulations with it
@drowsy lynx Still profiling, to select, what is the most sustainable system out of 3. @celest birch One way to reduce number of particles required, is to actually sub-sample deflection(or local time) within a particle. On a side note, when and hopefully Niagara will be deployed and allow fully compute shader based particles, the CPU bottleneck will be lifted from the method.
I mean, you are passing character's/object's velocity to the particles anyway, so why not re-use this velocity to add a bias to particle-relative time? Can increase particle spacing to something up to 2-3 meters.
That's a great idea!
Is there a workaround for scaling drag over life if you want to use it with CPU particles? The module only seems to work with GPU particles from what I can tell
Nevermind, turns out simply using a curve in the Drag module gets me what I want

In this Unreal Fest Europe 2018 presentation, 3D/VFX artist Simon Trümpler discusses the interesting solutions for creating stylized fire, smoke and water (c...
How would I implement pixel perfect, "vector-like" graphics, that are drawn in the world, ontop of everything?
(this graphic is not a texture)
don't think you can do that without changing the source
@spare hare I'd guess you reduce the image size, until you can't see what is on the screenshot ><
@analog onyx I am talking about the Crosshair
The shapes do not "blur" on higher resolutions. Afaik they are actual shapes and not textures
I realized. Just stressing out that at 4k monitor that image is indistinguishable. You have all the math in the world to make a cross hair. But quite commonly, they are just textures.
if it's really necessary, I would try to use UMG to create an overlay on the viewport
and create a new type of component that can be drawn into
The problem is not placing the Crosshair in the world. The question is how to draw it 😄
that has to be done in C++
First person template does have a cross hair, doesn't it ?
yes, it's a texture
Textures have the problem that they do not scale well, they would need to be uncompressed too and imagine a 2048x2048 uncompressed texture just for a crosshair to have as much detail as I want
You have a point, but Well.. what is the largest possible size ever of your cross hair on a 4k monitor ?
in pixels
The Crosshair will be placed in the world as big as the target itself
what is In the world ?
Well it will be placed around the actor
I guess you could try post-processing
I think you can draw things through a Text Render to get it super sharp 🤔
create a post-process material that draw it
@obtuse seal This is actually a good idea. The question is How do I get my Crosshair into it? 😄
You can create a font with your crosshair as a character 😛
@spare hare I'm sure I've read a thread on using Text Render in UMG to get super sharp graphics, but I think it would applicable. And yeah I suspect you'd have to make a crosshair font. Which is pretty metal.
@spare hare That makes it a marker, or decal, or something. One option is to use distance field instead regular texture.
This solution with Text Render seems grossly overkill but I guess it would work. You have to author your crosshair as a vector graphic file (.SVG) and then convert it into TrueTypeFont (.TTF). From there you can import the .ttf to Unreal as a UFont and use it in a Text Render. There's some additional setup beyond that: https://answers.unrealengine.com/questions/282513/how-to-make-clean-big-text-renderers-with-custom-f.html
I just opened the same thread 😄
I guess I'll stick to texture then. Not sure if the whole Text Render stuff is worth the effort
It's dumb enough that I'll try replicating it in a test project real quick
xD
Absolutely no point to use text for this, as internally, it still relies on distance field. Just author you effect texture not as a conventional alpha map, but a signed distance field.
I wish I understood anything about making a texture as a signed distance field but I'm lost
Thank you! 😃
@analog onyx the Texture appears completely white when I set it's compression to DF
@spare hare Erghh.. don't
?
Use either alpha, or hdr, if your distance field is HDR
and what's the point of using DF then? It's a simple Alpha texture then
@spare hare The point is achieving, what you were asking for. Smooth shapes, when using a texture at ridiculously low texel density. Compression method should be Grayscale(uncompressed R8)
TextureSize is 4096, Rendered in 2048
Would DistanceField be different?
I guess I simply have to live with that ....
would be same, but with 64x64 texture size
That particular shape of yours can be defined with combination of functions, if texture resolution is such a limiting factor for you. @spare hare
two circles, two boxes namely
anyone have an idea how one could set a fully Opaque Material using Mesh Particle to "Render On Top of EVERYTHING"?
same as the way translucency "disable depth test" works?
do you mean use normals?
how to make a circle that is always on ground (like in pubg there is a line on ground where the zone is)
well like this https://www.youtube.com/watch?v=gB-DXxSoXOQ

Recreación del efecto de viaje temporal que crean los cronolitos en The Legend of Zelda: Skyward Sword. Esto solo es una prueba que quería hacer. Por ahora n...
ok i did it nvm
This panner seems to be approching lightspeed with no signs of slowing down at all
what am i doing wrong?
Its like the amount of time is coming through the nodes some how 🤔
@worldly pivot try the debugscalar function, see what it being put trough the subtract, clamp, etc
I reopned editor and seems to be playing along now
@fossil swan Im getting a number that doesnt make anysense
one sec im uploading a vid
Everything is perfect up untill the panner

I feel like theres something I might not be getting here
what are you trying to do? because due to that lerp its blending between two values
Slow down over time
if you look at the first pic i posted im expecting the speed to start at 0.07 then lerp down to 0
but that time is always running even before it spawns
But its clamped between 1-0 so it should only even be lerping between 0.007 and 0?
its acting as if its constant with no speed change at all now
I think ive narrowed it down
so first
just set your time to have a period of 1
that way it loops 0-1 without any additional math
the lerp doesnt make any sense to me
Hmmm
its already clamped between 0-1
Well its playing along now if i plug straight in from the substract 😅
all you need is a time with period, append, panner
so exactly, what are you trying to achieve
it starts a speed of -.075 then slows down over a period of x seconds to 0
im making a puddle
but want the ripples to slow down
But I think its not working because im using negative numbers 🤔
and lerping into the positive or something
Ive got all the textures and such working one sec il show ya what im up to

Think ive got it decent looking so far
sine/cosine come to mind to slow it down
Il just keep playing around i think its something to do with coordinates im guessing 🤔
@worldly pivot You can't adjust speed of a panning texture on the fly seamlessly.
In the essence, panner gives you input coordinate + time*speed
what happens when you change the speed?
all coordinates shift
Im not following sorry
Ok i sorta follow
Sorry im not super mathematically minded
Returning to a topic of foliage interaction simulation, and what not. When you are driving your wind animation with a global evolving wind field, how would you perform shifts of content within render targets? When fluid simulation is not involved, everything is straight forward, since you populate newly shifted in areas with default values. But with fluid sim running, whatever you do at the border, will eventually have effect all across the field within some number of frames. Any ideas how this is can be addressed? Or perhaps someone knows and willing to give some insight on how it is done in shipped titles, that are using this approach to foliage wind animation ? Hope the people I tagged, don't mind sharing thoughts. @celest birch @still delta @calm hemlock
@zenith warrenathrey#7531 I would treat border as a sink. On top of that move sim buffer discrete steps
So if character is running forward and backward and buffer shifts, you would loose simulation information there, but I would expect borders to be further than whole effect being visible
@still delta Cheers for jumping in. I really appreciate it, especially considering not many users understand what I am asking about. Yep, the render targets are snapped in discrete steps, adjustable in render target texels. The boundary condition of the sim is already free flow. The areas, that move out of simulation, are simply gone and have no effect. The areas, that move in, have default conditions. Zero pressure/ zero velocity.
The problem is that newly shifted in areas causes a wave to run through all the sim
Populating fresh texels with a copy of previous border texels data does help a bit, but it is still an issue. Maybe I am just setting the sim parameters wrong, and should ramp up the dampening, so all the effect is more localized, but I'm in a bit of a doubt
Hmm, I see what you mean
Maybe something like a weight gradient on edges could help
Kind of like dampening, stronger near the border
Never done a fluid sim for wind so can't help much. I was going to suggest duplicating previous values but seems like you already got that one 😅
Yeah. In the essence, to fully cure that, I would need zero gradient on all the region of a snap plus two texels. That is quite a bit of simulation space, forcing to shift into far cascade earlier. Cheers for idea thought. I will try to brutally dampen the sim on the edges.
@analog onyx My solution would be keeping a safe border of calculations around the active tile
So like
When your player moves and RT for whatever global thing re-centers, player ends up in area which was already well simulated
And the new neighbor tiles are initialized with default values, then simulated until they settle
@calm hemlock Player is always within well simulated area, it is just that whatever happens at borders, eventually propagates to the player.
I'm wondering how I would do a drop-shadow post process effect behind a character, similar to the shadowing that occurs with cel-animation?
folks... how do you lock the axis of the particle, so that you can rotate it in the world-editor and it will follow that rotation?
@idle dove There is a lock axis module in cascade.

is this a post process material?
could be anything but you'd most likely want to make that in regular material
it's just way easier to control
edge effect could still be PP
could get something similar with fresnel/noise/emissive
how can i layer that effect ontop of existing materials using dynamic instance material without having to expose parameters in each and every material?
if i had an actor that has multiple materials on it, but i want that glow effect to happen on an actor regardless of how many materials it already has?
i think i got it actually
ya that's some bits built into original shader and/or a swap to a different shader for character.
i'd handle that with a Material Function so it could be recycled across characters
"Fire On" parameter and done
the easy thing about it is, it's mostly emissive, so it could literally just be plugged into an ADD node at the end right before the Emissive plug in
beyond a fresnel, at most this thing needs maybe 2 panners max, possibly world-space or object space UV's
and i don't know if it does a fancy dissolve-out, but that would likely be most advanced element of whole package
thanks
Is collison and actor Collision the same thing inside of cascade?
@worldly pivot no
Only CPU Particles can have Actor Collision. GPU Particles however can only have either Depth Collision or Distance Field Collision
Thanks
was just watching old tut's where its called collision still
was wondering 😅
Looks good
wrong channel though i think
@nocturne barn
We need a lot of effects for the game. alas at us to create them leaves very much and very much not qualitatively and slowly
are there willing to help in creating particles on enthusiasm or with a stint after the demo of the game?
Post a ad in the #looking-for-talent channel 😃
thanks!
When particles collide via Actor Collision, is it possible to figure out what we collided against so that we can react to the collision based on what we've hit?
I know we can get the location of the collision, but there's no info on the actor we've collided with from what I can see
No, we cannot. Atleast not without a work around
Anyone know if animated vector fields are supported yet? Last I checked (a year ago), the only way to get a similar effect was by lerping between 2 static vector fields.
@fresh harness nope, though there might be a plugin for it in the making.. but not anytime soon
No
Any ideas whats going on with the material on the right?
The material on the right is translucent
it is suffering from translucency sorting issues
Thanks @analog onyx, I'm not great at making materials, and I'm trying to figure out where this problem lays. How can I fix this? Is it an issue with the opacity?

Get project files: http://cbr.sh/od53nz Learn how to replace translucency with a dithered mask. Vote on ideas for new tutorials: http://tinyurl.com/taa-roadm...
they're drawing in the wrong order
i'm not sure how you fix it though 😦
is the bench just 1 object
you should be looking for this though "translucent sort priority" or whatever it's named
any pointers you guys could share when dealing with sorting issues in smoke and fire?
things to avoid, things to try...favorite sorting modes?
I'd guess unsorted alpha composite is my favorite.
I don't think I've ran onto sorting issues with this kind of particles before though. You could try sorting by age, if it helps. @harsh peak
Anyone ever notice that when using velocity aligned sprites - they tend to jitter / vibrate at low speeds ?
yup
you can kinda offset that some by using drag
at least i THINK that works
don't quote me on it
an ocean of grass
lol
xd
@fossil swan Can't you use BoundingBoxBased_0-1_UVW for that? Unless I'm misunderstanding
@celest birch that doesnt update the uv's on rotation along the X-axis (or any axis for that matter)
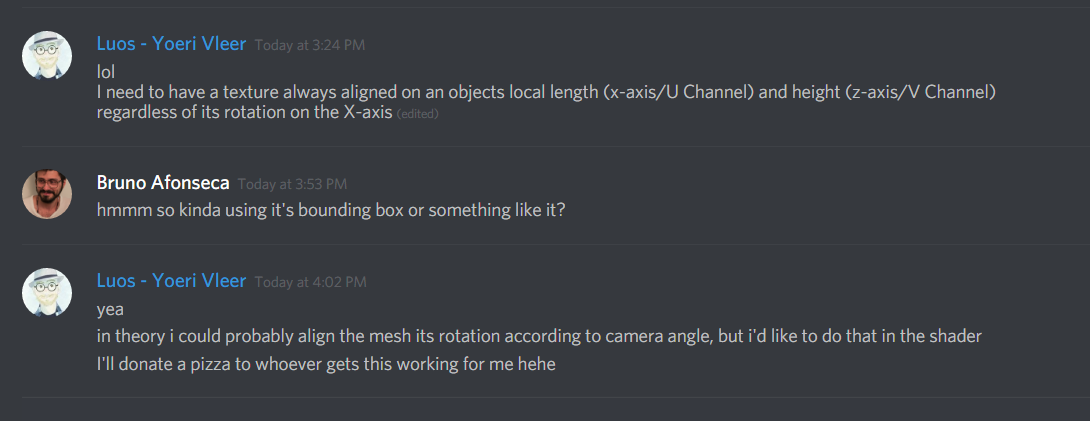
Luos of them particles, I don't think your demands are clear enough.
i have no idea how to properly explain it besides what I already said hehe
Drawing/Gif/Reference to this effect in existence, if any. Telepathy as a last resort.
I have a cylinder mesh, and I want the textures U channel to always be aligned along the X-axis, while its V channel is always mesh bounds aligned?
doesnt explain it either
think of it like fresnel, but doesnt change depending on angle

so from front view it looks fine, but from sides it fucks up

(using the fresnel as a gradient for uv-channel)
local Y-aligned fresnel ish?
In case with fresnel, perhaps you could transform normal and camera vector into local space, do fresnel approximation in local space, restricted to the axis, that you have interest in ?
I am not sure that this will give you want you need for this effect though.
no clue, spend 5 hours yesterday trying all sorts of stuff to get the result I want but my math (especially camera/vector based math) is suck monkeyballs at
Which view is the side view? 😅
i bet it has something to do with camera vectors, but well..
¯_(ツ)_/¯
when the camera angles along it
Looking at the cylinder caps?
I've reread your messages like 10 times and I still can't figure out the intended effect 😩
@fossil swan Isn't what you want already in the engine? (AxisAlignedFresnel matfunction? )
@analog onyx @celest birch ill try to explain it on camera-recording after I am done with dinner & chores.
@analog onyx hmm never seen that one
ill hit you two up when I haz the video
laughing my ass off because without context this would be the video of someone in need of psychological help STAT!

trying to explain my vfx buddies what I want. Without context this would be the video of someone in need of psychological help STAT!
@analog onyx @celest birch
@analog onyx sadly the axisalignedfresnel doesnt work when the mesh rotates on another axis then the one its being aligned to

Yeah, I sort of get it. You need to define position of UV seam in relation to object, and use difference between object and camera transformations to add UV oofset to V channel to make sure that seam is pointing towards the camera.
But it is a bit.. undefined.
well for my usage, I want to use it for a grayscale (white center, black edges) to use it for a mask to drive some neat masking stuff
so it doesnt have to be a texture in my case, just a grayscale.

lemme try
should be green or red vector, depending on unwrap

Then I still don't understand the intentions. The above graph should yield you this :

derp, forgot to add the trasnform

local bottom/top of the cylinder should always stay dark regardless of is rotation
@fossil swan Just woke up from a nap. Is this what you wanted? https://gyazo.com/3d933ac96deb14cffe627090994a312c

looks like it from a first glance @celest birch
Do I get to pick my pizza topping?
would like to try it out first hehe
It's actually literally the AxisAlignedFresnel plugged into BaseColor
I think you didn't provide local axis for the cylinder when you used it
I did
Can I see how you set it up?
already butchered it after other attempts hehe
Should be like this assuming the length of your cylinder is on the X-axis: https://gyazo.com/190780024526fe49c4255dbf63af4f12

yea that still messes up when you look alongside the mesh as if its down a barrel
more noticable when you increase the exponential
its really close to what I want, but not perfect hehe
😩
I guess the simple solution would be to not rotate cylinder around the x-axis
So you can use bounding box that is
Wyeth might have given me the right answer, will share if it is 😃
Great, no pizza for us!


I believe it still has the same problem of getting smaller at steep viewing angles
Which I think is what Luos is getting at
Yes, this normalization will run into zero vector length at angles.
my problem was it becoming bigger and either masking or unmasking wrong parts

from Epic's own Wyeth hehe
really appreciate your help btw @celest birch @analog onyx


Yo, Question regarding Translucency and PP.
I have a Post Process which adds a Fog to the Scene.
However It should selectively obscure Translucency. I have a plane that should be obscured by it and some visual effects (godrays) should be affected according to their depth.
The Black fog should not obscure the godray, only the water surface
Anything you've tried so far?
The fog is a post process. It can either be Before or After Translucency. So I dunno how to solve it.
I could make the Godrays Masked+Dither, but that doesn't work with Depth fade :/
Here's a screen with the Godrays Masked+Dither
Looks ugly af
Render them to custom depth and do a depth check?
Custom Depth doesn't work with Translucency

Works for me 🤔
Use Opacity buffer in PP to mask out parts you don't want
That could be interesting. I haven't worked with Stencils before. I probably need to make the Godrays have a custom Stencil to only mask their Opacity, right?
Hmm actually from a quick google, Opacity buffer is misleading. Apparently it is used for SSS not translucency
But yeah your idea of custom stencil is what I would do
I think the correct one is Separate Translucency
Could just abuse volumetric fog for them god rays.
Lose dat 4ms!
Separate Translucency doesn't seem to be a solution, since the water is affected by it, too
Render water to separate custom stencil and subtract opacity
There doesn't seem to be a solution.
I cannot access the opacity of the godrays or the Water surface. Separate Translucency Buffer shows everything in white, even opaque normal meshes and materials
Separate Translucency is in Post Process Input 1
Doesn't look like it
everything is black
god rays are set to render after dof but don't appear in the PP
This is what my Post Process Input 1 looks like: https://gyazo.com/9e130d9108daf08bc60bdae632559a7d

Wait, I got it now
omg omg omg
guys
Niagara just got pushed to Master on github
goes build the latest engine
sigh. Not gonna be able to build until weekends ;<
I've got a lot of meetings at work tomorrow, I know what I'm gonna make my machine do meanwhile
also building on my laptop right now whoo
how could i link one character to another with like a particle effect? what would be the best way
want it to wiggle a bit and the like?

Save your teammates from danger as Phase, the new ranged Support in Paragon. Play Phase for free now. #Every3Weeks https://www.epicgames.com/paragon/en-US/re...
like that where she links to the player
some would say ribbons, I would say a mesh set up like the linkgun in ut3/ut4
its very blueprint heavy, i'd download ut from the launcher and check it out in the ut4 ue4 editor
its basically a mesh along a spline
wire component might also work to some extend
not quite sure what i need to do, kind of new to particles
the linkgun setup isnt really a particle, but a mesh thats bending trough some shader and blueprint magic along a spline from point a to point b
looking at the link gun in UT
i got the Phase character, looks like they are using ribbons

yea thats what I meant, oops.
is there a guide on beam particles?
Anyone know how I get decals im spawning on impact to have better clarity over distance? They look blocky from not very far away
UltimateAuraPtr->DeactivateSystem(); but how do i delete the particlesystemcomponent after?
hey guys... i have a problem with smoke... i attached my particle to a character bp with sockets, but the smoke follow exactly the animations... is there a option where the particle only use that as start position and move the violocity correctly without impact from the character animation?
oh nvm
found it... under required "use local Space"
@wild basin mess with MIP settings in material/texture
thx
this may be more of a graphics question...so apologies in advance.
I've got 2 textures; (A) one for how I want it to look when it's receiving light, and (B) another for how i want it to look when it's not receiving light.
Is it safe to assume subtracting B from A and plugging that into base, and plugging B straight into emissive would work? It seems to work, but I was just wondering if it might mess up with certain A and B color combinations.
GUYS AND GALS!
IT'S TIME!
#realtimevfx #UE4 #techart #vfx

seems like it's coming


wow
HUGE commit
this is for real, its merging the absolute latest niagara code into master
Just built the release build with niagara, editor sitting at 45%, watching the GDC talk again 👀
this is supposed to be animated?
@celest birch That's an interesting problem you've got there. What have you tried so far? You would probably create a base shape and then duplicate them using math in the material
@bal\
The rotated box material function is a bit heavy but I couldn't think of a cheaper way to get the effect.
- Added preview
really nice work and using a node I have not played with before, the linear sine
Thanks, linear sine is super useful. You can also use the "ValueStep" function to do the same thing. Haven't tested to see which is cheaper.
I just find linear sine easier to get my head around.
I know there is another function to make a line easier but I can't remember it's name off my head
If you find it let me know!
well I've used it before but lol if I can remember
yeah generated band. No idea if it would work for this tho
Oh linear sine is just a triangle wave
@icy pebble Yeah the tricky part is rotating and scaling it around the middle.
yeah that's why I didn't know if it would work or not heh 😉
I really like the function for the first one tho, you FX guys are freaking smart
@celest birch No problem!
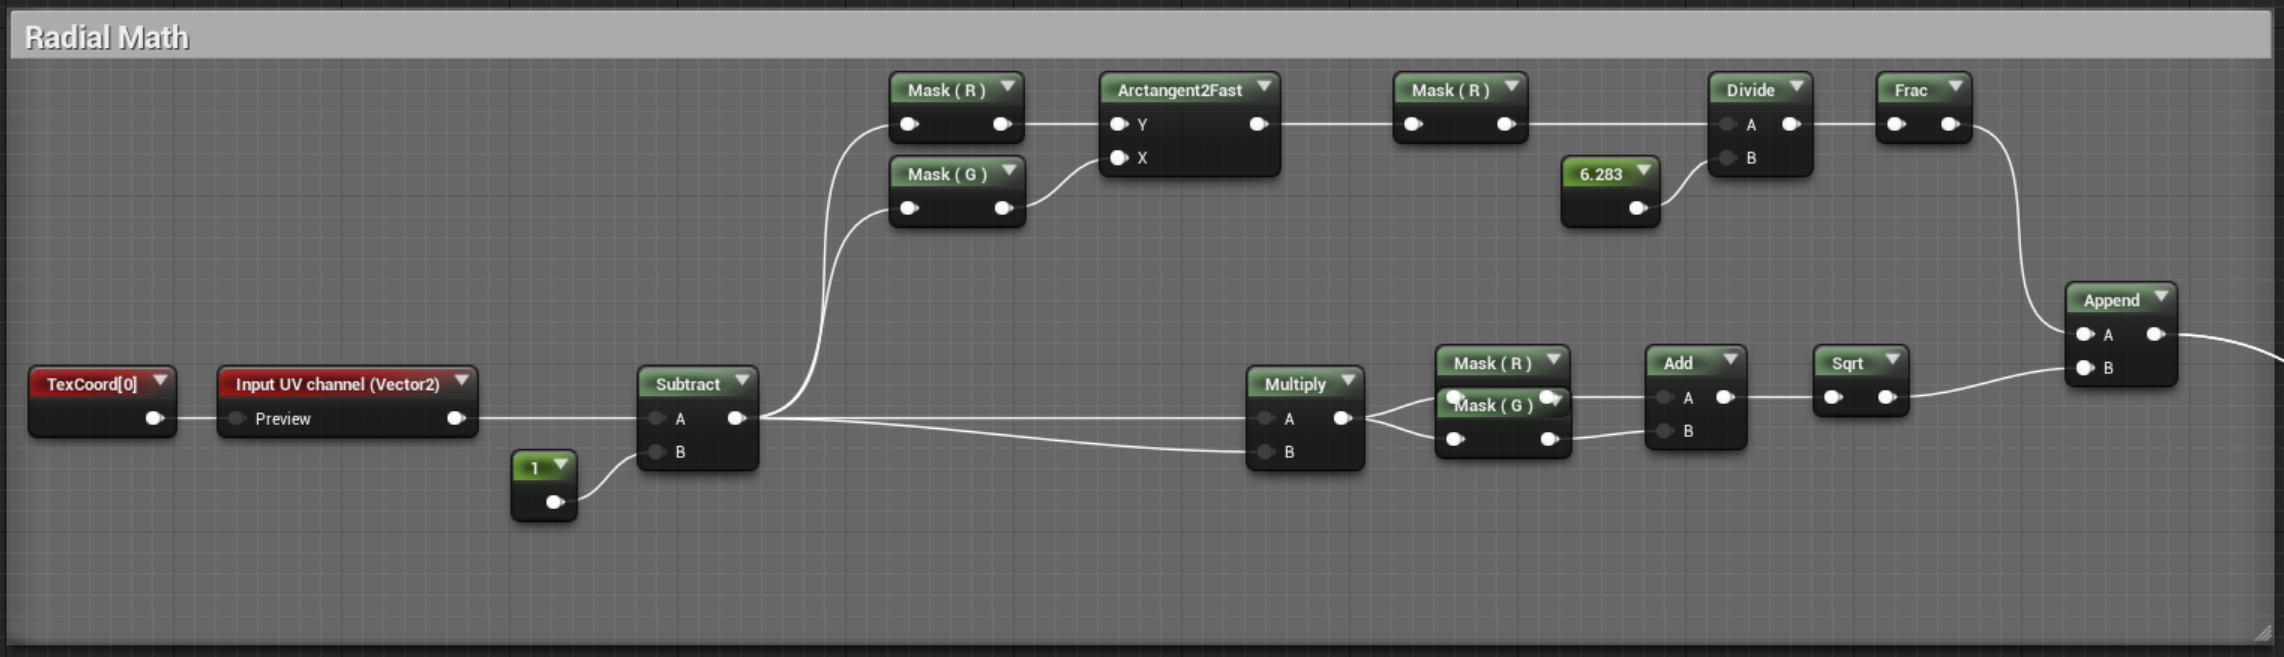
vectorToRadial has an outdated custom node inside it if im correct, which should be replaced with an atan2 node, saves a few instructions
Here's a more optimized version of the rotated box:
@brittle remnant that atan2 is a custom node, not the "newer" official atan node, and the atan simple version works fine, reducing some more instructions
@fossil swan Ah cool thx!
Cleaned it up to use both optionally
@fossil swan You have your X and Y inputs flipped. They were reordered in the original version of the shader. (Y on top X on bottom)
I did the same thing the first time I hooked it up. LOL
works fine for what I need
rgr
https://i.gyazo.com/1e3434c3910b30ea8ef300fd2949c58c.gif
https://gyazo.com/cc47cd7e63d0bb39cfaa362368c7a58f
I cant figure out why it does that weird stretching.
also, off to bed.
^ click on 2nd link for better fullscreen

I mean except for the stretching 😄
My guess is that the normals are getting distorted from the non uniform scaling.
Try using the pixel normal instead of the vertex normal at the end
Or another approach would be to move the verts along X using a local position offset to stretch instead of scaling.
That should leave the normals alone
@fossil swan i think you have Uniform Scaling locked 😛
hard to tell, but it kinda looks like it's inverting in all axis at once instead of just X
That gif was super satisfying to watch, Luos. Such a nice effect haha
@brittle remnant need to use scale, @indigo jolt thats not the problem.
@fossil swan do you see the same scaling behaviors when you remove the material and just look at the geometry?
no its fine then
@fossil swan I am not sure what you are up to with that node network. If you want to make certain WPO effect scale-independed, perhaps you'd need to transform unit vector from local to world and measure its length.
@analog onyx everything works as expected, but for some reason when scaling the mesh on its z-axis messes up a clamped gradient and causes that weird size/offset thing
Yeah, but what's the point of world to local transform before multiplying by vertex normal ?
using the normals of the mesh (which is made out of 4 cylinders) to change each cylinder's size
and that was the only way to get it working regardless of mesh rotation
(for me at least)
but the moment I introduce the gradient for the begin/end cap offset and rotate it:
https://i.gyazo.com/69da87b09dce3377e9f4ed7387484a79.gif
https://i.gyazo.com/f38579b9647b00441ef03e7e8b64a1be.gif while its fine when the mesh isnt rotated
Aren't you supposed to transform from local to world instead for that ?
if i turn that around the seperate cylinder offset isnt working
would this problem-solving be easier if I shared screen?
changing it from local to world actually results in weird behavour hehe

On a satellite dish connection atm. Won't be able to see a sharescreen without lagfest.
allright
But with that transform node, you will get different results, depending on mesh rotations. If you are interested in getting scale relation for each axis between local and world space, you would need to transform a unit vector and measure its length. I assume that is essentially what you are after.
length shouldnt be an issue at all, it should work regardless of me changing how long it is.
@fossil swan What happens if you remove the appends and the transform?
Also, what's the 1-x for? As far as I can tell, the input is not saturated so you might want to be using * -1
two of the cylinders have inverted normals
Technically, you should *-1 to invert
ill keep it in mind
currently only testing the gradient stuff, one sec
the hell
one sec
did I just overthink it? without the appends/transform its working hehe
🙂
want a pizza? XD