#aec-visualization
1 messages · Page 5 of 1
.....
have you tried to reset xform ?
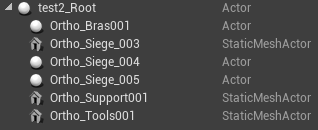
I've just done it on a mesh
and it now imports as a static mesh actor instead of actor
yep this is it
No. But I reset, will I lost the map channel?
no non no
you won't lose it
Lets try
(If you fix my scene I will buy you a house or something like that xD)
rofl, just a thanks is enough 😉
xD
.....LOADING
UUUUMMMMMMMM.....Almost. Now I have another problem xD
Look
The mesh has darkened and looks transparent in some areas
looks like flipped faces
are your polys facing the right direction in max ?
reset xform shouldn't do that
at worst its gonna change the pivot or transform
but not flip faces like this
and the mesh being dark/shadowed differently is probably due to the flipped faces
hehe
xform can do weird stuff
but when it does, then something isn't right with the mesh in first place
uumm
Maybe
Im goona try to fix this new problem
firist of all, Im goona try to fix one or two object.
I will write in a few minutes. Thanks a lot!
I have a nice Unreal walk through scene and a idle Oculus Rift ready in my office. Client is visiting tomorrow, and I want to show a quick implementation of VR in the scene. What is the quickest way to get VR headset working in an unreal scene. Interactivity is not important. Thanks!
@glossy creek have you looked at the unreal studio product viewer template ?
you'll have both 2D and VR in one package
Yes, but its a lot to dig through to just figure out the relevant part that I need. This client visit is a surprise, because I am taking a step one through one hundred approach to learning blueprints.
Oh wait, I have not LifeForLife, I was thinking about the VR template.
hehe
the Vr template is a bit bare bones
and it requires navmeshes
the studio one though doesn't
Bare bones is fine, and navigation can be left out for now. Just need to "copy and paste" the relevant blue print classes I would assume.
I'm not even touching the blueprints when its just to view stuff
Hi there! I have a quick question for you guys.
I remove a few actors from the template scene, then add a sublevel with the things I want to show
move a bit the player spawn and bam it works
I'm working on the lighting for a scene in UE4 and i'm getting weird shadows whenver I bake the lighting.
Any clues?
Lightmap resolution not high enough.
low resolution lightmap
Aight. How can I raise that?
in your mesh properties
Okay. Thanks!
General settings > Light map resolution
Also set the Min Lightmap resolution value to match your Lightmap resolution
and press apply
speaking of unreal studio template

made in a couple hours
model was from another project, had to remake some parts and lower polycount
Cool, I
I'll try and grab the settings* from that and paste them into my Unreal Studio Project.
@paper night found the settings ?
Yep I have!
Problem solved, muchachos.
Here's another question though: see that thin line in the shadow of the pillar? That horizontal thin line?
Thing is, it's not in my mesh.
See? The thin line doesn't make sense. Any suggestions?
Yep!
are you sure your mesh has all its vertices welded ?
it looks like there's another plane on top of the floor
:p
:U
disable its shadow casting. Thing's looking pretty now.
Thanks a bunch for your help!
o7
I have a shadows question. Despite having high resolution LightMaps, I will still often get shadows that I consider blochy, what else can be done outside of LM res?
can you show us your lightmap UVs @glossy creek ?
chances are your lightmap UVs are messed up, resulting in low res for the segment of the mesh you're looking at
Not at the moment, working on something else to get out the door. I can tell you its a wall, and I flattened the UVW's in max, simple wall, verts sealed, no missing faces, etc.
Shadows not terrible, just not on the level of vray or some of the top level Unreal ArchViz examples, like nutsnuts
@glossy creek What are your settings for lightmass ?
the defaults are pretty crappy for archviz
They are messed up now, because I've been messing with the GPU lightmass beta thing. I did production and 10+ bounces, etc.
Pretty darn high, I had swarm agent pounding 10 or so machine slaves.
yeowch xD

One skylight with HDRI, 10 bounces, quality at 6 and smoothness at 0.8
Using Production quality and GPU lightmass
one machine to render, (GTX1080 oc), does it in a couple minutes
Yeah, I have a GTX1080 at home, and a older Titan Black here at work. Works wonders.
Right
this may be caused by the GPU lightmass
other users had the spotchyness I think
That was baked before that I belive
oh really ?
what is your resolution scale ?
should be the first lightmass parameter
"Static Lighting Level Scale"
I usually put it at 0.1 or lower
Yeah, I'm aware of it, just loading the scene now
you can also try to switch off the lightmap compression
it'll take more VRAM, but can improve the looks
I've messed with low settings on it, and at times had huge diminishing returns.
"low" as in .2,.3 etc
Okay, it is set to .35
Not 100% sure that is what I had it to when I did the bake above.
have you tried to bake the scene with the GPU lightmass ?
maybe it'll give better results with less noise, who knows
you're bound to have a little noise anyways
woh that's way too high
Yeah. I went for broke
The GPU render HATES very high lighmap settings, found that out the hardway
yep, it clogs the GPU vram
unless you have a quadro with a lot of it you are bound to crash :p
The problem I found with splitting the walls, is that it introduces problems where the walls meet, not to mention the shadows were still blochy, I have gone that route in test.
you bet
there's way too much stuff in that UV
try to cut it into pieces
lots of assets with lower resolution is better than a massive one
Okay, I'll have to re-approach from the start, with all that I have learned. I have done test where my walls where not attached, but I should go back and try that test again but do it better.
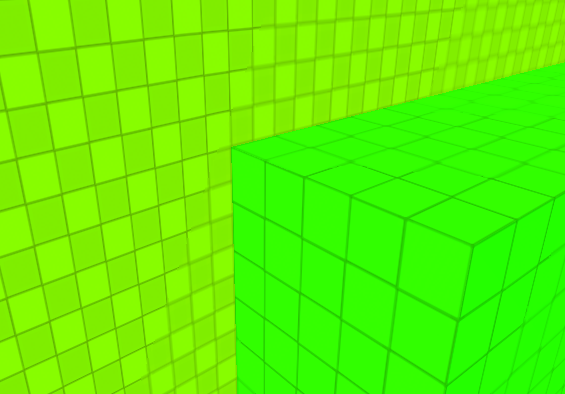
see for instance
the scene I posted earlier
with the flat colors
every cube is its own mesh
every wall side too
this is a bit overkill, but you get very clean light bakes that way
and for walls I'm not going higher than 1024
floors and ceilings, 2048
I was under the assumption, referencing that scene animation above you posted, that walls should have all faces, to avoid light bleed.
And its well enough to get good looking results
well there's an external wall
I'm just hiding it to show the inside :p
Oh okay
Yeah, nice results.
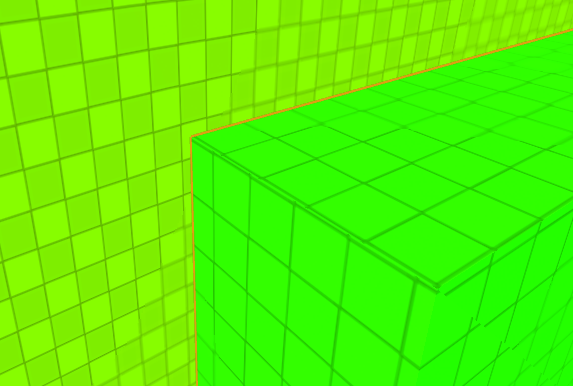
this is a one hour hackjob I made a few weeks ago
to test out GPU lightmass and lighting scenarios
when I told you about super simple UVs

😂
even with 2048px max for lightmap resolution, my screen is bright red while in lightmap res debug
Yeah, I need to pair back down to test scenes to work out these issues.
What I dont like about unreal lightmass, is that sometimes to reduce noise, it seems like adding light, is the nudged solution. For instance, the provided realistic lighting example scene of an apartment, looks nice and clean, take away a few lights, and the noise starts to show up.
well lightmass is a pretty old piece of kit
epic really needs to bump up the algorithms used
Yeah, I'm grinding my teeth coming from Vray.
at least now it takes skylight bounces in account, you were limited to one bounce before
but you can't do realtime with Vray !
No, exactly, everything is a trade off.
with how much epic is investing into studio
I'd be surprised if they don't look at better light baking stuff in the next year or two
I have full confidence in Epic going into this direction, as well as plug-in support making it better. So much so I've really pushed our company to embrace Unreal, VR, and spend time on it. I'll be going down to reighley north carolina for their epic studio learning thing next month, so - I'm all in!
oh you're attending the studio formation, nice !
"Unreal Academy"
I wish I could go, but a trip from France to the US is a bit difficult to justify 😅
yeah
I'm pretty hyped about the new datasmith features in UE4.20 aswell as the Revit compatibility they just started working on
Datasmith is making this whole thing possible, or else I wouldn't have bothered.
yeah
I've been trying to import CAD stuff before datasmith
it was a horrible process, very time consuming and not giving really good results
plus performance for VR was horribad
with DS and python scripting, we were able to make a few tools to optimize everything in a few clicks
anyways, been greating talking to you, gotta bounce home !
I'm always lurking in this channel, so if you have any questions don't hesitate to ask 😃
Thank you so much!
Can someone help me? T_T
I have this
But I dont have problem with the same part in Max
where is the problem?
Yo, another question for you lot: why isn't Screen Space Reflection working for me?
The floor has high specularity and low roughness, it works fine with a reflection cube
but my SSR wont work.
@paper night using forward or deferred renderer ?
Deferred
i got it to work but now its looking kinda odd
Sometimes it looks just right
However, sometimes it gets a bit weird.
then it just gives up.
what gives?
those are screen space reflections failing
and yeah it does that..
what you can do is add a reflection plane
much more stable reflections with it.
Now, planar's doing the job just fine, however it's not reflecting my atmospheric fog properly!
I believe the reflection planes don't reflect post process effects like fog? Not certain though
hmm you could fake it by adding a sky or a large plane behind it
it's plain white anyway so I dunoo if your fog is really doig you any favors
I would put a sphere with an hdri outside, that will allow your skylight to get better lighting from its capture
I have added a Sky Light and that did the trick!
make it stationary, that'll give the best result
You really want to stay away from SSR for arch viz
There is a great evermotion tutorial on how to get good, clean, reflections in ue4 just google it
On a different note you probably want to stay away from super shiny reflective materials because they generally look artificial and are rarely seen irl
Your reflections should be subtle not blatant
Out of curiousity, is there a preference between bringing in lights from our original source (ie: revit - 3ds lights) or just using UE4 lights?
not really, depends on what you want to do. right now the auto exposure doesn’t work with correct camera exposures so the physically based lighting units are mostly useless for now
it saves you from having to position them, that's about it
unless your project already has lights in the max file, doesn't serve any purpose
thanks!
any thoughts on why my foliage remains but my landscape has gone missing? https://i.imgur.com/VL4w0CF.png
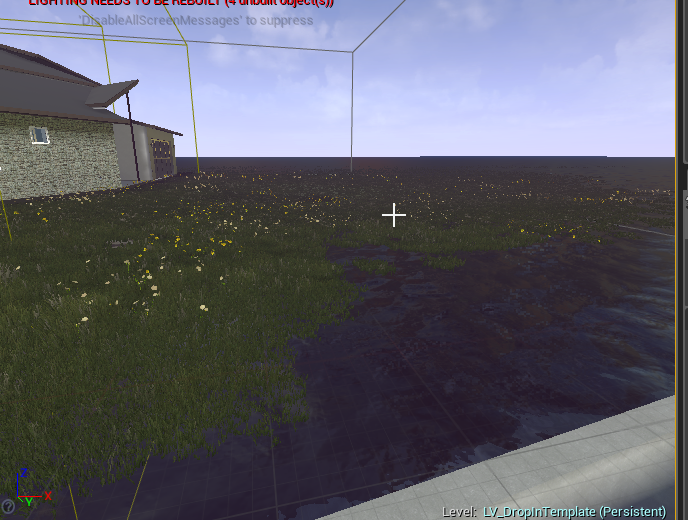
nevermind.. helps to turn it back on


CGarchitect Architectural 3D Awards recognizes outstanding achievement in the field of architectural visualization.
if yall want some money from Epic by making archviz !
Hi everyone. I have a big problem. Ihave this
But when the render its over I have this
I dont have error menssages or overlapping meshes
set your skylight bounces to 3 or something for starters
how is your lightmap density @normal river ?
Ahh ok
but tbh, even with low resolution its should still look much brighter than what you posted
hmm yeah it looks alright
maybe the stairs are too high resolution and the back walls too low though :p
but it looks like this isn't the problem
Yes. I will change this
can you show us your directional and skylight parameters ?
no problem 😃
Sun parameters
Skyligth parameters
General parameters
Ops sorry about the last picture xD
Yes, I have to use paint, I dont have photoshop in this computer
xDDDDDDDDD
good ol paint 😄
you can use the capture tool !
or sharex
sharex works wonders to do fast uploads
Thanks 😅
or even the snipping tool
@normal river have you tried building lights on a new scene ?
or is it doing only on this one
Yes... but I can do again.
also do disable the eye adaptation effects
I tried more than 30 times, but I dont care one more xD
try to create a new project
maybe something is fucked with this one
try to also verify the files of your engine
from the launcher
May be its a datasmith problem??
Never
try to also verify the files of your engine
from the launcher
I dont understand this
I have never modified the startup files
something may be corrupted somewhere
just trying to iron out the possible problems :p
when in your launcher
next to start on your engine version
there's a drop down
and a verify button at the bottom of it
(do close your engine first !)
Thanks Im so frustrated
I'm pretty sure its something that got changed at some point
And fucks up with your baked lighting
I begin to think that it is a gypsy dammation
Do I have to have the debug part of the code?
I had something like that happen to me, but only parts of my scene were black. Added a spherical reflection that covered the whole scene and it got rid of the black parts of my map, Unreal can be really strange like that.
uuummm I will try this to
But I had one of this big balls, and the result was the same. T_t But I will try again
another thing, make sure your lights are static or stationary
can you take a screenshot of your lightmass map preview?
@median mural scroll a bit upwards :p
I am talking about this
oh, myb then
depends, how many mesh assets do you have in your scene ?
@dusty gyro more than 60
also make sure everything is power of two
Power of two?? I dont understand what are you trying to say?
light map on every object
The fact is that I put a light inside and it does not work either. xD
@median mural How can i sure, that every object has ligthmap?
Oh! Its work! better!
But I cant see anything inside.
something is definetly not right with the skylight
try changing it to static ?
instead of stationary
I think this is a light map resolution problem, but it's 512
@dusty gyro I will try
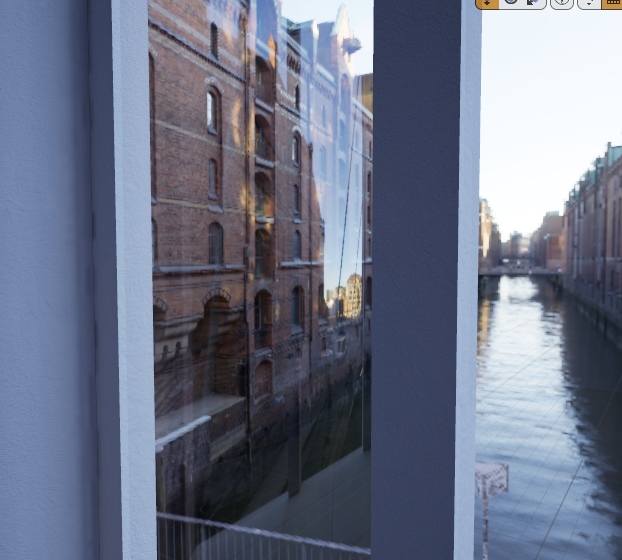
this reflection cube is reflecting the inside of the room onto the outside face of the glass. Any pointers on where to go from here? https://i.imgur.com/bvezRwg.png

also, this glazing is doing weird things that other glazing is not: http://gibsonhh.info:8081/revit/video/2018-05-22_09-19-01.mp4
I know this is arch-viz, and I apologize if it's out of the scope of discussion here but it is for visualization of architectural projects! xD
@gentle osprey what is your glass material like ?
also, sometimes you need to use cube reflections instead of sphere to get more accurate results
transparent material master: https://i.imgur.com/DRMn1xp.png

even with a box reflection and the center being outside, it pulls the reflections from inside the space
hah, its the material from that tutorial !
I've found out that lowered refraction values work better
as for reflections, you'll have to align and scale the boxes/spheres correctly, it takes a bit of tinkering but you'll get the results you want @gentle osprey
I think the only lower increment I can go on refraction is 0 for this instance but I may have to
@normal river use alt + 0 to check lightmap density
also if your UV maps are bugged it can give really wierd effects including black
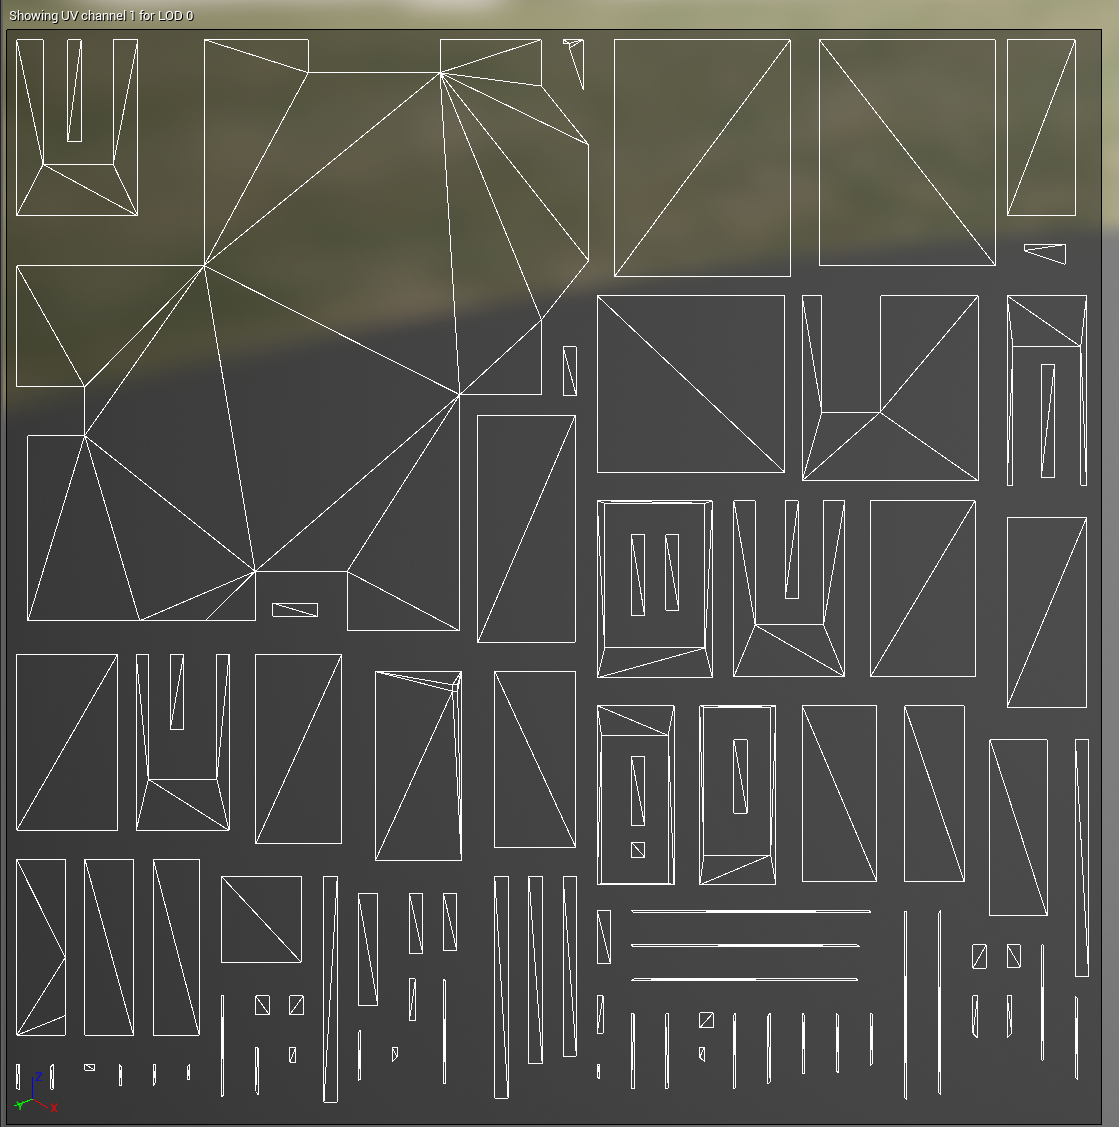
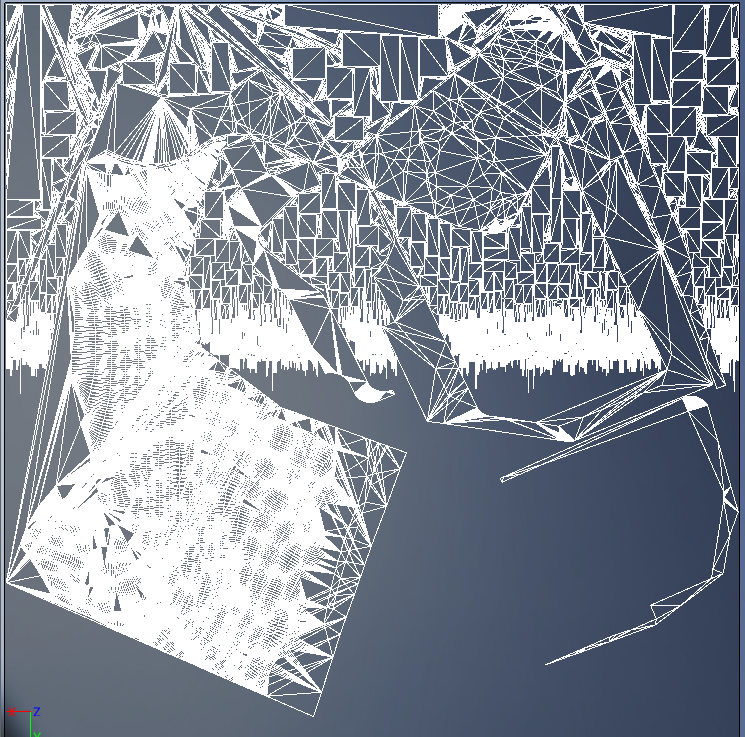
@pale prairie How can I Know it my UV Maps dosent work? Because, at the end of a render, I dont have any warning or mistake
If you edit the mesh, and look at your UV Maps, you should be able to tell
Ok
You don't want your UV Channel to look like this: https://i.imgur.com/r9YypCb.png
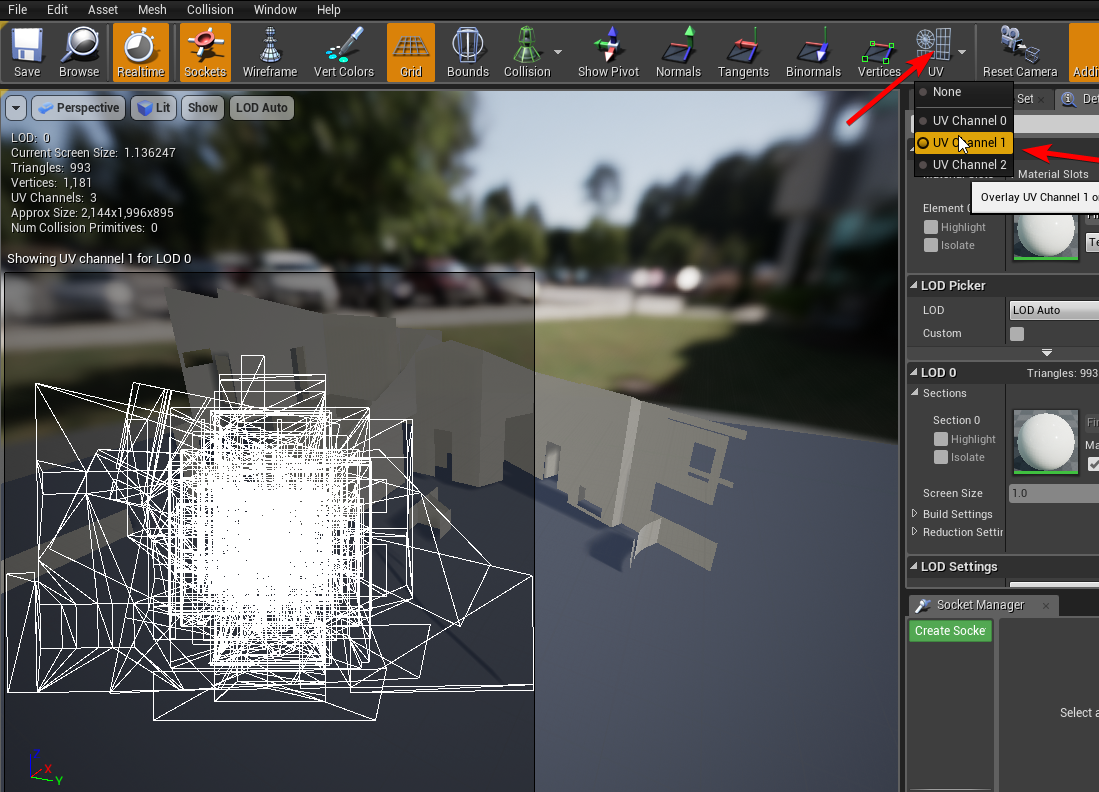
You want it to look more like this: https://i.imgur.com/bcb1fKy.png
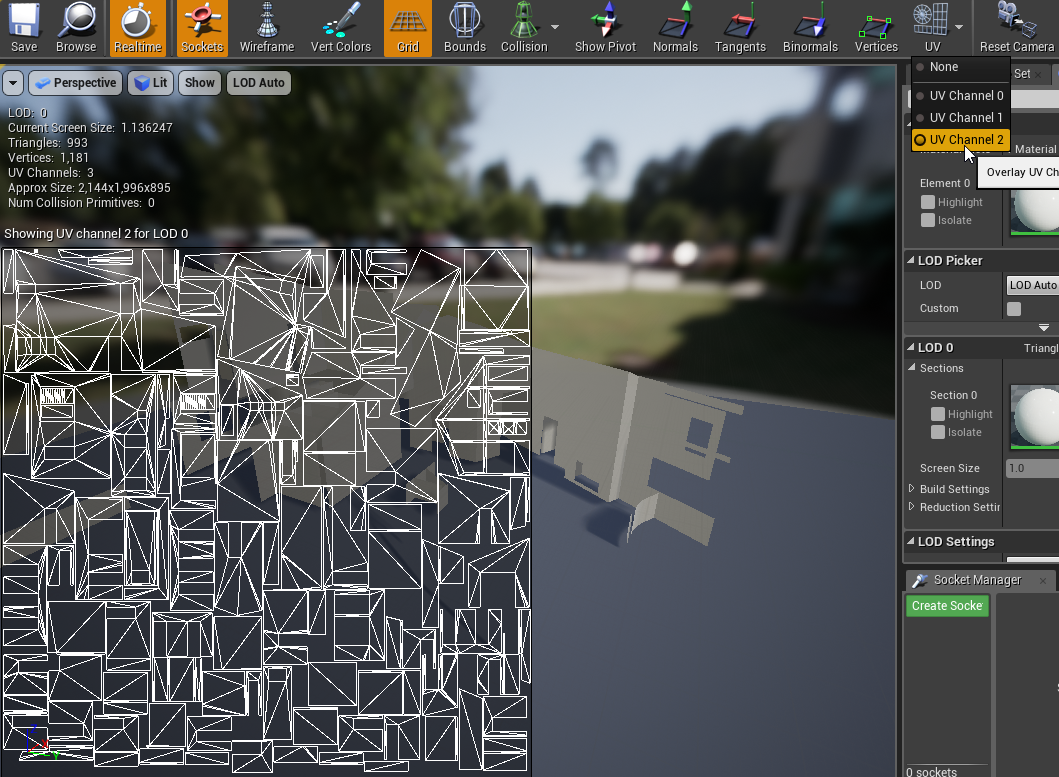
if it looks more like the first image, you may need to repack your Lightmap in your authoring software
I speak as having exactly 4 days experience in lightmaps and UVs
I have clean my uv channel
"rkitect: I think the only lower increment I can go on refraction is 0 for this instance but I may have to" To disable refraction you have to set it to 1
But sometimes they use channel 2 (messy channel) and Unreal never give me a warning or error I dont know why
So, I decided to build the lighting for this...
and it turned into this:
Resolution's at 1024
what am I doing wrong?
is this BSP?
HOW DO YOU DO THAT? T_______________________T
looks good
is BSP/CSG not supported by Lightmass?
are you using SSR for reflections?
im not using SSR because my target platform is VR and SSR is kinda screwy with VR
and that
Thank you!
After working with lighting for 3 years in Unity and jumping to UE4, i'm pretty shocked: thing's fucking powerful
planar reflections do work in VR, just limit yourself to one.
yeah lol
Yeah, that's what I'm using, dann
I said that SSR doesn't work well with VR, not planar
Last time I did a lightmap in Unity it came out fantastic, I used octane to bake it. it took a while tho.
yeah, octane does wonders
the progressive lightmapper has some serious issues tho
Now now, important question: does UE4's BSP/CSG work with Lightmass?
this is just a subjective opinion on my part, but I would recommend adding some sort of grunge or non-uniform noise to the floors specular
ye i will, Alexius
a normal map will do wonders, too
ah true
I need a good tutorial. I touch everything but it doesnt work. I tried putting my whole scene in the Unreal tutorial files, but it didnt work. I did all the things I read and saw ... I do not know ... It's so frustrating ...-
have you read Troubleshooting Guide?
huh
what the fuck
lower.. is higher?
LMAO lower resolution values yield maps with higher resolution
what the shit.
Thanks a bunch for the heads up, @median mural ! You saved me from going nuts here, man.
clearly it's some math stuff we don't know they need to calculate it somehow
but texel density would be easier to understand
yeah, that makes more sense
BTW, quick question: is there any way to change the resolution of all brushes currently in my map?
Ive never heard of CSG before, but its generally better to replace your bsp's with static meshes
there is ¯_(ツ)_/¯
and I have no idea how to use it
last time I tried it was a mess
I wish there was simple 2x button
uhhh
what's that ratio for?
what are the min max values for?
how do I just like
"assign all brushes to resolution 4"
I wish it was x2 and /2 button
Also, I just realized that my BSP brushes aren't receiving indirect lighting
why is that? :r
well they meant to be replaced by static meshes after you done with your level design
make then static or movable?
I decided to transform them into a static mesh but I don't want to delete them incase I feel like subtracting a door or a window.
I cant. BSP brushes dont have that option
well. I not sure I don't use them
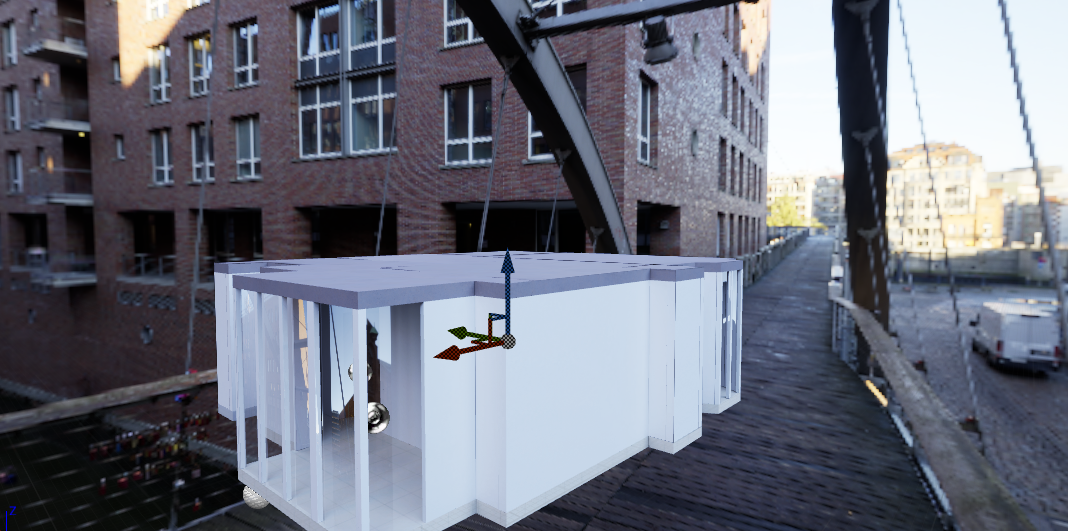
i usually add light actors to control the light-sim more of the emitting material
here for example the emissive search light have 2 point lights to throw light onto their close surroundings.

Evermotion.org
Collection of five inspiring living spaces for Unreal Engine.
Features:
High quality textures: all materials were made using Substance Painter PBR workflow
Use it anywhere: unique unwrapped UVs for each object
Photoreal even at close-ups: the most textures are in 2K-4K r...
new evermotion pack for UE looks pretty good !
I spent more than 5 hours rendering in high quality. I do not want to think about the production time xD
What are you using for light baking? A quad core?
It should take like 2 minutes to bake that scene
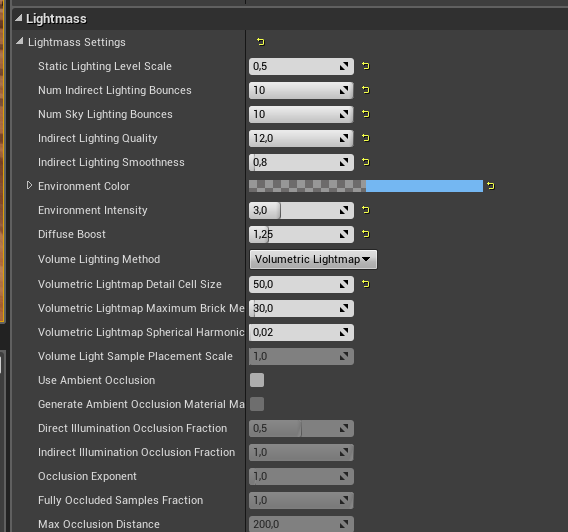
The more cores you have, the faster light baking will go, something like an AMD threadripper (or intel i9* if you’re made of money) will greatly increase your build speeds, what did you set your lightmass settings?
Set static lighting level scale (the first one) to one, num indirect light bounces and num sky bounces to 10, and then reset the fourth option down.
The thing its I made other test and I spent 12 minutes max and I dont know why I f I use this geometry the time increase a lot
I’d switch your skylight to stationary, this will help your scene look much brighter.
If you have very high res lightmaps it will increase your bake time
No problem, let me know how it goes 😃
@dusty gyro have you tried blending movable things with gpu lightmass?
I am totally forgot that this is important
Not sure if this is the right place, but I've got a trapezoid shaped wall and a square texture, and it looks to be warping my texture at a diagonal. Any ideas why? In blender.
@stuck crypt show your uv's and wire frame
i suspect it's messy triangulation on a ngon
@median mural Nothing too tricky here, but the warp looks to be coming from corner to corner so I think you're right
you can subdivide the mesh to add some support topology
for example this like doesn't look too straight
Is there an easy way to snap to the edge?
manually enter values there or pixel snaping
@stuck crypt https://blenderartists.org/t/addon-uvsquares-v1-4-updated-any-shape-supported/613111 or this
https://github.com/Radivarig/UvSquares git link
Alright I'll look into it further. Perfectly placed pixels doesn't seem to help but it's good practice anyways.
If I subdivide a few cuts it minimizes the effect, but I don't think that's the ideal route
How do I triangulate?
That plugin looks like it'd do the trick
Haha the triangulate just swapped the distortion to the other diagonal. I'll get the plugin thanks!
It's probably because the whole surface is at a slight angle as well
@stuck crypt triangulate might help because it's more controllable distortion. Like you can't have unexpected distortion in 3 points. Polygon is divided into 2 triangles and you just don't know exactly there you will have your distortion
it's just something you have to deal with then you have 4 points
it's like a chair with uneven legs height. If your chair have 3 legs it's not going to wobble
i like how this one working so far
hey everyone Im trying to build lighting and Im stuck all the time around 99% I dunno where the problem came from any idea ? swarm agent ?
It's gets finished eventually?
@kindred rover you can try looking in statistics chances are there is some big object.
nah not really thinsg looks right
it was fine two days ago
and today it doesn't work XD
@median mural
create a test scene everything can be fixed by test scene 😃
have you tried the gpu lightmapper? its great
yes
Quick bake on a more archviz oriented project !
as usual, GPU lightmass, only one HDRI skylight, "low quality" lightmass settings (3 bounces, scale at 1).
starting to look very interesting @median mural ! 😃
this room should look nice too
I am thinking about using planes as wall geo so it have better uv's and less unnecessary things like top and bottom thingy. Not sure if it will create light bleed
what is your current res on these walls ?
if you don't merge all of them it should be alright
top view looks pretty neat
left one is 512 others smaller
I can only show bottom one like that
need to implement your cutting thing
oh I'm just hiding the ceilings :p
I mean the section box tools are in, but I'm not using them here
😄
and also because I use stationary light there adds some light
oh right
this is why there's some light coming from the sun where you removed the ceilings
so if I want pretty top views got to implement masking 😃
how materials that can't be masked behave in you situation?
like translucent
just multiply the mask by your opacity
but this task have very low priority for me atm so not sure then I will have that
do it when you have some time for R&D 😃
I like my Houdini generated stuff there most of the storage things made from same thing with parameters
but it's strange because I am making archicad/revit from ue4 that way
like this small table is actually wardrobe
hmm I'm using an inverted skysphere
and applying the HDRI to it
you have to set the LOD mip gen settings to "NoMipmaps" though or it'll be very low resolution
this one is supposed to be 4k (we have some 8k hdris) but displays ingame 1024*512px
hard limit in the engine I've been told
You can make it higher
The max resolution thing that normally makes it lower? Type in 4096 or 2048 and it'll actually increase the resolution for an HDRI
you have to rebuild your own branch though no ?
Nope it's just a thing you can do
hmm do you remember the command line ?
It's just in the texture editor
the standard one
double click the thing
I am also running windows at 1 fps right now so I can't do any screenshots, you just need to find it
RIP my CPU

I'll take your word for it that it works, I can't open pictures. It's too system intensive! D:
(I'm exporting 38 UDIMs of 8k textures from substance painter, it'll be at this a while)
muh 8k panos 😦
Well you don't want to use 8k panos for lighting anyway, right? And you can just use 4k plates for the backdrop
yeah ofc
it looks good enough with the current resolution too, since its for VR viewing
@median mural you might want to check zero's solution for your sky texture resolution
@dark oriole you know that SP resolution independent? You can work in 1k if it's too slow and then export in 4k
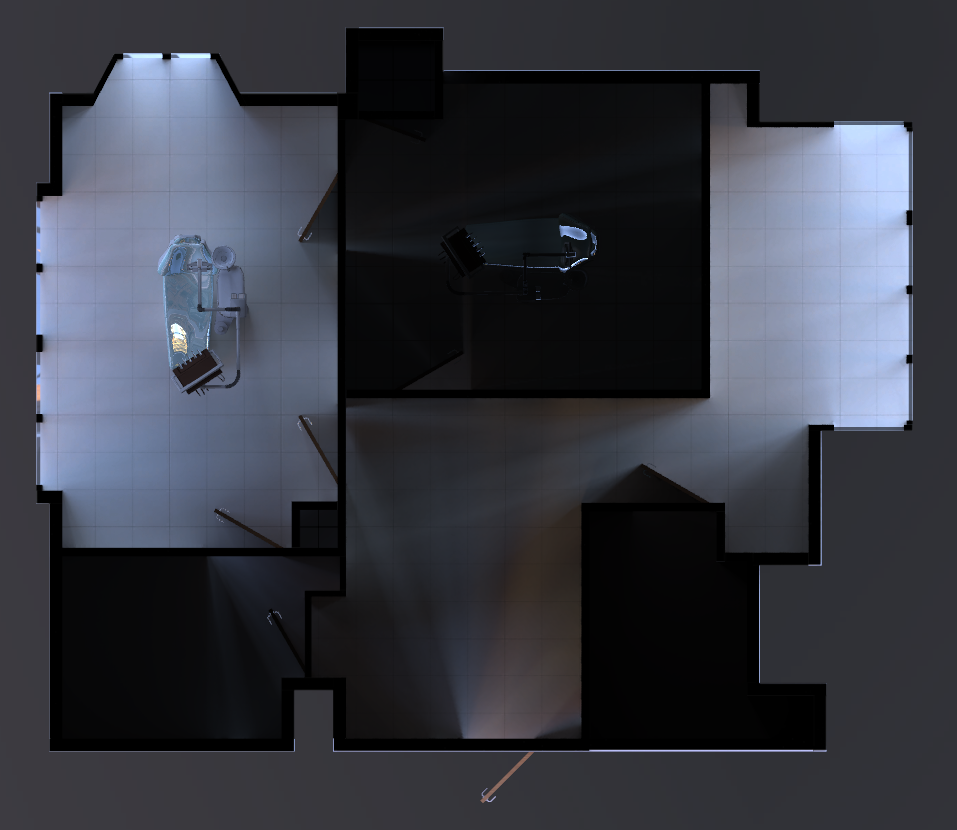
Progress on the dentist office, with better lighting and a planar reflection plane with very low resolution for the floors
playing with grass. client was ok with it, but to me i miss something...i dont know what btw lol
color variation ?
not strand wise, more like some areas around trees or walls where the grass is a bit different
Depending on the climate/season, grass may be brown where the sun shines longer during the day
and your grass may be of a different height around trees/walls
maybe some grass patches here and there
flowers
my grass looked like the face of a 12 year old trying to grow a goatie, so that image looked pretty good to me.
also, @dusty gyro , everything in the dentist scene is interactible and movable, right?
xD
Someone gave me a demo hospital room model one time. Everything was movable, so you could throw the opertaing table and equipment out the window.
hehe
I thought about making a chair with pivot points you can move around
but that would break the baked lighting
I wish we could just move baked lighting
I wonder what going to happen if you do.
I think it's probably something people going to notice less then quality of movable objects
oh shadows from the objects
that's the thing you will notice
you can spoof it in baked lighting if you put the work into it
it won't be very realistic though
it will be video game realistic
which in a VR environment....?
the solution that kinda worked, with decent results, was to bake lighting but let the interactive stuff movable
and then change the type of lighting sampler for the movable meshes
to not use point but another setting
that way it'll smooth the lighting based on baked data
still looked kinda crap compared to static though
@dusty gyro try VXGI
It definetly needs some optimization but it provides almost bake quality lighting real time
Your going to need at least a GTX 980 for VRz tho
VXGI doesn't give as nice results though
this is why I've deleted the VXGI branches and went for lightmass :p
Hey lovers of Archviz! here is the first release of my Archmaterials, a pack of materials for who likes to do Architectural visualizations, hope you like it!
See all here: https://www.artstation.com/artwork/0JKVE

ArtStation
This is the first release of Archmaterials series, the main focus is for Unreal users and the Archviz scenes
Check it out: https://gum.co/qfaMk
rules:
6. Strictly no advertising
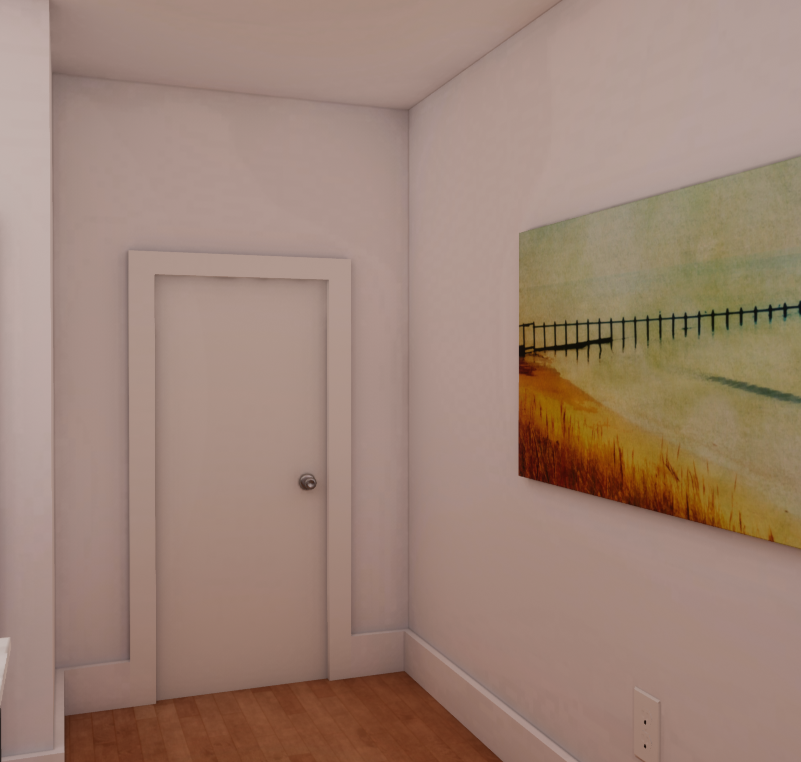
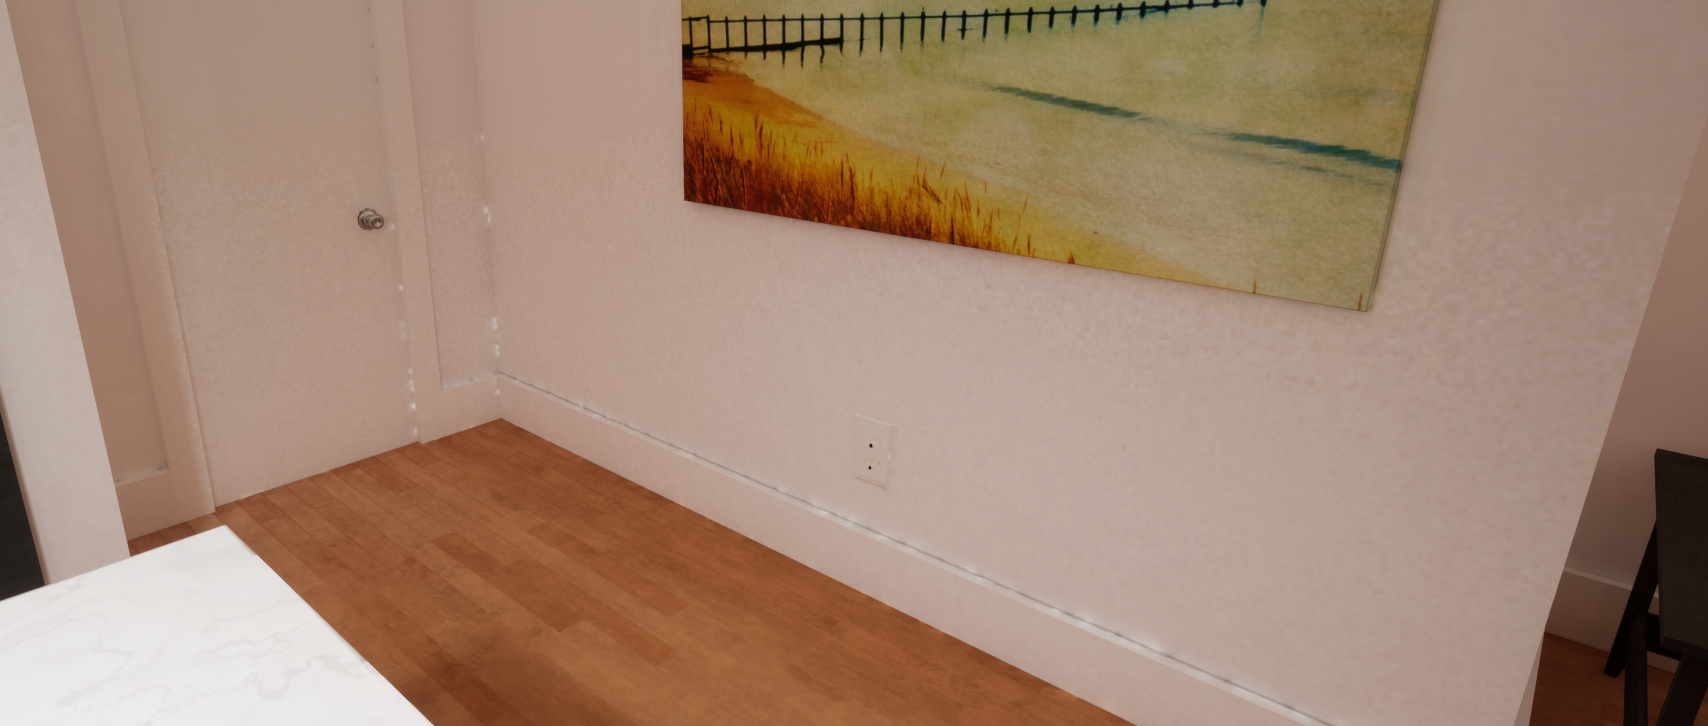
I just made a 4 hour production build and there are still these strange smears/artifacts on the walls, what can be done about this? https://i.imgur.com/9oTkAnI.png https://i.imgur.com/KOtNNKB.png
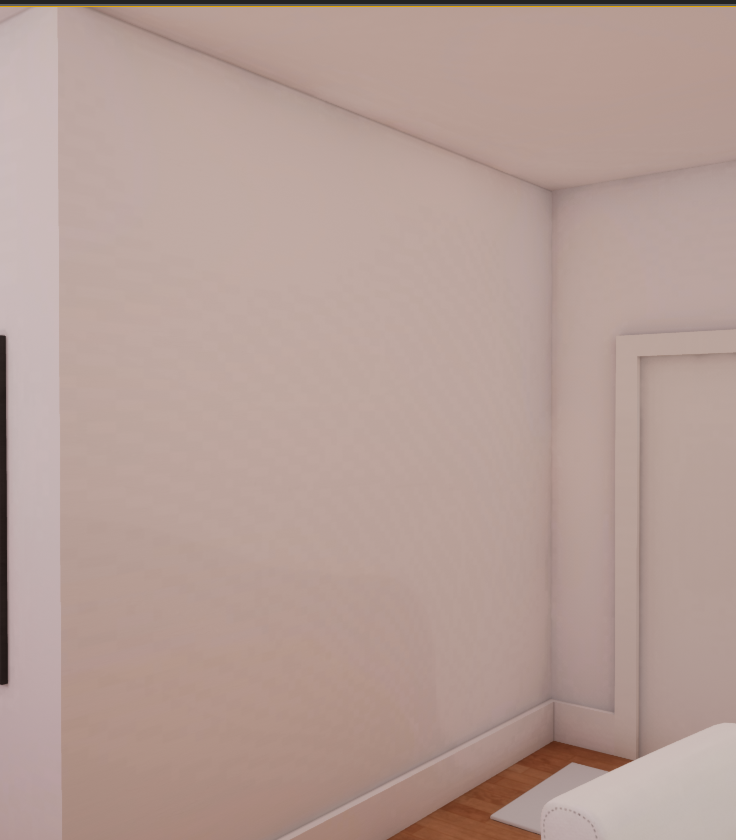
the settings are already cranked to the max https://i.imgur.com/8IwHo1K.png
it at least makes renders faster
did those show up on lower settings too?
looks to me like just banding. So not enough bit depth. Might be wrong
can you show how you ctrl+0 looks?
I've actually tried that before. It was very fast, but the result unusable: https://i.imgur.com/vjLx5uU.png
that is with his "ultra" preset
not on my pc right now, I'll see what ctrl 0 does later
@median mural
@dreamy sonnet this isn't a normal result at all
is your UV tilted by any chance ?
ie the pixels are not aligned horizontally
uh
could be
but even if we ignore those white dots the whole wall is really noisy
yeah absolutely
built on production quality ?
try lowering the level scale to 0.1
I'd be curious too see how your UVs are btw
and how much merged meshes are in this scene for your walls
I think the whole wall around the room is one mesh 😅
well
there is your problem :v
split it into parts
and lower the resolution for each
a wall shouldn't have more than 1024px res
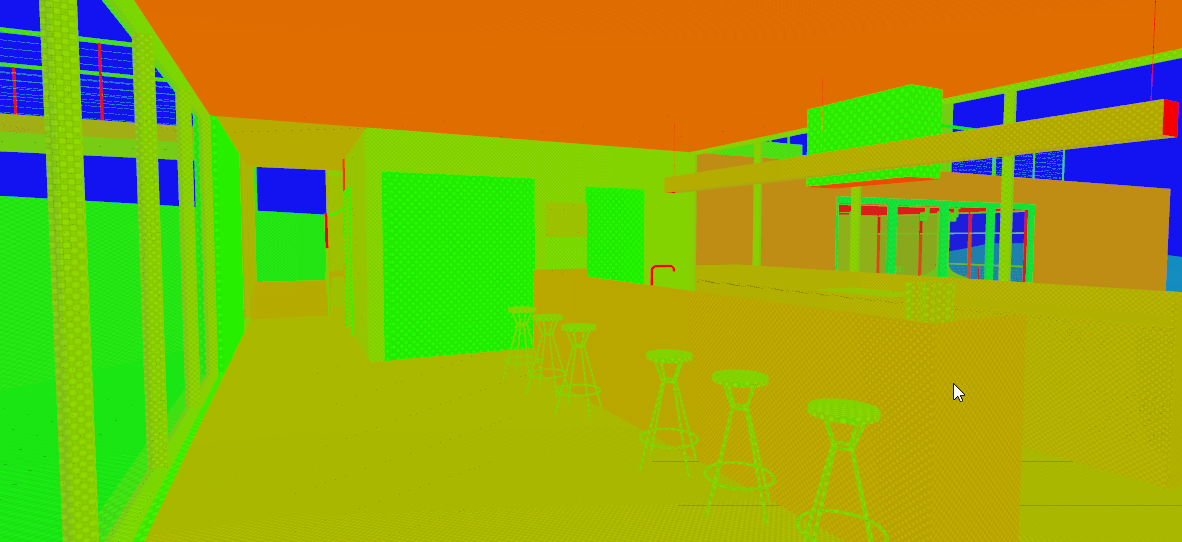
it should have enough rolution tho, everything shows up as green / slight yellow in the density view
hmm
that ain't enough for archviz
this is values for games
all my debug view is red on small scenes
well it is meant for a game, but you walk around this room as a really tiny player so every artifact in the lighting is instantly obvious lol
@dreamy sonnet The most important thing for quick + clean lightmass in unreal is good UVs. But in your case that noise on the wall looks like it's either a compression issue or a shadow issue. First thing I'd try is to use non compressed lightmaps. (look for it in world settings)
@median mural so I pressed ctrl 0 and nothing happened
gonna try the non compressed lightmaps later
have you tried purging your swarm too ?
what does that mean?
in the swarm agent (the window that opens up when baking a lightmap) you can clean the temp data
sometimes it fixes weird behaviours
interesting
I'm pretty sure youre problem is UV related though :p
problems with lighting here are 90% UV related 😂
there is an island that makes no sense at all and so much wasted space lol
oh wait nvm. that's the ceiling
should probably be separate aswell
yup
each wall, floor, ceiling of each room is a different part
if you merge everything you won't be able to get good results
and you will end in the territory of UV horrors...
oh god what is that
a terrain 😂
nice
Looks like a citymap 🤟😎
https://youtu.be/YbTvS-DyWr4 quality is not the best since i had to create everything based for mobile platforms. what do you think?

Architectural visualization of a house with garden site in Spain. Client: ChaletFlex Music: Alessandro Fantin Paintings: MJ2art
looks good for a mobile target @hard oar
maybe you could get a little more performance by ditching SSR for cubemaps ?
toiletbowl lightmap could use a little more pixels :p
colors are a bit washed out
about the colors, that's my client needs, so i had to apply what he desired hehe
ye true story about some parts which isn't that detailed, working on it too for the next update
People do you use source control for arch viz projects?
Can archviz ue4 project (interactive scene) be opened on a web browser but without losing quality?
not sure, shader model with webgl/html5 is a bit more limited than the desktop versions
So it would be difficult to achieve this, right?
Is there an alternative option to pack a project that can be opened in all platforms? Not only windows or mac? And also, one scene is around 2GB can this be reduced?
well you can open a project on any platform
a build though is another story
about the scene size, you an reduce it by using lower resolution textures and lightmaps
@dusty gyro https://streamable.com/mcql0 it was easier then I though it would be

sweet 😃
it ain't that difficult yeah
the mesh capping part though...
is it handling rotation aswell @median mural ?
No didn't do that yet
I only need to cut one wall atm
also it works only on one material for now
did you move it to a mat function ?
it is now
:p
So what we do if we don't have any windows?
have lights
it's looks to me that light bounces very poorly if there is no way to use skylight
Now I have strange workaround to add some
an indoor skylight would make no sense
you could try having mesh 'lights' that actually just let skylight light into the mesh by effectively poking holes in the room
hidden windows
are they resolving the point light (used with a source radius and source lenght) thing with 4.20? i remember that i had to turn the light shape 90degrees to build it correctly
good question @hard oar I can test this out rn
@dusty gyro oh nice it would be awesome if u already have 4.20
so the point light length goes upwards
but it matches the debug cylinder
so I guess they fixed it ? 🤔

looks like I going to do some rotation after update
but this thing doesn't work with gpu baker so I jsut used emissive lights that work better with gpu baker
yeah only works with the default lightmass
uhm ok
the gpu lightmass plugin doesn't work on 4.20 does it
it's not compiled for it yet since 4.20 hasn't come out
he doesn't do previews?
I'm not going to speak for luoshang, but I wouldn't if I was developing it, previews change quickly and are buggy
does the GPU baker produce the volumetric lighting samples for dynamic objects?
@solemn hawk in all cases luoshuang is now working directly with epic on lightmass, so he probably dropped the current implementation to focus on the now official stuff
gosh all those reflections is expensive
T_T cutting walls doesn't help reflections brake
bake or break ? :p
Unreal Engine Forums
We have released the first preview of Unreal Studio 4.20 for Unreal Engine 4.20
Previews should only be used for testing and not for development
Please
oooooooooooo
Metadata: User Defined Object Properties from 3ds Max, whether populated with data from Revit, or by the user, is now available in the Editor, or at run-time. This enables various workflows, such as finding all, “doorknobs” and simplifying them via a Python script or using metadata at run-time to display relevant information when someone selects an actor.

anyone with datasmith 4.20 and revit can test up the meta data import ?
I'm not getting any data 😢
apart from the meta data stuff
the new reimport workflow works awesomely
being able to just reimport parts instead of the whole project is sweet
🐫
@dusk pelican ? 😅
Revit to Max to Unreal reimport workflow
well it's looks painful
but this is probably the same files as blueprints for construction?
until we get a proper revit plugin this is the only fast way of doing it
what do you mean by blueprints for construction ?
@median mural
ones you print and then give to construction workers and all
It's just to open the door my workflow is kinda faster with 1 button
probably depends on a change but it's not going to look amazing too.
keep in mind that this kind of project on revit goes through the hands of a lot of people before me, and all of them are doing technical stuff related to building engineering, not archviz
I not sure what my point is 😃
yeah it will be faster then building everything by hand first
all the walls as I do now
when I try studio/datasmith stuff and ask for features like this, this isn't really aimed at archviz projects
its more about massive projects with thousands of complex entities
think industrial instead of artistic
yes I see. I wonder if you can automate this workflow with scripting so it takes one button
once the revit plugin is released
we're gonna get reaaaally close to a one button workflow
right now only max is in the way
in the video I just use max as a way to export to .udatasmith files
not doing anything to the model in max
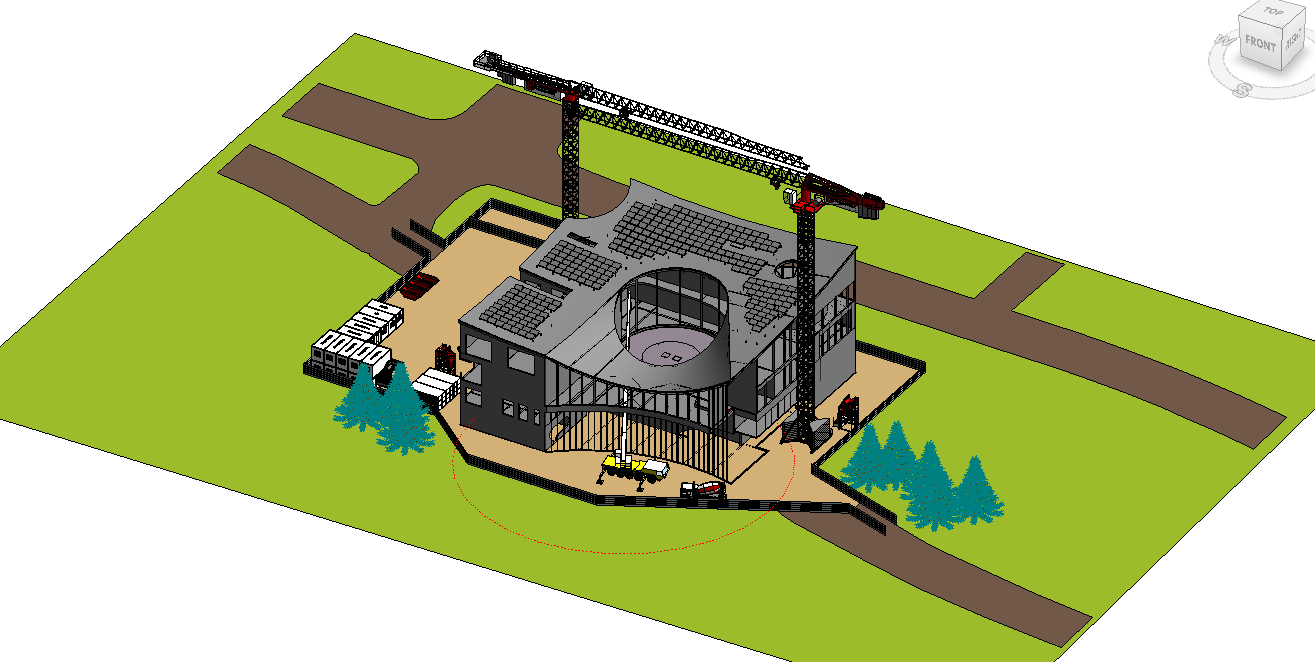
lets take this project for example
the revit file has everything needed to prepare the construction site
for the workers
but we want a nice realtime model to look around
and help construction managers to visualize the site
And all in VR. I see how faster 4 minutes workflow for this 😃
:p
exactly
I'm excited to see what kind of improvements they made with the LOD stuff
since our projects are very, very complex from a model perspective
our engineers dont care about realtime rendering performance
they care about getting all the needed details to build the project
doesnt look really sexy in max either
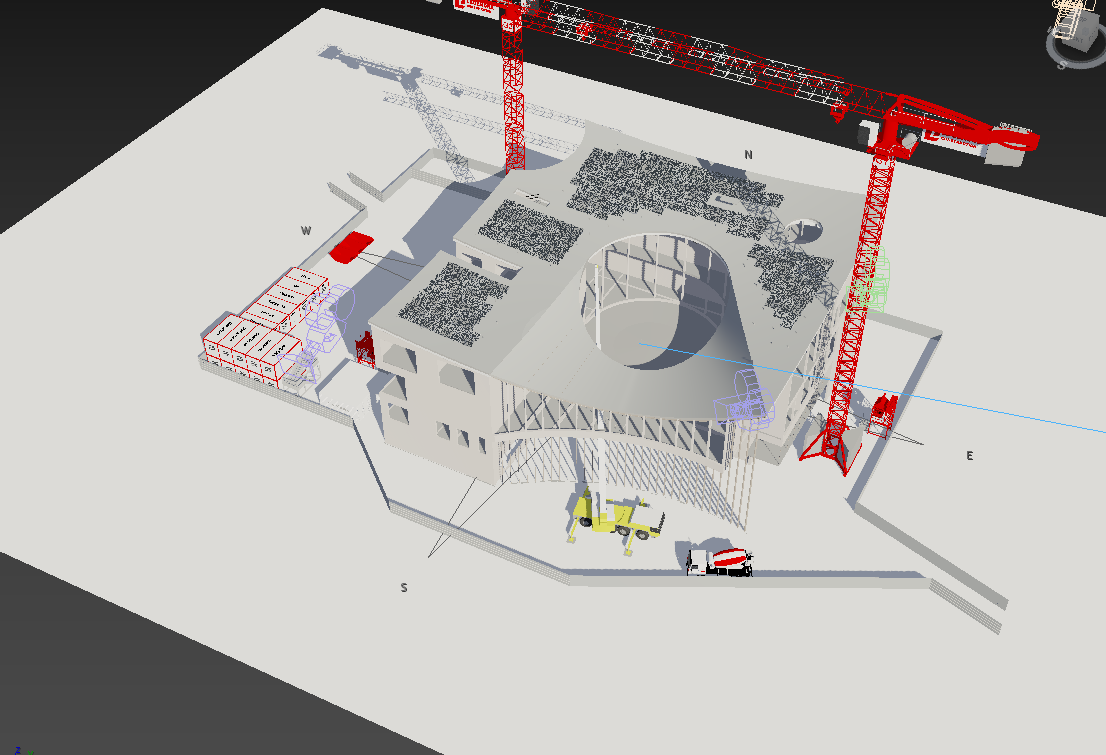
and some materials lost their colors
probably because these are not setup the right way
I wonder if I can turn off planar reflection update
isnt that basically what cubemaps do ? :p
maybe there's a way to change the refresh rate of the plane
I can capture it manually
I think I will do that
capture reflections and then cut the wall
yup sounds good
it's kinda sad and awesome in the same time that I need to do a lot of technical stuff to do arch viz in ue4
hi guys you guys seem like wizards with the ue4 lightmaps, im working on an interior and was wondering how big i should section off my wall mesh into seperate meshes
here is a picture of the interior in blender

its meant for a game, however you are a tiny character
i think zeblote was in here the other day about an issue with the interior so you might've seen this before
I separate every wall by corners
like this
your set up doesn't have volume to block light leaks so chances are you better not separating those and making good uv's would be better
try to render and then report about errors and stuff
start low to not spend a lot of time rendering issues
also is this relavant anymore https://www.reddit.com/r/UE4Devs/comments/246whl/the_most_important_thing_about_lightmaps/
i guess i can sum it up
but am not sure what olivierJT said is still relevant yeah. 4 years is a lot
and he's making a game with a very non realistic style
And it's about not generated lightmap uv's
I am confused then I should say lightmap, lightmass or baked lighting. Wonder what is correct usage of those words 😃
lightmap = texture generated by the engine with baked lighting
lightmass = rendering engine to calculate lightmaps
isn't it swarm?
baked lighting = process of baking lights with lightmass to create a lightmap 😄
swarm is the coordinator
to coordinate computers when you have render farms
Well looks like I usually use it right
:p
lightmass is most confusing one because it could be just called baker or something
and you want to say things like "how to calculate my lightmass"
but you actually calculate lightmaps with lightmass
this is what confusing for me
lightmass != lightmap but word actually doesn't sound wrong
well planar reflection trick I thought I can do not going to work
Im pretty sure light mass is just the name for the renderer
Just like how VXGI is the name for Nvidias realtime lighting
So I am not sure what happened but now my gpu light mass renders everything dark
masked materials don't play well with gpu lightmass...
or my box cutter implementation
and I tried to fix a thing in a different way. So now I am got to redo things =/
my lightmap uv's shift after i bake, using the uv's i created. any help? using 4.19.2
https://i.imgur.com/n6d1K7O.png
creates bad lighting artifacts along with it
@solid oxide I am lost here so your uv's change somehow after bake?
I wonder if I had this problem too but never actually try to make my light map uv's so neat
but this is very strange seam. I don't think that can actually happen
Can you show your meshes uv's?
MY EYES!!!
Dang is the studio support fast with tickets ! Got an answer back in a few hours O_o
Anyone know a good 3ds max discord?
behold ! Revit data in Unreal ! 😄 https://i.imgur.com/qGzWo2t.png

how that works? You can access it via blueprints?
yep @median mural
still missing some stuff though imo, like accessing the references in the "datasmith scene actor" which acts as the coordinator for your datasmith import
So you can show data like amount of light in the room?
if you had it in revit yep
and air
yeah volumes for example
just a matter of filtering the right kind of data
heck I even have the heat transfer for some models
:p
you can do some fancy presentations with that
even with just the base product viewer you can do some nice stuff with the xray mode
could imagine doing a widget to display info on highlighted object
or quickly create cinematics with updatable information in a living project

I see how it's good for your use case 😃
thats the tip of what we want :p
as in mixed reality ?
epic released a template for this specifically
for studio or everything?
nah everything
cool got to find project for that
go in the learn tab in your launcher
scroll a bit down
should be the first one in "Engine Feature Samples"

Unreal Engine
Composit real world images or video footage with computer generated imagery just like in the movies - but in real time!
blog post ^
I am actually saw that 😃 just need to learn it someday
😃
Does someone know why some objects wont throw shadows all of a sudden? They are set to szatic, lights too, tried to import them to new scene. They even got “cast shadows“ activated and the lightmap resolution is high enough. I tried almost everything and i cant figure out whats wrong, for the life of me :(
Did you bake light?
Yes ofc
Im still experimenting while we are talking what the cause might be
I have an older project where everything worked. Somewhere aling the way it broke or i just changed sth idont remember that is causing thid
@marsh widget are one sided objects?
it's some sort of strange material?
No
Its alrighr ty, i just went back to my old project, because i tried all and dont know what causes it. Thx anyway alex 😊
Unreal is weird like that.. I have spent 5 hours today trying to remove a black spot, like a shadow, from a chair and I just gave up. I have 15 clones of that chair, and all of them look great, just this one.. I have tried upping the lightmap res, tweaking the UV, moving lights, replace it with another clone, move it and rotate it a little.. the black spot refuses to go away.
have you moved your change from your left pocket to your right pocket?
That must be it
I love arch viz process in ue4. It's naturally support that thing there you assemble everything for render in one file and create stuff and assets in another. Makes managing everything a lot easier
like sharing stuff between project was a bit of pain before for me
yeah the migrate option is really nice
@dusty gyro , seen this while using 4.20? https://i.imgur.com/w6D0lk6.png
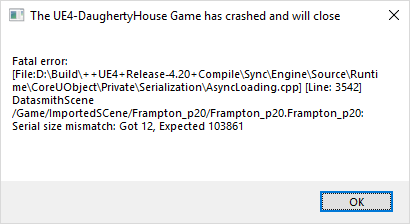
have you updated datasmith ?
@median mural can you clarify that comment a bit? I still find it a pain to move assets from one project to another. I actually wish there was a way to make a shared asset between projects so that if I modify a material for the better, I can go back and easily use it in a previous project underway without having to migrate it from another project
@dusty gyro yes, I updated datasmith exporter in 3ds to the preview exporter also
well I am totally doing a bad thing and using one project for all my arch viz
I'm not sure you can do crosslinking with unreal
verified that 4.19 can still build a project succesfully with datasmith files
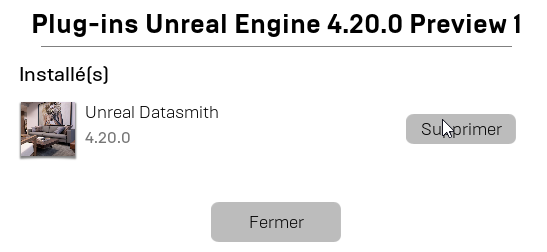
maybe I need to reinstall 4.20?
I'm pretty sure you cannot crosslink with unreal, and I can understand why as well.
4.20.0 datasmith plugin version
that's jsut what I wish
shared asset between projects
but apparently content plugins is exactly this
your exporter looks like is has the right version
well I have no clue if they changed stuff with the packager
@median mural true, but I'm not going to author a plugin just to connect to a shared network folder containing assets :]
yes this is why I just use one project called Arch Viz and there is folders for every project I am doing now
yeah this is what I have for the material library too right now
I just migrate it to new projects if needed
are you packaging EXEs for clients or just generating raw images to process and send to clients?
I don't have any reason to create separate project atm
idk it's fast enough
well you have a lot less stuff in your projects than we do I guess
since you do small scale interiors
I assume that working on a big game is the same if I put all the arch viz in one folder
fair point
yeah with packages you can just export folder of project if you need to
like that
to a new project for packaging
it should export everything with dependences
so every folder is basically a project but they are combined together for ease of use
as I understand plugin is the same but you open separate ue4 instance and that might work good too. not sure if you need to restart if you change stuff
Coming from the world of worksharing in AEC it's hard to imagine a team of game developers working in this environment
how do multiple people work on one project?
I'm interested in that
we have level streaming for that
problem is that files are binary so most of the thing require one user to work on it
so if you use source control you block this file from editing by other people
so you need to create things in small level chunks that can be worked by several people. So someone doing lights in the level going to use specific level that loads lights in the scene so this peroson only edit lights level in streaming levels
interesting. thanks!
oh man.. if our network were so rediculously slow I would be trying this out!
I have an intern who desperately wants to get into this VR development, but it's tought o supervise AND get work done at the same time without something like this
I am not sure if it possible to see changes in real time
at least with git you will need to download changes and then reload level
and it will not lock files for you so there might be issues
I want to make a 360 panoramic video of my archviz scene so it will be able to open on YouTube. I did some research and I found that the way to do this is to enable the MovieCapture plugin. Is this the only way to do this, because the documentation is from version 4.13 and it seems a bit complicated, or there is some easier way?
photo or video?
@gentle osprey Video.
hey folks
so i do archviz, but i'd like to discuss bp issues i am having, a bit of dilemma here or #blueprint channel 😛
or both
i lean to bp, but just came to check anyway
I'm looking for the best way to change the materials on multiple static mesh walls. So far, my solution was to select all the walls I want to effect, and drag it into my BP. Not very effective. Is there a way to group a set of SM so I can refer on them in the BP. Or is there a whole 'nother way to go about it?
I should clarify my question. This is for a interactive walk through, so white wall, blue wall, etc. Looking for the best way go reference a "group" of SM.
@glossy creek there's multiple ways to do this ! 😃 My method was to store these groups of meshes into an array via a structure (the STR was made of a name, an array of mesh actors/components references, and an array of materials). When you raycast your mesh, you can get the group name associated with it, as well as all the available materials for that group !
@dusty gyro Thank you! I'll look into that!
This is the problem I was trying to resolve by continuing to use DAE files which groups meshes by material from the revit export