#aec-visualization
1 messages · Page 2 of 1
Is there a way to host a project on a website or VM so people/clients can test it without havin to download ?
yes
you can export a "game" as WebGL
there is still a download on their end, but it's automatic and you don't have to send an exe, just a link.
https://s3.amazonaws.com/mozilla-games/ZenGarden/EpicZenGarden.html <-- an example, didn't work on chrome but works on firefox
@dann#6226 the server needs to have something special? or just need the storage space
I haven't tested unreal, I did test a unity game once, I uploaded it to itch.io for testing and it worked fine just having the files there.
I had the problem that the project size was too large. Needs some optimization in the project
For testing purposes if you launch the project as html5, the editor starts a local web server that you can use to test it.
https://www.mozilla.org/en-US/firefox/developer/
For run html5 UE4 games

Mozilla
Firefox Developer Edition is the blazing fast browser that offers cutting edge developer tools and latest features like CSS Grid support and framework debugging
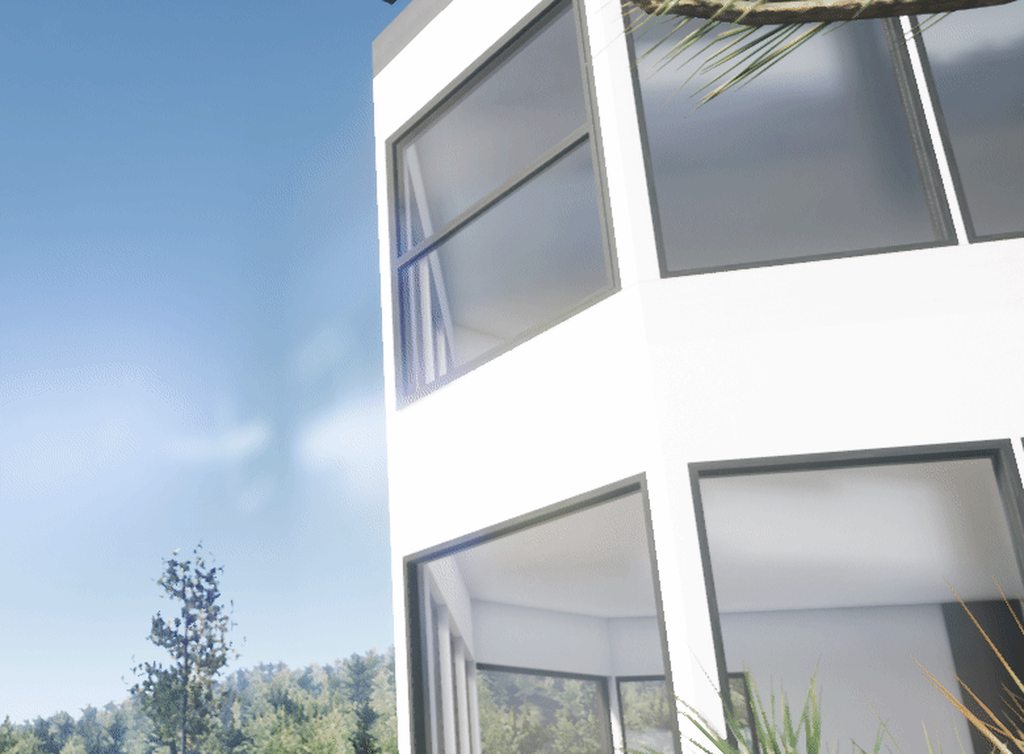
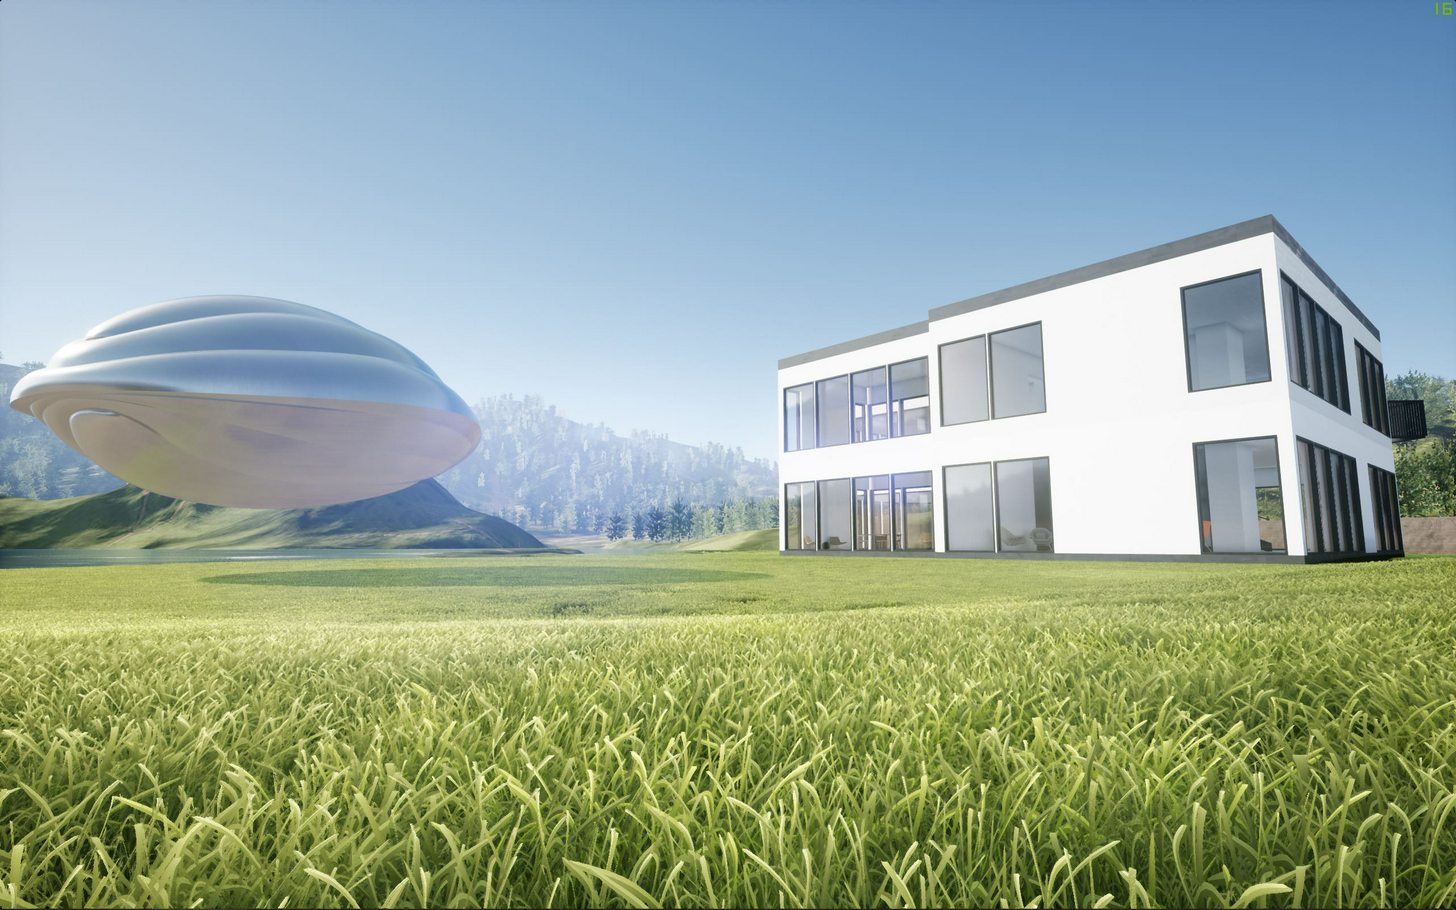
What u guys think? constructive feedback would b appreciated!
what are the ceiling light sources? doesn't seem to be any fittings modelled
there are some but the border is "white plastic"
@cinder oriole try adding some direct shadows from outside, currently the scene lacks natural light, I'd also look at dimming down the light sources in the ceiling/eliminating the "overflow" lighting
I'd also try fixing the carpet to remove the stains, it's good practice, looks like you're using the one from the epic demo
@solemn hawk ty im indeed using that same carpet heheh i have a question on a workflow for archviz, the "sun" its facin the fafacade since it looks quite dark when i tried putting it from behind i think thats why i added that many lights to the interior u whink i should work exteriors and interior in diferent levels? or what would u do?
adjust the exposure instead of lighting
I always use accurate lighting (hard in unreal currently because of non standard lighting mesaurements (this will be fixed in 4.19)) and adjust the camera exposure if a scene is too dark
also, use the skylight, for baked scenes I change the lower hemisphere lighting from black to white to give more even global illumination, also if you haven't already add a skylight portal to your window
i did i used.portals in all the windows and mm i think i have a skylight just dont remwmber if it is static or starionary
ll play witg the exposure i disabled the auto because it was washin the colors
what about nightshots? i tried to look for lumens and kelvin but im not 100 something looks off
wow, beautiful work dude
tip: stick a 360 pano on google photos, it will wizard it into a sphere viewable on the web
dino's advice is good. in vray interior projects i had similar problems with interior lighting making the visuals unaesthetic. then i fou d over time the more natural sun and sky from outside made it look so much nicer. balance it so 80% of your light comes from outside, boost up your skylight intensity and 5 bounce it, 20% interior lights, sky bg can go brighter too
what you have now is similar to a twilight scene, just darker and bluer sky i guess
light grey rug could really help things if you're allowed
Thank you for all the feedback i will implement all of them in the upcoming project since that one takes freakin forever to build the light!
if i were lookin to apply for an internship or something like that u guyhs happend to know where should i look?
Hm, is using a custom intensity for global illumination in post processing a good thing to do if one wands to emulate natural lightning or no?
Think of post process as camera settings
Hm, so far I tried to have it as perfect as possible without changing it, but I am not sure if going high skylight or directional light intensities is the way to go, or keep them low, if possible, and crank up that option (or exposure) instead.
i hiked mine up, seems to have done what i wanted anyway
i dont think the light preservation calcs are realiable enough like vray and corona to not 'cheat' with lighting
not for the moment, until i think 4.19
the outside of my building is bloomed af lol cause of all the energy im trying to pump in from the outside
gr33dy if you're happy going the arch route, theres plenty of building developers wanting what you got, or interior outfitters, i worked at spacelab and ibi, then modus. most of my skills are google style hipster office visuals
@brisk oracle By all means, stay away from exposure to compensate for brightness
Exposure is too volatile to work with, and frankly, most of the time it works really awfully
Yes, I usually try to stay away from it, but also the approach to crank up skylight and directional light to bump more light into the house/appartment doesn't always work that nicely, especially it gets way to bright outside (as johnline also mentioned). But as with exposure, I guess also messing with GI is only the last resort, right?
+-1EV is ok, what you want to avoid is the exposure giving you false representations of whats really going on, or you're forever tweaking mtls and lights etc
Yeah, I usually try to stay with 0.
Or at least now I do. My first scenes, not so much.
even games do it, it simulates that sun straining your eyes when going outside, quite realistic once you get the adaptation swift enough
hey guys anyone have rented a swarm ? have any idea about pricing?
Hi everyone, I have sort of a general question. I'm a computer science student who works part time at the chair of computer science in architecture of my university. We are planning to develop a framework for architects and planners to design and evaluate public buildings like hospitals, offices etc. Essentially buildings that are used by multiple distinct user groups.
The general idea is that an architect can design a building in Revit, import it into our framework (built in Unreal Engine), conduct tests on performance (experience per user group) using VR (for user studies) and/or AI for simulations and use the gathered information to make informed changes to the design.
This project will be open source and hostet on either Bitbucket or GitHub.
I wanted to use this discord to see if I could get some sort of discussion going on how to go about such a task and maybe get some pointers of people who might have done or are doing something similar.
@wursteimer#0412 hey, you might want to register for the Datasmith beta. Sadly you will still need to use a 3d modelling program (3ds max) to add your revit projects into UE4, but in the long term Datasmith will have a revit addin to synchronise your models directly.
@dusty gyro yeah I registered for datasmith beta a month ago or so. still no invite sadly 😦
attended the archviz webinars too
argh 😦
the arch vis character doesn't seem to have a blueprint, which is limiting my ability to make interaction in my level
i love its smooth movement, but wondering how some other guys more far along with interaction did theirs

oh nice, this helped me a lot to get what i need, the bp creation part, and the camera part are important
crouchin and jumping now
@cyan ether whats the diference between an arch vis character and a normal fps character? beside the weapon and arms
just the movement is a lot smoother, the rotation is dampened and the character moves slower
but with that comes a lack of jump and crouch
but i built those back in, by following that vid first ^
i managed to get linetraces to a button that played music in the building
tomorrow i'll try get mousewheel bound to character walk speed
nice! i love workin with linetraces XD , i tried the archviz thing but dunno felt odd probably becasue im used to fps D:
u or anyone have some exterior shots or videos that wanna share?? im looking for ideas since i have no clue how to make a good realistic exterior shot in UE yet =/
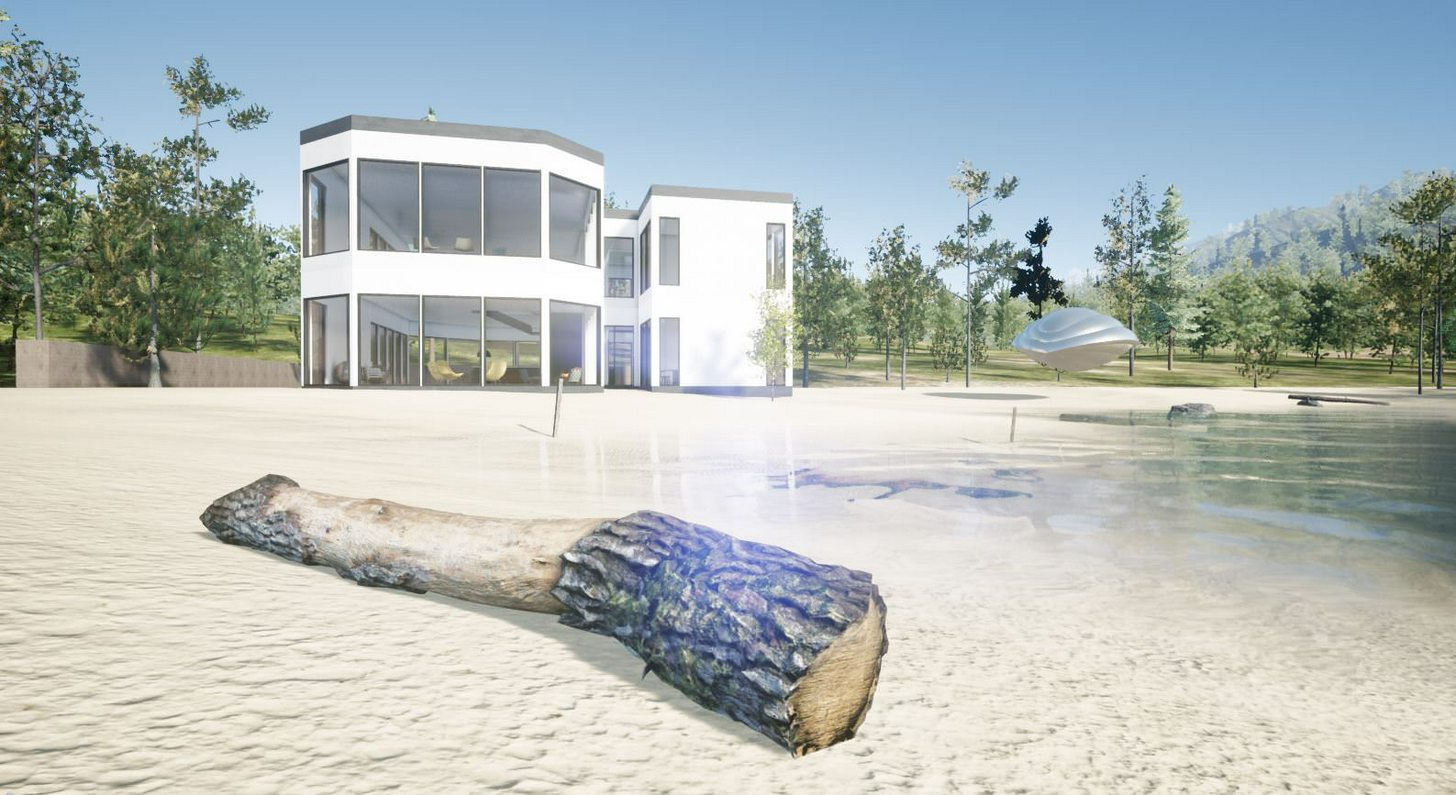
still fiddling around with my non inventive beach home
with overpowering white exterior
what uu think about this one
u have a shot around? besides the one with the wood piece
aight! man exteriors are the only thing that makes me miss lumion xD easy as cake ad a bunch of trees some terrain sclupt, and u r done!
had a mate raving about luminon 8,sounds like they really stepped things up
I've never used it
mmm it does what it says, creates good renders witin minutes. thats all nothing spectacular
the selling point to the firm was that it is easy and almost anyone can use it
so we decided to create the unreal team and we r stuck on exteriors xD im playing with height maps but dont know something looks off like the peaks or hills are too stiff
a lot use worldmachine first, then port the heightmap and terrain tex data over
you're lucky you got a work that is forward thinking enough to use ue4 for viz
indeed they just needed to see a couple of uearchviz and some quick demo projects to agree its not hard to get good results, but ~great ! or stuning im finding that quite hard
but he wow factor its been working clients are dont know amazed they can actually experience their house or loft way before even get to live in it
hi guys ineed some advice/workflow about gardening for archviz projects. some experiment with foliage tool for lawn grass..
There are 2 ways to go. one of the foliage mesh sizes reduce the size of the latter and increase the density. but in this way dynamic light can not be used due to FPS drops in the shadows. I do not even think of static bake. I use a moveable directional light setup with static skylight on stage. I am using static light architecture in interior and exterior lighting for dynamic light foliage lighting.
visual quality is good at the point I arrive, but I am having problems with shaping and filling. I could not figure out how to fill a single surface of a pattern, for example, square or cylinder, perfectly covering it. I also could not open the pathways in a smooth and smooth direction.
how can i improve that? any advice?
@lethal vigil not an advice ha! but that grass looks very nice, is that one for sale? when i tried to use foliage and encounter that situation, i reduced the brush size and dont remember if i increased the density but that helped me to kinda fill some spots, still had to be very carefull because mesh went inside the house heheh
ooo tv!
@cinder oriole it is not for sale as it is not ready for the moment. maybe in the future: D thx.

Been trying out some new things: https://www.youtube.com/watch?v=np3Y0jOj_ks

he did it better :v
nah man, they both look great!
whoho ! both great lookin projects 👌🏼
have anyone managed to create a decent lawn/ shortgrass??
I've used the Archmodels from Evemotion grass in the past, can recommend it! https://evermotion.org/shop/show_product/archmodels-for-ue-vol-4/13204

Evermotion.org
The collection consists of high quality trees models and a complete Unreal Engine scene.
IMPORTANT: This collection is prepared for Unreal Engine 4.13, so the final results may vary in the different engine versions.
Features:
60 models: 54 trees + stones, bough, trunk and fern models.
All foliage models are animated.
Added 12 animated cameras using new sequence edtior.
Trees have vertex paint for Unreal Engine.
Each model has at least 1k textures for leaves and 2k textures for trunk.
Average polycount: 80k.
Trees included in this collection come from northern hemisphere climat zone. This collection consist of European and North American species.
Grass and grass material are included in the scene.
Project uses Mesh Distance Fields (long computation time ~1,5h).
Archmodels for UE vol. 4 uses the Unreal® Engine. Unreal® is a trademark or registered trademark of Epic Games, Inc. in the United States of America and elsewhere. Unreal® Engine, Copyright 1998 – 2015, Epic Games, Inc. All rights reserved.
@cinder oriole
Or you could create your own with the megascans grass atlases https://megascans.se/library?search=grass

Quixel Megascans
Megascans is the world’s largest online scan resource, containing thousands of standardized and physically based surface scans, vegetation scans and 3d scans.
It's still on sale for 50% off and really easy to setup imo
I've got some footage lying around somewhere of the grass gimme 2 sec
That megascans thing looks really badass cant check right know but the round examples are materials? or meshes
Megascans is a must imo, really on top of the industry right now
I've been using substance source mainly, but going to switch to megascans in a week or two
nope im using advanced grass something its a free bp
i set it to movable an i can barwly notice any change
And is it for a realtime project or just to render out a video?
I'm checking out the forum post of the blueprint, does look great indeed
it does it takes sometime to tweak and some try and error but u can get nice results
u know how exactly make tje foliage mesh collide with anothermesh? mine goes tru the walls hah
This is a test render from a few months ago with the evermotion grass https://gfycat.com/gifs/detail/AnguishedIllinformedGardensnake

No idea, I usually just paint the grass mannually on a landscape and uncheck bsp/meshes so it only spawns on the floor
It's tedious work from time to time
ohhh ic im not using lanscapes atm since cant create any lifelike enviorement ha! but ill try that also that grass its like the coolor i want ;O
u said u using substance they provide meshes?
ive tried the free version but no grass mesh only textures
and parallax grass mm dont know doesnt look as nice
The color is nice, but the grass stems look too thick on those screenshots.
wow
yep, grass and fur is my next obstacle
thanks for the namedrops
whats the free grass bp name?
thanko!
@cyan ether yes! that one! sorry im 1v1in with openwrt x.x something worst than programming has to be working with network stuff
u got it working??
just been playing with a dynamic sky bp
i get sidetracked easy
lol yeah networking is way harder than it ever needed to be
acroynm hell... when they coulda just gone the extra effort and made explanations or hovers
hahah i know the feelin im not playin with animations but i have 0 clue xD seems harder than 3ds max im just not sure if i should invest time in that right know im not a fan of using "extras" in projects
If you need help with networking stuff, there I'm a bit better than with 3d stuff ;)
Gotta say for the networking... I've been making my servers in visual studio C#/C++ totally outside of unreal and connecting unreal through TCP connections with the free Socketer plugin https://forums.unrealengine.com/community/community-content-tools-and-tutorials/112836-socketer-free-tcp-socket-blueprint-plugin
Can recommend for simple networking purposes
as he was talking about OpenWRT I hope he ment that kind of networking. No clue about networking in ue4, yet. 😃
@brisk oracle Yes indeed i was talking about that kind of networking, i flashed an acces point to try OpenWRT and/or CucumberTony but i cant get it to work xD u have any experience with those firmwares?
I am using dd-wrt on my Linksys WRT160NL. What's the problem? I will go off now,but I read tomorrow. Better whisper me to not "conterminate" the archviz channel ;)
That's a nice looking death trap.
@johnline#5681 very nice concept ! Although I would prolly not be at ease standing on it 😄
thx, they really exist! https://weburbanist.com/wp-content/uploads/2016/01/bloomframe-gif.gif

yo @cinder oriole @glossy delta did you by chance have issues with supergrass4 having black artefacts?
Nope, never seen that before
Hey
can you like combine maps in unreal
like different maps from different files?
or different assets
<-- wonders what kind of maps
Maybe you mean that? https://docs.unrealengine.com/latest/INT/Engine/LevelStreaming/WorldBrowser/index.html
System for managing large worlds including origin shifting technology.
@cyan ether sorry i was on vacations xD never seen that that ! btw that looks like a perfect round circle how did u achieved that??
i have patches of my new landscape i just made, completely unable to 'paint' foliage on them
ohhh ic did fixed the black artifacts? the only problem i had was then lowered the wind height they turned black but adjusting the strengh i think was enought

thanks gr33dy, reading the thread they seemed to have the same issues until they made the bp interact with the grass in some way
Hey! I'm using "Landscape Grass Type", but I couldn't find any way to use Affect Distance Field Lighting on them. I can handle it on Foliage Painting Tool, but it's not what I'm looking for. Is there anyone else who has an idea?
No prob man, u modeled those scenes?? i need to keep practicing buit dont know if should start modeling or download the models xD
ya this one is years old, just to test datasmith. really coming along
hey guys,
if i added some dynamic lights with casting shadows off does that have low perfomance hit as a static light or not ?
@opal parcel im not sure, but wouldnt put my money on that, there has to be some kind of extra requirements even without shadows, what u tryhing to achieve?
@cinder oriole hey thanks for replying back ,
I am trying to light up some dark areas, in a very large scene so i don't have the time keep testing how does it look, i will do some profiling incase i didn't get an answer
ohh ic, been there, people have said they play with exposure, but to fill ive never tried but you should be ok is not thaaaat big of an impact without shadows
also lightbounces could help
sorted the blank patches and the black artifacts thanks guys,
surprised me how much those 5 grass assets were hardcoded into the bp
damnn that looks great man gud job!
hey what software u use to create that gif??
https://imgur.com/IBujr5O this one
@cinder oriole true i didn't get any perfomance hit using that method
light bounce didn't help in that spot it was completely dark, and increasing the bounces will make other areas too bright,
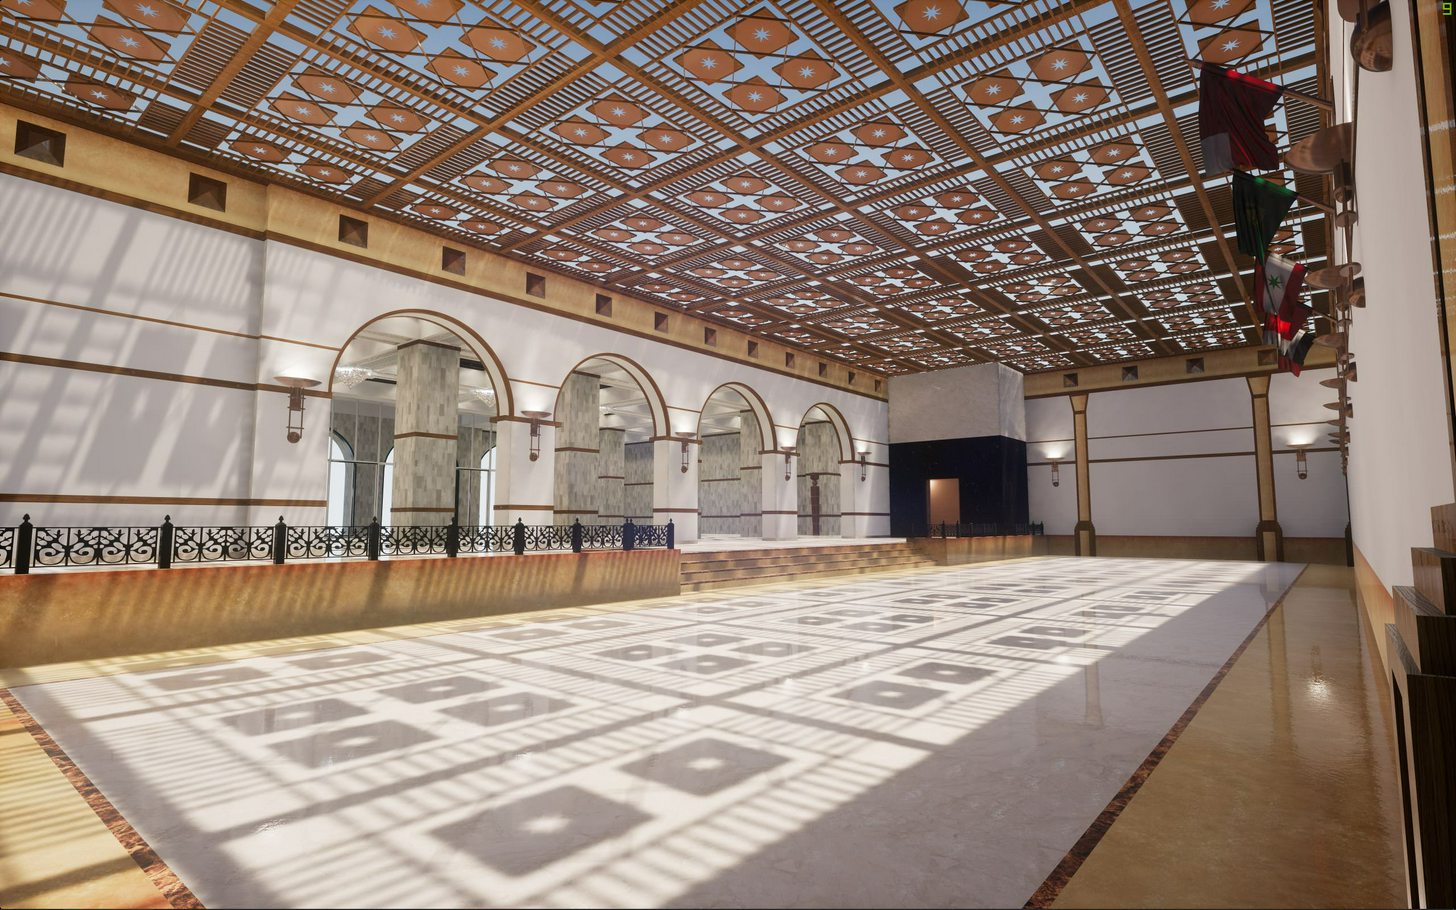
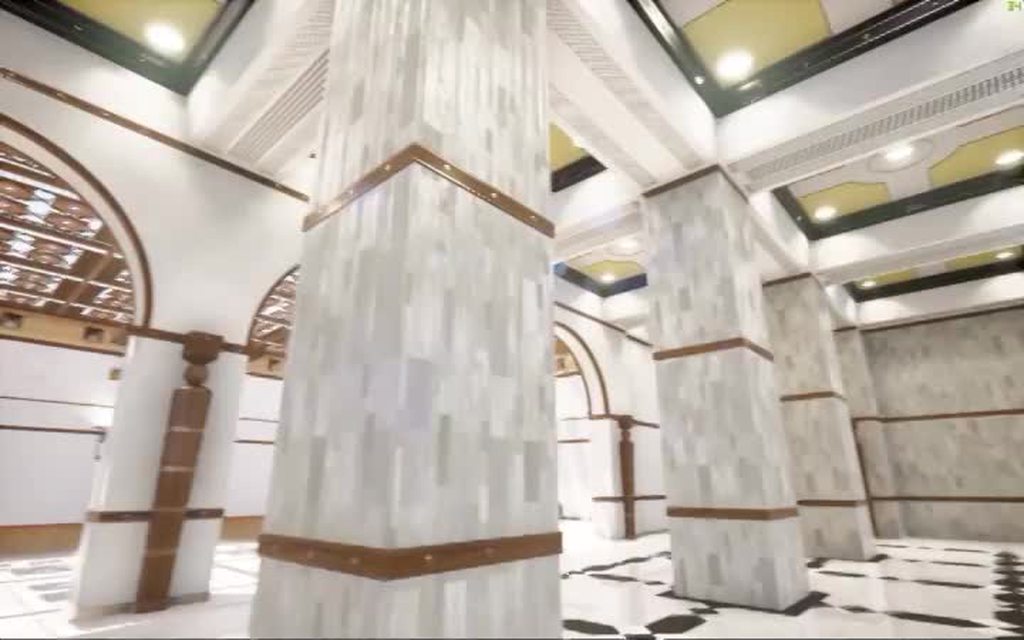
Got a question for you arch viz folks. Can anyone tell me if this sort of interior has a name? I'm wanting to create a house with an interior with the characteristics of this example but I'm not sure what it's specifically called, if anything. https://www.artstation.com/artwork/XXer3

ArtStation
UPD: Playable build available on Gumroad: https://gumroad.com/l/IHaY
Hello guys,
Welcome to Emily's house!
I started this project about a year ago in rainy October and creating it in my spare time. I was very impressed by Uncharted 4 and wanted to at least partially repeat visual aspects of this game and also improve my texturing and lighting skills.
In this scene, I tried to convey a feeling of the autumn evening. Hope you can feel it too
Environment and real time render: Unreal Engine 4;
Textures: Substance Painter, Substance Designer;
Facebook: https://www.facebook.com/AndrewAlexArt
Polycount WIP thread: http://polycount.com/discussion/178663/wip-ue4-emilys-house
just need to upload a <30s mp4 to imgur and they have a video 2 gif convertor
wow, serious modelling
I have the question,maybe whos know this. I create the level with geometry BSP walls. And when i go away from the walls i see the bug lighting in the top of the walls. When i come to the bug lighting on the wall it fixed. And when i go back this bug come again on the walls. If someone know how to fix this please write the answer.
https://imgur.com/a/17UxV

Oh light resolution 32 on the BSP wall
never thought of doing bsp walls here , whats the uvunwrap (for lightmass) look like on them
@vital thicket dont know if thats your case but try changing the lightmap resolution, when using BSP lower is better, unlike static meshes, try goin low

@cyan ether I think it is flexible to make the walls first with the BSP and later translate them into static mesh. But how work UV on the BSP i dont know..
@Gr33dy#2780 I tried to reduce lightmap in the BSP walls resolution did not help, as well as to transform BSP into static mesh. In the static mesh i changed UV (1) channel and lightmap resolution (512). Not working.. But i can make the walls wider but it's not a great way to fix this
@vital thicket have u tried building in production quality? to see if it fixes?? most of the problems ive had with lightbleed are because bad modeling, in this case dont know, check normal faces that arent oriented correctly, also if the meshes overlap that can cause problems otherthan that try using planes to detect where is the bleed source
@Gr33dy#2780 Yes i try to build in the production quality and did not help. This bug from point light in the room. I think only the way to make walls wider and this will hide the bug of lighting. Here is a point light details.
And when i make walls wider ones it fixed. I dont know more ways to fix this bug on BSP and static meshes walls.
@vital thicket Lightmap issues with BSP is usually because of the way you built your geometry. When your geometry is not optimally constructed you can get light bleeding at lower lightmap resolutions. If increasing the resolutions doesn't help you should rebuild your geometry. I'm pretty sure that's your issue here.
@sullen ingot oh okay
hey guys. i working on interior archviz scene with open / close doors. i have some problems with moveable door lighting. everything set static mesh except doors. bp_light studio for scene lighting with hdri. how can i mix true lighting static and moveable. i check distance field intrect shadows for doors but too many archifact mix with static lighting.
volume lightmap detail cell size even 20 not effect
v nice

Google Photos
Very cool nucturness!
lighting from the sun is amazing..
What are you using for the sky/clouds?
The car is hollow! But you can only see that in one shot. And when I think about it, all cars are hollow. That's strange. Moving on, the car needs a dust trail. Also interesting would be having the lights off and shiny instead of being a flat glow. Although complex reflecting materials are enormously tricky.
@mellow crater unfortunately thats not UE, it was made in lumion a while ago, ill b trying to get the same car model to unreal but since it have something like 800meshes it wont be easy @grizzled nest completely forgot about the dam dust ha! now that u mention that it makes sense but again wasnt made in unreal, and i think i couldve used some particles and animated 🤔
wow, really nice composition though, terrain and sky colours are perfection
One thing thar bugs me is that I find the car out of it's element, if this was an off road vehicle it would make more sense.
nice
'Stargate Depot' (WIP) Arch Viz / Level Design
https://vimeo.com/246686135
More to come on my website.
This video shows off some WIP architectural level design created in Unreal Engine. This level is for my upcoming indie game and film series called Immortal Abyss.…
cool with bsp did
Maybe someone know how to fix this light on the BSP wall ? Yes i reduce to 4 lightmap resolution.
anyone knows what "skylight radiosity" means and why the hell takes forever to process?? its being like 20 mins and only 5%
I believe skylight radiosity is the "multi-bounce" they added in 4.18, I'd check to see if you had a crazy number in the global settings for your light building
im not sure xD i lowered to quality and they still took some time but not as long as before
a total of 15 mins in production so no that bad x.x
Can't wait to build things like this...going to take forever to learn. Worth it! 😄
totally worth it
hey guys anyone have a house/room or something model that can share?
All the interesting stuff has been for cients, so no.. I cant share 😬
rip! x,x
A very quick workflow test using Revit > Max > Datasmith
few material touchups here and there to avoid shinyness of materials
@dusty gyro that lighting tho looks very nice is it static?
wow rly? how everytime i try to use stationary skylight it looks like palid or washed out x.x haha
I've been using baked stationary skylights for a while, it just needs the same tweaks as a static light
but you get the ability to use it with a dynamic time of day since you can change the color/intensity at runtime 😃
Hello. I'm trying to import a building from 3ds max into Unreal. I prepare models converting them into meshes and unwrapping their UV's.
When i do that with models from one scene, the import goes well, the models are visible, cast shadows, are solid. But when i'm doing the same with a lot more complex model from different scene, the only thing i see in the view port of unreal engine is the pivot of the model. I use milimeters in 3ds max, convert model into centimeters, i exlude possibility of that being backfaces, because i would see at least something instead of clear viewport. I wonder where did i turn wrong, so my models don't show up.
This is how it looks http://prntscr.com/hq9pp4

If anyone would respond, i'd like to ask to @ me.
I'm wanting to start messing with arch viz rendering with UE, but was curious if a Sketchup > Blender > UE workflow was doable or if there are any weird/odd things to look out for when using Sketchup (never used it before, but it seems good to make buildings).

Vive tus proyectos con recorridos virtuales interactivos, toma el control y disfruta de ésta experiencia. Envíanos un mensaje y con gusto te atenderemos | v̶i̶s̶u̶a̶l̶i̶z̶a̶ Vive tus proyectos ! #3D...
I have solved my problem, apparently after importing from FBX pivot point went way too far from the model, but the model was actually present in the scene.
hey guys how u avoid this any idea?
cull distances are 0 on both, ut still im able to see the ground texture
has anyone there made success with getting high resolution hdr for skybox? i can't push the 512 res limit
im talking about 8k+ images
hm, seems importing hdr files in ue4 forces them to be marked as 'texture cubemap', which limits to default 512 res, can be adjusted to max 2048
but if its different graphic format, like png, its marked as 'texture' and can be 8k, but i lose ability to adjust brightness nicely like in hdr
.hdr is for cubemaps only. for standard textures you can use .exr IIRC
yeah, resaving hdr as exr made it marked as 'texture'
and plain sphere is needed instead sky sphere because on latter you get mirrored when texture is applied
with text coord
framing up a house to scale
ssssssssssssssssssssssssssssssss
guys, how do you make a nicely filled light for small toilet room?
emissive being used for static light helps a lot, but there are some areas that give too darks shadows, even if i set lightmass settings to high values, including bounces
how do you counter it?
I'd wager what your'e seeing is an artifact of freedom in real-time combined witht he agressive default eye adaptation/auto-exposure in UE4
Lightmass is still a perception-based, biased renderer. That means it's going ot "give-up" at some point when things simply get too dark or occluded
In normal renderings you wojn't see this becauea normal rendering can't adjust the exposure on the fly. But, take a render and crank up the exposure, you'll see similar issues: Splotches, noise and areas where it transitions from a smooth gradient to absolute black.
The solution is to be careful about too much variation in your lighting values and to reduce the ability of the auto-exposure system to over expose the scene
I tend to use several, pre-determined lighting levels for my scenes: Brightly lit outdoors: Looks good at 1/2 brightness, Main indoor areas: Looks good at default exposure and Dark areas like closets or bathrooms. These I want to look good at 2x brightness. This lets outdoor areas bloom and look bright but doesn't require the Lightmass renderer to pump photons into every corner
@tired agate thanks, but i meant to ask how people make light sources for these small interior areas
so far, emissive light enabled for baked light, skylight (since its literally just toilet room with door hole for skylight) and spotlight with large beam angle to light darker areas (basically it covers bottom half of toilet room), gives decent results
some shadows in small gaps and behind toilet are pretty dark/black
i dont think i can push it further, except lightening up darkest shadows in post process or adding fake lights there for filling
asking for another scene, how would you get rid of black shadows in plant? material has already enabled foliage shading, two sided, multiplied up subsurface texture, lightmass has upped bounces
I got rid of some overly dark shadows on plants by removing the wind animation it had on the material and re-baking. Unreal can be very inconsistent on shading, we have gotten good results, but the setup time and troubleshooting has been hellish, I think we are going back to traditional 3d software for rendering. Some things just don't behave like they should. Like two identical items having totally different shadows under the same lighting conditions.
If in max I export out in cm when I import Into unreal do I have to convert again?
no, unreal units are centimeters
@spiral socket switch your skylight to stationary
@royal osprey ive workarounded it with adding subtle emissive green, surprisingly not bad band aid, probably could be tweaked like by coupling emi with ao mask
Hi Guys. What are the settings you usually use for interior scenes? Lightmass I mean.
no matter what I do, I can't remove these artfacts
For this result I am using these settings
Thanks I will have a go with that. I just reseted everything to the default values to start over.
@mellow crater u need more resolution
could also be the uv mapping
like if it's a box and there's more faces on the top
will need more resolution for that
@lethal shuttle Thanks for the reply. Are you talking about the Lightmap? I will have a look at the UV mapping as well
yeah that i mean
i usually allow UE to generate my lightmap
but if the UV map is good then it does it well
it creates the lightmap from the UV map
I went trought every single object adjusting the Lighmap. I am avoiding the red colour and keep a nice balanace between green and orange
btw I am using Datasmith to export all my objects
however, doing what @torn cove mentioned actually helped quite a lot
my pleasure 😃
Is this the place to ask for Unreal Import questions?
?
is it normal that I get better shadows and light for an interior scene with the PREVIEW settings instead of the PRODUCTION?
It's not normal, but it's plausible.
Is just that when I build the light with the Production Quality, I get more artifacts. I actually get a very clean light and shadows just by using Preview to Medium Quality.
@grizzled nest any idea why is plausible?
@Cyrus3v#6954 probably because low quality light is more blurried so you dont see artifacts clearly 😄
you can either pump up quality settings, or keep low quality, or mask artifacts with smart ways
like putting another light sorce in problematic areas or hide it with objects, like plants
Is the marketplace the best place to get stuff from
for arch-viz i think there are better places. the marketplace is mostly for game stuff imho.
Is this place much active?
Thans @lucid orbit . I am still struggling to get a clean interior. I guess because everything is basically white it makes difficult to get clean shadows.
overbright light and shadow usually means too intense skylight
maybe just drop intensities of both light sources to really low values and tune up gradually
those small lights
i bet theyre just spotlights?
if so, try spotlight + pointlight combo
should give better light filling for those corners
hey guys i need some help, im making a 3d vr house world(mabey entire neighborhood) can you guys donate some models of houses? the must match the following criteria, photorealistic, work with unreal engine, and include doors to go in and out of the house. ill release the game right here on discord so you guys can play (in vr).
thanks @lucid orbit I will try that. Yes I am using just spotlights, skylight and using the post process volume to increase the Global illumination.
forgot to mention that I am using the HTC VIVE headset to walk around this scene. That also has an impact on what I can have in this scene
Lights
@mellow crater Are these all stationary lights ? There's an overlap limit of 5 btw
@dusty gyro they are
I can't get good shadows with the static
maybe I am doing something wrong
but I get a lot of artifacts
strange it should be the other way :p
I know, right?
hehe
but, even with crazy lightmpas
the black spots right ?
still there is a lot of artifacts
can you show us a lightmap res view ?
yes
I know the small objects need to be optmized
Lightmap
do I need to increase the resolution?
hmm
maybe for the lighter green assets
I'm not sure about the lightmaps being angled too
can't remember if straight lightmaps are giving better results or not
good point
maybe is the process from 3ds max to Unreal. I am using Datasmith to export and import
Ligthmass
This was before the new lightmapping dll
oh geez
(I was using the hacked one from luoshuang)
so clean
yeah its really smooth
Need to take the time to reevaluate these settings with 4.18 though
don't understand why I am getting such a hard time to get a clean scene
should I try the ones you are using?
I thought it was because of the Sky light bounces
yeah, but let me tell you
with Production quality
is actually worse
medium is enough 😄
don't know why
that scene I posted is baked with medium
I get better results with Preview then with Production
oh geez
I am going to try your settings
probably the cfg file has been fucked at some point in the engine
hummm, maybe I should reinstall it
ah ok
unless you want them to be toggleable
no need to be honest
but less is more as we say 😉
at least for now
how would you light an interior scene? I am on the process of switching what I know it works with 3ds Max and Corona to Unreal. Which is a different beast
I don't really have much experience with max lighting, the best I did was baking AO with RT
But I like to only place the lights where they are supposed to be
no artificial lighting
other than that, IES are great
gives a bit of substance to your lights
although they work more or less well with stationary lighting
because I am lighting this scene the same way I would in 3ds max
and I guess that is my problem
well both tools have different ways of lighting the scene
lemme grab you a few screenshots of an interior I did for a Vive demo
I was under time constraints so I had to lower the quality of the lighting a bit
all furniture is fully interactable btw
still, is really good tbh
thanks
skylight is stationary, directional is movable, and all the other lights are static
yeah
this one is running on a custom branch though
using VRworks improvements
wait I may have a bonus video to show you
i gotta try getting back into this sort of stuff lol.
Thanks @dusty gyro
Most of the time I'm working with much, much bigger models though
Datasmith and UE are having a hard time
my scene isn't that big, but the interior is just white. Dear God, everything is white. The floor is white, the cabinets are white, the walls are white
😄
@mellow crater https://www.youtube.com/watch?v=W4jOXy-izJQ&feature=youtu.be

this project was full of tradeoffs 😂
it acts more as a prototype to show what we can do within VR for real estate and Building Information Modelling
oh boy
amazing
nice work man
I love that you use the motion controllers to control the scene
🤗
at the moment I am gliding around the scene and using triggers to open the doors
you should have a look at the example content package
this is what i used to build my tools on
ok, for the blueprints?
its on the forums
its a bunch of sample blueprints yep
that said we went a lot deeper with blueprints to suit our needs
I can see that
all the doors are parametric
teleportation is using a custom raytracing solution instead of navmeshes
model switching can just be done with Enumerators. if the enumerator == i dunno counterModel2 you can set the static mesh to whatever.
its checking for the normal of the surface the user is aiming at
the guys here didn't want teleportation, so I managed to setup a gliding system. But, these are as you can see my first steps with VR
I personally feel a lot more comfortable just using KB/Mouse while sitting down tbh
and I've had too many problems with sick people on gliding locomotion
@clear stag sitting down almost eradicates the problem
I beg to differ 3:
your internal ear isn't going as bonkers as when you are standing up
hehe
I'm very sensitive to that stuff
I just really want to use VR so I deal with it ;3
Got that damn headset for a reason
I've played doom on the Rift DK1 while standing up, my brain isn't VRsick anymore 😂
I am actually dealing with that issue. People getting stuck
@mellow crater use colliders to virtually restrain movement
I reduce the player's size by make it more slim.
but still some times it gets stuck
yeah
teleportation + predefined areas is a good solution to avoid that kind of situation
I think eventually they will see that,
and ask me to get back to teleporation
thanks for tips
try out both solutions and show it to them 😃
I am learning how to implement all of these blueprints
so, to do that
can I create 2 maps with different motion settings and then "import" the basic level?
does this makes sense?
hmm
it would work
but you'd better add a switch somewhere to change your teleportation
Could just make a trigger on button press that switches a bool
And then through a switch that runs through either teleportation or gliding
yeah, but all of these is quite new for me
You literally just take the BP code you have for both the gliding and the teleporting
You put a switch before them
If true you go to branch gliding, if flase branch teleporting
And when a certain button's pressed you switch the bool
@mellow crater have done any programming before ? Or something that comes close to it ?
I did a little bit of C and Python
you should be at ease then 😃
It's just an if statement
if you know how to code, BP is a piece of cake
the problem is that before I got here, they imported everything to a VR template. So, I am not using something done from scratch
I really like the blueprint concept
it is also easier for other people to understand what I am doing
giving an example, how to I swithc from the VR headset to the normal WASD keyboard navigation
is this kind of stuff that I get lost
hmm
you can migrate your content to a new project
and import the content examples stuff in that new project as a second step
for the VR to wasd
needs some BP tinkering
I think I will do that then. At this moment is a lot of Research and Development to see what is possible. But at the same time I still have to do Arch Viz work
but thanks for the tips, they are really useful tbh
are you working alone ?
on Unreal yes
I am basically the main guy. I know a little bit of Unreal, normal stuff is Ok. But then they asked me to have a look at VR
which is another league
but I love to learn and the Unreal team does an amazing job with tutorials and help
it is. But even using Unreal to create RT is ok and you can cheat a lot. But with VR, everything needs to be balanced because of the FPS
learning a game engine might be one of the most interesting stuff I ever got to do
and then you have the motion controllers as well
true @dusty gyro
it was one of my best decisions
yeah there's a lot of Man Machine Interface stuff to learn and apply
I've been doing VR for almost 5 years now (damn) and I'm still surprised almost every day
feels like I'm pushing the limits of the software AND hardware with my current job though
I mean look at that fat bastard 😂
geez
and I'm supposed to get it into VR
well Datasmith doesn't handle it so
I'd have to split it into parts first
I can't even HLOD it, the editor runs out of memory before finishing
its been a year already and I haven't found a quick and efficient solution
the main problem is that we need to keep EACH separate element
and each must have meta data tied to it
if you can explore each floor, then that is a crazy amount of work
so glad all I have to do for now is an interior scene
well we don't expect the same quality as Archviz
for that we use some other tools than unreal (although the one we use currently is using UE4 as a base)
I told them that.
in particular with VR you can't get photorealistic results at least for now
btw, any books you may recomend?
are you doing this in Unreal?
No baked alighting, using Global Illumination
it looks good
the new release uses UE4 with a custom Global illumination
4.19?
no idea
custom branch for sure
problem is, its unstable as fuck when you work on massive projects
Lumion is like a game engine as well, but you need to have a crazy graphics card
it is
and if is like Lumion, very diffiicult to manage the scene
well its not difficult with TM
just
not really well thought
a lot of the tools aren't really intuitive
well they are simple
but maybe TOO simple
and redoing them in UE4 is too much work
there's no in between :/
That's where the idea of Datasmith is awesome
gotta AFK, brb
no worries. Thanks for your help @dusty gyro
nice
i did one with Preview
69% in the log or in the UI ?
check out in the log :p
70%
not a big difference. But why? There is a difference between the log and the UI?
most of the time the log gives a more accurate %
no idea why though
the ui/bars screen tends to accelerate at the end, since its baking the small bits last
but swarm is a mystery sometimes
slaving computers with swarm is kinda hard to figure out too
and there's absolutely NO doc at all
I still need to setup our render farm
so I can use multiple computers to calculate lighting
good luck with that @mellow crater 😂
well it needs tinkering depending on the network setup
we have a very heavily firewalled network here
and it took me a fuckload of tries to find a kinda working solution
had to share a folder on the network with the swarm stuff
and open the exe file on each machine
then get a machine to coordinate everything
and most of the time half of my machines are "busy" and can't work, even if they have like 5% cpu used
oh boy
maybe would be better to have a better machine
we actually using a Alienware laptop to run the scene into the Vive headset
@dusty gyro this is the result
yeah, but I have some jagged shadows
I do think that'll be less if you make the light less strong
the jagged stuff is definetly low res lightmap
and the fact that its not straight
same for the small bits in the corners
since its approximating the lighting, you'll get some blotches here and there where the pixel density is low
Honestly, this black spot earlier was weird
doesnt make sense considering how well light were nearby areas
true
https://cdn.discordapp.com/attachments/375019569804345347/405300038604947456/Beta_SuiteBedroom_0.PNG

@mellow crater see the black splotches over the painting ?
the wall is kinda angled
and doesn't follow roofings in a straight manner
so it gives this aliased look
but how do I get the straight lighmaps?
unwrap them manually :p
datasmith uvs into slot 2
you can use slot 1
most of the walls you see on my interior project were remodeled and manually UVd
had no choice (and I like clean stuff)
i wish datasmith devs finally made sketchup plugin
datasmith been up for long time, no plugin yet available
and sketchup is darn popular archviz soft
@lucid orbit I wish the same for Revit 😄
Engineers where I work only use Revit, and the FBX workflow through max is such a hassle
yeah, i kept hearing revit pretty often in arch circles
max doesn't really like massive projects from revit
- most of the fbx exports are a mess since the files are coming from other softwares like autocad
baha
yea, know this pain, luckily theres good importer plugin for sketchup->blender
toilet made with diamond i bet
hehe
@dusty gyro I unwrapp some of the geometry, but I still have the crooked lightmap
I am seein that the problem is the extra UV channels that Unreal creates when importing the datasmith file
what UV channel is the lightmap set on your crooked model @mellow crater ?
by default datasmith sets it to 2
if you use custom lightmap UVs you should channel 1
(and texture goes into channel 0)
for this geometry I had from 4
Do get the straight lightmap, I had to change the Source Lightmap Index from 2 to 0
yup
3ds max, I unwrapp the geometry. Export using Datasmith. Import the geometry to Unreal. Open the Mesh Editor and I can see that I have 4 sets of UV channels. The lightmap is crooked. Change Source Lightmap Index from 2 to 0
lightmap gets straight
hmm
wonder why Unreal is creating 4UV channels
I think its the max side of datasmith that doesn't know (yet) how to handle uvs
so it adds UVs instead of replacing them
so, that means for the main geometry I need to do this workaround
I am building the light again to see how these new lightmap impacts the quality
alright, keep me updated 😃
@mellow crater https://forums.unrealengine.com/development-discussion/architectural-and-design-visualization/120797-beyond-architecture-projects have you seen these ?
They are using .1 100 30 1 as settings for the lightmass
as in 0.1 lighting level scale, 100 indirect lighting bounces, 30 skylight bounces and 1 lighting quality
Hi @dusty gyro . I was off sick yesterday. I will have a look and also share the result by using straight lighmaps
alright, hope you are getting better 😃
thanks man
I saw the project
really goo. and getting 20-30 FPS is amazing
I think the settings you shared are working quite well, but I need to rebuild the light again
I am getting this
yellow geometry
I saw the previous image. Are you using substance as well?
ignore the yellow geometry - double geometry
hm, theres option to disable lightmass compression
not best solution as it apparently increases memory usage by a lot, but perhaps will minimize those artifacts
also, do you use lightmass importance volume + portals?
so isn't double geometry
for some reason, when say to use another UV channel for the lightmap
this is what I get
@lucid orbit yes I am using lightmass importance and portals
maybe try increasing smoothness in lightmass settings, it may lose some details though
being honest, I think for this try I will leave it for now. They want to see something by the end of this month. I will switch my attention to more interactive stuff. I want to start a new project where I am in control from the beggining.
@lucid orbit I will have a look on that as well
is it normal that changes done to landscape mat instance arent shown in realtime? changes are applied once i release slider/confirm color
in realtime, as in viewport
@mellow crater yeah I use substance when needed (ie simple patterns the client wants for the finishing touches)
light baking from the screenshots look good imo
maybe a tiny bit of compression on the corners
thanks @dusty gyro , but for some reason, I can't remove the yellow colour. I think it happens because I changed the Change Source Lightmap Index from 2 to 0
.after baking
the yellow color is showing that you have overlap uvs for those meshs. that's why it only appears after building the light.
I don't remember how you can disable that color
hey archviz people, just a quick survey, what GPUS are you using ?
Thanks @celest vapor
@dusty gyro I use both a Nvidia Quadro K4200 and MSI R270X
on diffrent computers
R9 390 on my home machine, gtx 1080 at the office
980ti
thanks a lot !
how people usually handle this kind of gap on furniture?
I am not very happy with how this kind of geo bakes and I think probably it's better to do via texture
@median mural Typically, you don't want to represent seams like that in your low poly.
Is there any kind of list of preferred settings for an Unreal project that's used for rendering out a scene or arch viz?
And also, is there a way of rendering a scene out instead of just going into game mode and taking a screenshot?
For arch viz we just turn everything up in quality settings. And tweak the lightmaps till they are just high quality enough not to be noisy, To render out a sequence use sequencer.
There is a great article and video about this in the evermotion site. (just search evermotion unreal archviz) as far as sequencer there is the unreal documentation and many vids on youtube also.
wasn't there something about changing engine ini settings?
I don't think that's relevant anymore since 4.18
you can setup well your lighting with the tools exposed in the editor
Re: Lightmaps.. Anyone here who knows what the lightmaps consist of?
Its packing multiple types of data into RGBA channels. But which are what? And why does the lightmap consist of 4 copies of the total lightmap UVs? (2x2 on generated lightmap)
I'm assuming color & intensity, light directionality.. Anything else?
If anyone knows, please tag me 😃
@median mural I typically model that and use a separate Material that I can darken manually. Getting lightmass to correctly illuminate very thing geometry is really trricky
@elder scaffold You can also use the High Resollution Screenshot: https://docs.unrealengine.com/latest/INT/Engine/Basics/Screenshots/
Guide to taking in-game screenshots of environments and gameplay.
huh interesting idea to use another material
but I think I might make them movable objects not sure
Volumetric Lightmap in theory looks nice. I wonder if I can generate it in a small enough size
what is the best way to cast multiple shadows from chandelier?
Dynamic?
If you just want fancy looking shadows, I'd suggest a Material Function go get patterns in your shadow
Dynamic Point lights are VERY expensive, especially in scenes with a lot of triangles
So, using more than one at a time is inviting bad performance
atm I set my chandelier to another light Chanel and will use material function. Shadows from lights to harsh anyway.
Hey Im doing a project of an apartment for visualizing on VR. How high can I go with my textures so that I mantain performance and realism? And do you guys have any tips for making realistic enough glass and mirror materials?
I found this tutorial https://www.youtube.com/watch?v=JrbPlPOavzU. I was using Planar Reflection but its too heavy on performance and it doesnt work properly with vr, but this works. Still heavy. I can decrease the texture resolution, and it helps a bit. Do you guys know if theres a way to decrease the reflection size? The reflection is too big

Creating a Basic Mirror Material in Unreal Engine 4 (UE4) There isn't a simple enough solution for creating a basic mirror in UE4 that reflects properly. Thi...
@green pulsar https://docs.unrealengine.com/latest/INT/Engine/Rendering/LightingAndShadows/PlanarReflections/
System for capturing and displaying local glossy reflections.
and for texture budget you need to test things there is no way to know exactly what you can allow yourself for project
the best you can do is to optimize the best you can at all times. But think about speed/quality and then check if something slowing things and fix that.
Does anyone here know a script to convert vray material to standart, it takes long time to prepare standart material for export into UE manually.
Sign up for the datasmith beta by epic, it'll allow you to import straight from 3ds max and vray
for the best result you should probably set up all your materials anyway
and use material instances
I have signed up.
you can create material that inputs your vray textures in convert way to convert them to metal rough workflow
but i still have no clue how to get it.
@delicate garden https://www.3dstudio.nl/autodesk-material-converter
a hundred dollar script
i can't even treat myself with a videogame on steam
But thanks for the link
I am a newbie and have been trying to get this Refrigerator textured properly. I am pulling my hair out trying to figure out how to properly align the texture for the LED panel. I have spent hours trying to figure out what exactly I need to modify to fix this to no avail 😦 If someone could just say a few words pointing me in the right direction, it would be GREATLY appreciated. I attached a photo of what it SHOULD look like..
I have quite a bit of experience of level editing from years back. What I am trying to achieve could be done by selecting a brush face and choosing 'align/fit planar' .... this is what I need =/
ADjust the UVs in 3D package
Load the model into a 3D package > adjust UVs until it lines up properly then reimport to UE4
I have blender, this will work, right?
yeah
ok... not sure how to go about that, but that is a good lead
Also you might need to crop that image as it doesn't look square
your texture needs to be power of 2. E.G 1024 x 1024
You can do 1024 x 2048 ratios as long as it's power of 2 but square textures are easier to manage
you could try that but I don't think it will fix the alignment
Also having that many materials on one object is very inefficient. You should be using maps to define metal/rough values
oh ok.. sorry I'm totally new to this mesh stuff 😃 I would rather fix it 'right' in blender
ok, which kind of map would I need to create?
There are plenty good resources available for free on learning blender.
I think you should look at a beginners guide rather than trying to jump in with no experience
Even learning the basics will save you a lot of time and stress
Alright... that's what I will put my focus into then. Wasnt sure if it was a material issue or UV Map issue

Blender tutorial about how to UV unwrap in Blender, so that you can texture your model. Download the model: https://drive.google.com/open?id=0B8PFSrI9B3iwanN...
Blender Guru will have everything you need to know
Yeah a decal could work. You could also just have a low res texture applied to a plane that sits in the right position on the mesh
There are many ways to skin a cat 😉
(British metaphor)
ok.. This is great help, thanks man.
@cunning igloo https://youtu.be/ihg4uirMcec?t=15m11s

The session by Lead Artist Jerome Platteaux will focus on the different ways to light a project in Unreal Engine and covers the basics of Physically Based Re...
Thanks!
Doesn't go into much detail about how "light direction" is calculated.
well looks like vector to me. Like normal maps so probably it traces to light source or something
amazing
How do we properly use exposure?
I am working on interior and everything is too dark by default
https://streamable.com/11mjr made a thing

dynamic exposure based on distance ?

not exposure it is focusing
Is there ideas how one could make variations for baked lighmass?
like 2-3 different types of couch(different mesh)
I think that I can use day, night. And like 3 maps.
probably it's best way to achieve that.
also you gave me idea that there should be mid gray exposure set up in the controller
@median mural would lighting scenarios be what you search for ?
This page provides an overview of Precomputed Lighting Scenarios in UE4.
No. I need to make variants for all sort of meshes.
possibly walls too
and this thing on top of it
How do you folks deal with Blender to UE4 export for archviz?
I modeled my house in inches/feet and when I brought it into ue4, the scale was obviously off. Then I changed scene settings in Blender to metric and centimeters, scaled it up so that dimensions in cm proportionally match dimensions in inches, re-exported, but the scale was still off.
@motorsep#8292 I made custom scripts
btw by default blender will export in meters
I have every wall as separate object it's easier to work that way.
Scripts export in fbx properly but everything as separate file
another script exports selected to export groups.
@noble geyser top view
or side views
mousewheel click
and drag
its based on your grid resolution, so you have to lower it if you want more precise measuring
tried that - I see white line, but no measurement value over it :/
I think it works only in orthographic views
yeah you need to be in ortho (top, left, right, whatever)
but not sure why would you do that
like I don't have any reasons to measure things in ue4 yet
probably would be nice to be able to have some sort of default Actor for measuring to display as UI
are there any good texture sets for archviz, ready for UE4 ? (set of textures ready for PBR) Preferably textures of something they actually sell in HomeDepot or Lowe's ?
substance subscription is very nice option
Substance Designer is the best for recreating real materials
aye

Hey guys ! Many of you asked me to explain my scene setup, lighting, materials etc.. So I made this quick overview tutorial of my project. This is my first t...
what are those circles with folded corners and blue arrows?
(I tried baking lighting in 4.19p4 yesterday, just to see about indirect lighting bounces and whatnot.. My scene looked like sh#t 😦 So I am wondering if there are some things that I am missing in my setup)
@noble geyser waitasec, I have a cheat screen with good enough lightmass parameters somewhere
this is pre 4.18 though
I was using luoshuang's multi bounce skylight lightmass.exe
but now its integrated to the engine so
if you want good looking indirect shadows and lighting, you can lower the smoothness value
and up the indirect lighting quality
do I need anything special besides Skylight (and portals) and directional light ?
my test scene was all indoors, no windows, so I am not sure if Skylight worked there at all
maybe a lightmass importance volume
yeah, I have that
no windows at all ?
right
currently I am trying to get proportions of the geometry right, so when I put HMD on it feels right. Once I get rooms roomy enough, then I can cut in windows and start adding props and such
otherwise I'd hate to do all this work and then it feels totally off in VR, and I'd have to redo it all over again
yeah for sure
oh you can stick to medium quality aswell btw
in the build lighting quality level
high and production kinda are placebo imo
the screen I posted was baked using medium
ah well :p
what does Static Lighting Level Scale do? Right now it's 1.0 (default) ?
Also, why turn off AO ?
AO adds bake time
but if you have a skylight, baking it makes your AO
at least that's what I read a while ago
for the level scale
its kinda like supersampling for VR
you can stay at 1 and bake with your lightmap resolution
or push it smaller and bake a supersampled lightmap
I guess 🤔
it looks better with small value 😃
for example here I was using 1 for the scale I think
you can see awful AO bakings in corners
and the noise in the darker areas are caused by indirect smoothing
for quick testing its decent enough though
I see
(this one is using a stationary skylight and movable directional light btw)
pretty awesome for ToD setups 😃
the main challenge for my archviz project is to get virtual scale feel correct
so that 10 ft x 10 ft room VR feels as it's indeed 10 ft x 10 ft in real life
you can check if your dimensions are good with your controllers :p
heh
I do it all the time
it's for mobile VR
aaah
oh well 😄
I don't really have to check for size stuff on our projects since all the models come from accurate AEC modelling tools like Autocad or Revit
maybe make a template with an empty box or something, and make that box IRL to check if the size is right
aye, but I've heard that even though it's modeled to size, in VR scale looks off
or model your room even !
I guess you tried to change the world to meters value already ?
eeh, nope.. I don't even know what that is :/
(I haven't done archviz before)
VR archviz that is
oh
its in the world settings
one of the last parameters
you can change it to change the scale (probably some engine IPD tweaks)
gotcha, thanks
👌
probably in vr if you set wrong eye height there you get wrong scale
by default its at 100 yeah
no idea how UE4 behaves with mobile VR though
sweet sweet dynamic lighting
like then you are a kid everything looks big and when you get older everything start to become small
so real world values is the best bet
also you should consider that humans need reference object to understand scale. If you have something in the wrong scale this can destroy illusion of correct scale very quick
I'd rather model geometry in actual scale in correct units and then tweak something in UE4 to make scale feel right in VR (and not mess with scaling geometry all the time). Hopefully World to meters would help with that
can someone tell me how people manage to have dark sceneries with SkyLIght only?
No matter what, completely occluded rooms ( = Rooms without windows) are always affected by skylight...
set the geometry as static and rebuild your lighting?
Does sky sphere with dark and cloudy lighting affect actual lighting in the scene ?
I have one and no matter how much I crank up values for sky light and directional light, my interior scene remains dark
try changing number of indirect light bounces
Hello folks,
I'm trying to create an archviz interior. Everything is ok but I don't know why I'm getting soo dark my house staticMesh body. I have checked normals, lightmass settings, material, lightmass uv index etc... but still can't get rid of that. I would be happy for any suggestion. Thank you.
well, you only have a skylight there
you don't have lightmass portals on the open gaps like windows and doors
(those tell the baker to put extra effort there)
have you built the lighting? Have you unwrapped a second UV channel for lightmaps?
Just tried the portal but it has no effect. Yes. I have unwrapped UV for 0 (3dsmax) and 1 made UE as GenerateLightmap [tick]. Exposure is set to 0. Also tried to increase lightmass enviro intensity to higher value but still same.
btw I have 4.18.3
light quality is set to production.
could you post a shot from inside the house after its built
Swear its that hdr....
What other difference between the mesh preview window and your scene are there?
LOL
(I assumed that was intentional)
@still furnace is it intentional that you aren't using a directional light?
Hey do you guys know if Anodized metals is still metallic surface, dialetric or 50/50?
eg: white anodized aluminium looks like its painted
if its perfectly coated I would see no reason to make it metallic
but understanding anodizing process' might be better suited asking google
there may be metallic flake variants, sheen filaments all sorts of variables
slightly opaque materials more like a polish
@still furnace if you intend to not place any directional, at least boost the intensity of your skylight
Thanks guys for suggestions. I will check when I arrive home.
what types of light are you all mostly using?
finally figured out what was causing dark lighting - skysphere
now I am wondering if there is a way to set up directional light intensity to match intensity of 10am sun in real life, for example
otherwise it might look good, but might have nothing to do with how real-life interior with real-life lighting will look like after it's built :/
also wondering why lighting looks so different from Blender


pretty much same setup, but Blender looks more realistic (effortlessly) than UE4 (spent all evening tweaking lighting).
@noble geyser are you sure your direcitonal light is setup the same way as in blender ?
looks like there's a different angle
and intensity