#animation
1 messages · Page 143 of 1
i was told blender is better for animation
"better" doesnt really mean much if you have lots of experience in the one program but none in the other
if you know how to righ& skin and all of that in max, just stick with max
does anyone know how the movement from root motion influences the character movement when you turn off root motion? I have a character swinging and jumping off a rope (both animations in root motion) and then transition into a falling state, which isn't root motion. Now, instead of immediately starting to fall down after the jump animation ends and the falling starts, the character flies in a parabola shape, before eventually landing on the ground, which implies to me that there is some leftover momentum involved?
Can you bind OnCompleted, OnInterrupted, etc for slot animations played as dynamic montages?
I've created an animation montage with two sections, when the sections are set to play rate 1.0 everything is ok... when i set the play rate to 2.0 it plays every section 70% of the way.. each section is a punch.. so the punch doesnt go all the way... any idea why that could be happening? ue 4.25
play up to 70% of it's length***
I rigged the humasour creature , but its legs get twisted after doing the re-targeting....
Anybody on right now?
I´m still trying to figure out if bringing in blendshape based animation from maya to unreal is even possible...
I have a rig setup in maya, that uses blendshapes for the facial animation and while I can bring in the rig, including the blendshapes, when I import the animation, I only get the joint animation, but not the blendshape animation.
@azure roost did you check "import morph targets" in the import settings in unreal?
Yeah, like I said, I can bring the blendshapes into unreal, I just can´t get the animation from maya to carry over.
All I wanna know, if thats even possible or not, before I let my rigger work on it for the weekend trying to fix it...:)
you mean the blendshape animation?
hmm i had a similar problem, I imported blendshape from Blender into unreal engine, but I could not stop the animation from looping once i had imported it.
if thats what you mean, i have similar issues with exporting from blender. Sometimes it exports it, sometimes not
but if you have the morph targets, you can add curves for them manually in UE4
yeah i did not know how to set up talking 3d rigs in my game in unreal engine through using the data table for dialog because i had problems with Mixamo deleting the blendshape keys..
does anyone know what the best way would be to implement falling, depending on the speed the character moves with? Like, say, if you just walk off a cliff, you'd fall straight down, whereas if jumping forward, you'd fall in a parabol arc
This would probably be done in setting the Movement State
a custom one?
i think so, My Humasour creature didn't target right,I'll put up a pic of him shortly to show the issue, I'm not sure if the issue is with the rigging I done of it because i never rigged him before manually ,or I targeted some of bones wrong.
Arm and Legs Twisted
I am getting some lag when my animations play,
I made these animations in blender.
Is it possible that I exported too much information, as in keyframes etc ?
I just dont understand what is causing the lag outbursts when animations play (it doesnt happen all the time but it is in VR so it
REALLY stands out when it happens..
In the Play Animation Node you can speed up or slow down the time.
Ok, I can confirm its possible. Created a simple dummy rig for the model, added some blenshapes and animated them, export to unreal, all there.
So it has to have to do something with how the rig is setup in Maya.
Hopefully my rigger can sort this out then.
i need someone to check my rig to make sure its right ( am not sure I rigged it right. Can't seen to untwist the bones when targeting..
If I remember right, there might be a step in the retargeting process (the same part you select humanoid rig ect.., the list below that)
when you are at that stage I think you have to remove/uncheck the bones which have 'Twist' in the name, potentially a fix but Im not 100% on that
@trim vigil
I'll need to get the rig uploaded to check it, its a custom rig, I'm adding in the root bone now to it.
question guys,
I have just retargeted an Anim BP to the skeleton I use for all of my animations...
that skeleton is now prompting me to save,
for the life of me I don't want to make changes to that skeleton, why would It be asking me to do this ?
Here's what it looks like now
Dunno if its right or not. Not done rigging before.
Don't Unreal Engine always makes changes to the skeleton when re-targeting?
Sorry @trim vigil I havent actually rigged anything before, just worked with pre rigged which I sometimes had to adjust when exporting to unreal...
ok
hello. i have problem to retarget the free military character.
@warm cipher As a test, set all your bones back to skeleton (Right-click on your root bone, and recursively set it to skeleton). After that swhich pelvis bone to animation scale, and the root bone to animation
Let us know if you see an improvement. You will probably need to delete your currently re-targeted animation, and re-target again with the new settings
i need to know how to convert hair mesh edges to Curves in Blender. but I don't know the procedure. I When I try Alt C to select curves and then in modifiers select the ) curve, Curve is Highlighted in red with this error coming up saying "Modifier is disabled, skipping apply.
So I can't turn the hair mesh into curves because of this error.
what is the proper way for setting up skeletons for a workflow between ue4 blender?
In Blender with rigs you have to be more careful. Avoid moving armature when in object mode.
I'm not familiar with this part of Blender. So how do we get past this modifier error in blender so I can give the hair mesh some faces?
hi guys , when the animation blending from ragdoll, it will turn to other side , how to fix this problem in 4.22
I wish I knew, I got trouble with Blender's Hair conversion. Hopefully someone knows how to get it working.
how do i play a particle once
how do i play a particle once
@ripe coral you could use the "do once" node in the event graph
@vital mesa didnt work sadly v.v
how are you spawningthe particle?
hey guys, new to the animation part. Just wondering i have a set character, and how would i add animations to that character
greeting users, i call for your aid, i got a sphere, triangulated, most of triangles removed, solidified and beveled, like on the pic.. i need to make it animated when i interract with it.. it expands and on the inner side i need to store information such as text or immage or video or bullet points of my plan.. any idea how to do it? can i animate scale with matinee?
Scaling things with time is not so hard.
might be a better way, but for scaling things, i would use a timeline with a increasing float.
When retargetting anims, do you need to keep the source anims afterwards? Was curious whether using several anim packets from the marketplace means I need to have 2x the asset data in a project
To avoid causing file referencing problems, I import the animations in and just leave them on the hdd but the problem is, the hdd soon gets all full of FBX junk...But Unreal Engine won't let me delete the anims from the HDD without causing file referencing problems because Unreal Engine links itself back to the source files that it imports in and this creates difficulties when trying to delete the files from the Hard Drive because the editor is linked to them..
is it possible to get a bone's rotation, transform or forward vector in an anim graph? I can't find it anywhere,
You should be able to access it with the layered blend per bone node in the anim graph.
Hi everyone! I'm having this weird error when my character walks backward. I use blend space to change between animations. When direction is -180 or 180, backward animation should be played. But for some reason as you see in the vid, it bugs out with the other animations and it only happens while going backward. All the other animations work perfectly. Any idea where the issue could be?
Why does additive animation scale player up?
If I play either State Machine on their own, it stays correct scale.
@slow elk Are the animations you are trying to apply additive?
You can either do that by marking each animation as either mesh space or local space additive in the animation assets themselves or you can use the "make additive" node. What the make additive node does is return the difference in translation, rotation and scale from one pose to another.
So what the apply additive is expecting is often some small values in rotation, translation, and likely zero in scale difference which is then added on to the already existing translation and rotation in the base pose.
If you throw in a normal pose into the apply additive you suddenly get pretty high values, since now you are not measuring any difference but instead you reading the animation values directly. Another issue we get from this is that scale will likely be (1.0, 1.0, 1.0) in the animation we are applying. And since the apply additive node is just adding together the base and additive animation data we suddenly get (1.0, 1.0, 1.0) + (1.0, 1.0, 1.0). But not that, this is something that will be applied to each and every joint in the skeleton hierarchy, which means that the root will be scaled by 2 which then scales up the rest of the skeleton under it but also the next joint will be scaled by 2 which again scales up the rest of the skeleton under that joint and so on, so in the end you will get a bloated mess with often the head, hands and feet being the largest, since they are often lowest in the hierarchy and therefor will have been scaled the most.
@fickle citrus It looks like when you are pushing backwards you value you are getting will jump between 180 and -180 which are values on opposite sides of the blend space. And since blend spaces have some sort of blend speed applied when they receive a new target value, which then permanently sets the animation to blend from left to right constantly trying to get over to the other side.
What you want to do is read the value and test if it is lower than -179.5 and if it is you just force it to be 180, preventing it to jump between the two.
@normal bramble "Get socket location"?
Thank you @stuck scaffold
Yeh, the problem was the animations weren't set to be additive.
But now the problem is that 1 frame animations wont loop.
Is there anybody who has worked with the ue4 mannequin before? it seems to have a lot of strange properties with the bone rotations
@slow elk What do you mean? Usually a 1 frame animation would just be a pose, so there would be nothing for it to loop over?
@misty dagger In what sense? Is that something in blender?
The root is stuck with Y as the forward axis, the bone rotation issues in blender appear to be coming from having the bones rotated in ways such as the Z axis being sideways
Yes, Its just a pose, seems like 2 frames. 0 and 1 frames.
It has the pose for 1 frame.
but I am currently just working with it straight in ue4, one of the things I have to do right now is switch X & Y axis
for example the pelvis bone has X as up, Z, as sideways, and Y as forward
Yeah, differing coordinate systems are a fun time. Could you show an image describing the problem? @misty dagger
one sec sir
Wrong vid, just a sec
As you can see here, aiming_Hold_bow doesnt show pose even when its active.
@slow elk You should either be able to mark the animation as looping on the animation node that plays it or if you just want it to stay on that 1 frame with the pose you can right click the node and "convert to single frame animation" and then just select frame 1
Seems to be jumping pretty hastily between your states, do you have any conditions applied to the transitions?
Yes, States are working correctly with conditions.
I was just pretty quick with switching from aiming and pulling arrow.
I converted it to single frame animation, still not working.
You can ignore PullArrow and holdback ones, I havent switched them to additive yet.
@slow elk So for the excplicit time you want the time in ms where you have the pose that you want, likely at the end of the animation since you said the animation was at frame 1 not at 0?
Both of the frames are same pose.
neato, is the animation marked as mesh space or local space additive and what animation are you comparing it to?
local space additive.
@misty dagger I understand that those are the rotations you have, but they should not be an issue in of themselves. What are they causing to bugg out?
They're just being a pain
@misty dagger how?
@slow elk When marking an animation as additive you usually want to add an animation for it to compare its difference against. You do this by changing the "base pose type" under "Additive Settings" to "Selected Animation Frame" and then select the animation you are using as the base
@stuck scaffold It's really more of a problem with moving into blender, though I swear I did a tutorial a few years ago that just went into the skeleton asset in ue4 and rotated the axis by 90 degrees
@misty dagger Don't know a whole lot about blender, but what I would recommend is either rotating the skeletal asset in the character blueprint to fix the offset you are getting or fix it by adding a rotation value to the import settings when you want to bring something back into unreal.
Is the issue you are having that when you bring the unreal character into blender its staring into the ground and when you rotate him upward and bake out an animation the character gets flipped in some other direction in the engine? Or is it something more cumbersome?
@stuck scaffold The main problem with importing into blender is it appears that if a bone has a length of 0 it doesn;t get imported properly, and is shifts bones (I can;t remember up or down) the entire hierarchy
Or I may just not have figured out the difference between roots in blender/ fbx for ue4
how would i import the unreal engine default skeleton into blender to make an animation?
hey guys, im watchingvideos an i just cant learn from them half of them just explain what things are
i need to know how to spawn my item, through equip then idle then unequip, but not sure how to do it, never done animation
anyone able to help?
Hello, I'm having some trouble properly implementing my model & animation from Blender to UE4. I don't know if the Blender project itself is the problem, or if I need to tweak my import/export settings. I'm very new, so the answer is probably obvious.
Also, if anyone could link me to some tutorials on animating more mechanical objects, like machines and such, and putting those into Unreal, I'd very much appreciate it.
What it looks like in Blender
What it looks like in Unreal
Hi, I have some problem with maya. I've created my character with a.r.t 1.0 but I don't see IK bone. Anyone know what did I do wrong?
does anyone know a reason why my skeletal mesh would not show the pose that is being passed in the anim graph afaik
I pick a random pose from a list of 1, so it should be that pose, but it does not do that pose
@woven flower I recommend rigging the object. I would use 3 bones for that personally, one that is a root bone that lives at the world 0, and then one for the gun body, and one for the barrel that is parented to the gun body. I'd do a skin bind and weight the correct pieces 100% to the corresponding bone.
I've used this workflow successfully on props
Thank you! I'll look into that
edit: it worked, thanks for the help!
Hi all,
I made an animation in blender, exported to unreal, but it plays a little too fast.
Is it possible to slow the animation down in unreal ?
Not with custom time Dilation or anything, just generally
hi everyone, I have a roll animation with Root Motion, I'm activating the animation through my AnimBP with a bool to trigger that state.
The issue I'm running into is that the animation seems to play out, and doesn't move the character, instead just rolling away then zipping back to 'origin'.
If I create a Montage of that roll anim, and trigger it from my character it works as intended, but I'd like to replicate the roll over the network - hence trying to do it with the AnimBP
Any ideas or pointers?
I initially thought I could do it with rolls without any RM, but of course it just rolls in place - if anyone has suggestions for how to 'fake' the same outcome with a non-RM anim that'd be amazing too
err where do you set how the retargeting treats each individual bone? like I don't want the pelvis up in the air where the scale of the character and animator set it, I want it to snap down to where the target skeleton is
A lot of unreal fps tutorials have the student make a thirdperson camera and stick it inside of the character to emulate a full body character, but I believe most "good" games make seperate models and just disable the model they dont need to see. For example in multiplayer, the fps player would only see his arms, however the enemy player would see the third person model and not the arms. How tf do I get this to work, since im a beginner, or is it okay to use the "true first person camera" many of these tutorials suggest using?
Does anyone know how to add transitions in an animgraph at runtime?
The only info I can find on how to utilize animgraphs is more or less build out the whole thing, but I haven't found any sources on dynamic transitoins
Anyone available to help me with skinning a pair of FPV arms to the UE4 mannequin rig? Possibly add 2 bones needed to the rig too? I never dealt with rigging/skinning. It'd be much appreciated 💝
Would anyone be able to tell me how to add a virtual root bone to a skeleton? I can add VBs, but can't figure out how to add a virtual root
I am trying to animate this. So it starts out 'flat'..but 'extrudes' upwards. I do not know how to do this. I have looked online for some tutorials but haven't found anything..or what I have tried hasn't worked. This is crucial for my game that I get this right. I need to be able to animate these extrusions..I am assuming I use keyframes right? I tried adding locrotscale, then extruding..and adding keyframe but it does nothing. What am I missing? The final result uses modifers with noise to create a cloud for the game.
This is how it looks in game. But I need to create a state where the cloud 'grows' to the final result\
@simple forge I think you want to have your Z scaled to 0 to start, then have your keyframes be the layers scaled back to where you want. I don't believe blender records new faces as it doesn't fall under "location/rotation/scale"
I was able to fix my issue earlier by rigging it as suggested, so maybe try looking into rigging your model too
Bleh
im mainly here to ask for some advice, for attack anims, would it make more sense to make use of montages?
Anyone able to get ARTv2 working in Maya 2020? I'm getting some errors just trying to open the rig creator
anyone know how to avoid this during the animation ? her hand just went thru the skirt
@frozen moat There are some tutorials on YouTube, Have you tried search for some? I remember
https://www.youtube.com/watch?v=3ovSIOgCojs
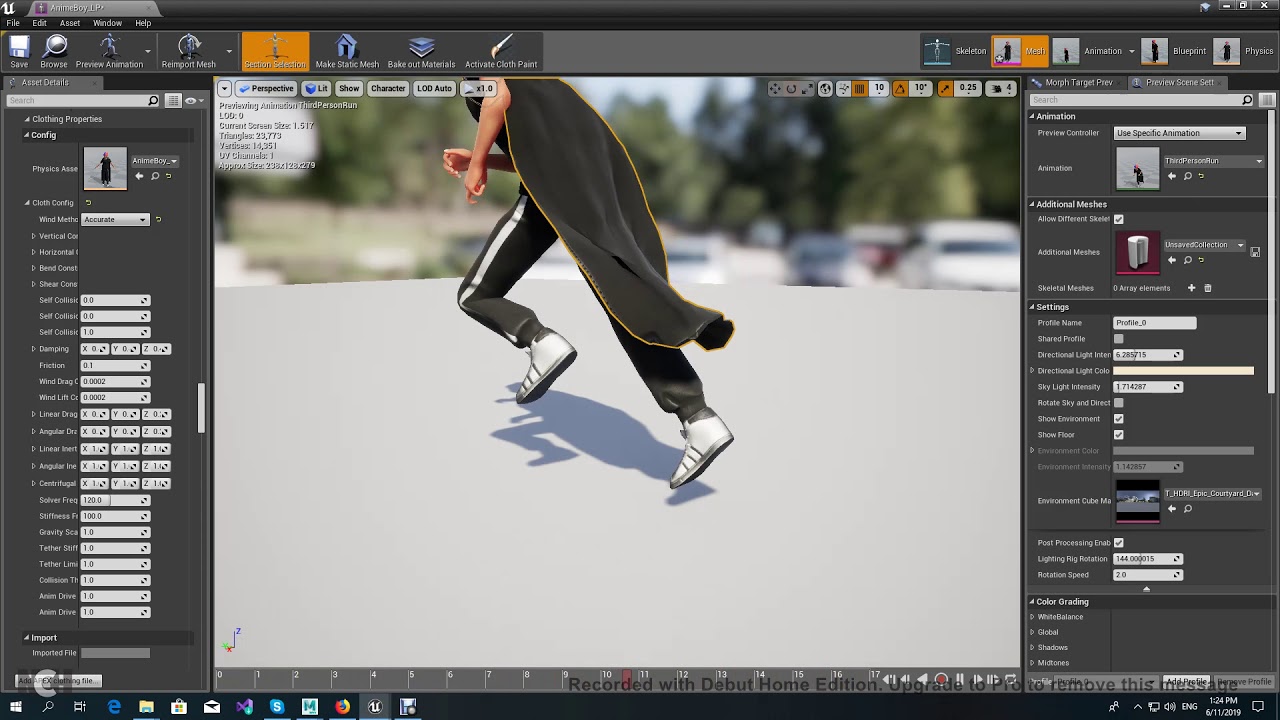
Short tutorial on how to setup clothing in ue4.
is there any way to connect a pose to multiple other nodes
like I want it to go to the top and the bottom node
like I want it to go to the top and the bottom node
@exotic wagon Save cached pose
https://docs.unrealengine.com/en-US/Engine/Animation/AnimHowTo/AdditiveAnimations/index.html
Demonstrates how to blend animations together, in this case, a character that can move and fire a weapon at the same time.
Help me with advice. I have a walking animation, but the root bone is in the pelvic area, not on the ground. Because of this, the animation looks staggering. Is there any way to do a retargeting animation on a standard dummy with a root bone on the ground?
asking this again from yesterday, but I have an issue where my pose is correctly updated on my anim proxy, and I can see it picking a new pose, but the animation does not seemingly update
until I switch states and come back
I think it's because maybe it's playing an animation already and it does not update it until the state is reset?
how could I force that
nvm fixed it, it was a custom anim node that a colleague of mine did something wrong in
I'm using layered blends per bone to play 2 animations over different "leg" animations, is there a way to carry over the time position of one of the animations between 2 states? For example: If in the middle of reloading from idle, the player starts moving, it switches to the reload from jog state, but the reload anim restarts when I'd like it to keep playing from the time position it was at.
I know you can just send the state machine to a cache and use a layered blend per bone from the actual anim graph, but that would unfortunately require a redo of a lot of the state machine. I'll do that if there's no possible solution to my specific problem, but I'd rather explore this option first
a blender issue, but maybe you can help. any idea why the hand does a rotation between keyframes? is it a bug? or my animation skillz?
Regarding my question, I've elected to just completely overhaul my anim graph using caches and blending per bone
Can anyone in animation help me with this problem?
Trying to get the character to look like he keeps moving forward when I collide with something
Maybe more of a physics question?
Anyone knows how hard would it be to make Advanced Locomotion work on a multiplayer enviroment?
So in the animation starter pack I am trying to use StandtoProne and PronetoStand but I cant seem to get them looping properly when I am hitting the buttons for going prone. I either get one or the other. Oh nevermind figured it out just now. Lmao.
I thought I had it figured out but it seems I do not
@stoic flume i might be wrong, but what might happen is, the speed at which your running anim is playing is tied with the velocity. now, velocity is different than doing W = speed 600 because the velocity will be constantly calculated based on all sorta things. gravity, drag, mass, and also collisions
when i export a fbx with animtions from blender to unreal it looks like this
anyone got experience with alembic geo caches? Im trying to get bifrost fluid sims cached and into unreal, but as soon geo that changes its topology frame by frame is present, unreal crashes because it cant calculate the motion blur (4.25, with raytracing enabled). Alembic geo caches seem to be somewhat unstable in general still, ofc its an experimental feature.
The animation editor (Persona?) has a new look in 4.25, is there any way to switch back to the old look or are we stuck with the new one?
I have a set of animations and my "camera" is the player so after animation ends I control player from the last frame. The problem is I can move the player but cant rotate him via Sequencer. It changes rotational values in Sequencer but in game nothing rotates at all. I need to control player camera rotation in Sequencer please help
Hello , I need help to convert Transform in bone space to local space please.
I'm using UAnimSequence::GetBoneTransform who give me transform in the animation but in bone space
Hi has anyone ever rigged/animated Vertical volute spring suspension or have any idea on how they would go about it?
I'm having problems understanding what blend in time and blend out time actually is specifically. The documentation isn't that clear.
like, it's how much time it takes to blend completely between animations? It's about at which point the transition begins and when it ends? I don't fully get it.
Hello, can anyone help me with my ik foot placement?
I made a post process anim blueprint for my character that has ik
And it worksl because i can see it in the viewport
I dont know how to apply it to the main animbp and the mesh in general though
I am recording a vehicle skeletal mesh, and when I play back the recorded animation it spawns waaay far away. To make it more confusing, in a new project it plays the animation in the correct position. Does anyone have a clue as to what I am doing wrong?
Can anyone help me though
Looks like the animation that is generated from recording a skeletal mesh to the sequencer also applies the x, y, z offset from world origin to the root motion's local position as opposed to having the skeletal mesh start at local 0,0,0. Does anyone know what is happening?
example: humanoid is at world pos 100, 0, 0. Record the human doing anything. Playing the recording now puts the skeletal mesh of the humanoid at 200, 0, 0 -- the skeletal mesh is offset by 100 from its relative position.
anyone here use control rig to set up IK?
hello there! anyone knows if there's any way to ask for a current skeletal mesh LOD level? I intend to disable IK update based on LOD level. or maybe there's a better approach to this?
@remote obsidian How exactly did you set up your ik?
Using a post process animBP?
I need help with that if yes lol
nope, just following the foot placement docs
Damn
@remote obsidian I got the code ready and working but i dont know how to blend it with the poses from my blendspace
How did you do it?
@misty dagger i'm just transforming the bones after the pose is processed in the FSM
Is it possible to bake an animation's root motion to keyframes?
Another way of asking is - is it possible to have Actor A follow the skeletal mesh of actor B's root motion?
Hi, anyone know how can I add ik bone like this with my character? I've created my character with some more bone with ART1.0 on maya but no ik bone was created.
@remote obsidian hmm, i tried that too but it doesnt affect it for some reason
Like when i click on the two bone ik and i drag it up
It doesnt do anything
But when i do it in its own animbp it works
Does someone know how i can turn off physics if under a certain frame rate?
Hi , i want to retarget but they arent same position and scale. How can i set the second model's position ? https://cdn.discordapp.com/attachments/612856038038700052/726053797138268200/1.png

Probably i have to set position and scale but how ? I cant select full model for scale, it is selecting parts of the model ? https://cdn.discordapp.com/attachments/612856038038700052/726055405175832597/1.png

It is retargeting with no head. How can i solve ?
actually there is have a head but in the belly
Anyone know how to fix animations not retargetting properly? I assume it's because the retarget pose isn't A-pose, but how can you get it to perfectly align? What I want: https://gyazo.com/f909e0c05b990833709cc3e498f920e6
What I get:
https://gyazo.com/2d0256917f0a466b076bdf1c1559c2ca
EDIT: The proportions are slightly different, making it hard to just overlay the mannequin on the custom character


Hi everyone, I manually added IK bone for my character and I got this. IK foot is work very well but it seems that IK hand is not work. Anyone know what cause this to happen?
is there a way to get a bone location in a animation layer?
i want to get the transformed location to process it further, not the location before the animation processing started
using getSocketLocation gives me a warning that it might not be thread safe to use
I searched history first and only found 1 mention of it, but no real answer. The Curve Blend Options in the Layered Blend per Bone node, what does it do? I am trying to get a tangible example of what it does as everything I have tried shows no changes.
I am starting to think its because I have no curve data in the animations I am testing with
hi!, im new using unreal and i have a problem with one animation if someone can help me, i now that if i put the katana of my pj on a hand socket she will stay on the hand,
but if i have animation for put it on my hip and go from my hip to me hand back
how i can do it?
like press tap and go to hand, press tap go to hip doing the animation
You could detach the object from the socket using an animation notify or use a bone specifically for that weapon instead of using the hand bone as a socket location
how can I play an animation montage on the aiming hands on top of the IKs setup?
without having weird movement on the hands
It is possible to take an control gizmo from ControlRig BP and somehow bring inside Blueprint Animations or Players blueprints? Thanks.
testing thousands of baked animation instances with a HIM component and a baked skeletal mesh into static mesh https://youtu.be/zO310XYAWJk

Using a single trace for visibility.
Instancing thousands of characters with goals (stimulus), perception of the environment, collision, cohesion, separation, aligment, and rendered using a single UInstancedStaticMeshComponent and baked animations into a texture used from a v...
can anyone explain me why third person walk animation is inplace, and why mixamo animation behaving like this?
is that inplace animation, what is difference between inplace animation vs root motion anim? how to check if animation is inplace or other?
--------------_
Does anyone have any tools/recommendations for easily creating mannequins? (Solo dev, great coder, no exerpience with blender/animation tools)
@crisp bluff a root motion animation is that the characters model (read motion) should be driven by the animation
Inplace basically implies no motion (IE a running animation 'in place')
Trying to make this anim starter pack animation work, but it is T Posing. How do I fix this?
how do i rigify
into ue4
i cant import animation
it imports like 90 animation files
even tho i have one rigg that has animations
pls send help
also my shape keys aka morphs dont import i cant see them in my skeletal mesh
What do these Yellow Question marks mean? I feel that these animations are not imported or something.
never seen that before
ok, so i turn on root motion, his face is move to left, but the rest body is straight? why? i imported from mixamo
That makes more sense, but why would the anim starter pack animations result in a t pose?
Hey all, I have zero animation experience, and I'm a solo developer so it's on me to learn this skill to progress. I'm wondering whether there are any particular things I need to keep in mind with my character model. Ideally I don't want parts to bend with the skeleton, as it's made of stone/rock. Also it's a group of separate pieces. From the only bit I know so far, I would guess I need to skin each rock to a different bone?
There will be some facial animation as well, which is the only place I want the stone to bend to form the shapes. Otherwise they should stay solid/rigid.
For a while I did consider just going the vertex animation approach but I'm guessing that's probably not very standard
i am using a timeline to animate my credits text, but I can't figure out how to get it to stop being slow at the start and end of the animation.
@copper sigil I think you'll be good by doing a "standard" skeleton and then making sure that some bone skinned to a rock isn't skinned to another one and only using weight values of 1, not 0.50 or some partial influence like that. That way you'll have a bone per rock pretty much and you'll still be able to take advantage of the hierarchy. Good luck !
could someone add bones to some arms for me? i am using a timeline to animate my credits text, but I can't figure out how to get it to stop being slow at the start and end of the animation.
@fringe moss this is probably due to interpolation
Try to use some linear function or something like that
As you can see the "auto" one grows slowly, then faster and then slows down again
Whereas a linear function
would allow to grow steadily
ignore the first part of the message. That was an old message i never posted.
Yeah I was a bit confused hehe
But yeah check the interpolation part here https://docs.unrealengine.com/en-US/Engine/Blueprints/UserGuide/Timelines/KeysAndCurves/index.html
This document contains an overview of how to work with keys and curves within the Timeline editor in Blueprints.
That's probably what you need to tweak
Good luck !
thanks
Hey folks, I feel like I'm missing something really simple. I have imported a fbx with a rig, done it several times, but I'm getting kinda tired and forget what the solution is here. My animations aren't showing in the preview window when I play them. Mesh shows before I play them though. Just disappearing as soon as I press play.
Bones all show, and I've hit that apply button thingy under the animation panel. Not sure what else is left here.
not sure if this is the right place, but i need some conceptual help here: I'm working on a movement system with parkour mechanics, and I do all of it with root motion. However, I also want to have the movement adapt based on things like height of an obstacle, distance to that obstacle and angle at which the player is coming from. Not sure if I missed something, but things like moveComponentTo and moving the character via script doesnt seem to work when using root motion, so my idea was to blend between animations based on distance, height, etc. Now, that means a shit load of animations to do, which isnt optimal, so I was wondering, that maybe I'm going about this all wrong? Is there an easier way to do this?
Can anyone tell me if there is a way to make an animation I made/imported to unreal a while ago can have its playback slowed down by default ?
I just need it to play a little slower but custom time dilations are not really an option because the player has the ability to slow/stop time and that seems to reset
the dilation on the animaption...
in the animation preview window on the left side, go to rate scale and set it to something less than 1
@remote needle just play around with the values until you find something that works for you
Here @vital mesa ?
thank you for the advice!
yes, this. Play the animation and see what works. You can also speed up the animation that way
can i adjust this orange thing myself?
doing target relocation and my 2B has lack of few bone compared to the original chara bone
Ah, I see you are already using this channel too.
Rigging
Don't know if this is the right channel, but I want to know more about mocap suits and the integration with ur4.. First of all, pricing, can anyone give me an avarege pricing?
@frozen moat What is happening when you do retarget an animation? What caused you to want to adjust the wrist?
in short
the original mode has a bone that i dun have
and this is the result
when i cant assign anything to the bar in the retarget menu
nvm i fixed it
tq anyway
What did you end up doing to fix it?
Click here to download the CC to Unreal Rig Reference file: http://www.reallusion.com/iclone/game/CC-to-Unreal-Rig.xlsx
Find out more about Character Creator here: http://www.reallusion.com/iClone/character-creator/
Learn how to add a root item to your bone hierarchy in Maya...
go 17:45
Haha, that was what I was about to get to next
Just knowing that option exists is the first hurdle to overcome.
lmao
doing 3D thing
is really
killing me
i spent like 4 hours do this
didnt know the solution was that simple
so ive been trying to import rigify model into ue4 for a couple days now
now i retargeted the default running animation to my rigg and guess what
the rigify plugin has 2 spine groups the def and the org
one of them has the shoulders parented but not the head
the other has the head parented but not the shoulders
how am i suposted to work with this? ue4 only allows me to select 1 bone to copy the animatoin data i cannot use 2
so how could i modify the rigg to have one spine group? that has both the head and the shoulders attached? somebody please help
Animation like prince of Persia 2d game
Hi all
Was wondering how can I create the walking and stop animation of the main character if you guys remember the old 2d prince of Persia when the player walk till the end of the edge he stop but there is like a smooth movement and stoping. Basically I don’t want the character to stop straight a way I want him to have like a moment when he stop walking or get to an edge.
Any advice is much appreciated.
Do you have a youtube timestamp or something to illustrate
Cause if I understood correctly you should just use a blendspace

Walkthrough of Prince of Persia 1 (1989), played&recorded in DosBox, original resolution. Not a perfect time, but first after my return to this game. Enjoy & Thanks for watching.
Here you can see at around 2:30 but over all the character when he move and stop there is like a reaction when he stop.
My question is do I just do blend space between walking running and stoping
But then how can I approach to get this kind of momentum when he stop ?
I'm attempting to move from Maya to Blender for animation software and I have a couple questions. Is there anything like ARTv1 for blender? What are some tutorials on how to set up blender for first person animations? I can't find anything about these myself
But then how can I approach to get this kind of momentum when he stop ?
You could work on the animBP to send an event during its transition to the "stopping" anim and break the character's velocity by changing his speed (using a timeline or something else for example) or use root motion
That's what comes to mind at least
how would i go about using custom hands/torso/head like pubg does?
i want to be able to change these parts for every character
do i add separate skeletal meshes?
how do i control them identically?
Here's a page to get started https://docs.unrealengine.com/en-US/Engine/Animation/WorkingwithModularCharacters/index.html
Describes the different methods you can use to create modular characters comprised of multiple Skeletal Meshes.
Also the beginning of this talk, he talks about it a bit iirc https://www.youtube.com/watch?v=Zwc9uuOYfFg
That one too, he gives a few ideas https://youtu.be/Oe7fYS9qxmk?t=117
I have no experience with that myself though
@arctic spindle I would wait for epic to release their rigify solution otherwise you will waste time trying to make it work
anyone know of any good tuts for like blender animation on UE4? i have a buddy thats trying to get into it and he says there are like no good tuts, wondering if theres like a paid series that can help with addons and workflows.
This is what I use for exporting, worked well so far https://discordapp.com/channels/187217643009212416/225448446956404738/656123154820890636
I create anims using the action editor then export to fbx with the settings detailed above and all anims work fine
If you want to use root motion there's some stuff you need to take care of though
for the export settings I use these I think
-Selected objects
-Only deform bones
-No "Add leaf bones"
ok so im trying to animate a VCR opening, but when i rotate it in sequencer it acts like the pivot point is some where else but i normally rotate it using the "rotate objects" tool it rotates along its pivot point like how i want it. Any fix?
@vapid breach oh yea? well guess what who made it work i just remodified the rigg to have 1 spine group instead of 2 and it works perfectly in blender and in the engine
@arctic spindle very nice 👌 I made my own rig with auto fk to ik snapping and vise versa that way I have a skeleton compatible with blender so is easier to swap back and forward 😀
noice
Hey all, I’ve recently upgraded my full body mocap solution called Rigel, by adding a real-time data smoothing, which is critical when using Vive Trackers, since they tend to shake quite a bit

In this video you can see the realtime motion capture data smoothing that allows the user to choose the degree of smoothing while recording motion capture.
This feature is intended to smooth out data while recording fast movements ( like fighting and fast gestures ), so that t...
This will be released as a plugin by the end of July 👍🏻
A demo will be released this week for potential customers to test
I started a small experiment showing how I learn control rig. is it ok to post this here?
Feel free to reach out for feedback, suggestions or questions.
https://twitter.com/AndiDev_/status/1277275152997322754?s=20

I just uploaded my first baby steps for a "tutorial" series on Control Rig in #UE4. It's an experiment me sharing what I have learned in the last weeks with not much hands-on 3D modelling or animation experience.
First Part: Setup and forward controls:
https://t.co/zhfnYQ6M...
Likes
244
If you have any questions let me know
anyone know how to close this yellow line in blender
I think your amateur is set to render on front. press the amatuer tab (upper green button) and I think under view or somethin like that you find a "render on top" or "in front" you can uncheck. But I am not 100% sure if it is that
nope not working
nvm its fine
just want to remove her eye patch
what does the node thing do tho
its rig?
yes that yellow stuff is the rigg armature bones
ctrl j
@limpid raven Looking promising, great work !
@umbral radish Oh awesome, I wanted to take a look at that stuff. Thanks for doing that, subscribed !
Thank you! Tell me if you want to see certain things.
@arctic spindle tq
tq?
I'm trying to get the rotation of a bone in its reference pose, what's the correct way to do this?
Hey guys i got a question.I want to seperate this character to his legs arms and body. But i can't understand how to rig it. Im stucking here, should i add to every seperated mesh a root bone? Or not.
Hi, is there a way to cut animation ?
I want to play 2 second of 3 second animation, how can i do ?
@zealous bone Just make a skeleton as if you'd make it for a single mesh. Then when rigging select all of them, then the armature and then rig
@sick coral Reimport it as a new asset and specify the new frame range ?
@delicate junco im trying now
@zealous bone Just make a skeleton as if you'd make it for a single mesh. Then when rigging select all of them, then the armature and then rig
@delicate junco like sharing a skeleton for multiple objects?
yep
i shorted animations but actually it didnt solve my problem
my problem is (loading gif) :
https://i.gyazo.com/f0966999534b511cc80fbc39b959a20c.gif My animation like that , which is very bad. And i want to make it like that ( loading another gif ) :

https://i.gyazo.com/4ba7b00b4f4c356713ce2175bdbc8c96.gif i want to make like that. I am making this animation with click-release-click. How can i make ?
Probably i solve this.
This walk cycle is not symmetric, the front leg does not go back when the other leg move forward.
How do I prevent the slide backward?
Hey! Do you know any free Pistol Equip animation? Even from paragon characters, because I can't find any :))
question, has anyone ever had any sort of shakiness added to their animation from using layered blend per bone? im separating my upper/lower body for animation and i noticed my arms become shaky only from the layered blend per bone animation. if i bypass this node its fine. example of the shake https://gyazo.com/9580303ac3826b5ee122a60b74374d71
@paper void using the mannequin skeleton or what? if you need just a quick placeholder animation i can make one when i get back home
@zealous bone you can use this add-on https://forums.unrealengine.com/community/community-content-tools-and-tutorials/1779192-blender-add-on-for-better-workflow-with-unreal-engine-4-blender-unreal-engine-workspace
Unreal Engine Forums
Blender Unreal Engine Workspace
Blender 2.8x add-on for export directly to Unreal Engine 4 with all setting in Blender (inspired by send to unreal add-on).
this add-on I make because I don't want to open file explorer and drag and drop to Unreal Engine, so I make this add...
@paper void using the mannequin skeleton or what? if you need just a quick placeholder animation i can make one when i get back home
@remote elm Yes, the manequin. Take the pistol from right foot animation :))
like, from the holster
@paper void roger, im leaving in like 10 minutes and i should be back within 3 hours (hopefully), ill PM you if i remember
Thank you so much!!!
@paper void quick and crappy before i left but its something for now so you can atleast continue
oho, thanks, I will try it tomorrow, because it's night for me :)))
Without root motion, how do people prevent foot sliding? I read that many people use displacement curves. If that is the best approach, is there an automated way to produce those curves like in unity, or is it a manual process?
@red ferry its like is trying to go back to the root position.
@viral moss with an animation curve i guess.
It just seems error prone to do it all manually for every animation and blend space. Very easy to miss one or forget to update one after a change somewhere else
@viral moss https://www.youtube.com/watch?v=7qzYv_lwebY

How to use Animations Curves with Plugin.
MarketPlace - https://www.unrealengine.com/marketplace/en-US/slug/dynamicnode-plugin
Tutorial - https://www.youtube.com/watch?v=5eGPgd_ZStY&t=103s
Forum - https://forums.unrealengine.com/unreal-engine/marketplace/1655300-plugin-dynamic...
Anybody here know how to get Curve data from geometry while doing Maya Live LInk?
foot sliding is caused by Foot IK easiest way is to disable it with a curve like in the video (even tho it could be explained better)
another way is to get the root to foot offset before ik and add it to the IK position (which has some disadvantages when blending animations)
my understanding of the curve approach is this: the animation has a curve, and every time you update the animation you read the curve value at time t. Then, you apply an offset to your character. Is that correct?
and to create the curve, you do so manually by making one of those 'timelines' and kind of eyeball it?
I'm used to using root motion in unity, so its taking some getting used to not using root motion in ue4
oh ok
an "ideal" approach would have an separate curve for each foot and disable IK whenever a foot gets lifted from the ground, while going back to 0 when the foot gets released to ground
Hey all, been having an issue with some 2d blend space animations causing drifting between my character and the vehicle they are riding.
Currently I have combined the skeleton of both models in an external program and am using animations for that skeleton in the UE4 2D Blend space.
The behaviour I want is for the feet to be still while bending at the ankle during transitions.
At the moment however the feet drift while transitioning from one pose to another while driving the blend space.
If anyone has run into a similar issue or has any suggestions I would appreciate any help!
Video of the issue follows:
https://youtu.be/MYreS0NYq-M
I have duplicated an animation of a widget element, is it possible to retarget its keys to other widget element? (its within the same widget bp)
@proud spear Ah, I had the same problem. (I haven't found one) No fix for it. My character was basically pushing a wheeled gun. And when blending from pose to pose his feet drifted.
Is it possible to see animation time according to rate scale? I have a 16 seconds animation and it still displays as 16s long with rate scale of 2
Soon will animate this thing https://www.youtube.com/watch?v=DBJZf_PoHwk

This is being 3D modelled and prototyped in Unreal Engine, so players can move the vehicle around and climb over difficult terrain. It will also be fitted with assault weapons and tactical equipment.
Malfunctioning AI mechs will also be roaming the wasteland, that have gone r...
Can't wait to see the result, good luck !
@paper void search in mixamo animation www.mixamo.com these animations are free and easy to import
I love ue4.25 animating feature and how i can see the result immediately without fps droping it really helps with the timing issues because in some softwares i play the animation at 15 fps which effect the final render
How do I best loop an animation (e.g firing animation) a dynamic amount of times (specified by blueprint). Anim montages are not a good fit because the animation which is supposed to be looped is in the animation state machine and is played based on the incoming transitions specified by the state machine.
my character spawns in as a spectator how do i fix it
Your game mode settings might need a look over. Controller BP, character BP, default pawn
In the 2d game I'm currently working on I'm trying to stay with 10frames a second with animations on the character. But some of the weapons almost need 15frames to feel snappy and satisfying.. does it ''need'' to all be the same fps?
Hey i downloaded a paragon asset which is have 140 animations but i cant see them, i am coming to play animation but i see only 30 animation from different assets
Where should they ?
Ok, i downloaded from searcher epicgames marketplace.com something like that, so it isnt downloaded good. So i solved now
I have a weird behaviour with animation curves. I have an anim curve called IK_Left_Hand which smoothly activates/deactivates ik by blending from 0 to 1 and vice versa. If I have a curve which changes has keyframes which are on the same level (e.g at time 0 we have value 1 and at time 3 we have value 1 also) I somehow get 0 as output when I get the curve value. It seems like I only get the value if the value changes over time in the curve. Can I not have a curve with a constant value?
Hey there. I want my game to run at 60 fps. I've already got animations that run at 30 fps. Will there be any problems when setting up 60 fps? Does it even make a difference since the animations are already 30 fps.
Thanks in advance :)
@restive flame No, but your animation will be longer (5 frames)
@tropic drift 30 fps anims actually got more frames, u get inbetween frames
so its fine
lets say if u put slomotion on and a 2 sec 30 frame animation plays over the course of an hour it still wont take jumps
unless you want it
greetings users.. i am to make a complex blueprint actor using anim sequencer plug in.. i have managed to record a sequence of 3 SM and 4 Text being animated ( appearing and disapearing - scale and loc transforms) .. it reccorded in one whole anim length 20 sec.. im looking for a command that within an actor blueprint allow me to play parts of this animation or any other way of playing this animation.. it must be controlled by a key stroke.. i also need to play them after delay, which will require similar node, can any user advise, thanks in advance..
@bronze osprey That's what I wanted to hear. Thanks a lot!
So I have the play random sequence node in my anim graph, but is there a way that I could sometime shave it not play a sequence at all
this BP has Sequencer compontent.. on it 20 sec it records all animations 4 texts 3 SM.. how to seperate them and let em be played on hitting keyboard key
Hello guys is there a way to optimise animation and play it with slower refresh rate?
I would like to create many units on the screen with simple animation
hello guys im looking for a way to implement ragdoll in actors that use animation sharing manager
i spawned about 200 of them but even if i make mesh collison profile to ragdoll at event killed it just wont work
kindoff animation sharing manager overrides it..
is there a way around
Hi can anyone give me some advice on import export skeletal mesh cloth of my character? I am stuck with the workflow since yesterday
I have a pre~rigged naked character made in 3dmax (has blender version too), I made cloth using MD and export as fbx file. I use 3dsmax to import the cloth and fit on the character. Then I hide the cloth. Export the character to UE4, everything is great. Then I have the character in 3dsmax and try to export the cloth with the rig and bones together, when I try to import in UE4 it keeps saying merge bones failed that it doesn't have same bone structure. Any thought? What's the right way to do it. Because I need to do master pose component after. Many thanks
Hi, how do i reduce the frames from my animation? On UE4.
hey. im working on a system for characters that have separate bodies/heads/hair skeletal meshes. all using same skeleton and one of them is used as a master pose. problem is for some heads, the eyes pop out of their sockets. the head animation is fine on its own, but when it uses the body skeletal mesh as a master pose, the eyes come out. not for all heads, though. just some. im a bit stumped as to what that could be. anyone had such an issue before or know about debugging techniques that could help me narrow it down?
there used to be a tutorial, i think from Epic on how to make a character face the mouse with their head and if it was past the clamp, it would rotate their body also using spine bones 1,2 and 3 and a blend... would anyone know it?
@cedar sigil it may be a collision issue between SMs, check that first i gues?
tfw you notice that the bones are sticking out
thats virtual bones
they dont do anything for the animation, just tracking locations

prolly wont need em anymore once controlrig stops bugging out and decompile on restart when i feed it data
yea keyframing is hard 😛
😛
its running a base anim, than i pop in the controlls to take it over and another rig to ovverride the base anims so its not actually running the base anim but the rig is running it
or something like that
wait
actually
how cool it'd be if Epic uploaded Fortnite anims on Marketplace
😂
yea i allready paid for em
with commercially usable license
but selling anims and skins is their core business, MP mod days are dead
@bronze osprey oh hi. remember me? we made a gamejam game together like 5 years ago. B) also, thanks
yup, not the best game in the world 🙂
and np, glad to help 🙂
@cedar sigil still kinda makes me laugh when i think about that1 😛
How do I remove a bone from a skeleton that is no longer there?
does anyone know if its possible to port animations from mt framework to unreal engine 4?
what can read that format? can you get it out in fbx or something?
@misty dagger
i dont know thats why im asking
i know bandai works cross engine
generally
if you can get the MT animations out in .fbx that has a reasonable chance of working
@misty dagger
ill check it out
it has no issue running in unreal engine 4 right?
is there an easier way to make an object follow a circular pattern than keyframing it in manually moving it? like follow a circular spline for example
i ported anims and models from a mobile game
to a pc one
but its an in house one
so i dont know if they are different or not
someone might just so happen to be familiar with capcom's tools but I'd imagine they'd be under NDA
@misty dagger
well me and some friends are working on a project
and i was thinking of porting shuma gorath with his anims over from ultimate marvel vs capcom 3
(i cant imagine the pain of having to animate him yourself)
i figured because its so old
it wouldn't be impossible to port
i know plenty of games with in house engines that succesfully ported their files
though i wasnt sure
hence why im asking
im not experienced at all
falls under fair use
by that logic any project that involves porting over anything is copyright infringement
fair use allows the files to be used as long as theres no profit involved
fairly sure
ill check it out then
without a license, yup
but in any case you'll probably have better luck if you ask around places with people who mod MT engine stuff
@misty dagger
im not doing any paid project or official game
i dont claim to be the copyright holder either
are mmd's also copyright infringement then?
i dont think thats copyright infringement whatsoever though
Only if you post it publically and claim to hold the copyright
or dont take it down on reqeust of the copyright holder its infringement
or of course if you make profit
by this logic anything ever is copyright infringement
you cant mod games
you cant do anything
your logic and perception of the law seems very flawed
if you keep everything on ur own PC and just a few friends get to see it, go nuts
if you keep everything on ur own PC and just a few friends get to see it, go nuts
@bronze osprey
thats what im saying
otherwize i wouldnt touch fair use with a long stick
yeah i agree
its a marvel related project anyways
so im still working with the original ip
most of the time engine info is public
fair use is verry fucking limited
fair use is verry fucking limited
@bronze osprey
doesnt club penguin rewritten fall under fair use?
no profit doesnt mean its okay
yeah ill move
found what i sought with a google search
thanks for the advice though
i feel like it isnt fair not to thank you
Is this a good channel to talk about character modeling->animation workflow?
Has anyone gotten these warnings when importing mannequin anims? The anims themselves look fine at a glance especially on the hand but maybe there's something Im not seeing.
The bones do exist but without the suffix -1 on my SKEL_Mannequin (which is just a renamed skeleton from the UE4 anim starter pack). The imported anim is from a marketplace seller that also uses the mannequin skeleton.
Thank you. When you say expand skeleton would I import the detailed skeleton and reassign my character mesh to it making it automagically work, or it's more involved than that?
has anyone had luck w/ pose watch on 4.24.1?
I activate it but don't see anything special in preview window
Not sure if i'm asking in the right place, in that case, apologies. Seems like animation works with bones and sockets a lot so... 😅
I want to make a clothing system. But before i start, i want to know some basics so i know how to tackle it.
The somewhat important question: Like, if you would have a female character and have different shoes, how would you offset the character to account for shoe height, including angles like high-heels?
The important question: The base character skeleton has bones/sockets for weapons and other items meant to be attached/visible on the character.
Now if i for instance had an armor piece, the bones/sockets would be inside the armor, can the armor piece only contain the bones needed and offset/override the original skeleton bones? Like, i have a back rifle socket on the mannequin, if i'd wear a armor piece, and that armor also had a socket or bone of same name but on a position that would better match the location for a rifle, could it override the one on the mannequin?
is it possible to change the rate of an animation using a notify through BP ?
Can someone here please help me with Animation Budget Allocator . Like how do you use it?
@misty dagger Lorash, yeah, i know it's flat. Ala sims, skyrim and fallout etc. 😂 But we got far since then so i thought there could be a way to make a system for that now.
I was thinking something like, shoes would be the base skeleton since they determine the player height based on shoe soles and heels. The rest would just be appended, but i was thinking of adding a weapon on back bone to make weapons have movement but place it based on what top cloth was equipped. If you get my meaning.
Tho, i could make a socket of a specific name and only quire the body if nothing equipped or quire the socket position of the mesh that is equipped. Probably much easier to do. Only to figure out the shoe thing tho. 🙂
is there a way to create morph targets in the engine?
Hey Folks! First time doing this here. I am having troubles with this Animation that wont play when im clicking the attack button. If anyone can point a beginner in the right direction that would be awesome. Thanks!
just look at the paragon blueprint it got stuff like that
I'm having a massive brainblock here. My character has a bunch of animations that allow it to swim in many different directions, but if I try to apply that to what I know of 2D blendspaces, it feels like I'm coming short an axis, considering one axis is devoted to speed, and the other to horizontal direction.
Anyone out there that can help me crack this conundrum? 🤔
how can i loop my montage, in 4.25 things are different.
Does anyone here have any experience rigging modular characters?
hello,
i want to know if there is some way (easy) to use ik with a static mesh in the character hands?
i know how to achieve it with just punch for exemple but can t achieve it with weapon like swords
hi. im trying to set up modular characters with 3 skeletal meshes. 1 for body, 1 for head, 1 for hair. im using the body skeletal mesh component as a master pose for the other two. but some of the heads have different positions for the eyes, which are then reset to the body's eye bone positions (the body doesnt even have eyes, of course). anyone know how to handle that?
i got some difficulties to understand pin joint target location
in the content map exemple there is a value hard coded but can t know how they get this value and why?
plus the exemple seams to be broken ik does nt work as exepted (lot of bug with upper arm)
any one can explain me how to solve the content exemple so i can really understand ik

another 6 hour job. little bit of ref on this one thanks to @StephanKesting No budget to polish anything more than this. https://t.co/kJcep05cym

This dual-wield assassination from the right took a little less than 6 hours to complete. No reference. For Monster Caravan, there is no room in the budget for heavy polish.
This a variation of the first take-down I ever learned as a kid. Learned the hard way from Luke Pears...
Does anyone know how I can make this so a scene component on my character follows the mouse cursor (in a sidescroller game)
Would this be the best place to ask a question about Control Rig? I know its an experimental feature
i would say yes
So I am having an issue being able to create variables within a Control Rig Blueprint so that I can access them in an Animation Blueprint. I have the option in the context menu to Get and Set variables but selecting them doesn't seem to cause anything to happen in the Details panel. I read in some forum post for 4.24 that even though they were somewhat broken in the interface, at the very least I would be able to see them in the My Blueprints panel but that doesn't seem to be the case for me.
i only created a var in control rig and feed it in, but it keep decompile and error my anim bp
the result allways leaves the CR?
Okay I think I am slowly figuring out my issue. So the Variables tab seems to be completely deprecated in favor of the Parameters tab. So in order to create an accessible parameter you need to actually use the Create Parameter section of the context menu, then hook it into your graph somewhere, then in you Animation Blueprint you create a Control Rig node and tell it which Control Rig you would like to utilize, and then finally you should see in the Input section of your Control Rig node with a reference to all your parameters. Each parameter has an option to "Use Pin" which will expose a pin on your Control Rig node. I haven't tested yet if I can set and correctly blend between my keyframed and Control Rig animations but thats the next step. This is way more experimental of a feature than I thought it would be.
hmm that sounds about right
last time i checked creating a variable bugged everything out , but havent tested on 25.1
Yea whether its just a name change or bigger things in store for the next update, variables seem to do nothing. But I blending between keyframed and procedural animation is now working so atleast things seem to be working once you get around the interface issues
how to move a animation to a a keyframe like the start in blueprint
Hey everyone, I am having trouble importing a skeletal mesh. I am using the Third Person Example project. I exported the included skeletal mesh to Blender 2.8, then exported that file back into UE4. I made no modifications but when I imported the skeletal mesh and assign it an animation, it makes very odd poses like this:

is there a technique where u can work with ur animation first with something like mannequin then just kinda like dress up ur mannequin
my own 3D chara has skirt
does such technique or method exist ?
@formal dragon Film obviously
Hey guys. Thought I'd ask here. I own a couple melee anim packs from Kubold, but they dont have enough directional attacks for a rasial coverage. For instance, diagonal, topdown, side swing, down left to up right, etc. Do you know a pack with these anims, or should I just hack them together in Anim BP with bone placement? Wouldnt feel nearly as impactful though.
hello,
i got some difficulties to understand pin joint target location
in the content map exemple there is a value hard coded but can t know how they get this value and why?
plus the exemple seams to be broken ik does nt work as exepted (lot of bug with upper arm)
any one can explain me how to solve the content exemple so i can really understand ik
Is there a way to export post processed animation and save it from Anim blueprint?
Is there an efficient way to export a blender rigify skeleton without the extra bones?
Check "only deform bones" when exporting @distant moon
Is it enough to make the rig efficient for games?
"only deform bones" will basically only export the bones used by your skinning so yeah that's definitely the thing to do unless you want to keep extra bones in Unreal for other purposes than anims
Not 100% sure what you mean about "efficient" in your case
By efficient I mean anything that'll make it easier for Unreal to handle the rig (like reducing the amount of bones). Is there anything else I can do to make it even more efficient? In some parts, my game will have around 20 human rigs on the screen at once.
Ah I see. I don't think you can do much on Blender's side tbh, despite simplifying the rig or something but I'm not an expert.
If your gameplay is compatible with it you want to look at anim sharing https://docs.unrealengine.com/en-US/Engine/Animation/AnimationSharing/index.html
Also make sure to always have fast path in your anim blueprints

If you don't know about fast path check my discussion about it with Vaei here https://discordapp.com/channels/187217643009212416/221798806713401345/635193737164750867
Describes methods to achieve more performant Animation Blueprints through optimization techniques.
good luck !
It looks useful, thanks!
Hi! is there a way to make an anim sequence with control rig, but starting with a pose from another anim sequence?
if I apply control rig it always starts with a-pose
put the Crig in anim bp and feed a pose in
[Question] can you actually trigger events or function in the state machine ?
@cinder linden You can do that with transitions
Just replace the default "None" by a name
And then in your event graph
You'll have an event "AnimNotify_NameYouChose"
Same for animStates
Thank you @delicate junco
hello,
i got some difficulties to understand pin joint target location
in the content map exemple there is a value hard coded but can t know how they get this value and why?
plus the exemple seams to be broken ik does nt work as exepted (lot of bug with upper arm)
any one can explain me how to solve the content exemple so i can really understand ik
Hey we bit of a question. I'm working on a VR game and I want the hand to enter an actor's collision sphere, attach to a socket, move with that socket as it animates, and then return to the motion controller's control. I've gotten it to work up to that last part. Instead of detaching, it sticks to the model. I can still move the fingers with the motion controller, but the hand's position is locked. Here's my blueprint
Hello, I want to create my own animations using UE mannequin in Blender
however, I'm trying to understand why manually exporting it from UE
bones came with weird directions, like in this video

Unreal 4.21, blender 2.8, quick method to transfer the unreal skeleton to blender, with bones keeping correct rotation and orientation. Transfer of animations back into unreal without any orientation issues.
does anyone know why that happens? Shouldn't it have no transformations applied when default pose?
If I had to guess, it's the export axis. But I'm not sure why it would only affect some.
@quaint raft Pretty sure it comes from the fact that Blender's fbx importer doesn't use the official fbx sdk, for license reasons. Also the convention used to represent them is different. You won't have skinning problems though.
I suggest to try the "auto rotation" and "ignore leaf bones" options to see if that mitigates the issue
I had the same problem with some software exporting to fbx, bones had weird rotations like that. I just ended up changing the shapes in Blender for these to classic "joints", using spheres.
So I'm trying to make my character go halfway invisible when the user presses a key, does anyone know how to do that?
nvm I found out
I want to completely stop my character when using an animation. So I used stop movement immediately but it still moves in the direction while sliding. How do I stop it?
@quaint raft Pretty sure it comes from the fact that Blender's fbx importer doesn't use the official fbx sdk, for license reasons. Also the convention used to represent them is different. You won't have skinning problems though.
I suggest to try the "auto rotation" and "ignore leaf bones" options to see if that mitigates the issue
@delicate junco
Thank you Dimy, that worked out well! I'm not a good animator, but at least this gives me the opportunity to try and start learning it (instead of always relying in good old mixamo lol)
Does anyone know a good tutorial for giving physics to some bones in a skeleton to make them behave like hair?
Hello everyone! Sorry if this comes up often but I don't read this channel a lot. I need to do precision leg IK and for the system I'm implementing I need to compare the position of what the bones were before any modifications
"Leg IK" doesn't do it for me, I'd like to do exact effector location
And I don't seem to find a way to receive that data in any way without any outside modifications
The closest I've found is to read the pose watches, which supposedly would give me an array of the transforms in that point in time
Has anyone ever encountered a similar issue or can think of any workarounds?
I haven't implemented that pose watch thing yet though.
Helloo, quick question any idea why it isn´t letting me switch bones to weight paint ?
@eager smelt You need to shift select the bone
CTRL select rather
@distant moon You probably want rigid bodies https://docs.unrealengine.com/en-US/Engine/Animation/NodeReference/SkeletalControls/RigidBody/index.html , anim dynamics https://docs.unrealengine.com/en-US/Engine/Animation/NodeReference/SkeletalControls/AnimDynamics/index.html or the kawaii physics plugin https://github.com/pafuhana1213/KawaiiPhysics
Unless you want to do the simulation in Blender and bake it on bones ?
Make main character a walrus, problem solved.
do you have to use the ue4 skeleton or can you import one from Blender for example. I can't imagine that you CAN'T use custom skeleton, right?
like, proportions are going to be different, some things have more limbs, some things aren't humanoid at all. What then, is the workflow for importing those skeletons? all of the import aiding plugins i see are designed around the ue4 mann. skeleton
@fair sentinel you can use any sort of skeleton and importing is (fairly) straightforward
Thanks @delicate junco !
What approach do people usually take to sync audio files with baked facial mocap in animation blueprints?
I'm quite new to animation system in UE4, can anyone tell me what's the behavior if I blend multiple animation sequences, all of some of them have a curve named X,
will the curve value be interpolated? and anim notifies in all of the anim sequences will be fired as well?
aim offset
I'm using the default skeleton. The aim offset works fine when idle, but the arm flails around when doing other animations. What causes that?
What are the need to knows about setting up a rig in blender for ue4?
so I notice that in ue4 (and by extensions possibly/probably maya) bones can have a tail length of zero
how do i prepare for this in my current/future rigs
@covert jay you might want to figure out a way to disable the walking anim/other anims from the waist up while the character's moving/performing an action, I think the other animations are causing the base rotation of the shoulder to change
Good Afternoon.. I have been workin on this BP, which has ANIM sequence.. on button press within trigger 1 i need it to play first part of animation, then on trigger 2 I need it to play second part of animation, I nearly made it work, but there is something missing please tell me what command must be used there
dead?
dead?
@bleak storm i dont think is dead but is either asleep or awake.
if I have a few models using the same skeleton but some of them have very slight variations in arm length in their meshes, how would I fix them so that they can all use the same animations? For example I have a socket on the skeleton that holds a pistol, but the socket is in a slightly different position for each mesh
Would I fix this via retargeting? Or what direction should I be heading?
Should I just duplicate the skeleton for each mesh and apply the slight modification to the socket per mesh?
does it matter if I use quaternion or euler rotation for my models/animations in blender?
does it matter if I use quaternion or euler rotation for my models/animations in blender?
@sage parrot the only matter is bone roll
Hey guys, what's up?
Two questions regarding animations...
-
What's considered the best approach for aim offsets, having an animation or pose for each direction or programmatically rotation a certain armature bone towards aim direction.
-
From UE, can I export Mannequin with all attached animations into a single fbx file to use in Blender?
Thanks in advance!
if I have a few models using the same skeleton but some of them have very slight variations in arm length in their meshes, how would I fix them so that they can all use the same animations? For example I have a socket on the skeleton that holds a pistol, but the socket is in a slightly different position for each mesh
@opaque hearth best approach for me is create socket for each model
and attach base on enums model
@quaint raft you can export all action from blender into a single fbx file, just check the All Action
@quaint raft you can export all action from blender into a single fbx file, just check the All Action
@simple shuttle
I meant the other way around, from UE to Blender, I only have uasset files, I wanted animations fbx
I think you can only export 1 animation from UE into a fbx file
i want to set the animation of a skeletal mesh within another BP Actor
this doesnt do anything :/
Does someone know what could cause this? My player disappears when it hits a trigger and plays an animation. The animation plays for a second and then the mesh is invisible till i get out of the trigger. I change to a different animation state when my player hits the trigger
So with the new control rig plugin, is it possible to rig a character with mixamo and retarget UE4 anims to it?
I haven't used it yet but I'm seeing some cool stuff on twitter about it
what am I doing wrong here?
I use Epic's free control rig example
https://gyazo.com/1ee805ac12e30fd393d9af62aed96023
Anyone know why my land animation goes through the floor? I assume it has to do with root motion, but I don't know much about it.
When weight painting can't paint 0 weight, allows me to paint more if it's higher, but not subtract. Ideas?
Is it possible to attach a skeletal mesh to another skeletal mesh not using a regular socket? Like I have e.g tail animations, but I have seperated the tail from the person and want to be able to dynamically add the tail if I want to
@opaque hearth best approach for me is create socket for each model
@simple shuttle Thank you for the answer. What about using the same animations? For example the left hand on each mesh is in a different position (perfect position versus clipping through the right hand). Would I need to fix this by making more skeletons, or adjust the mesh directly? (Not sure how to do this easily)
Like two characters using the same pose built on the same skeleton have hands that clip through each other trying to hold a pistol. But the clipping occurs at a variety of magnitudes depending on the character mesh
@opaque hearth I don't know how to answer, but this video may be can help you https://www.youtube.com/watch?v=vZW8mxlQJEk

Senior Gameplay Programmer Laurent Delayen explores animation retargeting and what it can do for improving your animation workflow.
i would take a more recent vid, 2015 is kinda old
yeah, but you get the context
@unreal pollen You could either use two skeletal meshes, one is the character, one is the tail
And use a blueprint to connect them together
Or you could (this is a bit hackey) for example move the tail bones inside of the character and scale them down really small, so you would have a pose or an animation clip that does this
I think the first one is more clean, unless you have a good reason for not doing it this wya
I would say the downside to the first way is that you'd have to sync up all the animations, so if the character jumps in his character blueprint, and you want the tail to play the "tail jump" animation clip, you'd have to connect that to the tail's animation blueprint. If your tail animation is done entirely through dynamics then this is less of a problem.
Or best of all would be to just disable the tail mesh so that the animation can play on the tail but you just don't see it. This must be possible... you could do it with a shader but not sure if that's the best way or not
i.e. have an opacity mask that switches between white and the tail masked out
Hello all. It has been a while since I have been on this discord chat, sorry if my message is in the wrong place. I am looking into the Control Rig example 4.25, and on the example they utilise. I am confused on why they utilise the 'NewSpace' items (the red plunger icon). They are not referenced in the graph. From discussions online they state they are a way to group the control points, but they don't state why you would do this, as they have no transform data (or do they?). Any guidance would be great. Thanks very much.
Anybody know of any non-human free animation packs that I could practice with? I see the animals that are free for the month have some, but not as many as I'd like. https://sketchfab.com/3d-models/goat-male-4f0b206788144866a8e56448a26c0ccb this one looks awesome but hoping not to spend $45

This asset has realistic GOAT MALE model. The model has 4 levels of LOD.
9400 tris; 6500 tris; 3070 tris; 1660 tris; There is a version for mobile phones with 1660 triangles. Texture maps - albedo, metallic / roughness, normal map (all 4k). 48 animations (IP/RM): Agression, at...
Another thing I'd like to find is a nice playable character I can dissect that isn't as complicated as the Locomotion blueprint, something a bit more basic, but more complex than the 3rd person example (i.e. aiming, leans)
I have a bunch of models and animations in editor. I'm trying to export one of the models posed (i.e. pausing an animation halfway through) as an FBX so I can import it into a 3D Miniature site. I've tried exporting as pose asset and skeletal sequence, but whenever I open the FBX it either doesn't work or it just shows the base model in normal T-pose. Any idea the best way to export posed models?

Is there a specific reason to use the T-pose instead of the A-pose in artv1 to rig characters in Maya?
A-Pose/T-Pose is usually just a preference of what the rigger/modeller finds easier to work with
in general, each joint should be modelled in the middle of its motion range, because the vertex deforms tend to get worse as you get further from the base pose
T-pose is "technically" in the center, if you count fully up and down, and it's also generally easier to model something lined up on an axis... but A-pose is "functionally" in the middle, since a character's arm tends to be between sideways and downwards like 99% of the time
so both have their advantages and it's up to the modeler to pick whichever one they like more
i bought animation asset from epic marketplace that uses the default UE4 mannequin
so is there a way of just drag and drop the skeleton from UE4 mannequin to my 3D chara directly without going thru a lot of rigging?
@delicate junco thanks, Dimy. My question was more about any issues with the artV1 rig tool in Unreal. Do you know if there are any constraints within the tool that require the bind pose to be in the T-pose? I tested it using the A-pose and it seems to be working fine, but tuts I've seen have suggested using the T-pose.
Ah I'm not familiar with that tool myself sorry. Hopefully someone else can answer but if I had to guess I'd say it's no big deal.
According to the description Epic uses it for Fortnite and fortnite models are in A pose
@delicate junco ok thanks a lot! I have a similar setup going on with using all skeletal meshes for body parts and copy pose to mesh in the BP. Seems to work well.
Hi everyone! It seems I can't find the official Unreal Face App on the Apple App store, only two third party link apps. It is not listed at the Epic Games Account as mentioned in the docs, nor at the Unreal Engine Developer Account.
I'm looking for the App refered to in this doc page:
https://docs.unrealengine.com/en-US/Engine/Animation/FacialRecordingiPhone/index.html
Use the Unreal Face app, ARKit, and Live Link to capture facial animations and apply them to characters in Unreal Engine.
@simple shuttle its interesting you mention the export example for creating a unified FBX. I've found that to be buggy with a rigid-body simulation then baked into an animation. Despite making adjustments like the following tutorial. I'm still spitting out 200+ meshes/animations during the import for UE4. https://www.youtube.com/watch?v=-CUBagJDtxI&t=371s

How to bake Dynamic Physics in Blender and Import it into Unreal engine as an FBX animation.
We look at how to back physics using rigid bodies and bring that into Unreal engine 4 as a single optimized animation
Animators - is it possible to freeze a frame of animation during game time?
Does anyone have the issue when doing FPS game making.... having different guns that look perfect in the hands when idling, but the gun readjusts out of the hand and palm when running/sprinting and knows how to keep the dam weapon in both hands perfect in idle run sprint ?
@safe ginkgo try use Alembic Animation for simulation https://www.youtube.com/watch?v=F9btSm2Dfvk

In this tutorial I show the alembic import and export feature of Blender 2.78 and UE 4.14 for a cloth simulation. I also import the materials to UE 4 and change them there.
Forget about adding the rigidy body physics, it is not needed for the cloth simulation;-)
See my socia...
hello! is it posible to use a sprite as a face animation like ff iii?
Of course it's possible, how else would they be doing it? 🙂
You can do it with a separate UV channel on your model in your 3D package
Then you need to create a parameter that drives the offset of the UV's to animate between the different face shapes
Anyone have any resources for creating working leg/arm IK setups? I've not been able to work it out yet.
Hmm, the MP seems to lack a sleeping animation. Can I do something fancy in-editor to pull off a decent sleeping animation? Maybe make the character vinterp towards the bed and ragdoll him ontop of it? Haha, I'm not sure.
What is MP?
Hi everyone! Strange problem. I'm Using the UE4 ARTv1 rigging tool in Maya but for some reason I can't hit symmetry anymore. I get a few errors including this:
# Error: RuntimeError: file C:/ARTv1/MayaTools/General/Scripts/art_v1\ART_skeletonBuilder_UI.py line 6174: setAttr: No object matches name: calf_twist_01_mover_r.overrideColor #
Any idea which plugin I may have switched off by mistake?
Fresh rig in Maya 2018 works. I'm assuming it's a recent python update that's now breaking the UE4 ARTv1 tool. I'll maybe give ARTv2 another look during the week.
Anyone, how does iClone compare to maya or blender for animation and mocap stuff? If you could tag me on the replay that would be great!
@lavish niche I can only speak for Maya, been using it for 15 years. I really like its graph editor, very easy to read, the weighted/non-weighted tangents on the curves are very easy to use. The UE4 ARTv1 rigging tool has been great for me since I don't do rigs. And throwing stuff back and forth between UE4 and Maya I've found very easy. Bust honestly your question is very wide - what do you want in an animation tool? You've mentioned three very nice applications so it really boils down to personal preference. Try doing three characters, one in each, see which fits nicely. See which you find easiest to model, rig, animate, and throw to UE4. You'll know what you want the moment you start shouting at some of them.
What is MP?
@static falcon Marketplace, my bad
Thanks @upbeat comet ! Isn't the ARTv1 tool really old? Is it maintained?
@lavish niche See that's the problem I ran into today. ARTv1 was last updated in 2016 I think, it worked just fine with 2020, but since 2020.1 it's having issues. Jeremy Ernst IS working on ARTv2 though. I've seen some videos where people are having success with it. I'll stick with v1 that works for this current project. Might update to v2 for the next, we'll see.
See, symmetry works great in 2018. It complains in 2020. We don't talk about 2019.
Thanks.
i want to cut the animation from 31.5 to 32 but i can only cut 31 to 32 how do i disable frame snaping
Hello, I'm absolutely lost on the best way to rig and animate. I'm a developer beginning in art and I want the process to be as simple as possible, but I don't want to take shortcuts that might end up not being worth the trouble. So, considering that, what would you recommend for me? I would like to stick to good practices but I'm just completely lost.
Could anyone run me through how you animate 2D eyes (Texture Sample) on a 3D mesh?
https://i.gyazo.com/244baef858fb80ef6a7d16896e66d4e3.png

Also is it possible to animate the 2D eyes specific to certain skeletal animations?
@sand gull I rig for me. Best way I've found is doing the character, rig, and animation in Maya, and then squishing it all together in UE4. See a few messages above 🙂
@unreal pollen In Blender you have a nice plugin for that https://blender.stackexchange.com/questions/18363/animating-eye-texture-in-a-head-mesh
The idea is just to snap the UV coords. Not sure how to put that in UE4 afterwards though but there's probably a way to have UV anims in UE4
I remember seeing a vid about it, need to find it back
There you go, it's for maya but that may giv a few ideas https://www.youtube.com/watch?v=pvLG4rmkB8A

Before you dislike the video, No, this is not suppose to be a full tutorial. This should give you the groundwork and logic behind our method so that you can recreate this yourself. Feel free to ask questions below and I will try to help where I can! :)
We had a bunch of peop...
Is that going to work in Unreal Engine though? When I import the mesh, will the eyes be textured?
I mean animated*
If you're referring to the first link it will probably not since it's a Blender custom plugin
reddit
1,176 votes and 47 comments so far on Reddit
@upbeat comet Yeah, I did some modeling in blender and in maya, and I think I also understand the rigging tools for both. Animation tools also look very similar and both more than enough to do what I want. ART is a problem for me because I can't afford full maya, and you can't install it on LT
thank you so much for you answers 😄
There are some characters models I want to purchase, but the creator has mentioned that there is no way to change the facial expressions. Would it be possible to face rig? Or is it something that needs to be done while creating the models?
you can add expressions after its done, but the fact ur asking this makes it unlikely to look good if done by you
its hella hard 😛
altho i dunno what char ur talkin about or what style ur goin for 😛
realistic humans, pretty hard
Hey Everyone! Im getting this Error while Trying to import my rigged Character. The Engine crashes. Some sources onlline said it had something to do with the materials, other with the weightpainting/ vertex weighting but i cant really seem to find whats wrong ... Any Tips or help would be appreciated!
@misty dagger you can change "play rate" value to higher, if your animation is slow
@lost sonnet to make sure that there is issue with your character (not engine), create a new project and try to import character, if still crash then there is issue with your character. also try to reduce polygons and vertices / size of your character, try to make it low quality and then reimport

Stack Overflow
Exporting from Maya to UE4 is causing the UE Editor to crash with no explanation. The submit error report dialog appears but there is no useful information available.
I have tried changing the FBX
is there anyway to not use root motion and the animation would still be in place?
im currently having this problem
where the character is getting launched forward without launch character node
is there a way to ignore the scale of an animation, like for example a bone is scaled up and down during an anim, i want the motion of the anim, but not the scale
🙂
I have a question about AI attacking states. When using BT task, wouldn't it be better not to use the wait task node and instead use notifies to restrict movement through animations?
you can add expressions after its done, but the fact ur asking this makes it unlikely to look good if done by you
@bronze osprey I've made a cinematic using ue4 and also used blender for some animations so I'm not completely a noob 😄
But yes it might not be easy but worth a try!
@covert lotus well then u could grab a paragon facerig and rig it up to the face, i had some decent results with that
or use morph targets
morphs is prolly more easy
Looking for info on how they were able to setup this "animation on 2's" kind of style in Revoider. I'm looking to create a stop motion style animation where it's driven by mocap but looks more like this. https://www.youtube.com/watch?v=A88PZb3RasM
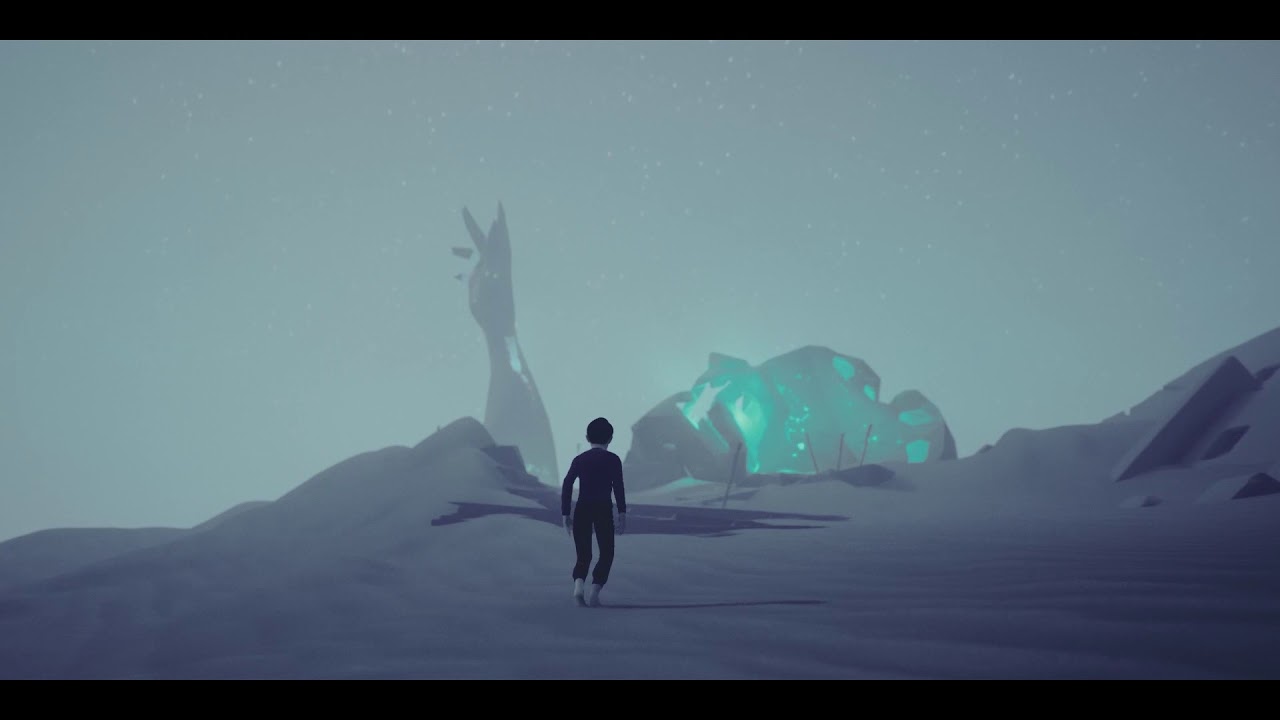
The first development recap of our new game!
Join us at https://twitter.com/revoider for regular updates on development.

This is some moCap work that I did for the US Army. 2 People in Marker-Based Suites on a 12 cameras on Hexagon Grid using an OptiTrack system. If anyone has ever used anything less than 14 on something like this, you know that I did something crazy to get it to work!
Is there a way to have models with different proportions share the same skeleton? I get my models shrinked to default size when applying anims. There's Retarget Source thing, but I have no idea how to use it
@obsidian mountain hm, that's interesting. what software are you using to create models and rig them?
I'm not sure this is relevant at this point. The thing has to be done in UE4
@glacial ridge key everything place it in step(curves), lets say you start on 0 so 0-delete frame 1-2-delete frame 3 and you have that feeling you can make on 2 or on 3 if you are at 30fps
I have a problem with an wheeledvehicle pawn with a physics collider, that doesn't work, the object doesn't collide with the floor
@obsidian mountain try messing with this
Oh nice, I'll give it a try
my characters clavicle was weird but after I've changed this, kinda fixed
I'm also using the same skeleton for several characters with different sizes
Hell yes, that did the trick. You have my eternal gratitude!
I used "Animation relative"
nice ✌️
what am i doing wrong?
@obsidian mountain some doc have good explanation https://docs.unrealengine.com/en-US/Engine/Animation/AnimationRetargeting/index.html
Describes how retargeted animations can be used with multiple Skeletal Meshes, allowing you to share animations.
@ashen warren why are you using spheres for the wheels? don't they have cylinder as an option?
a college solved it. i have no idea about rigging and that stuff^^
but thankk you for asking 😄
I'd def use cylinders because right now your wheel is colliding with the body of the object
and cylinders match the shape of the object more closely
@red cosmos I don't know if this is the issue or not but there's a version of the mannequin floating around in some old tutorial links that has bad skin weighting on the arms
It's even in one of the tutorials unreal engine made where it looks broken
Pretty sure that's your problem, because the bone is in the right place but the arm geo isn't
If you know how, I would fix the skin weighting in your DCC
and reload the model
that's odd
if you export the character as an fbx I can check it for you
see if that is the issue or not
Well if you look at the screenshot you sent
The bone is in the right place and the geo isn't
so there's only one thing I can think of that would cause that
If the bone and arm were both offset the same it would be a different problem
And I have had problems with the model's upper arm before
so I feel pretty sure it could be that
basically the upper arm wasn't 100% weighted to that bone so the geo moves less than the bone does
Doesn’t explain why copying it broke it but worth ruling out
@obsidian mountain my tutorial goes over this

@red cosmos it's translation retargeting issue, this video explain that issue https://youtu.be/XMoHbkIJ4Po?t=30

In this video you will see a new example of importing, modifying, and re-exporting unreal mannequin animations.
0:38 Mannequin Translation Rerargeting
1:12 FBX animation Export Settings
1:38 FBX import into Blender
2:20 Animation Position checking
2:37 New Feature / Rig Bone P...

Can anyone here help me use my custom charecter instead of ALS manniquin pls
Questoin for anyone with experience in this type of thing... If I wanted custom faces.. like eyeballs and mouths... would i be better off making a separate face skeleton for animation from the primary skeleton?
its like raising eyebrows and scaling type animation. but the mesh's for them will be changeable.
Excuse me, I want to create a walking animation from my character's skeleton, but I don't know how to create an animation sequence that moves or works well, can anyone help me?
Any suggestions on how to add the gun to this character, i need to animate it
How do you handle switching weapons in animations ?
what causes an anim montage to rotate my mesh
hey, anyone know where i could get a "gun over shoulder" like animation idle?
Can anyone help me get to the bottom of "root motion" for custom characters? I use Blender. I can get characters exported but can't get root motion to succeed in Unreal.
I export my .fbx without non-deformation bones (IK's, etc):
Here is almost the entire hierarchy in Blender. I think only some of the leg bones got cut-off in the Outliner. I use 2.82:
I was following a tutorial that told me to transfer the lateral keys on the pelvis (in my case, the body) to a new bone called "root" inside the Armature. "root" moves with the body. Is this the cause of my problems? Do I need to leave it at the origin? God, why are there so few tutorials about this
...
You know what's funny is that it IS kind-of working since he is not moving at all, whereas in Blender, he translates forward at least twice, 0.3m each time. My intention was for him to move forward indefinitely whenever that key appears
@bitter tulip I had trouble with root motion with Blender at first. That's because for some reason Blender's fbx exporter adds a new root bone when exporting, on top of the one you already have. Therefore any movement is cancelled
Here's my fix for that https://discordapp.com/channels/187217643009212416/221798806713401345/654332781819723786
Looking at your hierarchy it doesn't seem like you have an extra bone though
To make root motion work your root joint needs to move in your Blender scene and then in UE4 you need to declare it as a root motion anim. If it involves some z movement you need to change the movement mode to flying otherwise it'll get ignored but doesn't seem to be your case here
@delicate junco can the root bone have a key in the z axis for the first frame, or must there be NO KEYS at all in the z-direction?
Oh yeah you can have keys on the z axis without problems for the root, the thing is that the movement will be ignored because of gravity if your movement type is not set to "flying"
Like let's say you made a root motion jump (so you move the root on the z axis in Blender) then if your movement type is not set to flying the character will be animated as expected but will stay on the ground
How do I set that in Unreal?
So you'd have to use an animNotify or something for that animation to set it to Flying
I am not the programmer, see, I am just testing my animations. I just do animation
Do you really need that for now ? Cause your character is like those enemies in M64, sliding or walking right ?
So I would be satisfied throwing a single animation into the state machine and verifying that the animation propels the character forward indefinitely
It is precisely that character but I want better movement
it's the whole point, bigger and better
I can do sloppy just fine 😛
So just to make sure, what is the animation supposed to be right now ?
Just like the Blender render above but it continues from where the translation leaves off on the next cycle
oh, I didn't attach it
wait
one sec
I mean the Unreal gif lends the idea too
it's just "stuck"
I have other characters that will need this to work
Do you have the fbx file ?
Can we move this to DM
Sure
I think you need to update settings?
Accept my friend request cause I blocked DMs from non friends
ah
Hey, I'm trying to use control rigs for custom retargeting as I was inspired by the video here: https://youtu.be/Zwc9uuOYfFg?t=283
Epic Games' Animation Programmer Jurre de Baare recaps all of the animation features built for Unreal Engine over the past year, including those created for Fortnite that have made their way back into the tools. In this presentation from Unreal Fest Europe 2019, you'll learn h...
So I already have my rigged character, and I would like to create an invisible second skeleton that is rigged in the epic style
so that it can play standard animations
then the idea is to use a control rig to help with the retargeting
so that my rigged character copies the animation being played on the epic styled skeleton
however I can't figure out how I would reference a second skeleton in my control rig
would the correct way of dealing with this be to combine the skeletons in a 3d modelling software?
hello, I am new to Unreal. I need some help retargeting animations
I want to retarget the animations that come with the Third Person Project to a Mixamo character model
I converted the mixamo skeleton to UE using the Blender Add On, then I opened both of the skeletons in Unreal, mapped the bones, made pose of both skeletons same and then saved. After that I went to the animation and selected the Duplicate and Retarget option, it showed my Mixamo skeleton as compatible, so I retargeted it.
But problem is that in the animation created, the model becomes totally crooked and deformed
Is there any way to retarget 40 some facial bones from one skeleton to another? I tried using the source to target map from the node container to do this. Is this the right way? Yes or no?
I am trying to retarget the run animation to the skeleton of a model I downloaded from the marketplace.
The skeleton is identical to UE but still the right hand is dislocated
can anyone pls help me?
@icy saffron because they are identical, doesn't mean they are rigged the same way
Plus they only look identical
All the bone transforms are different
so how should I fix that? the model is from UE marketplace itself
Well you could rig the character yourself
Or find a new animation
Check if it says Rigged to epic skeleton in the marketplace page for this thing
can you give any resources to help rigging it to epic skeleton?
The market place says they are ready to use with Epic's Animation Starter pack
So is the animation you are using from the epic animation starter pack?
It is the run animation that comes with the third person project
That's not the animation starter pack
This is probably a pretty noob question, but some searches haven't really helped me figure out an answer. I'm hoping I'm just looking in the wrong places... feels like this should be really simple.
So I'm trying to implement some simple RTS-esque mechanics for a game jam. I need to have some sort of highlight effect when the mouse hovers over characters (and other for when they're selected). For testing purposes, I'm just using the UE4 icon since that's a circle. I've put it in a widget at attached that to the character.
My problem is that I don't know how to animate this. I've been able to animate widgets before, but all the animation was kept in the widget. However, now I want to animate the widget component. All of the animation stuff I'm seeing is about animating meshes/bones/etc. I just want to be able to set up a simple animation for the component's properties. Is that possible, or do UE4 animations only work on rigs?
(Once I have animations in place I'll just play them via blueprints. I already have made stuff for handling highlights and selections, but I don't have much in the way of visual representation. I guess for now I can just toggle visibility on/off, but I'd really like to be able to do some simple animations... probably just like having the circle move from top to bottom. I guess I could create this effect with blueprints alone, but animations would make it much simpler)
If I have to somehow attach widget to the mesh, that's alright. I'm just not sure how to go about this, either.
If this is the wrong place for the question I can take it elsewhere. Normally I stay in #cpp or #blueprint
@raven crag you need to create blendspace in unreal engine:
https://www.youtube.com/watch?v=wetDEd23q-w
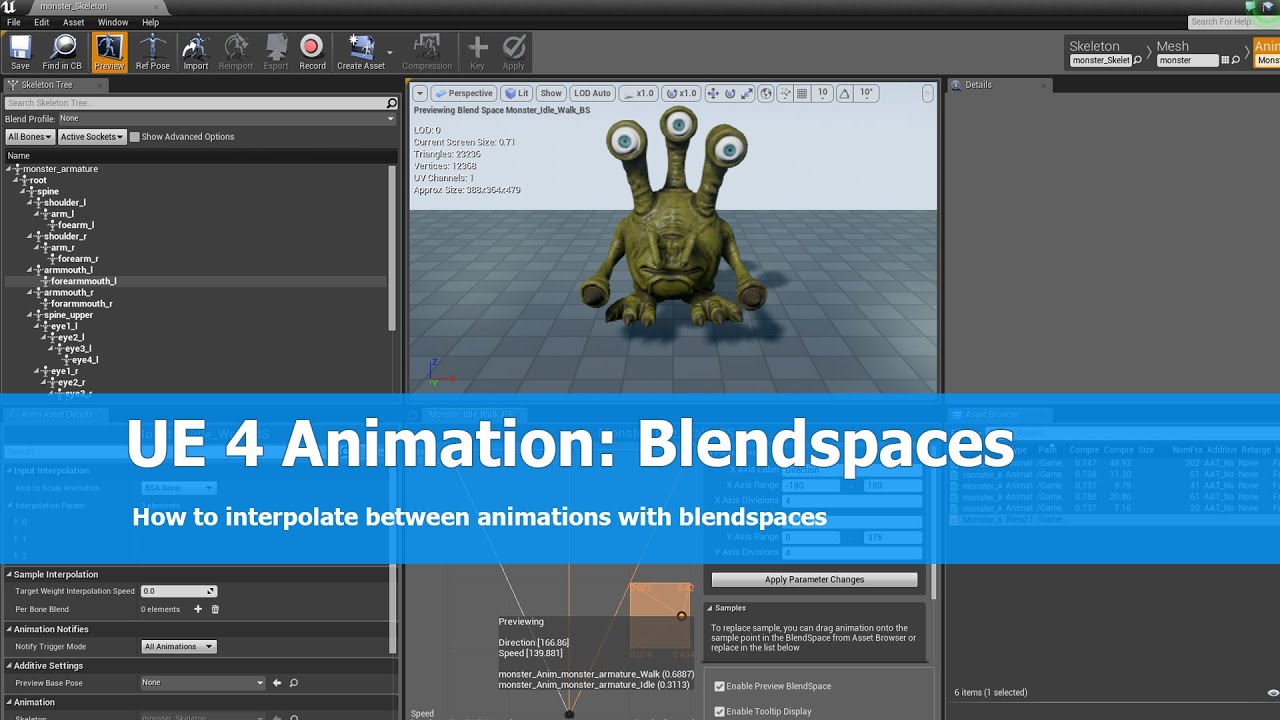
This is the first part of an animation tutorial for unreal engine 4. I show how to create a blendspace to interpolate between idle and walk animation of a character.
See me on my social platforms here:
G+: https://plus.google.com/+JayAnAm
Twitter: https://twitter.com/jayanamg...
hey, does anyone know where i could get a "gun over shoulder" like animation idle? or how i could create one?
Hi, I was looking for info on facial mocap and I've just ran into this : https://www.youtube.com/watch?v=EyUmWmlO4Yo

Discover the new features of our plugin for Unreal Engine 4. Learn a few tips in Unreal with Flora to get the best facial animation using our motion capture software Grabber and Dynamixyz Live Link Plugin.
01:02 - CUSTOMIZE YOUR ANIMATION
01:25 - Connect to Dynamixyz Grabber...
Anybody knows this UE plugin ? It seems awesome but not well know. I'm a bit surprised. Plus it's free ! 😃 EDIT : Ok nevermind ! It's not free at all indeed. It requires a software called "Grabbed" and it's something like 466€ per month... 😆
is it possible to interpret the incoming sounds from a mic and the linguistics, and blend the animations based on the linguistics (like LEH and TR)
I want to retarget some anims. The anim's skeleton and the target skeleton have different arm positions, should I adjust the pose of the anim's skeleton or the target's skeleton?
Anybody knows this UE plugin ? It seems awesome but not well know. I'm a bit surprised. Plus it's free ! 😃 EDIT : Ok nevermind ! It's not free at all indeed. It requires a software called "Grabbed" and it's something like 466€ per month... 😆
@misty dagger You have to contact the people via email and request to have a trial of the software. They'll contact you after they review your request
I want to retarget some anims. The anim's skeleton and the target skeleton have different arm positions, should I adjust the pose of the anim's skeleton or the target's skeleton?
@mild trail I'd check to see if the targets retargeting option corresponds with the source skeletons retargeting options, (animation, skeleton, animation-scaled,etc) and if that doesnt work just adjust the pose of the targets skeleton, I dont think it matters whether you adjust the targets skeleton or the sources skeleton though
can you give any resources to help rigging it to epic skeleton?
@icy saffron auto rig pro for blender to rig any model but it should work anyways. If the right hand is dislocated you might need to pose it properly or check the bones in the hand in the retargeting options
Thanks for the advice!
@hot dove I tried the animations in the starter pack but have the same issue. rather the animations in the starter pack are same as the ones provided with the project
I think something is wrong with the model skeleton itself
@oblique yoke I checked if right hand bones are retargeted properly. they are. also the pose is same as well. I have one doubt, A pose is different from T by 40 degrees right?
is it just me or did they completely change montages in 4.25? lol
I can't figure out how to add an animation to the track anymore
This is what I see
weird it wasn't working
until I restarted the editor
I dragged and all it did was change the preview pose
yeah sometimes I'm dragging and its just not doing anything
Does the Physics Body Simulation for Chracters only work with Animation Assets or also playable Characters with Animation Blueprints attached ?
Playable characters
You can swap to physics in your blueprint
Okay so there's a cloth paint bug for creating cloth physics in 4.24, I found it by searching through discord, so I'm posting this video I just made in case anyone else needs the work-around. If your cloth physics aren't working after you apply them, try this: https://www.youtube.com/watch?v=i0Udz-t-gwc

A work-around to get cloth to work on a skeletal mesh.
Ugh and now the animations aren't retargeting the way they're supposed to (as in at all, I just get a t-pose animation)
hey. im trying to understand ik bones. but cant find a detailed explanation of what exactly they are and how they are used. everything seems kind of vague. i already read and watched a bunch... hm. does anyone know good explanations? i dont even know exactly what data is in them and how it gets in them. i think they always have the exact same position as the hand/foot bones in the original, unretargeted animation, but they are in their own hierarchy, which means they will not be changed by retargeting, is that correct? if so, what's the point? why do you need bones like that, and wouldnt they need to be adapted to changed proportions of the character?
Hello, Im trying to make an jump and falling animation, can anyone help me?
my animation graph so far
TL; DR Any suggestion what is best way to animate many static mesh objects with simple animations?
I need to animate door opening, gear rotating, simple platform moving etc. And I'll have many static mesh objects that will need to be animated. I tried FInterp and similar (via c++) but i think that it is expensive to check every frame if something needs to "start animating" (tick function). So i switched to matinee but I'm not sure if that's the best approach . What should I do?
is there a way to set the root to stick with the model?
or at least anyone got any hint on how to fix the root to follow the animation?
cause i jump over the ledge and then teleport back down to my root >.>
Hey guys is there an option to make an animation in unreal engine to run in place? is there like a check box or something? if so where is it located?
I just found out the easiest way to use Mixamo animations onto UE Mannequin
https://www.youtube.com/watch?v=TnuCfyuIhpM
This video explains one of the ways to utilize animations from Mixamo and the Unreal Third person template with a modified Unreal Engine skeleton. This is a follow-up to my previous videos and explores new techniques based on viewer feedback.
I am not affiliated with Unreal E...
@outer trellis By one place do you mean like your walking animation is showing the character move forward?
yeah
When i try to edit a whole animation pack there is no editing option on mixamo
I think that is because Animation Packs option has been removed from Mixamo
so, you can only use premade ones
the best way around will be download the pack and then search individual animations
ok man, thank you 🙂 have a good one
Is their any documentation on Montages for 4.25? 4.16 is hard to follow
@warm island The animation would need to use root motion for that, it doesn't seem to be the case here
try to retarget animation use blender, it's pretty good for same size skeleton
@simple shuttle Is there a plugin for that ?
Cause I didn't know you could retarget using Blender
GitHub
Blender addon for converting mixamo animations to Unreal 4 rootmotion - enziop/mixamo_converter
Already posted this on the maya discord, but maybe someone can help me here as well:
Can someone answer a quick question for me?
I recently switched to unreal, before I was exporting maya animations via alembic and rendered them in 3ds max.
For more resolution I just added a turbosmooth modifier and if necessary a displacement modifier (or just used rendertime displacement).
For unreal though, if I just export the basemodel+joints to unreal via FBX, I don´t have enough resolution in the mesh.
I can use tesselation+displacement in the material, but the mesh isn´t smooth enough.
So...how can this be dealt with on the maya side?
Do you just convert the smooth preview to polygons, right before exporting it (so it stays lightweight for animation changes)? I´m used to max and the modifier stack, so I would assume thats a bad thing, I guess thats not the case for maya?
(https://knowledge.autodesk.com/support/maya/learn-explore/caas/CloudHelp/cloudhelp/2016/ENU/Maya/files/GUID-C27982A5-9F7E-45FF-B362-A3DE7129EE13-htm.html#:~:text=Once preview looks the way,directly to the affected mesh.&text=Select the mesh(es) that,Smooth Mesh Preview to Polygons.)
Or do you "skinwrap" a higher resolution mesh to the base model directly? Does that then still work in Unreal with all the joints, if you export to FBX, or do you only get something like a lot of blendshapes in Unreal?
You can use a Smooth Mesh Preview to view and edit what a smoothed version of a mesh will look like. Once preview looks the way you want it, you can then apply the smoothed version directly to the affected mesh. To convert a smooth mesh preview to polygons Select the mesh(es) ...

You can use a Smooth Mesh Preview to view and edit what a smoothed version of a mesh will look like. Once preview looks the way you want it, you can then apply the smoothed version directly to the affected mesh. To convert a smooth mesh preview to polygons Select the mesh(es) ...

In this video, Sam is going through the details of our updated Rokoko Studio live plugin for Blender (2.8 and newer). What’s really exciting about this release is that we have built the retargeting tool for motion capture animations that Blender has been missing! This fixes so...
How are AnimNotifyStates handled when multiple animations are being blended together? Does the AnimNotifyState run until it has ended, even if the animation has been blended out in the meantime, or will it only run for as long as it is the dominant animation (the one with the highest weight), or how exactly is this situation taken care of?
@primal yew Check that thread https://answers.unrealengine.com/questions/156553/animation-blending-causing-double-audio-notify.html
@delicate junco yes there some add-on out there for retargeting animation, I do that manually
you can retarget almost everything in blender using driver and constraint, and give you more control to edit the animation like layering animation
how can I make my character move backwards?
my animation graph so far
I want to make an animation that will play when moving backwards
You need to break the velocity vector and check the sign of the relevant components
Hey all, I'm attempting to follow this along (but in C++) https://docs.unrealengine.com/en-US/Engine/Animation/IKSetups/index.html
Inverse Kinematic systems allow for reactive animation, such as foot placement on non-planar terrain.
Can anyone point me to how I can start to debug this issue
The effectors are forcing the animations feet to be stuck at the bottom because they're (0, 0, 0)
But in the Content Examples, they're also (0, 0, 0) and the legs together pose doesn't occur
The effectors only set the X value as well so I'm not sure how this works in the first place

Ok, so maybe I can just do multiple animations and just swapping out them at runtime... But let's say, for example, if I want to do an animation like that (which obvioulsly must be synchronized between the 2 characters) : https://i2.wp.com/academyoffencingmasters.com/blog/wp-content/uploads/2017/02/Valentine’s-Day-Love-and-Swordfighting-Duels.jpg?resize=520%2C370 How to do if I have many similar enemy (humanoids) but with different sizes ? I shoud do some adjustments to the animation... 🤔 Can I just do different animations depending on the characters sizes and here we go, without thinking about the RAM, even if I will probably have tons of animations ?

This may have been asked, but I am use to doing animations in Maya. But I notice that you can rotate meshes via a blue print without the need of a animation file. Which is better and in what circumstances and why? Thanks in Advance too. 🙂
Does anyone know how to properly import alembic so that the textures come in with it? Any help would be appreciated. Thanks!
does someone know why my mesh isn't playing the animation ? The preview of the blueprint is fine. I've also selected it with the player mesh... but it won't just play it
Theres nothing going on
Literally all I did was creating an statemachine
plugin it in
@misty dagger
nope it only works in that preview window for the anim blueprint
nothing else
it's not shown ingame/editor/characterEditor
even in the reference viewer the animation is shown...
hey people I got a question,
I want my melee to play once and then go back to the idle.
Is there a way i can setup my condition to check if the animation played once or finished playing = true?
thanks in advance^^
thank you @misty dagger 🙂
Thanks @misty dagger
Question from an absolute beginner here: for a character with a large trench coat with cloth physics applied to it, how should i go about modeling, rigging and importing it? How does the workflow work?
Do i model the coat separately and throw it into the engine? Should I add bones into it?
Is there any video series that shows how it goes from the modeling process into rigging and into unreal?
yes im actually looking at the contentexamples at the moment and i don't quite understand what im looking at
like
how do i go about recreating it
?
I currently understand how to semi-achieve it in unreal
but the issue lies with the base animation in my 3d modelling software
@fickle geyser It's really easy
A work-around to get cloth to work on a skeletal mesh.
An overview of Cloth creation using the in-Editor tools with Unreal Engine 4.
that is what the coat looks like before simulation
Has anyone here gotten a chance to use the new Blender to Unreal tools?
Wait they're available ?
Seems like you're right, awesome news ! Going to test it in the next few days
Hey
Can anyone help me?
I'm trying to get morph targets working, If I look at them in the skeletal mesh window they react to the value change perfectly, but if I try to change them with BP they register the change in value but the model won't change
What I could find out is: 1 I didn't misstype the name
2 the bp works with other skeletal mesh
Can I ask about blendspace here
Something truly great happend today. The Send to Unreal @blender_org Plugin from James Baber and @kmvassey got released today! I could test it and it made my life so much easier! You need to login and connect your Epic Account with github to get it here:
https://t.co/kjuppFzD...
Hey uhm... so I download an animation pack from the marketplace and now I'm wondering if I somehow can use these animation with the default skeleton... because they aren't shown in the asset browser.. only if I create a new blueprint with exact this skeleton... but I wanna use both animation sets
You might be able to, but you will need to retarget the animation
Describes how retargeted animations can be used with multiple Skeletal Meshes, allowing you to share animations.
@mellow zenith I mean... it's both the UE4 Dummy I just can't use one while having the other selected
@vast glen they have the same skeleton?
Yesn't
It's the same skeleton in 2 different Files... So I have to either select one or the other
I basically just want to import some animations to one skeleton so I can use it
In that case you could either reimport the animation with the other skeleton if you have the original FBX file or retarget the animation to the correct skeleton
Hmm alright then thanks :)
There might be another way but I'm still learning myself!
Hopefully that points you in the right direction though
Okay so... for some reason I now get a shid load of Error messages on every animation update :o
nvmd I fixed it
Hi guys, Im learning how to rig, skin and animate stuff and did a silly animation for the second time today, but Im having an issue with the root bone. While it is presented as the top of hierarchy in the skeleton in maya and ue4, the animations are still played around the second bone in the tree
I have no idea what I did wrong
https://gyazo.com/2c988bf23f3b430e748f95910e33a673 The root bone is in the 0,0,0 at all times

https://gyazo.com/8a263d32d30947e571f5c9b5d67632f6 and this is how it ended up in unreal
Is there a way to tell unreal which bone is supposed to be root?
When I import this animation(alembic) in unreal, it doesn't animate properly
What is the problem?
@vivid meteor Did you bake the animation?
yes When i import that alembic file back into 3dsmax (or another program) it works fine
not only unreal
welp, sorry I cant help here, Im also new to animation
ok thx
i fix. thx
@static falcon Thank you! the first video really gave me an idea of how to go about it
how can fix this problem. it was transform animation.
Is 'Epic skeleton' considered the third person template skeleton or the anim starter pack skeleton?
Probably an odd question...
How precise is the Epic mannequin in regards to an average human shape? What i mean is, for instance the hand and finger size and length, is it like an average human-male or how off is it? I'm trying to porotype some procedural animation systems using the default mannequin but i'm wondering how well would it translate to custom humanoid models later. I got some marketplace pistol and it kinda feels as the hand is larger then one would expect and i'm not sure if its perhaps the gun that is too small or if the overall mannequin is off from an average male shape or perhaps just the hands. 😅
i have issue with animations, when my camera is far away from ai character, the character animation is stopped, and set to idle pose
@edgy ivy I think if the AI character isn't visible it's animation will stop completely as it is not needed
Just a speculation though, I am probably wrong
@misty dagger you can play an animation directly