#animation
1 messages · Page 128 of 1
blender
are you adding animations to the nla graph and exporting one big fbx?
Yea
i find it gets really slow to export every animation in the nla graph sometimes thouhg
but
when you go to fbx export
don't export geometry
however
hm yea its tough because then you get copies of all your animations.
life is a bit easier when you export one anim per fbx
Well I only get copies now and then
the obnoxious part is having to delete the fbx then reimport it again just so it gives me the option to import animations with it
yea. don't export the mesh/geometry and that won't be an issue
but your hurting yourself with the amount of animations it has to process everytime you add one
Yeaaah
you could either clear your nla graph
hm idk how a muted nla track works
maybe just muting is enough?
i generally script this sort of stuff
key is though, if you don't export geometry, and keep anims per fbx down, it shouldn't be nearly as painful to add new ones
I exported it without the mesh but it still didn't work, dude's obsessed with the mesh and won't give me the option to import animations
what does your exporter look like?
Ohh ok nvm
figured why
silly me, forgot to change its name so it was reading it as the same file as the mesh
Thanks a lot 😄
You can't make animations from scratch in UE4 right? You can only import 3rd party animations and retarget them to the model you want?
alright sound, I was thinking about using blender. UE4 is more user friendly for that
I may use Blender to touch up the animations
@clever mulch is there an addon I have to download or is it already In 4.23?
No plugin needed
alright bet
what?
bet as in great
Oh, never heard that one before!
caught onto it in Connecticut
Ah, that'd explain it.
<- Not american
I don’t think most Americans have heard it either
I heard it all the time up north, and when I went back to my hometown in SC all my friends were saying it
It was weird man lol
@molten jewel please verify 😜
you bet
Haven’t heard it in sc either. You might just need to punch them 😜
lol maybe
its all good man, to each is own you know what I mean
it's different 🤷
I will remember this day when I inevitability hear it. Will curse your name harbinger of bet
alright bet, I'll be here when you hear it
hm wait
no yea, i've not heard it like this before lol
retracting 'you bet' statement towards 'alright bet', its different still
Anyway, thanks for the answering the animation question. I almost went into it thinking this was a weight paint problem. I deleted a few bones I didn’t think I would need, turns out I’m wrong
check if there are vertex groups for the missing bones in the mesh still
The vertex groups were they, they just weren’t reacting
the stomach has its own bones for whatever reason
Probably a hook bone
Yeah it was these 4 bones that I removed
as a PMD file they're small in blender, but when I export them as an FBX they grow bigger than the hulk
Alright, so last night all of my animations got stuffed up and now I'm trying to just make a new AnimBp with backups of my old animations
But this keeps happening
Where the player clips underneath the ground
Anyone know how to fix that? It wasn't there before
hard to tell if its an animation issue
but you can lift the skeletal mesh up from its capsule
They all worked fine before so I know it's nothing wrong with the animation
The only way I worked out to fix the issue was just to reimport all the backed up anims and copy all the logic from my old state machine
Is that a bad way of doing things? @molten jewel
does that clipping issue still happen when you just scrub through the blendspace?
if not then it's something to do with how the character's rotation is being set
Are there any limitations to setting up 1 entire BlendSpace for walking backwards - > Idle -> jogging - > running (ofc in that order)?
Or
would it be better to separate them into different blendspaces? 3 anims each (left, forward, right)
hope that is legible
All good, fixed the clipping 👍
Anyone knows if there are free root motion animations for UE4 mannequin? even just for walking/running ?
Weren't the Epic ones root? 🤔
I just created a new third person started project in 4.24, from what I can tell the animations are in-place ?
unless you're talking about another project or I'm missing something?
So I have been creating a blendspace that I've been really happy with. The ONLY issue being when I transition from walk backwards right to walk backwards left (vice versa). The character does this spin/jitter and its because the direction changes from 175 to -175 (vice versa) very quickly. The only way to get rid of it is to set the interpolation time to 0.0. Which makes the transitions seems jarring. Any thoughts? Advice?
I wish there was a way to set interpolation time for EACH transition in the blendspace
BEST SOLUTION i found to this is: Setting interpolation to 0.0 in BOTH AXES (Horizontal+Vertical) and setting Target Weight Interpolation Speed per sec to something above 5.0
anyone tried making a simple upperbody ik-solution in bp-only?
@delicate locust Apparently it's now possible to show dialog at reimport 😁 https://qiita.com/EGJ-Osamu_Saito/items/3c18ede7d280d06c9551

Qiita
FBXファイルなどをインポートするとき、以下のImport Optionsが出てくると思います。
<img width="318" alt="2019-12-02_18h30_53.png"...
@delicate junco Oooh cheers!
@spare otter reason its like that is because its going like this i think.
(mistake, should end on backwars right)
not this
basically though
this is why you don't interpolate this way
you'd have much better results taking local velocity in for the graph
X: Side Velocity
Y: Forward/Reverse Velocity
right now you have
X: Heading Degree
Y: Forward/Reverse Velocity
it is bound to be difficult to interpolate
especially because the diamond shape alone
circles are things you'd want to make, dots and arrows are where you should move.
alternatively, if you want to keep with the heading degree instead of
use this
that will make your X argument go to -180 when it wants to wrap around like in that other picture i showed https://discordapp.com/channels/187217643009212416/221798806713401345/654766346608836609
but again, degree for strafing is not what you want
@molten jewel wow! Thank you so much for the detailed response! I will definitely take a look into it ! 👍 ❤️
yea, the smoothing stuff is something one should avoid, once you start setting those smoothing parameters like you mentioned its hard to see problems. They aren't meant to hide such noticeable issues like what you have there, they are more for subtleties. leaning too hard on them will give the player feel little reaction to their thumb/fingers
Yeah i definitely went for aesthetic instead of responsiveness : P
well im glad there is a solution that doesn't take away from my gameplay. thanks again. i'll be sure to try that @molten jewel
Hey guys, there is possible to connect Bone to Bone (Bind or attach?)? i have separate bow skeletons because have lot bows. so i wanna connect Weapon bone to LH_Weapon and Weapon01 bone to RH_Weapon, as you see image.
because in animations RH_Weapon always pulling the rope. and holds bow in LH_Weapon socket bone in character.
i really need any tip. i did googled but cant find any tip or solutions
Noira, technically yes
you can't connect the bones
but if you set the skeleton mesh component of the character as a tick prerequisite of the skeletal mesh component of the weapon then you can be assured that the animations for the character run prior to the weapon's evaluation
so long as they are in the same tick group
@molten jewel but how i can add the weapon skeleton to in character animation blueprint?
i only can add mesh.. or im confused can u explain more?
when character equips the weapon
and unequips
this would be stuff in your character bp (or could be in your weapon bp)
not anim bp
it just makes sure that the one skeletal mesh runs prior to the next
okay i getting understand now. but how i can choose the bone? because the rope need to be stay in other RH_Weapon bone.
this way in the event graph of the weapon's anim bp, you can read the world position of the bone on the character
What bone is the weapon attached to?
(not the string)
LH_Weapon because holding the bow
if LH_Hand, in post update animation event in anim bp for character. get both LH_Hand and RH_Hand bone transform and make a relative transform of RH_Hand in space of LH_Hand and save this to a variable on the character.
in update animation event of weapon's anim bp, cast owner to your character type, and read in the saved value
then use a modify bone transform to apply the motion to keep it 1:1
😅 glad you get it, its kinda advanced stuff
so you mean set the Weapon01 transform value like where is RH_Weapon bone in character right?
yep

this is what i meant by relative
reason i wouldn't recommend using actual world transforms is because physics
that prerequisite node will ensure the animations run prior to the weapons, but physics might move the capsule of the character after teh animations ran but before the weapon runs, so world position could change between time where the relative position of bones will not.
when you see games with shuddery looking attachment points, its usually from something like this not being done correctly.
i say correctly but the other reason could be performance. waiting on an animation to finish means they can't run in parallel
will just say to make sure your adding of prerequisite is also removed later in the proper way when it no longer needs to be relevant to the character. just saying this because you'll get performance issues if someone else picked it up and suddenly all your weapons are waiting on all other characters animations before they will start working on their own
only really need it for the exact case of assigning a non root bone to the transform of another bone in animation.. attachment alone does not have such requirement
i guess in 4.20 ver. no have "make relative transform" node
only have convert for it
Get Relative Transform
they probably just renamed it
Get Relative Transform what the c++ function is called too
so long as it takes the same pins, it should do the same thing i would guess
ah nvm
thats an accessor right?
Convert Transform to relative is actually probably it? haha
no just lookin to make Relative transform as your screenshoot so yeah maybe
let me try then
im going to true way right?
this looks correct
i looked at the source for Convert Transform to Relative
swap the pin positions
it gets parent transform in transform pin space
oh yeah
(it doesn't make a lot of sense to me that its like this, with that name, but yea)
i dont wanna spam to here can i send to ur dm ?
heres what i mean btw, they literally just swap the order
appreciate asking, but better to keep it here
some use the search feature and it might help someone else out
i guess i missed some settings bcs not worked well
or at least i can reference this to the next person who has the same question lol
whats happening
ah okay
what are the options in transform space
i missed that, it shouldn't be bone space or parent bone space
use RTS component
just to verify though
in character anim bp
that is Post Update animations?
you have to add this event yourself
did it also in wp anim bp is correct settings for transform bone right?
lets see how off it is first
okay
keep that as is
btw
this is what you want
for reading the bones
you have to add it
its not named post update animations like i thought
ye
trying sec
wrong position seems
my project takes long loading so :D bcs of multiplayer project
but it does move with the right hand?
hmm let me make some attack animation to see
i mean, i know it doesn't align but if you run and stuff, it bounces around? doesn't just stay like that angle there?
ye thats why i making to attac animation to be sure it stay like static or not
also
the weapon is part of the actor right?
if its a separate actor, that cast logic might need changing
but going by that active line i assume whatever your doing its fine
cool
yea your fine then
would try this
in your weapon update animation
for args to pass to modify bone
that might make it align perfect
you'd want to break the transform on event graph and not anim bp too
did make a attac animation the rope follows hand animation so its not static (mean works)
sure sec
believe that will get the bones to align perfectly
may need to change it to component space for loc and rot
you can press the compile button while playing to update it without restarting pie too
unless theres a reason you can't lol
i guess again the transform * transfom node no have in here too
"compose transforms"
yep

swap A and B on compose transforms
well
actually
your modify bone
is in what space?
try component space for both
okay
if its still off then swap A and B pins for compose transforms
then goes to up xD
swap a and b on compose transforms then
Why big engine didnt make the connect bone system yamete
okay
WORKED
POGGGGGG
OMG

compose transforms gets me every other time lol
same lol
remember to break loc and rot to seperate variables on your event graph too
thank you very much
that break in the anim graph makes your animation processing extremely heavy
i see
you want to see a lightning bolt on the modify bone node
i just wanted to be sure if it is work or not
yep, just mentioning it so you don't forget lol
so its work now time to make optimization
for that because 10 players can play this archer character so, i will make to run only when attacking
yea, a blend node on the graph ahead of the convert spaces part would be best to disable it

already did it xD
anyway thanks again
this was much helps me
@molten jewel btw what differences post evaluate and update animation event node?
1 frame
update animation happens before the anim graph runs
post evaluate runs after the anim graph
so if you did the work in update animation, it would be 1 frame late
good to know
or wait i have idea for weapon anim bp optimization @molten jewel. if i could use set component tick enabled in character actor blueprint for WP mesh. then animation will not tickable. so that will make 0 performance loss
becase will not check its attacking on cast character
or blend node
Animbp is just kinda built in overhead with the engine. only way you can escape it is to swap the skeletal out for a static mesh, and that would be kinda memory intensive
and likely incur a penalty when swapping
i'd just go with the blend zero approach
i think there are ways to make it not run stuff with animation based on lod too
i'm not sure what happens when you disable ticking on the skeletal mesh component though yea
good to think about it for sure
if you can test the overhead that exists with how it is, on like a 20x scale and use insights or other profiling , it'll show you what specific parts are expensive
but i was used this asset https://www.unrealengine.com/marketplace/en-US/slug/fps-boost-component-with-network-support
it looks like LOD for Ticking
i was added all skeletal meshes in the world map. i gain much performance why idk.
just uses disable ticking or tick interval to depends distance.
after i compared with profiler, the anim components uses was down after i build this asset
how many cores/threads do you have?
animations are one of the things that will multi thread so long as you've got all your lightning bolts
if disabling ticking turns off the graph evaluation then yea that makes sense to do
but i always think about the wooden pcs
but if you don't got all your lightning bolts this will affect performance more drastically than few other things lol
yeah
just bringing it up because if the anim graph is whats taking time (and not sum time), i'd look into making sure you have all the lightning bolts
they should show on anything that takes a variable
like translations in state machine or your modify bone or blend etc
its one of the faster things in ue4 so long as this is the case
I was kind of successful with having the back collision square get collisions, but only if my back object hits them. I try to tackle their back collision object and nothing...I know it's just a matter of time till i figure it out but if anyone knows how to get it to work i'd be grateful. Thanks.
it registers as a "hit" like any collision would but not specifically a "backhit" off of the back object
Is there any way to play montage with parameters, and to use those parameters in an anim notify? or something like that?
@dark belfry https://youtu.be/UaYck1FcCMU you can see how simple most fighters are here. You could more or less treat the 3D fighting as a 2D plane that always aligns between fighters and decide back from front this way
Montages are my weak point msh. But understand they can to a point I think..
Will ask around. Certain knowledgeable birb may know
Why does this happen? https://gyazo.com/c6d37ffa59654fd55f430c54dea89cac

Been working on this for a few days and can't get it to work properly
@molten jewel ok. I was just wondering why I only get the back object collision result when I back into the other character, but I get regular hit when I touch his back object. I'll post the event in a few hours
Guess I don’t understand what you mean by that lol
ok this is the event for the back collision box:
back collision box
I simply need to have it work for the attacker not just the receiver. It seems simple enough. I'm dealing with painting weight issues but I should be able to figure this out or just have a notify for the receiving animation to play the attacker animation.
you could use post evaluate animation event in anim bp
like.. check a curve value in post evaluate if the last frame evaluated was attacking or not
ok. hmm. I'll try that. Thanks
the thing is
your getting these race conditions
i think the only way you could handle this properly would be if your post evaluate animation just set a bool on the character if it was attacking or not. Then at some point in time after all animation of all characters has finished, you'd only then be able to evaluate the entire frame for interaction
as in, if you do something for two characters both being in attack state
if you compare this stuff between characters in post evaluate animation its possible that the other character in question didn't have its post evaluate animation run for the same frame.
which also means attack-attack state may trigger even though the attack ended for the other character after it was compared.
there are a few ways you could handle this without waiting for the end of the frame in terms of all animated characters, but with physics it gets even more complicated.. so perhaps again the comparison of state and overlap testing should be done in a tick group past the max of the animation and past physics tick
you may or may not already be deailing with frame old stale physics overlap data
Greetings. Newb question. How to preview Animation transitions in ue4?
whats the reason for skipping abp?
it's just for previewing how well it will blend
abp would be the only thing i could think of really
a simple one like this
no state machine ( i avoid state machines as much as possible anyways )
all animation in ue4 is ran through an animation blueprint though
when you use the sequence mode and don't assign a anim blueprint, it makes an engine anim blueprint under the scenes
oh..no...i mean, how to preview this
that is state machine no?
i don't know of other things that use transition
but i've not used montages much and that keeps coming up
but for testing it's kinda lot of work to assemble a state machine just to see if it blends ok
and ue4 seems have no other means for that (googling gave me 0 results)
@molten jewel for simeple bend like you showed you can use 1D blend space
it will also have only one variable
1d blend space has lots of overhead though
would just set something like this up s-ed
a utility of sorts
https://blueprintue.com/blueprint/03yyvng-/ use the copy thing at the bottom
but yea on the other note, blend spaces are only good if you really need better than linear interpolation
each tick / cross gets its own animation generated for interpolation, the blend node is as straight forward as it gets
yeah, i can't use yours 🙂 using custom skeleton
but i made same thing from your example
yea that was the intention heh
@molten jewel where to i suppose to paste it ?
yeah, does not work
then you need to enter the two states and right click at top center of the missing variables to make them
ah okay nvm then
just this stuff
yep, did exactly that
poking the eye ball on top right makes it so the anim is variable
yeahh..variable won't help...as every skeleton is different
how come you got so many skeletons?
many different creatures or something?
all skeleton files are is names and hierarchy.
ref/bind pose is all in each individual mesh
so its usually much easier to share skeletons. each mesh doesn't need to fill every bone either
@molten jewel thanks a lot! Gunna try
Does anybody have an animation reference sheet for in-place strafing left / right?
Hey, I'd need help I've been banging my head against a wall the whole day. I retargeted some animations to a character with high heels and everything works fine when I set the feet to "Animation Relative". Except for my animations in my animation blueprint. On the left is my "Idle" animation and on the right is my "Idle" animation inside my anim blueprint. I think there is a retargeting thing I've missed somewhere but I can't find it. Can anybody help ?
Nvm found it, if it ever happens to everyone it was the IK messing up everything
lol
I'm about to try the Interface Blueprint. I'm able to use "Other Actor" as other player. Hope it works
Hey, I'm trying to do a per Weapon aim offsets/blends, but I don't want to hardcode the offset animations into the actual AnimInstance. I'm thinking of using SubAnimInstance per weapon. Is this the preferred way to do things like this or is there a better way?
Have you looked at Skeletal Mesh Sockets instead of Aim offsets ?
Hey everyone, does anyone have knowledge about any source for clothing settings according to real fabric/clothing materials? (Similar to PBR guides on roughness/spec values for various materials)? Thanks!
Okay, I have a question D_D
If I am retargetting animation off of the paragon assets on to the UE4 Manequinn, some of the Characters have a rig called "Paragon_Proto_Rig" and some have the "Orion_Rig"
So if I change rigs while trying to retarget animations to the skeleton from two different characters with two different rigs, will I run into any issues?
Like can I first retarget animations for a character with Proto_rig to Manequinn and then some from the ones with Orion_rig and will all of them work fine? D_D
How would one calculate side/horizontal velocity and forward/vertical velocity?
I have tried getting the X and Y values of the GetVelocity Node but it doesn't seem to work
@molten jewel also as suggested: although not sure if I got ur 'circle' method as this looks more like a diamond
@spare otter Get the velocity of the actor and then get the transform of you mesh and use the node "inverse transform direction", it takes input for direction, that's where you plug in the velocity.
X and Y of the result would be the horizontal and vertical velocities D_D
Ooo I'll give it a try now! @wide pulsar
👍
@wide pulsar works beautifully! Thanks a lot!
now i just need to convert it into cpp now : P
I totally get that! But I just want to make a full game in C++ purely to improve my CPP skills/knowledge.
but yeh ty for the info
Oh understandable.
hello any good videos or material on making run animation with IK for foot placement ? Also can you combine the both and how would that work wouldn't one system fight over the other ? i have exp with animation blending and done an IK test system so was just wandering
Yep @spare otter what OneSilverLeaf said. Use side velocity for x
@molten jewel thanks again for all your suggestions. it works like a charm now!
hey guys, is there a way to change the anchor of a widget via blueprint/animation?
hey guys, I have this jittering issue. I think its caused by the blendspace in the state machine, I basically try to get only the leg movement from it and blend the other upper body animations over it. if someone knows a fix. https://gyazo.com/66fd16ec8a722cd049cafaf46794c978
Edit: I fixed the issue by unchecking the "orient rotation to movement" in player BP
Im starting out with animation today, wish me luck!
starting out with the model behind the horse
probably a stupid issue on my own part, but importing the mixamo y-bot, then importing an anim I get weird bone rotation like the pic:
is there a setting I have set which is causing this?
most everything should be set to defaults, I did use "set T0 as ref pose" and reimported
@low bone Is the mesh imported with the animation from Mixamo?
Hello @tardy stag the mesh was imported first, then the animation
I selected the y-bot skeleton on anim import and that is about it
Ok, idk what the Y-bot is but I'm assuming it's a model from Mixamo
correct, sorry for the confusion
No, it's ok, I'm just not that familiar with Mixamo since it broke collaboration with UE
Anyway...Try importing another model+anim.
okay will do
remember to check T0 & Z -90
on the transform. UE has -Y as forward axis for Skeletal Meshes so you need to import the mesh rotated on the Z axis by -90
But this shouldn't influence what you have going on there anyway
i had T0 checked, and yeah the rotation is weird on retargeting, but that is the root rotating. these are what seem like bone rotation
trying with the mesh and anim downloaded as "one"
that works, doesn't help me understand why doing it separate isn't working
I think it may be a keyframe reduction issue
Someone told me earlier that you can make anims form scratch, does that apply to 4.23.0?
Hey all how can you (is it at all possible) to remove peripheral bones? Not virtual bones, but rather the bones that get added peripherally when you import a second identical skeletal mesh but with additional peripheral bones.
when i hit remove selected, they don't get deleted : /
Can somebody help me to loop an anim montage? it looks like it's looping (blue with x) but only plays once
nevermind I just fixed it by doing a sequence in the blueprint... is that a good workflow?
This is a very bigger question to ask, but I’m trying to get a feel for animating and the ones that I create are glitching
I’m starting out small, just opening and closing the mouth
Do I need more keys?
The animations are for a new ark creature I’m working on just so you have some idea of what I’m actually trying to do
Why does my blendspace restart when I go into a new state that's blending with my blendspace?
Take a look a the legs when I do the new animation, it snaps back
Anyone know how to get the "Landing" animation to play X number of seconds before landing? Like a Pre-Land
@unique glacier because it’s not the same exact node
Get all the way out of your state machine
Put down a saved cache pose
Connect your blend space
Then go back into the states
And add the cached pose instead of a duplicate blend space player
@unique glacier if you just want to play that arm/upper body animation on top of the blendspace, you should use a montage.
I need some verification on whether or not I got the correct workflow... If someone can help. I've created about 78 NPCs using mixamo fuse, theyre all rigged from the mixamo site... They're meant for an urban city setting but that's besides the point... They are all varying heights and sizes of people. I have two questions, first if I just use mixamo animations on The mixamo rigged characters, I don't have to do anything other than set up animation blueprints for them? Second once I set up an animation blueprint do I really need to retarget the animation blueprint each of the 78 characters separately even though they use the same rigging skeleton? I just feel like I'm missing something hidden in plain sight like I should be able to just use the one animation blueprint for all of those characters without the extra step of retargeting it 78 times... Any animation gurus that can help with these questions?
My googlefu is failing me hard on this which leads me to beleave its something hidden in plain sight
@bronze turtle I guess it depends on how UE detects your rigs, if you have 78 different skeletons then you need 78 blueprints. if its just one rig they all share you can just make one ABP. I would try to import one npc with the rig and then import the rest using that rig. but not sure if it give you an import error.
With the people being varying sizes and weights can the original skeleton still work with the different meshs? I was under the impression that the skeleton is what contains the vertex weight information and not the mesh itself?
In other words, if i import a skinny tall women with skeleton, then import a short fat guy setting the original women skeleton on import, will the bone weights work correctly?
You want one skeleton
Skeleton is names and hierarchy
Not more
But retargeting is still necessary for each body type
Downloading each animation per body type would be most ideal
Then you’d just make child anim bps
Im not sure but I think its stored in the mesh not the bones. its called skin weight in maya. just try to import them and you see. the import problem can be if the bones are different and have different names.
Mesh stores ref pose yep
Yeah all 78 are rigged through mixamo so the bones are all the same
One skeleton, but you do need / want animations for each
Just one anim bp and many child anim bp from it
Its just crazy cause if i retarget the 25 animations these npcs will be doing around the city ill have 1950 animations...thats nuts when theyre all using the same set up but just different height and weights
78 is many unique characters
Its for a open world city game gta style
I would sort them based on height though. if they are too different it might make weird deformations. but you have to try to know.
Using procedural to add hats and hairs, and change colors
If you don’t care, look at skeleton window and show retargeting option on list
Set bones like knee to not read position from animation
So just to clarify, the mesh contains the vertex groups, not the bones themselve?
Then the height will be less noticeable. But it won’t be as good as specific anims
Yes
Skeleton file is just bone names and parenting
So long as each character has same bone names your good
Mesh doesn’t need to have all the bones in a skeleton to use it as well
Ideally I wanted to make about 5 people and use morph targets to control height and weight but clothing and items proved that it creates astronomical amounts of work as i needed to transfer morphs to each item independent
A 78 multiplier on anything is harsh yes
5 even is hard lol
Python for editor could drastically reduce manual work
So i can try to sort out everyone by height and weight into groups, then pick the most "inbetween" or each group to "assign this skeleton" to everyone in a group
And it will still sort of work right animating?
Am i on the right track?
Cause if i can get that 78 to about 10 that would be way better
The animations that look bad dont use or redownload for that body type?
Thanks for helping btw, if you try googling this you spend hours getting nowhere cause i guess im crazy for making 78 different people :/
Just see what it’s like. You’ll understand what to do
Ty pat, atleast you got me back on the rails, been at trying to find a solution for a week now
Ill try assigning a small batch of similar body types to use 1 skeleton that i already set up a animbp for
And it should, like you said show me what it does
So i get a better understanding of skeleton to mesh relationship
i'm about to fix all my animations because when i enable root motion it stays in place
@dark belfry In preview ? Or ingame ?
hi!
We're using anim notifies for trails in one of our montages, so we have a vfx trail with 2 bones etc (like in the image) and we have a bug with it: when the framerate drops (we force it to drop) the anim notify state end is skipped, so the trail never ends.
We know (because we use them) that there are Blueprintable versions of the notify states that are more reliable and we were thinking on trying to repro it with them. But we don't know how the Trail notify works under the hood to repro it in our won blueprintable version.
Any suggestions?
Can anyone help?
thanks a lot
in preview. i also have issues returning to idle. it shakes and stutters
@dark belfry That's expected in preview, it just removes the root movement but ingame it'll work
@delicate junco ok thanks. I clicked process root motion on the character tab and it plays the preview better
Hello is there something special i need to do to the empty objects other than adding the SOCKET_ prefix to it in Blender? Right now the sockets come in as normal bones instead
@full jungle Did you see that ?
If so I can't help more unfortunately, didn't dive that much into notify issues yet. P@t spoke about it before though
uh @muted fossil is that a thing?
I don't think it is
to add sockets you import the fbx first then enter them in by hand on the skeleton i think
and dimy, you might be thinking of someone else.
well
maybe not actually haha
but yea montage stuff, this is beyond me
notifies though yea
So when i test the game with root motion on, the character just keeps doing the side cartwheel or the animation i have for top speed and 90/-90 degrees. Plus my character camera is following and it's very wild. This happen to anyone?
@delicate junco yeah, we are aware of that and we prefer to avoid it because, as it says there, it's no performance friendly and it can get quite intensive in our particular case
For anyone that had my earlier posted issue, @molten jewel advice is spot on...and on a side note this live training was in my yt feed discusses the skeleton and how you can do exactly what pat suggested to me i do with my 78 characters, with "height" being the most important factor, you can import 1 skeletal mesh and import as many other ones that share the same skeletal hierarchy as you want pointing them at the first skeleton which then basically becomes a master skeleton...heres the epic live stream about the whole process

Senior Gameplay Programmer Laurent Delayen explores animation retargeting and what it can do for improving your animation workflow.
aye there needs to be a PSA on skeletons imo lol
everyone thinks you need seperate skeletons for body types
I tested it and for everyone that was similar not too much taller or wider, all my animations worked as good as the first character i set up...ty again @molten jewel
yeah
Best part is i just assign the first animbp i made to them all, no additional work required
Now if there was only a easy way to add ik bones to the mixamo skeleton ild be golden...root bone was easy, just required renaming "armature" to "Root" and tada you got mixamo skeleton with a root bone.
https://youtu.be/ybfEylFKpew?t=126 male in the background is using female animations. the skeleton has settings on what bones read position from animations or not. when you skip shoulders and stuff for translation it ends up looking okay, adding ik and it is passable
Even without the ik standard "people in a city interacting with the environment" type animations are looking perfect
I'm pretty sure you were the one that said anim notifies weren't that reliable because of frame drops @molten jewel 😄
Don't know if you know some way to mitigate the issue though lol
yeah thats right
only way to mitigate it is to make sure your game never skips frames
advice would be, don't use notifies for anything that must happen. Only stuff where you don't care if it happens or not. @full jungle
not sure what you mean
@bronze turtle There's also that talk about how they did it in Fortnite https://youtu.be/Zwc9uuOYfFg?t=85
Epic Games' Animation Programmer Jurre de Baare recaps all of the animation features built for Unreal Engine over the past year, including those created for Fortnite that have made their way back into the tools. In this presentation from Unreal Fest Europe 2019, you'll learn ...
if your animation has a on off notify that turns on and then off during the single frame, the events don't fire iirc
I meant that a notify either will happen or not(!). Not that it gonna be delayed a frame or so.
it gets goofy with transitioning and leader etc
Do my meshes need to contain ik bones or can i use virtual bones for ik the same during animations?
meshes need em
I don't know a whole lot about virtual bones though tbh, but i understand those as post-calcualted bones more than poseable ones.
Anyone know of any good tutorials/traning series to learn the animation blueprint in Unreal. it's hard to follow random videos from random people on YouTube.
Maybe something geared towards a 3D sidescroller?
When I create an animation offset, the animations for it all have be equal degrees? Like if my aim up is set at 20 degrees the others should as well?
hi all, I got a weird question. I'm making an FPS, and the weapon hold position is powered by IK. When the weapon is being held at full arms extent, the gun bobs a bit because of the motion of the shoulder. When not at full extension the gun holds still, exactly at the effector transform. How could I let the ik bone inherit movement from the shoulder even when not at full extension?
@slate olive doesnt HAVE to be, but its easier that way
you can choose the min and max values for each axis
Alright sound, I’m animating my first character, just want to make sure that’s the way it goes
what ive seen on marketplace is one for 90 up, one for 0, and one for -90
thats a common setup
I’m working with dinosaur models so it maybe be different
ahhhh, yeah, well you can make em whatever angle you want then really
Alright solid, and I’m guessing the up and down side to side should all rotate from the same bone?
I want to make sure the movement is fluid
that I don't know, I don't think its required, but dont know what best practice is for good outcomes
itl probably take iteration
Ah okay
Hopefully getting the offset done will be easy
I need 22 animations to do what I want it to
hey guys, i need help with animation retargeting. i have one skeleton for many characters. I have this deformed mesh (as you can see in the picture), before everything is fine with other characters
Looks like wrong Translation retargetting settings, play with these?
@torn tendon orient and scale do the job, is it ok that i use this settings?
I'm talking about "Animation" vs "Skeleton" vs "Animation Scaled" settings you have for the bones.
My bet is that you have there wrong one.
Yeah, @timber girder it’s named retargeting options to be confusing
@molten jewel @delicate junco
I thought that the "new" blueprintable notifies where more reliable?
If they are not, what's the best approach to do trail particles in animations?
also, according to a ue4 developer, it doesn´t matter if you skip a frame or not when using Anim Notify States (if I'm understanding this correctly)
https://forums.unrealengine.com/development-discussion/animation/24057-bug-animnotifystate-notifybegin-notifyend-not-executed
Unreal Engine Forums
Animation discussion, including Animation Blueprint, Persona, Skeletal Meshes, and more.
ok, I modified the code of AnimNotifyState_Trail to monitor if NotifyEnd is always call with fps drops, and it's not.
If you have access to the code and you want to check yourself, it's easy
in the header:
UENUM()
enum class ECycleState : uint8
{
    None,
    Begin,
    End
};

ECycleState CycleState = ECycleState::None;
int the cpp at the end of UAnimNotifyState_Trail::NotifyBegin
if (CycleState == ECycleState::Begin)
{
  UE_LOG(LogTemp, Error, TEXT("Anim Notify Never Set To END"), *PSTemplate->GetName());
}

CycleState = ECycleState::Begin;
and at the end of UAnimNotifyState_Trail::NotifyEnd
if (CycleState != ECycleState::Begin)
{
  UE_LOG(LogTemp, Error, TEXT("Anim Notify Never Set To BEGIN"), *PSTemplate->GetName());
}

CycleState = ECycleState::End;
I get the error log in BeginNotify quite often
@keen solstice Check video 7 to 11 (included) for "classic" animations and 16 to 20 (included) for montages. Still the best resource to get started imo https://www.youtube.com/watch?v=7b9WM8TVdpA&list=PLfQ3pODBwOcaV1TdnqNWLTJ4wiUzEvXis&index=7

(00:05) - Intro to Blend Spaces
(02:02) - Blending between different animations
(04:30) - Creating a Blend Space
(07:00) - Apply Parameter Settings
(08:25) - Adding Third Person Run animation and wrap up
Hey guys,
I'm struggling to find a good workflow for facial animations and how to implement them. Basically I have all my face morph, I created some FBX with some basic "Talking" facial animation but I'm really unsure on how to work with them. What's the best way to add these animations over other animations in real time ? For example when playing my characters make some comments and I just want to make their mouth move while they are doing another animation. Same scene in my Sequences.
I saw the UE documentation on facial animation sharing but didn't really find what I needed. I would like to avoid having to create one anim asset for each talking animaton, just layer it over.
Thanks to anyone who can help !
@full jungle Not sure what would be the best approach unfortunately 😦
@delicate junco thanks for the help anyway. I'm asking Epic what would be the best approach (without using the expensive tick version for the montage). If they answer with anything useful, I will post it here
Thank you !
I would be interested to know that as well.
i have an animation in blender that uses a curved latice to deform a mesh, i have keyframes for the curve angle but when baking the animations to make the deform work in unreal, it doesnt bake the angle of the curve in the latice leaving it always the same angle in the baked animation, any way to fix this?
Can anyone please point me to a tut or something aobut hand bones (UE4 skeleton). I can't setup the thumb to curl up in a fist for the life of me...
It probably has to do with joint orientation, but I can't get it right...The thumb always follows the fingers and it's driving me crazy...
@delicate junco thank you so much. You've been extremely helpful :D
Does anyone know of a guide to really understand IK setup in UE4? Tried several times but it always lagged and didn't work properly
@tardy stag The thumb follows the fingers... what do you mean?
might help to make a little video if you can
I mean, when the hand gets lower (with wrist bone selected and all under it in hierarcy), the fingers bend inwards. The thumb should have that specific thumb movement. Mine bends outwards (relative to itself) just like the rest of the fingers transformwise.
I would set it up so that it bends inwards towards the palm, just like all other fingers. I've seen all animators having that - just didn't see anywhere how to set it up 😐
yes it's a matter of joint orientation by the sound of it
what software are you doing the rig in?
Akeytsu - sry I'm not a 3D artist, so this is the only one which isn't an entire universe by itself 😛
Managed to fix everything except this and the damned collarbone skinning xD
are you rotating the thumb bones on their local axis or world axis
yeah make a little screen recording if you can... I use shareX on windows (free)
I don't even know what Akeytsu is... but presumably it must have orientation settings
For what it's worth, Mixamo does a really good job with auto-rig
yea, nah, I need my own animations - besides, retargetting from mixamo is a pain. Akeytsu is only rigging and animation software.
Heard of it, there are one-two evangelists here I believe. Anyway, fix your bones.
Ok, made video: https://streamable.com/obfbv

I know it's bone orientation, but Idk how to orient them....Z pointing to the next bone, X should be inward (towards the palm) I guess - but it doesn't work...
you're 100% sure your gizmo is local rotation not world?
hard to tell from that vid
didn't try raytrace
xD
it was just a good offer when i upgraded, cheaper than 1060 so I said lol ok 😛 (needed to upgrade the whole PC)
Did that fix your problem or still need to change the orient?
now it's different but still not ok xD
but lemme see, maybe it makes more sense now 😛
Yep, did all of them while learning this whole thing 2 days ago 😛
around 9:00 it goes into it
at 9:45 she is rotating the orientation
that's what you gotta do 🙂
Does anyone know of a guide to really understand IK setup in UE4? Tried several times but it always lagged and didn't work properly
Fixed, bone orientation should follow the same axis - thanks @static falcon
when you make a montage from an animation does it play the associated anim notifications even if they're not listed on the montage's notification bar?
Hey everyone, quick question for facial animations now that I'm almost done :
What's the process to create just the head of a mesh without losing the skeleton link ? My problem right now is that I have my facial animations on a full mesh so when I merge it with another body animation the body takes both into account when it should only take the head
@lean tiger Hopefully this talk from epic about Fornite could give you some ideas https://youtu.be/Oe7fYS9qxmk?t=103

This talk by Epic Games' Senior Technical Animator Jeremiah Grant covers Fortnite’s use of animation Blueprints including the use of Blueprints for gluing together character parts after retargeting, dynamic solutions for low LODs, and faking dynamics in higher LODs with pro...
Looks interesting, I'll take a look thanks
@lean tiger you've got options. But between face morphs and or bones, you're likely going to drive these the same way regardless
https://www.youtube.com/watch?v=m6QECOE0G-U I've used a face rig before, Its one of the things pose asset actually does.
whether its bones or morphs you'll be using curves to apply it
only difference with pose assets (bones) is that you need to evaluate the pose asset in the graph, but when it evaluates it uses curves named after the pose in the asset being evaluated.
basically insert the curve values to the animation output or author it in curves elsewhere
trying to locate a chart that helped me make those faces..
Ok so if I understand correctly there is no way to trigger directly in the sequencer a "Character Talking" trigger or anim that just layers the facial animation over the current animation?
Because I already have my facial animations with all the morphs and curves, it's fusing them with other animations without having to go through the anim blueprint where I'm stuck
Maybe post assets are the secret, I'll give it a look
Yes but I don't want to use it in the sequencer as I want to fire a lot of custom animations
(i'm just using the right stick mapped to the below in the video)
yea
So in anim graph
just to kinda show you
add a Modify Curve node
when you right click on the new node
hover over add curve pin
in that menu you'll see all the curves on the skeleton
some of these should represent the blend warps or whatever yes?
Yeah I see all my curves
So if you add that pin, then you'll be controlling the output of the expressions this way
but you can also insert those cruves into animations if you wanted to make a talking sequence yes
(modify curve node will overwrite those of course but i'm more or less just showing you how to drive the expressions)
btw reading top down so addressing your first question about faces lol
Ok so let's say I have different animations chaining in my sequence with the character talking, I'd have to re-create each of these animations with a "talking version", is that correct ?
not neccisarily
won't claim to know the most efficient way to do it, but a blank additive animation or something with the curves and no movement for example would be a way to overlay the curves
you could also evaluation values in event graph to pump into the modify curve node if you wished
there are many different ways to pump in curve values
i've never used montages before, but maybe this would have something for you too
Ok I see, it just looks like the solution I had in mind might not exist haha. I also thought about the anim montages, it just takes more time
could you describe what you were thinking
But thanks a lot for your advice, I'll definitely look around on what you said
wouldn't want to discourage you haha, its possible there is something i'm missing of course
Well in my head the dream solution is : In my sequence I have all my animations (no facial expression), I'd like an easy way to insert the facial animations I have in this sequence directly above my current animations. Kind of like the layered animations that are doable in the anim blueprint, but directly in-game (because the anim blueprint is terrible to use in the sequencer imo, but I might be wrong)
well
were you thinking you'd author the curves in 3d software or something?
I don't know sequencer so well but, I believe curves is something you can output directly to it or something? You'd want to look around for such option/track.
Nope more like say "here I have my animation, add this animation that takes over everything in the facial rig"
ah okay
That would be fantastic but I didn't find anything like it
looking around a bit
Thanks a lot for your help
I've been banging my head against a wall for 5 days on this haha
hm having a hard time finding anything like set animation curve in it
however
if you added an animatable float for example, on the actor
you could use that modify curve node to feed the sequenced float in
as in, in the event graph, cast owning actor to your type with the floats that are being sequenced
save them to variables on the animation blueprint
and insert them into modify curves
its not the most ideal thing
if anyone else knows a better way to set animcurve values in sequencer though this would be the place to ask i guess
Hmm that sounds even more complicated than the anim montage solution
Because that would require manual work for each animation too right ?
by animation you mean the curves right?
you know how you can add properties to record in the sequencer?
I'm saying you add some floats on your actor to animate in sequencer
then your animation blueprint, copies these animated values and then in the anim graph it binds those values to curves.
there would be manual work in authoring the curves yes
I see
That might work yeah, pretty clever idea
I'll give it a try
Thanks for this 🙂
its just me or when compiling a animation blueprint class, all the children class of it simple doesn't compile too and keep broken at 4.24?
i had that type of problem in 4.23 with a blueprint, i changed one var at parent, all the children doesn't update, and everything got corrupted
😢
doesn't sound normal surikate
well I'm having problems, lol
check your transition rules for landing torbulous
looks like your waiting for it to play some amount
alright. I also found out if I walk off a ledge, it plays the jumping animation.
I don't want that either >_<;;
I think I fixed the landing problem, but it looks like my jump start is too long. but I want her to have a jump animation : (
I fixed the landing issue, but I think I might need a separate animation for when the jump button is actually pressed.
what you could do is check if Z of velocity is > 2 meters per second
if you have a jump animation and a fall animation that is
set a boolean to true if Velocity Z > 200
and make sure falling animation plays when air and not that boolean, and jump animation plays when air and that boolean.
okay, I'll try that tomorrow or tonight if I have downtime at work..
I think for what I wanna do, I might have to make 2 sets of animations, one for facing left and one for facing right.
idk how platformers are usually done. I'm thinking I might force the the capsule so it's always facing one direction, and just have her movement change directions in her animations.
entirely up to you yep
Is that something people usually do for platformers or would that be strange? I'm thinking I'll have it setup so my animations are pretty much a glorified sprite sheet.
i don't know whats normal really but would just go with what you think would be cool, and see if it works or not
I think I might. do that.
Hello everyone. Is there anyone online now? I'm having some strange bug that i don't really know what's happening. Somehow the cloth simulation is just not working on the character. lol
Just that character to be honest, idk why the cloth is not working there
The physical mesh itself moves, but not the mesh. wtf
Hey guys, I'm working on a weapon system and I have a set of different walk/jog/run for every weapon. Any tips on how I do this AnimBP without repeating the same state machine for every weapons(changing the blendspaces and etc)?
@keen solstice Not working with traditional 3d animations myself, but locking the character to one direction and playing animations to change directions might be unecessary
oh, I'm completely new to this stuff so I guess I was just spitting out thoughts. Would I be able to have different animations for left and right for a 2.5D platformer?
i was wondering does anyone here have a little "home" motioncapture set? 😄
@fiery gust not me, but I saw a video in which someone made one with Kinect controllers and a playstation. lol
yeah im currently watching a video for face motion capture with just a phone cam and blender the results are pretty nice and with a stable camera u put somewhere there is alot of potential
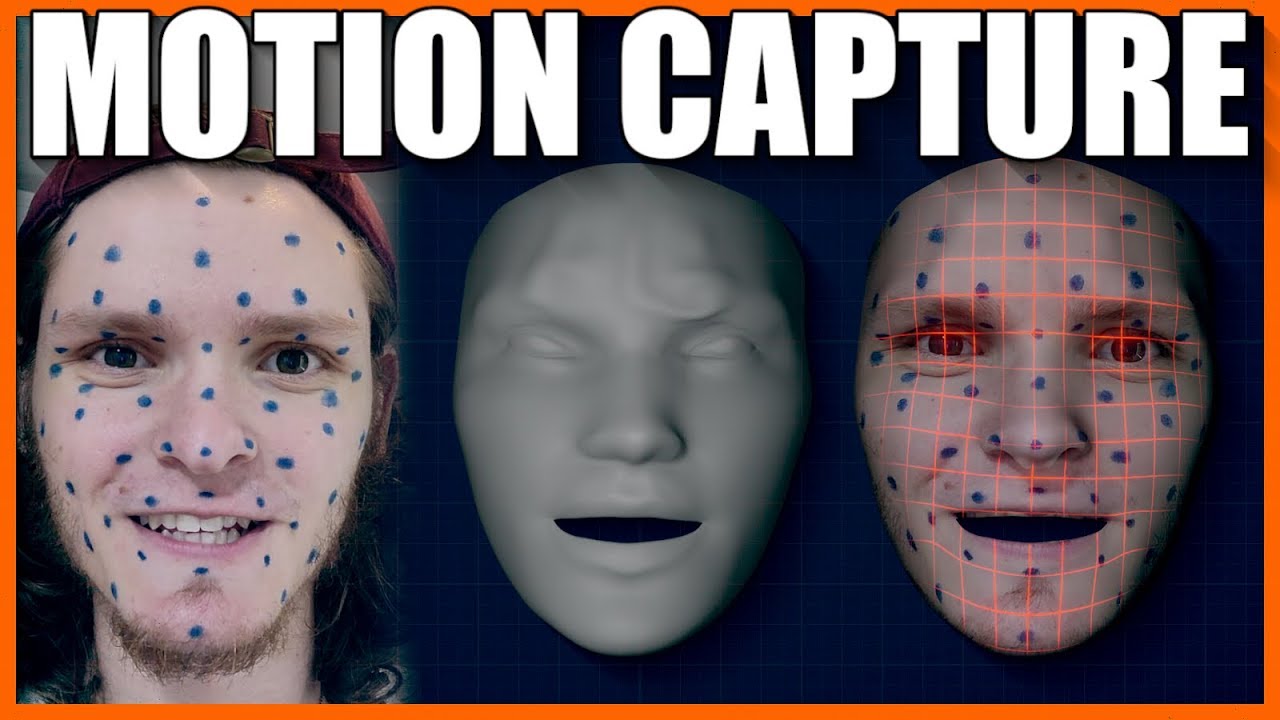
SUPPORT THESE TUTORIALS https://www.patreon.com/cg_matter
MY WEBSITE https://www.cgmatter.com
In this blender 2.8 tutorial we go over how we can use blender as a free facial motion capture solution. Track facial performance using just tracking markers and blender!
super interesting stuff
thankfully my game doesnt need any of this but still super interesting maybe for something in the future ^^
Oh yeah saw that one, it's impressive
@keen solstice would recommend caring less about what is standard with this type stuff and seeing what works, what does not work via attempts
Hello! Does someone have experience with rigging a character in Blender using the Mr Mannequin addon?
blender is: whoa
There’s an add on?
is it just make maya bones look like blender bones?
Ew
gotta love that broken mirror tool
Thanks!
I'm going to assume my issue is animation, considering the imported mesh looks and rotates fine, but some (all) imported animation shows up with the mesh scaled down immensely by the root, and crumpled up
blender? @strange echo
yes @molten jewel
I tried applying all but dimensions
Which... Can't really be applied, to my knowledge
how about the mesh? is it's scale 1 1 1?
and you set unit scale to 0.01?
Scene > Units drop down > Metric and 0.01
if its 100 times larger than it is, its because scene is meters not centimeters
The skeleton, textures, mesh, everything imports fine
It's just the animations that do this shrinkage
Where would I do that?
Do I do this to the skeletal mesh, animation skeleton, or both
I know
your best to set it before creating either
Do I scale the mesh and armature up by 100 now?
the units are in centimeters
so what blender reports as dimensions
you'll want to match with unreal
This... Just shrunk the character down to a hundreth of his dimensions
Pretty sure Blender compensates for FBX now, considering I've made a whole other character, which works fine in UE4, without this unit change
You'll want to measure things in blender in cm, so scaling up or down is neccisary yea. then apply scale to transform fo the armature object and the mesh
if your character stands 2.5 meters high, then 250 should be its z dimension
once you got the scale right in blender, there should be no inconsistencies between animations and meshes after they are all exported again
I'm think I'm safe to just scale to compensate the unit change, considering I used the Mannequin for a scaled reference
yea scale up by 100 then and apply transform scale
1, 1 ,1 is what I'm aiming for for scale?
Blender confused me for a minute...
Just for a laugh, I'll share the animation, along with how it imported
Seems that the first time you scale something after a unit scale change in Blender, the dimensions will remain uniform to allow you to compensate
For some unexplainable reason, this also fixed the problem with the mesh absolutely fucking imploding. Which I can not think of any reasonable explanation for.
yea unit scale thing is usually whats wrong when there are blender import issues
Hey all, what kinds of things could cause a copy pose from mesh to be slightly out of sync at begin play? I’m simply casting from one actor to a character to get a reference to the sk mesh in the character then using that to copy pose into my actor. The actor shares the same skeleton actually but I want it to be in its own actor BP
I spawn and attach the actor to a socket on the root bone of the char
If I do set master pose in the actor construction script sync is perfect
But copy pose from mesh is slightly off by a few frames or so
Anyone here ever added the actor sequencer through c++? :s
Hello! Does someone got tips / tricks or info about rigging a custom character (humanoid in T-pose and smaller in scale) to the UE4 mannequin skeleton in Blender?
Not in Blender but I've done this quite a few times in other software
Here's some thoughts on how I did it
Store the rotation values for all the joints as pose so that you can return to the TPose if needed
Move all the main joints to the location for the proportion of your character, don't break the straight line of the arm or leg in the process
If you need to re-pose the skeleton because your mesh doesn't have the same posture as the mannequin, you can do this now by ROTATING (not moving) the joints to match your character's posture
Now bind the skin, and apply the stored rotation values to get your character back to the TPose that matches the UE4 skeleton's
Optional step here... since you've now altered the mesh's base pose, you can unbind and clean up any modelling issues this may have introduced, such as in the armpits
That's hopefully it... but there are other options too...
You can try ART (Animation Rigging Toolkit) to make your own rig
You can just make your own rig the traditional way and match the bone count and naming conventions
You can use any skeleton and just retarget in UE4 using the Rigging Retarget system
There also seems to be a paid plugin for Blender, autorig pro. I don't use it myself but I think I saw people talking about it here https://www.youtube.com/watch?v=jyXxI4Mw05E
Seems to support direct Unreal mannequin hierarchy
What I did on the project I am working on was just use Mixamo and then set up a Retargeting Definition in UE4 so I can easily retarget any animation from UE4 rig onto my rig... worked a treat
Ah nice, that works too 😄
I only make custom anims for the moment so never had to try such things, useful to know for later though
Well the best solution is usually the most flexible one... This setup means I can animate my own animations (because I linked my rig to the Mannequin rig in Maya), use mixamo animations, and also use any animation made for the Mannequin in UE4! All bases covered
Yeah definitely a great approach
Thank you 🙂
Thanks for the replies guys, mixamo is probably the easiest solution indeed, though I've tried auto rigging with Mixamo but it kept giving an error that every marker had to be placed on the character, which they were so that got me stuck as well...
Do you have an unusual character, as in weird accessories or non human shapes?
not really, but it might be because all the parts, like helmet, boots, outfit etc aren't connected as in that the edge verts are merged, they were modelled separately
One thing I have done in the past is create a more mixamo friendly copy of your mesh that is simplified. You can then use this to get a skeleton that can be used on your original mesh in Blender, or you can possibly even transfer the skinning weights onto the original.
That actually shouldn't matter
Is your character properly placed at world 0?
facing forward on the right axis
I guess yes, because when uploading the character was immediately facing forward so I didn't have to rotate the character in mixamo
alright I'll do that, thanks!
Any ideas on how to get rid of spiderwebs?
Your doing it right
So there is no way to better organise it : /
Like putting a state machine inside a state machine
Maybe cached pose and sub anim instances ?
Go through the slides from 77 to the end, even if it's in JP the images will give you a few ideas https://www.slideshare.net/EpicGamesJapan/ue4animation-blueprint

Although your state machine doesn't look that messy to me tbh
There are arbiter states but I’m not sure how ideal those are
Yeah true but I've only just started . Worried in the future it could get bad. So I thought I'd ask just to check if there is a better way of doing things 🙂
State machines are haystacks
yeah alright. well once again ty for the quick response and help! 🙂
Jak's moveset in Jak and Daxter (1st one) 😁
Wow! THATS AWESOME.
Seriously! thats so cool to see.
Haha yeh thats pretty damn messy xD
Thanks for sharing @delicate junco
Oh oh oh! Santa Keytsu is here! Get 44% off your annual Indie subscription NOW! Offer lasts until January, 2nd 2020.
Visit our store at https://t.co/dgXnrTKVcp 🎅
#akeytsu #3Danimation #gamedev #indiedev #gameart #unleashinganimators

What's so good in this one anyway?
What is it lol
it is animation software
check out its trial I like it a lot
I learned about it from here so a few UE4 devs use it at last
Yeah, I hear some preaching from time to time, but not really interested. There are enough rigging solutions out there.
.... hence got curious what so much about this one.
I'm all perpetual with paid updates. Or subscr going into perpetuals... (lookin' at one company...)
imagine paying for software updates in 2019
Its part of the subscr. but yeah... whatever - I love ZBrush ♥️
Yes, Blender is awesome
akeytsu is just really nice stand alone rigging / animation for characters
if you have a character mesh thats not targeted for the UE4 mannequin , how hard is it to change it
Does anybody know why the first calculation of my IK feet orientation when I first launch the game is bad? When I add a delay for the calculation everything works fine. It seems like things don't have the time to initialize correctly before the IK calculation.
@misty dagger how you mean targeted?
retargeting will only work on bipeds
rather, it's meant for bipeds
@fresh ember would seem your using a transform or location/rotation pair for the ik target on the graph
i'm guessing you just have a bad default for it?
whatever your doing to detect ground, or which direciton is being faced, to calculate rotation for the foot
It could be a lot of things really.
My guess is that the pose is not set yet before the calculation of the ik
hard to say what could possibly be wrong with accuracy other than, whatever logic starts, or defaults on the animbp exist are wrong until whatever checks runs
if your checking the pose in event graph
never do this in update animation
try to stick to post evaluate animation (you have to add this event)
its ran after the animation graph
throw a break point on the thing that looks for the ground or whatever you have and see if it runs with pie start
Okay so I need to check it in my pawn instead of in the animation graph?
what sets IK Left Foot Rotation?
it's a line trace which is done in the update animation
Then i find the rotation that aligns the feet to the normal on the ground
I didn't know about the post evaluate animation, maybe this will help me solve my problem
well
there are a few problems here
tracing based on the last frames bone position will be problematic
but
its more complicated because the character might move after its animations
but regardless
if you add a float for alpha on those two nodes for modify bone
Oh right, I was wondering, is the animgraph evaluated after the event graph?
well if you add a alpha for the two node, and default it to 0.0
then set it to 1.0 after you've got the proper offsets
you wont end up with that incorrect bone orientation.
yeah this is what i've done for now, it works, but i found it weird to do this lol
this will fix the issue with the foot pointing the wrong way but it doesn't solve the chicken egg situation
yea
casting for the floor isn't great
what i prefer doing is using the ground info off the character
and just finding a point on the plane of it
hum... interesting... you mean that I need to do the trace in the character instead of in the animation?
so the character already does many traces for the ground
and that hit result is exposed to you
so by using the capsules bottom hit, you can make a plane out of that hit point and normal
and just calculate a rough estimation of where feet would be if the floor was just forever like it reports
its not perfect
if you consider the drawbacks of how you have it now, its got more or less the same problems just with a lot less waste in the line casts
with the line casts as you have now, the foot would pop up and down stairs for example
remembering the capsule of the character is what traces though, you can make an assumption based on the impact point of how the ground generally looks.. that might be good enough
like you'd be better off starting with that approach and looking into how to more better improve the results from there out imo
keep the option of physically locking the foot in place relative to the thing its standing on as well
if you record the IK_Foot_Root bone when either foot hits the ground
and compare it to the current ik foot root bone past that hit but before the foot is lifted
you can just offset the ik foot bone by that delta in parent space.
it'l look glued to the floor but still animate as expected when you account for the movement in the animation on top of that root translation
i'm not sure i understand... i need to move the ik_foot_root instead of each foot?
uh so say your walk animation moves 0.5 meters while the foot is on the ground
you detect the foot is on the ground 0.01meter into that part of the animation, record where the foot root is at that time. next frame your 0.2meters into that part of the animation, and foot root has moved 0.2meters as well from when you recorded it (in theory)
so if you just subtract from that foots ik transform by the amount it actually moved between frames and account for the authored movement, the ik bone wont be locked at all (ball bone and all this will still look natural) and you don't need to trace further.
Oooh I see
then you just remove that offset you applied to that foot smoothly when the foot is detected as up
This looks feasible
admittedly, all of this is easier with custom animation nodes but it probably can be done, without them,
thank you so much! I was scratching my head for days trying to find why this wasn't working
I'm going to try implementing all of this ^^
thanks again
np
Hey all, what kinds of things could cause a copy pose from mesh to be slightly out of sync at begin play? I’m simply casting from one actor to a character to get a reference to the sk mesh in the character then using that as source to copy pose into my actor. The actor shares the same skeleton actually but I want it to be in its own actor BP
I spawn and attach the actor to a socket on the root bone of the char
If I do set master pose in the actor construction script sync is perfect
But copy pose from mesh is slightly off by a few frames or so
This is all i'm doing in my animation bp on the actor. then i use that mesh reference to be the source for copy pose from mesh. But the animation is out of sync with the mesh animation : /
Set Master Pose in the Actor Construction script works perfectly, but i can't use it because eventually i'll need physics sim
Unfortunately haven't used copy pose yet
Idea is to have them all share the same animation?
Ya
exactly @molten jewel for modular clothing. The animations are just maybe a few frames off on the modular clothing actors. I found one bit of info online but i don't understand it:
"Copy Pose from Mesh: - It allows you to copy from any SkeletalMeshComponent. You also want to make sure the SkeletalMeshComponent (I'll call this Body) you copy from ALREADY has ticked. Otherwise you're going to copy last frame's animation. To ensure this, you can just attach Child to the Body. Once you attach, it will ensure parent ticks first before child."
so maybe i'm spawning actors before the master has already ticked : /
If its a character, you have to make the master the skeletal mesh on the capsule to avoid headaches. The skeletal mesh assigned to that skeletal mesh component should have every bone for every article of the same skeleton. so were you to decide the master component would also serve as the head renderer, all of your heads need to have every bone for any article of clothing that is on the same skeleton for master pose to work.
you could have a blank skeleton mesh assigned as well
more or less the master mesh has to be a super set of everything using it as master
I understand everything you're saying and yes I can easily do that, but I don't think you're correct on some details
in terms of bones in the same skeleton
reduced skeletons are also valid as long as the hierarchy is the same
does not have to be exact skeleton
by skeleton i mean same skeleton file
what bones are in the mesh that uses the skeleton is different
but whichever component is used as the master must have all the bones for anything that is using it as master
i think you mean asset, but asset does not have to be the same either. you can copy pose from mesh from two different skeleton assets
I believe
meshes don't need to use every bone in the correlating skeleton file
But listen hehe, it doesn't matter. It already works for me. My issue is just about sync : P
why is it off sync with copy pose from mesh when set master pose works perfectly in sync
i THINK it has to do with what ticks first
but i have no clue how to fix
ah like is said, i don't know of copy pose. I'm only familiar with set master pose component
Wish I could use set master pose on the clothing actors, but some need rigid body physics
so at some point on those i have to use copy pose
well, so if its just torso that may need or not need the rigid body physics and you want to use master pose for example, you would use the pose process animation blueprint on the torso, ensure all bones for all articles exist on every torso and use it as the master
I don't think post process animation blueprint would work for anything but the master.. but i might be wrong
hmm, i want to understand what you're saying. R you saying I can use Set Master Pose Component and get rigid body physics?
rigid body physics is a node in the animation graph
are you familiar with post process animation blueprint?
look at the skeletal mesh
there is a post process animation blueprint option on it
its an additional anim graph that you can have run after the one on the character.
yup i see it
you can think of it like the output graph connects to the anim graph you set there.
so I can use set master pose and then put the rigid body anim bp into post process?
that'd be sweet
i'll try now
it needs to have a
"Input Pose" node (on the post process bp)
this is the pose that is generated by the pawn's anim graph
and again, I suspect that the post will only run on the master component. but would be worth trying
ya still trying here
doesn't seem to be working
To simplify i just have my main skeletal mesh comp in a char and then made another sk comp for a clothing item. I used set master pose in constructions script which works perfectly. Then I put the post process anim bp into the clothing skeletal mesh asset