#animation
1 messages · Page 124 of 1
yeah, im just triyng to figure out howto create the animation first
doesnt ue4 come with an animation editor?
i just copied one of the mannequin animations
the idle?
yeah
hi guys! i hope to ask in the right channel, i'm a real unreal newbie, and i'm french.. so i don't start well :p
i work on some videoclip and visual show and i'm tired to work on the same workflow so i decided to try unreal .. i try on one of my project to import a bake morph animation in fbx but the animation don't play
i have all the morph slider, and the bake keyframe, but it doesn't work.. i try to export an alembic file and it's work.. but i really want to do it with an fbx
can you help me on this? 🙂
this is the file ! https://drive.google.com/file/d/1ZiczW5mIHKhsfGB7mJocYgr4TBv_wL1S/view?usp=sharing
Google Docs
It sounds like it’s working as intended. Morph targets will only appear as a slider. You set the value at runtime using set morph target in the animation bp
i don't think i get it... the fact is i bake all the animation in c4d, if you open the fbx in other software you can see all the slider are baked
sorry for my weak english :/
Your English is wonderful. Let me see if I can find a quick video to show you it in action
thank you a lot 🙂
Here’s a decent one. It says Blender but that’s irrelevant https://m.youtube.com/watch?v=haQBRXjQOJQ
In this Unreal Engine 4 tutorial I show how to import a Blender fbx file for using Morph Targets from the Blender Shape Keys. I import the fbx to UE 4.18 wit...
yes i saw it but it's not what i want to do
Oh?
yep lol
if you have time open the fbx into a 3d software
you will see that all the slider are bake, every frame there is a keyframe, so my charactere face is animated
and i just want to import this into unreal and press play to read this animation..
Ah
ive try into unity and it work... but not into unreal T_T*
Yes, let me see
thank you!
what software were you exporting out of?
c4d, but i try to export from blender too
and the same thing happen
but it's weird because with the file i give you, i can import it into unity and it work well...
well, I can tell you a brute force way with blender 😛
the pb is.. i don't know so well blender.. lol i use c4d all the time :/
so for you what is the solution to make this work? i really don't understand why blender or unity can read my animation but not unreal... and i really don't want to move into unity, i really want to stay in unreal ( i really don't know why lol)
Hmm
@molten jewel got a better solution? He wants to convert shape key to an animated sequence then import the sequence into unreal. I was going to suggest baking shape key then export but that'd require doing it for each and every shape key separately
T_T
do you open my file? because i think it's what i do, every move for every slider have a keyframe at everyframe (yes i say everey too much time)
so
this is one thing i've not tried myself. but unreal and fbx does support custom curves
its something i could look into and test for sure
but curves is what drives blend shapes
and i find a solution to really bake all the animation.. is to export in alembic, but it's not very cool, i don't have hand into the bone skeleton..
so custom curves is what we want here
i'll test something quick if you give me a moment @sinful sundial
oh yes for sure! i really being stuck all the day with that
thank you
but i really need to find a cool workflow between fbx export from c4d or blender... like i say you can import my fbx file into unity and it work well... T_T but when i import into unreal, i have all my slider for the blend shape, and apparently all my keyframe, but when i press play nothing happen
and sorry it's litteraly my first day into unreal... but i always want to try hard stuff when i start something lol
my solution would be from blender
I opened the file, no worries Neko. The problem is that it needs to be bone driven. So the shape key keyframe won't register. Morph curves is going to be your next best bet
i just discovered that you dont have to have all the bones in your skeleton for an animation , i bet you can make a skeleton with 1 bone and then assign all your characters in it
hmmmm i think i need to check some tutorial about that... i really thought that if i bake the slider animation of the morph target unreal will be able to read it T_T
indeed, you can look into animation drivers https://www.youtube.com/watch?time_continue=193&v=O-QLwQMRm_4

This is a short Blender tutorial in which I show how to add drivers for shape keys by using bones. After that I add constraints for limiting the location tra...
maybe i'm too newbie to understand, but i think there is misunderstood @misty dagger , i don't use bones animation/rig to animate the face, i use blendshape, and all the animation is rig to myy slider to drive every movment
nah im just talking to myself lol
hah ok
@restive yew thank you , but it's not the workflow i have, if i dig into that it will break all i do with my morph tag
i think it's not the same, or maybe i'm wrong...
if you have time and if you don't already open it, please check my fbx files, like that we can be on the same stuff.
anyway, thank you a lot guys to take time to help me
i will continue to search and test some stuff, and if i find i will tell you 😉
and if not i will make this into unity lol T_T
making some progress, drivers solution would work with asset post processing though. if you convert a bone transform into curve with the bp pipeline i mean
but yea trying to just get custom properties to show up as a curve, putting break points in the engine to see what its actually looking for

Mesh could be animated by both skeleton and shape keys, but I had trouble like many other guys when export animations made through shape keys to unreal edito...
ya damn
Oh thank a lot! I will check it tomorrow !
that is what you need neko lol :D
Yes i think so!
Just to let you know, i record from an iphone x from the facemocap app
And it export me an fbx model with all the morph target
In c4d i make all the blendshape with daz and some custom hand blendshape. After i link my sliders to the ref model (from the iPhone) to copy all the animation
After that i bake all the animation. So im stuck here. Now i need to check the blender tutorial to see if i can convert all my shit lol...
Btw thank you @restive yew for this tutorial
damn. nice
I am going to archive that video
is that ManuelbastioniLAB thing needed?
🙏
still kinda curious how material curves would be exported 
no
ah good
Hello, so my socket is not animating hand movement Any thoughts?
It's animating root, not things it is attached to
There is anyone online atm? I'm having some deal-breaker issues with the clothing simulation on my character
What's better for performance (on mobile Vulkan/ES3.1) - animated Alembic model or FBX with animated morphs ?
https://twitter.com/Luos_83/status/1184503892555554822
rt's are appreciated, if you can rig/animate and reply i'll add you to a (hopefully) big list with likeminded peeps 🙂
If you know any #gamedev / #indiedev / #ue4 / #unity / #animators or #riggers from AAA quality to beginning students, from tech focused to creative expressing , tag them or yourself in a reply to this tweet and I'll generate a Twitter list so you can meet like minded devs!
Really Luos? Really?😜
can you blend blendspace and aimoffset?
@restive yew shhh :p
when i unparent the mesh from the skeleton in maya, it causes the mesh to "fall to the ground" https://gyazo.com/fb12658e5b8ddc9ac735dfe72fc3aa21

what am I doing wrong?
thats probably mesh's default transform
happened to me when i messed around with extracted models
from games
@misty dagger it's a common issue, you have to unlink skin with preserving history and then link it back with postponing the weighting process (so it basically just use the weights it has)
well, you have to rotate mesh between those steps ofc
i have no clue why people linking the meshes to the root, or even link the meshes to some joints
What’s an rt luos? Render target/texture? 
I've hired a guy to make a simple animation blueprint for me with turning animations implemented. Now he's saying that that's not possible .... is he right ?
From what little information we can gleam from that. Yes, he is right. You need to have something drive the animations. Animation bp doesn’t handle movement logic, merely uses it.
i want to make a fps game but i dont know how to make fluid fps animations
like a proper fps locomotion
e.g 4 way motion blending
or dynamic animations
The animation blueprint can have lots of logic on the event graph. But it’s better when the pawn supplies some if not all of the information it caches. Turn animations would be possible but would be better if the pawn provided them
If he’s working purely in the anim graph, your very limited what you can do without event graph
@simple star hope you won't get in to naughty list
but it's a good rule to understand what is required and will be done before the task, for both of you
Does anyone have any tips with retargeting? I'm trying to retarget from the base mannequin skeleton to a much more complex skeleton from Battlefront 2, and am having issues with various parts of the arm being "offset".
The original animation:
The retargeted disaster (a different example of the same problem):
That particular skeleton is drastically different from the mannequin (nine spine bones!), but it happens in several others including SWBF2.
Hey guys, sup? I'm trying to animate a skirt, but I'm facing some strange problems. Does anyone have some tips? Using anim dynamics my meshes bend a little
@mighty roost I don't know how your skirt is exactly but maybe parts of this talk can help a bit https://youtu.be/Oe7fYS9qxmk?t=1299 (put a timestamp to show you some sim)

This talk by Epic Games' Senior Technical Animator Jeremiah Grant covers Fortnite’s use of animation Blueprints including the use of Blueprints for gluing to...
Also there's this plugin if your cloth can work with it https://github.com/pafuhana1213/KawaiiPhysics/blob/master/README_en.md

GitHub
Simple fake Physics for UnrealEngine4. Contribute to pafuhana1213/KawaiiPhysics development by creating an account on GitHub.
@misty dagger to do a retargeting you have to place skeletons to a poses, where their initial relative joint rotations will be the same...
initial = bind pose
Hmm
They were both in a-poses, but maybe the minor differences (caused by Arthur being bulkier than the mannequin) caused it?
@young urchin
@delicate junco thanks Dimy. I'll take a look at it. I tried to use the kawaiiPhysics but it didn't work as expected. I'd appreciate if you could help me in a voice call.
lenght of the bones should not matter
only angles
make sure the skeleton in the bind pose, maybe default one is not the one it was bound in
Can you add animations from one skeleton to another? Im kinda new to animations in Unreal Engine 4 and don't fully understand em
my clothing is ignoring the capsule of the physics asset. Anyone faced this problem b4?
can I subtract animations?
@carmine umbra Im brand new too, however look up Retargeting Animations
What's the best way to put a rotation limit on a bone but angle / axis specific? Like I want the clavicle to not rotate down but it should be allowed to rotate up, forward and backward 🤔
Here is a tidbit of information that I learned from my procedural animation R&D ( and with help from @molten jewel ):
The lighting bolt icon representing "fast path" actually means that the animation is multi-threaded, despite the underwhelming tool tip.
If a single node is missing fast path, EVERY node in the chain is single threaded (anything that doesn't take parameters will never show this icon, as its always fast path)
Simply breaking structs on an anim node will lose fast path as breaking structs is an execution
"Local to Component" and "Component to Local" nodes are extremely expensive (they rely on fast path to be affordable)
I don't know why its a subtle icon with misleading tooltip instead of a blaring red siren on every single node on the chain, but there you go.
there are additional rules with structs btw
believe theres a size limit on the native struct OR its something to do with if it has to use a copy constructor or something
if the reading of the pin value requires more than memcpy it wont be fast pathed from what i've found
structs containing arrays for example are unlikely to fast path? not positive
@smoky shell I recommend checking the checkbox "warn about blueprint usage" in the class settings of the animBP
It tells you where you don't have fast path

Yeah, its equally underwhelming though. Its more about informing people about the significance of losing fast path
Their wording makes it sound like its sorta nice to have, if you can be bothered
Sure, even in the animBP tutorials they used nodes such as "get remaining time" which break fast path.
I discovered it on my own too and made some research, don't know why they don't talk more about it tbh
Kinda hoping mods will pin what I wrote so its in plain view
It goes really under the radar
I only really noticed it when reading through AnimNodeBase.h and the comment caught my eye
    /**
     * Whether this node can run its Update() call on a worker thread.
     * This is called on the game thread.
     * If any node in a graph returns false from this function, then ALL nodes will update on the game thread.
     */
    virtual bool CanUpdateInWorkerThread() const { return true; }
Third line
I think I saw someone mentionning it here, must have been Kaos or someone else. Learnt it thanks to him
@cloud lodge ^
But yeah maybe a mod could pin your message above, would be nice for the others
yeah, i handled a lot of the "time remaining" transitions in c++
I used notifies and events to bypass the "get remaining time" nodes
For example I placed a notify at the end of my "jump_start" anim and then the event graph puts a bool to true, used in the transition
i have nothing in my anim bp event graph
Oh lol
I use C++ but didn't know you could bypass the event graph. Can you tell how you did (rough idea) pls ?
@lofty marlin Hey man, could you pin the above message about fast path from @smoky shell please ?
Also the video of the other pin has an update version https://www.youtube.com/watch?v=Oe7fYS9qxmk maybe we could replace it ? It has more info
This talk by Epic Games' Senior Technical Animator Jeremiah Grant covers Fortnite’s use of animation Blueprints including the use of Blueprints for gluing to...
@cloud lodge So you just override the base animBP class in C++ and put all the logic there, then make a child animBP with only the animgraph ?
yeah basically, i have a C++ UPlayerAnimInstance class
and reparent the BP AnimBP to it
and have all logic inside that
Ok don't know why I didn't think about it, especially since all my logic is in C++ except that lol
i'll port the eventgraph logic to C++ then, thanks !
Thank you Cedric !
@cloud lodge For my MP asset I've been debating it, I know its terrible to have anything in BP but for some reason people always use it as a selling point because BP users can modify it
👌 Thanks man !
could someone explain what the difference is between an AnimInstance and an AnimInstanceProxy? As I understand it, proxies are supposed to be for interacting directly with the animgraph nodes, but I pull stuff directly from the AnimInstance all the time in the AnimBP and keep the multithreading lightning bolts going. Is there something more to this than that?
Hi, I'm new to facial animation, or with minimum skill in this from college times (long time ago), and I'd like to learn how to set up the right rig for lip sync etc for unreal, but have no clue, where to start, there's just a lot on the market and frankly I am lost, I'm a Zbrush, Max user, so like morph targets I have a bit of experience with, and would like to know more - please point me to your tutorials, links, mo cap..whatver you're using - many thanks in advance
Does anyone know how to create a skeleton in blender?
@misty dagger what kind of skeleton?
you could set up an advanced ik<->fk switch rig with sockets: https://www.youtube.com/watch?v=LO2gvPvkCRA&list=PLWbnoG8MQdQSO79Kq3EVvtxrO8MTwzJNd

Blender is a free open source 3D animation software available at https://www.blender.org/download/ If you enjoy using Blender please donate at https://www.bl...
or you could make a simple fk rig
Evening all. I am looking in to creating modular characters. Or mechs to be precise. I have a vague idea of how to do it. But I'm after some pointers on how best to handle the skeleton.
I was thinking of simply animating the legs, and allowing the player to choose a torso, and left and right arm pieces.
Could I just use empties / sockets as the picot points to attach the torso and arm pieces?
@misty dagger a skeleton for a weapon, for the mechanical stuff
when i export from blender 2.8 to ue4 my animations get scaled down by 0.01 i dont want to set the import scale of the animation to 100, what can i do?
@misty dagger there can be many attempts, it depends if you only want to make animations or also have the mechanical parts be affected by physics or another dynamic behaviour in the anim bp
@mortal storm so this seems to be a known bug with the physics asset, dont think I had the problem with animations
the physics asset is scaled right, only my animation is smaller
never had that issue, did you apply the scale of the model?
and the armature probably
haw do i do that?
in blender ctrl+a apply scale
probably want to apply all transforms though
but make a backup before
nope still small
and the unit scale?
1
then another fix, this is what is used for the physics asset, is to scale the model and armature up by 100, apply scale, and set the export scale to 0.01
but beware that your location keyframes will be scaled down by 0.01 then
even when i set my export scale to 100 the animation is still small
so you will have to manually go to each animation and multiply the values by 100
for each single keyframe
what exactly do you mean with small?
do you have scaling keyframes?
no
how is it scaled down then if there are no scale keyframes?
its like when you place an object and set its scale to 0.01
i think its something with the units, because in blender i have meters and ue uses cm
Is it better to do a vibrating actor with an actual animation or just use a timer with a looping location change???
@mortal storm In your scene settings, are you using metric units?
Hey guys, our team has watched the animation blueprint youtube tutorials but we are still wondering, how do you set-up animation blueprints best for stuff likes dances/emotes/...? Currently we do everything with booleans but it feels like this is becoming quite a maze 😕
I can't think of a simpler way of doing it
@floral horizon in ue4 or in blender?
@mortal storm I had this issue before. Make sure that you apply scale, then just before exporting change the blender metrics to "meter" and 0.01
Then when importing in UE4 choose a scale of 100
@mortal storm in blender. Set units to metric and scale to 1. (Which is now the default in 2.80)
Then when exporting to ue4 via fbx, make sure the scale is 1 also.
i did that, but its okay i found a solution
@misty dagger - First, you need to rig and weight your skeleton. This tutorial will show you how to do that:

Welcome to the 2nd Blender 2.8 speed tutorial! Today I'll show you how to create your character rig in less than 5 minutes! Hope you guys enjoy and learn a l...
Then you need to export your skeleton and mesh into unreal:
In this video I show how to export our low poly character that we created in the previous tutorials and import it into unreal engine 4.18. There are some imp...
@tall maple - For dances and emotes, you probably want to use Montages.
Don't use a state machine for that, as they're one-off animations.
AnimBP setup question. Ive got my jumps setup and built in some delay (really a custom notify) so the jump can have some prep time. Ive also built it up to support different jumps (say one from idle and one while running). But sometimes Im getting a double jump to happen when I only jump once. And it seems to be that since both anims have that notify, sometimes the blending between the two will fire the jump notify twice. Is there a better way to set this up? Or to tell Unreal that these anims are grouped and I only want the notify from one?
@mortal storm Which was what?
just set the import scale in ue4 to 100, its easy and its working
Nope. I want to know what they are though lol
Noticed them
Ue4 docs reference other “anim layers” it’s like “material layers” and “layered materials” all over again 
@slate olive looks like weight issue yea
But blender won’t show maya bones how maya shows maya bones
If the question is about the strange way they point, bones in blender always point Y forward. Maya and other things don’t have this limitation and instead just draw bones from child to parent
@molten jewel well I connected the skeleton and mesh together with auto weight and now I found out that each bone has it’s own weight
So I’m confused on how to move forward
When you select the armature in blender, enter edit mode with tab key. Select bones you don’t want to deform the mesh and go to the bone settings panel and uncheck “use deform”
But heads up, blender is gonna likely do weird things when the bones don’t point the right direction
Do you need to retain the skeleton for animations or something?
Answer on how to auto weight best is pretty complicated. First step would be importing the skeleton from fbs with the “fix bone orientation” or whatever on the import panel in blender. Then define what bones are not deformable as mentioned, and then auto weight. The skeleton won’t be compatible to animations you have at this point but verify the skinning is acceptable. Then you’ll need to transfer the weights to another copy of the mesh on the non fixed orientation Skeleton OR reorient the bones after the skinning is made to match the non fixed orientation
A script would make second option easy
Reorienting I mean to enter edit mode after auto weights and match the original Skelton position with the fix orientation option off
(Tbh it’s a little silly there is no simple retarget options in ue4 for this come to think of it)
@molten jewel I tried retargeting in UE4 but the naming convention for the models I’m using aren’t even bone names
Definitely not for a hadrosaur
I’ve retargetted dolphin animations to a shark. This was not easy lol
Yea not a hadrosaur
Trick is getting the bone orientations how ue4 likes them. Turning them how blender likes them. Auto weight. Then turn back to how ue4 like them
I just don’t like how each bone has it’s own weight
I understand the reasoning but not the execution
You need to disable “use deform” in blender on bones you don’t want to deform in auto weight
Before you auto weight
guys, is maya live link able to sync geometry animation?
(i just want to use ue4 to render out my animation so i dont need skeletal setup in ue4)
are there any good guides for setting up locomotion animation with starts/stops etc
Hello Guys, I was looking at the Epic Content Example project and in the Animation map there're some examples for IK setup, in the animation blueprint for the "TwoBoneIK" node they used hard coded variable for "JointTargetLocation", for example a vector with these values for Right Foot "(50,217,-38)", I want to know how they found this variable?
Hello, i have a bunch of animations captured from Xsens but i can't import them into unreal. I have changed ascii to binary version and i tried to add root bone to existing fbx by watching tutorials and somehow i could get rid of error messages.
But after importing to Unreal it can't find any animation data. I am total noob on animation, can anybody help? I can share the captured animations if someone wants to check
Tyring to figure out how I can combine multiple skeletal meshes that are different proportions.
Say for example I want to be able to swap out legs, torso, head, left arm and right arm.
"Set Master Pose Component" is all well and good but expects you to be just using the torso bone transform.
What if I want the hip location to vary greatly on Z axis, or have the arm locations in different locations from that stored in the main skeleton?
This is what I have currently.
All four meshes share the same skeleton hierarchy.
The torso snaps to the legs skeleton exactly where it should do.
However, the "arms" snap to the arm location in the legs skeleton and not the torso skeleton.
Hey! I'm working on a VR demo for an industrial setting so I've never really bothered with anything animation. Is it possible to rough out some very simple animation in editor (Just a simple keyframe based linear interpolation thingy)?
Not yet
Ah.
is there a way to make some bones of an animation stepped and some linear
for the interpolation
Okay I got a weirdo question: is there a straightforward way to take an animation from UE4 and import it into blender to edit/tweak?
@opaque stirrup - Yes. You can export the animation from ue4 as an fbx file, and then import it into blender.
@fallen nebula - Yes, your DCC should be able to set individual key interpolation on a per frame basis.
@worldly ibex - Technically yes, but this is considerably harder than using a dedicated animation program like Blender.
Unreal is not designed for creating animations.
And now, my question!
Does anyone know when Inertialization was added to the engine? Which version?
Hi, I'm trying to add a Roll animation to my character as a way to avoid attacks, I have the animation which is made with Root Motion (the char translates in the animation), and I would like him to stay in place. I tried many different methods, but none does what I want
The four you see in the pic are alternative methods
the one at top (Play Slot Animation) is the one which is the closest at the moment, at least it works
but the char moves forward when I play the animation, while I would like him to stay in place
@dapper panther - Have you tried turning off "EnableRootMotion" on the roll's animation asset?
this is how its now
and roll in place in the editor preview
but roll and moves in game
So try.... turning off root motion.
ok trying
(And turn on Force Root Lock)
: )
the only issue I see is that the char seems scaled while rolling
like smaller
then pops normal size again after the anim completes...
I have no idea why that would be, unless maybe the animator scaled one of the bones?
I will check that separately
the scaling doesnt happen with previous settings
happens only when Root motion is disabled and Force Root Lock enabled
Like I said, I have no idea why that would be the case. There is no obvious reason why it would scale the character. Neither of those things have something to do with scale.
Ah
"Root Motion Root Lock"
if I set it to "Zero" it gets wrong scale
if I set it to "Anim First Frame" seems ok
I have imported the Paragon Sparrow character and retargeted. It's mostly working well. However, for some reason the animations all have Sparrow's arms so close to her body that her hands disappear into her body quite a bit. I think increasing the angle of her upper arm bone will work, but I'm pretty new to animation, so how do I do that?
I figured it out. Just in case anyone ever has the same problem and comes across my post, here's the solution:
Here's a better image. For each Transform (Modify) Bone node, in the Details pane, I set the Rotation Mode to "Add to Existing" and the Rotation Space to "Bone Space."
o I bought this Twinsword animation pack and I tried applying it to the third person character. However, when I tried adding it to the statemachine, it would not show up on the animation list to add into the state. I tried retargeting the mesh to fit the thirdperson mesh but the third person mesh wouldn't show up on the retarget mesh even when I unchecked "show compatible meshes." The SK_Mannequin mesh in pic related is apparently it's own mesh seperate from the thirdpersoncharacter
It's almost like this thing is rigged against me. If anyone has any solutions, please suggest some.
Hey guys!
I was wondering how would you make an AnimGraph in the Animation Blueprint? Cause whenever I try to make an AnimGraph, it makes me an Event Graph instead.
Look below your preview window >>> Graphs
Yes, I tried that already. But it keeps making me Event Graphs only.
I found the solution, no worries.
Actually it automatically makes you an AnimGraph, but you have to make sure the skeleton chosen doesn't already have a Animation Blueprint.
*associated with it
This isn't quite unreal related but, I have an animation issue in Maya I can't quite resolve, does anyone happen to be well versed in Maya?
Pretty certain its a small issue and I'm just an idiot.
@fringe oriole - I think you imported your animations wrong. Were they FBX files?
@lean pagoda - I'm not an expert, but I might be able to help. What's up?
@next pine
I have a maya scene with some bone animation.
The bone animation is the exact positions of where I want my camera and aim to be.
However, if I parent my camera and aim to these bones, because they're now the child and the bone is the parent, the bone is what moves, and the child doesn't actually change its relative position.
I'm not sure if I've explained that right.
I'm more than happy to provide the scene if anyone wants to take a quick look at it, its a basic scene, I'm a modeller and technical artist, but I don't know much about bones in maya and animation baking.
What happened is, where the files came from, the software can't export cameras, so instead it uses bones, which you can just parent a camera too, but parenting in maya doesn't work because things become local space instead of world space, so it only reads additional movement that isn't movement created by the parent moving around.
Hmm... I'm a bit confused. If the motion you want is coming in on the camera bone... why would you want additional motion on the camera?
All right. Throw it on drive or whatever. I'll take a look later if nobody else figures it out.
Or that.
there you go.
you'll possibly recognise what I'm trying to do quite quickly.
Yeah sorry, that was a bit quicker than sticking it on a google drive
I have to say I don't get it. Your geometry doesn't look like anything, your objects aren't named, you have three cameras... it's quite confusing.
You have four bones called 'camera'
I'm using 2019.
And you mentioned that you wanted additional animation on the camera and the 'aim' but there's nothing in here called 'aim'.
I was about to explain that part, my apologies.
So if you press play, you'll see the 2 bones move around the scene.
Those are the positions.
What i've previously done is create a camera and aim, parent the camera to the camera bone, and parent the aim to the cameraBbone
that gets the cameras moving around correctly, but, because they're parented, their transforms and rotations don't update correctly, because they themselves aren't moving, they're just parented to an object that is moving.
Yes thats correct.
Ah, OK. Use a constraint!
Thats it?
If so, thankyou so much.
Yeah, don't directly parent it, use a parent constraint.
Then you can bake it, if you want animation keys.
thats the plan, to bake it out
now to learn about constraints (will google it, no need to explain you've done enough, thankyou so much)
just did that, figured it'd make them easier to find
Hello, not sure if this is the right topic -- I have a question about switching between different types of animation within similar anim state machine configurations... for example: I have idle/walk/run/jump/etc but also variation of each of these for different weapon types.
What should I do? I'm thinking of setting up an enum for each weapon type, then switching within the animation graph state machine...
But I'm not sure if that's the best way to go about doing things -- any suggestions or recommended readings?
Unfortunately @spiral parcel - this is one of those things where 'it depends'!
If you have very different locomotion animations between weapons, it might be worth doing child blueprints, or maybe, if the animations will be mostly the same, you might do layer blends within the states, blending an upper body animation, which depends on the item held, with a lower body animation, which is always the same.
Unless you really want the weapons to feel like different characters I'd probably do the latter rather than the former.
Thanks, I'll play around with blending and selecting anims within the same anim state machine for now, see how far that takes me...
👍
Is this drag in the mesh a result of weight and not the skeleton
Can you show the skeleton? Check the fingers, it seems like each arm/leg has something wrong with it
I'm trying to use a 'Transform(Modify)Bone' node in my Animation Blueprint to rotate the "upperarm" and "lowerarm" bones of my character's mesh depending on the rotation (roll) of the respective Hand bones. I'm setting the 'Roll' value by doing a "get socket rotation" for a socket I added to the hands.
It works, but if I rotate to a certain point (seemingly near -180 and 180) then the rotations begin to trip out, snapping back and forth between some value below and above the -180 and 180 point. Rotating the hand at all other angles works fine.
Anyone know why this might be happening? Here are some images of my AnimBP:
Thanks in advance
(note: this seems to be a similar issue to 'setting' a rotation without taking the 'shortest route', having the rotation flip around to the other side by going all the way around instead of crossing the 180 degree point. but, I'm not setting rotations here and I have no control over whether shortest route is taken)
Hello,
New in animation (i m a programmer)
I want to know how does fps animation work
I don t know how to fit weapon animation and player hands animation.
those are some nice looking connections
Quick question: Can multiple animations trigger the same notify? Why you may ask.. Because i have different run / walk cycles that I want to use physical materials with to define which sound plays on the footsteps. I don't wish to have a million notify's to do exactly the same thing 😛
Not really sure but maybe if you use the exact same name that should work ?
Also reminder for blender users https://twitter.com/UnrealEngine/status/1187091336668893184
Developer of @cinetracer Matt Workman (@cinedatabase) joins us on the livestream to demonstrate his Blender to #UE4 workflow.
Tune in tomorrow at 2PM ET!
https://t.co/qO7D0bgSzs
Likes
238
@novel viper definitely yes
I have an ik question. If my effectors is in world space it looks great location wise, but there is some movement delay. If it is relative to a bone there is no delay but the location is unpredictable. I feel virtual bones could be used to get the best of both worlds, but I'm not really sure if that is true. Does anyone have comments on this situation?
hello, if there's a foot sliding animation (non root motion), how do you guys solve it?
You could add a curve to the anim which is the velocity, have the player actor read that curve during the anim and apply the value as velocity
@hoary knot ElectronicNodes plugin 👌
Is it possible to run an anim at 0 speed and just manually set the position of an animation in the animbp?
@molten hamlet In theory -- what are you trying to do exactly?
Steering wheel
That's not the best way to do that, are you just trying to determine at what rotation the wheel is while driving/steering?
What part of the hands animation to play in response to the steering wheel rotation
Start position only sets the initial position so right now I have to keep resetting the animation
@molten hamlet
If you right click an animation in the AnimBP you can convert it to a single-frame animation and override the time there
You could set up a cached pose for this and use a float set in the event graph to constantly drive the output
You're a legend, would have never checked the right click option
This was my ghetto fix
❤
hello, could someone help me with exporting a quick explosion effect from blender to ue4?
The above set-up results in this behavior:
Roll_Hand_R is set, on tick in the Event Graph of my AnimBP, based on the (roll) rotation of a socket attached to the hand bone:
I'm getting multiple root bone failure when trying to import from 3DSMax to FBX into UE4
https://www.youtube.com/watch?v=z5Yf6dUWRzE following this video and no success

When exporting skeletal meshes from 3D Studio Max, from time to time it can kick out errors - one being Multiple root bones being detected. This video shows ...
Multiple roots are found in the bone hierarchy. We only support single root bone.
Damn it
Do you have multiple root bones?
@next pine I don't believe so, what's the easiest way to tell in 3DSMAX?
Thanks for the help lol
You'd look at the bones in your file (or basically your non mesh objects, because I think max exports them to fbx the same way, so helpers and things count) and if they aren't all part of the same hierarchy, they have multiple roots.
I would, generally, export using 'Export Selected' and make sure only to export my desired bone hierarchy, and my intended meshes.
Exactly that my dude..........i selected ONLY the weapon bones and weapon mesh, but each bone is using a 'point helper'
when i check the schematic view, could that be a thing?
Point helpers are fine, but what you want is basically this:
weapon_mesh
root
-> weapon_bone_1
-> weapon_bone_2
All your bones need to be ultimately parented to one bone.
So you just have, at the top level of your outliner, two objects.
Your mesh, and your root.
If you have:
weapon_mesh
weapon_bone_1
weapon_bone_2
This counts as 'multiple roots' because you have more than one bone at the top level of the hierarchy.
Hey everyone, i'm new to the group and unreal and have a few different work flow questions. So with my animations i make them in Maya so should i just import that to unreal or animate in unreal? And second question is that i was planning on making some death animations. How do i make that work with the rag doll that is on the unreal model? Do i plug it into there or is there something simple i'm just not getting. Thanks for reading.
hey just a quick question > What do you guys doe when you have an animation such as pushing an object causing your characters arms to go through it?
Do you use another collision that activates when a push animation starts?
anyone around, what would be the best way to handle holding items on upperbody? like rifles/etc
Additive or just a blend bone ?
@midnight thorn - I would make my offset between the box and the character match in the engine and my DCC so the character doesn't clip through.
If I can push variably shaped things, I might use an IK system, but I'd start with 'make the animation fit'.
O I C
@vernal sentinel - Animate in maya. Unreal is not a proper animation tool.
For death, you generally have to choose when a character releases from the animation system into ragdoll, if you're using ragdolls at all. You don't have too.
@cloud lodge I’d recommend a 180 frame animation for aiming up/down where the guns barrel comes directly out of the eyes centered. One of these in crouched or whatever would help too. When you used ik gun root proper and have ik hand root centered immobile but pointing down the eye sight, you can easily move the gun to shoulder aimed and match ik up later. Locking pelvis in place would be one way to go. You could FABRIK the head to the IK_hand_root otherwise to keep some normality with a moving pelvis
Have reloads and what not be additive
Also would want to center the ik gun root on the muzzle for your animations. Idea is gun pivots from a single point in space but slides up and down on its X axis.
Anyone here had issues with the 'look at' bone node?
Nope
So I'm looking at a vritual bone which I am forcing into position to the targeted player, not sure why but teh blending seems inconsistent to say the least
Does it flip around sometimes?
OK, so for Lookats to work, you need to provide an 'Up', either a node or a Vector.
Otherwise, it just takes a default value which is usually world up.
Which can cause problems if your target passes 180 degree boundaries.
So it needs local up for that particular bone? the issue is that it flips from perfect targeting to 180 degrees back even if i stand infront of it, like it can't choose whether to target me or not
Try adding the local up. What could be happening is that the character is at a boundary.
It could also be something else, some error in your code feeding bad values, but if you're not setting the Up vector for a lookat somewhere, you're going to have issues with it.
I think I figured it out, so as you suspected it was a mistake on my part, fed it a bad value at a enum switch
Hello Everyone, maybe someone here can save me. I have an issue where my character will reload his weapon in first person, but not third person. As in, he won't do the animation. Other third person animations such as crouching, jumping, climbing, and death animations are working just fine. But i cannot get em to reload his gun

Myles Yeo shared his approach in the Devil Leonardo Ninja Turtle, where he worked on the animation and gave 5 essential rules of it.
Does anyone knows why my pistol is moving to the right
https://www.youtube.com/watch?v=fUIqHov3Q_I&feature=youtu.be
Anim Montage:
https://www.youtube.com/watch?v=6cUr77B8SLI&feature=youtu.be


@carmine umbra How is your setup, using different Animinstances for FPS and TPS? Might be something to look in the animBP at that particular animation and see what you are doing different from other animations. Sorry I can't give clearer advice but as I do not know enough I must generalize the advice a bit
Damn luos, that’s cool
is there a way to use enums instead of bools for animation transition checks
Consider not using state machines. But if the question is about fast path: I don’t think so
Can Someone Explain Distance Matching Techniques How to Implement It or Can Suggest Some Tutorial Videos online To Understand
i am blending two different animations
one is upper body from Rifle Anim Pro, and the locomotion is ALS animations
as you can see for some reason the rifle upperbody just looks odd
I'd say the way the bottom part of the torso rotates during the run feels very unnatural compared to how the hips rotate (not much at all)
how can i smooth that out
maybe my blend node is wrong
this seems a little better
was trying to kinda sync them using sync groups
but maybe i need some sync markers
if you have some sort of holster animation I would try to throw that in there to see how it would look blending all 3 together.
I have an anim montage that has a number of sections. When I retarget the montage, the new montage is good except it does not have any of the section names, so I have to re-input them. Is that normal?
@cloud lodge so its separate upper and lower animations but they are timed the same?
You could right click your sequence nodes and convert to evaluated
to have fine control over the timings
i might end up paying someone for some proper animations
but ill just get the rest of the game logic done
as long as i can hold and fire a weapon and shoot etc
animations can come later
so i got the basics for now
Hey, hope this is the right section:
I got a question for animNotify BP: I got a camera shake and it replicates to everyone, but I only want it to play on 1 camera - how can i get that?
i tried to get player controller, player character, but it always goes to all players
I did a check for is locally controlled, didnt help
Is Maya ARTv2 usable? I'm using Maya 2019. Should I use the v2 beta or v1?
hi im having a problem with exporting a mesh from unreal to 3ds max and then importing it from max to unreal
can anybody help me on this?
Anyone know how I can take the first frame of an animation and use the bone positions as an ik goal?
@sudden sedge right click on the anim file in the animgraph and choose "convert to single frame animation"
You should then be able to use the pose to do what you want
Would it be possible to have vertex facial animation similar to how it's done in Source engine? Or have any animation with both Morpher and Skin modifiers for that matter
Do you mean morph targets ?
I guess
Yup that's possible then https://docs.unrealengine.com/en-US/Engine/Content/FBX/MorphTargets/index.html
Creating and importing Morph Targets for Skeletal Meshes using the FBX content pipeline.
Ahh, you're a lifesaver, thank you
How could I not see this before, I've been working with UE4 since 4.10 and it shows 4.9 here
Oh lol, np
i'm trying to make an animation blueprint where i call to play an animation but i can't find that animation as an available method in the blueprint
@misty dagger Didn't understand your issue
If you want to see your anim files there are at the bottom right hand corner of the animBP, in the asset browser, you can just drag and drop them
But typing their name should work too
@stark nova I remembered you asked me how to make State machines cleaner, I just found out this presentation made by a japanese guy who presents a few tricks I didn't know before https://www.slideshare.net/EpicGamesJapan/ue4animation-blueprint
Check from slide 77 to the end in particular

The sub anim instance node that I didn't know at all could be really useful
Nice, thanks for that @delicate junco, I completely forgot I asked
Np, I recommended to make sub state machines when you asked iirc but here some nice tricks are presented
Will it pass through Google translate?
Unfortunately no but it has lots of pics
So this one is understandable, contrary to other jp presentations which have a lot of text
Also @cloud lodge in case you need that too
I think this one's best viewed on desktop, I'll bookmark it and look properly later 👍
Yeah unfortunately, at least it's quite understandable with pics 😦
There are a lots of great prez but all in jp https://www.slideshare.net/EpicGamesJapan/presentations/
Read and download presentations by エピック・ゲームズ・ジャパン Epic Games Japan

yeah it was deleted, I got you
Since the official website is down, I've posted my https://t.co/vOKAkkiR7l 2016 talk about the Paragon Animation Technology (Distance Matching, Animation Warping) on youtube: https://t.co/nZOQdLMz6Y
First video upload on the channel. :)
Hope this is useful!
question yall - i got an jumping animation that is also using root motion.... when the animation lands - it is higher than the ground level - but the animation when played in sequencer shows it landing properly. I've tried to add a key/curve so as to bring it down to the ground (Unsuccessfully) - any thoughts?
Must be tired cause I didn't understand the issue @hushed agate
Your character isn't jumping in the air as expected and root motion is only applied when he lands ?
If so it's because root motion ignores z axis movement unless you're character movement component is in flying mode
Oh ok I got it. Are you sure that your anim is ending at the end, not doing some blend with another one ?
i'm unsure to be honest- tasked with cleaning this up.... didnt make the animation/sequence in the first place
but i do see tha thes NOT in flying mode in the beginning
lemme try switching to that.... see if that cleans up.
as for blending - i do see that he's blending between his jump (outro) and into an idle - they do overlap
i'll play with that also
Cause my guess is that flying mode is on but your jump anim blends into the idle one before it finishes so your character doesn't have the time to touch the ground yet. And since you're in flying mode he stays above the ground level
Yeah try to put the transition blend time to 0
so debug stepping - hes in flyin gthe whole time - even after landing.... but he doesnt land fully on the ground like the sequence shows him to. I've moved all blends out of the picture - theyre not overlapping any more...
rootmotion is just a pain, if the root doesnt put the capsule back on the floor then the player will be stuck falling
you need to verify the capsule position
after the jump
Does anyone know how to get rid of 'multiple root bone' issue in ue4?
I have a gun bone and ue4 mannequin bone, can I merge the two?
Dunno what to do 😄 still learning lol! thanks for help guys
@proper grotto - attachToActor(PassManequinBoneNameHere)
look up that function though - theres other params
i think mostly snapping rules
i'm doing a first person animation in 3dsmax and it has a gun bone
so if i google the above, should solve the 2 bone thingie? nice, i'll have a look ty
you'll still have 2 bones - as their seperate skeletons....
however -your wanting to ATTACH the gun to the manequin - i'll asume
@cloud lodge @delicate junco - i wound up having to put in some animnotifies on the animation (rootmotion) and set movement mode to falling (when he was coming down) and back to flying (when he was initiating another jump - as theres several in this sequence). This fixed it!
Ah dope ! 😁
yeah I use notifies too when using z movement root motion !
Im having a problem with a skeletal mesh imported from blender, when it plays an animation it becomes tiny, now the common fix for this seems to be to rename the armature to something else which also works for me, but when i do that unreals throws an failed to merge bones error which does not occur when the name is armature
anyone know a way to fix this?
@magic plover Before exporting try putting your scene units to metrics and 0.01 then export and when importing in the params choose scale 100
Armature rename is for root bone issues afaik
Sadly that didnt work, mesh still becomes tiny
Though retargeting the animation to a new skeleton works well but that feels more like a hack rather then fixing the issue
no, that always messe sup the entire rig
Could you send me your blend file in DM or is it private ?
its private 😦
retargeting however works
but ill have to makes some changes and reimport to see if the problem comes back, wouldnt really work if i have to retarget everytime i change anything in the mesh
Yeah that's super weird. didn't watch it myself cause I manage to get assets from Blender to UE4 with no problems but maybe this recent livestream could help https://www.youtube.com/watch?v=UCESgYBphLY

Creator of Cine Tracer Matt Workman, will join us on the next livestream to demonstrate his Blender to Unreal Engine workflow. As an artist familiar with tra...
ill give it a look
Good luck !
Ty
Hey everyone, this is probably a stupid question, but I'm kind of stuck - I want to have the character go through the "Perch" animation before it gets to "Perching", though the transitions Idle/Perch and Perch/Perching have the same variable condition (aka 'isPerching') which causes that before the "Perch" animation sequence is finished, it jumps to "Perching". What am I doing wrong here?
Can you show us your transition rule from idle to perch and perch to perching
Yep
So from perch to perching. Add a Time remaining node, set it to less than [small value] (this will help make transition smoother)
Then add an And Boolean node, connect your is perching and time remaining node into it
^ this or if you want to preserve fast path which "get remaining time" destroys, use a notify event on the perch anim which will put a bool to true when almost finished. Use that bool to make the transition
Okay, so I went with the anim notify, though the animation seems to jump when it's time to play the "Perching" one 🤔
What do you mean ?
Cute !
When you say jumping you're talking about the fact that it's going from one anim to another too quickly ?
It seems as though before the "perching" one is being played, the previous animation gets to default state (looks like idle)
Talking about that thing where the bat suddenly is on ground before 'perching loop'
Oh yeah I see it now
Seems like it's going through the idle state before, can you tell me exactly how you did the notify event ?
I'm setting the "perched" in the animation here
This is the event graph
and this is the 'perch to perching'
(don't forget to turn it off using a notify on another anim or elsewhere btw)
Hum, try setting the blend time to 0 in the transition ? Also your perching anim doesn't start on the ground right ?
Oh, right! Thanks
And no it doesn't start on the ground
Ok so that's some weird transition problem, wished I had the file before me to test cause I can't help much like that unfortunately 😅
OHH, I figured it out - I had the blend logic set to custom which was messing things up
Thank you so much for your help! ☺
Oh lol, glad you found out
Np 👍
is it possible to change IK bones (in my case, the effective tip bone of a FABRIK node) dynamically? I'm trying to avoid writing a new animation node in code for something so small.
Does anyone have a good weight painted mesh that i can use as a reference for my own weight painting? im having trouble getting good weights
Hey all, is it possible to use a static Mesh as a weapon for my fps arms?
Do you guys know by any chance if its possible to import a vdb into unreal somehow ?
@queen stump - Yes.
@misty dagger - Apparently yes, there's a plugin called ProxyLODPlugin which has OpenVDB.
@flat agate - Nope. You'll need to write that new node.
@final mango - It's impossible to say. It looks like an update order problem if I had to guess. If you're relying on previous frame values that might be what's causing it.
@next pine I am. Is there a better way of doing it?
Not... doing what you're doing. I don't know why you'd try to lock rotation in this specific way.
turn in place
This week, Jay will demonstrate the coveted turn-in-place! He will also cover methods an animator or designer can use to take a seemingly daunting feature li...
That video is an hour long. You'll need to provide more context.
Basically what I'm trying to do is cancel out the Capsule rotation on my Character.
visually in the animation
the method in the video gets the delta rotation by Delta = PrevRotation - Current, that gets applied in the anim graph as Rotate Root Bone
I don't understand why using the prev frame rotation would cause stuttering?
If you were using the previous frame of an animation bone your values might stutter like that.
If you're using a stored value on the pawn it probably is another problem.
@next pine Can you provide me some further information?
You can attach a static mesh to your character using "Attach To Component"
This will let you use a static mesh as a weapon on a character.
I wouldn't necessarily recommend using only a static mesh for a weapon. I'd probably make my weapons an Actor, so that they can have things like collision, particles, custom materials, etc.
But you can.
awesome, thank you very much. ill try this out
How can I control the animation with event.
?
I want to rotate propeller when start engine. But its start automaticly when start game.
@astral axle - You probably want to use a state machine.
Breaks down how State Machines work and the core systems used within them.
In your case, you have just two states for the propeller, on and off.
Thank you so much. I will try.
Hey all, I have multiple skeletal mesh components in my character bp for clothes. all additional Skel Mesh Comps use an anim bp with a copy pose from mesh. my really annoying issue right now is that when i pause the game, only my primary skeletal mesh comp moves and none of the skel mesh comps that use the copy post anim bp node arg
Anyone have a fix? in short, can copy pose from mesh work when game is paused?
so currently i'm having an issue where if my character is looking anything less than 0° through their camera, it'll show to other clients that they're looking directly up. the issue doesn't occur if they are at 0° and greater
i'm actually baffled by this
Hi, I have an animation montage which contains some of my combat animations, then I use "Play Anim Montage" node to play one, specifying the section to play, example "fastattack". In game when I attack, the character plays the fast attack, then the roll, then the die animation, all in sequence.... while I want it to play only ONE of the sections.
My understanding was that having the sections one for each line in the lower part of the picture is what is needed to have those play separately
but seems not working
Is there anyone using animation sharing plugin here? Looks like it removes collision from skeletal mesh, I couldn't find a fix for that issue.
Hello everybody! am so exited to see so many magicians here! 😎 💪
I have some questions about "Animation Sharing Plugin"
https://youtu.be/-2LZyV8SJ5o
Am not quite sure if it's correct on this channel, or better on the PROGRAMMING/ #gameplay-ai discord channel instead?
What are your thoughts? Thanks! love you all! 😃

is it correct to ask here? or better over under the #gameplay-ai tag?
my questions are about using Anim Sharing on ENEMIES on my game. Would like to create some (hopefully) inexpensive CROWDS attacking me/MyCharacter for a mobile game.
After searching about the topic around UNREAL SLACKERS, it seems here is the channel more relevant, or at least were more people have been talking about it.
As you (the ones interested on this Anim Sharing tech) know, there are no tutorials right now about this and how to implement it
there is the official docs
https://docs.unrealengine.com/en-US/Engine/Animation/AnimationSharing/index.html
But, it's confusing
So am thinking to put together and post on forums and here the current WORKFLOW
Couse my self haven't managed to do the FULL CIRCLE of the workflow yet. Will post here a video about me following the kind of obvious STEP BY STEP process am following with what is said on the OFFICIAL DOCS and were am stuck. And hopefully if somebody, has some expirience with this tech, can share some light on overcoming the STEPS WERE I GOT STUCK, and after been able to publish the FULL WORKING WORKFLOW for it! Couse this tech seems veeeeeery powerful!!! 😎 💪 ok?
About "Animation Sharing Plugin" this is this CONFUSING STUFF THAT IS going on on the OFFICIAL DOCS
Take this example:
when i push the + sign on the array, on the drop down it says NONE so i select the only available option
but then i want to take a quick look on this file

and there is no ASSET EXISTING on the asset browser
in the context shown here (where you can see the secondary hand is getting blended off to the side)

this gotta be a situation that has been solved a million times before? I just don't seem to be able to wrap my head around how it should be done. Hope someone can explain what im missing
About the ANIMATION SHARING PLUGIN
Here a example of the confusing "AnimSharingTransitionInstance" file

This is why the DOCS are confusing Docs link: https://docs.unrealengine.com/en-US/Engine/Animation/AnimationSharing/index.html
@molten heron @vivid surge @cloud lodge @dusty burrow @river briar @spice hill any of you guys knows or can share some more light on this? thanks!
I already made it working, I can share my insights here later. My problem is, physical asset collisions don't work for animation sharing skeletal meshes
because of them using master pose
wow yeeeees meeen!
its valuabler stuff! 😃
can you send a quick video explaining the basics or so? thanks!
🙏
when you have some time!


hihihihihi
i remember your profile photo too xD
was not quite sure! xD
quite memorable
don't worry
will take it easy
For your question btw I'm not sure unfortunately since I never used anim sharing till now
nothing like with the NINTENDO DEVELOPERS stuff
it's cool stuff!
Doğa maybe will share some light later
so stay tunned!
Yup I know it exists but don't need it rn so didn't dive into it. And since ue4 doc is pretty scarce to say the least...
yeeeeaah..
Great, just remember to post concise posts cause many people ask questions here 🙂
@misty dagger are your characters rely on skeletal mesh collision (physical assets)?
Because if so, do not even try to use system. There is no collision
You can only can use capsule collision
this problem
As separate component
isn't it enough for you the "capsule collision"?
what is your porpose more or less?
Imagine a fps game
You can't trace against capsule component for weapons
It won't be accurate
i see
But if your actor is small enough, you can get everything working with a small capsule/sphere collider
yes
For as an example from the project I'm working on, Project Borealis, headcrabs are good candidate for animation sharing. You can trace against a sphere collider easily & accurately, because of small size of the enemy mesh.
ok, and whats the problem?
Also as an early insight of the system, it reduced my game thread time from 15ms to 12 ms, for 100 headcrabs rendered & animated at the same time
got you
but think about a zombie, you can't accurately trace against its capsule collider
Because it has legs moving, arms moving
Those body parts will sometimes get out of capsule collider while animating
apart from that, you can't cover a human body with capsule collider accurately, for a first person shooter game
mm.. i see.. 🤔 what have you seen happening so far
the thing is, fortnite also using this system, and Epic has this system working with skeletal mesh collision
I'm not sure what trick they're doing, but it's not shared on anywhere
There is also some issues opened in issue tracker, but epic immediately closed them with "by design"tag
mm.. 🤔
tricky one
what about sending a plain email or something to them?
will they cooperate, do you think?
by the way, just to start getting the feet wet with this tech.. 😯 do you have some time available, to create a quick video, or put some screenshots in a album and share a link here, or somethink about the "basics" to make it work Doğa?
not like a complete tutorial.. but just.. like some keysteps.. to get the "workflow" idea..
My idea, was to use it to create some quick "crowd cinematics", hopefully som unexpensive crowds enemies, and mess around with it..
Somewere i readed that you saved a lot of performance with this tech.. so it made me preeeeeetty curious to see "the reality" of it
@misty dagger For cutscenes you may want to use this trick https://www.youtube.com/watch?v=xWq-ZPMhai8

Lazy Tutorial 5! I'm surprised this works as well as it does, actually. I cranked the number of people up to 100,000 and Blender just got a little laggy.
For crowds in the engine it won't work though cause that's only for prerendered stuff with Blender
yes thats the CON i see.. but.. sooo funny! 😂
I stumbled over this video that got published for 22hours ago.
He calls the method "Vertex Anim Toolset"
This dude, seems to use a very inexpensive way to animate up to 2500 mannequin!
https://www.youtube.com/watch?v=M2UwDvR06uc
Can't find anybody talking about this on UNREAL SLACKERS.
is there somebody that knows if this dev called "hethger" is using another discord profile name around this discord channel? can't find him by the same name.
My questions to him are about how well does it perform his method, or more info about the performance numbers using this method? how many pushes/updates does FPS do it REALLY drop with this new method 😊 Is there any considerable performance saving between the original and the new one?
Can i use this tech to animate CROWDS of enemies?

Warning: When creating the Render Targets you no longer have to set the Render Target Format to RTF RGBA8, simply ignore that step in the video. Plugin Forum...
Ah. World position offset
Used it to animate fish. We managed to get 600+ instances running without too much performance hit
holy smoke! 😯
Granted, the programmer was using the cpu and multi thread witchcraft
what is the "BAD NEWS" from this tech?
there is always somethink in exange.. 😅 for higher performance normally
The animation or the system?
the animation
Well, you can’t do too much with vertex animation. Like have a human walking around for example. You need to use skeletal if you want such “complex” animation
My fish for example just flap their tails 😜
its more for background animations i guess then
so it's sound like it's some form of BILLBOARD effect right?=
Hmm?
it's a fake 3D, like a 3D illusion somehow, right?
No no
about the 600 fishes.. what platform is it targeted for? PC or mobile? 😯
do you have a screenshot handy to share?
Hmm. Not quite. I’m holding off showcasing it fully until the next update or two https://m.youtube.com/watch?v=IPPCCmi-D6s

Blades over the Horizon is an upcoming action-adventure game set in the vast and ever mysterious blue sea. Interested in learning more about this game's deve...
oki i understand
Have a gander. More or less the same concept I used. Masked the vertices and threw a sine on it. https://youtu.be/l9NX06mvp2E

In this 2017 GDC talk, Giant Squid Studios' Matt Nava offers insight into the unique art style of Abzu, and the processes that he and the team at Giant Squid...
can i see on the video some where the tech in action
fine! thanks!
will check it to understand it better
Woooow!! So impressive tech! 😯 thanks for sharing!
(900 fish cough)
but... wait a minute.. 🤔 can anybody explain this effect then..?
This is the same tech
Quote:
" rendered as a single Hierarchical Instanced Static Mesh Component.
these are animated with a single texture holding multiple animations, each instance can play a different animation, based on an encoding set through blueprint."
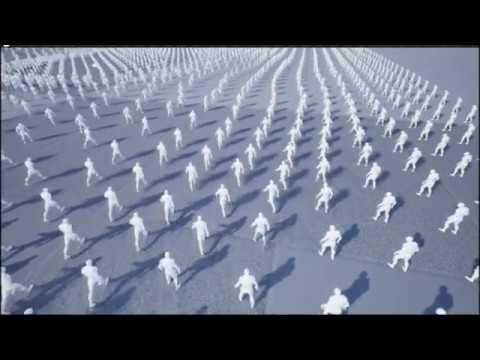
Forum Post: https://forums.unrealengine.com/community/work-in-progress/1674329-vertex-animation-toolset-crowd-rendering Here are 2500 Mannequins rendered as ...
😉
but.. did you notice, that on this second video created by the same dude "Hethger" he managed to have 2500 mannequin, moving.. using the same tech..?
this is true. https://www.youtube.com/watch?v=l1UzggkzUNw 900 something here though
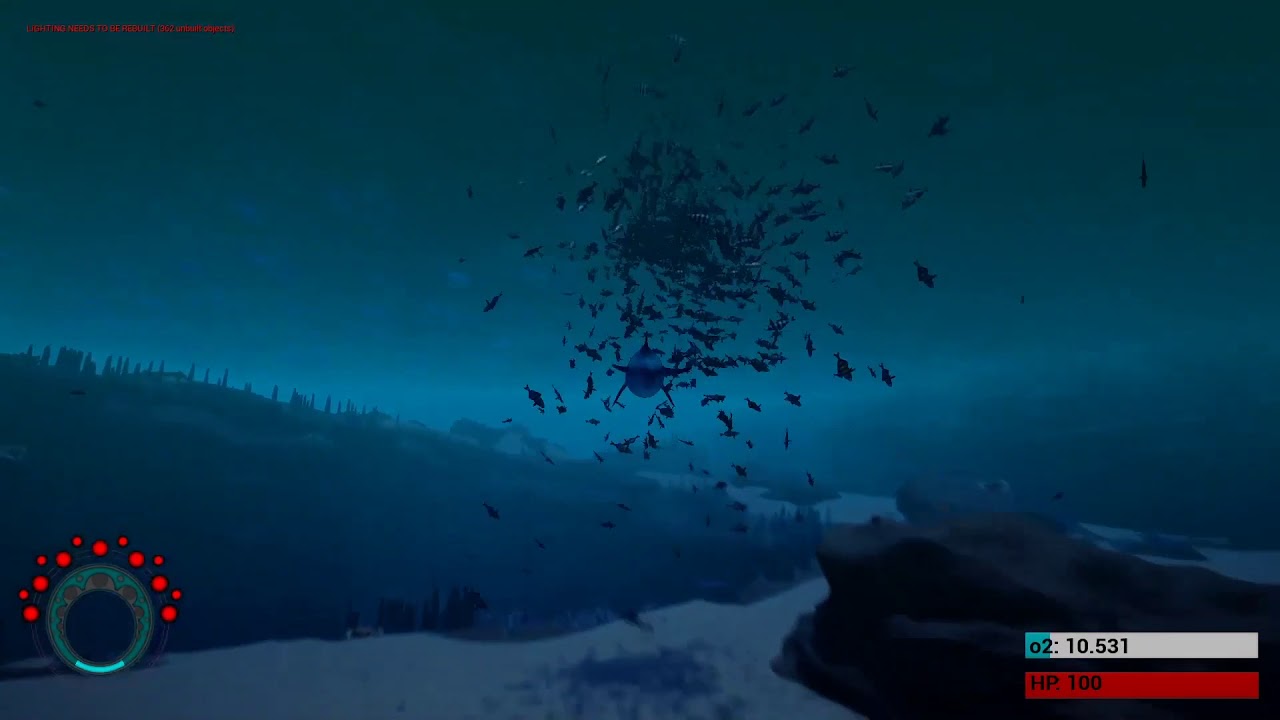
This is an early version of realtime schooling behavior of fish! Blades over the Horizon is an upcoming action-adventure game set in the vast and ever myster...
it uses one static mesh component per fésh, which is what i believe they are using in that gdc video too (static mesh component). Don't think theres a way to pull the effect off with "instanced static mesh component".
If this mannequins are animated witha single material..
do we agree then.. that this tech.. is.. like.. CRAZY MAGIC ON STEROIDS?!? right? 😅
it's like the fish tech version 2. A newer version somehow.
Forum Post: https://forums.unrealengine.com/community/work-in-progress/1674329-vertex-animation-toolset-crowd-rendering Here are 2500 Mannequins rendered as ...
Thousand is the around the max number of skeletal mesh you can run regardless
yea it also says in the video "Here are 2500 Mannequins rendered as a single Hierarchical Instanced Static Mesh Component."
is there any trick maybe on this video? 🤔
so they aren't using skeletal meshes, sounds like they are realtime baking out vertices on the gpu
do you think, there is a illusion/trick maybe?
Ouch
the key words there are "Hierarchical Instanced Static Mesh Component"
but that sounds bizarre in my world..
would guess that there is some very specific reasoning as to why they are placed in a circle and move as they do
never seen animations with HIERARCHICAL INSTANCED... only on preeetty still static meshes..
sticking wtih my assumption that its 'rendering' verts for a few animating instances and copying / redrawing them multiple times
how impressive is it in your opinion from 1 to 10?
What we used, what abzu used, what the guy with 2500 mannequin used 😜
its very impressive, imo. sure, it's not as impressive as fish but 2500 of anything is impressive. It's just a very good hack of some sorts. and hacks should be the developers bread and butter.
well.. both are.. mind blowing.. actually
the fish number of instances.. are.. explosive for sure
but duuude.. the mannequin is moving the legs and arms.. wtf?!?! thats harder! right?
The fish see eachother and make decisions 480 times per second. Leveraging that amount of computing is tough. I don't know enough about the "Hierarchical Instanced Static Mesh Component". But yea we're also not using mesh instancing at all. With the mannequin, its sharing animations or frames of animations. I'm guessing the peak example of that tech is having that many people looking exactly the same with some limit of variance in pose but again have no idea.
But yea again, its still very cool. I dont know enough about the mannequins to say if its as hard on the computer or not
i think the guy has misspell it actually.. he calls it "hierarchical instanced STATIC mesh component".. but should be DYNAMIC/MOBILE/MOVABLE etc..
It is still a static mesh
he added somehow a animation.. flipped a Static mesh.. for a animation..
@molten jewel yes i agree about the decisions..
skeletal animations are actually a newer thing than vertex animations in terms of games
Note pat, the mannequin has hard joint points. The weight are either at 1 or 0. No in between.
Kinda why robots are so easy to rig 😜
Yea :) for sure
Though I think Houdini has a couple of tutorials on how to export vertex animation from a rig. Though I think it’s by frames. So, not very adaptable for real-time parameters changes for example
Still don’t think it’s possible from blender due to the whole reverse engineered .fbx issue
Yea, it's interesting that vertex animation like with quake 3 and half life etc, no standard for vertex animation formats really emerged from that haha. like those preceded skeletal animations
Indeed. Just add some vertex colour and a lot of math
Oh shove it with your mathematics 😜
lol, 
I have sended him a PM on the forum, and invited to this conversation to give us a quick explanation, of what's going on.. couse this is MAGIC ON STEROIDS..
cool stuff, i've heard the term HISM before but yea again, unsure what is going on likely framed vertex data or blending. #graphics may know more of this buzzword/abbreviation
Clearly more boids pat 😜
I would be very cool/happy with more boids
let's see in some hours if somebody tells more about it!
why is the x axis flipped 90 degrees?
@molten jewel @restive yew just a quick update on what we were talking.. the DUDE hasn't respond on the PM yet.. but on the #graphics channel they say it's like "GRASS WITH ANIMATIONS(Vat with multiple segments in tex for different anim).. so far from HUGE CROWDS running inexpensibly in a phone"
by the way @molten heron how much time available are you having this days, about the "sharing anims process"? do you think could be humanly possible during next week maybe? 😅 🙏 😜
And also was taking a look on your Project Borealis! Men you and the team should feel proud of it! Great work! 😎 💪 It gives me the impression there are 2 rols for the animations on the project, are you like the AI DEVELOPER, or the RIGGER? Seems preetty cool future for this project! 😎 ✌
@misty dagger I'm co-lead of the programming team, like I said, when I find some time, I will share a small guide here (or in forums)
😍 🙏 yes, i can imagine! thanks thanks thanks!! 🙏 🙏 🙏 😎 💪
We already told you how it was achieved 😜
Hey guys!
I want to make first step in my character on root animation.
But I have a problem when root animation transition to loop running. It's trembling.
What to do?
Hey I don't know much about animation so probably a stupid question: is it viable to make an animal mesh with independant legs that arent integrated directly in the body part ? like this:
Would probably be fine, but you’d need to use a ‘empty’ skeletal component parent and socket the limbs in. Not super efficient. HighTides posted GDC video has lobsters in it 🦞
ok so in your opinion I rather take a little bit more time to merge every part in one single mesh ?
I can do that I guess, Im not the one that gonna animate and rig it so I want it to be easy for him
No just if intention is to not skeletal it, you’ll still need to
ok
Should look fine esp. for lobster to have floating parts
ok thanks sir, gonna look the GDC video to see how they did it
hi there, anyone successfully exported the mannequin from the thirdperson template with animations? after i import the model in blender i get no animations.
you have to export the ANIMATION SEQUENCE file dude
not the SKELETAL MESH
all of them
one for running, one for sitting, one for flying, and whatever ANIMATION SEQUENCE file there are
THANKS @misty dagger some VALUABLE INFO there
Hey
I have a problem
I am trying to export an animation from either maya or blender, and when I import the animation and view it in UE4, it is just blank
@brisk pewter this is the fastest way to get you there.. seriously..
- install camtasia or similar
2)record your desktop, do the clics you are doing.. and show your current procedural
3)send de recording here
4)and you will get a reply with the solution quicker than you can blink
5)and you will have learned some new skill that you will use tons of times!
is there a way to combine montages? I have an upper body animation and a low body animation and I want to play them both at the same time... I tried making both montages different layers and using layered blend by bone but it only plays one montage at a time
screenshot?
Hey! can i get some help from you guys? Im haaving a hard time fixing this problem. If anyone knows what im doing wrong, pls help me.
Is there a way I could dynamically change the Bone from the Modify (Transform) Bone from blueprints?
@meager plank make sure the animation of "loop" is not set to loop.
sorry
I meant the other 2 animations, probably could happen because of the "Start" if it's looping
And make sure you have added the correct animations
loop should be set to loop
Is it possible to permanently change bone rotations? This model is currently in the ark devkit, which was built off of UE4
click on that animation inside the abp and select the pin where you connect that animation to. then on the details on the right there should be a loop tick box
^whenever i upload the model into the devkit, the bottom jaw always shifts into the the upper jaw
anyone know how to get an animation montage to use root motion on specific animations
i have an animation that has translation in it, setting root motion works well to keep the capsule in the right spot
but when i put it in a montage, the root motion is not applied.

this is the underlying animation
as you can see the root motion works on it
checking and unchecking this box in the underlying animation in the animation montage, also does affect it
but the translation isn't added
Why does my kinematic collision skeletal mesh not collide with environment? Only when i set it to simulate or default it interacts with envirnonment
@slate olive yes it's possible, and it's easy.. can be many things the problem. I would go and look the weights first. Show a picture/video or something
Guys how do i make so the kinematic physics type actually interacts with the terrain etc???
Only simulate works for me
Only simulate works for me
@native moss what about adding a key and then changing the transform
@misty dagger show something dude! don't get you. Pic is more than 1000words
@misty dagger I will send photo
give me a sec
Here
The landing gear litteraly just passes straight through the terrain
only happens when i have kinematic turned on
@misty dagger I have been trying to fix this goddamn shit for like 12 hours now litterarly..
ok, now at least i understand you dude! @misty dagger haven't had the need to learn much about physics yet, just basics.. so can't help you.. but guess will be easier for another person to help you! meanwhile keep testing the tech and watching videos of it on youtube.. until.. magic maybe happens
I want to end my life
jk
dude! it can't be that difficult
take some similar video on youtube
replicate it
and then MAGIC HAPPENS
i have brain damage from trying for 12 hours straight
😂 common dude!
that makes you "GOOD" when you find all this GOLDNUGGETS
the best way i know, is to chew and chew similar videos
So I moved some folders around in editor
now all my animation notifies are broken
so let me guess I need to go through a hundred animations and manually redo them all? Huzzah
holy cow
I can't even copy and paste them from an older version.
use Jitbit macro recorder
i mean
as far as i know it's pretty.. fucked up..
maybe somebody knows a REAALLY GOOD TRICK
This is what I wanted
this is all I got right now
so the plus side is it retained the timestamp and rough name...
but Im needing to manually reassign it, and then reset the settings if they're not default.
how many do you have?
Right now i'm using ALS
hundreds? or thousands?
so 238 animation sequences
pfff..
Did you try using "fix redirectors" ?
yeah.
but more disturbing is it broke in the first place
I've been having a nightmare here.
😦
I've used perforce since the project started
No backup ?
but I tried rolling back on that and I just end up with weird duplicate files and have to clean THAT up.
omg
I could try-re-re-rolling it back, again.
But it's not exactly what I expected when I think of source control I think I can have a clean-slate retart at a save point
not have.. more jumbled messes.
I just wanted to restructure the folders to make a bit more sense for my project.
Shame on me
have you consider reverse engineer from autosaves or something?
No idea, I guess I could try-rolling it back, again , I just don't like using perforce at all.
but it seems like git isn't really set up to handle binaries
so I'm not having a lot of options when it comes to doing blueprint projects.
anyway I was just curious if there is a way I could 'find and replace' notifies
since there is still that broken marker left in the animation
yes.. but it's not a bad idea using replace
My main downfall was reading this and deciding having a uniform layout and style would be beneficial https://github.com/Allar/ue4-style-guide

GitHub
An attempt to make Unreal Engine 4 projects more consistent - Allar/ue4-style-guide
you mean using like NOTEPAD++ or ULTRAEDIT and FIND IN FILES and point the folders.. and using expresions and so?
instead of just using whatever random crap a marketplace author decided to throw down.
Yeah but, it'd have to be in UE4
since the animation notifies are not just stored as a text file somewhere?
Im saying there is a blank notify called footstep_C
so why can't I find all instances of that and bulk replace them with the proper link?
like
I can manually click on the notify and select the right one from this list.
but I need to do that for EVERY ONE
and then edit the settings if needed
buff.. i would play it safe
and do it manually
put some videos on your secondary screen
and chew it down
200 its pretty possible
the other options.. is a jungle
and you can end up.. spending the same amount of hours.. and being still nowhere
Hello 👋
So after retargeting several walking animations I noticed they scaled up when transitioning from one point to another( in the animation blend space ) . The animations have the same exact scale , same location and rotation.. but just scales randomly. Any help would be appreciated thanks !
it happened me once.. @rocky hound the problem that time, was that i was importing the mesh with some scale on it
and went super crazy
how are you importing the stuff?
u mean from blender?
my problem back then, had to do with this
i had mess it up by touching value when i was importiing the assets
and afterwards it just got a mess..
so this import scale is 1
you know best, were you have been clicking for the last hours
did you touched any of this?
my expirience is that.. it get very wild, when you scale from that point
I haven’t though
When I click the animations to preview them they are fine
Even on the video the last 2 points have the same exact scale it’s only when transitioning from 1 point to another
what hapens in the game?
show a video better couse don't understand with that screenshot
ill sent u on private ok?
ok
This was the problem:
so you had first:
ORIGINAL_WALK
ORIGINAL_RUN
you create a new BLENDSPACE file and it works. The only problem is that it's missing some movement and it gliches
then you loaded on that third-party program:
ORIGINAL_RUN (with the glitch)
exported it and got
MODIFIED_RUN (without the glitch)
you import the new file
MODIFIED_RUN
and now when you load it on the BLENDSPACE it scales up suddenly right?
solution: ask on the Discord channel of that third-party program
I've followed a tutorial to set up an aim offset, but my pitch is inverted. How do I fix this?
Does anyone know how to fix the issue with the FABRIK node lagging? I'm IK'ing my left hand onto my rifle but it slides around a bit. It seems like the FABRIK target transforms are 1 tick behind the actual transform of my weapon
I wound up fixing it by multiplying it times -1 in the state, but this seems like a weird way to have to fix stuff.
Open aim offset, and reverse the pitch min and max values around