So @restive yew , is there a way to do what I'm trying to do using the state machine and stuff? I'm just basically trying to make it where the jump animation only plays when I jump, and not every time it registers that I'm falling like I've been told multiple times to do it like instead. I don't want the jump animation to play every time i get out of the air boost or walk off a ledge, ya know?
#animation
1 messages · Page 118 of 1
For something simple. I'd have another variable or more ideally, an enum that contains player state. Have the transition rule for option 1: Is Falling > AND boolean > Player Jump (custom var) > transition. For option 2: [enum] > get enum (jumping) > transition
What's an enum?

What is an Enum in Unreal Engine 4 Blueprints? Source Files: https://github.com/MWadstein/wtf-hdi-files
So do I use the first option for if my character is jumping and then the 2nd option for if my character is just suppose to go into the falling animation, or were those both for the same thing, but just different ways to go about doing it?
both option are for Jump start. You need to have a more define condition so you can make a power boost branch. Since it shares similar condidtions
What's a power boost branch? XD
idk, thought you wanted a boost function or something
Ok, so I need to somehow create an enum that contains the player's state, then in the transition between idle/run and jump just attach the enum to the end result thing in the transition, right?
you can be lazy an just have a bool reflect the jump input in that case
Oh I have the boost thing set up, it's an in-air forward dash, to be more precise, and whenever my character uses it, i plays the jump animation afterwards, which I don't want. That's what I meant. If you want, I can show you what it looks like if it'll help you find a solution.
I'm about to hit you with a trout 😛
Hahahaha, sorry. I'm just kinda confused on certain things and I only slept for about 5 hours last night XD
An enum is just a list of static values.
Here's what forward air dash system looks like
previous suggestion still stands. Have more specific conditions
class enum DogState: uint8 {
EDogRun,
EDogJump,
EDogEat };
or something like that.
Those values translate to a number that the machine uses:
Hmm, and how would one use this for what I'm looking for? Just curious, again I've never used anything like this before XD
I'm just trying to figure out what the Enum would look like/need to have in it so I can play the jump animation only when I jump, and not when I walk off or something or after the forward air dash XD
It basically wraps everything in a neat manageable bow with added modularity
It's handy when you have more than just two states;
To build off my dog example
If I wanted to change my animation pose based off the state of my dog. I could do this:
{
    // Set animation state for Dog Running

}
else if (bDogEating)
{
    // Set animation for DogEating
}
else if (bDogJumping)
{
    // Dog is now jumping
}
else
{
    // Don't do anything
}```Less spaghetti code = less being hit with an old trout
Hahahaha, well I don't wanna be hit with an old trout, that'd probably make the stench rub off on me
Hahahaha, well I don't wanna be hit with an old trout, that'd probably make the stench rub off on me
So it's basically just a state machine with more conditioning?
It's just a variable with a human-legible value associated with it in a neat package. And because it's static it's consistent.
Hmm...
But to me it doesn't sound too much different than an anim blueprint or a state machine, so how would this help me get my character to play the jump animation whenever he's jumping, but not when he's walking off of a ledge or after my character is done with his Forward Air Dash?
Sorry if I'm asking obvious questions, hahaha
Yeah
Now you have a variable that you can pass around to various places and you don't have to define it
Everything knows that EmeraldEnum will contain those states and so you can pass through a variable that will be one of those EmeraldEnum states
So how do I set the variable to mean that the character is jumping?
Eh, I think I'm going to bed, I'm a bit too tired to try and figure out how to do this tonight, I better bounce before I hurt myself in confusion.
Oooh okay, thank you!
I'll work on it tomorrow then! Sorry for annoying you both with all the questions 😄
Is it possible to take the UE4 mannequin skeleton and apply it to a custom model? What are some issues that might arise?
Aww, come on! XD
No real issue given if the model has a similar rig. You can retarget it or grab the mannequin rig and skin the model directly
@restive yew pretty much
anybody know why my cloth layer wont import into ue? do I have to flatten the geometry into one layer before exporting as fbx?
Flipped normals?
normals are fine
if I merge them it imports okey
but the mesh gets shifted
or idk whats going on but somehow they are not aligned, even though they are flattened and correctly positioned in blender before export
maybe i can export them as seperate files and parent the cloth to the neck bone in unreal
Doesn’t look like the cloth is skinned to me.
sorry, as u can tell im a beginner, can you elaborate?
Vertex weighted to the rig
i was planning on doing the vertex painting with ncloth in unreal but maybe i need to do this in blender first aswell?
It needs to be assigned to rig first yes
i tried parenting it to the armatures neck bone
but that didnt seem to help after import
No. The cloth mesh doesn’t have any vertex weight if you do that
You need to merge the mesh, weight paint it or assign bone influence per vertex in edit mode
alright ill try merging it, weight painting it, export to fbx then ue
thanks alot for the help!
hmm i now saw that the meshes jump when i merge them, any way of fixing that?`
nvm fixed it I think

Anybody have any good CAT rig tips for stylized / small characters? Trying to rig up this little guy and he's giving me hell right now. His legs do some crazy things, I think it's because they're quite short... I've tried re-skinning multiple times...
[Using 3DS Max CAT by the way]

The skeleton/rig itself seems fine. It's just not skinning correctly I think
Automatic skinning gives some horrendous results and I can't seem to adjust in any way that makes it better..
So, I've got the Enum thing set up like how you showed me, now how do I attach the Jump and Idle variable in the Enum to the transition thing in the Anim Blueprint?
alright so i got my cloth simulating in unreal now but something is wrong with the collisions, i guess the size of my armature/model could be a reason. does any1 know why my poncho stays in its initial place instead of falling down over the character? I want the entire thing to deform similar to how the edges behave

Alright, so something doesn't seem to be working right. Whenever my character jumps no animation plays but whenever my character uses his 2nd jump in the air, the jump animation starts playing constantly over and over again, and it doesn't stop even after I land or anything. Here are some pictures of how I set it up.
Since I couldn't connect the Enum to the transition node in the state machine, I used bool's so that I could connect it. This is how I set it up. Can ya help me figure this out Courtney? 🤣
Or anyone else, if you know how I can fix this hahaha
does anyone here know how the AnimProxy works?
I haven't been able to figure out how to fix this, but I think I set something up wrong.
Can I trigger a blend space as a one off animation? I'm working out how I'm going to do hit reactions/ flinches. I was thinking of using a blend space with the unit direction of the hit. I'm just not sure yet how to get it to play as a one off.
I was thinking something like this
@restive yew nice trout
still looking for answers to regarding why my cloth doesnt simulate properly, although it simulates, it maintains its original shape. Really appreciate any tips regarding this guys, if any1 have any ideas let me know (if it's not clear I would like the green plane to fall down and become a simple poncho, rather than just floating as it is now)

I think I almost fixed it, changing the paint value from 100 to a 1000 fixed alot of the problem, only corners which are still acting a bit weird
update: bumped it even more to 20.000 and painted the edges, that seemed to fixed it, idk if its a scaling issue hence the crazy values but it works!!
Question about root motion being used for a dive roll. The player is losing all their velocity by the end of the roll as if their stick input is being ignored. How to I maintain the velocity after a root motion animation plays?
@glossy moss That value you are inputting is how far in units the cloth is allowed to move from it's original position. You should model the cloth closer to the ponchos natural shape over the body rather than as a flat plane.
@winter notch but i also tried that at first
didnt really work out
anyways! thanks for explaining, it helps to get a better understanding, and I wont probably need to make as crazy stuff as ponchos anyways so its good now that I grasped a bit how it functions
Hello, I am trying to use the LegIK node. When trying it with the default third person character, I can get it to work - the foot follows the foot ik and the bones adjusts. So I want to see how it works with a longer chain, 3 or 4 bones. So I make a bone chain in blender (novice in this area so I could be doing something wrong) and import it to UE and setup the nodes. The result I am getting is that the bone chain almost always aim towards the IK, but 'overshoot', ignoring 'bending' the bones. Occasionally - as I drag the IK gizmo around - there's a frame where the bone chain bends. I've tried fiddling with the settings, but no matter what I still see the same issue. What am I missing?
Hey all, I had a quick look but couldn't find any tutorials on youtube.
Does anyone know of a tutorial that shows how to basically create a copy of the default UE4 character and then modify the scale?
I'm making a basic tower defense game and want to have a "big" enemy that is physically something like 2x the size of the basic enemy.
I assume there's an easy way to just duplicate the content and change the scale to 2x, but I tried doing that and it lost all of its connections (skeleton -> mesh, etc) and i wasn't sure how to recombine them.
I suppose you could just go ahead and change its scale to 2.
Perhaps I didn't explain it clearly enough 😃 I first want to duplicate the UE4 character. If I just CTRL+W on the 3 files then it loses all connections internally. The skeletal mesh isn't associated with the new skeleton, etc.
Right click it and select duplicate?
That's the same as CTRL+W
so hope im asking in the right place, I've been trying to build a rig in Maya to match the ue4 mannequin as even with the fantastic retargeting kit ill often run into issues but i cant fine a explanation for the mannequin twist joint set up, or if any of the ik joints like ik_hand_root ikhand/food etc are still necessary. the upper twist is set firmly in the shoulder joint and none of them continue in the joint chain, just sitting there with no children. is there a guide or breakdown of the mannequin rig?
So Is there any decent tutorials on how to rig up animations for UE4? I have tried following a tutorial in Blender but its using existing assets and just rigging them where as my T Pose Is all in one solid mesh, The existing bones are not parented either, So do i just use that mesh as a positioning aid and create a new skeleton but how can you tie the mesh to the skeleton as I cannot select the Arm and Parent to the bone as the arm is part of the solid character.
doesnt help that the mesh contains 5 copies of the mesh as Lods
First thing first. When you import into blender. (import menu) Armature >>> Automatic Bone Orientation
To animate the rig: Click on the armature and go to Pose Mode. Standard keyframing nonsense from there
If you want to assign a rig to a mesh: Click on the mesh (in object mode) + Shift + Click on the rig (in object mode) >>> Ctr + P >>> With Automatic Weight or With Empty Group (Either is to your preference)
ok so I parent to mesh but its not working as expected
When i sub selected the arm and parented to the bone, the mesh dissapeared
So if i add a new bone how can i parent it to a specific part of the mesh
Vertex weight it
if you want to split the mesh up you can try going into edit mode pressing p and then 'by loose parts' but if you didn't make it in blender might not give the results you expected
or 'by material' too you can try if it has materials
Hello all, I'm trying to look for good tutorials on procedural/physical animations, I tried to check some (the main ones you find on youtube) they are either too old to be used with 4.20 or 4.21 (the options are not the same) or the end result is like ... unusable, like most of the time it's "hey look, here you go you add physical animation and a custom profile to your character, with a bunch of stuff to tweak" look the character is doing some crazy funny shit with his arms and looks like he want someone to put an end to his suffering. Cool to share the knowledge tho, always, but not really usable in a game.
im trying to use a blueprint to run an animation
but its onlyletting me do
montages?
Untick Context sensitive and look for play animation or drag the node from your static mesh (target), you can also play an anim montage, but if you are looking for a sequence it's play animation from the mesh
Yep, when you right click in your event graph to add a node
Untick context sensitive in the upper right corner to get the play animation node
Or
Drag from "as pawn close combat fighter" to get your Charachter "Mesh"
And from the Mesh, look for a node called "play animation"
The "context sensitive" box hide some nodes if they are not relevant to the node you are dragging from
Hey @restive yew , whenever you aren't busy, I was wondering if you could help me with something? I set up everything with the Enum's, but something went wrong. Whenever my character jumps no animation plays but whenever my character uses his 2nd jump in the air, the jump animation starts playing constantly over and over again, and it doesn't stop even after I land or anything. Here are some pictures of how I set it up.
Since I couldn't connect the Enum to the transition node in the state machine, I used bool's so that I could connect it. This is how I set it up. Can ya help me figure this out?
You call the variables like you would with any ref variable
What do you mean?
Guys
even if all the bones are right
this is how the character run...
What the hell is going on?..
Oh wait, no I figured it out! I used the integer node that determines how many jumps I have that we set up for the double jump, then I did some tweaking to get the falling to happen when it's suppose to and not happen when it's not suppose to. If you want HighTide, I can DM you and show you how it works in case you ever come across this or anyone else 😄
By the way HighTide, do you still have the video you made to show me how to make the double jump? I don't remember all of the steps we did to make it, and I may need to do it again for the Forward Air Boost, since I only want you to be able to do 2 until you touch the ground.
wtf why is there an anim graph node to set position of a bone but not one to read it?
now I have to go make a custom anim node because it's the only way to get at the position needed 
Can I use IK as a replacement for anim. offset?
I want to pass in a location vector as my param to move my character's arms about (within limits) - not sure if AimOffset is the right way to approach it since it's not really a different animation.
Just a movement of arm location.
Hi guys. Is anyone able to help me out? i have a cube which is only using Joints one in each corner. When i export it to Unreal engine it just errors out and wont import it at all?
Hey everyone! so right now I'm trying to make it where my character can only air dash twice until he touches the ground, then it resets and you can air dash again. I'll send a picture of how I'm doing this. But the problem is that 1. I can't seem to get it to where the number resets whenever you touch the ground/stop falling, and 2. I set it to where whenever the integer is <3, it'll do the forward air dash, but it only plays once, and the integer should be starting at 0. Can anyone help me?
Oh, and I don't know if it's important or not, but that Is Still Falling Bool is there because without it, after the air boost my character would go into his running animation, so basically I made that for whenever the boost is done, it turns that bool to true, so that in the AnimBP it goes into falling from idle, but then it almost immediately turns off so that my character doesn't get stuck in falling animation, but since there's no falling to idle, it stays in the falling animation until my character lands.
Hey, I'm trying to make my enemy character jump attack. But the problem is that the capsule remains at the position where the enemy starts jumping. So i try to move the capsule to the mesh position after the attack launched. The issue with that is whenever the capsule reaches the mesh position, it pushes the mesh away forward. I recorded the issue in slow motion. Any idea how to fix this issue? https://youtu.be/-qngJ5Jkqlk

This is the code that resets the capsule component
Are montages designed to continually loop?
im trying to figure out how to play my animation
onyl letting me use blendspaces/
montages*
@royal hatch Maybe check the option > root Motion, in the animation
im trying make a "jump loop" but my animation is 1 frame long... any advice?

I'm trying to smooth out my end animation to movement but it looks weird. I've tried increasing the Blend Out Blend Time but that isn't working, any ideas?>
Is there any difference between Playing a montage on a character BP vs an anim. BP?
Sooo many issues trying to import this skeletal mesh from blender, originally it was exporting all the anims squashed and now it exports a random squashed animation. The bones are all shifted so the head has scale 0 the neck is where the head should be etc
hmm this time it exported 2 things.
heh
So I got a layer Blend per bone going into another layer blend per bone
In my case only one or the other slots should play on each layer bone - any idea if I can make a branch based on some variable?
Ah.. Blend poses by bool
Anyone know how to match a MAYA camera to UE4's camera for animation?
if so please @ me
I have a model with several bones that dont appear to link to anything, If i delete all the bones how do i re-rig it as the Mesh is a solid mesh
so i can't parent the bones to the mesh and when i split the mesh and try - the mesh vanishes
I guess what i need to understand is the difference between the Armature(bones) mesh and how to link them together
or any links to resources that can helpme understand it
@ember ivy Have you unbound the skin from what is left? And i think if you add a picture people might be able to help better. (Sorry i am an extreme noob still learning to rig too)
Bit of an issue I have some blender animations but they translate and scale up when they play, I can add an offset but can't seem to change the scale because the world scale is the same each time
oh its okay just need to offset by -270 on z and scale by 0.2...
Is the tutorial about IK on the unreal site still relevant?
My capsule seems to just hang in the air.
Hey guys! Has anyone worked with Control Rig? Is it possible to use a single rig with multiple different skeletons (hierarchies) in case if the required joint exist in all these skeletons?
I didn't found a way to import multiple different hierarchies, they are merging if I import more than one
hello, i'm using third person animations for a first person game that uses full body, the problem with that is that the camera is a bit shaky, is there a way (maybe with a control rig) to stabilize the head bone without manually editing all of the animations?
@bronze sierra try toggling controller yaw
any ideas how to add editor events to the control rig sequence
@fickle pilot i use that already and that helps a lot, but since the camera is attached to the head bone i still have the location offset from the hip movement going up and down
i need to apply a counter delta location to the bone
in order for it to stabilize
I have problem w/ an animation I’m trying mess around w/. The animation is 1 frame long and I’m trying to make a “jump loop”. I wanna slow it down to 20 frames but have no idea on how to do so is there any 1 that can help me?
@fickle pilot can you explain it better so i can understand what you mean?
Trying to make a jump look out of a 1 frame animation
unreal engine is not an animation suite, but if you have the patience you can add a few extra frames and use the key button above and keyframe the movement you want to do
although with the new control rig you are getting closer to an animation suite
you can also take a look at that

Parabolic Labs develops a plugin in Unreal Engine 4
So right now I have an ability for my character where if he's in the air, you can press shift and he'll get an air boost. It works, but I want to limit it to only be able to do it 2 times until you land on the ground, then it resets. Before I figure out the resetting, I wanted to try to limit it first. I have a variable called Max Boost Count and another one called Current Boost Count. Max count is currently set to 3 as a test and the default value for Current Jump Count is 0, but for some reason my character can only air boost once, then he can't do it again. Can someone help me out? Here are some pictures of how I set it up.
Hey guys I have an issue I'm not sure about. I have a parent actor that contains all my logic. I then have several child actors. My issue is with my child actor. He's using retargeted animations. I have all my weapon animations stored in a data table and then set inside my parent actor. So my child actor cant play those animations from the data table. How can I get my child actor to play the animations? I can't override the parents functions because the animations aren't there, they are in the data table. 😦
Hmmm, so your problem is that you want to take the anim names and find the equivalent named anim for your other character?
Pretty much, yes. Because technically they are the same animations. I just had to retarget the originals to work with my new child character
The same movements but totally different animation assets to unreal correct?
Also, these are on different skeleton assets?
So you could go crazy and get the display name of the animation, loop through the asset registry finding all assets (i'd recommend putting them in a folder), comparing the names then choosing the match
or in your data table you could just add an extra property for each child actor that has a different anim
So you have ParentAnim and ChildAnim
may look the same name but point to different assets'
Hmm. Would the first suggestion be costly in performance?
And would I just do that inside my child actor?
It could be depending on how often you ran it
Not sure with your system the best place. The parent or child could work
My data table holds all my weapon stats and info. The only animations I have in there are the "Fire" animation, and "Reload". I think it would get confusing If I add more to the data table because I have lots of characters all using retargeted animations. https://i.gyazo.com/9a82fc3ca1fb123921bf8ec013db4c3b.png
The data table is really long too lol.
thats just a snippet
Ahh right. So you don't want to add a new entry for this specific setup
makes sense
You can try out the asset lookup and see if it works and then test performance. If it sucks, you could just make a mapping of anim names to your anim assets
It's be best if all the anims are in a specific folder structure to make searching easier
Right now I have my animations organized in nice and neat folders so It would only have to read through a few animations
Now I haven't messed with this stuff in a while, do some tests and verify it works in a cooked build if you decide to use it
So you would want to set your package path to /Game/MyFolder/MoreFolders/AnimFolder
But you could also just hand create a map of string:animsequence and do a find. Would be faster but require hand setup at first
Ok thanks. I've never done this kinda thing before so i'm reading about it and testing it out. I'll let you know what happens.
Ok so your first suggestion worked! 😃 I only have to search through 4 animations so It shouldn't be to demanding. But I could add more anims later if I add more weapons. But it works. Now I'm going to try your second suggestion because I want to learn more about that too
Hooray!
Thank you so much I was at a loss. Now I'm good to go.
heh, you could also combine these. Each time you find a match, add it to the map. That way you can always check the map first and save a cycle looking through something you already found
I am within my first year of UE4 usage and my gameplay components work. I use a lot of fire and and am trying to optimize things now. I have this basic fire actor with a collision box and particle emitter, the emitter has 2 components one for fire and one for smoke. It works great up close, but I would like smoke to be visible from more than 10,000 units. Say 100,000 units, over large hills and such. I'm trying to figure out the best way to show smoke high in the air or far away as I attempt to optimize the fire emitter iteself today. Does anyone have thoughts on how to do this? Late game 2500-3000 emitters can be running on the server. Possible paths I can conceive are:
1.) Should I add another emitter within 'P_FireEffect'
2.) Extend the life of smoke in 'P_FireEffect and change the color more
3.) Separate the smoke and fire effects all together
4.) Make something outside of my fire actor and my particle emitter to achieve this effect
I need the generation to be as cheap as possible server side
@sweet kettle I did what you said. At the start of the game I add all my anims into the Map then I can quickly Find the anim I want whenever I want. 😃 Thanks agian I just learned a lot of new usefull stuff.
If actors are on the server, and are not owned by a player, would setting to 'owner no see' reduce processing of the actor on the server but still allow it to be visible to clients?
Dedicated server doesn't render anything do shouldn't affect performance
maybe its just the creating of all those particle effects taking time
but, if it isn't the server, maybe that isn't the case
maybe its just showing up in editor, I can use profiler
Can definitely happen, the push now adays is to use GPU particles and avoid that cost if possible
let me make sure they are GPU particles
Typically I wouldn't spawn particle effects on a server
I didn't know I could set them differently 😄 I am a noob like I said
heh
made my game watching videos and reading epic guides
I would call the Server_SpawnMyEffect then have that call a AllClients_SpawnTheActualParticles
so I fix things as I run into issues
We're all in the boat at one time or another :P. And Multiplayer architecture is anything but simple
my game works
and people have played with me on the server
I just have to improve tick time so it is playable all 20-25 minutes a round
so I am mostly at an optimization stage now without knowing much
about that
and yes being knew to UE4 in general and doing multiplayer has caused some interesting challenges 😄
for me at least
about to test this
For replication improvement, you'll probably want to make sure you aren't replicating the particle system components at all. You want to really limit what you pass back and forth
The particle system is in an actor blueprint
the actor is replicated
I need a collision box to go with the fire and things to happen when it hits objects
better fps with 2000 fires
Hmm, that should be fine. If the actor needs replication already it's fine. Just don't want to spawn any new actors on the server if not needed.
I don't know if this many calls for 3000 fires is usual
Is your problem more to do with frame rate than server lag?
Here is the lifespan of the actor
10-12 seconds in it shuts off the emitter
so I assume those particle effect times are all from the actors in the first 15 seconds of life
it hangs around invisible after, to stop the fire from burning backwards
when it spreads
Are you spawning new actors for each "grid space" to check where the fire should spread?
no, it checks the grid space, then spawns if an impeding object isn't present
roger
this check is run at 8 locations
determined by build locations above
so if it hits a firestop object channel
it doesn't spread
Hmm, honestly your frame rate isn't too terrible. What's the main issue you are seeing?
It gets bad when I try to make my smoke visible from far away
right now it is visible from 150,000 units
but it only goes up 7 seconds and disappears
you can't see it over hills or high in the sky
But I also need it as efficient as possible. Think of little 300x300 fire cells spreading over a 2 square mile map
there can be a lot of fires late game, so every function and ms used is important
Would be good to get a stat unit while that happens. I'm assuming its either the cpu unhappy with how many extra particles there are when they last longer and/or overdraw from large overlapping translucent cards
I need 30 fps so my vehicles are playable
Have you added LODs to your particles?
No, the other problems I was having prevented me from adding that to particles or doing much work other than adjusting the default stuff
I was just trying to get the game components to work and the fire wasn't getting big enough to add that much time
So if you run stat unit and the Game stat turns red, you probably have too many particles on screen. LODs will fix this nicely.
If you run stat unit and the GPU turns red, you are overdrawing too much (rendering through stacked translucent particles). LODs can help this as well, making less particles that are perhaps larger and not overlapping.
If you have a thick smoke, swapping to a masked material at a distance could help, especially if you have the earlyZPass for masked materials enabled in your build
things didn't get red after 2000, just yellow, but all the threads stayed about the same time
I am going to look at what is needed to implement LOD as I haven't really used those in my gamme
I think you just need to focus on the particle effects themselves. If someone plays and has trouble, have them turn on stat unit and take some screenshots
will do
thanks for the advice, I'm going to work on these things now while the misses has the kid out
lol
Has anyone gotten foot IK to actually work properly?
It just seems to separate the capsule from the ground
ok, I have a smoke and fire effect set up
and I used LOD on each
I'm about to see how it works
yay, I can't see either now, lol
oh the old particle that was working isn't now. So I guess something else is going on, not my LOD on these emitters
so if I had 2 particle effect components in the actor BP it doesn't work
ok I'm trying a dif idea
Is there a node I can use for anim montage's where it basically says if X happens between X anim notify and X notify, do this?
I want to import a hierarchy of rigid body meshes from Max/Maya. Should I just link them or skin each mesh to a bone? The goal is to attach the hierarchy of objects to a character (via its parent, to a socket on character). Each mesh will also need capsule collision/limited angular constraints. Any pointers would be really appreciated.
Do first person games typically have separate animations for first person/third person?
@sinful smelt , Hey, sorry for the late reply. What about root motion? I enabled root motion and also set to force root lock. Still having same issues.
How much of a nightmare is it to animate multiple chains controlled by a being? Or chains in general I should say.
I am thinking about adding a character that has 6 chains that it controls with tis will. Am I burning money?
@radiant phoenix yes, since first person often requires a lot of cheating and other solutions to work from the camera angle while 3rd person has to be proper.
@real karma do you mean actual chain chains like metal chains? Or chains of things? Also why are you 'burning money'? I'm sure there is a free way round what you want to do but might be harder.
I've got two horses pulling along a cart on one of my actors, but I'm trying to make it so the horses animations are offset from eachother
any idea how I can offset them so they playback at different points?
playback position I think
is that a node? is it an option?
Im not sure just type it into a bp and a few options will come up, read what they say
also talk to more experienced people. are you using animation asset or anim blueprint?
Okay. On my own end I have a turn based system and on the player/AIs turn to play a corresponding animation asset plays, depending on the move they do. This is fine but between turns they are static statues which I think looks bad so I want to add idle anims which I guess will necessitate anim BPs. Is there a way to use the (quite complicated) logic I already have and just tell my anim BP to play the right animation at the right time from another BP?
Not sure if this has been posted yet, but Advanced Locomotion System V3 is free this month!
https://www.unrealengine.com/marketplace/en-US/slug/advanced-locomotion-system-v1

An advanced bipedal character locomotion system focusing on high quality character animation with responsive movement. (100% BP)
Hey guys, is there a node I can use for anim montage's in the anim blueprint or wherever where it basically says if X happens between X anim notify and X notify, do this?
Can someone please help me? The blueprint isn’t enabling root motion for any of my animations.
For some reason only the roll forward animation enables root motion when I tick the box but the others don’t.
@frosty peak What's that? Advanced locomotion System thing?
For some reason they’re working on preview mode but not in the game itself
@misty dagger Metal chains. I was banking on motion capture and idk how to rig that up for chains and doing it traditionally looks terrifying and paying someone to do it looks like it may be many man hours.
Image a character that lifts itself up with chains and uses them as legs to effectively float. Think invader zim or an immortal from 40k
@fringe oriole On your root motion animations, do you see the red bone animating off the origin?
guess you just gotta make a decision. If it's an amateur project you might learn from trying to do it yourself (btw I would be hopeless too). If you want it good maybe better paying. Pros and cons of both!
I actually fixed it. For some reason the ones that I was checking root motion for were different from the ones in the blueprint
But what is a red bone? I think that might be important someday
Does anyone know a good way to pair animations by poses? Basically I want to model a throwing animation as follows: When the user starts holding down the left mouse a wind up animation starts and at the end it'll hold the final pose. When the user releases the mouse then it'll play a throwing animation. This is easy if the user waited until they reached the final animation pose (AKA a full windup) but I want them to be able to throw early for less distance. This means that if they're halfway through their windup, the throw animation should start from the current pose. I'm experimenting with having the animations be the same, but one is played in reverse hoping that it'll help.
@fringe oriole Hey, sorry for the delay. The red bone shows the difference between the origin and the root bone. If you are animating a root motion clip, and root motion is disabled, you'll see the red bonedraw between root and origin. It's a sign that your root motion is off. When you enable root motion, you'll see the animation snap to in-place and there will be no red bone.
I'm not sure if this is physics or animation so I'll just post here. How can I make my characters hair be dynamic and move instead of being static and going inside me? https://i.gyazo.com/adb0a3dbf69c285fed6cd6f59c95d90b.gif
you might need to look at cloth stuff for that
You have some options. Binding the hair to the spine is the old school cheap way to do it. Not perfect but sometimes is good enough.
Cloth can get dynamic movement but is error prone.
Physics bodies will get you an approximation
Anim Dynamics would be a less error prone method but weirder to implement
depends on what you quality goal is
Which one of those is the planes of hair with alpha channels on them?
Ok so it looks like she already has bones in her hair. https://i.gyazo.com/32f43a4f20d0f91d02b6e721ab8e7ac8.png

I'm not picky on how perfect it is. It's just a Paragon character I'm using as one of my characters.
@sweet kettle What would you do to make it look better? (Easy way lol) you said something about binding it to the spine?
Here you can see how Paragon had it setup: https://i.gyazo.com/5ebe1fb02c831fbba7c2ede0d3b446b9.gif

I think, am not sure, that paragon used AnimDynamics
Are there bones bound to the hair?
oh sorry
just saw above
Anim Dynamics are a bit harder to get working so you might wanna go with physics
I'm guessing there are more tutorials on that
I noticed some other stuff that didn't look quite right for this character so I may just use a different character and come back to her. lol Live to learn another day.
Guys is there a way to animate meshes?
For example, i made some wings, and i want that they just swing (Moving the position, nothing really hard) can it be possible?
Yes but it depends on complexity of animation whether you can do it in ue4 or need external software for animation.
I looked at a few of the paragon characters and they did use cloth sim for the hair. That one didn't have a skeleton in it though, so they may have used skeletal anim, physics, or cloth sim, or even a mixture. Could do the main action with physics and get some nice finer detail with the cloth anim.
Anyone have any good links or resources for advanced character setups in UE4? I have done the basic tutorials but want to get into more of the complex stuff such as leaning and turning the head and upper body when rotating in place. Edit: Just seen you can see some of how they set it up in the Paragon assets as well, so that's one option. Still would love to see somebody explaining it in some more detail.
@misty dagger nothing so huge, i have wings, they just need to rotate a bit every 30 seconds for example
Well are you new to animation? How nice do you want it to look? If it's very basic you could use a simple timeline to change the rotation. Also you could probably use some advanced techniques to make it look nicer in UE4 but in the long run if you want more complex animations you need to use external software then import the animations.
Lol this is creepy
Announce Post: https://forums.unrealengine.com/showthread.php?123585 Wes Bunn and Jess Hider will be join Alexander on this extra-large stream covering the n...
Exporting from sequencer
is it possible to see the states change in the animation preview editor in the animation blueprint like when you're running the game? (the boxes lights up depending on what state it is in) Right now i have to run the game but then obviously AI can do all kind of crazy things, I just want to see what happens transition wise if i would increase the speed or something similar.
Wondering this too... Was hoping to watch the state machine flow while playing the character like it normally works in blueprints but it wasn't doing it
@static falcon actually found it just now. Just set the debug filter to preview instance.. 😄
Anybody whose good with Maya around? Something broke in my rig and while I am now aware of the lovely incremental save feature, I was not before this. Maya crashed while animating and on reload, even loading a scene from way back I am having an issue with weird translations on the joints. Loading animations that were created on the same rig is resulting in unwanted joint translations. etc... The weird part is animation on the control rig is not distorted. Baking it to the control rig the animation looks correct.
asked here and in general please @ mention if you reply, and If you know a better place to ask share that too. Seriously thinking of switching to Modo.
Actually, looking closer with the control rig selected the lower body looks correct but the upper body is not, and with "none" selected in the scene the upper body is right , and the hips and legs are separated.
I did have something similar to this happen on a project and couldn't figure out why, so what I ended up doing was creating a new control rig and matching the animation from control rig a (old one) to control rig b (new one). Would be a pain to do this for lots of animations but it worked
Can't remember if I matched it using the "source" tab in control rig or by creating my own constraints with maintain offset ticked
@fickle yarrow
I'm not sure, the bind pose seems correct. I think there's something influencing the joints somewhere that I can't find. Any animation I load is messed up at this point. Maya LT was a mess and I've been giving Maya a go, but I need a pipeline that just works. I'm spending way too much time just trying to fix things.
Are you sure they weren't wrong when you saved them, but you were on the control rig and didn't realise?
Seems you are implying they broke from a correct saved file, which is unlikely but could happen
Yeah, I was making animations, exporting them and loading them into unreal. They look fine still when loading into unreal.
I changed the skeleteon, unbound, rebound, exported skel and model to ue
then ik riggged, and ahve been animating.
I can load the animations I've made into UE and they are fine on the model I exported but loading them into maya they are all over
Did the problems arise when you changed the skeleton?
Are you using referencing?
I'm not sure. I really don't remember. I saved the rig model to a scene and may have loaded that as a reference. To be honest I am not very experinced with Maya and there is a lot to learn
Well you either have a copy of your rig in each file or you are referencing it from another file
I have a scene I saved after rigging, and one I saved for animating
You would probably know if you were using references, because you have to do it through the reference editor
It's a way to share a rig across files so that you can change the master rig and it will update within all of the scenes
You can confirm by opening a scene and going to File > Reference Editor and seeing if there is anything in the list, but I assume you aren't
ok yeah nothing there
Very hard to say man, there are a million variables, and it may be that you've rigged something incorrectly. I could try taking a look at your file but very hard to guess!
You can usually salvage your work though so don't freak out 😛
yeah, I'm not sure either. The file I kept that was the scene for my model just after skinning and rigging is doing the same thing. I'm going to keep looking. Yeah, I mean worse case I have the model, I have the animations. The rig is not an issue and I saved the definition. I can recreate it all. The namespaces are a little confusing in how the are implemented though.
The big thing that gets me is the not getting work done, I'm a one man shop so a day trying to fix something is a lot of lost work
Thanks for trying to help
Been there man, you learn from experience, I know that's annoying to hear but it's true. In the future you can consider version control like perforce or github so you are backing up your work more safely, or before that you just learn to save lots of copies, I was in the habit of saving versions every 20 or 30 minutes or after anything meaningful.
I have a perforce server setup, and thought I had saves that were redundant. Something in Maya is affecting things and I just don't know enough about how Maya works to figure out what it is.
Well you could consider moving your Maya preferences folder to the desktop and deleting it out of your my documents folder, which will force it to rebuild and reset maya, if you believe Maya is doing something differently
There's really no other way that it would change a saved file that you haven't touched
or there's something in the animations that is only showing up in maya. yeah I'll try that now.
Could also check animation layers, sometimes they can screw with you
Is there a window for that?
I don't have those tabs, I'll have to look for that
Hello does anyone know how to make a character opens kt eyes like it was sleeping
Animate it with good old bones or make a blendshape (morph target)
Hey there, is it at all possible to implement the mannequin unreal rig into another biped that doesn't have a rig?
Hello
Yes. You can take the rig into a 3D software of your choice and skin it onto the mesh
Anyone know if there are any issues using the default makehuman skeleton for general characters? Would it be too complex for Unreal vs say the Game Skeleton.
Also wondering if anyone has taken the default skeleton and removed all the fk bones and all extra bones and managed to get it to work? Would I need to remove painted weights from the bones if I delete them in Blender?
With the recent Update 4.22 there should be a new feature available for skeletal assets to update/bake bone transforms made in the skeleton editor into the reference/bind pose of a rig. But i can't find this new option where it should be according to the release notes. Anyone tried and got it working yet?
"New: You can modify Skeletal Mesh reference pose in the Editor with this change. Use normal bone manipulators to modify and call Update Reference Pose option in the Edit menu in Mesh Editor."
can someone tell me what these bones are for exactly? where should I skin them to my model?
hey Im trying to import an fbx from faceshift that contains a rigged animated face, somehow the mouth movement is broken after import, only head/neck movement seems to work, any ideas?
Hey all I am having an issue with my character sliding around when moving in game, I’m using. A different mesh with the same skeleton and pose when I retargeted his animations and anim bp and blend spaces, I’ve set the character up to use the new retargeted animation bp but just slides instead of walk animation why would this be?
@boreal vine what do you mean sliding? maybe a problem with root motion?
I solved my own problem by the way: if someone has the same problem you just have to tick import morph targets in the import menu
@quartz swallow They are legacy extra bones for helping with guns and IK i believe. They are definitely not necessary
aah thanks for clarifying!
Do you guys separate out your animation BP for AI / players ?
Yes, I have vastly seperate anim BPs for player vs AI
👌🏻
hi all
Is there any way to change the skeleton used in an Animation BP?
I would like to reuse an AnimBP with all of the state machine and anim graph, just with another skeleton.... and reconstruct all is the last option...
What's popping guys, I'm currently working on updating my multiplayer third person character, I'm trying to make it so I can walk sideways and backwards etc. I have followed a basic tutorial from a couple of years ago but stuff doesn't seem to add up. I'll be adding some screenshots and a recording of what's wrong. Thanks for helping in advance!
To fix it- make sure this is unchecked!
@visual eagle Trying to think of a way to do this... You could try deleting the skeleton and choose replace references, which may let you point it to a new skeleton, but it would happen for the original anim bp too. Maybe could migrate to a temporary project to get around this.... not sure just guessing here.
I tried it out... it's complicated since Animation BP requires lots of things that are based around animation assets which are unique to a skeleton. So if you have different animations and bone names you'll get into trouble. But if you don't maybe you can by duplicating the skeleton, right click on Anim Bp and do Retarget Anim BP, Duplicate Anim BP and Retarget, then you get a new anim bp and skeleton, then can perhaps reimport the skeleton with a new source and see if UE4 can resolve it.
Hello guys! Please vote for the Control Rig bug – it's not working in a stand-alone mode :-(
https://issues.unrealengine.com/issue/UE-72326
though I'm not sure if the votes are mean anything 😄
Affected all version (4.21+)
Is anyone free for 5 mins to take a look through teamviewer st my project spent days trying to figure out why my player slides across the floor and doesn’t animate when he walks runs 😦
@static falcon Thank you for the advice!! I will follow your suggestions and see if I can solve it 😃
Hello, I have a question I create a state machine, I have a different attack of my character and I want to choose one. I think I could use a Conduit but I don't know how to use it.
I search an expert of integration animation.
@robust drum Apparently there's a random sequence player you can use in the Anim BP, or you could generate a random integer in your BP and maybe cast it to the Anim BP
like so
@static falcon Yes i found random sequence player but with that we don't have the end of animation for exit the state. So i can try your solution thanks ! but what would you put in to your conduit node ?
Hi guys... does 3d's max's rigging and skinning controllers like dummies and circles and dots and splines are supported in UE4 for importing a character with animation? or do i have to use bones and morphs only?
Bones & Morphs
shame
Yeah, even just getting a curve/spline from another program into UE4 is no easy feat
but can i make an animation controllers in UE itself then?
It's a brand new feature, released last week, so there's very little documentation, but yes now you can if you're willing to plow through it
Normal workflow is animate by whatever means, export baked skeleton as an fbx
for example if i want to animate sonic hedgehog mouth it is very complicated thing
because his mouth is on left cheek can be shown on a right cheek and with morph all the topology will squeeze or stretch too much if i will do that
but with controllers i could mirror it easily
Do you mean you'd mirror his entire head?
I'd say.... make one skeletal rig, make the mouth a separate mesh and then you can flip that mesh when you want to
no mirror the moth part only
but when i flip mesh will bones flip too?
and does flip count as animation key?
in 3ds max flip or a mirroring does not count as an animation key... so the whole animation will sux
I'd need to do some testing to make sure you don't get normal issues when flipping. Maybe somebody else could answer that. You just have to be clever about how you get that animation data into UE4. What I do sometimes is make a dummy bone, for example "DummyJntMouthFlip" and then animate it's position X to be 0 or 1 , 0 is not flipped, and 1 is flipped, then in UE4 In blueprint I connect that bone's X position to something
Just a workaround to get skeleton keyframes to control something in UE4
In Max you can rig that joint to control the flipping so that you can preview how it should look, but obviously the flipping will need to be set up in its own way in Unreal
and also would like to attach mouth flipping to the camera angle
but that's a coding part way beyond my understanding
Don't know how to do that off the top of my head but it doesn't sound too hard
If you want the flipping to be dynamic (based on camera) then keyframing it isn't the way to go
Is it a cinematic or game?
well i'd say both
game too
i feel like what works for game will 100% work for cinamatic
Okay so you need to set it up to have a switch that controls which side the mouth is on, then have that set by the camera's position
so i put mouth bones under mouth hierarchy but not under head or neck right?
because i mirror mesh but not bones.... or do i need to put mouth under bone hierarchy to mirror bones so mouth will be mirrored too?
I think it may be a bit out of my depth... but my GUESS is that you would attach the mouth bone to the head like normal, but just have two separate geos bound to the same skeleton. I assume somehow in your blueprint you can select the meshes individually, so that you can flip just the mouth and not the body.
ok i posted the model in WIP channel...
and that still will affect on a mouth if bones are in body right?
ok
based on your picture, i will flip the mouth mesh but as mouth bone is attached to a body, how it will be flipped as well?
because i assume if i will flip the mouth and bones wont flip, the result wull be like:
I don't think that would be a problem
because you're flipping the geo after it gets the skeletal animation
You just animate it on one side then you can assume it will look the same when flipped
ah ok so bones will move like for left cheek mouth but that will be flipped and react like bones are on a right cheek as well?
Yeah that's my hope!
I'd do some tests, make a really simple rig like a sphere as the head and a couple bones, and a cube as the mouth, and then do a little test animation with blendshapes and a jaw or however you plan to animate his face, something like that
better to figure this out before you get too far into the rigging
yeah that's what im trying to do by asking questions first 😄
but also would be better to get the person in a team who does the job to not make me worried so much but in other way i have to be able to do all that too if i want a job in the industry...
so i start with a fan game first
👍 Well let's see if anybody else has any more wisdom than me, I'm still learning too
is it possible to use animations from different skeletons? or a way to change animations to use a different skeleton?
it is possible but you'll have to find an autoskinnning scripts and i think they costs money like that "KinematicLAB" one https://www.kinematiclab.com/
or you have to do it by hand applying new bone influences and weights
but im more into how to apply same skeleton to different characters...
well i was hoping to use the animations from a bunch of different ue4 projects as a placeholder, like action rpg and default third person animations
but the animations both use different skeletons
Is this correct about Anim Notify States? It states in the doc you are guaranteed to get the tick between the beginning and end notify, and you are guaranteed to get the end notify. So can I rely on that even if the animation is interrupted and not played in full I will still get the end notify event from an Anim Notify State?
@peak thunder look up retargeting animations. UE4 has some solutions but it’s not the best. Maya and Motionbuilder are more robust
My IK bones are imported with a non-zero rotation for some reason. To fix this I've just been setting their rotation to 0 with a transform node for each on the anim graph but that's no longer working. Is there a way I can manually set the rotation of a bone to 0 outside of the anim graph? It seems like that should be a feature
@static falcon appreciate it.
Alternatively, what's the proper way to import bone rotations from blender? Every solution I find online seems to assume that my rig has certain orientations and when I apply them to my model it freaks out
Like, should every bone read 0,0,0 on import? It seems like my IK bones are supposed to be that way, which is why I set them there in order to make anything work. Does that imply that all my bones should be zeroed out?
Is the joint’s rotation zeroed on the bind pose? If not, try setting Use Toa as reference on the mesh import settings
hmm, that imports him as crouching by default. I assume that's because alphabetically my crouch animations are first and it's taking frame 0 of the first alphabetical anim?
t0a doesn't work even if I wipe the animations so that it imports in t-pose. thanks for the advice though.
I'm running into a heck-ton of problems when weighting the twist bones for the arms, (Mostly because my budget only permits blender.) Are they necessary? Will animations look good without them? If properly weighted, can the regular upper and lower arm bones be used as twist bones?
no, maybe, not really
Hi guys, first time animating first person so not sure how to explain this but my claymore animation, when in "stab" mode makes the sword seem small. Not sure how to fix it. Here's a gif with the scale of sword shown. It's pretty big, but doesn't look like it when stabbing. Any advice would be appreciated
And another question. In Maya, the camera has same aspect ratio/FOV as the UE4 camera. Everything as far as I can tell is matched and placed correctly. But, the point of the sword doesn't go to the center of the screen in UE$, but it does in maya. Anyone know what could be the cause?
please @ me if anyone has some insight thank you
Does anyone know how to arrange blend shapes position ? They seem to import randomly
Hey guys, anyone around here who could help me add epic skeleton to a human mesh? either in Maya or blender?
@radiant phoenix This is just how the FOV is representing your scene. You could try a smaller FOV but this is just what happens with cameras. Moving the sword more into the frame would reduce FOV scaling
@radiant phoenix You will need to figure out the location the sword should point at in world space and inversely position the sword to match it. Project your screen-center to some distance in the world, figure out the transform for the sword and use IK to place the hand to a relative position to make sure the sword ends up there.
This might be dumb question, but how do you access the finger bones in the animation editor? I'm attempting to modify a paragon animation for my own game and I want to adjust the fingers so it looks like they're gripping something. Whenever I try to select the fingers it either doesn't register or selects the hand. The bones are listed in the animation tree, and I re-rigged the animation to the default mannequin so Its uses that bone structure
Nevermind, I'm stupid. I just needed to switch to the skeleton tree tab
@sweet kettle thank you!
Hello folks! I've been trying to import a mesh with an animation and I get weird form of shading on the mesh (Or at least I think it's shading). Does anyone know what did wrong?
Here's a static version of the mesh with no issues on the shading.
Looks like the normals got messed up when you reexported or imported
Ah, so it's the smoothing?
looks like it
on import settings, tell it to use the mesh's normals if you think they are correct. Sometimes it chooses to generate its own
Alright then, thanks mate.
Is tethering gameplay to animation notifies and montage ends problematic?
Hi, does anyone know how to add a joint using ARTv1? There's documentation for adding joint, however I can't find the panel to do it.
https://docs.unrealengine.com/en-us/Engine/Content/Tools/MayaRiggingTool/RigTool_Rigging
In 4.20 a state machine keeps reentering a previously blend out state. The sequence is not looped, and the transition finished completely. Yet, as soon as the STM becomes active again it will repeat this last state before going into the right state. Anybody had similar issues before? It is not consistent error but just happens after a while and it will keep doing it after that.
i tried to import an animation from mixamo
the animation for some reason is not working as expected
the character is turned by 90 degrees
and the center is not correct
ok, i fixed the rotation problem
but the feets aren't still
Well, you need to be a bit more specific on what the problem actually is. But just as a guess open your animation in Unreal and check "EnableRootMotion".
doens't work
Anyone know why anim trails might stop working during gameplay?
hey guys, I have a gun with a socket for the muzzle. I trial and error rotated the muzzle until it would shoot an object with projectile motion straight (afaik), and now im trying to add muzzle flash but its shooting 90° from the muzzle socket
before, it was always shooting towards north, but I used socket rotation to make it turn with the gun, but now its basically glued in the same wrong direction no matter where i aim
idk what to change here. The muzzle socket is aligned to make the 'bullets' shoot straight, but the particle effect for muzzle flash isnt aiming straight, so i cant rotate the muzzle socket without messing one of them up
and i dont see a way to rotate the particle effect itself
you can rotate the particle effect
@devout pagoda are you using cascade or niagara?
i dont know
sorry 😦
idk what those mean, guessing some kind of program for editing? im still in unreal
go into your particle emitter
will look someting like this but black on left not pink ( I changed my default colour)
by the way this is a 'graphics' question or a 'blueprint' question. You will get more help if you ask there.
i see, ty, and sorry 😃
did you open the particle system?
you see in my picture there is a yellow rectangle saying 'required', if you click it will open some basic settings, the rotation is one of them
Is it possible to transition out of a state while its transitioning from a previous one? Say I am in State A and are transitioning to State B, then State C becomes active, then I want the A to B to cancel and go straight to C. Can this be done without having to drag another transition from A to C?
I don't think so, this is why state machines get messy when you end up with a lot of states.
You could put StateA and StateB in a substate, and then use the hierarchy.
I have a question about the new ControlRig stuff. How do you add 'Rig Unit' objects. When I click on "Add Rig Unit" I just get an empty search bar.
Does anyone know if Paragon character animations work with default UE mannequin? Might just ask before downloading multiple gigs to find out
Yes, it seems to work, just tested it
is there a way to link a camera to a socket but not have it sway from the animations?
Hmm you'd have to somehow make it only use location and not rotation
Like... Take over the rotation somehow. Maybe use a springarm and look for a setting about that
Springarms have lots of cool camera tools
Oh yeah!! You can def do it with a spring arm... Uncheck inherit pitch and roll and yaw on its settings @sly carbon
You need to make the spring arm a child of the socket and the camera a child of the arm
Basically every camera should always be under a spring arm from my experience. They are just too useful to not .
@peak vine sadly that didnt work
Really :o weird!!! That makes no sense
it could be the custom controller i am using maybe
@sly carbon If you use a single socket transform as the basis for your camera then it will sway and move with the socket (obviously, bear with me).
You have two options:
just put the camera near the socket one time and hope it stays close enough to proper during animation.
IK your skeleton to always be relative to the Camera placement so you are aligning the socket to the camera instead.
If this is simulating the eyes of a character and you want a body below the first person camera then you need the animation to never move away from the camera. Either you have to make all animation not move the head out of the camera location or you must IK the body so the head is forced to stay in the camera area
was trying to follow this tutorial https://www.youtube.com/watch?v=0mgm16ki8zM&list=PLL0cLF8gjBprG6487lxqSq-aEo6ZXLDLg&index=2 however with the animations i am using the head sways more and is at a tilt which gets really annoying

In today's episode we take a look at how we can setup the true first person camera by converting the third person camera to first person, giving us a realist...
It won't remove sway completely but if you attach your camera to a spring arm that is attach to the socket you can enable the spring arm's Location and Rotation Lag
At the right small values this will add some interpolation and keep it from being as abrupt
And make sure your camera is using your control rotation and it will fix the tilt issue
is there a way to not attach the camera to the bone and just not render the head?
or something of the like so you done get the clipping
You can always just place the camera whereever you want or move it to the bone location at begin play but don't attach it
for not showing the head you have some options but depends on the model
You could shrink the bones to 0 for head/neck, you could use a vertex shader to collapse the verts, you could remove the geometry in Blender/Max/Mara
Maya...
Whats the workflow to create an animation without maya or 3ds max?
@oblique yoke A Bipedal character animation? Like a human?
@oblique yoke You need to do that in some sort of animation software
Blender is free
Can I do it inside UE4
Not in any way that would be considered feasible
While you CAN make a character rig and pose characters it is not recommended
Im pretty familiar with blender
Oh i didnt mean like an exact handshake
Basically I want to create an animation for the UE4 Mannequin Skeleton and have it play inside UE4 with my characters
... what is an in-exact handshake?
Well I meant more like any animation between two people
So would I have to animate two skeletons in a scene or animate one skeleton and program them to interact with each other in ue4
Righto, but the link was just to some animations of hand shakes in case you didn't want to do a full animation from scratch.
Ohhhh okay, thanks for the link
wooord
i made some walk/run animations and when I put them in a 1d blendspace the feet animate/deform through the floor during blended states instead of staying flat like in each individual animation, any fix?
it's pretty slight but I took a lot of care to make sure the soles of the feet stayed flat against the ground, it looks awful pushing through as they walk
to clarify, it's not the collision capsule, feet are in proper place during idle animation and even during walk/run when they are being played without a blend
could an ik foot trace override just the z axis foot locations of a blend space animation?
@sweet kettle Creating decent animations was actually pretty easy
I'm a little confused as to how 'tracks' work in Montages
Where is the Save Pose in the retarget manager? It's not where it is in the tutorial and I can't find it
I'm having problems with morph targets creating noticeable seams .... could anyone help ?
So in general FBX don't keep normals when rigged ?
Hi guys. I'm quite new to Unreal and I'm currently trying to get a character I've created with Character Creator 3 into Unreal by retargeting the default mannequin. I followed the tutorial on how to setup the character that's posted on the Reallusion Youtube channel, but I'm having some issues with certain body parts.
As you can see in the image the feet and the right hand has issues. When I rotate the bones in the character view they deform alright. What can I do to fix issues like these?
Ive got an AnimBP (and C++) question on some behavior that seems to have changed with 4.20 -> 4.21. Anybody in here comfortable in that space?
hey all, how can I get the particles to follow the blendshape mesh?

I'm not sure if AnimNotify on Montages are a good way of tracking player behaviour - especially since some of those AnimNotify relate to the state of a player's input.
Is there another way to approach how it works? in my use case a player can click and hold to chamber their weapon to ready an attack. Upon release they play the attack anim via a montage.
When the animation finishes the attack, an animNotify fires indicating the attack is finished. However if I interrupt this behaviour before it finishes the animation, that event never fires.
Whatever interupts them should also reset whichever states you are waiting for I would think
Alternatively you could play the montage then add a timer based on the montage length and then clean everything up when the timer completes if it did not get a call from the notify
But that doesn't seem very clean. Anything interrupting an attack should probably call something on the target to note this.
@sweet kettle yeah that's what I've got at the moment. Someone way more experienced than me suggested to not rely on animations but to instead coordinate the time itself.
I think it's gotta come more upstream - either the input from the character or some kind of event that triggers the change in montage, and not the montage itself.
Typically I would use the anim notifies to trigger timing based things like when a blade would make an impact. Just knowing the anim is done can just be a timer that samples the anim length when it starts
Yeah I was thinking that might be the best flow
Can you get the timing of a montage section?
I've only ever come across an animation in full.
ah float GetSectionLength(int32 SectionIndex) const;
I'm retargeting animations to a stripped-down version of the UE4 mannequin skeleton. The arms haven't come out quite right: https://drive.google.com/file/d/1fUKNkaKtEP4aaOYzra3AQRjnnjlVtNRJ/view?usp=drivesdk

Google Drive
One is detaching at the shoulder, and the other- the forearm is extending forward over the hand
any idea on a common issue or mistake which might cause this?
something i selected wrong in import/export?
I'm making an advanced rig in blender, because of pivot points, toggle-able FK/IK, etc, I have used constrains in multiple places where, classically, I'd use parents. Will this cause me any problems in UE4?
1/3 bones in the rig have weight values on average, the others are all control bones.
just make sure every bone that has weight is in the root hierarchy, and that everything else has Deform checked off, and when exporting choose Only Deform Bones
exception for like a gun or socket bone, which doesnt deform, but still must be exported
Thanks, I have one more question, how do I need to set up my IK bones for hands and feet in UE4?
I know that blender's stuff Won't transfer over, I'm just unsure about the percise placement of the bones
Do bones that aren't skinned to anything incur a performance cost?
Say I have a biped and didn't skin any geo to it's finger bones, do those bones now cost less to animate?
is it possible to detach a state arrow in the animation blueprint and keep the conditions while dragging it onto another node?
or do you have to copy paste all of them and re-create them from scratch?
@sinful smelt interested in feedback?
@floral sky yes definitely less performance cost. Not sure how exactly it's measured but it's just an empty transform if it has no weighting
@tacit citrus Omg yes
@static falcon Sure i do 😃 It was done quickly so its far from perfect but i am interested by feedbacks to know what can i improve in the future
How would you play an animation for a character at a certain location
@sinful smelt First off, it looks really cool, good work! My suggestion is to have more of a push off the foot. He kind of just shoots off the foot without bending at the knee. I think he needs to squat down a little on that knee and then jump off of it
I'd act it out and video yourself if you can
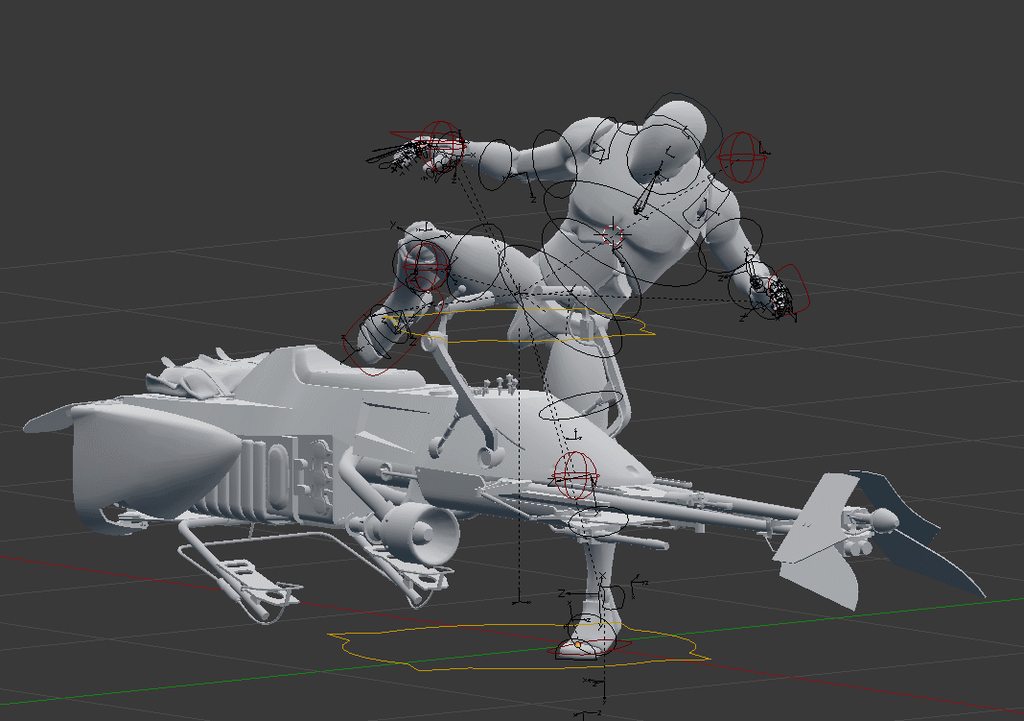
I imagine if I were getting on that bike I'd probably grab the farthest handle first too to stabilise myself as I jumped too
@static falcon 👍
Yeah correct i sot about the left hand grab 1st then do the move and i forgot to do it later ^^
About the little flex, yeah nice notice, left leg must flex a bit just before he gets on the SpeederBike
you'd really need to give a good push off that leg to lift your entire body basically
@oblique yoke elaborate?
@static falcon I want to play an animation where one person is shaking the others hand
If it's a game I'm guessing you'd need a camera cut or an animation that steps him into the correct location to play the animation on both characters
Yeah
That's a complicated one so I may not be of much help
I was thinking to program the animation with the base model / using the animation package but wondered how hard it was to change out the mesh of it to something different? Would i need to start from scratch?
like going from basic unreal mesh guy to swat / any other seems to break everything?
does anyone know how to decrease the transition time between animations in the animation graph? i found something called transition rules and blendsettings duration, but changing that seems to have no effect
@oblique yoke Many games do a camera cut and in that instant move the character where they need to be. Pretty much any lined up take down in a game does this to some extent.
Some games just dlie the character to the correct position before/during the anim, like The Witcher, etc. (Though the witcher also does the camera cut trick with a fast zoom in).
@peak thunder Are you specifically talking about between AnimStates in a state machine?
@oblique yoke Ergh, by "dlie" i meant slide.... i don't know what happened
@sweet kettle yeah, i'm going from idle/walk to a sort of teleport/dodge animation which only lasts a fraction of a second, longer than then blend to and from the two animation states
You may want to use a slot animation for that if its not really state related. Otherwise if you state machine expands it could be hard to manage for small one off anims
@sweet kettle Ahh I see, it should be pretty easy to get it working
Do you know if there is a way to "reimport" a retargeted animation ?
When I re-upload the mesh whose skeleton is the target of my retargeting process, it breaks the retargeted animations and I'm forced to manually retarget all my animations once again.
It could be cool is I could tell all my retargeted animations "Retarget yourself once again to this skeleton". If that make sense.
Hello everyone I'm wondering if there's anyone that can help me out with weight painting I have a rig that I have been working on for 4 weeks and cant get the weight painting right.
Hey guys quick question for animation blueprint, will I need an arrow from "Landing" to "GroundJump" if I want to be able to transition from landing animation to jumps, or will unreal automatically traverse through the states until there is no allowable transition, going "ok we are going from landing to idle, but the player pressed a jump button so we are actually skipping the idle and going to jump"
i have a wierd issue with retargeting moving my twist bones around. I've written up a lot about it with pretty pictures to look at too. Maybe someone can assist? https://www.reddit.com/r/unrealengine/comments/bboh8j/animation_retargeting_plus_rigs_and_skeletons/

reddit
5 votes and 1 comment so far on Reddit
I am trying to minimize the movement of a certain bone in the animation blueprint. I just want to multiply it by 0.2 or so. But how can I get the current rotation of the bone which I then multiply?
I think some of the wierd stuff in my game is caused by animation, anyone want to help me fix it?

@sinful smelt that animation looks weird. Shouldnt the character touch one of the handles first before trying to sit on it?
@static falcon "player" is the player character, that isn't the problem, but the anim-graph of the blueprint doesn't want to have the player mesh as target.
What i wanna accomplish is that the left arm is swing less while running without editing the animation itself
@fresh swift I think you can do it by blending two anim poses with an alpha to the same result. Might need to use slots too, still figuring out how those work
@small spoke have you tryed to remap all animation bones to skeleton exept root and pelvis ?
@dusk dove yes he should put a hand on the ride 1st, for the moment he ride it like a gandam style 😂 Ill correct it when i have time
@sinful smelt hi i seen ur animation where the guy sits on a hoverbike... all these circle controllers you made in UE4 or can i import my autodesk 3ds max rig with custom controllers into UE4 for a gameplay animation?
@shrewd monolith as far as i know it can export only, the rig controls are from the UE4 Garcia Tools Plugin
you can import it into 3DS Max doh
can i know more?
i mean.... i am planning to do all the animation and rig in 3ds max because i have no copy of UE4 yet. so it's important for me to make it readable for UE4 later
i got ur pm ty
The mesh isn’t skinned to the rig
I’m guessing that’s rig was made in maya yes? https://m.youtube.com/watch?v=Fcl1fs7Bn_M

Hey guys this is the second video following the easy rigging tutorial. This video focuses on the weight painting of the character. --------------------------...

This is a tutorial showing you the workflow I use to skin characters in Blender. Hope you guys find it useful.
How do you make an npc play an animation then go back to idle
@vague furnace I use this mannequin blend file to make animations and rig ue4 ready characters - https://wiki.unrealengine.com/Character_from_Blender_to_UE4
@oblique yoke https://www.youtube.com/watch?v=hRO82u1phyw&list=PLfQ3pODBwOcaV1TdnqNWLTJ4wiUzEvXis watch these, should all be in there

In this series of videos, Wes Bunn will walk you through the steps to create a third person game. (00:05) - Intro and Play in UE4 (02:17) - Importing FBX ass...
I was trying to do it without the creating a new animation state but I ended up doing it
Well I need a big list of 20 animations that need to be selected in a widget, unfortunately I cant use an animation state for that
All i need is a node that switches a characters skeleton mesh "mode" to use his animation blueprint
@sinful smelt I just gave it a try, i think this is what you mean:? https://i.imgur.com/gzWoF1j.png It fixed the left arm, but made the right one even more broken than before. Not sure if i did the correct thing, and I really have no understanding of what i've done here. Setting the right forearm twist bone back to animation makes things work. https://i.imgur.com/btklNrS.png
This is a somewhat tedious process to fix things, can you tell more about whats going on here?
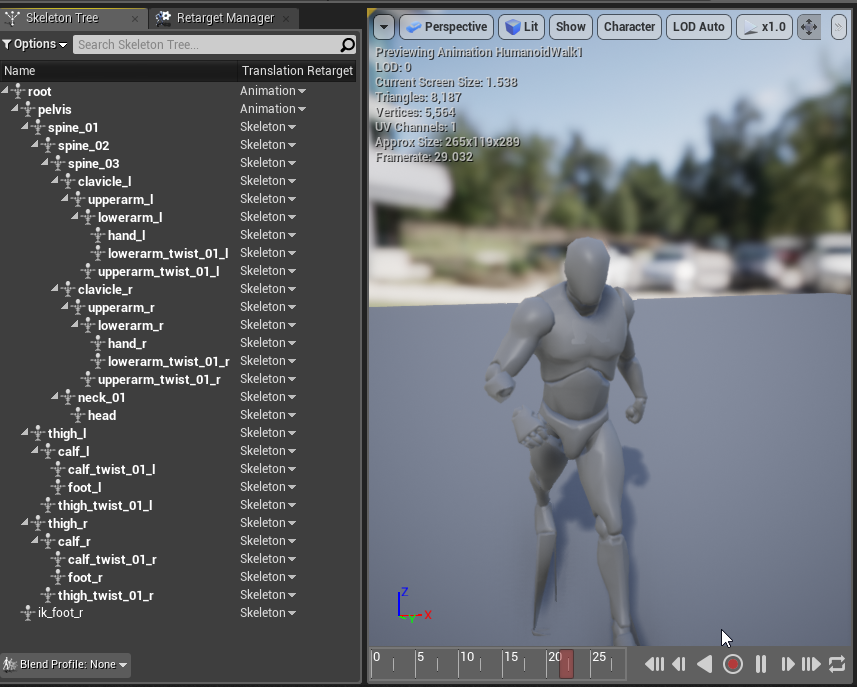
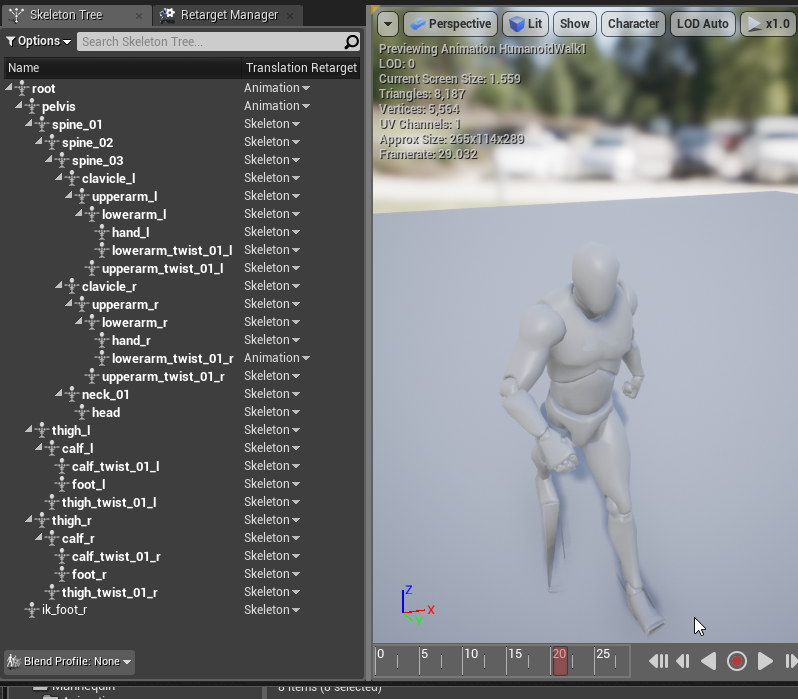
anyone know how to attach a camera to a socket without it following the animation movements?
I know for meshes and emitters if you spawn attached you can keep world transform maybe for cameras too
Does anyone know why Epic doesn't think it's worthwhile to have dual quaternion skinning in the engine?
Can animation blueprints be subclassed?
I've imported a replacement mesh, and assigned it on import to a skeleton.. it works (plays animations) but if I click the "skeleton" tab of the mesh it doesn't do anything, it doesn't take me to the linked skeleton. Also, whilst the animBP does work, the virtual bones I added to the underlying skeleton aren't being "found". It seems like it's linked enough to know where the bones are but isn't actually referencing the skeleton asset.. any ideas? is this a bug? i'm in 4.21
nevermind, restarting the editor fixed it
@small spoke its look like lot of bones are missing especialy the IK ones
This is the right way
yes I deleted them, this is intentional. It's a stripped down skeleton with many bones removed
I wrote up more explanation on the thread: https://www.reddit.com/r/unrealengine/comments/bboh8j/animation_retargeting_plus_rigs_and_skeletons/
reddit
5 votes and 1 comment so far on Reddit
The aim here is to make a stripped down version of the mannequin skeleton, removing bones that arent needed
OIC, well its better to be compilant and preserve the default skeleton, it also help for futur compatibilities
well that's the point of retargeting, i'm trying to retain compatibility while removing bones
and its almost working!
ive only removed bones from the end of chains, mostly ik and fingers
existing hierarchies arent disrupted
anyways @sinful smelt could you explain the bone remapping thing you mentioned? I did it and it worked, but kind of oddly. What exactly is it doing. Is that the recommended way to fix it, or is it covering up some mistake ive made elsewhere?
@small spoke My last recommendation to be verified is to include the IK bones, then if you want more information's as a consultation or even course it will be not free, if interested you can PM me but i'm sure you are on the good way and you can handle this.
I understand, thank you for the advice so far
How do I check if a skeletal mesh has an anim instance on it?
Hello, I am attempting to use my own humanoid characters in UE. I have animations and anim BP's setup for 1 character and I want to use them among several different characters WITHOUT DUPLICATING ALL THE ANIMATION FILES. Everything I have seen retargets the animations to my new skeletons but it retargets AND DUPLICATES which makes alot of extra files. Can I just pass the animation data through a rig that relates to my new character and skeleton?
the unreal documentation states: "The benefit of using animation retargeting is increasing the number of unique characters without having to create an entirely new set of matching animations which could seriously cut down on your animation memory budget."
Is copying all the files the best way to do this? It seems like you should be able to translate the animation through the original skeleton to rig that translates it to your characters skeleton and thus be able to use the same animations with different characters, all without making hundreds of extra files. Is this correct?
Is it possible to prevent an additive animation to affect certain joints ?
maybe blend bone by channel ?
It sounds right but I cannot make it work ...
My additive animation has still feet https://i.imgur.com/JJ5UbqN.gifv but in game they wobble a lot https://i.imgur.com/yTlmClQ.gifv ... any ideas ?
@simple star
Choose the start bone on that
@silver stone Import the second skeletal mesh, and select the existing skeleton that has all the animations. Then they will both reference the same skeleton and anims. They need to have the exact same (mostly) heirarchy.
@sly carbon Can you add the socket to the root joint? The root joint shouldn't move in your character's anims
@static falcon yes but using the skeleton attached to animations cause my new imported mesh to distort, pulls the shoulders back, looks unnatural etc. I feel like I need to use the bones of the mesh as it’s modeled, when I bring this in (mesh and skeleton) character looks good, but can’t animate unless I retarget and duplicate. Duplication is what I am trying to avoid.
Also thank you for helping me with this
Okay, so your characters are differently shaped I'm assuming, which is why the animations are distorting the new character
So you're trying to have one animation asset for a character that is shaped differently than another character?
@static falcon Let’s take the default UE mannequin as an example, let’s say I am trying to retarget my character to the UE skeleton so I can share the UE mannequin animation set. My character is human and very similar to the UE mannequin, she is a little smaller and shoulders aren’t as broad but she’s close. In Blender I have created her skeleton to match the UE mannequin skeleton bone for bone (4 spine bones etc.).
I import her and her skeleton I made, this looks good but I can’t share animations.
@silver stone As far as I know, the UE4 retargeting tools do not offer a workaround for this problem. I tried to do this before as well. Unless somebody knows otherwise, it seems as though retargeting just puts the same transforms on a new skeleton, so it won't account for the difference in shape. The new control rig tools in UE4 might be able to create a fix for this, but they're so new you'd have to do a lot of problem solving. Alternately, you could TRY this but I haven't tested it... In your 3D package import Skeleton A (original) and move the bones to the position & rotation of Skeleton B. Export a 5 frame (not important how long) animation of this new position. Now Set that animation clip's mode to Additive. In theory, that should add an offset that moves Skeleton A's bones to the position of skeleton B, then you can add this animation to your other animations in the anim BP and they should in theory be corrected. Then you'd want a switch that toggles whether that corrective pose is enabled or not for the two skeletons. The new control rig system is supposed to be lighter weight for these sort of corrections though.
https://youtu.be/TYSdxW2WHcI?t=1037 - this video towards the end shows this kind of thing in action
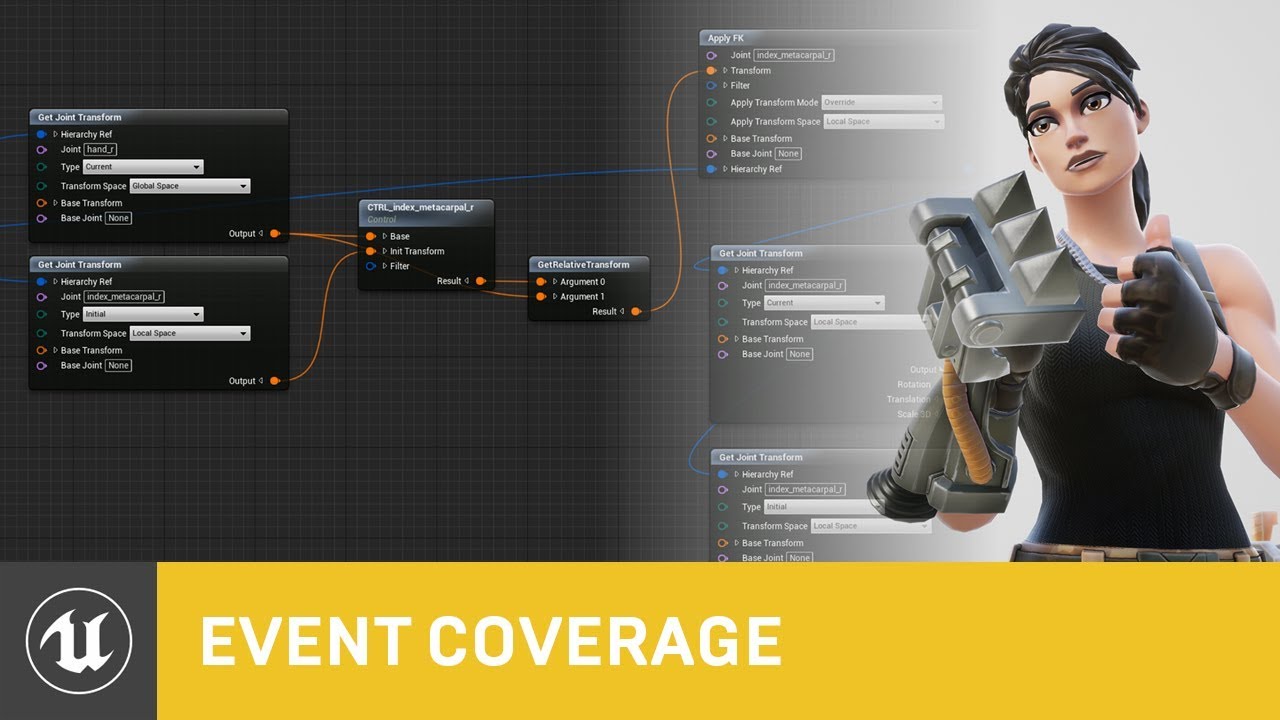
Control Rig is a highly flexible tool based on Blueprint that can be used to drive animation inside UE4. In this Unreal Engine Learning Theater session by Ep...
@static falcon isn’t that what retarget ting does though? Make it so that a different skeleton can use the same animations?
Oh okay, did not know that. I guess I primarily used it the other way, for different skeletons or to re-create animations for a new skeleton!
Guessing you followed the steps described on that?
Looks like this method you don't use that retargeting menu at all, you just change settings on the bones themselves,
Will test it out when I have time!
Is there an easy way to hide parent bones but keep the child visible at runtime? Like if I wanted to hide the main body/spine but keep the head visible.
Bones are never visible
yes I'm referring to the mesh thats skinned to bones.
as in hide the bone, the weighted mesh gets hidden
What are you trying to do? animate visibility with bones?
I want to hide the body mesh but keep the head mesh visible
at runtime
I know you can do this through materials and through hiding the bone
but if you hide a bone it effects all the child bones
which is why i asked if anyone knows an easier way to hide a parent bone but keep the child visible
I don't think hiding bones would work or is the correct way to hide parts of geometry
what do you mean it doesn't work. there's literally a node to hide bones (it just scales the bone to 0, which is why it's a parent/child issue i guess)
Okay well that's where you're confusing me... scaling something to 0 and hiding them aren't really the same thing, that's just a strange workaround
I see what you mean now
Hide Bone by Name
it mentions Hide by Index, instead of scale and I see this function in c++ but I don't know if exposing it to blueprint will help
Unreal Engine Forums
For gameplay programmers writing C++ code.
thanks mate, yeah i'll screw around with it some more and then move on to try exposing that and the other c++ function
GL!
@static falcon isn’t that how retarget ting is supposed to work? Or do I have the wrong concept of what it does?
most people talk about Retargeting as to use completely different skeletons and retarget the desired animations/blueprints onto the different skeleton.
as far as i know this actually duplicates/copies and then transforms the old animations to a new different skeleton
i don't know why epic calls it retargeting when doing this using the same skeleton
Yeah it’s quite confusing... I guess in the case of share skeletons the retargeting part is just in reading the data slightly differently so that it doesn’t distort it, but they’re two very different techniques using basically the same name which threw me off
As gallonmate said, outside of UE4 retargeting means transferring animation from one skeleton to another
@static falcon it still causes the issue of clipping
Hey guys, im trying to implement a simple "look at" function for my charectors in game. Im doing it through animation blueprint and transform modify head bone using the add to existing and world space options. I can get it the head to follow perfectly in the Z direction, ie side ways. But when I try to drive pitch values, they seem to be turning the heads in one direction only. which means the head turns sideways some times and looks downwards in stead of up if the ball is the negative Y direction from the character. Im probably doing a really poor job of describing my problem. Has any on else had similar experience?
How are you calculating the rotation value?
Getting the look at rotation between head bone and ball, then getting the delta rotation between that value and the current rotation value of the head bone.
@sweet kettle is there a better/proper way to do this?
So maybe gettingteh cameras normal direction and get yaw and pitch from "vector to yaw and pitch" aslo set some bone constraints @graceful wharf
Anybody have a good learning resource for advanced animation blueprint techniques?
@static falcon not a tutorial but a good example to learn from, on marketplace look in free the month section for 'advanced locomotion system'
Thanks man. I had a look at it, but it was REALLY advanced for me
guess I could slowly dissect it
can someone please tell me why my animation is so weird in unreal engine, when in blender everything goes smooth?
i imported the model as a .fbx.
i would upload a picture or video, that's view-able right in the chat.


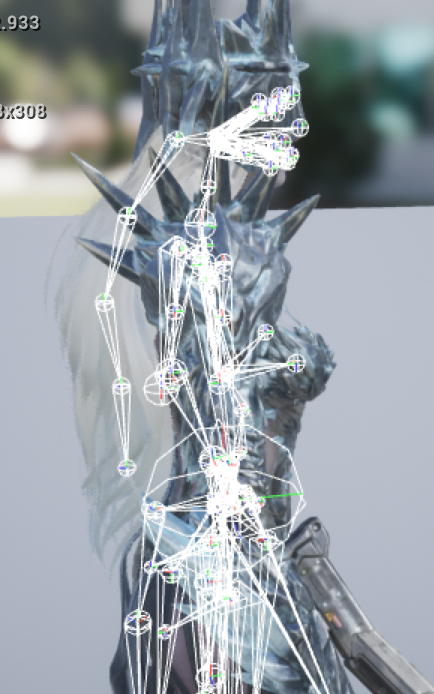
is there a common way to handle bones which are only sometimes attached to other bones in a skeleton? For example, a held melee weapon, which might be thrown or stabbed into something as part of an animation (then picked up before it ends)
most of the time such a thing would be attached to the hand
is this something i should handle at authortime with a completely detached bone, and just make it follow the hand while making my animations except for those exception cases?
Maybe you can attach the bones as a skeletal mesh to a socket at runtime but idk if that works
Hey, The paragon character Morigesh has a Post Process Animation BP that comes with it for physics animation on parts of the char like the pouch and doll and bunch of other stuff, I have enabled it and in the preview window for all the animations it shows it working perfectly on everything, however when loading into the game only half of them work and the doll for eg doesn't get the Post Process applied like the preview, does anybody know how to fix this ? thanks
how do you change bone physics types to kinematic
why is it when i finish marking keyframes with sequencer, and i close sequencer, my meshes don't return to their starting location? they stay wherever i moved them for the sequence
Why does retargeting animations require picking a specific skeleton, and not a rig? Can an animation be targeted to a rig and work with all skeletons using that rig?
No, it's a major issue with Unreal, animations are tied to skeletons. Perhaps one of the worst design decisions of any game engine I've ever used
I am trying to understand this as well, When I import my character I have to pick a skeleton, so I pick the skeleton that's tied to all the animations. when I do this it distorts my characters mesh.
Did you try the link I posted @silver stone ?
Has anyone been able to successfully use "Control Rig"? When I import a mesh it crashes because it uses the wrong array count to access the bone hierarchy 🤦
@molten jewel Maybe you've used it?
Its this part here
        for (int32 BoneIndex = 0; BoneIndex < RefSkeleton.GetNum(); ++BoneIndex)
        {
            // only add if you don't have it. This may change in the future
            if (Hier->GetIndex(BoneInfos[BoneIndex].Name) == INDEX_NONE)
            {  // snip...
            }
        }
Its this line for (int32 BoneIndex = 0; BoneIndex < RefSkeleton.GetNum(); ++BoneIndex) and it should actually be for (int32 BoneIndex = 0; BoneIndex < Hier->Joints.Num(); ++BoneIndex)
I don't wanna fix and PR before I understand why they've done this
They sure aren't kidding when they ticked that beta checkbox!
Even if I fix it, it doesn't import anything
Once again, Epic has broken something by not testing it with virtual bones
Thats why control rig wouldn't work for me
...sounds like they're testing it on you.
Sure seems that way 😉
I actually just threw in the towel and slapped proper bones in there to use as knee pole vectors
hey Vaei, no. have not used control rig. am kind-of considering it but dunno the overhead price of having a blank skeletal mesh component for the sake of it
If I already have a walking animation created in blender, would I just rotate the characters entire body to make it a 4 directional animation?
@oblique yoke - You're probably better off using one animation and rotating the character entity.
Has anyone managed to extract a list of animations used by a particular skeleton?
I need to bath retarget my animations, and I need to find all the skeletal assets and export them into a folder.
Any ideas?
All right, well I can get the skeleton from an animation asset, but the python api doesn't make it easy to find all the assets.
hi guys! i have roll animation, 30 frames for example. when I push input for roll my character start rolling from 5 fame to 30, and resume play from 1st to 4 frame. I have no idea why? Maybe someone else met with a similar problem?
and correct looks
Hey everyone,
Can anyone tell me what the 'Additive Node', 'Normalize Alpha', and 'Alpha Scale Bias' settings do on a Blend Multi node ?
I get what they mean, but can't understand the effects/implications they'll have on a blended animation pose.
Test them

im trying to change a montage in anim notify but when i click an animation nothing shows in details tab
@static falcon I did try something along those lines, in the end I measured the angles and distance it took to get the UE mannequin to the T pose then just inverted those numbers on my characters T-pose which but her in pretty much the same pose as the UE mannequin. I also determined that the distortion I am seeing in my characters when I try and share the skeletons in UE is due to the fact my weight painting wasn't very good and neither was my spine base placement within my model. When I corrected all of these things I ended up with a much better result. Know I just need to get a couple hundred hours or weight painting practice in and I should be decent at this 😃
Thank you for helping me and following up on the question.
Ooooo
It’s a tricky skill!
Don't forget you can mirror the weights so you paint one half! My best advice but I'm sure you knew
hay iam super new to animation in total
so i got a question ... when i want to import an animation from the market place into the sequencer it tells me that the animation is incompatible whith this skeleton... but i use the standart third person one
So in UE4 animations are tied to one single skeleton
The starter pack uses a different skeleton than the animation starter pack you are using
Though they are pretty much exactly the same, the animations currently belong to only one skeleton
So you need to re-target them
mh okey
thank you 😃
how do i retarget them? XD do i just do a new anim blueprint or what? 😮
Find the skeleton in the folder path in the image, right click and do retarget to another skeleton
now all the animations are available to the third person BP
This only works this simply because the two skeletons are exact just so you know
Hey guys, can i have ur advice?
my friend is an 3d animator, and i wana purchase a gift for him, will be this statue with musels and stuff will be usefull in his animation job?
Does he make models as well as animate?
Those are great modelling guides for sculpting characters
now it is stuck in T pose even though i use the same animblueprint
it worked perfectly for me 😮
You retargeted the skeleton in the Starter Pack to the other one correct?
@static falcon fck i dont rly know
ah no retargeted the mannequin to the starter pack XD
okay
Not sure the best way to go from there
search your project for UE4ASP
Is that blueprint working?
i made a new project and now it is not stuck anymore
going to import the blueprint into the new project
thanks 😃
@boreal smelt Any luck?
yeah
but now im desperate because when i press ctrl it just loops the crouch walk animation ...
Is that something you programmed yourself?
aint that right?
Did you create that blendspace or did it come in the pack?
i did create it
You've got them backwards I think
at 0 speed (underneath the keys) it should be idle
does anyone have a problem with too many keyframes when using blender's auto rig pro and making animations to import into ue4?
i'm getting like 1800+ keyframes per animation
Hello, I want to use the sequencer with my animation but my character have an animation blueprint and the sequencer doesn't override the animBP.
Hello all, Would I be better performance wise to make one skeletal socket and attach a hidden mesh with many mesh sockets,( like and armor plate) than many skeletal sockets? Its hard to get performance stats on skeletal sockets
OK, I have found something. It seems less skeletal mesh sockets are preferable. WHen a socket is used, and animating. "Animations allow for sockets to be set to always update (USkeletalMeshSocket::bForceAlwaysAnimated). If that is set then every socket will get updated on every animation tick."
Hey guys, after watching this video https://www.youtube.com/watch?v=r40PJ6r_P4c , I wanted to know what the best workflow would be to import a character with a necklace which could be used with a rigid body node for physics simulations.

In this GDC 2017 session, members of the Unreal Engine 4 development team demonstrate several exciting upcoming animation and physics features for the engine...
I have bones that have both angular and linear constraints fully locked but they still seem to be bendable when I simulate physics. Why?
Found this: https://youtu.be/SeA52BYK0hg

Link To MB Lab Character for UE4 https://github.com/studiostry/UE4MBLabCharacterStudy Link to animation mirror node for UE https://github.com/fblah/AnimNode/...
What would be the best workflow for a character with a long dangling necklace with respect to rigid body nodes....does the necklace have to be a seperate entity or can it be imported as part of the characters clothing accesories (preffered)
So I have a character creation process where I tweak bones location and rotation in real time per tick in the animation blueprint. Once the character is created, do I have to keep applying the changes through a post process animation blueprint ? or is there a way to apply the changes to the bones just once ?
please @ me if you can help !
Is it possible to use the Character skeleton that ships with UE4 for MakeHuman models? When I try to import an fbx from make human, I get something horrifying when I try to attach the skeleton. Do I need to go into Blender and rename the bones?
@gilded patrol I think this may be a good case for cloth physics, but you'd have to experiment. If you want to do cloth, make sure it has its own material ID. If you want to do rigid body dynamics, make sure it has joints that are only weighted to the necklace and you should be good to go
@simple star Trying to understand what you're asking exactly. You want to apply a permanent tweak to the bones, but do it only once instead of every frame? What sort of tweak?
@static falcon i've sent you a DM !
@gilded patrol Easiest way would be to proportion your makehuman character around the UE4 rig. Export the rig, import to blender, pose your character's geometry around it, and do a skin bind
What of the character's physics asset,what the cloth and accesories will collide with, is there any method more accurate than capsules (lets say performance isnt an issue).
Lots of capsules 😂 not sure really. Either are prone to errors. Safest way I guess would be authoring skeletal animations for the necklace and creating rules for them.
I'm making a pose asset from an animation, and if I open that asset they work, I can see the change following the slider, however it doesn't work anywhere else. Any basic stuff I might be doing wrong?
is it not possible to "Transform (modify) Bone" by a name reference? I want to loop through all bones and set their transform, is this not possible without plugins etc?
hey guys, i have an issue with working with modifying my spine_01's rotation to look at a target, but when the character is holding a weapon in their ik_hand, the weapon does not follow since its not parented to spine01. Are there any workarounds for this?
i've tried messing with fabrik, but so far, no good
the weapon does need to be attached to the ik bones since the attack animations are driven by the ik bones
Why mesh acting different in 3d app and in UE?
here in blender, i moved legs up and everything seems to be ok
but in ue4 her butt goes trough skirt in same position. why is this happening?
@opaque estuary do you have cloth physics for the skirt?
I'm trying to import this animation
The importer specifies that the file should be 300 frames
But when I open the new animation I see this
That's only 10 frames (for the whole animation)
What I expect to see is this
Which is 300 frames in the animation.
So what am I doing wrong here? I've tried both Exported Time and Animation Time
How do you use default slot only for Arms and Head?
Heya slackers, currently I have a issue in a animation blueprint. I am trying to get a variable form the event graph of a anim blueprint to be used in the anim graph of that same anim blueprint.
The issue is that the variable is being set in the event graph and works there. But in the anim graph it is always null or 0. Does anyone know why this is? Even by setting a default value it does not do anything. Making a float with a default value of 100000 in the event graph still is 0 in the anim graph.
@dusk raven just had this issue, try disconnecting the node where you set the variable, most probably in the event animation update
@dusk raven actually, make sure youre validating any reference variables (such as charater reference) , that was the issue with mine
@native ocean Thanks for your reply. What do you mean with validating the references?
Here is a little gif of the variable not being set. I am really running into a wall atm so any more help would be extremely apricated.
So I think I may have gotten the downward dive problem that I've been having figured out for the most part, but now there's 2 main problems. 1. Whenever I'm doing the downward dive by holding S + Shift, the animmontage constantly resets until I release it, when I want it to just keep moving forward in the animation instead of constantly resetting as long as I'm holding the buttons down, don't know how to fix that. Also, 2. I don't know how to get out of the loop in the montage. Right now I have a loop in the anim montage because I want the diving part of the animation to continue as long as S and Shift are being pressed down, but I can't figure out how to get out of it. I'm trying to make it where after you've started downward diving, once Is Falling is set false, or S and/or Shift is no longer being held down, it goes into the last section and goes into the falling/idle pose and stops the movement so it doesn't try to continue the launching. How do I do this? Here's a picture of how everything is set up so far
how to add animations to a character. he has them all done. just needs to be set up. and ive never done this
ping me if you know the answer
Hey guys I been thinking that the way I have been going about my objects was probably the long way. I could just use sockets for tripod legs (think manually extendable legs that dont have to be even) and have the legs each just function through those sockets, right? instead of blendering animation for the legs?
example of the legs im talking about
or I could bake an animation for one leg in blender and use that through the socket? but idk if it would allow me to influence the level-ness of the top plate
Is there a way to animate a Montage in WorldSpace rather than in Component Space?
I have a Climb animation that should play separately from the Pawn because I want to move the Pawn programmatically while the animation plays instead of using Root Motion
when i click create
it doesnt do anything
it just freezes for few seconds and thats it
you can check the editor's Output Log
Hey, in 4.22.0 where is the use T0 option?
Not sure why, but I'm getting some lovely errors importing my Makehuman model into Unreal.
It's not under advanced during import?
I mean you clicked Skeletal Mesh and there's no Use TOAs Ref Pose?
Ah, found it. Not sure why I didn't see it there before.
it's been a long week
May be time for a break lol
Had all my animations retargeted and all my meshes and retargeting data set... then did some re-organization and corrupted my project. 😛
At least I'm not terribly far into it.
Any one familiar with Master Pose Component? I'm using it to group some skel meshes together to run one animation but also I want to separate them back as normal and run different animations on each skel mesh component.