#animation
1 messages · Page 104 of 1
you do all your animations on that master character
BUT you can export out the split up FBXs
bingo
like same hieararchy
and you only have to talk to 1 animation blueprint
and youc an still add custom stuff like a hatch
since it branches off the core hierarchy
because the secondary animBP is simply matching the pose
so you have a main skeleton that does the core stuff that you want
it defines the main pose
like using a biped human skel and adding 2 extra limbs
and then you can actually have seperate skeletons with additional bones and stuff
the 2 extra limbs would just not animate but rest would work in theory?
and they will still copy the same pose, but then you can layer in dynamics and such
copy pose is super powerful
cool this is good stuff
so when you have 1 skeleton and you swap the turret out
you can read the curves from 1 skelMesh and use those values to drive different animations on the other skelMesh
the turret has same hierarchy but different animations for how the gun recoils
yes you can do that
so it's copying the "pose" from the rest of the tank in terms of where the turret is pointing and such?
but the turret has to have its own animation bp to drive the recoil animation right?
first you copy the pose
then you can take that pose and layer in anything else that you want
so you could have a different shooting motnage
montage*
however, that would mean that you're talking to two animBPs
you can have the parent skeleton play different animations based on the customized pieces
this is getting into the structuring territory
the animations should be quite simple for a tank though
if I drive the turret rotation through code
there are a lot of ways you can play it
instead of an animation
personally
I would evaluate the rotations that you want in code
but let the AnimBP actually modify the bones to make that happen
animBP runs on its own thread, and ticks faster than the game thread
yes
and let it transform the bone
awesome...yeah bc different turrets might turn at different rates
and i dont need an actual animation for that
but let the AnimBP handle the movement of the mesh/skeleton...makes sense to me
Modify Bone for days
it's cleaner
and then you have gun angle upwards and downwards
that can vary depending on where turret is turned
so turret would drive that and i suppose I could tweak it with a curve
ie at X rotation allow for Y gun depression
you can define the target rotation in the actor, and let the animBP use RInterps to ease to it
yes
for example
pointing gun down over the front of the tank might only allow for like 3 degrees of rotation downwards
but over the side of the tank maybe 10 degrees
this is good separation of concerns, the data exists independent of the implementation.
so my curve should constrain the depresion value on the code side
per frame
and the AnimBP transforms that bone
You could leverage Curve Assets to define your constraints
Cool man. I know a little bit about these concepts but you really helped me understand how to put it to use
Glad I can help, If you run into any issues with Copy Pose, give me a shout
Cool thanks. Gotta remake this skeleton first and import it properly
1 thing to note about copy pose
the parent skeleton must have all the bones
so if you remove unused influences on the skin cluster
Need the skeleton to be correct for PhysX tank implementation to work

Hello Im having an issue with my animals sliding instead of completeing the walk/run animation
@high dune Is it like the animations are being interrupted?
Hey I’m doing a footstep system . And I need to be able to check if the players current velocity is aimed at or going to get closer to the footstep location . Any ideas ?
@undone ether make a directional vector from current loc & footstep location, then use the dot product of the direction & velocity?
I think that should give you a 1 to -1 range
if you want to animate sword attacks do you animate the character model then stick a sword in their hand or do you animate them and sword together?
You usually animate only the character
but you can animate it with preview assets in your 3D Tool of choice anyway
@harsh ocean Both to a degree
You would usually parent a sword into their hand just so you can have reference of how long it is and how it fits in their hands
But you'd be animating the hands
Or rather the whole character model
Is there a way to make a bones rotation match yaw
or rather have a portion of the model face the center of the screen at all times
I am not sure if this is an animation question either. I want the head to always be looking at the center of the screen or crosshair area.
Hey there, I'm looking for helpful resources (lectures, tutorials etc) on game animator workflow.
More that I would love to find demo vids of animators showing their work methods off
cause it will help me get my head in the game
Most videos are specific to a certain subject, you may have a better bet with streamers
who steam while animating.
or maybe the GDC videos
which contain a lot of information on how stuff is done
from companies that make games
could anyone advise me on how i should animate my model in blender? The Model is just a blob of slime, but cant decide on skeletal animation or just using shape keys. (Morph Targets)
Hello guys I'm having a small issue with my frames In blender, when I create two animations and the there playing, sometimes they jerk or get really deformed and I can fix it no matter were I place them here is the issue https://gyazo.com/5427ae91038f971b68abdd546769ee1d the right knee moves to the right and corrects it self but make animation look jerky.

look at your dope sheet on that action and see if there is a frame you keyed on accident
interpolation? ik limits? pole change? I don't know
what have you tried
lol
move a leg knee red ball or delete it in dopesheet
@prisma tangle There is a LookAt node that you can use to have the head look at a target position
the tricky part is you need to figure out a screen space position to a world space transform
I just created animations/Aimposition offsets based on yaw and pitch to get him to look at the center of the screen, but since the yaw is from the mouse x
I am not getting any left or right
Does the Yaw rotation of your character capsule follow the yaw rotation of the controller?
that will rotate the skeletal mesh with it, so you'll almost never see a delta between the control yaw and the skeletal meshes yaw
where the character looks towards the center of the screen
its like the character doesnt rotate with the camera until a yaw is met
I would look into this: https://docs.unrealengine.com/en-us/Engine/Animation/NodeReference/SkeletalControls/LookAt
both left and right
That is interesting
but a hud crosshair isn't in front of the character is it?
its just painted on the screen essentially?
right, so you need the screen coordinates to world transform node
ah so I would get a position in front of the character and have him look at that
Do you know of a way to not change the character capsules rotation until camera rotation hits a certain point?
or have a documentation page
that might address that
I'm currently building, so I dont have unreal open at the moment
but I believe these are defined in the movement component
there is like a character rotation is control rotation
alternatively, you can let the animation blueprint control the world rotation of the skeletal mesh, but this is not something you want to do in a multiplayer game
I think I will need an event something like
camera doesnt control rotation unless its at a point
so I would rotate the character based on the cameras yaws at certain points
Ya you could evaluate a delta rotation and trigger a rotate of the character based on that
character rotation and TurnInPlace animations are the bane of my existence at the moment
I'd really prefer that the character didnt rotate, and I performed the rotation in the animation graph so I can have more control over how it happens
yeah, I need to figure out the best way to get the rotation limit on my character, but I removed the controller rotation yaw
and the character is looking around the way I want him too
I just need to get that point where the aim offset is maxed
then rotate the character
and play a turn animation
for Paragon, they have AimOffets that go 180 in each direction
because you can have a player that turns with the mouse very quickly
their animations must be on point haha
they use IK to correct some of the drift that comes from the AimOffsets at big angles
but ya, your idea is sound
sweet, thanks!
👍
@frosty peak Do you know how to rotate the capsule via bps?
I got the direction of movement working but the character doesnt turn
the direct he moves based on the camera does
@prisma tangle There is a flag that roates the character capsule in the forward direction of the motion, perhaps thats what you want?
I am going to post a gif really quick
to show you how its working now
it might give you a better idea
on the movement component "Orient Rotation to Movement"
yeah that keeps a constant rotation going which destroy's the strafe.

so thats the character turning at the approriate points and the direct is working
but the turn is a snapo
snap*
and thats the bp
i am using
guys do anyone have an efficient way to create combos like a linear one you know what i mean ,right ?
@prisma tangle So basically you want to create an RInterp, where you take the current rotation, and the target rotation is the set Rotation value you have there, and then you want to apply the result of the Rinterp to the character over time
^Something sort of like this
but the make rotator would be the world rotation that you want to get them to
This is somewhat self promotion, but I'm a GDC speaker and my talk this year focused on ideas/strategies for setting up bipeds. All the examples are in UE4 using animation Blueprints. My part of this talk is 5 minutes:

In this 2018 GDC micro-talk session, animators Gwen Frey, Joe Han, Almudena Soria, Jalil Sadool, Kyle Chittenden & James Benson rapidly deliver their best an...
Hopefully someone finds it interesting!
@split haven Some pretty cool tricks, Thank you for sharing! For the Land, are you using a Pose Asset?
@frosty peak I was working on the same thing when I looked at your response haha
I figured it out not using world rotation
which you said was bad for networked games right?
nope, it's just an animation. If you right click an animation sequence in the animation BP you can "Convert to Single Frame" and then drive the input variable on that
its bad to set rotation in the animation blueprint for networked games because they run on a different thread from the main game thread
and you can run into replication issues
I have been doing all of this inside the character controller bp
is that not good?
@split haven Holy crap, I did not realize thats what Single Frame anims meant
Thank you so much!
this changes everything!
;D
And it's normalized time?
I live to give people those moments
Er, just to put it out there. Here are some other short (2-3) minute videos on UE4 animation BP tricks:

YouTube
👍

I got it working
woo
what a pain in the ass
now just to make a turning animation
or I guess two
turn right and turn left
@prisma tangle you could try @split haven 's technique in the video they posted. It seems like a pretty clever method that requires very few assets.
First or second
no I mean the first or second video posted
first
k
It's kind of like World Yaw = The Frame of the animation to play while in idle
I want to say 90% of what was said went over my head.
I am still really new to unreal and animating and I used rigify to rig my model as I had no animating knowledge acouple days ago.
Given that, you may not want to bite off turn in place animations just yet
they are generally more technical
That is the next step though!
setting the play rate to velocity divided by a number is a good idea
and im stealing it from her
😃
@prisma tangle its not quite play rate. If you right click on the animClip and convert it to a single_frame anim, you can literally select the frame with a float
so in a sense the animation is frozen in time
which is why there is an additive animation that layers on top
but I have used playrate in the past, it requires some pretty finely tuned animations that are pretty tricky to author.
I see that
there is a bunch of cool stuff in there
I will look into the multi layer animations and blending between them
when I am a little more experienced
Keep it simple!
Can anyone explain to me what the ik_{limb}_root bones are used for?
@bold fjord They have many uses. They can help you maintain solid foot placement while compressing animations. They can be used to modify animations for slopes. And they can be used to correct drift from AimOffsets.
So the IK root bones are used basically to set the floor?
they are a little bit offset from the floor, because they usually represent the ankles
I'm trying to imagine the scenario. The ik bones are what the constrained bones target, but the ik bones seem to be parented to the ik root. If the root moves, then both ik bones move. If the root rotates, both ik bones rotate in relation to the root. Is that the use case?
So if you were to programmatically constrain bones to their ik bones, up the hierarchy, the root can be used to control both ik bones simultaneously?
@bold fjord IK_Root is there so you can have a central bone to rotate the placement of the IK_Ankles to, without rotating the rest of the character's body
IF you need it
the use case is basically to have the linear movement of the feet, which is easy to modify, that can be used to adjust or correct poses.
I guess as a weird example, If you scaled the IK_Root to x = 1, y = 1, z = 2 in component space, it would make the ankles lift twice as during the run cycle.
For Paragon they stretch the placement of the IK bones in the direction you are moving when you go very fast, instead of changing the speed of the animation. They refer to this as Stride Warping.
And it'd look more natural than increasing the speed of the animation?
ya, but it's a lot of effort to make that work
it depends on the style of the game
since Paragon is realistic, you don't want to play the run at 2x speed, it'll look very silly
just got a mental picture of the paragon characters wigging out to silent film music lol
Hey I'm struggling with state machine, I'm simply trying to reset an animation when I press a button, since it seems tricky to reset an animation within the state machine itself, I try to exit and re-enter the state machine but somehow the animation is not reset, any idea ?
@vivid wasp you may have set the default value for the variable used for the animation
untick and tick variables defaults can change the pose in the viewport
hey @twilit hemlock thanks for reply, for i'm not sure what you're talking about ?
@vivid wasp is your character currently jumping?
yup, I want to be able to reset the jump while it's jumping
You should break the jump into 3 parts,
the jump
the in air
and the landing
create a loop through them and a second loop
if in first loop and jump is reset move to second loop
same back to first
but it's a bit tricky in my case, because my jump is a super fast back flip, so I can't really break it into three parts..
but you just want it to play the jump animation over again
this is the variable I use to exit - re-enter the jump state if I press jump while jumping
when you reset it right?
yes
so in your control
is your reset button a different than the jump button?
a different button*
nop
@vivid wasp setting a variable twice in the one frame will only set it once. in the final frame
not really, basically I just want the player to have a small buffer (instead of waiting for the character to touch the ground, you can re-jump if he didnt completly touch the ground)
ah good to know ! I didn't know that thanks
so I could just put a 0.1s delay in between, but it's kinda hacky...
I don't think you'd need the reset state than because when he lands he would go back to the idle/run state
you could remove character control on event landing
delay
than give it back
after the delay
@vivid wasp there's a transition rule to only change animation when near the end of animation
near end of anim ratio or something
not sure if that's what you're looking for
time remaining ratio
with transition back to the other state at that point
if your animation only plays once than any time you transition you can return back to it and replay it
this will delay the characters movement when you land for a delay
if you set the delay to whatever looks good with the return transition using time remaining
you should be able to spam jumpsafter landing
ok thanks will try that

@prisma tangle how do you mean
so I hid the player model and stopped movement while we did the teleport thing
added a particle effect exploding out
and sucking in where you land
but the suck in looks odd and I was wondering if you know how to make it look smoother
in some way
do you mean cause the screen instantly teleports back or
i'm a little confused
@prisma tangle as in the character spawns in too vaguely?
@prisma tangle you can interp the scale of the character with a miniture respawn effect. or teleport the character over time using timelines
as in if you want a slow teleport towards the spot. or persay slower than instant
use a timeline
@prisma tangle bout to sleep you all g?
@vivid wasp Something that I do for multiple jumps and transitions is an INT called JumpCount. In the jump state I have a Blend By Int with some number of jumping anims plugged into it. This way if I am currently in the jump animation, I can simply increase the jump count and it will start another jump animation without needing to transition out and back to the jump state.
@twilit hemlock yeah gnight
I’m using Mixamo to animate a fuse character but the gas mask warps with the head
Can someone help
Amm, guys, do you have any idea how should I implement hipfire? I currently have a blendspace for primary weapon locomotion (when you hold it in hand but not firing it), an aimspace for hip fire and a montage for firing I play over the blenndspace + aimspace. It works just fine if the character is not moving, but it looks weird if it's moving. Do you guys have any suggestions? Or should I perhaps just creae a separate blendspace and aimspace for firing?
@swift heath Is the montage slot before or after the AimSpace?
before
that should work well. Is the Firing animation an additive?
the aimOffset applies delta rotations in mesh/component space. So it's likely that you'll want a different AimOffset that corresponds with the hipe fire pose.
No, the firing anim is not additive. I have 2 aim offsets, one for normal locomotion (without firing) and one for firing
The one for firing was made for the firing anim (I set the poses used in the aim offset to be additive in mesh space and use as base pose the first frame of the firing anim)
And it does seem to work well when standing
But not when moving
Does any of you guys know how could I go about detaching a bone from a skeletal mesh? I want to do this for removing a mag from a weapon.
Thank you, I'll look into that. What do you mean it's skinned correctly though?
well rigged
so if you move the bone, all the vertices of the mag have to be skinned to the bone you want to move
Oh well, I have rigged it and the mag does exit properly in persona if i just drag it around, so I guess it should work? Gonna try using that node though and report the results.
Thank you @twilit wigeon it works properly now, I just need to make some adjustments to the socket I want the mag to move to so it looks decent.
👍
Anyone got experience using Rigify?
I have a tiny bit of Rigify experience. Mainly just using automatic weights and exporting into UE4.
Im implementing a combo system using state machines, the problem is that I need to use notifies for the control of the animations but I cant use animation montage and therefore I cant use notifies that way, could someone tell me if it's another way of doing this?
Anyone know how to set the in game bounds of a skeletal mesh?
ahh it's the physics mesh

is it possible to create multiple animation trails for a single animation and change which should be used runtime?
@indigo hornet its sounds, gamebana, i made the animations
nice
@misty dagger looks good but the motions seem to unnaturally stall and are also a bit slow...like they are not snappy enough
Like you dont pin the the forestock back like that when cycling
Well, I'm gonna make more shotty reloads, gonna try to speed it up.
looks good, but it seems like when it kicks it should go to the right or left a bit. It looks like it goes up and back
but doesn't roll either direction
Fallout 4
Also cycle speed has to be same lenght as vanilla
Or longer
Any shorter causes bugs and have to speed anims up in ck
:'))
Either way good job it looks nice.
What do you mean by rolling
like the initial reload
the guy is rolled onto its side and more to the left
but they reloads in between shots dont roll the weapon at all
You mean cycling
Keep in mind reload has to match 3rd person as well
Ill try a faster reload next time
And some variation on the recoil
Thx guys
:^)
is there an easy way to find every animation that is fed into a specific animation slot?
content browser, ctrl+shift+f, anything...
Easiest way to add Ik foot on animations?
How do you enable clothing simulation on the paragon assets?
hey guys....
i'm trying to make a vaulting system
and as i'm doing so, i want it to play an animation
so... the animation works
but after it's done
i can't aim up or down
for some reason my aim rotation doesn't work after that...
Hi chat! Can someone help with custom animation node? The problem it is not working in standalone
yes
I had the same issue
sec and I check on the solution
@feral copper:
"Editor modules need to be marked as "Developer" rather than "Editor" to run in Standalone."

Changing the Type to "Developer" instead of "Runtime" should work too.
@civic fiber thank you! I wll try
@civic fiber After this changes I cannot start dedicated server with error:
LogOutputDevice: Error: The MainFrame module should only be loaded when running the editor.  Code that extends the editor, adds menu items, etc... should not run when running in -game mode or in a non-WITH_EDITOR build```
I tried to revert it back and dedicated server runs ok :/anyone tried ART and maya live link?
I have a character with root motion. When I play it in the animation editor, it moves the correct distance. When I use it when I run the game, it is doesn't go as far. What am I doing wrong?
@tough oracle if i remember correctly root motion will always keep the character in the capsule
can you show me what your trying to actually do
One moment. I'm trying to get OBS to capture the screen.
should use gyazo much easier
Ok, I think I fixed my problem accidentally.
Now the character pops back to the beginning point.
Oh, I turned off root motion. Video incoming.
Ok...youtube gave me an error. I'll try again.
My internet died at the worst possible moment.
I am so stumpped
Changing max speed and acceleration doesn't seem to work either.
Somehow I fixed it. I have no idea how.
I need some help
So I have the iron belly rig right and they have a weapon rig with that I'm trying to get my own weapon mesh to work with that rig so that I can use other weapons Of mine with that specific rig so that I can aim down sights with the animation that is already made basically seamlessly using that animation with my other weapons...
hey, does anyone know what the deal is with blender, NLA tracks, animations, etc?
like I'll make an animation and import it into ue4 and it'll have like 6 versions of the same thing, etc.
there doesn't seem to be a whole lot of tutorials out there on the whole action editor in blender for creating a series of character animations.
I believe the reason that there's different versions of the same animation during import is I think due to how Blender doesn't really have a solid notion of ownership of animation. Rather, an animation is simply a bunch of animating channels (X location, X rotation, scale, etc...) that can be applied to any Blender object. If you look at an action, you may see a number next to the action which references how many objects the animation data is tied to. If the number is more than 2 (one for the action itself and one for the armature of the action), then that means that something else has been tied to use the action. When importing, you may see the animation has a name built with some block armature which means that the animation was associated with the armature of the Blender object. Extra copies will have some other name block like Mesh meaning that the action was associated with the Mesh object data. Anyone with more Blender experience correct me if I'm wrong.
interesting, i always wondered what that number was about.
i always noticed when you clicked the number it looked like it copied the animation and there was no way to remove it without restarting blender
or actually restarting doesn't even get rid of it, weird.
Yes, Blender seems to be rather sticky with the references. Clicking the number makes a copy of the action so whatever object you selected will have the animation data seemingly attached to it. Even if you clear out the reference so that no other object references the action, Blender wants to keep the reference, denoted with a 0 next to the action, that nothing is currently connected to the data. Restarting Blender in that case will get rid of the reference to the empty action, since, knock on wood, nothing should be referencing it.
To get rid of the reference, you have to select the object that's tied to that action, and then click on the X next to the action.
That will get rid of the reference of the action to object currently selected.
i noticed with newer versions of ue4, using just the action editor isn't enough. i had to click "push down" on an action for it to get exported to the point where it could be brought into ue4
do you know what's up with that? or what the NLA stripes even are?
NLA is for non-linear animation. Basically, you can layer or add actions together in parallel or serial and export a Track of animations. Example is to create a combo made of several action mapped to different attacks. You could bake that animation in Blender, pushed down as an NLA track, and export the combined actions as one animation.
I personally haven't found a good workflow for it.
ahh
hmm.. yeah i'm hitting a ton of issues lately
it wasn't like this a year or two ago, i'm not sure what changed.
before you could just create a new action, export from blender to ue4 and be done
i don't even know if it's possible to export a single animation
and when you add new animations and try to just import the file again it won't add in the new animations which is a pain.
I'm not sure if it's a Blender thing or a UE4 thing, but I'm guessing the reason you can't just reimport the same file is that the filename is actually used to build the asset name. I think if you rename the file, you should be able to import the animation, but you'd get some extra animations to go with it.
When I want to import a single animation, I've used NLA tracks and pushed down one animation, nothing stashed. Turned off export all actions from the exporter options. Not a great solution, but better than nothing.
Additionally, file needs to be named something different than the original.
i think i'm beginning to understand it a bit more. thank you
just kinda learned what the NLA track does, so that helps some as well.
still not sure why some duplicates of animations don't want to be deleted
Whenever, I get duplicated animations, I look at the name of the animation and look for anything that tells what the action was tied to. If in UE, the asset name wasn't built with Armature in the name, then I know I probably accidentally tied a different object to the action. I have to then go back in Blender, and remove the data link if I want to clean it up. Because of this, I used to export two files. One just for the skeletal mesh, selecting the armature and the mesh. And one for the animations with just the armature selected. That way I can just import the skeletal mesh as a single file and import the animations as another. e.g. SkelMesh.fbx and ArmatureAnim.fbx. That way, if I need to reimport a set of animations, I could just reimport the animation. Nowadays, I kinda play by ear since I have no idea what a good workflow is anymore. As long as animations get into UE4, I'm content enough.
Boys, I have been trying to fix this for hours on end for a couple days. I have run out of ideas regarding what it could be, so I recorded it with as much detail regarding what's going on in the blueprints as I can. If anyone has even a single idea regarding what could be happening, please let me know

Does anyone know of a good workflow involving similar AnimBPs for different skeletons? The quadrupeds and bipeds in my game will behave very similarly and share a lot of the same functionality, yet I cannot use the same AnimBP for obvious reasons. In case I have to make changes in the logic of one of them, do I have no choice but to essentially copy paste the changes into the other AnimBPs as well? Or is there a way for me to do some sort of inheritance for both of them, maybe if I create C++ child class of an AnimInstance? Is this recommended or looked down upon?
Thanks for any pointers!
Anyone had experience building neural networks for animation?

We present a novel method for real-time quadruped motion synthesis called Mode-Adaptive Neural Networks. Our system is trained in an end-to-end fashion on un...
and damn, only unity
meanwhile at my animation:
if "IsFalling -> Is Falling Animation
I'm having an issue when importing a skeletal mesh from 3DS max to UE4 in which the skinned weights change on import into UE4. The skinned weights are good in the exported FBX, but for some reason the mesh alters the weights for the vertices weighted to a specific bone. Has anyone else run across this?
Hi, quick question. I've got a third person character with a bunch of animations going. I want to add an impact (sort of a knock back). So for example, when an enemy damages the player then the players head should rotate backwards and then back into place. What should I be googling?
Would it be possible to play a damage or knockback animation when damaged? Or do you require that only the head specifically move?
Not the head specifically.
I've got my blueprints calling the animation when the character is damaged but I'm not sure how to blend it on top of everything else.
I tried setting the different additive modes but I'm obviously barking up the wrong tree there.
Or (more likely) I don't know what I'm doing 😉
Seems like you should be just able to add a new state to your anim graph.
I don't know about it being a new state... BRB
Are you using animation blueprints with your character blueprint?
Yeah.
I don't want it to take over certain bones completely. I've essentially animated from his first spine up to his head. I'd like it to play (add) to it weather he's blocking, or just standing in idle, or whatever.
Or have I approached it wrong?
I think you're on the right track. I believe you can pretty easily blend animations together. I haven't had need to in my work, but my guess is you can do a simple animation blend on your default slot, which requires an anim montage.
Hmmm... that feels wrong. I'm sure I'm missing something in the animation about this additive stuff... I'm watching this:

Hi people, in this video I explain how to set up a nice and precise solution for your hit reaction system. By the use of both dot product and cross product, ...
I'll report back what I find.
This might give you an idea on my character.
The video may show a different way I'm not familiar with, but I'll watch and see what he suggests.
28 minutes of my life but hey, it's all learning 😉
The video doesn't seem to talk about using animations. It looks like when he's talking about hit reaction, he's more talking about detecting where a hit is coming from if an attack hits, but he never seems to go into playing an animation. Is that right?
I think the video is useful for like learning how to detect if the character is hit from a certain side and maybe playing a specific animation to coincide with that side and handling logic e.g. Getting hit from behind should be handled differently than getting hit from front. It's definitely useful, though perhaps not what you're looking for in terms of simply playing an animation.
It's the animation overlap bit I'm struggling with. I'll carry on looking.
I've decided. I'm going to make a system to find which direction the damage is coming from (Something like in that video) and then use physical animation to drive his reaction for about 15 frames. Right now, supper time.
I broke it.
Looks like the physical animation is always on. Kinda cute in a deformed kinda way.
HAHA, yeah the tuts I'm watching are for old version so the things they're doing to fix this aren't there anymore or don't work. I'll keep at it and look for a way to sort of fade it in and out.
does anybody handle root motion at all?
I got it working. The simulation still doesn't reset but animating the blend on a hit impact causes him to "react". Would still like to find out how to reset the physics in the future.
anyone know if theres a way to get remaining time left on a montage? I have an anim notify and i want to know how much time between that notify firing to when the animation will end as a float
hey, I am trying to export a basic mesh animation from max into ue4
its just keyframing a pathdeform
do I need to add a bone system?
oh, seems like the issue is in max and it cant bake the pathdeform into an animation
need to find some way to bake it as a vertexanim
Would someone be able to give me a crash course on how to use multiple different jump states, with walking etc? i cant find anything on it
for reference im brand new to UE, and im using the Phase paragon asset to test
@mild trail Why don't you have return from stop to start transition. And problem could be in ur logic. It is hard to say by looking at this abp
How do i get an animation to play consistently and not do some glitchy loop in a state machine? for example jumping

Yea... this
Wouldn't you want to transition from the jump animation to a falling/inair animation?
the only anims i have are jump start, apex (highest point of jump), landing, recovery
I mean looking at the Paragon assets, the Jump will hang at the Jump_PreLand state until no longer falling. The Play Animation node in the Jump_PreLand is set to not loop.

the phase one doesnt come with any animators or anything
So basically, you'd detect if Phase is in the air. Play Jump Start, transition to Apex, then Jump_Land (not looping), then transition to recovery when not in air.

sometime when i am sprinting, and turn quickly it transitions back to run and straight back to sprinting
should i be doing the sprinting somewhere else?
@floral turret if you download the shinbi one, it comes with a basic animation graph, you can use that as reference to build phase's one
Coudl someone gimme some insight into how to fix warping after retargetting
Here's rig & skin
lol
ok im new at this.
but this is a mixamo skeleton i am trying to retarget to basic ue4 guy
any idea why suddenly he looks like spaghetti when i play a retargeted anim? i have been through retarget manager and assigned all the bones already it doesnt seem to be doing anything in the viewport..
hey guys
I'm trying to import Mixamo animations to Unreal
but when I import everything, the animation is not there
the Skeletal Mesh and the Physical Mesh are there but the animation isn't
please, help!
check your import settings in ue4 or when you export from maya, make sure you include the things
I have a question: let's say I have two humanoid with different proportions, eng. dwarf/human. If I want to have them both be able to equip the same chainmail piece and have animations work, what woudl eb best practice?
Would I have to create a different skeletal mesh for each humanoid, riug and skin them separate? I can't wrap my head around on how to have one skeletal mesh for any type of humanoid
@raw light are your root bones rotiation off or something?
I ended up reimporting, still having issues with it but it's not looking like spaghetti ATM. So that's a step in the right direction
Going to try again later had to take a break, going to try from the beginning again.
@plucky viper that elbow kek
Yeah its fixed now lol
Question: am I correct in assuming that if I want to use animations made from epic rig, then I need to make my own characters to exact specifications? I finally got really good results retargeting to my character after remaking him. But what i don
don't understand then is how to use those animations on special characters. For example a guy with really big hands or something. Do I just need to match the proportions of the hands?
@plucky viper you can scale bones, the skeletal mesh will inherint that, you could match the scaling you choose in unreal to your 3d app and animate liek that
if you scale TOO MUCH then the aniamtions will look 'wrong' due to weight etc, as in huge hands would not move as fast as smaller hands but if you don't go too far it'll all look alright
as for your previous question about the chainmail - use the same rig/skeleton for the characters and the chain mail, all you need to do is skin the chainmail to the rig and when the player equips it just attach the chainmail skeletal mesh to the root of the character in your blueprint, or the capsule component. you'll need to play the same animation on both the skeletal meshes to have it work. there is most likely a more elegant way of doing it if you dig thru the documentation, but it's a place to start so you can check everything is working
can someone give me good advice on make a lowpoly landscape? (Light settings, post process etc)
okay, I have that nice gate (skeleton mesh with open and close animation) with this blueprint
this is viewport
and issue is that if I move too fast in and out collision box animation jumps around 😦 https://www.youtube.com/watch?v=WFqtc4X3qyw

Okay, looks like I need more fine-tuned control over animation...
is there possibility of more finetuned control over animation in standard blueprints or I have to go all in and use animation blueprints and all that jazz?
Anyone know of any good tutorials on working with the FPS hands to create new animations? I want to take the hands and just make a punching animation basically and I am struggling with figuring out how to keep the rig in 1 piece
So what is the UE4 standard for animating the eyes?
And setting up characters for it?
If someone could point me to where I could learn more about the topic, I'd be very grateful
Have a major problem, virtual bones don't seem to package on Win 64. Anyone have experience with that? I found a similar thread where it doesn't seem to work for PS4 packaging
Does ANY one know an answer to fixing this? I've been editing the bones for close to 12 hours now and I'm running out of cuss words 😡
If anyone has a fix or better yet a working one to share that's be great.
your retargeting of the animation isn't quite right
so its skewing the bone locations to match the original to closely
I know but I've adjusted the bones for sooooo long. It's driving me batty.
I'm having an issue with root motion animation. Is this where I ask for help?
its not the bones you need to adjust its the retargeting itself naraku
whats your issue warweasel
I have a character with ragdoll and I'm detecting collision receiving the name of the collided bone (after it's shot at). Now I want to apply a force to that bone. Some kind of feedback when you shoot.
How can I apply a force to an animated bone?

Full hit reaction system in unreal engine 4 Mixamo Animations Names: Standard Idle Standard Run (in place) Standard Walk (in place) Roundhouse Kick: a roundh...
its older but the method still applies
@bronze canopy I have an animation with root motion. When I play it, it moves the correct distance. When I use it on my character during the game...it's much shorter. No matter how long I make it, it stays the same length.
This is really causing me issues and has brought my (personal) gamedev to a full stop.
I've looked into it being a physics issue or maybe maximum speed/acceleration. Nothing changes the outcome.
thanks @bronze canopy I'll check that
Here is a video of what's happening:
This is another attempt to demonstrate the root motion error I'm having.
Apparently duplicating an animation state machine crashes the editor.
Is there a "switch" statement where I can select one of several state machines?
Create a new one.
I believe this has a small explanation and even youtube link that should help. If not let me know I'll do some more hunting.
Hey guys!
I need Heeeeeellppppp!!!
I've just imported an animation from Maya into Unreal and for some reason my move controller isnt importing: So all of my animation is there, but just stading still in one place.
Is there any way of fixing it without having to start all over?
It might be because I added a move controller to an old skeleton
hi, to make a character blink would you use bones to physically move eyelids, or just do it using the eye material to make it the same colour as the skin then back to normal?
I started with bones but I cant get the skin to follow the eye bulge. character has quite big cartoony eyes
are the eyes seperate mesh?
Is there a way to animate textures on objects in unreal?
a texture is a texture, should be doable
@tough oracle Did you get some help on your root motion or state machine issues?
On your root motion example, since it is part of the state machine the distance the root motion wants to travel is being reduced because of the blend into and out of that state. You could make that be a montage or set the blend on the transitions to zero. As far as having several state machines, you can have as many as you want and simply use a Blend By Int or Blend by Bool to choose which state machine you want to take a pose from.
Anyone have an issue with anim blueprints, in which the entire anim graph seems to trigger at the start of BeginPlay, so references that should never get reached - get reached for 1 tick?
It might be negligible, it's just annoying seeing a couple errors on startup.
@finite trail My suggestion is to have a reference to your pawn as a variable, and simply perform an IsValid Check on the Tick. If InValid, then set that reference. It's a good way to avoid that startup spam.
^Kind of like that
hey gang quick Q
can I import morph target animations using drivers from blender?
damn actually - the morph targ animation seems to be running
but the actual morph isnt morphing my mesh
curious...
nevermind im an idiot
kthxbye
@frosty peak : You were right. I had a delay of 0.2. I made them both 0 and they work great. Thank you!
Glad I could help!
Unreal has so many settings. I feel like I'm in a fighter plane.
Is it possible to attach a charact3rs hands to two different sockets on a weapon and just let constraints so there thing when animating?
@simple karma you can get the transform from each socket, and use those transforms as targets for TwoBoneIK.
Ah so an on animation BP update get the values for that then?
Hi I need some help so I have multiple weapons in my game now and I got different ADS animations for them how do I make my character use those specific animations for when he has those specific weapons equipped?
@frosty peak Yeah, it gets set in the anim BP. For some reason it still pulls invalid for 1 tick. It's very strange, because it should never hit that anim graph segment
Can't seem to stop it. But it's just 1 error for 1 tick at begin play. Meh?
@finite trail Is the animBP erroring? Invalid for 1 tick is the trade I'm happy to make, but it shouldn't trigger any errors on that tick.
Sometimes things can be initialized in a strange order. Like the Gameplay ability system seems to generally initialize after the skeletalMesh & AnimBPs.
@frosty peak It's on a Blend by Bool node. If is false but the true chain uses a reference that's invalid.
But yeah, negligible. I think it's an order of operations "bug"
It's possible Select nodes and anim bool nodes check both paths even if one is never actually used.
Hi guys, I'm having trouble importing blendshapes from maya as morph targets, I've did it succesfully in the past but right now I'm getting completely incorrect deformation in UE4, the morph targets basically scale the skeletal mesh in unpredictable ways instead of deforming it like they do in maya, any ideas ?
Answering myself: Seems like keeping the blendshape targets in the maya scene before exporting messes everything up, deleting the target meshes made it work 😃
@wide badge The solution was to delete the blendshapes?
@finite trail I am guessing that in your animation graph you are trying to access a variable from your character reference. The Animation Graph runs on a different thread from the game thread, so the best practice is to do all of the logic and setting of variables in the Event Graph, and let the animation graph only use the variables defined in the animBP. This way you can set default values for your variables before the event graph sets the references. There is a feature called Fast Path Optimization, which can be a big performance win for AnimBPs: https://docs.unrealengine.com/en-us/Engine/Animation/Optimization/FastPath
Hi anyone know how i would make this? https://www.youtube.com/watch?v=zuK2p6eurkE

• Buy it NOW (without watermarks) : https://ladyoverlays.com • Easy use with OBS / Xsplit • If you need help, contact me : Fb : https://www.facebook.com/lady...
@north dragon Usually this is done with something like Spine: https://www.slant.co/topics/1561/~2d-animation-tools-for-game-development
@frosty peak Thanks for the help i will look into it
Hello, I want to ask how should I approach a rolling ball game, but its not with physics, more or less like a motorcycle but with a sphere. Like a monocycle
How would I approach animating this
Using the vehicle handler and just have one giant wheel?
I have never tinkered with this so I dont know were to begin
Hi everyone i'm a french 3D designer, so if you need i can do some 3d file for you, contact me
@misty dagger try #looking-for-work
@Crow#9071 Just deleting the target meshes in the maya scene- blend shape modifier still exists but is basically «baked » into the object and doesn’t reference existing meshes in the scene anymore.
Huh, weird
Very
@frosty peak That's the thing, I'm setting the var in the event graph and using that, but the code itself which pulls the var should never get hit. (At this point the blend pose by bool node is always true, but the false path uses this unset variable.) All around very odd.
I'll have to show you sometime. It's just got me scratching my head. Hardly matters though.
Has anyone here tried to animate something procedurally via UE4?
yeah
Hi all, Is there a way to get an animation's frame info in specified seconds?
For example, there is an animation called "Attack", and it has a socket named "SwordTick";
In editor, I want to get the socket location when the animation is play at 1.34 second.
Is there an API to do this? thx 😃
@dusky arrow I'm currently using SplineIK to get a swinging tail motion using tig
but was wondering if there where any tips to get more control to do this programmatically
I have like this monster quadruped
but animNotifies need to do so many manual works. I want to generte an location array, it may has 100 items;
it just need to work in editor module, no need to run in runtime. 😃
@outer fable you can always take a pose snapshot at specific times, then blend them into another pose asset. You can do this several times to "stitch" together blended interp animations between poses. So it makes animations really smooth
Thanks!
Another thing I noticed is that when I do a splineIk node and expose the control points so I can adjust them dynamically via an aray I have to to something like this:
Is there a cleaner way of doing this? I have several tentacle elements I want my waveform function to control but doing this for every individual component seems cumbersome
If I'm working in Blender, can I create all of the possible animations in a single .blend file for my character, stored as Actions in the NLAEditor/DopeSheet, so that when I import the .fbx file into UE4 it will automatically import/update all of my animations?
@fleet venture You can use AnimModifiers to generate a float curve on the animation that will tell you the information that you want, however you need to manually compose the transforms of the bone hierarchy in order to get a transform in component space. https://docs.unrealengine.com/en-us/Engine/Animation/AnimModifiers
@outer fable Short of writing your own animation node, there really isn't any way to avoid that. But a small suggestion in regards to performance, You'll want to evaluate your transforms in the event graph, and feed the splineIK the unique transform variables. Using a Get on an array will stop the fast path optimization (which matters if you have many active animation blueprints in the scene).
@jovial imp I'm not sure if Unreal supports splitting animations from FBXs by takes. Typically each animation is its own FBX. You could write a script that used your Dopesheet to export separate FBXs though, so you have like a batch export.
hey friends, looking for some input on an animation state I have
I have a state called "SuddenTurn"
and I want it to be able to interrupt itself
so that it can start again (with a reset state)
the idea being, I could have
Running -> SuddenTurn -> Running -> SuddenTurn -> SuddenTurn -> Running
currently the only way I can think is to have a dummy state that I would transition to, and then immediately back to the SuddenTurn
but that feels a tad hacky
@slow island Something that is pretty easy to setup is to have your SuddenTurn state contain a Blend by Int, and then you can increment an INT and effectively 'restart' an animation without having to leave the state and come back
Kind of like this^
awesome, thanks @frosty peak , will give it a go
make sure your animations are not set to loop!
@frosty peak working well, thanks again
Glad I could help!
Anyone know if there is a way of hiding parts of a skeletal mesh. I have a character with a jacket and I want to hide the parts that the jacket cover so they don't poke through.
hi what would be the best option for me to change the camera fp view to a lying down one as i want the player to lie down on a bed should i use matinee?
@toxic dew If there are different material slots, you could swap in a hidden material when you want a part to be hidden. If they are 1 material, you can author texture masks & float parameters that control the visibility. OR if they are customizable, like you can swap out different jackets, then you can use Either MasterPose or CopyPose on a separate skeletal mesh component.
@wanton nebula Is this like an animated camera? You could use Level Sequencer to do some of that stuff fairly simply.
@frosty peak They are different skeletal meshes. One mesh for the base "naked" body and multiple skeletal meshes for the other clothing they wear. All the skin is set to the same skeleton and the base mesh is set as the master pose for the other clothing but it dosen't seem to sync up all the time.
is the level sequencer in matinee or would i find it somewhere else
@wanton nebula Its next to matinee in the menu, Cinematics > Level Sequencer (I think). It's the replacement for Matinee, and its a lot easier to use.
@toxic dew I'd highly recommend using CopyPose instead of MasterPose. CopyPose can do a whole lot more, and it does not require perfectly identical skeletons.
@frosty peak Alright I'll look into it. Thanks
ahh i see it ill give it a whirl thank you 😉
humm. Yeah they use the same anim BP. Not sure how I'd determine which is which. They don't have any extra bones or anything or play additional animations. Seems like Master should be the correct thing to use in this instance.
@toxic dew When I used MasterPose in the past, there was 1 skeletal mesh with an AnimBP and the rest were set to either Custom or None. Definitely didnt have multiple AnimBPs running for each mesh.
Weird. If I have no animBP I get no motion.
Chest is doing nothing.
oh well it would help if I added the chest to the master...
But I get little bits poking through even so. That's why I was wondering about the culling pieces underneath.
^this particular issue looks like some skin influence problems
Hahaha. Oh my god. So I just tried it without the animBP and the master set
seems additive animations aren't transferring
what I like about it, is that you can make adjustments after copying the pose
looks interesting
yeah but it runs another layer of the animation BP
are the custom piece skeletal meshes zero'd out on the relative transform?
its a super light animBP
fortnite uses them =\
the pieces are skeletal meshes built around the same skeleton
the clothing looks rotated off of the skin
so thats why I am wondering if the skelMesh component is rotated differently than the parent skelMesh
yea The character looks left and moves the head instead of turning but the clothes turn
I'm not sure how else I can ask this question
Yeah I get it. I'm going to make it a child to have it take the parent mesh's rotation (I hope)
ideally their transforms are all zero
their relative transforms ?
ya
they share the same root bone position as the base skeletal mesh but the mesh itself is positioned according to where it should be on the body
right, and it's bound to the skeleton
the component should be zero'd out because the master pose will align the skeletons
Yep 😃
is master pose working on these pants?
so is everything working then?
but it causes more to poke through the mesh.
either need a material solution, or you need very consistent skin weights
yeah. I think the animation retargeting is messing with it a bit too. Not completely accurate .
potentially, ya
ya thats definitely something that is fixed via skin weights
need to add a little of the upper arm influence to the traps
or something
to push it in?
ya
depends on what your animations look like though
maybe needs a twist joint on the shoulder
Right now basic locomotion. We are using the epic skeleton to keep things easier for retargeting.
Nothing about animations is easy
ya, I wouldn't worry about those details then
to really hit polish, you need to have more control of the animation than what you can get from retargetting
you can always export the retargetted animation to FBX though!
yeah, I was thinking that but we have 9 races, all with 2 genders and lots of customization. Our locomotion and a Punch is already about 100 animations if you include all the additive stuff. that 17 more times would kill our budget 😦
sounds terrifying
Maybe your suggestion of adding in a material solution to fix some of it might work. Vertex paint some offsets.
so definitely go for a material masking approach to hide parts of the body
you could make the naked chest BE a 'shirt'
but you might get rendering artifacts
Naw we have barbarians. Barbarians won't wear shirts. It hinders their muscles.
I guess what I mean is that the chest area is a 'shirt'
just that it looks like the skin
so when you put on a different shirt, you are removing the naked chest
it moves the burden of work around
we did this kind of thing on the Sims
you have a bunch of different swappable regions
oh yea it's not a modular mesh for the base body.
and there were never any meshes resting under other meshes (except for the head & hair)
are you using Maya?
Yeah, We talked about that but we don't know every customizable piece yet. so for the time being it's base mesh+Clothing meshes.
We also need blend shapes for all these things which is when we will be breaking it up.
I would limit the use of blendshapes to just the head to be honest
Unreal doesn't have wrap deformers
managing blendshapes across various clothing pieces would be a nightmare
All the seams!
If you are using Maya, You may want to add Proxy Skinning to your workflow to help the skin weights on the clothing: https://lesterbanks.com/2016/10/introduction-proxy-skinning-maya/

Learn the basics for creating a production workflow with proxy skinning in Autodesk Maya, making it easier to iterate on rigs and models.
Proxy skin from the skin to the clothing
it interpolates better than copy skin weights
We start with a base mesh for them all so the verts for the skin and armour are mostly the same across our characters. Little different for smaller characters. I'll forward this over to our Actual rigger. Might speed up the workflow a lot.
right now we just copy weights for the most part since they all similar
When I type a value into sequencer its not changing it, it just sets it back to the default? I havnt locked the track or anything?
oh ive changed it to moveable some how and it wont let me change it back to static
oh no thats not it
all, what do you use for quadruped feet placement? is ikinema the only real alternative?
no you can roll your own.
@obsidian path Are you changing the value in the Sequencer UI or in the Details panel in the level editor? Have you tried toggling Auto-Key? Sometimes that UI gets kind of buggy.
@wintry belfry LegIK, TwoBoneIK, or FABRIK should work fine for Quadropeds. IKinema is awesome, but it can take a lot of time to get the right tuning.
the issue with those is that i’ve yet to find one that works constantly, i.e. while walking (not just when stopping)
usually You'll have curves in the animation that control the masking of the effect per leg. So you only apply the IK during the planting phase of the anim
right
which is what i have
instead, i’d like to see it applied continuously as i can see in ikinema demos
You should get the demo of IKinema and give it a shot.
yeah i will
Hey guys I’m super new, just wanted to gauge how hard it might be to get the standard UE4 mannequin in third person game to my custom character
I imported an fbx character and have some root motion anims
From blender
UE4 made a skeleton for it when I imported it but does that mean it is rigged to UE4 skeleton?
it will have a basic humanoid skeleton presumably yeah. If anything is wrong though, you can retarget it.
@zenith depot The skeleton that is made when you imported it into UE4 is a file that holds the bone information. You can have a bunch of different FBXs, and you can tell them all to use the same skeleton asset (and so they can share animations). This skeleton asset does not mean that it will be using Mannequin skeleton or animations, that will require animation retargeting.
IF you made your character in blender use the same skeleton as the mannequin, you can pick the Mannequin's skeleton when you import the FBX, and it'll be able to use the mannequin's anims & animation blueprints.
All, I don’t get how to use a stop transition. Sure, for start you can use a finterp while button forward is pressed. But when the button is released how can you have a stop animation while the character still moves?
@wintry belfry are you driving the animation based on the input? You could use the length of the Velocity instead.
I am yes
but it’s not only an animation thing
the character needs to keep moving a little
even when the button is released
otherwise you just have a stop animation while the char is still
so ya, Velocity would accomplish that if the capsule is still moving
ok
how do you get capsule to move then
you feed a finterp into input (on event tick)?
the controller catches the input, Sends the movement to the pawn, and the Animation Blueprint reads the velocity of the pawn
@frosty peak Ok thank you, I made the character in Fuse
So you’re saying if I import the .fbx, I can pick the mannequin skeleton and it will work?
@zenith depot there should be articles on retargeting Mannequin animatons to Fuse
If it is from Fuse, then no.
Fuse has its own skeleton
i don’t think you’re understanding 😃 stop is when the forward is released. there’s no capsule movement then, that’s the whole issue.
I’m assuming if I bought animations I have to have my character on the UE4 mannequin skeleton to use them right?
@zenith depot most assets on the marketplace are for the mannequin rig, but better is all subjective
@wintry belfry In the movment component on your pawn, you can control the drag
Ok so if I made my character in Fuse, is there any way to make him work on the mannequin skeleton?
If it’s possible I can read up on it
@zenith depot You would need to learn how to retarget the animations in Unreal, You don't need to change the skeleton.
https://www.youtube.com/watch?v=u87GKmTnDu0 <-Perhaps this may help

In UE 4.14+ there is an additional step required!: https://www.youtube.com/watch?v=Na87CbnRM_c This video shows the basics of UE4 retargeting system. This is...
You’re saying it’s easier to retarget animations for the mannequin skeleton than go the other way?
Its just different work
Making your character use the mannequin skeleton etc
you can make your fuse work on the mannequin, but you'll be painting skin weights
and the proportions might not be correct
Right so it’s cleaner to retarget for the skeleton UE4 made for my character
yes
neither is really all that clean though
but at least a lot of people use fuse
so there should be good documentation around
Ok thank you
I grabbed a couple animations from Mixamo and gave them root motion in Blender
Mostly as place holders for now I guess
But now I gotta figure out how to set it all up so the playable character isn’t the mannequin
Level design is my shtick lol
How can I pause a anim montage at the end of each section?
Say i have 2 sections and i want the montage to play through to the last frame and then pause there
Or I want it to loop the last anim in the section
Got it to work with bPauseAnim but that seems messy

Damn Daddy, that is good looking
Ah your name is different for discord 😂🙈
Are there any inherent visual downgrades when you retarget an animation? Is it all dependent on the skeleton you are going to/from or is there always guaranteed to be drop off in quality?
I don’t want my nice animations to turn into Skyrim jank
No, just fo4 textures are potato
😂 I mean in my case retargetting animations from the mannequin skeleton to my skeleton
I meant as a question for anybody not to you specifically but if you know feel free haha
@frosty peak
@zenith depot no quality "loss" per se. Just takes some work to set up good retargeting.
Ok thank you
Just imported in a character I generated through Autodesk's Character Generator web-app. T-Pose looks fine and everything.
Uploaded the character to Mixamo and got a few animations to use with him....
I don't even know where to begin with explaining why this looks beyond horrifying.... any clue what on earth is going on?
hi guys anyone experiencing that morph targets can't be exported in max?
we tried exporting a morph target from max
and when we import them to ue 4.19
we can't see the morph targets even we already ticked the option
That looks really nice @misty dagger I'm working on my own open-source first-person-shooter. Hope I can make something looking as good as that 😄
Cool stuff
I'm assuming it's not possible to create an animation within Unreal Engine?
@kindred basin Goddamn
Bare in mind I'm a programmer, I have no clue how to do anything animation related 😂
Anyone here also familiar with Unity? Is there a way to animate certain properties of a blueprint or actor like you can in Unity?
Traitor
I'm actually coming from Unity to Unreal heh.
o nice.
😂
@soft trench you can use a timeline component (right click->add timeline) to animate values. you can use level sequences to record scene (and i think bp stuff now possibly?). unity's arbitrary animations were pretty awesome, it's one thing i miss in unreal
@kindred basin It looks like the axis got flipped around. That why all the limbs are rolling 90 degrees. Is it a skeletal mesh when it comes from autodesk character creator? Why send it to mixamo?
@soft trench You can store curves on animation assets that drive arbitrary things like bones, materials, etc on a skeletal mesh.
ACG gives a skeletal mesh, Mixamo gives the animations, hence why I used both. Supposedly both are directly importable to Unreal.
It sounds like you might be right about the 90 degrees, definitely appears that way, but I have no idea how to fix something like that directly.
I suppose checking the forward-vector to make sure they all line up would be a good start?
you will likely need to retarget the animations
Unfortunately, Unreal doesn't have the Mecanim Humanoid setup
I'd imagine a tool that did that would sell pretty well
@kindred basin You should checkout the section on retargeting adjustments: https://docs.unrealengine.com/en-us/Engine/Animation/RetargetingDifferentSkeletons
I just switched the ACG bones retarget modes to skeletal and got a better retargeting.
To make this work I had to set the mannequin retarget to a T-Pose as well.
I'll try that out now, see how it comes out, thanks for the advice!
what about use t0A as ref pose on import? i seem to recall that fixing some mixamo twisting, i could be misremembering
on import of the skeletal mesh or the animation?
skeletal mesh
Hey guys! Does anyone know how I'd go about animating textured faces on my character in the sequencer?
I animated them in maya but they didn't transfer over via the fbx
I know it has something to do with "Paramater2D" but I'm not entirely sure
@hidden elbow This sounds like you need a material with some float params that create the effect that you want. And then you either drive those params with Animation Curves (which could be created & imported from your DCC) or those could be authored in the animation asset or directly in Sequencer.
Alright, the last part sounds easy, though I can't find the option to create a float parameter (still super new to this stuff)
You have a material for your asset ya? If you held 1 and clicked in the material editor, it would make a float node, and then you can right click on that node to make it a Float Parameter. Animation Assets can drive those, or you can just animate those parameters by hand in the sequencer.
Oooo, I'll go test that
Right, so I tried linking them all to compile as one material but I clearly don't know what I'm doing haha... how exactly would I move on from here?
so you want to flip which texture is used based on a float?
let me load up unreal, this is not too hard to setup
Yeah, that seems to be the case. I appreciate it!
Confused as how I'd get it to link to the sequencer though
Unless I can just create tracks for them or something
you add your actor to the sequencer, then you add a track for the skeletal mesh (or static mesh) and then you can pick the material, and you can add keyframes to that material parameter
OR, you can make your animation asset do it.
Right. That workflow makes sense, but I don't even know how to add a track for the static mesh. I thought that the actor and the mesh shared the same track
nah, you dont want material parameter collections for this. You want Actor To Sequence
Material Parameter Collection is for stuff where you have a ton of objects that you want to set the same material parameter value on.
Oh, cool cool!
I've already got my actor in though. She's set-up and has all her animation applied already
Is it possible to go through with this process on an already animated actor?
Sweet
😦
so this is how you could setup your material
you'll want your keyframes to be stepped keys, or transition from 0 to 1 very quickly, because you dont want to cross fade these textures
Or add the ceil to make the textures flip whenever the float is above 0
There's so many lerp node options, which one do I select?
its the linear interpolate
or you can press L, and click
Lerp = Linear Interpolate
Noted
Right so I've got everything set-up
How do I go about adding the mesh instead of the actor to the sequencer?
is it in the scene? or is it the player?
You should be able to add the component from the actor
and then add the material 0 (or whatever the number is if it has multiple mats) and then you can add the parameter from that material
click the plus on Jane
It only gives me the option to add the skeletalmesh
yes, add that
then plus again on the track
pick material 0
or whatever index is your face material
Yup, aaahh I see it now
you can also just add the curves in the Animation asset, and then it will work whenever that anim plays
Thanks a whole bunch dude. I really needed this!
glad I could help!
@misty dagger Is that in unreal using epic rig?
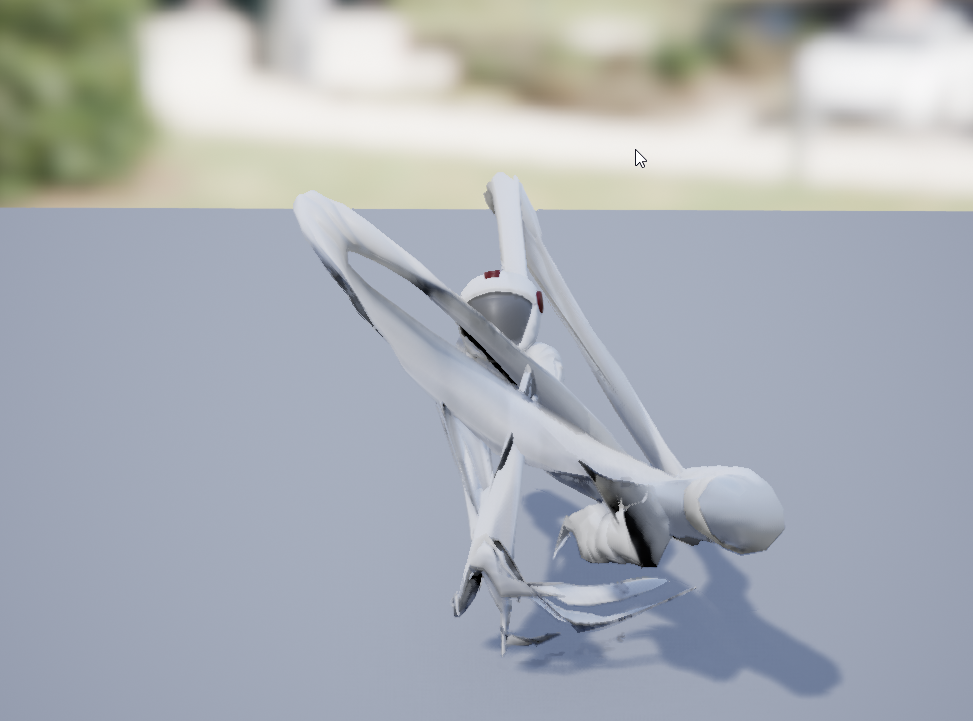
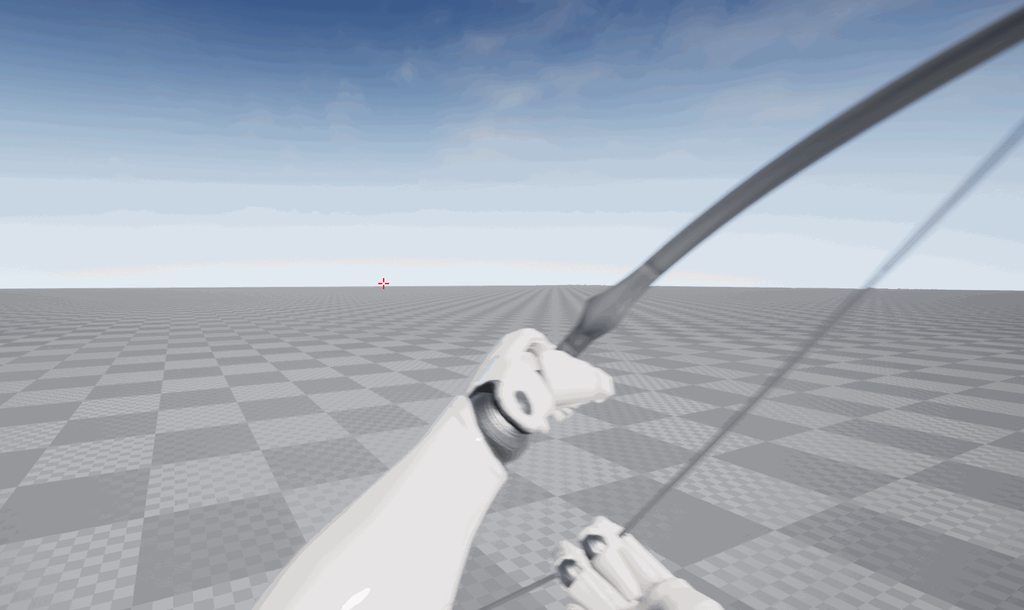
To everyone here.. I feel like animation is easily the mostt difficult part of game dev, at least for me as someone who has dabbled is everything. Spent loads of time and still thing don't work out quite "right", esp. workflow related. Took me days to learn how to do this simple bow animation and there's soooo much tweaking and work arounds I have to do to work w/ epic rig.
@plucky viper That looks like a solid draw & loop! How are you animating the bow?
I definitely agree, animation is at the convergence of a lot disciplines so there is a lot of work to bring it all together.
what is the node in anim bp to apply a value to a bone, (not add a mesh to mesh blen but just modify the bone)
oh i found it, transform (modify bone.)
@frosty peak I animate the bow along with the arms, then export the anim separately. bow rig is driven by a single control for string which just drive two IK setups, one for wooden bend and another to keep distance equal from mid string to top/bottom of bow
can some 3DS MAX users help me here?
I've made a CAT rig for the unreal skeleton but upon export, the hand skeleton jitters
I've tried export selected, hiding all but the skeleton and exporting, baking animations... but no matter what I've tried the skeleton jitters upon export
Does anyone know much about root motion? How does it differ when I build my blueprint? And should all of my animations be setup for root motion or just ones that displace the character
@zenith depot Just the ones that Displace your character.
Ok thank you
@plucky viper fallout rig
HI Guys
Is it possible to blend animation like Run and Kick?
Like you have football player that runs and after a while he must kick ball , but he shouldn`t stop.
Should i have 1 Run animation and 1 Kick animation , and blend them ?
Or should i have 1 Run , 1 Kick , and one animation with Run and Kick already in it?
i hope someone got it 😄
PS. Sorry for "good" English
you can blend animations per bone. Look into "Layered Blend per Bone" in your AnimGraph
i tried, but its kinda stopping one animation and doing only second.
if 2 animations using same bones at same time? is it possible to blend them correctly?
in this particular situation, both legs used and in Run animation , and in Kick
if i set Weight value to 1 , it will play only Kick animation , but Character still moving, and would move char , but already with kick animation, which is wrong
@distant sigil His suggestion is to specifically use Layered Blend per Bone, which allows both animations to run at the same time, You just need to specify which bones you want to bring in. The Blend animation node will basically lerp between animation, and it will stop the inactive animation.
Alternatively, a simple way to do this is with a state machine.
Have a running state, and a kicking state. Set the animation in the kicking state to not loop. Then you can just pop into the kick state as you need it.
OR you can have a running animation, and a Slot that comes after it. Then simply use a montage to perform the kick. They will naturally return to the running animation after the montage is complete.
There are a lot of ways to do this, just try out a couple of ideas, see which works best for your assets.
Seems like with State Machine i got what i need. Thanks @frosty peak and @dusk dove
Has anyone had issues trying to get particles to trigger in sequences in 4.19?
does anyone know websites which are selling good looking and any kind of animations?
What kind of issue u have @molten shore ?
The particle system is in the master level, set to not loop, autoactivate turned off. Sequencer references asset, triggers at a specific time with the activate track and nothing happens
Yeah
Hello, do you know if there's a way to trigger an animation graph transition without setting a variable?
f.e. from a notify state?
@molten shore if u change particle to another one, are u still facing same issue?
@charred beacon You mean Transition from one anim state to another?
There is checkbox called "Automatic Rule Based On Sequencer Player"
if u click on transition rule
it will appear in Details panel
@distant sigil yes, it seems to be a problem for all particle systems :(

Gotta love @EpicGames ARTv1 Allows for some "dynamic" run cycles #naruto #anime #run #indiedev #gamedev #animation #maya https://t.co/CxVrN3thFl
i will leave this hear i know you guys will appreciate it!
@distant sigil @frosty peak isn't this only to transition when the animation ends? I'm trying to be able to cancel the animation into different states according to game events
You're going to need a variable then....
i.e. if i'm in the middle of a hit and I receive a damage event i want to go to the hurt animation directly
@misty dagger who runs like this tho?
because having a state variable and checking it against different transitions is just a redundant step if i know which state I want to go to, isnt' it?
it can become an error source for my fellow designers
does anyone know websites which are selling good looking and any kind of animations?
Please let me know if I'm asking in the wrong channel
@charred beacon There are many different ways to structure this, but generally the animation graph reads values off of the gamestate in the event graph, and passes those values to the animGraph to evaluate on a different thread
would you reccomend transitioning between montages without an anim graph, @frosty peak?