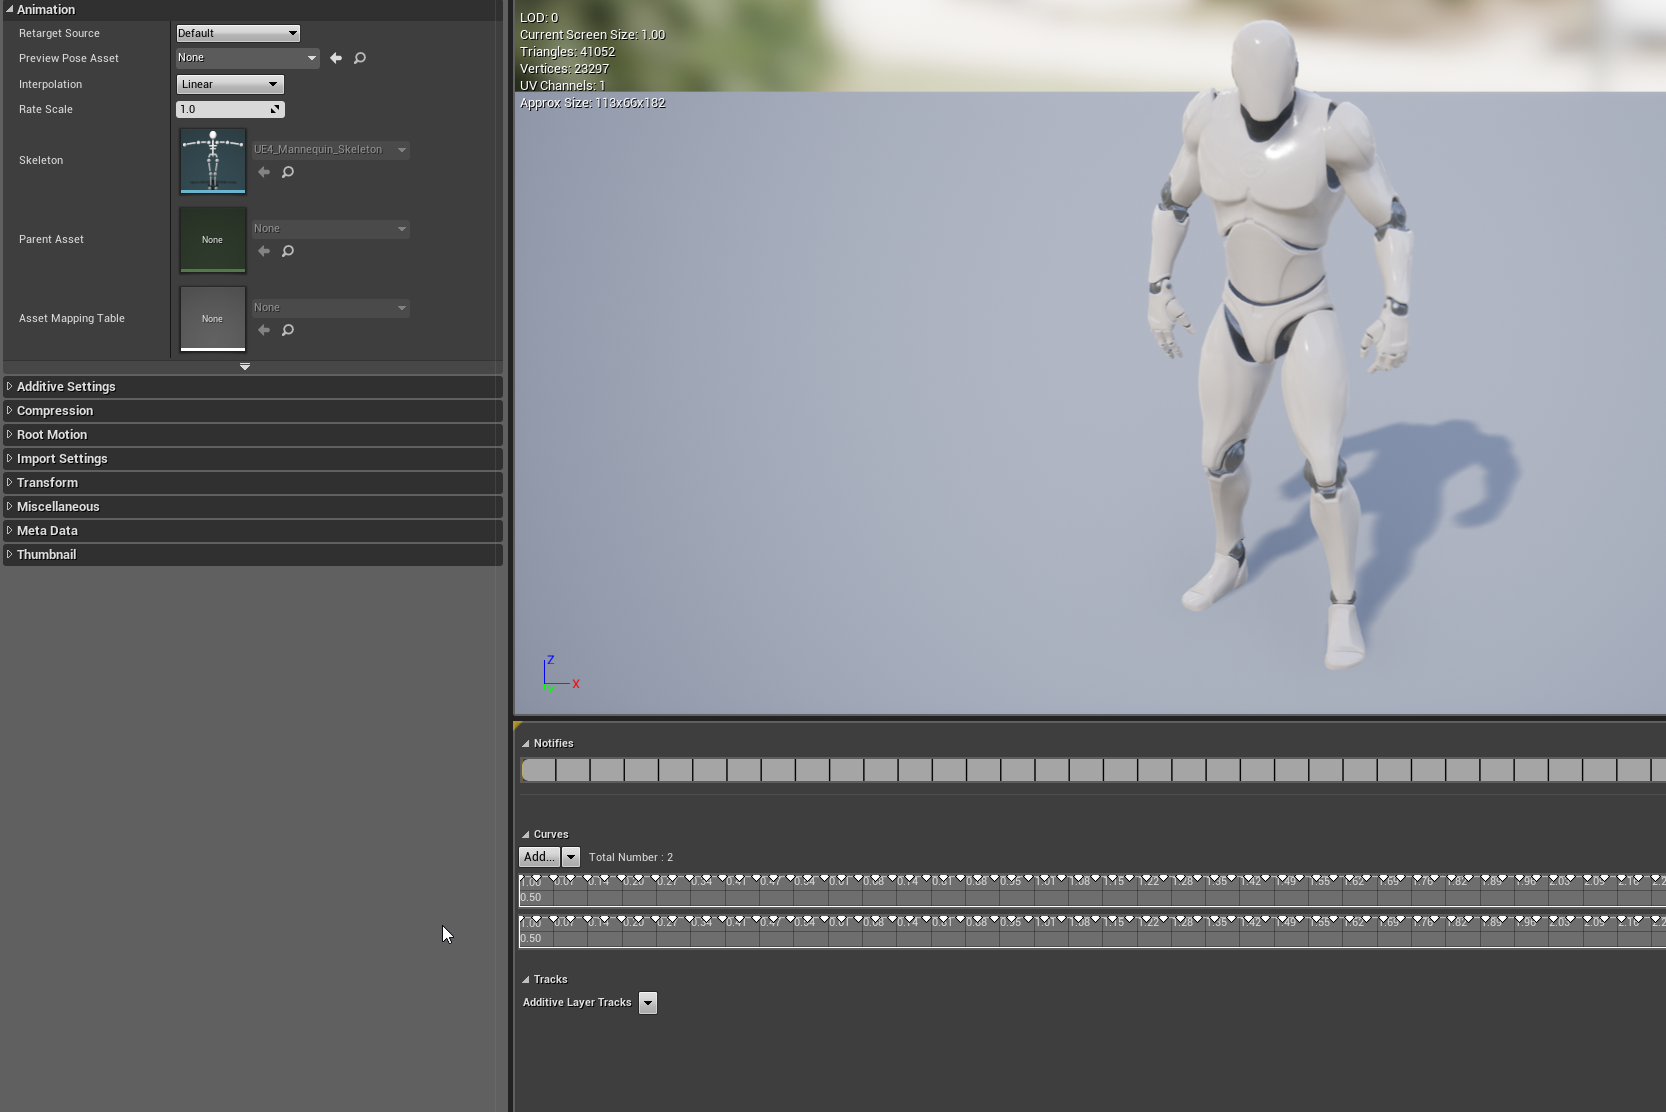
#animation
1 messages · Page 101 of 1
Overview of Virtual Bones that enables you to add IK or Anim constraint joints inside of the Editor.
Never used myself but I think it should work for what @misty dagger was asking about wouldn't it?
I was thinking about playing around with virtual bones over the next few days to see what it works well for and what it doesn't because they do sound like the limitations they impose might seriously limit what they can be used for
If I wanted to check something while an animation is active would I use a NotifyState? Example is I want to check if an attack has hit an opponent while its playing
Hi, when retargeting a skeleton, is it common to set Translation Retargeting setting to 'skeleton' ?
Hello everyone, quick question: I'm working for the first time on an AimOffset, and i'm following the UE Doc guide. Thing is, when editing the AimOffset, I don't have the parameters panel
I can't seem to find where to setup my AimOffset Axis parameters
Found it 😃 It's now in the Asset details under Axis Settings
^ answer for anyone from the future (hi future)
hey guys, ive found something wierd
3dsmax
ive made a tpose of the mannequin..
Unreal
when i import it as animation, the legs are still A pose....
Anyone knows why?
i actually have a version where it works .. but dunno whats wrong..
anyone know where i can limit the bone influence in a skeletal mesh
I wonder if its possible to animate from Blender with the UE4 Sk Mannequin ?
Rotation of the bones doesn't look right....
Do you have any solution for this guys ?
I've been adding a root bone to my skeletons and animations and a tutorial I was initially following was saying to move the forward translation from the hips to the root and zero the forward translation on the hips. My question is, shouldn't I be moving both the X & Y translation from the hips to the root? If there is sideways movement that needs to be on the root too yeah?
@sinful smelt download the UE4 Tools addon for blender, that will allow you to animate and export on the UE4 Mannequin
@proper tangle I generally tend to constrain the root to the hips on the Y axis with an offset so the root follows exactly what the hips are doing, while staying on the ground. I only use Y because when i am animating attacks and locomotion i am generally only moving forward. But you can definitely move it in the x and y axis no problem if you need the side to side movement
okay thank you. A few of the animations I have also include some movement on the x plane as well.
yeah that will be fine, it really depends on context of what you need the character to do. I think by default though the root bone ignores any Z translation, im not 100% on that though
@misty dagger limit the bone influence in which software?
I'm trying to set the location of my component in this animation to 0, 0, 0 but every time I change any axis to 0, it adjusts the rest of the axis and it doesn't actually set it to 0
It just adds an offset or something
So how do I make the animation play in 0, 0, 0 relative space?
So I have IK on the left arm to keep it on the gun, on EventUpdateAnimation I take the socket location/rotation for the left hand placement socket, then I apply the IK to the left arm, but it appears to always be behind and as such its offset, when the gun moves such as while running it's always on the wrong frame, basically it looks like it's lagging behind the animation - also I've blended out any animation on the left hand (so it's not that)
Think I found a solution, apparently the socket transform isn't updated every tick or something
that's pretty gross, you would hope sockets would follow bones accurately
is there perhaps a setting to have the socket update every tick?
Doesn't seem to work anyway
I mean, it somewhat works, but then with some animations the IK pops a bit
@viscid willow Thanks for your answer, actually i allready use UE4 Tools to animate.
The problem is that my UE4T Animations goes only on the Skeleton made by UE4T and not on the Native UE4 Mannequin Skeleton.
Also the Animations done on the Native UE4 Mannequin, does not work on the UE4T Skeleton, example with Animset Pro pack.
ANY IDEAS GUYS ?
@viscid willow in ue, i could have sworn i saw an option inside the skeletal mesh to set the max influence, default was 4, now i cant find that anymore
cause when i set it in the project settings it crashes my project
Any idea how I can use one of these animations on a different skeleton?
https://i.imgur.com/8zi1o3V.png
Thgis one?
https://i.imgur.com/oiSo57E.png
Trying to redo all of it to learn it myself,


@distant shore Thats the difficult point i try to resolve as well
Hmm, alright. Maybe at some point I'll delete the skeleton that the animation is attached to so I can bring up the dialog to reattach it
is your state set correctly?
i dont know if you set it, but you select a boolean with that state if its always the same it will always true
how can I move a bone of the skeletal mesh via Blueprint and based on that linear motion also rotate another bone ?
Describes the Transform Modify Bone control which can be used to modify the transform of a specified bone.
Quick question about sockets. So in the skeletal mesh, I brought in a preview of the weapon I am socketing, lined it all up right. Looks great to me. But when I go to socket it on the CharacterBP it is way out of position.
Also, my weapon is a bow and arrow. Both separate skeletal meshes, and they need to be socketed.
@misty dagger If there is a setting like that I'm not sure, I hope you find something
@sharp knoll The look of the preview mesh is not important, you should line it up perfectly in the CharacterBP, thats what the player sees. The preview mesh is just for preview purpose.
hi, i retargeted from the mannequin, but the IK_ bones are not correct.. anyone knows how to fix that?
If I create an object in Blender and want to animate it, do I do the animation in Blender or after importing it into Unreal? (A simple rotating block that rotates when a certain condition is met)
@nova owl You can do both, if its a simple animation I would do it in unreal.
OK thanks!
Hey all, with animation slots, I understand how to setup the animation blueprint etc, but I've got an animation from Maya, when I play the animation in the montage preview, it's fine, but when I select a different slot, the character is just in APose in the preview window. Is this a problem with my slots or a preview glitch?
Hi there again im using a dialogue system in my game project and am curious on how to get a mouth blab going for my characters. Something similar to the original deus ex. I have a mouth bone there and a mouth opening and closing anim but am curious as to how they got the words to extend the mouth opening and closing on time to match whatever word was being used. I believe skyrim has a far more complex system in mind. Any help would be much appreciated.
skyrim uses phonemes @regal crane
If you just want to blabbing, you can probably read the sound input and set the mouth rotation using a uh
forgot what the node was called to remap a number
0-1 > 0-100
hey: has anybody ever had an animation that plays fine in the editor preview but won't play in-game?
Anyone know if 'Play Random Sequence' in animation graph can accept animations with a negative rate scale? I only ask because I have one animation that's a duplicate of another but played in reverse with some tweaks and the animation does this when I try to play it:
It looks like it's playing the first few frames then cutting out, which is very odd. It's worth noting that if you try and set the rate scale to -1 inside the node it doesn't let you — hence my suspicion.
@blazing sky I've send a friend request
hey guys, im trying to set the mannequin pose for retargeting.. but why cant i rotate the bones.. it seems like the rotation is IK based.. is it new?
Hi, what do you think of that? ^^
https://www.instagram.com/p/BgG0WdalmBD/

Instagram
14 Likes, 2 Comments - Nicolas brg (@brg__nicolas) on Instagram: “A new species in the mysterious seabed... #cinema4d #c4d #3d #design #render #art #graphics…”
did anybody ever use the ARTv1 tool? if so, did you ever manage to save the scene?
Is it possible to mix layered blend per bone animation's without out montages?
Like I want to combine 2 animation's to play at the same time, on character, on different bones. Is that possible though slot animations?
We are using sequencer to play the slots but still want the ability to blend per bone.
hey how can i make my widget animation play when i set it to play reverse on destruct event?
How can I play physics in Sequencer?
seems like nobody has any answers for anybody here, sorry to say I have none either,
https://i.imgur.com/4ZPsXPA.png
But I am getting frustrated, why can't I change the skeleton targeted by this animation?!
Don't know if this is the exact place but does the animation look "off" to you? Does it look okay? Just needing some feedback
any one know where I can get a prone animations ?
maybe mixamo @Dezusa ED#6502 ?
i will take a look thanks
How can i make an animation vid like the intro to a game?
has anyone got any articles, blog posts or anything at all regarding setting up animBPs with curves ? There seems to be no info at all
Hi there. I have a simple animation montage and now facing the problem that its anim blueprint won't trigger it. Do i miss anything? I'v setup everything as usual...
For simplicity: The anim blueprint update method fires string - my notify event not. I've never faced this issue...
Hi does anyone know how to fix the offset of an animation? I want my character's animation to move a little to the left. I use a blendspace to move forward,left,right. So icant use the transform bone there..
Hey guys, I've been pulling my hair over something for a few hours now- what's happening is that my anim notifies seem to trigger several times during gameplay instead of a single one.
I have footstep particle effect setup on my Run animation, which looks good in the animation editor (one single burst per footstep), and look good as well when I drap and drop the animation into my level- but on my pawn character each footsteps have multiple particle bursts happening at once instead of a single one, resulting in too many particles.
My animation is setup inside a blendspace, and is the only animation inside this blendspace that has anim notifies (so it's not other animation triggering notifies at the same time), I've tinkered with trigger weight threshold and notify trigger mode, to no avail...
Kinda hitting a wall here, was hoping you guys would have an idea
cheers ! 😃
AH ! I figured it out- it's because my character is setup using several skeletal meshes, all using the same anim blueprint (it's a customisable character)- so each 'body part' is triggering its own notify. Not sure how to handle that differently though...
The SetMasterPose component was the solution, if anyone has the same issue 😃
Hello
I need some help with using AnimBPs for a tank i am using
It seems that i can only using my animations if it is in the AnimBPs
hi
I'm setting up a simple Physic asset for a character which falls into its pieces
I have no constraints
for some reason there are 2 body parts which doesn't collide with each other no mater how I set up collision
for my prev character this method worked
any idea how to fix it?
ok found the solution
right click on collision - collision - enable collision with all
Hi all,
Just taking a look at making our character's animations, and noticed that the legs on shooter game's character clip sometimes whilst running in a certain part of the blend space (gif below hopefully) is there a way that we could avoid this? Perhaps with IK?
@spiral cloak you need a separate Animation in your Blendspace for this
So just an extra step to blend between essentially
For backwards left and backwards right
which is where the problems appear
yep
I have the exact same issue and making new animations is easier than fiddling with IK
Ah brilliant 😃 Thought this might be the solution 😃 I'll put it on the backlog as polish if it fits within our timeframes/budget
Would hate to see this in game haha
So, does anyone here using Blender has managed to import animation into UE4 ?
I can import the asset and while the skeleton is fine, the mesh isn't visible, and crashes the engine when I animate it
@lucid otter make sure you export the skeleton without animation first
then export the animation
I'm using copy pose from mesh node and it seems to go out of sync if you attach the target mesh after initializing the source animation. is there a convenient way of resetting it so they're guaranteed in sync?
@vocal depot Thanks I'll try that
@misty dagger Some Boogie Moves right there! Will 100% be avoiding this haha
Hopefully im in the right channel for this, but I was wondering if someone could answer a question about UI animations. I have a simple transform animation where a UI element is just moved over the right smoothly, but in game it just teleports. In the UI editor, everything moves how it should, but in game in jumps to its location in one frame
The widget is set up correctly, and the Play Animation node is also set up
Hello hello! Me and some friends are working with an exhibition where we are going to use a mocap-suit and have different effects on it for an exhibition. Any tips for effects or general tips for what we could be making in one week? We are using the rokoko-suit and there is no real tutorials on it except for changing the mesh of the character in unreal!
Thanks in advance for anyone who could lend a hand/tip <3
If you have any tutorials or whatever that you think could suit us id love if you could PM it to me (we are quite new in the software)
you could use some infinity blade assets, retarget one of the characters to your mocap rig setup and jump around as an orc thingy
Hi, I have a question to all you blender users out there: So, I retargetet a mocap animation using AutoRig Pro, cleaned it a little and used Additive keyer to make some tweaks. know my problem is to merge the additive tweaks with the mocap (via baking?). when I try to bake the additive and the mocap NLA strip, the mesh and rig gets destroyed... i will attach pictures below. my only goal is to export the altered animation to UE4 but when I import/export without the bake, it'll export the unmodified mocap animation and the tweaks seperatly, while the "tweaks" cause the mesh to blow up in the animation 😦
Whats the best way to sync animations with movement speed in UE4?
Hello all i have a animating question if someone could help im animting a weapon
is there a way to bind the hand to the mag insted of the mag being bound to the hand
using animation and rigging tools but for some reason i cant get the contollers to conrol the mag the mag controlls the controllers

@misty dagger Probably the scale of the mesh or the camera's FOV is bad
@sharp knoll I'd imagine that using AnimNotify events in the Animation BP's Timelines are the right way to go about it
yeah i just adjusted the FOV and that fixed it
I am trying to rig particles to a smartsuit that I am going to use. It worked fine with the 3rd person character but it will not connect to the smartsuit character. Anyone have any tips on how I could possible make this work?
@toxic geode I think you need to do it the other way: drag from the SmartSuitActor on the left there and then do "Get Mesh". The reason why it doesn't work right-to-left as you're trying in that picture is probably because the left side pin there is expecting an exact, specific thing and that isn't it.
@jovial imp How exactly would I control the speed that way? I was looking into "Root Motion" but it doesn't look like my movement animations move the root.
So, importing animation from Blender here... Skeleton looks completely fine, I can pose it manually in the skeleton editor
However, the "animation" (one frame long and basically just a pose) imports as nothingness, the animation just disappears the mesh entirely
Logs say stuff like IMPORT TRANSFORM ERROR : Bone (Root:0) Source Global Transform (0.000000,0.000000,0.000000|-0.000014,0.000000,179.999985|100.000000,100.000000,100.000000), Converted Global Transform (0.000000,0.000000,0.000000|-0.000014,0.000000,180.000000|1.000000,1.000000,1.000000)
Any idea ? 😄
@subtle matrix Looks like you had this before
that sounds like 0-scale issue
if the mesh disappears
try swapping export scale to import scale @lucid otter
how should i approach animation sync between two skeletal meshes? for example i want to characters to shake hands, but their location is way of.
2 bone IK system is usually used for minor adjustments in animations
you still need to figure a shared center point where the hands are suppose to meet
which needs to be converted from world space to local space
was thinking of adding socket and attaching one of them to that socket
but i think it would be too much work each time adding different socket for new anim
hmm, thanks. will take a look at that
it's commonly used to adjust like, foot locations to match the terrain
@subtle matrix Uh, what if I don't have any scale applied ? 😃
source global says 100 for scale
Yeah, I saw that, but I really have 1 at exporting and 1 at importing
use blender units
iirc they fixed it to engine that you no longer need to use metric
The scale is fine in UE4 though
(Ugly, but programmer art here)
This is the correct size and also the default pose
Skeleton works, apparently
But the anim is just empty space
...so it's not exporting keyframes?
Well, I don't know. I just have this error log above for every bone when importing the animations.
(for every anim, too)
Maybe the keyframes have a scale
I'll try that, thanks, back in a minute
if that doesn't work, I'm out of ideas
Hello everyone, I'm trying to have a dog follow my main character (heel). Everything works fine, however the constant trigger of the move to node in the behavior tree causes the animation to be reset all the time. See here: https://gyazo.com/abb46dfa85c29b6490ce5968889bc1e9

Anyone know how to avoid that?
Any suggestions welcome, I've tried playing with the interpolation times and speeds to no avail...
weirdly enough, if I just use AI Move To without going into the behavior tree, everything works fine...
@subtle matrix It didn't, but scale definitely is the issue. Animation shows up, it's just scaled down 100x
did you switch the unit type?
Nope. Trying that.
it used to be metric at 0.01 which would export to x100 for the engine
but I believe that is built in now
So, scaling everything up to 100 and exporting at 0.01 works
Trying the "convert units" thing now
Doesn't work (x100 in mesh, x1 anim)
Settingthe 0.01 at import also fails
I guess I'll stick with the 0.01 export ¯_(ツ)_/¯
Thanks for the help !
@wintry belfry check this out

In this 2016 GDC talk, The Molasses Flood co-founder Gwen Frey illustrates techniques for effortlessly creating high quality quadruped locomotion without the...
to avoid foot sliding on quadrupeds
especially the wolf
this is really nice but it looks like my issue is not animation
rather, using a behavior tree
if i directly use ‘AI move to’ on every tick everything looks smooth...
then sure, having an animation for direction changes would be nice
In 3ds max the animation I have doesn't appear to have the root bone moving. Its comes with a root bone, but it doesn't ever move during the animation. Root motion wouldn't be possible with an animation like this right? If that is the case, what is the best way to pair the movement speed up with the animation. Right now, everything appears to be sliding.
with in place animations you just have to manually adjust - trial and error.
Alright. That makes sense. In that case if I have multiple animations like SW, NW, NE, SE, N, S, E, W, etc movement both for Walking and Running (N, NW, NE) how would one go about getting those in. Also walking left and right is slower than walking forward and backward.
are standard actor and scene components not supported in animation blueprints?
...in lieu of that, is there something similar to a Timeline that may be used in anim bps?
I'm trying to do hit-based physics reactions but don't want to have my anim bp be aware of the parent actor's class to fetch variables from it
I want them to be independent
(so I don't want a timeline in my char bp that's used in the anim bp)
the way epic did it in their content examples is by setting it from the character bp
to me, this doesn't seem like the responsibility of character bps
they even mention in the docs that this should be done in the anim bp's event graph
defo doesn't belong in the char bp
anyways, any help is appreciated
@jolly osprey add a event dispatcher to the character that the animation bp binds to, this way you can call it from character without direct connection to anim bp
@spring steeple thanks. this wouldn't affect replication in strange ways, would it? bear with me... :)
not really if lets say the character gets hit it would call its dispatcher and anyone bound to it would get the call, so each local copy of the anim bp would get it whenever the local char knows that it got hit and calls it
thanks. this means that the anim bp needs to be aware of the char bp's call though I guess
call = class
I normally don't use anything but Character w/ components on it, so I wouldn't really want to have to start casting to specific types of actors
in that case, my only option would be to handle such timelines in the char bp itself, correct?
dont you only need a blend value? you could run it in tick
you can create a curve asset and run it with adding delta time
@jolly osprey something like this, doesnt look as nice as a timeline but does the same
thanks @spring steeple , that might be a viable alternative
@jolly osprey as for only using components you can add the dispatcher to a component and bind to it in anim bp if char has that component
is anyone using ART v1 with maya, no idea why my joint_mover_root got deleted and now can't do anything on my rig setup
Hi guys, my crouching animation is little bit of, when i stop the animation keeps still movning the animation but im stopt ? way is that
Hey animation and AI people, I have a problem where the root motion of an enemy AI Pawn istn't playing, or at least it appears so. It's an anim montage with root motion where a drone moves back and upwards., but its capsule just stays in place. I already tried an other animation with a simple backward root motion, but it won't move either. The Drone is controlled by a behavior tree. Any ideas why the actor just stays in place?
anyone have experience with cloth simulation in unreal?
Overview of the samples provided in the Cloth Content Examples.
ok
would you know if i need to move his geo so its out more on X axis
or if it needs bones or anything besides material ID
the link provided is more for non character cloth
not sure I understand the question. what's the cloth issue? is it leaking through the mesh?
@strong flame
its not leaking through the mesh, i just wasnt sure if i need to do anything special to it from where it is now besides assinging it its own mat ID to get cloth physics in game working
you'd probably have to tweak the mesh's physics asset in PHAT
so that clothing wouldn't bulge out for instance when the thighs are too wide
so i need to make sure the physics asset for the legs are sized correctly, do i need to PHAT the cloth or add bones?
PHAT is for the character
it generates a physics asset automatically for you
you just have to go in & tweak it
those pink capsules are the physics bodies
they "interact" with clothing
yeah
ok so for the cloth it just needs its own material ID
if i leave it in the position its in now, it seems like it will interfere with animation of the body in maya
yes, needs its own material id
i notice alot of people rotate the cloth on an axis
or could i just seperate the mesh from the object and hide it when animating?
or does it need to be part of the character to work
im kind of new to animation
I tend to make cloth a little bigger than I normally would - like putting XXL shirts on an L-sized character
this way it'll have some leeway when the cloth sim kicks in
so do you see any issues with the cloth where it is for animating
also do you think i could get the front and back all in one material ID or should i seperate in two
isn't it just the apron you're looking to set up as physics-simulated clothing?
re. material ids - if all your clothing is simulated the same then 1 mat id should do
you'll have to paint in weights, and you can leave out areas you don't want simulated
yeah its the apron and the back flap around the buttocks
there connected geo wise
can i get away with detatched it from the model when rigging so i can hide it for animating the legs without clipping?
not sure - with the thing on my screenshot I weight painted the clothing to the bones
@sharp thunderottpetty3d.com#7818 I think it needs to be skinned. But you can just put the cloth mesh into its own layer and hide it
@misty dagger strange that it would need to be skinned, do you think I can detach the cloth mesh and hide it in the layer or does it need to be part of mesh attached?
How to synchronize ragdolls for two skeletal meshes? I have 2 skeletal meshes, 1 is character and 2 is bulletproof vest. They both share one skeleton for animation.
@strong flame You should be able to detach it from the mesh. I think as long as everything is skinned to the same skeleton, it should be fine
I've got a character with a cape sort of thing that's not part of the character mesh and it works
Although this was using APEX cloth so dunno if anything has changed
Ok any idea why it needs to be skinned to work, is that just so it has reference to the mesh since all the skin weights will be redone anyways ?
Ah ya the new editor has it so you do all weight skins inside editor
Tbh I haven't tried without skinning it to the skeleton
But really, it's easy enough to just hide it in a layer
Ya detach it first would you say?
I'm looking for my Maya file to check but I don't seem to have it anymore...
Any bones you had to throw into the cloth or just detached skin mesh
I just gave all bones zero weight to the cloth
Ah
anyone know why my character walk cycle is lying down when i import it into ue4 from maya ?
skeleton mesh is standing up right... i tried fixing the rotation in maya - but no matter what i do he is lying down when i import
Imported bone transform is different from original. Please check Output Log to see detail of error. And i get this error
sounds like your Maya scene is set to Y-up, Unreal uses Z-up, this can be changed in your Maya preferences>settings
same issue - the skeleton mesh is exported from maya in the same way
the mesh itself is fine - but the rig is laying down - and since the mesh in binded to the rig - the mesh is laying down too
Why is my timer jiggling so hard? I am using UMG and animating the scale of the wrapped scale box and in the scale box sits my text.
I'm using blend space 1D to extend wheels of the vehicle
basically one animation where it extends and copy of this animation with -1 rate for collapsing it back
it sort of works but I see that some bones are not behaving correctly in blendspace
can I create like a one frame animation in UE4? I just want to have a "reference" position of the bones for the middle section of the blend space
well, I can but that doesn't really help with anything
damn
ha, actually with blendspace even single animation is not played correctly
hey can somebody help me with an ik issue?
If I have multiple classes; I.E knight, archer, mage; and they each have separate idle/running animations, is it a good idea to create multiple anim bps or is a "blend poses" based on the class enough? Thanks!
@misty dagger if you make it a variable than you can set it based on class
Ah yeah I could do that too, thanks
I have another issue I was wondering if anyone could help me with, I'm trying to make an aimoffset but for some reason the animations I'm trying to use completely mess up the base pose so whenever I apply them it's unusable
here's what the base pose and the first offset animation look like (the base pose is just a breathing animation):
here's the preview for the aimoffset:
lastly, here is the aimoffset without a preview base pose.
as you can see it works fine without the base pose, but as soon as I set any animation as the base pose it gets the same way as the second picture, not sure what could be causing this... any help is appreciated, sorry for taking up so much space!
have u ever made a animation offset before?
Making a new Animation Sequence is so weird and strange to me -- you'd think you could just right click and go to Animation > Animation Sequence... but noooooooo. You gotta make an Animation Composite and then go to the top left and click the tiny first option in the drop down menu that is the only one without an icon picture next to it that says "Create Animation" and then you can finally do it.
uuuuhh this is so annoying like sometimes my aim offset works but occasionally it Fs up and my character does a stupid arm dance
Ah I fixed it, I had the aimoffset animation set to mesh space -> skeleton reference rather than mesh space -> selected animation
wait, just in advance, if I add tail bones to a duplicate of the skeleton I'm already using, it won't mess up the animations will it?
I don't believe so.
I have a question: Would you make an AimOffset if trying to do melee attack animations?
oh ok good thanks
When I enable Root Motion on my animation
the character rotates by 90 degrees on the X axis
the animation looks fine otherwise
what is causing this?
ah finaly i found her sister ! lol
https://imgur.com/KrIIeBh

@minor hearth i retargeted and i got a warped torso because my model is smaller than the basic unreal model
I am creating a plugin which would automatically create animation notifies on all selected animations on a button click with naming and frames data extracted from a DataTable. The notify is a custom notify which has a property NotifyID and it is unique to every instance of the notify. This notify is supposed to print its NotifyID in its Notify method, which is working. The plugin is doing what it is supposed to do, only with a weird (but understandable) bug:
When I create the notifiers with the plugin button, all those notifies would only work during the editor is open, but they convert to a simple named custom animation notify when I restart the editor or right click and click reload on the anim asset.
BUT
If I create the same notifier from animation window, it remains consistent and works fine.
I noticed that there is a difference between the ones that the plugin is creating from script and the ones that I create from the animation window:
Plugin created notifiers' path is Transient i.e. "/Engine/Transient.CustomAnimNotify_X"
And the ones created from the animation window have the path "/Game/AnneAnimatinos/Uniclass_shot01_Anne_IK.Uniclass_shot01_Anne_IK:CustomAnimNotify_X"
(X = index number)
I think the transient thing is causing the problem.
Any help would be greatly appreciated
Am having trouble creating anim sequences for skeleton meshes. Can't seem to find any tutorials. Am I blind?
HEy guys!
just a quick question...
I'd like to code the character in a way that i would get rootmotion. basically..but considering only the Hips X and Y coordinates
What's the best way to handle clothing? I want to swap out bits of clothing like a paper doll. I assume there is a way to keep feet, torso, etc separate so I can combine them at runtime?
jfaw: I don't think you can create animations inside unreal editor...by default. I do all my animation in blender, which is a free 3D modeling tool.
Master Pose Component. That looks like the ticket
@manic patrol let me know if u get feedback I’m trying to handle ai root motion roaming and I’m having difficulty keeping him aware of navigating through the nav mesh
I can get root motion movements working by finding a random location and setting the rotation forward vector on the path index 1 but that only gives my guy a directional location to walk the ai move to lets you know if you’ve made it and I’ve yet to find a way to replicate this with root motion
@jolly osprey use physical animations component and apply properties and simulation on damage taken
I’ve got this on my ai character blueprint and it seems to handle it well.
If you don’t use the physical animation component you will run into issues where your physics body collision doesn’t stay with your body
is it normal that the results of retargeting an animation are horrrible?
@novel oxide make sure your skeleton has the same base bones as the ue4 skeleton or skeleton you are retargeting
Setup your humanoid rig the map them both to the same bones
Setup your pose in the retarget manager on both skeletons to match each other
Then retarget
Retarget the animation not the skeleton
Sometimes ppl get that confused
how can you even retarget a skeleton in unreal?
So after the rig is setup with poses on both and you’ve checked the advanced mapping (take off ik bones on the target skeleton) then go to the animation and retarget select the destination skeleton
You can setup a rig for the same skeleton (different mesh height but exact same skeleton) and retarget the skeleton (so that all animations on the larger skeleton are now selectable on the smaller one)
Sometimes people get this process confused
I’m assuming you have different skeletons
If you are using packs that all share the same ue4 skeleton but they are shorter or taller follow this guide https://docs.unrealengine.com/en-us/Engine/Animation/AnimationRetargeting
well the skeleton is the same as in the structure and bone names are identical
but the location and rotations of the bones are different
@ornate yew
thanks @ornate yew , will have a look
The location can be corrected by modifying the pose in the retarget manager using modify pose
It won’t mess with your normal pose as this info is just to let the retarget data understand bone position
The rotation data is applied as additional data to the bone rotation that already exist so as long as the bone position lines up in the vertex groups of the meshes and the poses are identical in the retarget manager everything should retarget fine

Here we go through the import process for several different Skeletal Meshes and show when we can and cannot share Skeleton assets. We also show how we can sh...
What I'd love to see a tutorial for is with importing some skeleton mesh and then creating animations from it in the UE4 editor from scratch. I've had a lot of trouble finding the resources to learn that.
You can’t really create animations in ue4
Not easily anyway
They have matinee but it’s to put together a scene using animations you already have
To create animations you need to use a modeling and rigging application such as maya or blender
@jovial imp
You can modify animation tracks to reposition hands to hold weapons and such
But I’ve never seen ue4 used to create a brand new animation
The control rig was free for sequencer but I thought since going to matinee allright rig wasn’t usable either
@misty dagger ... I might be wrong
I guess u can see if control rig is still there under plugins
I just thought that 4.18 made changes to that whole thing
I’m sorry I said that backwards
Once they upgraded sequencer
They broke the control rig plugin
Haha had to go back and read what I wrote over
The plugin might still be there “control rig” it should let you use sequencer to build out a timeline set keyframes and save as new animation
@misty dagger u going to learn root motion?
Very hard to do mocap ipc animations
@misty dagger u going to learn root motion?
Without root motion your dude is gonna look like a retarded MJ moonwalking everywhere
Yea so imagine walking in front of the Kinect but trying to stay still
Looks funny
But that’s what in place animation requires
If you do true mocap by walking a few steps in front of the Kinect you need root motion as your root will move
If you lock it in place in the editor you can try to simulate in place cycles but usually you get the moonwalk effect
That’s why mocap is bad for non root motion animation
But since root motion isn’t replicated in ue4 it’s good to stay away from it until they add a root motion controller
The VR game I’m working on now uses the starter zombie animation pack and it’s mocap
Very good animations .... horrible for ue4 and it’s in place blendspace based on speed
Cool 😎

PNG Image
Called “Day to Night”
VR Dayz/H1z1 type game
Should be in alpha by Christmas
Yup that’s what I’m going for
It’s going to be scaled back to 25 man sessions and a bit smaller map

JPG Image
No baked Lighting, Forward Rendering - Dynamic Day/Night Cycle.
Keep in mind that this was only testing the performance of the dynamic day night system in VR
Cool
Yea I’m in a struggle between looks and performance
VR isn’t there yet in the looks department
Not with dynamic lights
If it’s all static and baked then sure
You can get some gorgeous stuff
Things like this kill VR
But I’m pulling it off
Cutting back here and there to get a good balance
Yea HLOD is in 4.18
I’m gonna do it on all the houses
Should help
Still got some material optimization to do too
Won’t be long and I’ll be testing networking
Lol
Yea imagine telling yourself that it doesn’t matter how amazing something looks .... it’s gotta come out
But this is after optimized to hit performance targets

PNG Image
Not too bad
Forward rendering with low dynamic light resolution and only 1 shadow cascade and a baked stationary skylight that changes intensity instead of DFAO
Still gives me day night cycle ... still looks good at over half the cost
On the sun
Flashlight is still 3 cascades
Yea way I figured is if I can optimize low I’ll let them bump up settings with better cards
Eventually I’ll push out a deferred rendering build with full dynamic lighting and DFAO for those titan z’s ll
Lol
Thank you so much @ornate yew! I had been under the impression that you could move bones and create keyframes in the Persona editor, but I must've misunderstood. Looks like I'll have to get into Blender animation! I did those Blender tutorials a while ago, but the IK bone rigging and the UV unwrapping are exactly where my eyes glazed over and I gave up.
But my target card is a 1070
Too many situations where the video didn't match what happened on my screen, sadly.
lol
Don’t worry too much about IK’s
Hold up a second I’ll get u a great video I learned on
I'll be happy to add it to my watch later list if you find it @ornate yew
Welcome to the third episode in a series on creating a simple character in Blender. (http://blender.org) Rigging part two: http://bit.ly/characterRigging02 D...
It's a really good video -- I was great throughout the modeling phase, everything was good. It's just that the IK bones, the texture unwrapping, and the baking all didn't work like in the video for me and I had nowhere to reach out for help so I just gave up.
I was thinking of just grabbing that Y Bot on Mixamo and trying to make animations for it so that I can skip past the rigging, UV stuff, and the baking/texturing to go straight into the animation stuff.
You know, I heard about that -- I hadn't looked into it too much though but maybe I should
There are a couple of really good ue4 blender plugins
Then the only thing u need to do is get good at using make human
Lol
Import the ue4 skeleton into blender and export only the animations
This is good stuff, dude, thanks so much
The make human comes with a ue4 skeleton so u can just use them
And don’t forget to go grap the free animation starter pack
Grab•
Should get you going pretty quickly
Can I control physics simulated bones with an AnimBP?
Hi there! Do you know if it's possible to copy-paste a frame on the animator window?
I want to copy the first frame at the end of the animation
I've used "Asset>Add Looping Interpolation" but it doesn't work
Yeah this can be very usefull, some one know how 2 ?
This panel is showing here everytime I press play for my mocap-suit! It does not work to toggle visibility like I have done with the characters in the blueprint. Anyone have a tip for what I could do to hide it?
Does anyone know if there is a default maya rig out there for the mannequin?
Something like this but for maya? https://forums.unrealengine.com/development-discussion/animation/27629-3dsmax-biped-rig-for-herotpp-default-blue-man?56835-3DSMax-Biped-Rig-for-HeroTPP-(Default-Blue-Man)=
Animation discussion, including Animation Blueprint, Persona, Skeletal Meshes, and more.
you could export the mannequin from ue4
so do you know about the ART tool (auto rigging toolkit)?
Ive heard about it, I haven't used it.
I dont actually have maya, just trying to find a link or file online to send to a contractor.
o i c
basically you have to download the ARTv1 off the unreal marketplace (its free)
this doc should help you the rest of the way
one important thing the doc doesn't mention if I recall
if you do not set the project in maya to the folder that contains the ART rig it will give you an error when trying to add the character into the scene
hopefully this helps out your contractor friend : )
What is this Jump Asset node? - Found on the mannequin on startup.
If I replace it with what is available to me on other blueprints - "TimeRemaining (ratio)" it stutters just like my animations do ...
ops .. that node is weird all right, but it stuttered for me, because I had my (very short) animation on loop
using art within maya, i deleted 2 joints mid-way through rigging, now i can't build the control rig due to a script error, not fiding those joints, anyone got a workaround for this?
Does anyone know if there is a the UE4 Mannequin with the corrected bones axis that correspond with the UE4 Mannequin from UE4?
@jovial imp You can just upload your characters to mixamo to get them auto rigged and weighted properly as well if you're having a really hard time getting the hang of rigging on your own
That's really good advice dude -- thanks for that! @proper tangle
@proper tangle Thanks for your advice, unfortunately Mixamo Rigs are not perfect and also there is only 1 finger bone per hands...
mixamo rigs actually are pretty perfect lol. Its blenders absolutely terrible handling of FBX that screws up the skinning weights (end skeleton too if you arent careful of your import settings)
I've worked quite a bit with mixamo/fuse stuff and the best two options I've found are:
- Using Maya instead of blender. or if that isnt an option,
- Get your hands on the blender plugin that imports/exports FBX using the official fbx sdk
Hum Maya is not an option because of the license prices
Have the name or link of the blender plugin please ?
I grabbed auto-rig-pro for blender yesterday as suggested above by someone, and it's exporting my char into UE4 with the UE4 mannequin rig correctly. No retargeting needed and default import options work fine. I generally have to touch up the weights a little before export but that's not surprising.
@sinful smelt This is $40 https://www.youtube.com/watch?v=E8ny7fMXwaY

Demonstration of FBX export as Mannequin skeleton from Blender to Unreal, with the Auto-Rig Pro addon. Ready for humanoid retargetting. Same workflow for Uni...
I wouldn't use mixamo. The entire service could be sunsetted tomorrow...
@wise yacht Excellent thanks !
I cross this plugin before but I had doubts about its effectiveness, now I feel reassured and it could be an option.
Could you send me a Skeleton from this and blender please ?
I had the same reaction when I first saw it - thought it was just an extension of rigify, but it's so much better and the guy is clearly actually testing the UE4 workflow. I could send you a low poly base mesh I was testing it out on - the .blend file will look pretty crazy without the plugin, but the .fbx should import normally.
yes just a fbx to see please
pm'ed
@sinful smelt Regarding the plugin: Its out there Sayato, but its against Blender GPL so it'll be hard to find. It was originally for people working on Half Life 2 mods I believe but not 100% sure
@proper tangle OIC Thanks, ill try to find it
Other question, any of you have imported and modified kubold animset pro into blender then reimport into UE4 ?
or copy BVH animation to UE4 skeleton in Blender ?
could give bastoni lab blender plugin a shot, it has some bvh stuff
its not 100% EU4 skeleton tho, fingers and stuff not correct
Anyone managed to set up your own BP for the Paragon Characters? I was only able to do the basics as Idle_Walk_Run.
"mixamo rigs actually are pretty perfect lol." ... pffwwaAHAhahhahawhahah!!!!
no they are not
alright that reaction wasnt fair. Mixamo actually does a really nice job. But its still far from perfect
Does UE4 have something like jigglebones?
does anybody know how to add simulated clothing to sevarog from the paragon models?
or where to start at least?
@glossy flicker I have been messing with Sevarog but it's being quite hard to setup a proper blueprint to him.
I've got the paragon murdoch model basics working in my project, but when I aim behind the character with the aim offset, the legs stay pointing forward. how do I get the legs to turn with the aim? what should i google for this?
@finite fractal hm. strange
I tried set all bodies below simulate physics but it didnt work
I'm trying to get one of the minion models to ragdoll on death and its not working either
I've tried Set Simulate physics, set all bodies below simulate, wake all rigid bodies, and several combinations of those
do they have physics assets?
you need to disable moevement from the charactermovementcomponent, coo
Yeah, in the physics tab, I can hit simulate
you disabled the character movement component movement?
I have now
i think there is a special radgdoll state
There is a ragdoll collision preset
There must be something on this mesh. I dropped the mesh I'm using, and two others into the world straight from the content browser
the other two ragdoll automatically, but the one I'm using for my AI doesnt
argh.
ok, so under the Mesh, it didnt have the physics asset selected, even tho it was in the tabs on the top right
In the skeletal mesh preview window, where it shows LODs and material slots for it, under Physics theres a Physics Asset
In the pane marked 2, its down under all the material slots. https://docs.unrealengine.com/portals/0/images/Engine/Animation/Persona/Modes/Mesh/SkeletalMeshEditor.png

Hey! I have run into a problem when trying to export animation from ARTv1 to unreal. The animation is looping smoothly in maya but in ue it seems to be cutting out a bunch of frames in the end even though the frame count in the animation is the same. What am I missing here?
First time exporting/importing animation so its probably just some beginner thing im missing
yeah, i found that, but sadly its setup for sevarog
are you sure you are importing it with the right length @indigo lotus
or rather exporting
I think i run into a similiar problem in blender
I usually use game exporter with no issues
Im exporting it one frame more than it is to get the interpolation frame since it seems to be cutting out one frame
oh thats why
you should export at the exact frame it loops
unreal takes care of the interpolation
trying it now
Game exporter makes my maya die so would rather get it to work with art
as laggy as it is
any specific import settings I should keep check on?
hmm
doesnt work
the animation is 240 frames, lets say X happens at frame 130 in maya but at much later frame in ue so it ends up cutting the animation off
thats odd
yeah
it lets you specify the time range and does most of the job of exporting pretty well
and it wont hurt to at least try 😛
heh, now that I added the physics asset to the mesh, its throwing my player character around
you cant move your character with chanracter movement and have ragdoll activated at the same time
nope ragdoll isnt activated until the character dies
is physics enabled on your character mesh?
My player character is Query Only, no physics. The AI char doenst either, until death
Ah. Seems related to a collision channel I put in
yeah I think thats fixed. 😃 lots of AI bugginess to work out tho
that i can't get the clothing to work bothers me terribly
I'd help if I had any clue about setting up clothing :/
I have done a very Early Animation of Sevarog here, simple Idle_Walk_Run and Jump. The actual Blueprint for this Character is going to end up being much more complex than what i initially thought. Might need to wait for the Epic's upcoming LiveStream in order to fully enable all Animations properly. Also noticed a very weird behavior where Pressing "W" the Character should move forward, instead it moves to Left, "S" it moves Right and "A" it moves Forward and "D" it moves Backwards. https://www.youtube.com/watch?v=5OweFsmED8g

Testing out Epic Game's recently released Paragon Assets for UE4 Developers. Right now, I am currently creating a full animation Blueprint for Sevarog, this ...
are you sure you rotated it properley when you created the character?
I think i did, i have rotated it where the Arrow was pointing as shown in the BP Tutorial.
you need to rotate it by 90 degrees
hm ok strange
that's not an animation problem though nor it's related to the paragon assets
dm me ur input blueprints or something?
They're doing an upcoming livestream on the paragon assets?
Are you asking?
yeah
Oh Idk,
Yup @eternal ivy Seems to be scheduled to March 29th. "How do I setup the animation on the characters other than Shinbi?
Jay Hosfelt will be joining us on the March 29th livestream at 11AM PT / 2PM ET to walk through how to set up the animation Blueprints for the Paragon characters. Be sure to head over to http://www.twitch.tv/unrealengine and give us a follow to be notified when the stream goes live." https://forums.unrealengine.com/unreal-engine/announcements-and-releases/1445832-12-million-worth-of-paragon-assets-released

$12 Million Worth of Paragon Assets Released
@eternal ivy Yes, i have gave up on trying to set it up on my own. Going to wait for that LiveStream, in the mean time improving my Project as well in other areas.
here is a yt video where they are talking about AniMDynamics

Announce Post: https://forums.unrealengine.com/showthread.php?97824 Charles Anderson and Benn Gallagher joined us to explain the new AnimDynamics features be...
I think I found the solution
they took all the bones of the respective clothing stuff (e.g. the things hanging down on Sevarog) and made a AniMDynamics Node for each of them in the animation blueprint
not sure how much that helps you guys if you don't have any experience with animation blueprints lol
got it working
looks a little bad
because settings arenÄt tweaked
but works!!!
animDynamics is dope
Trying to design a simple dodge skill where the character leaps forward towards whichever direction the player already has input, how would I go about this?
I have this unremarkable setup ready
I just don't know how to have it reference which direction the player wants to go
the plan is to have the character leap rather than walk if the player decides to move while blocking
I guess you could calculate the direction of input, right? X = cos(inputX) and Y= sin(inputY) in the range[-1,1]
or something like that
actually, sorry, cos and sin require angle input
I think
though you cold straight take the input values and build a vector out of it
hmm
it should be the direction the player want's to move, right?
call the MakeVector node, pass the X input to X and Y input to Y, then call the Normalize node, so you get a vector of lenght 1
that should be your desired movement direction I think
So am I lol
Well the vector should be correct, you can print string on it and see X being 1 when you push the key to go right and so on. I don't know what are you trying to do though. you want to rotate the character toward this new vector?
I basically want to replace regular walking with a forward dash whenever the player is blocking
and I want the dash to move in whichever direction the player has input
since they can't change direction in the regular block
The best thing to do in this cases is to print strings and make sure the numbers are what you want them to be. So if I'm not mistaken you should now print the Yaw of your rotator (Roll and pitch should be 0 I think)) and D should give you 0, W=90, A=+-180, S=-90
Btw, rotation in Unreal match this mapping I believe

I think I'm going about this wrong
I should probably just have the walk be a dodge when the character is blocking
if the dodge uses rootmotion, would that block rotation?
Read everything back, finally got it to work, thank you @sand acorn
glad it works 😃
actually, there's a few more errors but I'll tackle those tomorrow
hey guys, does anyone working with blender know what the most optimal way to transfer a hair physics simulation from blender to unreal would be? i'm trying to figure out how to bake the simulation so it transfers as an animation, but as far as i know there's no way to apply the physics directly to bones or bake them as an armature animation..
if anyone has any ideas, i'd really appreciate some help!
i made this little animation in maya https://gyazo.com/d8f9eeae93d1f26ff279cb1ca7697477 but this is what it looks like in unreal and i cant figure out why https://gyazo.com/d21bb11419d2481c3aca6f228099148a


I dont see anything happen in the second clip?
doesnt even look like the same mesh. Skeletal animation?
i put 2 cubes in place of the mouth and just move them up and down
but it was 2 separate cubes and i combined them
on a skeleton? with bones? afaik, ue4 doesnt do non-skeletal anims
also, thats pretty much the limit of my knowledge on the subject 😦
https://gyazo.com/caa67ec95422716f42a717e65cde58e1 it's not UV'ed but i got the basics working and it follows the player


its a character based on mixamo rig, i retergeted the animation of default mannequin to it and this is what happened
any help i can get here.
I followed the docs to retarget
everything's fine except his arms.
How possible do y’all think it would be to Retarget animations from humanoid paragon characters to the standard unreal skeleton?
Howdy
Trying to plan out a couple maya/unreal animation portfolio projects for myself
Not sure what I’m gonna make yet but I will peep around for ideas. I’m a 2D tv animator who has been learning 3d more lately
I don't get it..
@spare nebula, had the same thing here, the only way i was able to fix it was to rebuild the physics asset and make sure "create body for all bones" was checked... Not a great solution, but it did work... It also meant (if you are wanting to use ragdoll) that you need to go and set up all the joint limits again
Can I use a .txt file to drive a skeleton properly? Maybe with the "Transform (Modify) Bone" in the animation blueprint? Is that reliable?
@spare nebula ask @hybrid tulip
Is it possible to start an event chain inside a blendspace?
I have picked up from a few online posts that animations for NPC's are different from animations for PlayerChars. Can anyone point me to solid documentation on this?
i bought 2 animations packages from the Marketplace, Interaction Animations and Advanced Movements animations and i did successfully merged the pawns blueprints but now i need to merge the animbp for both
do you know how i can do that?
sounds possible, but probably pretty tedious
I only did my first foray into animBPs this week, but they're not that hard once you understand what they're doing
so it'll just be a matter of comparing whats in one that isnt in the other. Doubt theres anything that will do it automatically
@vagrant quail Don't know about any documentation that compares the differences but I can give some insight.
If you were to take Devil May Cry as an example.. Dante (pc) needs to have animations that are very quick and responsive for the player to feel like they are actually controlling the character. The tighter the controls and the more responsive Dante is the better.
Enemies however, cannot attack as quickly and need tells (lifts arm up before striking) to convey to the player that this enemy is about to attack. Giving enemies the ability to strike as quickly as the player would end up frustrating most players and would make the game feel unfair. Pretty much most games follow this design.
the few exceptions being Dark souls, monster hunter, etc
@formal musk ahh I gotcha. I was thinking there might be some variations in the way you BP'd for NPCs. That said, I wonder if you couldnt just set up your anims with a "if npc" run a longer version, or just drop a brief pause into the anim
what is BP'd? 😅
The second part of your sentence would not end up looking good visually. The PC attacks have extremely short frames from button pressed to when they hit in the animation (something like 2-4 frames to hit).
so you would need animations that are designed for the NPC attacks
BP'd = blueprinted Just glad that its only an issue of making alternate attack animations and not having to do every animation for an npc in a completely different way.
ooooooh I thought that might have been it but was overthinking it ..
So Paragon characters seem to come with 100s of animations, a dozen blendspaces of the sort I never seen, yet no animation BP. Can someone show me an example of how to use them?
I made a quick demo for getting Paragon characters and animations into blender and back again, just remember to remove the cloth modifiers from the characters before attempting to export, https://youtu.be/dUeGeM4f2l8 Retargeting from Paragon to UE mannequin using the Humanoid retarget works fine, I haven't got into the blend spaces and graphs yet, sry.

Transferring Paragon Characters to blender, creating animations and importing back to UE, re targeting to original skeleton.
Also figured out how to export those naughty textures 😃 Image from Substance painter, rough workflow in comment of above video, hope it helps.
@hearty ice Excellent. Been trying to export those textures but gosh...
Question, how do I access a variable stored in a "Character" from my animation blueprint?
Basically my character has a bool "HasRifle". When this is set to true, I want my animation blueprint to access this variable and enter the animation state showing the character's hands up with the rifle.
My HoldRifle animation is working, I just can't access the variable from the character to know when to enter the state.
@woven heart
you need to make your variable editable in your character blueprint by clicking the eye icon on the right side of the variable.
It is.
I just don't know how to access it. from my animation blueprint. Should I use "Get all actors by class"? "Try Get Pawn Owner"?
How do I pull the variable from the character into the Animation Blueprint file?
Try Get Pawn Owner & then cast it to your character BP
That's working, thanks!
@woven heart 👌
Hey all, if anyone here is looking for a quick buck and is familiar with unreal's retargeting system and mixamo, please PM me. I'm looking for someone to help get a retargeting pipeline established from the default unreal skeleton to our mixamo and FP skeletons, and am running into a few issues.
Willing to pay $50usd to get this issue sorted.
Turns out mocap animation stuff is quite fun

Needs some editing in motionbuilder - this is just a test
Heya
@misty dagger I'm using neuron mocap
It has pretty good results for raw mocap
I really need to learn how to do animation. Wish I could make the time for it
Hiya guys
Currently checking Paragon assets
And noticed they using 4 blendspace for the movement
Fwd BS,
Bwd BS,
Left BS,
Right BS
How should I handle this?
I know I could make my own blendspace
But still I am kinda curious why they doing it like this?
@next comet I can help you with that. Sent you a PM.
Quick blender question, making a turret and I want to test some basics. Should I try adding skeleton while the mesh is still preliminary? or wait till I have more than boxes?
I would wait tbh, no need to paint the bone weights for it. Granted if it's a turret you should probaly use two separate actors, one for the base and another for the turret and attach them using a socket.
I have a base, static mesh that doesnt move. Then the tower part of the turret, with the gun portion as a skeletal mesh
I am hoping to have it animated as it tracks the player, along with animated shooting animations, destruction, etc...
I made a quick test and recorded the animation in the editor and set up aim offsets, it kinda worked, but the aim was completely off from where it should be
redoing the turret right now, adding more detail and polish. Then I hope if I record the animations inside blender, the aim offsets will work better
Guys
do anyone has a lil bit experience in distance matching?
So basically what Distance Matching is:
I have a stop animation, and when you usually stop your movement, then want to play the Stop Animation
The stop animation step X unit
over N time
In DIstance Matching you got these values in the Curves of the animation
I tried to Add these as World Offsets, but the result was not to smooth
the 2nd solution was to Add Movement input but that resulted foot sliding 😦
@pearl swift How possible do y’all think it would be to Retarget animations from humanoid paragon characters to the standard unreal skeleton?
Seems ok.
LMAO
Is there a way to use apex cloth on a mesh that isn't linked to a rig?
Good question and also i would like to know how to handle collisions to avoid this to happen
I have one skeleton mesh for the character and a skeleton mesh for the skirt
Guys
How can I achive to not blend the Anim Curves at transitions?
I always want to use the destination's anim curves, instand of blending them
So basicly I want to get the Destination's Full weighted Curves
Instand of the interpolated between the Start and the Destination states
If you make scale rotation or translation changes to skeletons, can you apply those changes across all animations using that skeleton?
Doing it right now, the skeleton is deformed but the animations play normally
https://answers.unrealengine.com/questions/772784/anim-transaction-curve-blend-problem.html
If anyone has any idea I would be greatful 😄
I rigged and animated my turret in blender, and it looks great in there
but when I import it into UE4, the piston is deforming really strangely
using a control bone, with a stretch to contraint on the main piston bone, then two bones for the tip and tail
Ok, changed to two tracking constraints, and it works now! 😄
woohoo
Except I didnt set up the materials correctly 😦 the uvmaps arent split like they should be 😦
Not sure how to have a second animation inside blender tho?
k, animations mostly work. AnimBP isnt... 😢
anyone tried working with Ikinema for physics based animation at runtime?
My static mesh on my actor isnt running the AnimBP as far as I can tell
its not animating at all 😦
set the animation instance via BP in begin play and now it works 🤔
@sinful smelt afaict, cloth collision only works on the physics bodies of one physics asset. So in order to get the skirt to collide with the legs you'd have to combine the skirt bones with the biped skeleton. I hope I'm wrong, though, and that you can have cloth collision with bodies other than its own.
@kusokuso1#7409 Thanks for your testimonial it was precisaly what im lookin g for, ill make some try with this way then tell you guys
I'm using aim offset with blending, etc. But for some reason when I crouch, the animation direction is 45 degree's off.
I can fix it by hard coding the change when I crouch, but that seems like a dumb solution.
Could anyone with experience importing models and animations from blender offer some help? I've never done this before. So far the model and it's bones import perfectly fine, good size and everything. However working off of that exact same model for animating, no scaling or anything has been done, placing the animation makes the entire thing shrink to a ridiculously small size. I upscaled it by making the scene size much larger in blender, and exported again. This time, it's larger, but now the mesh looks like it's missing most of itself and looks like it might be deformed as well. Everything looks completely fine in blender, the mesh and bones are all the same size, location, and rotation.
this is it's current state, the deformed model in front with the animation, the one behind it with no animation.
Everything is also set to cm, metric, 1.0
and on exporting (fbx), I have the following checked: selected objects, armature, -z forward y up, only deform bones, baked animation, key all bones, force start/end keying
anybody used the advanced locomotion v2?
@clever violet These are settings I use. I put the world units into Metric then meters.. then export/import with all the FBX defaults of UE4 without a problem. I might add a T0A pose for the rig default resting pose, then use that for animations.
Just so you know, Blender is x100 smaller in unit size than UE4, so playing around with converting the unit size (UE import dialogue) or exporting correctly (by setting up Blender world units correct) will fix this. Do not scale the rig on import manually, as imported animation won't scale with that.
@hollow summit do you have a seperate aim-offset for crouch?
Unreal Engine Livestream - Animation Blueprint Setup & Walkthrough - Mar 29 - Live from Epic HQ
twitch stream started https://www.twitch.tv/unrealengine
how would i make lets say all the animations from the paragon characters in to the UE4 manny
@frosty knot Select the animation and choose retarget, then pick the UE4 Mannequin.
ok thx
anyone know a good rig/plugin for humanoids in maya
tried using advanced skeletn but the knees are bugged
hey guys,
does it make sense to rig a stylized/chibi model for UE4 mannequen skeleton?
is there a way to retarget fps arms on a thirdperson skeleton? for reload animations etc?
you might be able to retarget
then use it as an additive animation
are you doing full-body awareness?
you might be able to force the bones on the third person skeleton to follow the bones on the first person skeleton, then use ik to get the shoulder, upperarm, forearm motion
if not, a seperate third person animation is the best solution
I''m messing around with MoCap animation takes and I'm wondering If there's an easy way to get animation aligned to be in location 0 0 0
Anyone knows a good way to correct this?
Like, when I'm walking, I move out of the comfort area.
Hey so I wanted to ask about animations.
In the engine content there is that old orange guy.
Let's say that I want to create new animations for its skeleton mesh.
As I understand it, the workflow goes like this:
- Export the Skeleton Mesh to FBX
- Import the FBX into Blender
- Create animations in Blender (???)
- Export animations to FBX
- Import FBX animations into Unreal
- Assign animations to Skeleton Mesh
- Now I am ready to start incorporate them into my animation blueprints
Is that right?
@jovial imp for the "create animations in Blender" part you would need a control rig to create the animations you want. I'm not much of a rigger myself and I don't use Blendr unfortunately so I am a bit limited in how much I can help. Hope everything goes well though!
anybody know what the best way to do key-framed IK would be? I have a VR character which already animates properly through blueprint, but I'd like to alter it to follow a series of keyframes instead of HMD/motion controllers
the system i've got now basically just drives 3 points based on sine/cosine curves using the animation blueprint tick, it works but is a huge pain in the ass to modify
@Fazwaz#6375 Doesn't the default built-in orange guy skeleton mesh already have the proper rigging?
Anyone know if morph targets work in live link or can suggest any workflows? I'm trying to figure out how to rig/animate a character and render using sequencer.
looking for a trade off..iam good with landscape and design..i can setup advance materials setup LODS for better optimize FOLIAGE..and landscape..need some assistance in animations
@jovial imp yes the joints should come with the model but you would need a control setup to actually animate it properly
@formal musk So does this mean that it's better/easier to use an external rigged skeleton mesh that we import? Because it sounds like exporting the built-in one from Unreal is more trouble than it's worth. (also when I tried, I didn't see how it's possible to export it via Content Browser or Persona)
Generally it is better to have your own rig but the built in one shouldn't cause too many issues. Could you post a picture of the character?
@formal musk
Oh one never seen that character before
Are you familiar with the auto rigging toolkit (ART)?
Nvm that's Maya forgot you were on blender..
If I want my character to activate a lever , should i make an animation on my character that makes the movement and an animation on my lever that move it in the right spot? or should i put the lever inside my character animation?
I would animate the character with the lever.
You can still bake them out separately
ok thank you :)
Np 😊
hello everyone, new to UE animations and could use a link to a step by step to using UE4.18.x's Blendspace editor. I've scoured youtube and google but haven't come up with anything concise for the 4.18.x revision. Thanks in advance for any help
Hey all, we have recently migrated over to 4.19 and we have found an issue with our animations that use override animation data. We have numerous gates in our game that require automated opening and closing which is set up in the blueprints. The animations worked perfectly in 4.18.3 and earlier however when it comes to reversing the animation by setting the play rate to -1 the animation does not play, has anyone else discovered this issue? Obviously a fix would be to create an animation that closes and what that opens however we are trying to be efficient and use one animation.
Hmm
Anyone got idea how to sych the animations by Distance Matching?
So I got the Stop Animation with the Distance Curve, and know (predicted) where I will stop
What is the next "step"?
I am not able to figure out how to evaluate the stop animation to match to the distance
I cant retarget animations between different skeletons
help?
ok probably a stupid question, but why does the UE4 skeleton have IK bones? I though IK was only for creating animations?
What do I do with this Object node? I'm trying to fire a custom event with anim notify and blueprints are being overwhelming : |
you're firing an event that just fires another event? I'm not an expert at this, but I don't think that makes sense
this is anim blueprint where I have access to anim notifies
when a notify happens, it's supposed to tell one of blueprints in my level to fire an event inside of it's event graph
what is Raziel
a blueprint - mesh with some animations
you can drag off animnotify and get all actors of class
hm, okay
but Im not sure thats the best way to do it
you don't need the cast if you get all actors of class
alright, seems like that part is working. Thanks!
How I can resolve this? (after retarget)
lol .. where is your head?
someone can help?
it was to be a person...
Hello, does anyone know which assets or packages on the Marketplace have a crouching animation or pose that does not involve holding something? The starter animation pack as well as most animation assets have plenty of characters holding a gun or something else, but I can't find a crouching animation with the character holding nothing, just acting normal...
Whats it called when you edit the animation for just the top half of the character? (I am trying to set up aiming whilst keeping the rest of the animations on my characters solid)
@spiral parcel https://www.mixamo.com
I found this, although I'm afraid to get it because it's so old... https://www.youtube.com/watch?v=pwZK13vTNm4&feature=youtu.be

Get it now: http://www.kubold.com/?page_id=55 This is a complete set of 180 (after update 1.5) motion capture animations, to build a seamless third person pe...
Maybe I'm just paranoid...
It's apparently compatible with 4.19 so maybe it's way better than it used to be.
Biggest prob I see is that this creator doesn't appear to answer any questions (at least on the marketplace).
@spiral parcel If all you want is a crouching animation, I wouldn't buy it. Just get someone you can trust to make you one real quick, or hell do it yourself, it's not that hard. Shouldn't take long at all to do. If your model was compatible w/ blender I'd do it for you.
@trim stream There are a couple ways to do it. One way is by using montages. Lemme give you a ss hold on.
This isn't the best example, but it gives you an idea how to set it up. (I did this like 2 years ago, so there's likely a better way to do it, but it works).
https://gyazo.com/c91de7fa8db280be380c68072ee59e02
Basically makes it so the player character's waist down is driven by one animation, while waist up is driven by another.
You're going to have to do some montage tutorials to figure how to set it up though.

This might be more appropriate in your case though:
https://docs.unrealengine.com/en-us/Engine/Animation/AnimHowTo/AimOffset
Hello, can anyone please explain what Automatic Rule Based on Sequence Player in State means in the animation transition rule?
In which case should I check this?
hey guys has anyone had luck simulating physics for meshes that are connected to the character (ie. hair)? i can't get it to work in the latest version, the simulation doesn't play even though i've checked it in the blueprint and assigned a physics asset
@wheat geyser Hey, so that pretty much evaluates the blend time of the transition, and the time remaining on the animation, and automatically blends out of the state at the end of the animation. Its pretty useful in some cases.
Thanks @kusokuso1#7409
Importing a model .fbx I get "Could not find any node" what does this mean?
Hey guyz. Just wondering if there are any solutions for unreal autorigging in 3dsmax
@worn sphinx Have you checked out https://www.mixamo.com/
@soft crown Are you importing a static mesh or a skeleton mesh?
Can someone help me? Whenever I go into the animation for 'Aiming', my character disappears. Any reason why? Can provide more screenshots if you let me know where I may be going wrong.
I think my problem may be here...
@trim stream It may be because you are feeding an additive into the BasePose of the Aim offset. The Aim offset should be additive, and you should feed regular animations into it.
I see, when I put in my idle animation, the offset doesnt work
Can you elaborate on that? What exactly doesnt work?
Sure.. So right here I'm aiming, and the character (which is kind of hard to tell as the camera zooms when aiming), is not playing the aiming animation which is in the aimoffset
He's standing in the idle animation when I try to aim
Should I be using the aim front animation that isnt trimmed as the base pose?
@trim stream don't want to upload smth to adobe)
any plugins for 3ds?
Why wouldnt you want to upload?
Sharing something with adobe servers makin me pretty uncomfortable 😃
🤔
So .. ART is not being developed anymore. HumanIK is not being developed anymore. And both have been crashing on me. What should I be using? (Just starting to learn)
Hey guys, can someone help me with an animation importing issue?
I have this strafe animation I downloaded for mixamo. I uploaded the mesh of the character (I'm using the unreal mannequin from the 3rd person template) to mixamo, selected the animation (a strafe anim) and downloaded it.
Problem is, when I import it with the default settings, but selecting the UE4Mannequin_SK the animation looks a bit weird. That is, the legs don't seem to be rotated properly in the position of the strafe, as if the character would be trying to strafe forwards?
Do you have any idea what might be causing this?
Morning-ish all, have a bit of a problem with some imported character animation. The imported dodge roll has its feet floating off the ground at the start and end of the animation, but at the middle, the character is correctly close to the ground. I dont get why the animation is selectively being shifted like this. Anyone have a clue as to what might be wrong?
Oh, those are a tad big. T_T sorry for the image spam.
@swift heath I've tried that as well. Doesn't change the fact that the characters back manages to go down to the ground while his feet do not. Its really strange because even in Maya the animation looks correct, and if it was an offset issue, I would imagine the entire animation would be floating off the ground, not just parts of it.
Also tried messing around with the translation retargeting in the skeleton tree. While that does change some things, it doesn't seem to make a difference for the height of where the back lands.
Aw, then I highly doubt I could help. I'm a total noob myself to unreal, and the animation really seems very strange to me...
A lot of things just seem to not make any sense
I also have a problem with an animation I imported from mixamo. While every bone seems to be moving just fine, it looks like the spine_01 bone is locked, as in, refuses to move at all, although in the animation preview on mixamo it shows it moving.
@signal cloud Its looks like a bad retarget
You should double check the retargeting of thr mixamo rig to unreal one
And consider to make a root bone for the mixamo character, and animations
So they will be easier to work witb
Woth*
With
And the legs seems to be too high even on the first one
You might tried to add a root bone
But used the transform of the hips bone
Hmm I think this is what happend lol
@pastel spindle Yea, actually I was talking to my animator about what was up, and he thinks that it is something to do about UE4 trying to retarget the animation, rather than using the values of the mannequin skeleton. These are actually custom animations, not mixamo, using a skeleton that is identical to the UE4 mannequin, including having a root bone, and just until the other day, they were working and looking fine. The only way I've been able to get it to look somewhat correct is to change the translation retargeting in the skeleton to all be animation, but that results in the character having distorted limbs, though the animation does play correctly
Usually you want the root bone to be skeleton scaled
I mean
The whole to skeleton
And root to animation
I've tried pretty much every combination under the sun for the different setups in the translation retargeting, and none of them really change much of anything but what i stated above
Hmm unreals retarget should works fine
You mean you rigged the animation with unreal rig?
So the same bones etc
?
it was a custom rig, but the skeleton was identical in naming, shape, and hierarchy to the mannequin skeleton
we dont actually retarget it at all, when we import, we just select the skeleton to use as the ue4 mannequin
Cant you preview the
Animation eig
While you playing the animation
To check which bone has the biggest faulty behaviour?
If the whole retaget is scaled by the Skeletion and root by animation
hhmm, im not sure about that. I'll email my animator as that might be a good check, but I dont know if they do that regularly
What are the result
if the whole animation is skeleton scaled, then the animation just stays in places and sort of rotates around the hips
Well when you retarget the animations you clsee the preview windoes
Are the poses looks the very same?
Hmm is it root motion btw?
it has movement in it, but I dont use it as root motion
Hmm
I am not sure if that possible
Try to enable the root motion
To see if it working properly that way
I am kinda sure u cant make a root motion to inplace just by not ticking the root motion
I've tried enabling root motion too. The problem is that, the character is floating at the start and end of the animation, but during the middle, they get to the correct distance from the ground. The result is that, if I try and lower the character so their feet start on the ground, the character will roll INTO the ground in the middle of the animation
changing root motion doesnt really change anything about that problem
oh, and you can make a root motion change to inplace by clicking the Force Root Lock just below root motion. Quite a handy button, that.
Hmm
Floating?
Are you using a blendspace or wut?
Or it goes under even with a single animation? :D
Nope, no blendspace. This is just the pure animation by itself.
Hmm, well you should ask what is that bone
What is up a lil bit
And at midway
Its goes a little dowb
And the end again up
And the end again up
Or a faulty retarget pose
Because I really can just image a retarget error here
Or a faulty retarget pose
Because I really can just image a retarget error here
Yea, somehow it seems like an error, but we never actually retargeted anything. And in maya, the animation looks correct, nothing dipping under the ground at all. Maybe if we purposely try to retarget, rather than attempting to apply the animation to the mannequin in the first place...
I wouldn't use the mannequin skeleton. Even if the names were the same, it's highly likely bone rolls are different, and that could cause some problems. Why do you not want to use your own skeleton when you import it? (Sorry, it's a long post and I didn't remember everything you said)
Well, originally I just wanted some custom animations for the UE4 Mannequin because I don't have any particular character model of my own right now, so it seemed to be the most prudent action. If I cant fix this soon, I might as well try a different character and skeleton
Gotcha. That makes sense. How did you guys make the custom rig? Used the UE4 mannequin as a reference?
And made it from the ground up? Seems like that'd take a long time.
It's a bit of a hassle, and a waste of the time you spent making the custom rig. But what if you just export the UE4 mannequin, and then remake your custom animation with it? Lemme try that out.
So hey, I just checked it out. Having exported the SK_Mannequin skeletal mesh > imported it into Blender > exported back out > imported into UE4 basic leg and arm rotations, and pelvis location changes work correctly.
https://gyazo.com/c78455a9166233431a9934fbb1170200
You'd lose a bit of work, but that way should definitely work and it's quick. Presumably quicker than trying to retarget it.

@hazy pollen Yo, I need to learn how to do that!
What? I made that in a couple minutes and I'm a sheity animator lol
@signal cloud Since you guys are using Maya, I'd assume it should be quicker for you to make the custom anim than it was for to do in Blender. (In Blender half of the bones are oriented wrong, likely because of a mirror modifier used in Epic's Maya/3DSmax? rig)
Nah dude, I need to learn how to do something even that basic animation-wise. I'm trying to figure out the basic workflow for making simple animations that I can use as placeholders for my project so that it's not just a bunch of colored cubes and cylinders everywhere
For example: how did you export the mannequin from Unreal? I culdn't find that anywhere.
I haven't been able to find any video tutorial or write-up explaining exactly how to do that basic stuff.
@jovial imp I can actually help here
@hazy pollen Interesting. I'll definately let them know about that possibility, though I am not so sure about whether they will think it a worthwhile idea. In the end, they are a separate group and I am contracting them out to do the animations, so they have the final say in how they go about doing the animations.
@signal cloud Cool. If they said they'd make the custom rig so it's identical to the mannequin's I'd argue they didn't do it right, because if they did you shouldn't see any problems with it. I kinda don't understand why they'd make a custom rig that's identical to the mannequin to begin with; better to just use the already made mannequin rig.
If you're worried about them taking offense, and you don't want to pay for additional anims, I'd recommend doing what preko suggested, and just retarget theirs to that of the mannequin's.
@hazy pollen Yea, I think the retargeting option might be what we go with if I don't hear something new by tomorrow. The strangest part of all this is, however, that two days ago, the animations looked fine. And on their end, when they sent them to me, they looked fine. But today they were different, and when they went to check the animations that they had sent me, which they hadn't changed since they sent them to me, they were all screwed up like this. So IDK. ¯_(ツ)_/¯
@hazy pollen Could you share your home made Mannequin please ?
@signal cloud yeah that's weird. You mustve changed something?
I haven't seen data get messed up over time.
@sinful smelt I just exported the ue4 skeletal mesh.
If you use blender I recommend u nuke the right or left side and then symmetrize it so u can mirror paste poses.
Err when i import the UE4 Mannequin in blender the bones are upside down, do you have a blender file with the bones in the correct direction to use it in blender ?
@sinful smelt I just found this out -- what you should do is delete one side of the bones and then replace them by doing the "Symmetrize" thing in Blender to mirror the side bones
@signal cloud I assume you already tried to completely delete the animation > Fix up redirectors in Folder. Save. Shutdown. Restart. > Reimport the anim and make sure the same skeleton it was working on 2 days ago is selected.
I had problems with animations getting messed up back in 4.17. Changing the name of the animation before importing might help. Not sure if it's still a prob in 4.19 though.
@hazy pollen yea, tried most of that. Though i will probably try it again in the morning. Didnt try renaming
Worse comes to worst. If the animation was definitely good to begin with, make a new anim BP to reference it. Hopefully you didn't spend a lot of time making the animbp. Ive had bad luck copy pasting them.
Ah, nm. That's right. You said it's bad when you play it separately. (double-click in content browser I assume?)
Anyone know if by skinning various meshes to the same rig allows you to toggle those seperate meshes in Unreal?
@strong flame you mean each mesh is its own skeletal mesh, or each mesh is a section in one skeletal mesh? For the former, you can use the master pose component, for the latter you can use the material to not draw.