#animation
1 messages · Page 96 of 1
I'm using the default robot hand mesh, can I get the rigged fbx from the asset?
Yeah, animating a mesh like that (without a real control rig) isn't great but if it's just for setting up poses it could work.
You need to make sure you don't mess up the skeleton when exporting though (make sure you don't use force connect children and don't use automatic bone orientation on import).
@winged valley Gonna have to dig into the animation workflow then, it was bound to happen at some point. So is there a way to get the skeletal mesh from UE to blender or is it baked in a uasset?
You right click the skeletal mesh and export it from there.
You can export an animation too if you want something to start from.
(can't remember if that would play correctly though 🤔 )
Oh right asset location / export, thanks 😃
I'll try a bit of everything, used to bruteforcing the workflow by now
Maybe it's possible to do a pose with a real rig like UE4Tools though and export it that way and then retarget.
what's a "real rig"? I thought rig == skeleton, is it that plus IK?
Yeah I mean a rig with controls.
And sure, IK too. 😛
If you import a skeleton from UE4 you get the deform bones and that's it.
Plus in Blender everything gets really messed up because of Maya black magic. 🤖
Oh right, I know nothing about animation, controls are guess are just bones + constraints?
Controls are the animator friendly things you grab to move the character.
so at the fbx level it's essentially axis constraints for each bone?
I'll need to try and learn about fbx file structure to understand what's even in that
Like these red things for the feet/hands, rings for the body and so on.
Hmmokay, I'll have to look into that 😃
Those only exist within the 3d software though, usually you end up exporting only the deform bones.
The controls are not deforming the mesh themselves so they don't really do anything inside of UE4 anyway.
Of course it would be nice if there was an official UE4 control rig, which the ART tool for Maya kind of is.
But it seems like Epic want to do that inside the engine itself, with control rig sequences, but that system is not done yet.
@winged valley Ohh ok I see, I thought controls were exported and then make part of the animation, I see it's like a marionette control for your marionette controls
Yeah exactly.
We have a character who has two idle animations played at once (don't ask) and they both affect the hips of the character. This unfortunately seems to be causing the feet to slide around, presumably due to the hips rotating the legs and so on. Does anyone have any thoughts on helping negate this other than sticking the feet in place with IK
The best way probably is having a layered blend by bone and override the leg animation with only one of the animations.
Cheers @winged valley I will look into that!
@winged valley I might be doing this one backwards - I would want to take say, Idle 1 as the Base Pose, and then Idle 2 (who I don't want to influence the legs) and that's Blend Pose 0. For the branch filters, I'm specifying the bone branches I want to take from Idle 2 right?
I specified "spine1" and a depth of "-1" thinking that would give me all the upper body idle animation
That wouldn't do what you want though, right?
It seems to be inversed though, as in it takes no animation from the upper body.
I want both idles to contribute to upper body, but only one on the legs
You're blending the upper body animation from idle2 that way. 😛
You probably need to set the blend to use the thigh bones.
Is the blend saying which bones to take from, or which to not take from
Animation nodes that blend multiple animations together based on a set of criteria.
It's not terribly descriptive hah
I'm realizing it's maybe because Idle2 is intended to be additive
You can just try different bones and see what happens. 😛
So it's trying to mask between an actual pose, and an additive, instead of two absolute poses
They all seem to give the same result which is no influence from Idle2 at all
The node doesn't remove animation so you need to set it up so you're blending another pose on the bones that you specify.
@winged valley Giving that a poke. Something's at least happening now, one leg is massive (I had fiddled with the additive settings)
It doesn't really have anything to do with additive animation. 😛
(but you can use it with additive animations too)
@winged valley I know. I changed it to cache my base pose, and then apply Idle2 additively to that, and then use Layered Blend per Bone to mask out
Now that they're both at least full poses instead of one pose and one coming in designed for additive.
There we go. spine1 blenddepth 0 seems to do it. Legs stay put and I get upper body animation. Now to see if the animators notice what I did to their beautiful animations 😃 Thanks again
If you increase the blend depth it will blend more so you get a smoother transition, you could try that out and see how it looks.
Which direction does the blend go in, down the chain? So if I specify say "2", does it blend it in over the spine2/spine3 bones?
... I think so. 😛
Easier to just try it out zoomed in on the bones and see what happens.
Either it looks good or it looks bad. 🤖
Pose Watching is handy too
I can't figure out how to export poses from blender to unreal :/ it sorts of randomly imports the skeletal mesh I use, a physics asset, a cube with 2 bones, or nothing at all
@worldly ibex Export all bones in the skeleton every time, on import choose an existing skeleton?
@jolly escarp Well I've tried a combination of a bunch of things, if I export both the mesh and the armature it tells me I need to merge the skeleton, and it fails at doing that. If I export just the armature it just tells me "Can't detect import type. No mesh is found or animation track."
The imported hierarchy is a bit non standard so it could fail.
What mesh were you trying to import to Blender and export to UE4 again?
I can try getting that to work tomorrow.
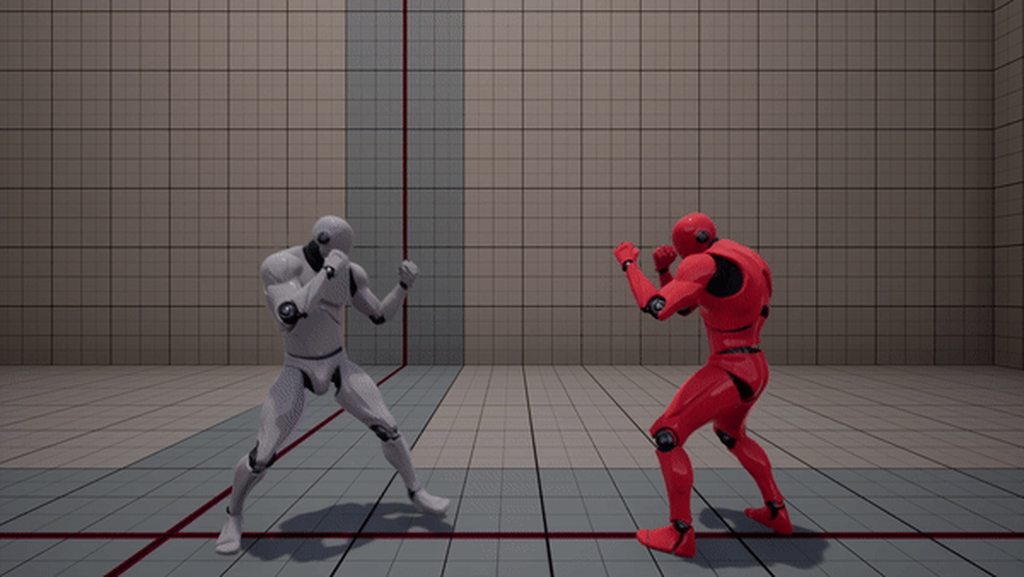
Another fight test. Now with some physics-based animations. :-)
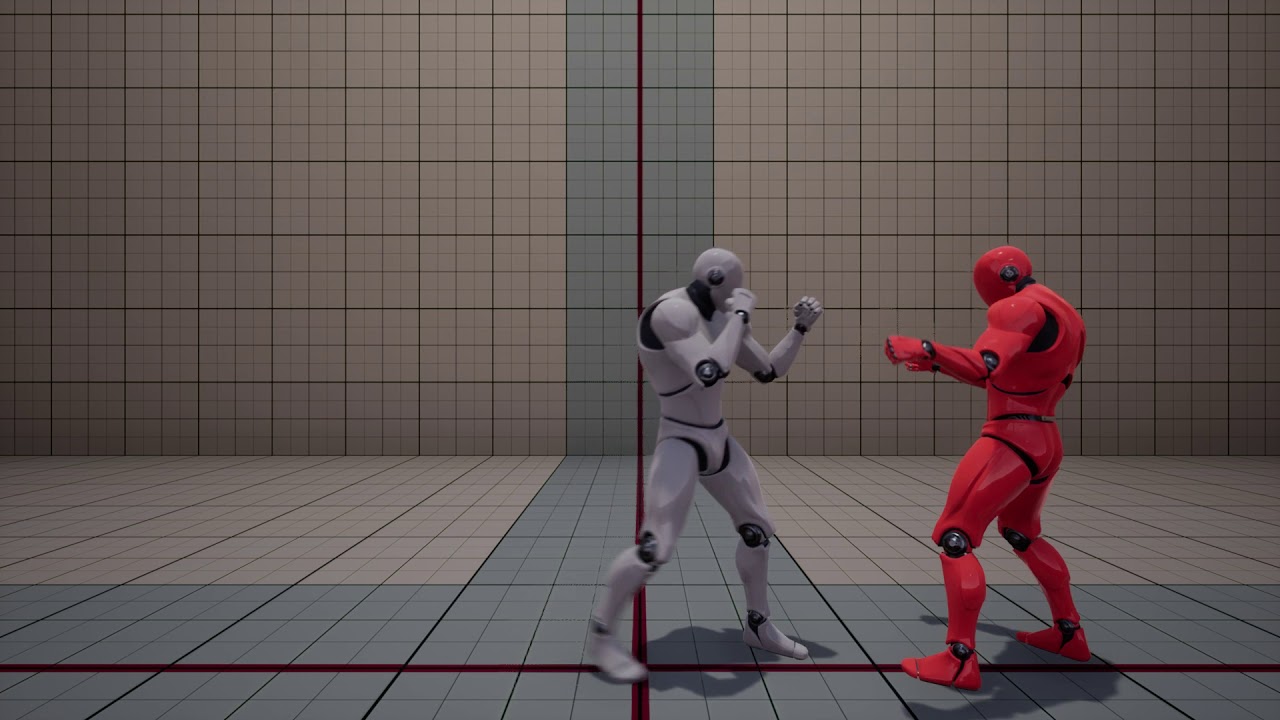
Fight Test 2: Skeletal Mesh Animation with Physics
Woah
@gritty jay Any chance you will release something like this in the marketplace? I'm creating a film and I want to add fight scenes, this would be a cool alternative to animating manually 😃
@crystal gobleto Reis#0486 very cool!
anyone with experience doing 2.5D games? I'm trying to mimic the same turning animation found in Insider. But I'm having hard time canceling an animation mid-turn, while keeping the character locked on the same plane (I'm using all root motions). I'm looking for some tips on how to do it. (repost from general, as think that was the wrong place to ask this).

^ this. Any ideas if this should be accomplished using root motion (by undoing the animation) or some other technique?
@cyaoeu#1358 The Mannequin hand, the default hand mesh in the VR template. I can export it, the bones seem to be jutting out vertically from the knuckles , but maybe that's on purpose? Doesn't prevent me from posing anyway, but I just don't know what/how to export. For example it seems weird to me to export the armature in order to export a pose, I only assume that's what I need to do.
im planning on how to do face animation, and i wonder if the following works correctly: i have an eye, a bone inside the eye to control its rotation, and a shape key that drives the position of the eye
if the mesh moves away from the bone, will the bone still rotate the mesh around itself
or because the offset it will rotate away from the face
like
oh well it does dettach from the mesh
anyone in here use ikinema for fullbody solving?
@worldly ibex I forgot to tell you an important thing, you actually need two keyframes in the animation for the import to work in UE4.
Because the second (well last) keyframe is deleted to make a smooth loop.
Or not, it worked with one keyframe too... 🤔
Guess something got fixed in 4.18.
Is it possible to update the skeleton bones but still keep the same skeleton name(asset)? I changed some bone positions but they don't update when reimporting using the assigned skeleton in the dropdown, but if I create a new one I would have to reassign all meshes that should use that skeleton to use the new one. 😱
I tried importing a new skeleton, deleting the old shared one and replacing references with the new one but that just crashed UE4. 🤔
Yeah... that happen to me as well @winged valley
Replacing skeleton crashes the UE4
It's usually fine with just a few references but I had over 100 asset references and 60 memory references. 😛
I want to merge bones and regenerate the skeleton but it seems like you can't do that unless you make major changes to the skeleton.
Actually it's really weird that the skeleton doesn't update because even when I choose the same skeleton in the dropdown in a new project bones do update.
It works in a new project but not mine. ???
@winged valley Man I'm lost, I've created a key in my animation, I select the armature, but I always get some problem or another. Right now it's saying FBXImport: Error: Mesh contains SOCKET_Container bone as root but animation doesn't contain the root track. even though the socket is not selected (and I make sure to export selected) and generally unrelated to the armature. I'm really confused 😦 https://puu.sh/ycr6B/6dc59f72e2.png

And you're exporting everything? (the Empty, the mesh and the rig)
I don't have an empty, but I'm exporting only the rig
when i tried importing a mesh with it, I only get the skeletal mesh
I can see the empty in your hierarchy. 😛
is that the one with the gizmo Icon?
thought you meant I had to create one explicitly, well then I only export the armature yeah
Then it won't work.
if I select the empty and hand_r (Grab is another pose) I get the same error https://puu.sh/ycriB/75cec75561.png

Did you make that socket?
Yeah but I'm never selecting it on export
Well you can try exporting that too then. 😛
For me I just selected everything, disabled import mesh on import, it imported the animation fine.
Tried exporting it aswell, same message :/
I don't know, maybe something's off with my export parameters? I tried playing around with it to no success https://puu.sh/ycrni/f4d44a66b4.png

You probably don't want add leaf bones.
But I have no idea, I didn't have a socket.
I solved my problem btw, I added bones for the eyes, but I had the body as the preview mesh for the skeleton with the head as an additional mesh, so I didn't see the eye bone in the right location until reexporting and reimporting the body. 😱
I don't see the socket at all when importing the mesh into Blender though.
Alright I started fresh, reexported the skel mesh, added keyframe to the pose, exported without the mesh, and I get a proper result! Except I get two animation sequences actually, one appears to be empty (skeletal mesh just doesn't show even though it's selected as preview) and the other which is normal. Minor issue of course, but do you know the cause by any chance?
Yes, you exported with all actions and NLA strips. 😛
cool! Now to learn what the difference is between all those (actions, NLA, dope sheet...etc), thanks 😃
You can just forget that the NLA editor even exists. 😛
If you disable those two you will export the current action in the action list which makes more sense.
And things are less confusing when you have a single animation per .fbx.
actions are just like smaller sub animations you compound right?
Nah one action = one animation.
But you can put several actions in one file which turns into many animations when imported into UE4. It makes reimporting stuff slower though so it's not great.
Not sure if Maya allows for multiple animations per .fbx at all but Blender does.
I use a script that exports a single action (aka animation) with the action name as the filename, that way it's really easy to edit animations, reimport them and so on.
Oh ok, so either use a script or have multiple animations per file by creating more [ whatever this is called : https://puu.sh/ycsZs/50bb35cffc.png ] ?

Ah, no, in the dope sheet you can click Dope Sheet and go to the Action Editor.
Then you get a button which shows all of your actions, you can switch between them there.
To make a new one you can click the F to force saving the animation even if it's not used, then click the X. Then New Action.
Or if you want to start off from a previous action you can just click + and you'll get a new action with all the stuff in the previous action already there.
Alright I see, and when exporting it'll select the action that's currently selected then?
Yes.
Perfect, thanks a ton
np

Pole target.
oooo ty ty
When assigning a debug filter to an anim BP and starting play it gets reset to No debug object selected. Is that supposed to happen? 🤔
4.18 bug?
@winged valley nah, happens all the time, but I thought there was a new 4.18 feature for that
Happens all of the time? First time ever I'm seeing that. 😛
Does bone driven controller driving a material parameter do nothing when the mesh has several materials applied?
It seems like it's not working at all. 🤔
I have problem importing riged from mixamo character and add bone from maya now when i import to UE i have this wierd finger bones in wrong place ?? any fix
Wut
@frigid flower It's probably a turn animation that plays as a transition animation
Yeah, but how to such smooth turn animation cancel? In my current solution I'm reversing the animation, but it's a bit bad. Doesn't look that smooth.
They probably use some procedural stuff to make it smoother
any idea what procedural stuff would that be? Maybe some physical animation?
don't think it'd be physical
could have multiple animations that play based on current speed
as well as long blend times
root motion is only really needed if you aren't travelling at a constant speed
more often than not root motion isn't responsive
only really good for attacks or dynamic movement
though, source engine uses it on its playermodels to sync animation with the current speed
if I blend rotation, the character doesn't end the rotation at 0 or 180 degress. So I end up doing 0 blend to make sure the turn is correct.
hmm.
yeah, that's what I have. 180 degrees one. I'm using the root motion of it to let it turn the character
well i'd say get rid of the root motion and just make it a regular animation with the rotation zeroed out
yeah, totally.
I'm more worried about the head and arms movement when the animation is canceled midway
to be honest i haven't quite figured out how to make a good turn in place
it probably just uses long blend out
the cancel part is the hard one. To cancel it and make it look good as in Insider
yeah, a blend would work, but it would not work with root motion 😛
don't use root motion
so maybe I should stop using root motion,
yeah
I guess using root motion is just easier for basic stuff.
I can see that. Interestingly, all tutorials I see for Unity for 3D characters, they just rely on root motion for character movement.
(just happen to find more about unity than unreal, so I watch some of them insire on how to solve the character movement in unreal)
a lot of tutorials aren't really helpful with complicated stuff
as a lot of them require creative thinking
there's always multiple solutions to a problem
@gritty jay but you should stop double posting
with several sphere colliders attached to the skeletal mesh
Aye
sometimes the simple solutions are the best
I mean, your fist is basically a sphere 😉
Are they bigger than the fists?
Anyone currently using the free animation starter pack?
nope: same size as the fists
Okay. 😛
But couldn't you use the physics asset then?
Maybe there's no easy way to isolate the hands that way though, I have no idea.
I am also working with physics based animations
but the collision check is made with colliders attached to specific bones
Yeah but the physics asset already has that. From what I know. 😛
I'm still learning to animate. It's kind of fun
I know more about compiling animations than making them :v
additives and deltas are fun
@winged valley : The physics asset does NOT perform collision check for you
Boolean class variables are considered blueprint usage?
Well not by default no, but you should be able to set it up to do so.
I found it! 
It's per body though, might cause a lot of on hit events to happen if you enable it for many.
I want IK to use Shoulder, Upper Arm, Lower Arm and Hand.
What's the best method to do so?
FABRIK does a good base job, but the Shoulder should be limited on the rotation...
Two Bone Ik only uses two bones (d'uh)
@crude fjordildex#6923 for that, I use custom rigs to be sure they're compatible with two bones IK
I tried to set each bone transform individually, but that resulted in problems and making a rig that would work with two bones IK was more simple
Also, anyone knows why blender animations are very tiny in UE4 and how to fix it ?
Yes. 😛
It's because of units, by default Blender units are 1m, but UE4 units are 1cm, so your 1.8 Blender unit animation will be 1.8cm in UE4.
It's pretty easy to fix though, you need to set the scene unit scale to 0.01 metric, that way 1 Blender unit will be 1cm.
Quick question : Is it possible to manipulate bones without animations?
Yes, using Modify Bone for example in the anim graph.
using " convert scene " , " convert scene unit " and changing
@green ether After changing the scene scale you need to scale up your rig, select the rig and scale it by 100 times, then select the rig and mesh and do ctrl+a Apply Scale. (if that's a default shortcut)
the import uniform scale doesn't seems to do anything
Yeah you shouldn't touch those really.
@winged valley you mean in UE4 ?
Also your animations may get screwed up if you used location keyframes (for stuff like IK controls) but you can fix that too.
@winged valley you mean the unit scale has to be set to 0.01 ?
Yes.
And after that scale the rig up 100 times, select the rig and mesh and do ctrl+a Apply Scale.
aye
To fix animations you select all bones in pose mode, go into the curve editor, press the magnifying glass and search for "location", that will show all of the location keyframes. After that select everything in the curve editor (using A) and press the scale hotkey, then Y to constrain the movement to the vertical axis, then 100 to scale everything up 100 times.
ok i'm gonna do that
(changed unit scale and rescaled the rig, now exporting the rig)
You should also create a new physics asset because the new one will be way better.
that's interesting, the skeleton is scaled correctly but I have to redo the skinning
very easy to fix
Skinning shouldn't be affected by the scale stuff. 🤔
hm hm 🤔
@winged valley i didn't applied the transform on the mesh
the mesh is still scaled at 100 , perhaps that's it
Then you screwed up. 😛
👍
Don't forget to save a file with 0.01 unit scale as a startup scene so you don't forget that when creating some other character. 😛
@winged valley thank you a whole lot ❤
np
indeed, changing the settings right now 😄
Hay what is ikenima good for? seems like it's just a solver to use with MB or something
what's the best way to add a start throwing anim (pulling the arm back) then having a loop anim with the arm staying back then having a throw anim based on a key being held down?
would the start and stop anim be a montage?
You could make the whole thing a montage.
how do I keep the arm back until the key is released?
You make the "arm back" a looping section.
Then when released you go to the next section.
To make it loop you just add the section a second time, it will turn blue which means it loops.
@winged valley https://i.imgur.com/4S1bNqd.png this is what I have so far
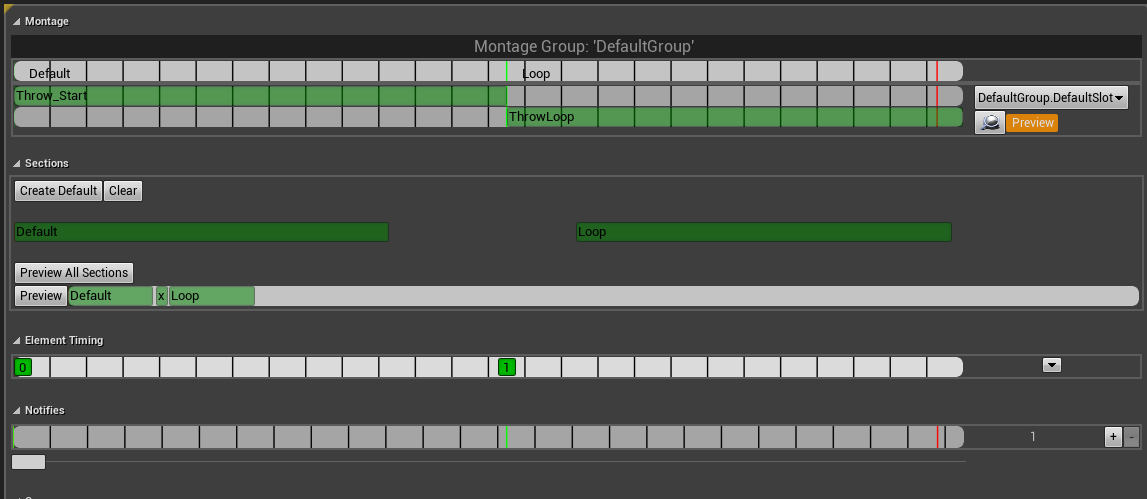
is this correct?
I right clicked and added a "New Montage Section" and called it Loop
You need to make it blue by clicking the Loop section again.
clicking it where?
The long green thing. 😛
@winged valley thank you, you pointed me in the right direction and I figured it all out
Nice, I wasn't super specific but I didn't touch montages for a while either. 🤖
Where the heck is the save pose button in 4.18 retargetting?
guys, in the Animation blueprint, if I select the animation of the character in game and press play, the blueprint always switchs back to "No debug object selected". Is this a bug or by design?
I'm talking about this ^
it work for the Character blueprint but not for the animation. I have to F8, select the character and go back to the game everytime I'm debugging the animations/state machine.
Cool. Want me to report it or do you want to do it?
You can go ahead, my latest ones have been ignored. 😛
👍
Can we create several child animation state machines in a general state machine?
Like ,I want my attack animations in a attack state machine,independant from locomotion state machine
Then when I want to switch state machine,I can just use a single link to connect both child machines
Is that possible?
Nope action game
I mean like,20 gound attack animations,all need to switch to jump when I press jump button
I'd just delta out the locomotion then apply an additive with a weightlist
at the end of the chain
I dont want any blend
uh, you're basically asking for one
well I mean, zero out the torso with a delta, for all of your locomotion, so you can run and jump and all that
then just add the current attack animation
that's how a lot of games do it
what kind of action game? like bayonetta action?
those games usually lock you into an animation, or just cancel it
Yes
I was just asking if we can include all 20 attack states into a sub state machine
Maybe I need to learn what's animation cache first
iirc you can cache the current pose then add to it or so
Thanks ,I'll try later
Can some one help importing mixamo character to UE4 and retarget with Manequine
i have add root bone but have wierd deformations on fingers bones when importing in UE
anyone here have experience with ikinema rigs?
Do you guys have suggestions regarding syncing Animations of different Objects?
For example a door and the person opening it? What's a good approach here?
ik
and root motion
also god it's so painful to import single frames from a multiframe animation
it's actually faster to let 3 different programs split up and rename the animations than it is to do it in the editor
"Blend" doesn't really mean you have to blend either, you can completely replace a pose.
It's more like a lerp, you can have 0% effect, 50% effect or 100% effect (or anything in between).
@winged valley (Boothand here, just renamed)
hey, I've set up a Blender animation to last exactly one second. 30 frames, with 30 fps.
imported into Unreal with 'Animated time' option set.
I'm using it with the Explicit time node in various cases, and I need to know exactly when it's finished (so it can loop, and more). so I've assumed that when Explicit time is 1, the animation is at the last frame, but this doesn't seem to be the case. do you know any reason why it could get imported wrong, or why explicit time would give incorrect results?
the last frame is at frame 30, and identical to frame 0
My test was exactly 1 seconds long.
I think your assumption is wrong though.
At 1 seconds it would be at the first frame probably.
What I'm trying to say is frame 30 isn't one frame long. 😛
well, if I keep it rolling (sending explicit time beyond 1), it doesn't loop, it just stops eventually
Frame 30 is technically the last frame but it doesn't have a length.
But what exactly is the problem?
the animation 'jumps' when I reset it to 0
because it hadn't reached the end when it becomes 1
And how does your logic look like for triggering the animation?
in this case it plays constantly (doing flips in air). and 'AirRotation' here is the value driving the Explicit time node:
AirRotation += AirRotationDelta * DeltaTime;

float AnimLength = 1.0f;
if (AirRotation > AnimLength)
    AirRotation -= AnimLength;
else if (AirRotation < -AnimLength)
    AirRotation += AnimLength;
and have tried variations of this, but it basically boils down to that it's longer than 1.0 and shorter than probably 1.1 somewhere :D
hmm think I've identified the issue. 'end' in blender is set to frame 30, but Unreal imports 0-29
Yes, it removes the last frame to make a smooth loop. 😛
Anyway I found something that looks like it works:
For me that's exactly the same as the animation playing normally (Play anim) even when changing the max fps.
@delicate locust
it seems like the issue on my end has to do with the start.. there's always a jump from end to start even if I let the explicit time float exceed 1 for a bit so it pauses at the end. so it's like it starts at a too late frame, even when starting at 0 ;s
that version you posted there is identical to the thing I posted above I think
the animation loops fine in Blender and in the animation editor. let me try one thing though
o_O
Also it shouldn't loop fine in Blender, it should repeat for one frame.
😛
v3
So you should actually export 31 frames.
Frame 1 and 31 are the same.
On import in UE4 the last frame is removed and the interpolation calculated.
one thing I noticed though was that when I had the first frame at frame 0 in Blender, this didn't show up in Unreal. when I moved the animation to 1-30 or 31, the first and last frame were equal in Unreal. if I had 0-30, or even 0 - 35 (where the last 5 frames were duplicate), the first and last frames in Unreal were not the same.
you asked earlier So you're using frame 1 to 31 in Blender?, is there a reason why it should start at frame 1?
o_O
... maybe?
😛
The default for me was 1 so I just used that.
But it's possible that things break when you use frame 0.
so it should have a blank 0 frame in Blender like this?
https://puu.sh/ye0jN/4f6b2e86b0.png

That would mean that's a bug though. 😛
Uh, no.
You start at frame 1 and export from frame 1 too.
Well yeah.
But 0 shouldn't be in the preview range.
ah, so set the range start at 1 too
Yeah, I guess you don't see the preview range in the dopesheet though (a bit weird).
The evaluate animation thing is nice though because you can make an animation with several loops in one animation, then change the loop being played randomly in runtime. That way you can get nice variation .
I've got something similar to that right now but way worse set up. 😛
weird, I export frame 1-31, unreal imports 0-30 (which is fine, all looks well in the editor), but there's still this little glitch on every loop
I've never heard of that, what is it? :P
It's in the FBX exporter settings, the last tab.
It simplifies the curves basically, but UE4 does the same thing so it's not really needed and can mess things up.
all curves are set to Vector for what it's worth (and I'm using your batch export script), though I can give it a try
And you could try the smooth f-curve branch too, maybe that helps (no idea) http://graphicall.org/1221
Ah, I'm not sure if that version changed the simplify setting. 🤔
It didn't but I don't really think that is the problem anyway.
I've seen you mention this branch before. I'm just curious, what does smooth f-curve mean in practice, that other animation programs don't have? I'm not too experienced with curves. (a bit of a sidetrack though!)
Basically animations have really bad bezier interpolations. This branch tries to fix that by using some fancy math.
😛
ahaa
I suppose there will be no difference in this case since I have totally flat curves
Well I guess simplify could mess up your curves if you're changing them a lot.
bake_anim_simplify_factor = 0
You can try adding that to the end of the FBX export line in the script.
Technically the smooth f-curve branch is already commited to master but I didn't see any updated builds yet.
https://blenderartists.org/forum/showthread.php?426641-New-F-Curve-Smoothing-mode-in-review-for-2-8-(with-2-79-RC-test-build)&p=3226632&viewfull=1#post3226632 Here's an example of different software.
You can see that the handles aren't aligned to the curves which makes the animation look bad (the interpolation), that's why usually you have to drag them around manually, but the Blender fix helps with that, you get smoother motion for free.
ah I read that before I think, but had to be logged in to see the pics, so didn't bother registering ;d
Ah, that sucks.
anyway, here's how it looks, if the GIF does it justice. there's a 'jump' near the upright position https://puu.sh/ye12C/5412e02b9e.gif
in the editor it's seamless: https://puu.sh/ye0sd/31ec0820b1.gif
Yeah it's not, are you sure those frames are the same? 😛
not really sure what it shows there though, the curves in Blender just skyrocket? :P
If you click the fast forward/fast backward(?) button the animation shouldn't change at all.
Nah it didn't fit into the screen. 😛
yeah have done that
But you can see that the handles are on top of the curve.
The curves in other programs (and default Blender from before) were kind of lumpy, the handles are not exactly on top of the curves.
So the animation doesn't look perfectly smooth.
hmm
Anyway, not sure what's up with your animation, I could try it here and see if I get the same thing.
that's cool though, maybe Blender will be like.. aaah look open source is best because they innovate and stuff, come get blender yaaay!
uh, that's the wrong gif
😛
Deja vu!
Well now that Blender got that other software can look up the source and steal it. 😛
using ShareX, makes me paste images and GIFs like there's no tomorrow you know!
true!
Next Maya version! New bezier curve interpolation! 💯
Why are you using vector keys btw?
just to make it not slow down in the beginning and end to reveal the loop. also because I don't know better!
Yeah that gif looks good.
hmm okay I think I've got results
In the curve editor you can set the easing to ease in, ease out, or ease in and out.
Anyway there shouldn't be a problem with using vector keys.
turns out the solution was to do as you said and export 31 frames, 1-31, then I just had something sub-optimal in the code I tested. so it's good
Ah okay. 😛
I guess using easing doesn't make sense though, apart from maybe in the middle frames
If it's something like a roll it could have linear interpolation anyway, the speed shouldn't really change I think.
Or maybe it should. 🤔
But if it was a free fall thing it would have constant movement.
well, as long as the loop is non-revealing I guess anything goes
thanks for your time and help, as usual =)
this has been unchecked on my list for a long time
np
Thank you for that evaluate thing, I came up with a better animation looping system with the help of that. 😛
aah, cool!
Treating a single animation like a montage... kind of.
so you said you basically have a long string of animations after each other that could potentially loop? isn't that what montages are supposed to do?
Yeah but messing with montages can be not great, for example if you want to change part of the animation by reimporting it.
If you just use animation sequences you can tell how long each loop is, how many loops there are, then use some function to calculate the right timing values.
And you can do interesting things with math, with montages you just kind of plug animations together and they play. The only thing you can change is the play rate. 😛
aah, so if you change the length of one of the animations, you'd have to readjust the sections in the montage, if using montages?
With this you could play animations backwards, loop a tiny bit of an animation for some effect and some on.
Yeah I think so.
At least you used to, maybe that was fixed though.
I never understood why you have to eyeball the sections in montages. like, it doesn't have a concept of the different animations you put in, only sections of a random series of animations
I have to zoom in and try to place it exactly where the new animation starts
your system sounds more flexible indeed
I didn't implement it completely though but it will probably be better than the thing I'm using right now. 😛
what kind of game is it, if you don't mind me asking?
It's a fighting game, so being able to play back certain frames would be really useful (kind of like M.U.G.E.N)
Except right now it's in seconds rather than frames. 🤔
I guess it makes sense if you can have animations with different FPS.
I see. yeah, seconds is confusing to program animations with
Anyway it shouldn't really matter as long as you use the same FPS for all your animations, then you can convert seconds to frames anyway.
3D, I guess? or is it like 2D with spritesheet animations? :P
cause I guess with 2D having more explicit frame control would be more relevant. like playing exact animation frames on demand
Yeah, well if they're sprites you kind of have to plan how to play them.
But with 3D animations you could mimic that style if you want to.
Sometimes it can look better if you drop some frames instead of smoothly interpolate everything, but I think my system will have smooth animations but with lots of cosmetic variations.
At least for now. 🤔
yeah. I tend to steer towards ultra smooth non-japanese motions :P
anyway, you mentioned all the weirdness that comes with 3D? like unexpected interpolations etc?
For example collision. 😛
I'm not 100% sure just using the physics asset (or the mes or whatever) would feel good for example.
like, the players colliding with each other you mean? or world obstacles?
Hitboxes, hurtboxes, and so on.
ah right
Guys
My interface is kinda part of the environment and would like to animation it
(like 4 mesh come out from the ground, one by one)
Is there any animation tool, or trick to it
Or just do all of it in bp / code,
?
guys im making animations in ue4 because its easier for me but ive just got to a problem could anyone help me and make a 24 sec animation where the normal character makes a t pose would help a lot
guys, in this video: https://youtu.be/I3unyVysgk8?t=5

Work in progress of my locomotion animation system. Using Distance Matching and Pose Matching techniques for Stop Transitions
the person is making the character capsule rotate without actually rotating the animation. At least it's what the video description says. How is that possible?
That's something I'd like to do. Point the character to a direction and start the walk animation and have a blend from the current animation to the new direction animation.
I'm kinda lost on how to do that. Any direction anyone can point me to? Documentation/Tutorial/Book?
Has anyone attempted what Jacky suggests here https://answers.unrealengine.com/questions/413226/how-to-get-more-than-100-morph-targets.html ?
I came to the realization that exporting with blendshapes in Maya LT probably contributes to the polygon count export limit, if that were the case, it would be necessary to have some way of importing morph targets in "waves", but I've never tried this.
Just wondering if anyone has any suggestions or knowledge on the matter
also i have a pretty weird bug when i rotate a bone the same bone will also be rotatet in other anims
Can some one tell me how to fix this when i reloading he always stop and reloading
https://streamable.com/n344l

Put the reload animation in a layered blend by bone from the spine.
i use montage for this one
It doesn't matter what you use.
You can hook the slot node into a layered blend by bone.
It would be easier if you understood your setup. 😛
In which slot are you playing the reload animation?
I guess there's only one. 🤔
The montage plays using your slot node in the anim graph.
well for swap weapon
Otherwise you wouldn't see the animation at all. 😛

To merge our Montage animation into the existing AnimGraph, we need to utilize a Slot node. We will also set up the appropriate Branch Point events to deacti...
hah i dont get get it i done everything right still not working
I dont know maybe becuse i recompiled my project in c++ can it make changes to the project and make some funcions not work ?
Anim graph. 😛
how
The montage plays using the Slot node.
So you should blend that node.
Like in the video I posted. 😛
You can still use a cache but you need to blend the montage from the waist from the locomotion cache.
And the output of that would go into MontageCache in your case.
ok i try that
like this
still not working or my reloading not showing but i can hier it its reloading but when i switch the connections i can see reloading but still in place not wile moving
I followed this video how he can reload and walk i done the same thing
https://www.youtube.com/watch?v=5sI2t6SPMOQ&list=PLM6ZWbxOgIqsCb3dUJRdYoUbyi_zFCOjs&index=13

MY FB PAGE https://www.facebook.com/groups/UnrealMastersAcademy/ Hi Guys in this Video we going to fix some reload and fire anim montage Problems and add som...
can u pls see the video on 11min he done the same thing and iy works for him how does not work for me ?
Yes, because you are doing the wrong thing.
I posted a picture with the right setup even.
But you did something else.
Which makes me more confused than you are. 😛
Hahaa
😃
no my friend i am more confused then this video telling me and u i know u showing me tight thing but can u use my pic and just edit in paint and show me what and where
https://cdn.discordapp.com/attachments/221798806713401345/376330671104196609/blendbybone.png Look at the picture and compare it with your anim graph.

Look at the pic, look at the anim graph.
10 times.
See if you can find what's wrong. 😛
well i did not set blend by layer with defailt locomotion
i just set it in montage cache
What's outside of the picture doesn't matter.
so i just have to layer blend with default loc
and add it to my MontageCache
Here as u say
the same thing in pic
Yes. 😛
If you set the Layered Blend per Bone node to work from spine_01 for example it means that your base pose plays, then the montage is played on the Slot node and is blended from spine_01, which means only the upper body will play the reload animation.
complete noob in animation here, why is it that when I translate the rig control(head) it won't export properly in fbx? rotations work fine
using the rig provided by auto rigging toolkit
@winged valley still same results
@still escarp What did you put in Layered Blend per Bone? (click it)
@sage blaze You can check the retargeting settings in the bone list, if it's set to skeleton then translation data will be ignored, it needs to be set to animation.
@winged valley you're a life saver, thanks! 💀
@sage blaze yes he is
So your animation still stops when reloading?
Can you hook up MontageCache to Final Animation Pose?
So Use MontageCache - Final Animation Pose.
u mean delete thos 2 poses just add MontageCache
Just disconnect for now. 😛
o_O
Do you have root motion enabled in your reload animation?
let me chack
Or is the state changing when playing the montage?
You can try disabling it and see if that helps.
@winged valley U are genious !
😛
But that is really weird, if you're blending from the upper body root motion shouldn't have an effect, kind of seems like a bug.
Anyway you can connect the rest of the anim graph back and see if it works now.
yeah i put back to my setup and its working normaly
👍
Tnx man u are !
np
LIFE SAVIER !
A GOD !
😄
@winged valley can i as u something i have one more problem wich is confusing as this one
but
it was working but now its not
its about croching
my character is crouchign WHEN i weapon equip only
no meter what i do
when i debug
without weapon i pressing crouching its shows the blueprint works but wont crouch
???
i guess not
@winged valley sorry for tagging you but it seems you know ue4 pretty good so i have a pretty weird bug when i rotate a bone in one animation the bone will also be rotatet in other animations any thoughts?
@hasty pivot No idea, rotating a bone in one animation doesn't make sense anyway. Usually you bring in animations from other software, I don't really have experience with creating animations in UE4. For good reason. 😛
@still escarp Then that's a problem with the blendspace probably.
@winged valley Everything is fine i double check and nothign
i cant find where the problem is starting
When i crouch without a weapon its not crouching but when i equip weapon it crouches automaticly because i already pressed crouch so its trigering the crouch just dont wont to crouch without a weapon
You should select the anim BP instance in the debug filter so you can see what state you're in when playing.
For some reason wont go to crouch state at all
only with weapon
its like does not see the is crouching or what ever
just wont not go to that state
o_O
xD
What is your transition?
And where are you setting that?
Well if you need equipweapon to be true it obviously won't enter the crouch state without a weapon.
Yeah that should work if you're setting iscrouching with the crouch key.
Well i removed it top test it
it wont gop crouch without a weapon as u see the BP its notmaly fine to check is equiped and crouch
also removed wont rouch xD
wtf
So where are you setting IsCrouching?
Equip weapon - Branch - False - Set Alpha 🤔
set alpha is for aiming when equip that i can shot up stays up bla bla
Yeah but don't you think something is missing? 😛
Set IsCrouching maybe? 😛
The branch node is splitting your logic into two things.
If it's true, do this. If it's false, do that.
yep
You're only setting IsCrouching in True.
How are you expecting it to be set when not holding a weapon?
Answer: It is not, so it will always be False without a weapon. 😛
yes
You have the wrong idea right there anyway. 😛
Because if you don't set IsCrouching to true when you don't have a weapon the EquipWeapon NOT + IsCrouching check will always be False.
Right now your logic is: When crouching without a weapon, do not set IsCrouching at all (means IsCrouching is false). This means you don't enter the crouching state at all.
This should be obvious. 😛
Because you're only setting IsCrouching when you've got a weapon (from the Branch node).
You need to set it from the False output from the branch node too.
U mean here
No. 😛
If you don't see the problem here you will have major trouble in your BPs. 😛
omg xD
u right
damn i was too much focused on previous problem that i made a new problem without notice xD
well u helped me again
!
be my brother xD
Tnx man
np
How do I make my anim tree play this attack node once and return to wherever it was? I feel like setting up a bool isn't the propper way to do it.
If you feel that way you can use a montage, it will play using a Slot node.
Otherwise if you really want to use a statemachine you can use an enum and Blend Pose (enum).
When you say
You mean that?
Cus I used the play animation node earlier and I then had to manually set the animation mode afterwards.
Or perhaps

@winged valley
Both of those would work. 😛
The Play Montage node is more fancy with all of those exec outputs.
I just realised that I have no idea how to setup a montage... The struggles for an animation lol
Yup
It's pretty easy, you just create a new montage, add the animation, set up the section (if it should loop or not), add a Slot node to your anim graph and you're done.
Usually you use the slot node combined with Layered Blend per Bone so you can play the montage on only the upper body for example, so you can keep your locomotion stuff.
That is on my todo list so lets get to it. First of of all, there is no slot node in the anim graph. 😛 You've got state, conduit and comment.
Assuming comment is not what I want 😛
That's in your state machine. You don't put slot nodes in a state machine. 😛
I'll youtube it so you don't have to describe every detail 😛
You do the state machine stuff first, then you apply the montage (slot) on top with the layered blend per bone.
Would you help finding a good youtube tutorial on this?
Cus not really sure what I'm looking for 😛
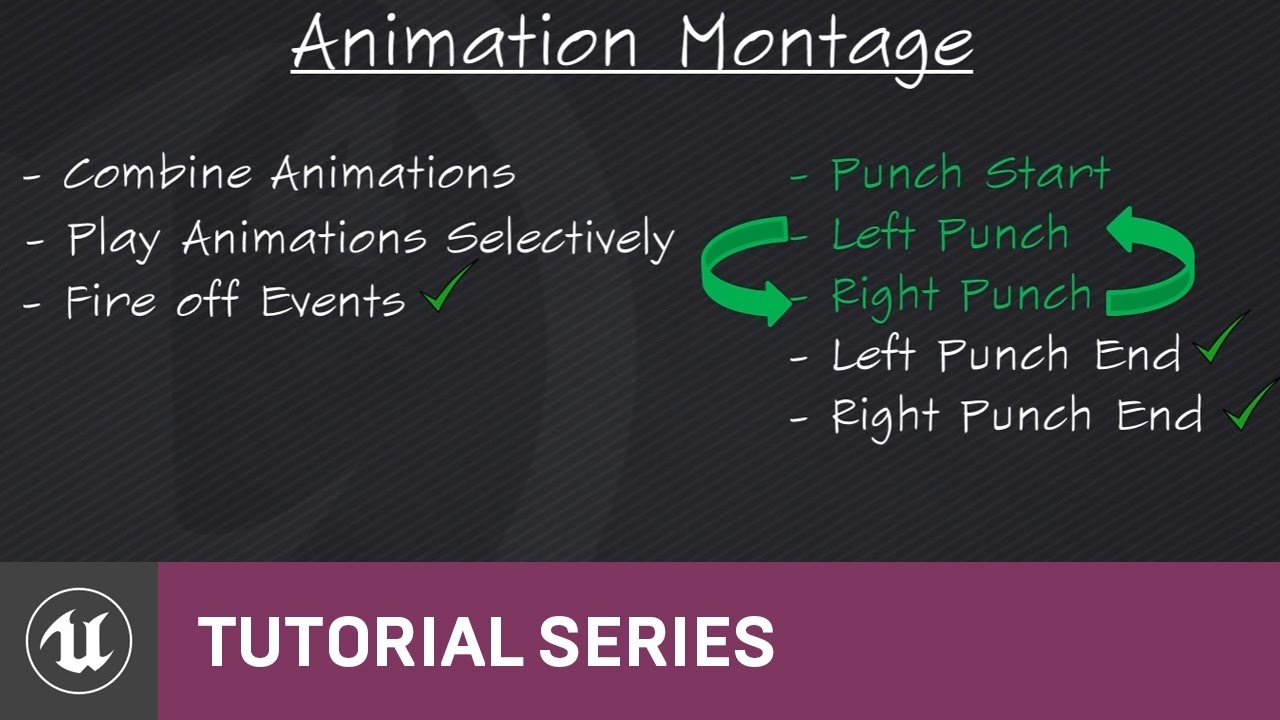
(00:05) - Intro to Animation Montage (02:34) - Setting up the punching system (04:35) - Recap and wrap up
Thanks!! 😃
np
if i was to make a char attack is that a movement component?
The movement component is for moving the capsule, either using player input or AI stuff.
o then attacking would be an event right?
Yeah it's something else at least. 😛
ok and i would need to put the attack in the chars BP event graph right?
Yeah.
That makes montages nice because you can hook them up directly with the gameplay logic.
(instead of having to add a new state for every new attack)
is this the best thing to do if u are making a fighting game like street fighter 5 tho?
That depends, you might want to make your own animation system for that.
Using something like https://brunoxavierleite.com/2016/07/03/ue4-finite-state-machine/

I’ve developed a new UE4 Plugin. Simple, yet powerful, Finite State Machine system which allows you to manipulate Actor States through Animation Graph’s State Machines, Behavior Tree T…
anyone have any tutorial videos on how to make and use state machines?
Has anyone worked on weapon switch/Swap system ? i need little help with it
Could anyone send me the skeleton with the mesh from ue4?
u can export it
Just delete the bones??
yeah
I want to have the mesh with the bones @eoinobroin#6833
Cause i want to animate them in blender
Exporting the mesh from UE4 will keep both the mesh and bones
Opens fine for me in Maya at least
I don’t have Blender or intend on getting it sorry!
I’m sure there is a guide online somewhere it must be a common issue
Maya LT 2017
It’ll work with any version of Maya though
Ok
Importing a mannequin .fbx in Blender gives me both the mesh and the rig (although the rig is screwed up), no idea why you only get the mesh.
@simple aspen which version of the export asset should i use?
@hasty pivot I’m not sure what you mean- when you export there is only one file, no?
There are different versions but I just used the default.
how can i make it to where presing the key makes attacking true?
im using the Fight Game Select Character templet and both of the players contrals in the same contraller anyone have any ideas on how i came make char 1 attack?
@simple aspen ik this has nothing to do with anims but i ran into a major problem i tried find my maya 2017 but its nowhere i looked at all programms and in folders it isnt there but when i try to reinstall it says its there lol
Is there any good way to split up animations into single frames?
because right now it's faster for me to send the animations through 3 different programs than to manually split them up in the editor

This is a fan project made in Blender & Unreal Engine 4. Unreal Engine 4 is such an incredible tool... I hope more animators will consider using it. Unfortun...
Made in Blender & Unreal Engine 4
Hello, Question does anyone here have the Unreal Character rigged and ready in maya and is willing to share?
So I have a montage with 3 sequences, AttackFirst, AttackSecond and AttackThird. At the beginning of each attack, I want an event to be called in the anim BP. However, sometimes at the end of the previous sequence, it calls the start function for the next sequence? The likelyhood of this happening seems to depend on how close I place the event to the end of the previous sequence(not actually on the previous sequence)
Is this a bug?
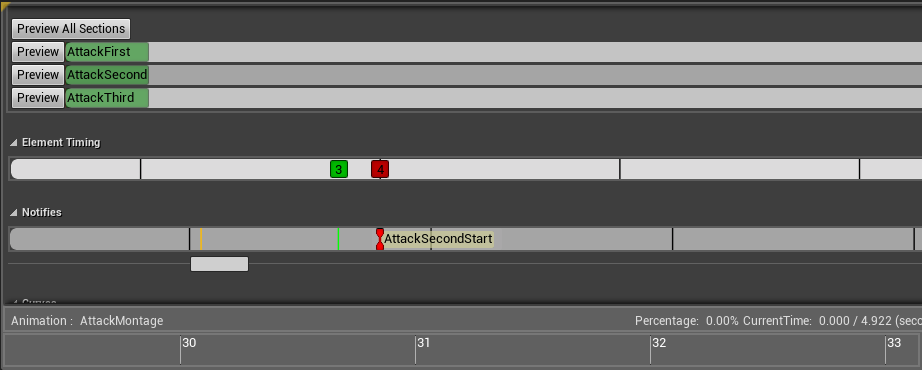
Is there any other way to call a function when a sequence starts?
Hi.
I tried use set actor rotation
ITs working but turn animation doesnt work. In blendsapce
How do I automatically go to the next animation state when the first one is finished? I've ticked off loop but it just stands there
@misty marlin In your transition, check if remaining time (ratio) <= 0.0
Thanks, I eventually managed to google it! ^^
how would you guys implement a character breaking apart, so that all the individual body parts would just roll around as a phys asset and then after a while reassemble back to the original pose? (think of the skeletons in dark souls)
@misty marlin Keep in mind that time remaining zero only works when looped is off. If it isn't it has a chance to keep on looping
@sudden sedge Yeah, only wanted the animation to play once 😃 Works nice for one off events.
Can be used Macros for calling animations when equipe
i cant finde nowhere totorial or what ever is reliated to that question
@Spooky360#6921 if it is looped, checking for <= .1 is the way to check, as the Docs say
i have a question, when animating a sequence (two characters fighting), how do you blend static and root anims, is it just using the weight or is there a better approach?
I tried also using the location transform with the weight but it still looks a bit unatural
@winged valley Hey bro i need your help i see no one is give me any .... how i say
can u help me out on how to use animation when equip weapon
i have inventory system and stuff just dont know hot to get this done
i cant finde nowhere similar tutorial or something
I'm confused on how to switch between states in a state machine. Lets say I have one state (idle). And I want to switch between 1 of 4 different idle animations. How do I go about that? For simplicity lets say I'
I'm just randomely switching a number 0-3
It won't let me start with a "conduit" so I can't ensure that idle is in fact the animation set I'm wanting to switch between
In my setup I have a enum that says it should be idle, so I would imagine somewhere I need to check that enum and from there branch into a state
in my case the idle state
Then in that check location I would randomely generate a number between 0-3 (for testing) and then have it switch dirrectly into that animation state
You don't make different idle states
You have one state
And there you simply switch between them
For example with a simple integer
okay so how do I go from nothing to the idle state? Where can I check my enum to see if it's "idle"
Because it seems like it wants me to go from the entry point directly into a state
even though I haven't determined which state with some logic
So right now it's StateMachine->EntryPoint->State, but there doesn't seem to be a spot for me to check which state I want to go into
I would imagine after the entry point there would be a location where I switch on Enum, and that enum branches into the different animation states
You probably need a default state, the entry means that the next state is the default state probably.
But in any other transition from Idle to whatever you could have Enum == in the transition (if that works).
Then Blend Poses by Int for the different animations within the state.
@main ferry
Can some one clear me up on how to call a name by ID and play animation ?
Not sure what you mean, but you can have animation sequences/montages as variables and use those in your anim BP.
Well i have monate as testing anim. Because all weapons are i Data Table so if i can call by ID and then like when equiped by that ID play montage
So I'm exporting from blender a rig with multiple objects attached to an armature, how do I handle materials in this instance?
If I add a material to each object that'll almost definitely cause way to many draw calls


it imports in many parts as well if I import as a skeletal mesh
😦
doesnt seem to let me combine like with static mesh
Managed to get it. https://www.dropbox.com/s/wcbrren1bq1ax12/2017-11-07_06-48-19.mp4?dl=0
Yo, Is there a common workflow to animate multiple Objects/Skeletal Meshes?
Hey guys I'm using 4.18 and I am trying to find the option Recursively Set Translation Retargeting Skeleton, in the bone tree but when I right click the bones the option is no longer there any ideas?
@misty dagger in the Bone Tree View in the lower rigth corner is an eye icon.
Click on it and enable the Retargeting options
haha so simple thanks
@terse forge I've exported something like that and I'm pretty sure it only used a single material
I don't think I had any material setup in blender for it though
oh I was using object animation though and not an armature (a skeleton still gets synthesized on export)
I ended up joining them all and kept everything loose in that one object
Anyone have exp with 3ds max IK animation?
This skeleton has this jaw bone, I'm don't want it there, is there anyway to remove it?
Going to asset and doing "Remove unused skeletons" says says "There are no unused bones"

The text says "Jaw"
If I try to assign my other skeleton to the mesh, it asks me if I want to add that jaw bone, I untick it but then it just says "Failed to merge skeletons".
Reimport it with the jaw bone removed from the rig.
Can some one tell me how to do equip meshes ?? like skeleton just with a rifle i will post a pic
something like this
hey guys.. I want to cheat.. can i use animation pb to animate moth wings with a sine wave?
i thought this would work
but I'm using houdini logic on unreal.. can this be done, or am I being stoopid
@still escarp Additional meshes to the right.
@lethal pecan Yes it can be done.
But in your version Time will be the same value all of the time.
Well that math is up to you. 😛
But for example you could increase a float until it's a certain value, then reset it to 0 (or start decreasing it from there).
i just need to know how to read the time as a increasing number
You can set Time to be Time + Delta Time X.
Why would attaching other actors to sockets of a skeletal mesh mess with its animation?
@winged valley Hey, sorry for the late reply, I fell asleep lol.
I don't do animations, like at all. I don't even have these programs installed. Is there a quick way to do this or do I have to send it to someone? 🙂
@quartz cove Collision?
@misty marlin If you don't have the source files there's no easy way.
I see, thanks! 😃
@winged valley Nope, anything else?
Last night I tried to manually disabled the whole actor's colllision
this morning, made sure all meshes had no collision
What is happening to the animation?
ummm, basically goes haywire
seems like it can't figure out the rotation
moves super fast back and forth
Making sure nothing else is interferring now
That sounds like collision. 😛
Not even a capsule?
@winged valley Hey again, sorry to interrupt.
I'm using this pack: https://www.unrealengine.com/marketplace/countryside-mutants
Saying that all are rigged to the default mannequin rig but the mutant brute(The one I'm having a problem with) is using an additive yaw animation. Could this be something?

This pack of mutants will fit perfectly in a post-apocalyptic/horror game or project.
@winged valley nope. but I just tested it. It works with a basic sphere. So there's something else going on.
If it didn't have collision wouldn't the actor fall through the world? 🤔
I am attaching it to something else
There's lots of different collision stuff, capsule collision, physics asset, the ignore/block stuff.
It's easy to test though, make a new socket a bit away from the body of the character, then attach it to that.
If it still happens it's not collision, if it doesn't happen it is collision. 😛
Does anyone have experience with building responsive creature animations that respond to the player but don't suffer from typical game-animation issues (sliding caused by blending, lack of weight transfers on blended animations,e tc.)?
Wondering how to do this too, @ me too if you answer him 😛
hello. Can somebody help me about ai animation? I tried change only rotation. But animation which I set in blendspace class is doesnt work
I used set actor rotation. Its turning but not with animation
I have an animation of a character jumping that I got from a animation pack but the animation is leaving from the colision capsule. I wonder if the issue is with the animation that is moving the hip bone too much or if I should reposition the capsule to adjust with the body. Unsure what is the preferred approach. Can anyone shine some light?
here's the animation
I'm reducing the size of the capsule based on a curve value on the animation to fit with the compression of the character. But the issue now is the animation moving away from the capsule
@frigid flower try enabling root motion
The root motion for that jump seems to be "wrong". At least the jump is very clunky.
Animation probably sucks then. You'll probably have to edit it in some fashion
to zero it out
for those wondering, I got the animation from here: https://www.unrealengine.com/marketplace/movement-animset-pro

A set of over 180 motion capture animations for unarmed TPP character.
You'll probably have to edit it
normally Jakubs anims are pretty solid imho
the animations are probably solid, the issue is they're not tuned to work
from what I'm getting
well not every locomotion system needs / uses rootmotion.
yeah. I had to disable the rootmotion on the jump to get the jump looking good.
jumps and running if they don't use root motion are usually zeroed out
I could probably do it for you if it's just that animation
I g2g right now, so just pm me and I'll get back to you
❤ if you could show me the way on how to do it, it would be much love such heart
would you do it in the editor or edit the animation on maya/3dsmax?
Did some one try to use manequine's skeleton and use it on own character in maya or what ever and skin it and use it for own character without ritargeting ? because mixamo and ue4 retargeting its just not going well
hey i have a half mechanical half skinned character (one arm has cloth and such), i skinned the arm on it but i got double transforms in that section
then i solved that by removing it from the bone hierarchy like a moron
so now ieven though the skeleton drives it i can't import it into UE
works great in maya
how am i meant to sovle that problem normally

pink sections receive double transform
i removed from hierarchy so they work well, but it's become clear that was a mistake and that i still need them parented under the bones
for UE
@still escarp I had skinning issues (meshes flapping) using animations from Mixamo and AnimSetPro. I guess one suggestion is to not use UE4 manequin and just use mixamo's rig and export that and build your character on top of that?
So no use of AnimSets with mixamos characters rig
Is there a way to put an AnimNotify for a duration of frames instead of a single frame?
@short glen couldn't you just make a start notify and an end notify?
it'd achieve the same effect
Yeah maybe. I'm trying to make a line trace from two sockets trigger every frame in the middle of the animation
Hey guys, I made a character in maya, (just a model) however I put colour on it, I just need to rig it and animate it now. Do I do that part in unreal or do I do it in Maya and still export as FBX?
you do it in maya
you export the model and all its bones as one fbx
then each sequence as its own fbx
Any suggestions? I'm worried about root movement / rotation impacting presence in VR.
hello guys. I tried change rotation of AI with animation. Its turning but not with animation. Is there anyway to change only rotation of AI character? I trieduse set focal point also.
no idea? or my question is wrong
i re-targeted an animation from one rig to another - i think its impossible to use the re-targeting options to get it exactly how i want it - what are my options for some minor tweaks (holding the pistol angled incorrectly)
i think there is a blend system i can use, or more easily do this in a tool like blender?
How to add a characters skeleton to a mash
you need a 3d modelling package
@sudden sedge talking to me ?
Sry did ot know he was speaking to me anyways i have mash just asking can it be done to use manequine and skin it with own mash character
and retarget it with other animation
Yes, import the mannequin into your 3d modelling program
Delete the mesh, import your mesh and then bind skin
You'll probably need to repaint the skin weights
well i dont know where this IK bones shell i delete them
How add root bone in 3dsmax ?
No meter what i do what i add its going crazy when retargeting
if you're using max import both models and use skin wrap. you need all the bones. Then setup the retarget manager, set all bones and the pose to be the same as the source mesh
Hey guys, sorry for this lame question, but I've searched google and can't get a straight answer. Using 3dsmax, whiah way should the character face if it's meant to work properly in engine?
is it y+, x+, looking forward "at you" in the front viewport ?
importing the mannequin has him facing Y-
@lexx#2167 I exprorted everything with root bone also same thing only or maybe when i pose it is hi saved like that when i save or i have to do something else when i click vie pose its back to normal pose
@pale silo The Front of 3Ds Max is right, Unreal automatically converts the Scene when importing it
thanks mate.
@winged valley hmmp, my IK targets are keyed in 'world space', any simple trick to get them to stay relative to the root bone instead? I intend to just remove the keys on the root bone and have an in-place animation.
only way I can think of is to parent the IK targets to the root and re-do those keys, but then I won't keep the current animation and will be harder to make it right

Don't know really, if you want to have both root motion and in place animations it's probably better to have the IK controls parented to the root bone before animating.
yeah, just makes it a bit harder to get them to stay still when moving the root
Yeah that's true.
You could try Copy Location constraints on the IK controls targeting the root bone with invert and offset ticked, then baking the animation for those bones.
ok will look into!
Or just key visual location instead of baking. 😛
But I usually do it the other way around, do the in place loop first and then add root motion, that way it's easier.
In blender, is it possible to delete all keyframes of an animation except for the first one automatically? (without having to manually select them)
With a script yes.
oh
do you know how to make?
Yeah but it seems a bit pointless to me. 😛
There is also Select - After Current Frame, then just delete.
Guys
I am trying to copy some animation keys from the hips to the root in Maya
But somewhy its keeps tell me I have to select and object to it (even thought I selecting the root)
"No object selected to paste keys"
Ah found it nvm
Had to create some key first
Guys
Is it possible to export the keys curve from maya
If yes, is it possible to import them? xd
to ue4
Any solutions ?
I downloaded this animation from mixamo and want to decrease the Z location so it plays at the floor height, but when I do it in blender in Object mode it doesnt work, is there an alternative?
@still escarp you have retarg bones in the option details?
has anyone buyed the advanced locomotion system? when yes is it an addon or a single projekt? and if its a single projekt how can i implement this into my game??
Anyone here know of a way to use an animation as a single axis blendspace?
I tried turning playing and looping off and driving the start position from a parameter but it doesn't work as expected
The start position only takes effect when the animation first becomes relevant, such as when the state is entered.
hi
I tried use aniamtion preview in my animation BP
My blendspace work only when speed min 5
Is there anyway to change it?
Hey guys, has anyone by any chance know one of these two things?
- What are Sync Markers, and how do i use them?
- How can i sync two animations using curves? A small example: I have a curve ta represents a limb placement. When i change state or blend to another animation i want it to sync with the same value in the new animations curve.
Are there any people who make animations here that take on custom work?
@winged valley (forgot to say, your suggestion of using Copy Location constraints and baking the animation worked like it should =] )
anyone knows why this bad interpolation happens and how to go about fixing it? the beginning shows both alone, then blended:
https://puu.sh/ylQp8/c92486b46b.gif
What's the best way to set up animations that "interrupt" other animations? Like a punching animation . Player could be running, jumping, walking, crouching, crawling, falling, etc. and could decide they want to throw a punch at any time. BlendSpaces won't work for that reason, so what should I use?
Montages.
Oh ok, will check that out. Thanks
how do i resize bones at runtime? (not scale)
almost like the translation from transform (modify) bone but without affecting the mesh
@frigid drum can you give an example of what you are talking about