#animation
1 messages · Page 91 of 1
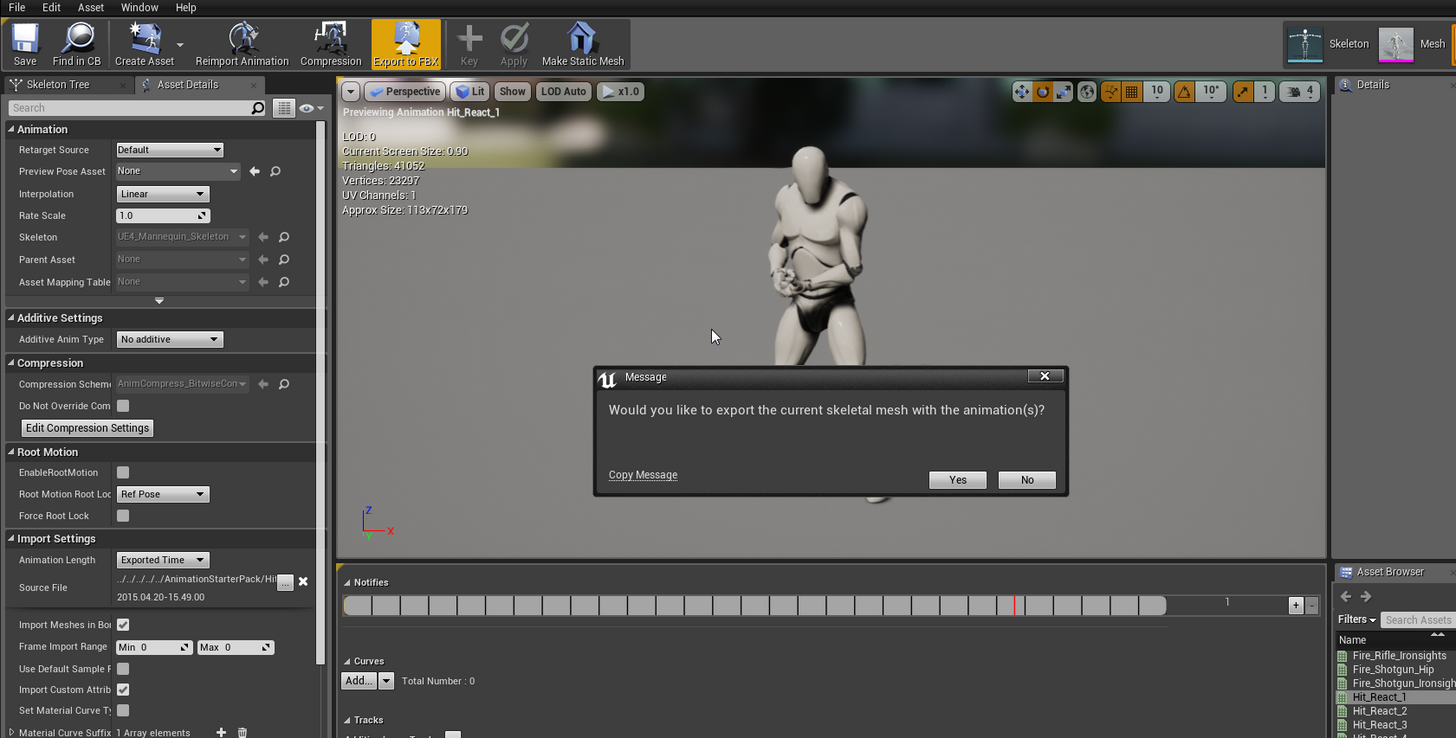
In the sections, remove the loop by clicking the x.
There's no x xD
omg
a bug?
if the Section's name is "None", it will repeat
if it's "Default" it won't
possibly an old link, but thought i'd share it again if someone hasn't seen it
Making hobbyist 3D animating easier, cheaper, faster
if anyone knows a good up-to-date tutorial on how to get bones from blender working with retargeting please post it, been trying for days...
i'd be interrested in that too... also if someone has a good skinweight painting tutorial for blender it would be awsome
By retargeting do you mean a skeleton that emulates the Default Unreal Skeleton? Then allowing you to throw it into the retarget manager as a retarget source
Coz if so I have been working on that exact thing lol and in terms of skeleton creation I have got a skeleton that has an almost one to one heirarchy to the Default Unreal Skeleton
I havent set up retargeting just yet and I am currently at work but I will make a post when I get home tonight which will be about 8 hours from now 😞
For weight painting and character generation in general its hard to go wrong with Darrin Lile's series. He goes over weight painting here: https://www.youtube.com/watch?v=G3gIN4dJYw4

Learn Blender at https://Blender101.com In this video we begin the process of binding the character mesh to the rig. We touch on weight painting and point we...
The character might not be a game asset but the techniques and principles still apply
As for some tips and tricks this video was pretty nifty with some weight painting hotkeys: https://www.youtube.com/watch?v=PgtFlShmdro
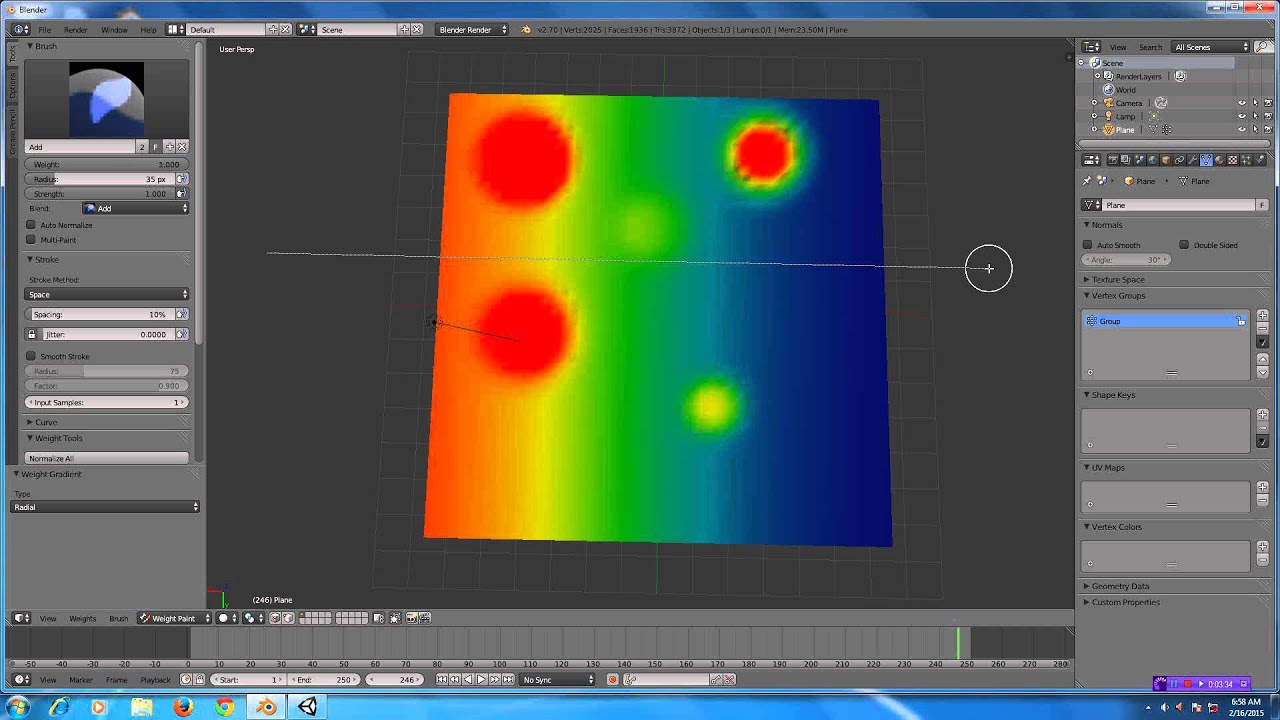
In this Blender 2.7 tutorial, I show you some of my workflow when creating weights for a mesh.
when i do a sqeuence, and roate, lets say a door, sometimes the door chooses to open the wrong way through the wall. Is there a way to control this?
Has anyone every had the issue where inside your Anim BP by testing the preview, your animation works, but in-game it seems like some states are not firing correctly?
I am printing the values to the screen as I play, and the boolean that controls the state switch says its true, yet the animation still does not play
Nevermind - figured out it was a rouge Boolean value that was default set to true when it should have been false.
@outer herald @jonas_molgaard#1272 @viscid willow What's wrong with UE4Tools?
Stop trying to reinvent the wheel. 😛
@analog palm Are you rotating over 180 degrees?
You might need to set the value manually, sometimes you can get flipping when rotating in the viewport.
@winged valley Nothing wrong with them at all, I use them a lot and its helpful to not have to worry about things like scene scale and export directories, I'm just going for something a bit more custom
@winged valley didn't know about ue4tools, seems nice, but still wouldn't mind knowing how to make it all work with my own armature.
@viscid willow yeah, watched that also, but still can't get it working, in 4.10 I managed to retarget ue4 animations to my own character on first try, but no luck in 4.17.
been reading about UE4Tools and it seems like alot of people are having problems with it, also seems like it's not updated for ue4's new rig :/
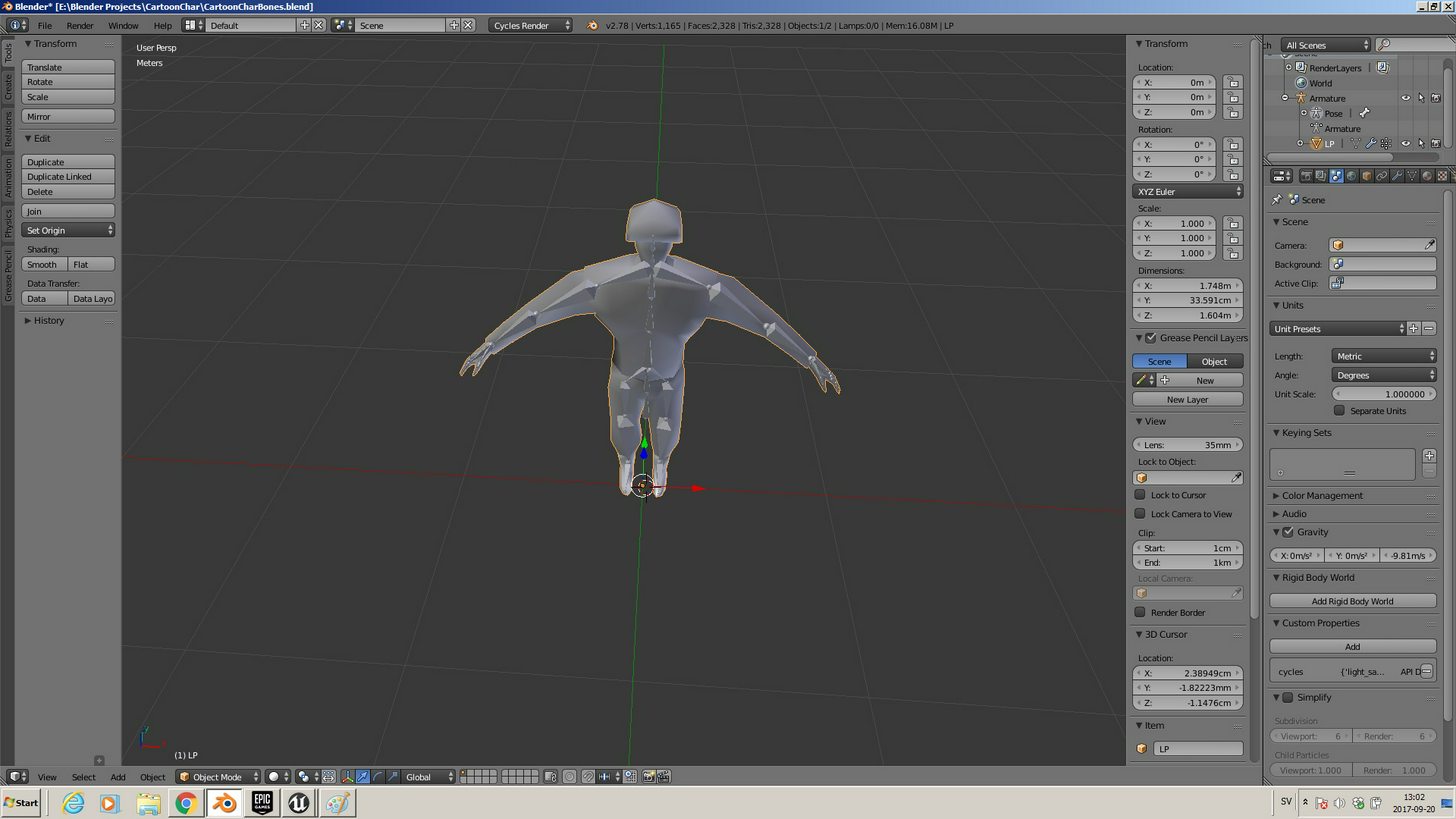
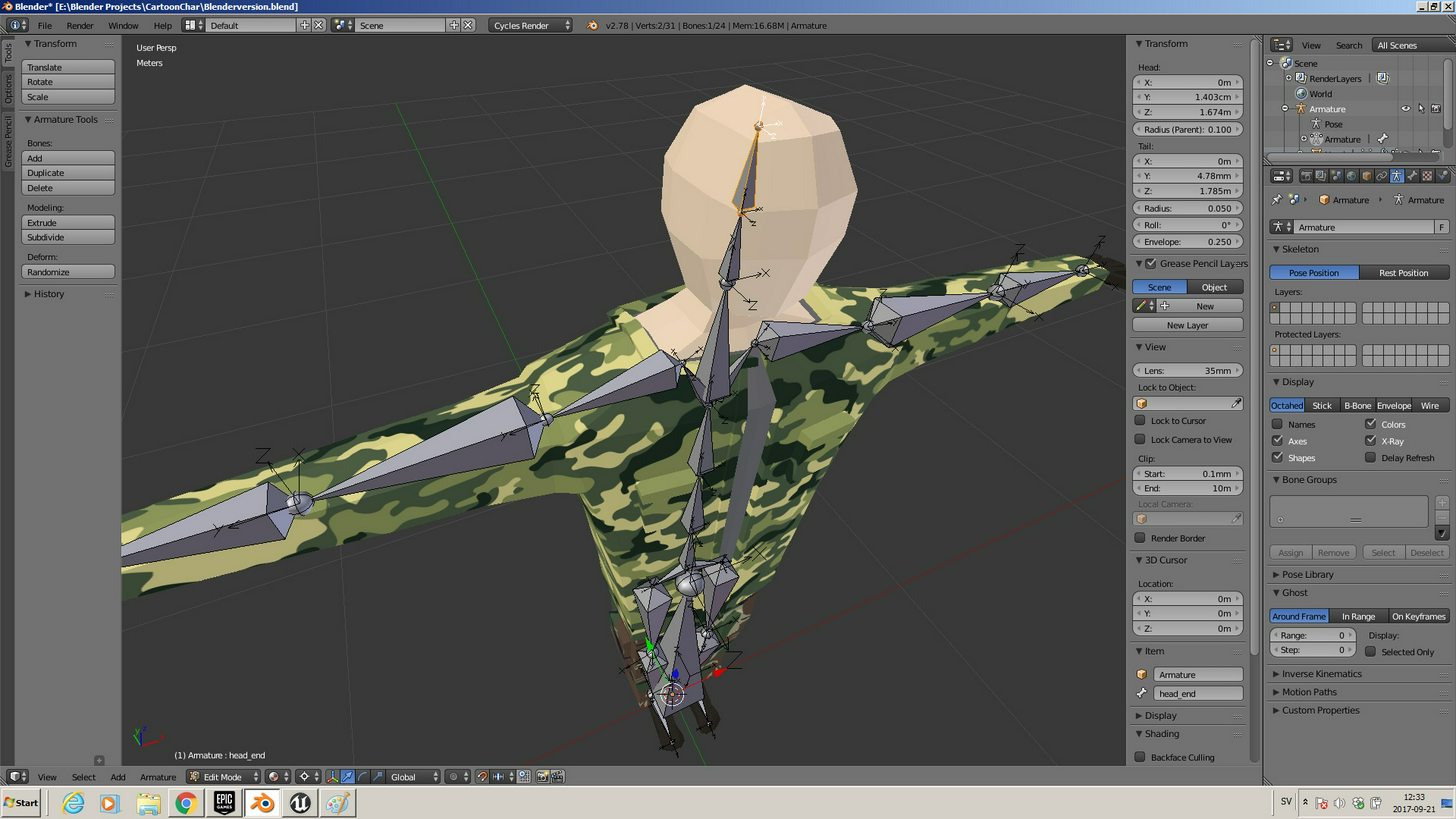
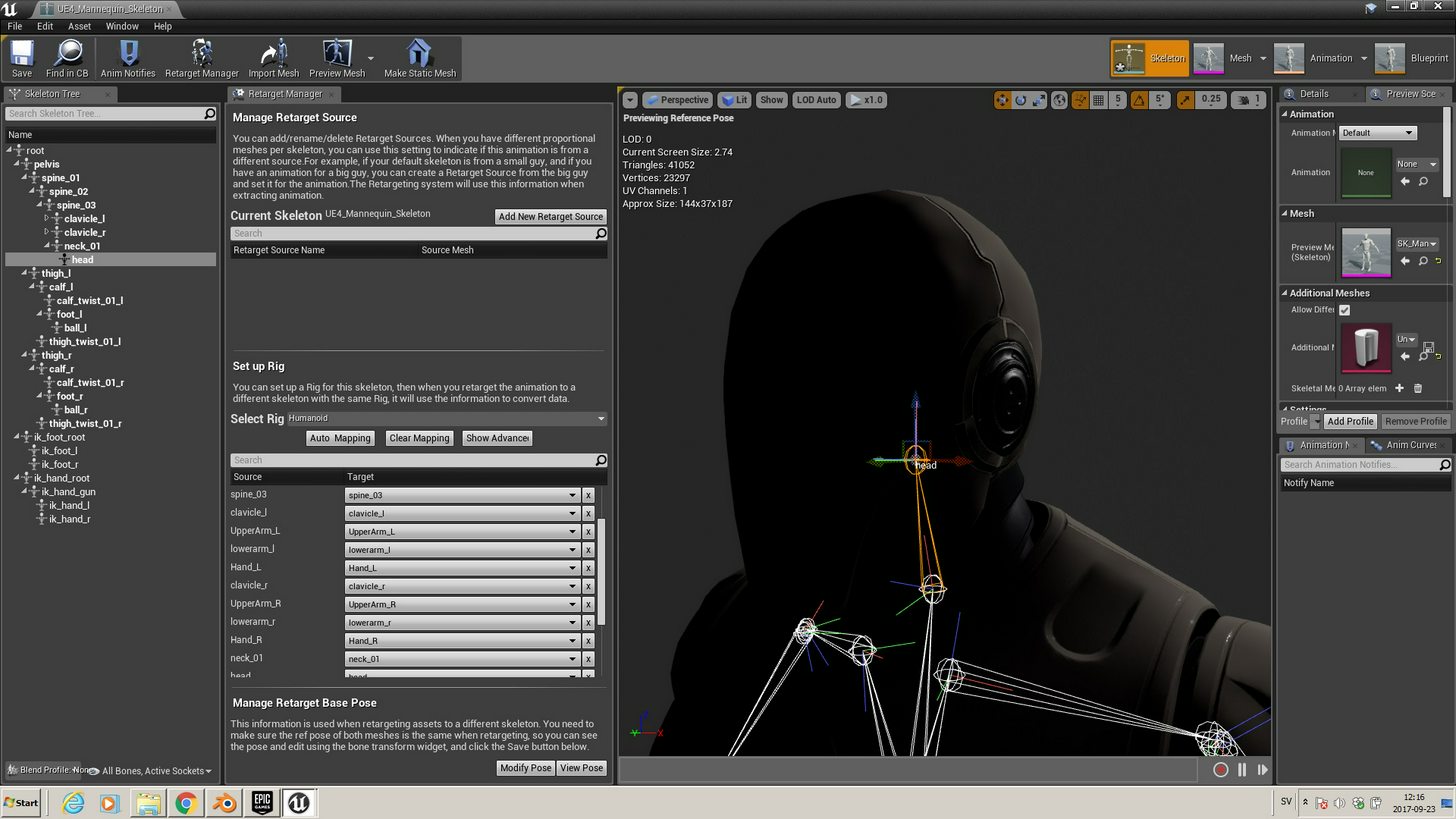
@outer herald This is a block out character I built a skeleton for with the UE4 Skeleton in mind
I added this to the retarget manager and retargeted the mannequin idle animation to this guy
You can see the rotations and positions look pretty funky coz the proportions of this character differ from the original mannequin
@outer herald If you did want to make a rig for UE4 the important thing to consider is matching the main deform bones of the mannequin character. That is if you want to use the animations provided in the engine for example.
But in any case having matching deform bones that you can assign in the retarget manager is all you really need. That applies to any characters you want to share anims between. Having the base "humanoid skeleton" will allow you to fill out the retarget manager pretty successfully
To get it closer to perfect is when you need to get in there with IK Bones, which I have here, however they carry no animation in the current UE4 assets
yeah, that's what I tried to do, on my first try in 4.10 I didn't even have the scale in blender set up for ue4, and the bones were really simple, but I got it working, now in 4.17 I tried to make the bones as close as possible to ue4 skeleton but stil cant get it to work
from one of my tries
I tried with several different characters and bones
oh cool, ill have a look
thanks 😃
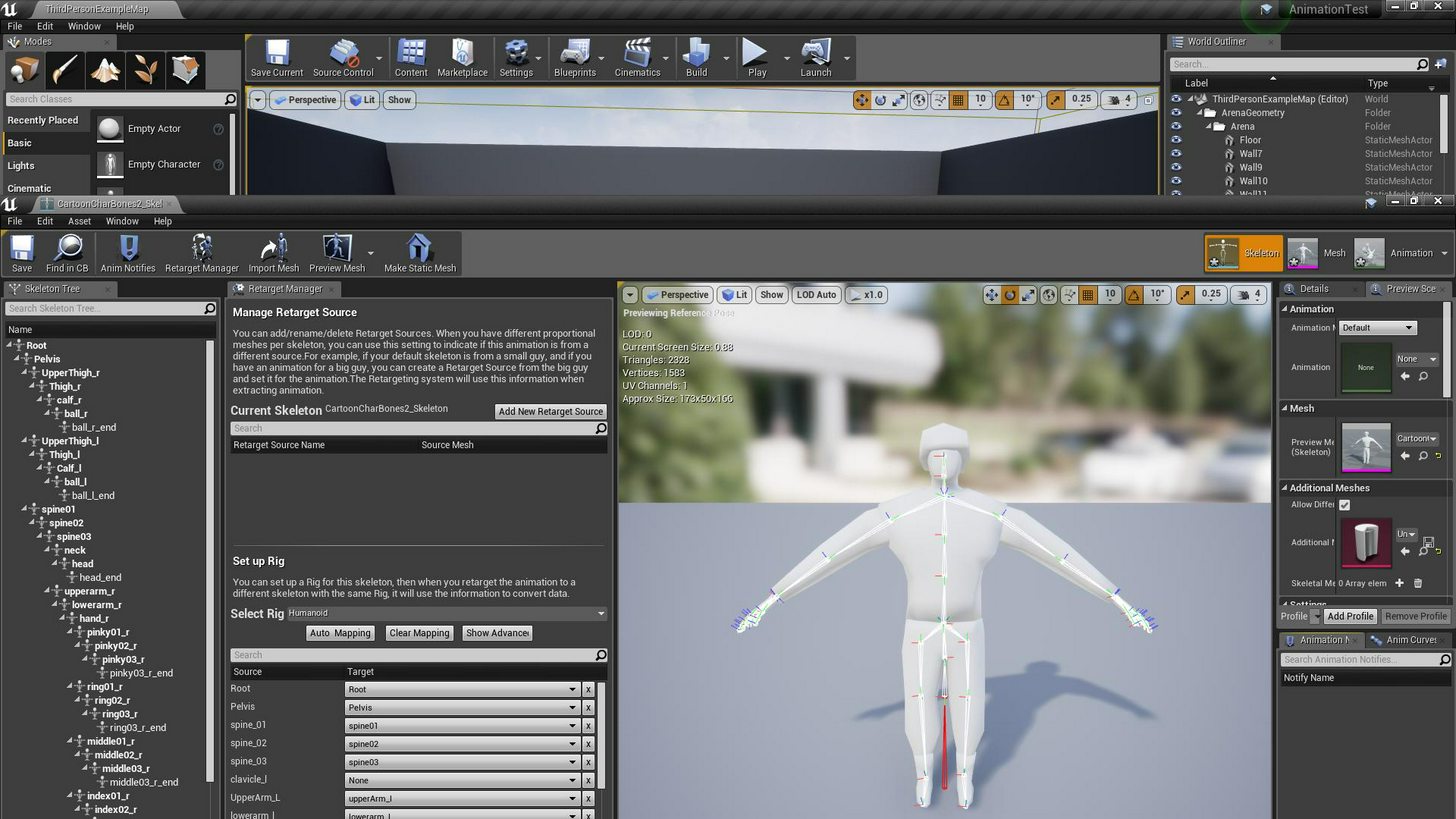
Have you set up the UE4 Mannequin in the retarget manager with the humanoid rig as well?
yeah
first set up ue4 character, then save then my own, set all bones accordingly, then try to retarget
you say you didnt set the scale in blender?
if you import the skeleton and ask the engine to make a physics asset for you does it say bone size is too small?
yes
or wait let me check
I'm sure it did it before, but not sure on my latest character
right coz im wondering if thats the issue because if you are using the default blender scale your rig will be 100x too small
It's easy to check, just check your Blender scene unit settings.

scaling skeletal meshes is one of the biggest nono's
And in general the transforms on the mesh/rig in Blender (object mode), they should be at 1 scale.
I "applied" location,rotation and scaling before exporting, is that bad ?
hmmm, interesting, doesnt say its too small but yeah would you mind checking your blender units?
Ah okay
to work in unreal best practice is to begin by setting your scene scale to 0.01 and your units to metric then work from there
can I simply change it now or do I need to remake everything from scratch ?
By the way, the bone size too small thing was fixed a long time ago, but the physics asset still gets messed up (3 bodies instead for a body for most bones).
unit presets is meters btw
You can change it now, it's not hard.
alright, so I just change that and try to export again?
You need to do a few things, but you can change the scene units to 0.01 metric first.
unit preset still meters ?
Yeah.
Then select the rig in object mode and scale it by 100 times, after that select the rig and do Apply Object Transform ticking scale, then select the mesh and do the same thing.
alright
Then it should be fixed after reimporting.
If I were you I wouldnt scale up the bones
Why not?
If you don't you get a 1cm mesh. 😛
The scaling is just to get things back to normal after changing scene units from 1 metric to 0.01 metric, the scale doesn't really change in Blender, just in the .fbx.
Personally I would delete the skeleton, scale the scene and the mesh appropriately and then remake the skeleton. Scaling skeletal meshes can be problematic, not all the tiem but most of the time it will be. You will get cases where it looks fine in the viewport but the rotations require extreme numbers to rotate a simple 90 degrees. This is because as far as unreal is concerned your mesh is 100x bigger than it should be
I have been doing this for about a year and making rigs in maya, blender and max. And the first step you should always do is set your scale correctly
I don't see why you would need to do that.
I'll try like this to start with this, can try to remake bone if it doesnt work
btw those 2 error messages are nothing to worry about ?
Its good practice for a clean asset
I mean it's not only possible to rescale rigs made in an incorrect scene scale, you can fix animations too.
smoothing groups and influence count
smoothing groups are part of your blender export
For smoothing groups you should set the normals to Face or something, Normals is bugged (but got fixed really recently).
the vertex groups could be an issue , some of your weight painting might be off because UE4 supports 8 influences per vertex, you have 13 on some vertices
For the influence count you can do Limit Total in weight paint mode.
anything extra to select in import options? other than TOA refs ?
Disable leaf bones maybe, nothing really.
import normals and tangents might be a good one to have on for importing your mesh smoothing, this is getting outside the realm of animation lol

You should try retargeting again.
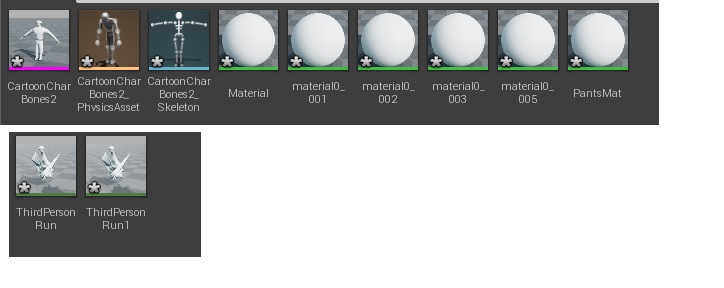
what does the thumbnail for your asset look like?
Oh i can see it, it looks pretty normal. Does it look normal in the content browser?
ah thanks
not to be a pain but i do think creating the skeleton at the correct scale is going to help shed some light on this 😕
It's not. 😛
😄
It more looks like the weights are off or something.
I'm happy to try whatever, been trying everything for days, need to get this working ! xd
Or the retargeting settings for the bones.
lol why is it so hard to believe it might be a scale issue
Because it's fixed now. 😛
uh
lol
Animation looks normal (in scale), so scale is not the issue.
red bone is the root
but my root bone is a smal bone just below pelvis
hmm
It should look something like this (at the origin)
root bone shoyuld always be at 0,0,0 when at rest

In edit mode you can press shift+c to set the cursor at origin, select the root bone, do Snap Selection to Cursor, that should fix that.
o_O
You can upload images here by pressing the + thing at the left.

Yeah that doesn't look right.
shft+c to get cursor at 0,0,0 then snap your bone to the cursor
Remaking the bones won't change anything, I would guess something is messed up with your retargeting, you should try it in a new project.
Also did you reimport the skeleton itself?
Or you could share the .blend and I could try it out.
thats a good idea, I still think scale is something you should be keeping consistent between your modelling tool and UE4
it is pretty important
If it looks right and is at 1/1/1 scale it is consistent.
😛
You can change scale after the fact by scaling and applying transforms.
Its not really that simple, there is a reason most epic devs say to get your scene scale right first
It is that simple.
The scene scale is a different thing, it's for making the rig 100 times bigger so it's in centimetres (like in UE4) rather than meters (like in Blender defaults).
But rig scaling not working properly in UE4 is a UE4 bug, it doesn't happen when using Maya because it's in cm already, so it's not fixed yet.
I tried in a new project now
last time after fixing scale

this is after I repositioned root, but there might be some problems with automatic weight now, I just went into edit mode, then removed the armature modifier, then remade automatic weights, not sure if that's all that's needed for reparenting armature
I mean I went into edit mode and positioned root bone
then removed armature modifier and remade with automatic weights
Weights look messed up for sure, not sure why you remade them.
😛
You could've just used limit weights instead.
clothes
Okay, you might want to copy the weights from the mesh later.
Anyway I'll try your mesh and see what I get.
oh after making two objects one, with ctrl-j I need to remove doubles or something ?
Not really.
Anyway the problem is your rig.
Your clavicle bones are called upperarm, the upper arm bones are called lower arm, the lowerarm bones are called hand, and there is no real hand bone.
Also there are upperthigh bones that don't exist in the mannequin rig.
yes I know, but I posisitoned them accordignly
And the spine bones don't have an underscore like spine_01 so you need to select them when retargeting.
just left out the calvicles
You can't do that. 😛
but it worked on my first character in 4.10 😦
At least not if you don't change the retargeting settings to the right bone.
yeah that's what I did
but yeah I see what you mean
can create alot of room for errors
will try to remake bones to be more precise
Looks like this with (mostly) correct settings
(with the clothes removed)
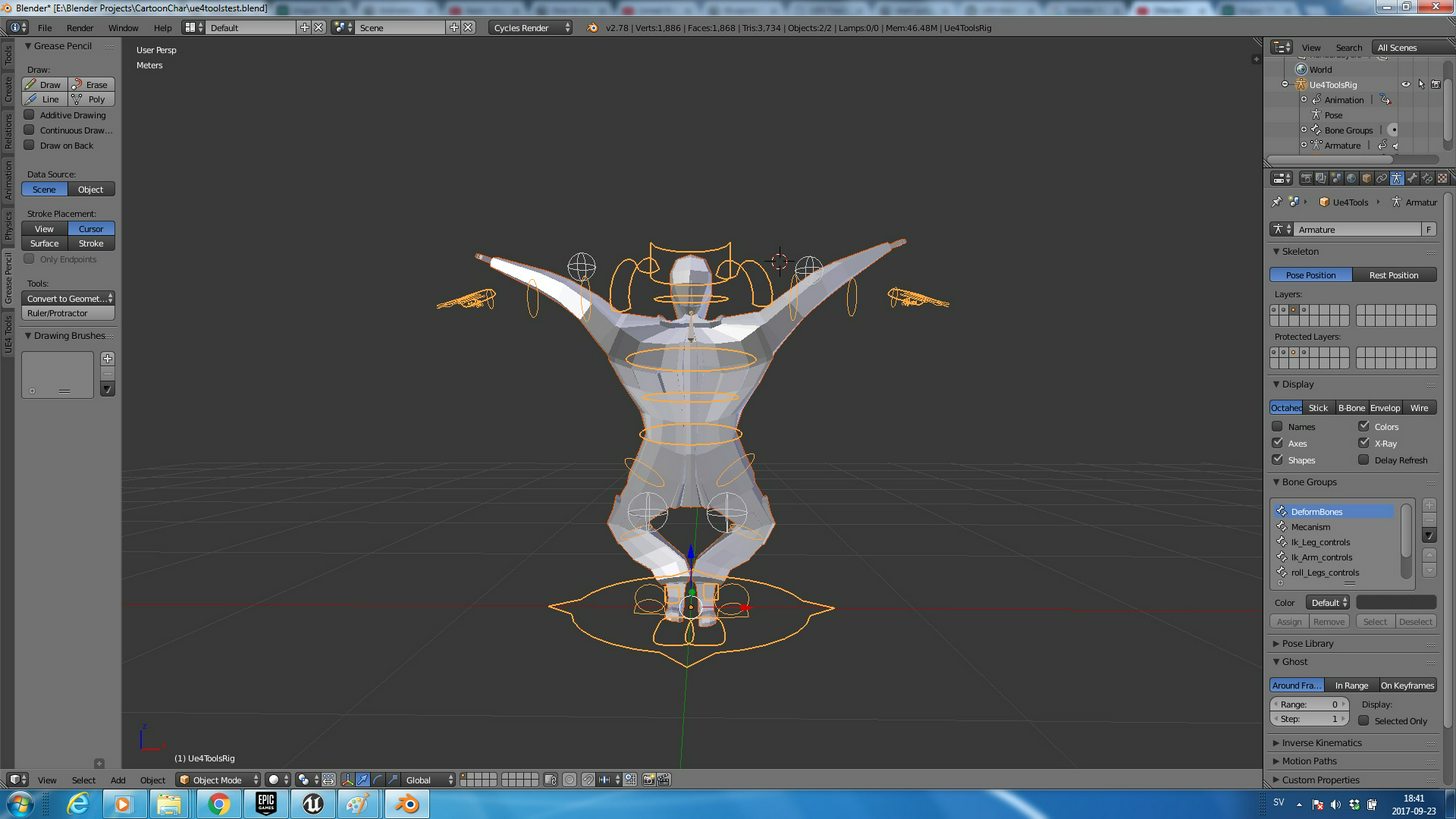
Anyway I suggest you just use the UE4Tools rig instead of creating your own, or you will run into lots of issues.
And make the mesh fit the rig rather than changing the rig.
Glad it has been resolved
Here's an example with a UE4Tools rig, as you can see it looks way better even though I didn't fix the weights for the feet/legs (/anything), and the mesh isn't aligned perfectly either.
But your mesh is pretty weird in general, it's triangulated for no good reason, it's not symmetrical and so on.
night guys, good job @winged valley
thanks guys! will try to remake everything and see if I can use ue4 tools also
Is there a good way to 'break' out of an animation via animmontage? I.e. a player gets attacked mid-movement or something.
heh, I was thinking that or I can play another montage er.. thing.
oh actually, before I go to bed, hey @winged valley have you had any experience getting a squash and stretch bone out of blender and into UE4?
Nope.
K coz i am trying to figure it out and Im pretty close
currently looks like this
until i rotate the bone above the stretch bone, then it looks like this
You could try using the Constraint node in the anim graph to constrain scales for the bones to control bones in your rig that are not connected.
Okay, ill look into that. What do you mean by "bones that are not connected" though?
Just not attached so they don't inherit scale in UE4.
All the bones here follow a standard skeleton heirarchy so the spine is all connnected
does this mean i would have to disconnect the bones to have a squash and stretch rig without inheriting scale to child bones?
because as you can see if i dont rotate the bone it behaves like it should, stretching in the torso but maintinaing its shape on the chest
Actually I found a way, you can inherit the scale of the next bone in the chain to some other bone (in my test the control rig bone for the same bone which has 1 scale)
just checking - animBP exist by default on the client, right?
First constraint, scale to some other bone (you could probably replace this with the squash/stretch bone in Blender)
Second constraint on the next bone in the chain, important is setting the Offset Option to None.
The second constraint will make sure the scale is set to 1 for that bone and any child bones of that bone, so just insert constraints like these for any bones that should not inherit scale from the squash/stretch.
ho dang, i think i need to update my engine coz i cant seem to find the node in 4.16
Probably 4.17 then. 😛
But using that node you should be able to get squash and stretch to work.
my god
a whole year..ish of trying to figure this out
what exactly is the name of the node so i know what im looking for?
Constraint (in the anim graph)
Could you share your stretch leg rig?
the one i made for my forum post a while back?
Yeah, just the leg. 😛
sure im gonna have to fish around for it haha
please ignore the disgusting topology this was made in a rush, also you might want to double check the bone heirarchy. I recall i dosconnected the foot bone for testing purposes
but yeah if you extend the leg the calf stretches and you can stretch down the knee too to further extend the leg
ideally the knee would move to 50% of the stretch of the calf so it would stretch the full leg in one go, allowing the animator to tweak the knee position after but this is as far as i got
anyway its 1:40 am and i have work tomorrow, im off to bed, will be back for round two though
Later.
Here's what I got, you need extra control bones that should not get messed with so you've got something to copy the rotations from. For scale you could have any bone that has 1 scale.
And something else (a bit silly but you get the point)
The extra control bones are they one's you export with the skeleton?
This is incredible though
Yeah, but you could make special controls for that.
But you need to have extra bones that are not affected by the squash and stretch for stuff like the feet, you need something to copy rotations from.
I just used the rig as it was kind of, I guess if you really wanted squash and stretch you would have set it up to work right from the beginning.
Guys, I want to create a character customization system based on morph targets and my question is about the performance. My model contains about 40 morph targets for the face and about 20 for the body. I'd like the online players to use two base models for male and female, the rest is up to how they set the morphs. Will I get a big performance hit while having a lot of players in one place at the same time?
Just make a bunch of random morph targets, apply them and throw a bunch in a level and profile it with them enabled and then disabled.
Sorry @winged valley I'm just a bit confused. So you made control bones for the feet that are exported with the skeleton so you could copy their rotations?
Yes, well I used bones that already existed in the rig (exporting with Only Deform Bones disabled).
The rotations got messed up because of the IK so I used another constraint to keep the rotation of the feet.
Ah okay. Would you mind sending a screenshot if the skeleton heirarchy so I can take a look?
It's a UE4Tools rig with Stretch To constraints added to the thigh and calf (deform) bones, nothing special. 😛
But the rig is not really set up right for squash and stretch to work so you need bones that don't get transformed by the Stretch To stuff or whatever you use.
And in UE4 use Constraint nodes to replace the scale values to 1 and the rotation value to whatever the bone rotation should be.
For anything that isn't supposed to get stretched I mean.
But you could probably do it the other way around too, have stretch bones that aren't attached to anything, then copy the scale from them to the bones that are supposed to stretch. That might be a better idea because you wouldn't get strange rotations on stuff like the legs.
Uh, feet. 😛
@winged valley Yeah I will do that when I finish the model, but that involves tons of work so that's why I prefer to ask someone experienced with morph targer performance and to ask if it's actually a proper way of doing things like character customization. Many games that I've seen use very tricky ways to optimize stuff like that. I'm doing a test with totally random morphs and it doesn't seem to hit the performance too much.
I think it's cached so if you don't change them at runtime too much it should be okay.
Right okay I see. So say I'm stretching spine 01, I would create two bones to export. The main deform bone and the stretch bone, then constrain from one to the other
Getting some incorrect animation playback in UE4 when exporting using ART with the default Maya 24 FPS playback speed (since ART only allows 30 FPS export) - does everyone normally working with the tool set the Maya defaults to 30 FPS?
@viscid willow Just try a bunch of stuff and see what works and what doesn't. 😛 I didn't have to do anything to the stretchy bones themselves, just the ones that shouldn't be affected.
For example if you want spine_01 to stretch but spine_02 (or anything above) to not get affected, set the scale of spine_02 to 1 using a constraint.
@simple aspen for games a lot of animators work at 30 fps, at work we use the ART tools and we work at 30 then use the exporter to export at 60
thanks for your help @winged valley I will mess around with it tonight when I get home from work
needless to say I am very excited to get this working :D
@viscid willow Awesome, thanks! Any reason you are exporting at 60, not 30?
it gives the animations extra fidelity with no extra work on our part. It can be problematic as it adds keys to get from 30 fps to 60 fps so sub frames can have some strange interpolations but so long as you are careful it should be fine :) the extra fidelity helps for things like anim trails and arcs
So with 30FPS you'd miss out on some manual keys? UE4 handles the interpolation regardless right, so if I had only a few major pose keys, 30FPS should be fine?
Would be interested to see the comparison between 30 and 60, since I imagine it's more expensive to playback a 60FPS animation
UE4 does handle interpolation between single frames if you set the animation interpolation to linear, in any case if you export your animation through ART it will bake the animation anyway so yeah that will be fine
The file is slightly heavier in terms of file size, im not sure about the in game cost of running a 60fps animation.
and yeah you do miss out on some manual keys, we call them sub frames, not sure if thats the correct terminology but yeah haha
@viscid willow Ok gotcha, thanks for all the info! TLDR: use 30 unless you need more fidelity (have more frames that might get lost if running lower than 60) or are working with mocap, then go higher.
Also, is playing back an animation that has all frames keyed (baked on export) more expensive than just exporting the anim with only the actual changed poses keyed and letting the engine handle the interpolation, or does it just not matter?
Hey all, figured i'd ask since i've been wondering about this for a while now....
Is there a way to add anim graph nodes in a child ABP?
I have a base class that can do everything except throw grenades, and then a grenadier that just extends the functionality to throwing grenades
I'd prefer to put the ThrowGrenade state, boolean variables, and notify events in a child class, but it doesn't seem like i can add nodes into the anim graph on children, only overwrite existing ones
I guess the only time you'd want a child ABP is for different characters that do all the same things
@simple aspen Any animation I export I bake before hand. That is the way that Unreal wants animation data, I believe this is consistent across most engines but in my experience it is best practice to bake you animation before sending it out the door to the engine
that is why most animation programs have a "bake animation" option in the export settings
@viscid willow Awesome, thanks a lot 😃
Hey, I'm trying to import a character in T-Pose from Mixamo. The character's feet are flush with the ground in Mixamo but when I import the character in UE4 the feet hover like this:
What's the proper way to fix this?
There are multiple ways to do this. I can do it on the skeleton, on the character controller, on every individual animation, on the import transform...
I'm not sure which one is correct for this situation.
Well it could be becuase of the location mixamo has
is it the character in the capsule (so capsule causing elevation) or is it skeletal?
This is just in the skeleton view, so no capsule.
It also happens in every animation.
I can lower the hips in every animation individually but I'm wondering if there's a better way.
I wish UDK had blueprints
I think in the left panel there is like a global transform property which you can apply to the skelton right? actually don't think so
Under Import settings there's a "Import Translation" vector that I can change to apply an offset but it doesn't seem to work on the animations
So I'm setting the Import Translation to apply an offset that fixes it in the mesh view, but doesn't help with the skeleton view or any animations
@tender sigil if you turn this option off is the character flush against the ground?
Also if you drag the asset into they world are the flush against the ground?
The reason i say this is because if i have this option on, the character looks like they are floating, but when i drag the asset into the scene it is fine, when i turn this option off the floor stays at 0
Also as a note if you have a character in a capsule you should drag the character location on Z by -2.15cm below the capsule, we found that Unreal applies a small offset when playing in game. As far as I know this is so the capsule doesnt snag on small surface details in geometry/intersect with ground geometry.
Yeah, I guess I can just apply a correction in the capsule.
if you drag the skeletal mesh into your viewport is it still floating above its origin?
Yeah, though not when I apply the import translation
I can just do that per-animation
dang, thats a pain 😞
@tender sigil It's normally from the bounds. Turn off 'Auto Align Floor To Mesh'
sorry @tender sigil i realised i never posted the image to show shich option i was talking about, this option
Ah, that seems to help in the display once I apply the offset. Thanks.
its the same option @carmine cove mentioned
Anyone know where I can get a male/female human character for prototyping purposes . That is useable with the unreal skeleton . Getting sick of looking at the mannequin. Prefer free but can pay a little . Thanks
Y axis orients down the bones in Blender and as far as I know you cant change it, I also know that the Y axis orientation is fine so long as it is consistent.
The only time it becomes a pain is when you want to import marketplace anims/rigs into blender, as assets made in maya for example will usually have their bone axis oriented down X
You can retarget animations to your skeleton, then export with the preview mesh option to import the animation into Blender.
So it converts the bone axis, that's neat
Actually both export options (anim data and preview mesh) will change the bone axis, but preview mesh also accounts for any edits in the bone retargeting settings (the animation, skeleton, animation scaled etc) so it's usually the better option.
At least when doing something with the screwed up animation starter pack animations. 😛
@winged valley how do you know so much about everything? Do you work as an animator?
Nope. 😛
Probably just experience from messing around with things. The Blender-UE4 workflow was a lot more... complicated before.
lol you're telling me, i remember being mystified trying to get smoothing groups out of blender
It's pretty good now though, except the 0.01 scene unit scale thing which screws over newbies. But that is an issue for other programs too like Max where you get inch problems instead.
haha I would hate to be working in inches, so do you do this as a hobby in that case?
Yes and no, meaning it will probably be my job in some time. 😛
oh right, goodluck in that case
@outer herald Why do you have an additional bone between the legs, I've been seeing people rig like that and wonder what purpose it serves?
becasue it's the root
but Im sure Ive done something wrong
after I import to ue4, all the names of the bones change one step in the hierarcy
so pelvis becomes the root bone
and root bone becomes the lower ball on the pelvis bone 😒
and the root bone/ball gets a red color :/
Can you share a .blend?
yeah 2 sec
this is right after I finished making bones
havent made aprent
parent
so all that's left is to put automatic weights or whatever
what do you mean ?
For example your calf is named foot and so on.
yeah, but that's how it is in ue4
Yeah but that's not how it should be in Blender. 😛
if I select calf of ue4 manniquin it shows foot
That's just a selection outline bug.
dammit -.-
hmm
alright, will try to change the names
why don't you fix this @Staff
It's not just the names, it's the position too, for example the pelvis bone should be in the pelvis.
And the thigh bones aren't Connected to the pelvis, they shouldn't have that ticked.
(in the mannequin skeleton)
If you don't know what that means you probably shouldn't make your own rig. 😛
all just say " extrude extrude extrude " 😄
well, how are you supposed to learn with that attitude?
I guess that's right, but I think you'll be pretty frustrated when things don't work the way you think they would.
I have been for a couple of days now, but that's how I have always been learning
Of course you can make any rig if you just want to make your own rig, but if you want to be able to retarget other animations to your rig it needs to be set up in a certain way.
but if the legs are not connected to the pelvis, how come they are in the hierarchy like that
The thighs have the pelvis as parents but they are not connected, there's an offset.
It's like in your own body, the legs aren't stuck in your stomach somewhere, they are attached to the hips.
It's the same thing with the clavicle bones, they have an offset too.
bah
it's sucks that tere is no way of seeing that

when I have this bone selected, what I really have selected is the root bone ?
not the pelvis
In UE4 you can see the offsets, in Blender the view is just different.
What you have selected is the pelvis bone but the root bone has the selection outline (bug).
You can see that if you move it it moves correctly.
I see
Anyway, gotta go now, good luck. 👍
😦

anyone know how I cna see that there's an offset there ?
looks connected like all other bones :/
We're looking to have a character punch at a player provided location (say, holding up a mitt or pad) - does anyone have suggestions on how to achieve an accurate punch, but also nice natural looking punches that are't just awkward jabs?
A better example might be a snake striking
Any good resources for setting up a good looking no-root-motion controller in UE4? (For RTS units that are driven by the navmesh.)
Trying to figure out how to incorporate turn animations and also sidestepping/backstepping etc. in blendspaces.
Or I guess I mean a controller that just uses the current velocity (forward/back speed and right/left speed, for example) as an input as the navmesh character moves around.
what would be a good way to have a two-piece animation that plays only the first part usually but both parts if they meet a certain requirement
im doing a sword slash that i want to go back and forth but only if they click within a certain frame window
@outer herald one way to think about the bones in Blender vs the bone in Unreal is that the base of the bone is where the rotation comes from and Unreal will draw the connections as the white bones you see
This is how you can disconnect a bone
the bone is still parented to the first bone but you can freeely move it around
Like this
the dotted line shows the bone has a parent-child relationship but unreal will draw the bone connection in engine along the red line i have drawn
@broken geyser You would use animation montages to achieve actions like that
anything in particular i need to know about the montages to get started? iv never used them
There is a lot to find on montages but you fill them with animations, you can set up sections and notifiers. you can then call the sections in code/blueprint and the notifiers can be used to trigger events like a particle effect or input enabled/disabled
ok ill start researching, thanks homie
the more the merrier
I found one solution to my issue using montages
i would create 5 separate animations, a starting, a right swing, a left swing, and two separate endings
then loop between the swings until they stop meeting the requirement
Hey, I have a walking blendspace set up for my character but I'd like to have a separate animation play on the character from the spine up while walking. Both animations are full body animations. What should I search for for a guide to see how to do this kind of layering in UE4?
@tender sigil look up ABP anim graph and layered blend per bone. Lots of tuts out there explaining how to set this up! Blending from the spine bone up is pretty simple. Good luck!
and now a question of my own...
Hey everyone! I have a character who does a melee attack. The attack animation is full body and uses the hip bone to rotate and have some up and down motion. We also want the character to be able to walk and attack at the same time, and use the hip bone's rotation and movement from the attack anim. The issue we are running into is that the hip is the parent of both the spine and the legs so im not entirely sure how to set up the ABP to keep the feet moving from the run anim, and the hips and body from the attack (or at least 70% of the hips for the attack or something).
@broken geyser That sounds pretty solid :)
@tender sigil with the layered blend per bone you will also might need to set some anim slots which are bone targets to tell the engine which bone to target to start the blend
@lavish plover check out the animation tricks of the trade video from GDC 2016 and Jay Hosfelt solution for Paragon https://youtu.be/_1j5Tf6ulII?t=27m15s

In this GDC 2016 session, Riot Games' Alex Lehmann is joined by 5th Cell's Amy Drobeck-Jones, ILM's Jean-Denis Haas, Sucker Punch's Billy Harper, Epic Games'...
timestamped
@viscid willow thank you! ill check it out
@viscid willow that is pretty much what i wanted to do, but i dont think he explained how he did it 😦
yeah i didnt understand what he meant hmmm. my melee animations are quite dramatic and move a lot vertically from the pelvis. so when i blend from only the spine, it looks completely stupid because it loses all the weight of the attack. None of the secondary motion makes any sense if there is no vertical movement from the hips.
anyone know why a function call to Montage Play would only play the first section?
i have a montage with 5 sections, a start, 2 swings, and 2 endings, but when i run the function Montage Play, it only plays the start section and then stops
ok so its not that its only playing the first section
its like blending out for some reason
In an AnimMontage, are Sections and Segments different terms for the same thing?
Segment isn't really an anim montage term though, but yes it probably means section.
The important part about sections is that they have names, and you can jump to sections and so on. These nodes are called Jump to Next Section, not Jump to Next Segment.
I just got a bit confused because inside an AnimTrack they're called AnimSegments
MyMontage->SlotAnimTracks[SlotIndex].AnimTrack.AnimSegments
still not entirey sure if that's the same but it seems to work 🐧

White Paper Games Technical Artist James Burton shows the process used to create the locomotion system of the AI characters in the upcoming game ‘The Occupation’.
Anyone know of a way of exporting curves out of Blender without using the shape key editor?
It seems like there's no way of importing custom attributes from .fbx which is a bit disappointing.
If enabled, import a custom attribute as a curve within the animation. Requires Import Animations to be enabled.``` ... except it doesn't do anything. 😛Is there a way to disable the grid snapping when making a blendspace?
I created curves using animation modifiers instead, worked fine. (except for random crashes) 🤖
yo @winged valley can i bother you for a sec about that combo system you mentioned?
what i want to do is actually slightly more complicated than i originally said
Sure but I didn't make the whole combo system, just the ring buffer. 😛
@viscid willow okay i finally get what he was talking about. Hes actually using the strafe as the base for the attack. So when he initiates the attack, the base switches from run forward, to strafe forward and then the attack actually looks like its twisting the hips, when in reality its just the strafe that is doing it. Thanks again for posting that vid!
@broken geyser You have a ring buffer which adds input to an array (fixed size) every frame, some sort of player state like FSM or enums/switches if it's not too complicated, a move list with a priority, then on input check the array (backwards) for moves, if any were found choose the one with highest priority, and after a combo was executed clear the input buffer. Very simplified. 😛
so the thing im trying to do is less of a input window and more of an optimal time to input
like lets say the best time to input the followup as halfway into the first attack
if you input it too early it wont come out as fast or come out immediately and override the current attack
You can do that too, just check how far away the next input was from the first attack.
ok i think i get you
You would probably need to create some custom functions for the array stuff though, for example the Find Item node only gives the index of the first found variable.
And then set some enum or whatever depending on the result and switch on that, then do the action/animation stuff.
If you want to fry your brain you can read the M.U.G.E.N docs, like https://mugenarchive.com/docs/1.1/cns.html . I guess it's a bit more complicated than my example because there's a state for everything.
would it be better to port the mixamo animations onto the UE4 skeleton so i can keep my old animations and blueprints or start from scratch using only mixamo stuff
because the mixamo skeleton doesnt easily retarget the humanoid rig
Are you sure? I tested before uploading a UE4 tools rig to Mixamo and downloading some animation, it retargeted fine.
oh ok so i just upload it first
No root motion though. 😛
aww man, any way to fix the root motion?
Not really, the animations are kind of messed up, rotating the armature in object mode.
It was possible before but I don't know if it's possible now since they removed some of the functionality.
do i need to change anything about the ue4 tools mannequin to upload it?
I don't think so.
hmm said it couldnt map it, maybe im exporting it wrong
ok using different export settings got me somewhere
though i am seeing two of him lol, one in T pose one animated
You should probably upload a rig without any animations or anything, that might mess things up.
i got it working by deleting the herotpp hierarchy and the mobile character hierarchy
easy way to pick between 3 animations in anim graph?
without additional states, i just want it to randomly pick one of 3 attacks
blend int by pose seems a good way to solve my problem
Looking to make a tornado using 'Animate Noise' in the Noise modifier in 3ds max. However, after having the Animate Noise setup and exporting it to UE4, there is no animation.
The animation also disappears if I collapse all of the modifiers in 3ds. Anyone any ideas?
my pipe line from mixamo/fuse to 3ds max to unreal doesn't work, but from mixamo straight to unreal works fine. anyone know if there is some fbx setting i need to go through 3ds max.
more specific, retargeting the character from 3ds max is all messed up. even though its unmodified from mixamo.
@winged valley There is very little documentation about importing animation curves huh?
Yeah, but I don't know if the Blender custom parameter thing in the FBX exporter works at all.
😛
But it was pretty easy to make curves using the animation modifier blueprint.
This window?
Yes, but you create the modifier itself in the create blueprint window, searching for modifier in the class list.
ah neat. what are you applying it to?
Animation sequences. 😛
lol yeah i get that, i mean what is the result you are trying to achieve?
Just a thing for corrective morph targets, so I have a modifier that creates a curve with the same name as the animation sequence, and then if a corrective morph is required I can just create a morph target on the mesh with the same name as the animation and run the modifier.
oh naisuu
Normally you would have to export both the rig and the mesh, and have the shape key editor set with a keyframe for the morph, which is a bit annoying since it's decoupled from the normal action editor.
ah yeah i see. You have to set up the curves in the modifier right? but its a one time setup rather than going through and creating the curve on every sequence
@lavish plover Awesome dude! Im glad you figured it out
is there a way to overlay another character inside the animation, mesh or skeleton viewer ?
to use as a reference point
Has anyone here used Ikinema?
Do you guys know of any website where I could find a "Looking at watch" animation like this: https://image.freepik.com/free-vector/businessman-with-watch_23-2147499430.jpg

i'm confused about the selection outline bug when selecting bones... if I select the head like this:
it shows the name head, but it outlines the neck bone, so where is the head bone ?
if I make an extra head bone in blender it shows the bone like all others in ue4, so how can I make a head bone in blender that is invisible in ue4 like the ue4 manniquin....
@outer herald UE4 just displays the bones in a different way.
It's kind of hard to explain, but when you select a bone in UE4 the head of the bone is selected, and the part that goes to the parent.
Any bones without a child bone will just look like a ball, but you can still rotate it/move it and it would transform the way you would expect. You only see the axis lines change though, the bone shape itself doesn't change which is also strange.
I see
so on that pic, if that was in blender, I would see an actual bone from that last ball ?
Yes.
alright

tried with the riggify addon in blender, and it seems to work better than my own 😄
Rigify was never meant for games so it probably won't be perfect.
To me it's a bit strange that the UE4 streams on Blender used a rigify type rig, it has a lot of issues.
Like the "selecting the right bone in the hierarchy when retargeting thing" with little screen estate, that was just painful.
Hey guys just curious do we make the animation in UE4 and the rig or is that done prior to importing a static mesh that is meant to be animated?

@winged valley Using the "Rigify to Unreal Script" can make it work fine
@viscid willow I wrote something in the forums about why you shouldn't use the rigify style rig:
1. Blender scene units are not correctly set to avoid issues, so you have to run a script before exporting every animation to create a new rig with the fixed settings (instead of changing the scene unit settings once and be done with it). This will also cause problems with custom rigs, for example if you make a hair rig (or whatever) in the same scene it won't work properly if the root bone is removed.

2. Unapplied 0.01 scale on the mesh because of the above workaround, which could make newbies think that having unapplied transforms on meshes isn't a bad thing, which could screw them over later.

3. When running the script the armature is replaced by the "fixed" armature, so when you want to animate again you'll have to delete the "fixed" armature (and the empty) and add the normal armature back in the armature modifier because it is removed after deleting the fixed rig (after exporting an animation the mesh will stop responding to the rig every time).

4. Because of having to run a script before exporting every animation you can't run other scripts like normal animation batch exporting scripts for exporting every action in the file to a separate .fbx file. Or at least they become way more complicated.

5. The bones do not have the right names, so if you want to retarget you'll have to select the right mapping in the retarget manager which is a bit strange for a custom rig, it should just autodetect the bone names (by using the correct names in the rig). We saw this in action in the stream. :P

Rigify was never meant as a rig for games and anything to make it work like that is more or less a hack (as you can see in the script). It can work as showed in the stream but it takes more time to set up than should be necessary.```And also
1. It forces you to use correct scene setup (0.01 metric) because the rig is that size.

2. No unapplied transformations.

3. No script required after generating a rig, you can use it for multiple animations exporting the same rig (control rig with deform only ticked) instead of having to create a new one.

4. Ability to run batch export scripts or other crazy scripts (see https://www.youtube.com/watch?v=Iy-CXoIkr8k for retargeting UE4/marketplace animations to the IK control rig).

5. Correct names for retargeting by default so you don't have to waste time doing that.

It's also on github (https://github.com/lluisgarcia/UE4-Tools) and uses templates for the rig so it could easily be expandable by the community in the future to support other kinds of rigs like four legged rigs and so on. I think it's a better alternative all things considered.```So there are lots of reasons why you might not want to use that, but you can use whatever you want. I just think UE4Tools is better. 😛
I suppose the reason I dont have an issue with the fact that i cant batch export is becuase I have used maya for a long time and when i started doing stuff with that there was always a destructive export workflow. So its not ideal but it does work.
Also the thing with the transforms, for me at least, was a case of changing the scale parameters of the script from (100,100,100) and (0.1,0.1,0.1) to be (1,1,1) and (1,1,1) that solved any issue with scaling the scene/skeleton.
I suppose i generally dont use a lot of retargeting or marketplace assets. Im very much geared toward making my own assets so options like the ue4 tools and rigify are great for different situations. Nowadays I prefer making things custom
I'm just saying, why have two rigs when you can just have one instead. 😛

The streams would have been way smoother with UE4Tools used instead.
@outer herald naisuu
thanks for all the help guys!
@winged valley @viscid willow
still needs alot of tweaking but atleast it looks like a running man 😄
@winged valley It is definitely good to have a standard for the bone setup so that everyone starts using a universal language when it comes to rigging. And its not fair to expect people to learn rigging when they wanna just make something work. But you know...
Because one is superior. 😛
Also i think most blender users are familiar with rigging a humanoid from tutorials, it seems to me that a tutorial on how to rig for unreal would go down a treat
superior is a strong word lol
Of course if you just need a rig for retargeting marketplace/UE4 assets to there's not really a difference except of the bones having the wrong names.
And a tutorial for rigging is not too useful if there already is a good rig with controls.
Superior is a strong word but it's the truth, it's at least what I think.
its like, give a man a fish he eats for a day, teach a man to fish he never goes hungry again or whatever
having a rig is one thing but understanding how it works and how its made is far more valuable to users imo
It depends, it's useful if you want to make your own custom rigs later, but if you just need a rig for a character just using the one standard thing that exists works fine.
If you can watch https://youtu.be/hJ0GpTQaShs?t=21m53s and tell yourself that UE4Tools isn't superior I don't know what to tell you. 😛
The Blender dream team strikes again! Tom, Mike, and Kevin return to discuss a variety of topics in Blender. Tom shows how to import animations and retarget ...
yeah and its like @outer herald here, he could use the UE4 mannequin and develop, but having your own character run around is pretty neat, and it does a lot for your morale to have something that you like in the engine instead of prototype cubes or the default man
I mean, they got it working
Yeah but in that case you could just attach your own mesh to the rig instead.
true that, although I used riggify now 😄
That's what I did for my characters.
I don't know how you can see what bones are connected and not in the ue4 manniquin, so it was really hard to make a new rig (?)/bones
yeah and thats allgood, using whatever method is fine, i just dont see the reason in trying to make everyone conform when everyone's game is gonna be different
but I totally agree, the more you make yourself the more motivated you'll be and happy when its finally working
Well if you need a rig you should probably choose the one that's flexible, you can still edit the bones and everything if you want to.
I don't really care about what rig everyone uses but I do care when people are having bad experiences using Blender because of using a rigify rig instead of something that's nicer to work with.
Like new people not knowing they have to click a button at the top to enable the rigify script, stuff like that isn't really obvious, but when using an addon it just works instead.
I mean, the retargeting thing I linked for example just isn't your usual experience, what I do is select "Human" and it's done. And that should be it.
And if you use some rigify script that requires you to input all bones that weren't detected right I just have to ask everyone: "Why bother doing all this unneccesary stuff when you there's an alternative where you don't have to bother with it".
😛
Anyway, end rant. Just use what you want. I use UE4Tools because I think it's better.
clikcing a button?
I didn't have to click a button? 😄
will definately try ue4 tools
@winged valley That's fine. Not everyone is going to have the most efficient workflow. I feel it would be very limiting to not encounter some problems in the pipeline, and ofcourse you want to make your pipeline as bug free as possible, but if there are troubles it requires creative solutions. Having issues and being able to go online and find answers from other users teaches people a lot, and getting that solution to work is really satisfying, making you willing to carry on and solve the next issue.
but ue4tools is like riggify right? You need to position all the bones manually?
you get a skeleton but it doesn't fit completely to the character, so have to drag some bones to correct places
?
@outer herald You don't need to click a button if you've got Auto Run Python Scripts enabled in the settings, but it's disabled by default. If you open a .blend file with a rigify rig it will look messed up until you click the button.
ah I see
Yeah, but it's better to change the mesh, because the rig retargets perfect to the UE4 mannequin.
You can change the bones if you want to though.
but then all your characters will be the same ?
^
You can have different scaling for the rig, and for the individual bones too.
And the mesh. 😛
But yes, usually characters which are sharing the skeleton would look similar.
If you want to have different skeletons for each character, that's possible too, but you will have more trouble when retargeting (having to fix the pose).
But like this https://docs.unrealengine.com/latest/INT/Engine/Animation/AnimationRetargeting/ you can do a lot with just scaling.
Describes how retargeted animations can be used with multiple Skeletal Meshes, allowing you to share animations.
the manuel bastoni lab rig is pretty easy to retarget to UE4 rig
a new contender
its inside of blender givin it a big advantage over some external programs
can do some stuff with it u cant do with other generators
Names aren't the only problem, there's the orientations too.
As you can see it looks pretty bad because the pose is wrong. 😛
Wit most bones set to skeleton it looks better, but not really carrying a rifle.
That being said I talked to Manuel in the blenderartists forum and he said he will make a feature for retargeting the base pose of characters, so that will probably solve things.
yea its off a bit, hes pretty cool tho lot of progress on his plugin
Here's how it looks after the mesh was changed to fit the UE4Tools rig, I didn't spend a lot of time so it so the fingers look bad (you can't really see those anyway here) but it's easy to fix.
If you know the skeleton is perfect you can just change the mesh until it looks good in the animations, but if you change the rig you will have to mess with extra base retarget poses and so on. That's why I think changing the mesh is better.
yea, if u fix it up takes a lil time but u can reuse the skeleton
Of course if you've got some crazy cartoony looking character you will have to change the rig, but in that case you probably want to make your own animations anyway. 😛
What does it say?
alot of text, runtime error not in library at the end
How did you install it?

Can you try it in a new .blend?
oh, do I ned to put the install file in a specific folder?
need*
I just extracted the addon in a random folder
Nah it should just work anyway I think.
same with new file
Can you check if the .blend is there where it says it should be in the path?
The mannequin template thing.
that is also in the folder I extracted it to
o_O
I put the template in the blender foundation folder
😃
thanks
oh so you should install the entire zip file? 😮
didn't know that was possible
Yeah, usually you do that. 😛
Actually you can open the template .blend file and change a thing:
In pose mode there's a tiny bone called "Bone" in the left elbow, you should delete that.
Then save the file again.
alright thanks
it seems like alot of work to edit my character to fit the bones, if I were to edit the bones to fir my character, do I just need to select layer 1 of the armature and edit those bones ?
or should I not touch the bones at all if possible, and only edit my character ?
nvm think i got it
seems like these bones dont have the names of ue4
lowerarm_r is called cs_lowerarm_r
Are montages glitchjed?
they play when we set the slot to default (in the preview window) but when i set it to a separate slot, the preview stops playing
in persona
@outer herald The control bones are called cs_ something.
You should also enable all bone layers if you want to edit the bones.
Is there any way to make AnimNotifyStates to set their own variables? When I attempt to "Set" a variable in an AnimNotifyState it says that the variable is read only. It would be useful to be able to get an actor, and then save a reference to it.
@outer herald You can see in the layers that you only have the control bone layer selected, so you probably only changed the controls and left the deform bones as they were making things not work.
@lilac plank Why would you want to save a reference to some other actor? You can already get a reference from the mesh component and anim sequence outputs in the overrides.
@winged valley I have a "weapon actor" that is attached to the player's hand joint. I have a AnimNotifyState that is supposed to set a "CanDamage" variable on the weapon. It would be useful to store a reference to that weapon actor in the NotifyState
You could store it in the player character BP and from the notify get/cast to the player character, get the actor reference and set the variable there.
@winged valley That is what I am currently doing 😃 However which variable the weapon ref is stored in in the character may change mid-animation, meaning that the "notifyEnd"-function in the AnimNotifyState may change another weapon instead (which is unwanted)
Is there a reason you have a CanDamage variable in your weapon instead of your character?
If you're playing the animation on the weapon itself you can get the actor reference by doing GetOwner or something on the mesh reference, then casting it to the weapon, then it shouldn't change.
@winged valley Playing the attack animation on the weapon mesh itself is an intriguing thought... Hmm, I have a reason, albeit not a "hard" reason for the "CanDamage" to be on the weapon; it simply makes sense that the animation controls when the weapon can deal damage (by activating it's hitbox). Doing a Dark Souls-like combat system. I have found alternative solutions to my problem that I will try. Thank you for your help, kind person. 😃
Well it doesn't need to be a real animation, just a sequence that has the notify on it. Anyway if you found something else you can try that. 😛
@winged valley yeah, but had enough trouble moving only control bones, cant imagine the time it would take to move all of them
Not any longer because you would select all of them and move them at the same time? 😛
but is it possible to select all of them and move only the hands ?
You would box select and move the ones that are in the same place.
And use stuff like pressing x, y or z to constrain the rotation to some axis.
yeah, that's what I did
but I guess all bones have to be moved proprtionally, so the distance and scale between bones would have to be the same as original
so that makes it even harder to get it exactly right, but im not sure about that
Then it should be pretty fast, you can do it in pose mode (remove the armature modifier from the character first) and do it for one side, then copy and paste it flipped to the other side and apply it as a new rest pose.
yeah I have mirror x-axis
Well yeah, but if you are moving bones you are screwing up everything anyway. 😛
yeah thats what I mean xd
im using blend poses by int to randomly select a death animation but its looping instead of just playing once
riggify was very simple, but then again it's much simpler bone, and you dont get ik stuff
because riggify doesnt have different sets of armatures/bones
like control bones, deform bones etc
@broken geyser not sure if it's of any use, but you can uncheck "loop animation" in detail panel
If you've got some weird pose you can still get a good result using UE4Tools by constraining the IK bones transforms to an untouched version, then baking the bones. Then use a pose asset to se the base pose.
Well I guess it doesn't work if you had much changes, you would have to do it on the deform bones then. Still possible though.
So I deleted the earlier versions of UE4, and now I cant find the UserSetup file for maya ART tool. Anyone know how to get it back?
what would be a good way for a projectile to knock back a ragdoll enemy
launch doesnt seem to do anything when they are in ragdoll
couldn't you just apply a force and let the ragdoll do the rest?
that was to @broken geyser
im not sure where to apply the force and when
I haven't done it, so don't take my word as gospel, but you'd probably need to make sure the capsule follows the ragdoll and then apply the force to the capsule using AddImpulse
Anyone know why my retargeted animation's arms go through my character's chest, even though the retarget reference pose is a standard A pose for each character? I'm using the ThirdPersonShooterKit animations from the marketplace and retargeting them to the default UE4 skeleton.
radial force or add imulse to bone
I tried setting my skeleton to recursively set AnimationScaled, but while that fixed the animation I'm trying to get working, it ruined my existing animations. I'm not sure how I can fix just this animation without affecting other animations on the same skeleton.
adding impulse doesnt seem to do anything, do i need to do it after i set them to ragdoll or befo
Hmm...animation relative setting on the left and right clavicle tentatively seem to have fixed my issue
have they removed the ue4 option?
@hasty pivot Yes, but you should be able to retarget them anyway.
i downloaded it now as an normal fbx
You can upload a UE4Tools rig there, download the animations, then in UE4 retarget from the UE4Tools rig to the mannequin or whatever you're using.
wtf why its when I downloaded it an normal file?
@winged valley i uploaded my own mesh
so what have I then to do?
Good question, you can try retargeting that to your character.
No idea if it will work though.
If you upload a UE4Tools rig you get an a-pose result which is good for retargeting.
and how do I come to the ue4 rig? its an uasset i think
yeah and thats the main problem when I download it then its an normal file and I had choosen the fbx format
I renamed it to rifle.fbx and it worked. 😛
Yeah, that's why you don't choose the same skeleton as your character. 😛
So should I let the skeleton section empty when Im importing it?
Yes, then retarget it after importing it.
Ok fixed it by myself but thanks
One thing that I noticed it that he havent imported any animations yet or what im doing wrong?
Did you import with Import animations ticked?
Ok was a fail by my files but fixed it
What is the major differnce between a composite and a montage? Why can't I use Montages in an AnimationBlueprint for example?
You can, using a slot in the anim graph.
You can also play montages in the event graph.
So the only difference is that Montages have blending?
Montages don't have blending inside the montage itself.
But montages just have more functionality.
@winged valley so how can I then add other animations to my skeleton?
? Retarget animations?
no in mixamo I exported it with one animation how can I add others to the skeleton?
@winged valley
You can only export one at a time I think.
yeah and how can I add every animation to each other in ue4?
Retarget animations. 😛
ok
But if you've got your mixamo skeleton in UE4 you can select that for the other mixamo animations too. Then retarget them from there.
What skeleton are you using for your real character in UE4?
the mixamo generated skeleton
Okay, that's probably not a good idea because you won't really be able to use marketplace/animation starter pack animations. Depends on what skeleton you uploaded though.
Yeah, but you won't be able to make your own animations either so you're pretty limited that way.
I know but this is only for testing
A question regarding the optimal Skeleton Setup:
Should it be
Root->Hips(Translation)->Pelvis->Leg
Root->Hips(Translation)->Spine
Or
Root->Hips(Translation)->Pelvis->Spine
Root->Hips(Translation)->Pelvis->Leg ?
Why do you need both pelvis and hip bones?
Yo, just a quick q, what's the conversion rate from Unreal Units to Blender?
Or are they identical?
Can some one help me with my walking animation
@serene perch Use metric 0.01 unit scale in Blender.
cheers
hey guys, is there a way to rotate an animation 90 degrees within a blend space? I've got an animation that is rotated the wrong way, but it's just the one animation, so modifying the skeleton's rotation doesn't fix it.
what does an anim graph transition interrupt do by default? does it go back to its original state?
does it reverse the transition?
hello
can i make an anim graph interrupt restart the state its transitioning from?
nevermind that would be a bad idea lol
Are there any up-to-date tutorials on Fuse -> Mixamo -> UE4?
The non-CC fuse, that is.
It used to be simple, but now the results I'm getting are... Less than satisfactory, to say the least,
i want make skeletal bone controlled in pawn, but i don't know how to make it.. i was put my skeletal mesh to pawn, and try make bp like that, but it doesn't work. can you help me? btw i'm newbie 😄
Is it possible to rotate your character while he is in a root motion animation?
Some people on the forum (and me now) are confused how to make a Devil May Cry combat system, where you can rotate your character a split second after you started to attack
Last guy even recommend not to use root motion at all in DMC type game which I think is nonsense
@icy valley Looks like a skinning problem to me
🤔
Yo @naive terrace what's the trouble with your walk anim?
I fixed it now just need to know how to mantling
is there a way how I can smooth the movement of ue4?
anyone used the mixamo befor?
i used mexamo one day before
were you able to make 2 or more animation smooth?
cause im struggling between a jump attack anim and running
@inner zephyr you know the movement of mass effect andromeda?
no?
do you know the movement of battlefield 1?@inner zephyr
How can I make my running animation lock in place there checkbox in ue4 isn’t working
is it better to do my hit reaction animations as a blend of the final animation or to make it a state in my machine?
currently i have it as a blend and the annoying thing is that i cant figure out how to make them react to taking damage if they are already reaction
reacting*
figured out a good way, i put a custom event in my anim blueprint to change which anim to blend and i call it whenever they take damage
@winged valley know of a good way to blend by custom enum?
Blend Poses (Enum)
when i search for that i comes up with a list of all the individual enums but i dont see my custom one
Well if your enum doesn't have Enum in the name it won't show up if you search for Blend Poses (Enum).
😛
Also you'll need to right click the node to add the pins.
how do I make the idle animation on the blendspace go back to the time 0.0 (first frame)?
@inner zephyr yeah?
how can i fix a animation that has a different rotation then my running animation?
@winged valley how do i add a root bone to just a mesh in blender? my buddy made me a simple spear mesh but i want to turn it into a skeletal mesh with a root bone where you would hold it
You can just import it as a skeletal mesh without a skeleton, then offset it in the BP.
ok ill give it a try
im trying to play an animation im storing in an object, like this
but im not getting anything playing, anyone know of a way to do this?
the stored value is coming up null here
I remember something about being able to blend two animations together, in a way that top of the character's body has one animation, and the bottom has another one. So that you can have just one set of animations for walking, and then simply blend, say sword holding animation with it, so you have a whole set of walking with a sword animations...
Not sure if it's a real thing, or just my delusions, though. If it's real, I'd very much appreciate any pointers, even what to google for will be useful.
Does anyone here know how to export an animation to Blender? I just need to rotate it around 90 degrees and then re-import it, but when I open the FBX in blender, it's just a mess a bones with no reference to go by, so I assume I need to export the animation with the skeleton...just don't know how to do that.
just hitting the export button does the trick for me
you shouldnt even need to do any extra transforms from UE4
atleast I didnt
But how do I import it in Blender? It just creates a second skeleton with bones in all kinds of crazy locations when I do so.
I usually empty out everything
the way blender handles objects and stuff is a bit weird
you cant just import a single animation really afaik
it doesnt separate them the same way ue4 does
so what's the right way? to export from Unreal and to import to Blender?
that's what I do
I found UE4Tools add-on for Blender during my research, and it creates a default UE4 character in Blender, but when I import the animation, it imports a second skeleton instead of using the one I've got.
I'm a total Blender noob, so I'm sorry if I try your patience.
yea, thats because when you export from ue4 it packs the mesh aswell
and blender doesnt really do the effort of trying to figure out it's the same one
What I do is just open an empty project
and work with the export
and when it's all done I reimport it back to UE4, while only importing animations
you can do that from blender -> ue4
not the other way around tho afaik
so you're saying that if I have an animation in Unreal 4 that needs fixing, I can't export it intact to Blender?
I'm okay with that. In my experience though, that's not what's happening. When I import, I only see bones, and they're all over the place.
did you make sure to also export the mesh then?
I guess I'm not sure how to do that part.
it should prompt you when you export from UE4
When I export, it only asks me for a file name, no other options. Let me check again.
I just closed Unreal though, so it will take me a few minutes to load it again.
thanks for your help so far, btw
uw its not like I got anything better to do rn
I only really just picked up animation in UE4 myself for placeholders
Yeah, it only gives me a save prompt. I don't see an option to select the mesh with it
it shouldnt ask you to pick one
just whether you wanna export the mesh too or not
maybe you accidently skipped it?
nope, Right Click->Asset Actions->Export
I did. Same thing. Could you take a screenshot please? So I know I'm not crazy? This might be a Linux-specific bug, and I might have to upgrade to a new engine. I just avoid doing so because it requires compiling the entire editor from source.
which version u running?
4.15.....2?
I think it's the last version of 4.15
no, I'm saying that it might only be missing in the Linux version of 4.15
Sorry to be a pain, I meant a screenshot of the part where it asks you to select whether or not to export it with the mesh.
yeah, I 100% don't get that prompt
sigh, I'll try downloading and compiling a new engine tomorrow then
perhaps theres a setting somewhere
you mean like append them together?
Can Unreal handle 3Ds Max' "Skin Wrap" Modifier?
I would like to animate my Low Poly model only and simply use the High poly Model ingame
I think as long as it work in 3ds Max, It will work in UE4 as well.
@elder wadi To not get a mess when importing you'll need to retarget it to a reasonable skeleton first (like UE4Tools), then export the retargeted version.
@elder wadi
Woops. 😛
@drifting oyster Layered blend by bone maybe?
@winged valley The problem seems to be that I can't export the animation with the mesh, since that prompt is missing for me.
Do you need the mesh?
Also if you just need to rotate the animation you can export it, then reimport it back and changing the transforms on import.
Trying to capture cinematic using camera rig. while recording it shows a wide view of the complete map at the 3rd keypoint, but while checking the track/keypoints there are no error.
anyone know why it starts to record the wide view after 10sec (300frames)?
Maybe the camera cuts track is too short.
Are you recording though or just placing keyframes in a sequence?
recording
With the Sequence Recorder?
ye
Maybe the animation recording time is set to something instead of 0.
But I never got the sequence recorder to work properly.
I would just make a real sequence instead, it should still play back things in the level, you can't preview it that way though.
@winged valley Someone on reddit showed me how to rotate the animation even if it doesn't have a mesh to go along with it, but when using a blend space, it blends the animations by doing a full 360 rotation in between instead of doing a shortest-path rotation. Ever seen that before? And if so, do you know a fix?
Never seen that before.
But still, if you export the animation by right clicking in the content browser and doing Export, you should be able to import it to a skeletal mesh, and there you can rotate the animation in the transforms.
@elder wadi
I found one record online of someone who has the same problem, from a year ago, but no fix for it.
If anyone else has seen this problem before, I'm open to suggestions.
So I have an animation blueprint, with a node activating an animation montage
that part works well
however, the animation montage is supposed to trigger some "notifies" at certain places of it's timelines
those notifies are linked to events back in the animation blueprint
and those notifies(and therefore events) are never triggered
if anyone would have any idea about why that would happen, that would help a lot
hey guys quick question ... what's more efficient? blendspace or aimoffset?
@ebon portal I feel like each one is better for a different job.
it sure is, although I'm curious whether it's more efficient to work with aim offsets (meaning additive animations) or with blendspaces
because I can imagine blendspaces being a tiny bit better since they have all the animations in them and you need a base for the aim offsets
it seems my animation montage is reset every time it's triggered
so that's why the events aren't firing up
it's not just that, i'll continue working on this tomorrow
@green ether How are you playing the montage?
@unreal cosmos Apologies for the bother but I figured it would be more appropriate to ask in Animation. You mentioned that it depends on how the animation is imported into UE4 whether or not the rotation of the object is handled by the rotation of the animation. I was wondering if you could dive further into that for me.
I've done as you asked, and put a root bone at 0,0,0 that is the parent of all the other bones.
I currently have the rotation built into the animation and would like to pass that into UE4 and rotate the figure from that animation but I have to assume it's more complicated than that haha.
is there a way to change the play rate of an entire animation blueprint not just the individual animations?>
you can probably just create a variable called playbackrate and make it a float
and then set the playback rate on each animation using that variable
oof thats a pain, guess theres no default value i can easily change then huh?
Anybody got a bunch of guns I can animate in Blender?
I've got to practice but ever model I download is fucked in various ways 😦
*every
@winged valley I play if from the AI controller of my character
sometimes it's triggered by a behavior tree task, sometimes by the player, sometimes by the AIcontroller
@misty dagger I don't, but fortunately, guns are not the hardest thing to do with blender
hello
@green ether I know but I just wanna cut to the chase tbh fam
Sometimes you just feel like animating
oh
didn't ping me
I need help on state machines animation
on UE4
I set a blend space for idle > walking
and in there I set jumping animation
jumping up > in air loop > down
now I need to edit the blend space to idle> walking > running,
but to run, I want to use a specific key
so normally when you move forward, you just walk,
then when you press a key, the character runs
either after idle or after walking
plus setting the speed and the state machines for the "jumping while running" animation
how should I set the key to trigger running in the first place?
Blend spaces change the animation based on a variable, usually speed. You can have a key that increases the max speed of the character. So as the speed increases they will start to run
sadly, I don't understand
@Kojiro#8889 in the project settings menu ( project settings/engine/input )
you will be able to define action mappings and assign keys to them
you can define your run key there
and in your character blueprint, you can place a red "event" node " RunKeyPressed" when the event is pressed
and you execute your code from there
Also, if you're more specific about what you don't understand, we might be able to help better
let me test a few things first, will let you know if works or not
my animation montages are still not working
and I don't comprehend why they aren't
i followed the tutorials to the letter, but nothing is showing what doesn't work
what kind of animation is it?
just have a slight knowledge on state machines and blend states, but could probably help
@Kojiro#8889 it's an "Animation Montage"
I need it because I need to have feedback from an animation ( get the current animation time etc )
it's mad
i'm trying to get the active montage , I see the animation playing
but i still can't get the active montage in blueprints
oh you mean the
animation in blueprints where the connectors are conducting energy, as in when an animation works?
in that case, no idea here
apologies
: (
hola
@green ether How does your animgraph look?
How's everyone doin'
@terse forge hello, doing animation montages how are you ?
@winged valley the anim graph isn't used when the animation montage is used
?
@winged valley i'm changing things a little bit, getting back to you in a second
Then how is it supposed to work? 😛
You will need a slot node in the anim graph at least.
except when the behavior tree fires up the animation montage
then the animation montage " replaces " the anim graph while it's playing
once it's finished, the anim graph resumes execution
the animation montage is launched from the animation blueprint of the character
behavior tree-> "launch animation" task node -> animation blueprint launches the animation montage
So again, how does the anim graph look?
The animation blueprint anim graph.
the anim graph indeed
@winged valley there is a state machine driven by some bools
Idle-> walkRun blendspace
but the anim graph isn't supposed to play when the animation montage is playing
So what happens when you play a montage right now?
I think you just need to put a slot node before the Result node.
You mean notifies or something else?
yes the notifies
i removed the "sections" of the animation montage
seems to work better
It should work anyway. 😛
@winged valley yeah i'd need to get back to you perhaps later but i see what you mean 😊
so now the events are firing, but the animation isn't playing
So do you guys happen to know if I should have my rotation in my animation stored in the animation itself or should I handle the rotation logic on the game side because I'm not familiar with how this works I assume that an animation is just that and doesn't actually rotate the character but I wouldn't know enough about how bone animation works to make a good call. The guy from last night recommended I add a root bone which I did do but did not explain exactly what that accomplished
Usually you handle rotation in the game. Unless you have an aimoffset or something.
Yeah it can be interupted so the animation may never finish
So I should remove animation rotation on blenders end
That's what I figured
It was useful during the actual anim process though
It depends on what you're doing though. But you either have gameplay affecting animations (capsule/movement component controlled) or animations affecting gameplay (fighting games/Dark Souls style games).
Or both, movement component for locomotion and animation controlled for attacks and so on.
You should make sure you know what you're doing before animation the root bone though. 😛 Usually it's not needed.