#arma3_texture
1 messages · Page 27 of 1
 fiery barn
Well I have made it gray, but its still bright
I don't know if im exporting it incorrectly or a config thing
 ancient smelt
@errant palm A map surface? Check your graphics settings, parallax is turned off at some graphics settings.
 errant palm
Thanks, already fixed it anyway. Had to open the normal in gimp and save uncompressed with an alpha layer
 full quarry
samples or template thread on biforums
 solemn mural
Kk
 nocturne prairie
@fiery barn do the Ambient or diffuse lower
ambient[]={0.2,0.2,0.2,1};  //not bright
diffuse[]={0.2,0.2,0.2,1}; //not bright
you can do in Stage 6:
texture="#(ai,64,64,1)fresnel(1,1)"; //the last number is the glossy/metallic number. 0 = no effect ; 1 and higher more metallic/glossy
Got it
 analog mulch
I have a problem my street model is black where it should be transperent. http://prntscr.com/h4qvxp
 acoustic dove
@analog mulch try using _ca.paa prefix
 young owl
I often see squad logos with sizes not in power of 2, 400x400 for example. How do you create such textures? Image2PAA and Pal2PacE conversions refuse to accept such sizes, manually saving as paa in TexView results in texture invisible in the game (faulty I assume)
Not invisible, but rather black with alpha
acoustic dove
simple, you paste your 400x400 texture into 512x512
young owl
Nope, its properly working 400x400 texture, I wonder how it is done
Looks like Arma 3 Units makes these, I assume it is somewhere on BI server side?
 severe rune
custom paa conversion tools might also be able to ignore the power of 2 rule.
I only know of armake though. And I don't know if it enforces power of 2
young owl
Just tried armake, produces faulty textures as well, does power of 2 sizes okay though.
 frigid escarp
we have some issues with overbright textures (Winter reskins) - mainly at night but some also during daylight
https://cdn.discordapp.com/attachments/362321180973072394/375655907192733696/20171102104034_1.jpg
https://cdn.discordapp.com/attachments/362321180973072394/375699416637767700/20171102131828_1.jpg


any suggestions?
 twin bane
huh, those look a bit emissive to me. what do the rvmats look like on those?
frigid escarp
sec
close LOD: https://pastebin.ubuntu.com/25874297/
distant LOD: https://pastebin.ubuntu.com/25874299/
twin bane
emmisive[]={2.6,2.3,2,0.02}; is probably suboptimal. although i could see where a slight bit of emmisivity might be functional.
twin bane
those producing the same effect or they look normal?
i vaguely recall that. (been out of the loop for a minute..)
frigid escarp
emmisive of all bushes: https://pastebin.ubuntu.com/25874325/
(basically the same but just some bushes are affected)
twin bane
gotcha. hrmm..
i need to be at the rig to be of any use here, currently on el phone. maybe one of the other goons will have a thought. overall though, it 'looks' like too much emmisivity to me. but i suppose it could be spec/gloss issues. plants are odd things in general though.
frigid escarp
i guess the result of early versions of linda
frigid escarp
have another weird one
Also about textures, Stuart tank forward wheel shines strangely when turning
Not sure if its textures or normals on the model though
https://www.youtube.com/watch?v=3yogijj9jRQ
 severe rune
looks funny tho
acoustic dove
that looks like a normal issue to me like it doesnt have the proper angle or something
 somber pier
It doesnt rotate on the perfect axis if I'm correct
Thus is tips back and forth a little bit
 unreal magnet
Normal issue
frigid escarp
tx guys
 hardy basin
hey there friends, question about alpha map textures. I am experiencing a crash every time I load my alpha map texture into the game. I've gotten them to work before. What could I be doing wrong? Is there a size limit? Do they need to be DXT5?
I made them in gimp and exported them thru PNG format
 frozen blade
2^n size?
full quarry
do they run in buldozer?
hardy basin
yes
frozen blade
that was the next question
hardy basin
they do run in buldozer
frozen blade
well, buldozer should convert these textures automaticly for you
if you open that .paa file in texview does it renders it correctly
hardy basin
yeah it looks right in texview
frozen blade
does that texture has the correct naming convention as well, before converting it?
hardy basin
I put _ca
frozen blade
as in _ca.png > _ca.paa
hardy basin
but I looked at one of my other models that had a working alpha texture and it was _co
yes it was named correctly before I converted it
I'm going to do it again just in case though
frozen blade
_co can have a 1bit alpha channel irc
hardy basin
so _co is ok?
hardy basin
yeah it gives the access violation error
I think
or maybe
instruction could not be read, I dont remember
frozen blade
no more ideas from the top of my head, you sure is the texture crashing it?
try with a _co texture without an alpha channel first
see if that works
hardy basin
ok, I'll test some things, I'm pretty sure its the texture because its just a box
thanks for the infos
frozen blade
never had arma crash due to a texture tbh, so there's that
hardy basin
well, I changed the texture to a working _co texture and the object loads without crashing the game
so maybe I have a problem with my texture, or my .rvmat?
I'll try some more things
hardy basin
ok, I got it working in the game by using the grass pixel shader
if anyone has an example .rvmat of like an alpha mapped metal grate, I would be most grateful
I am very stupid when it comes to making proper .rvmat files
full quarry
What shader did you use before?
A3 fences may have examples
superhader should work in those
hardy basin
I'll look for some examples
hardy basin
yeah, the super shader works great
full quarry
👍
 leaden fox
I'm not sure if I get everything right
I can apply textures both via Object Builder or config?
How do I apply normalmaps then?
full quarry
they are applied in the rvmat
leaden fox
and what is rvmat file basically?
full quarry
no
it is a file that tell the engine what shaders to use and what shader related textures to use with the model
there is a BIKI page about basic rvmat functionality
and for proper material you will need a bit more than just diffuse and normalmap textures
unpacked A3 data on your P:\ drive has plenty of rvmat examples and the currently badly working forums have quite a lot of info on them too
most of the A3 assets use "super" shader that is quite versatile material shader and also what you should use for your characters and equipment
leaden fox
mmkay
I will have to take a better look into it
for now the texture is transparent
and is glitched badly
but thx for the info
full quarry
also the suffixes are essential for the textures to convert properly into .paa
and you should not mix solid and transparent bits
keeping them in separate textures works better
leaden fox
Ye, is the rvmat using those suffixes or what?
leaden fox
yeee, I've found clothing rvmat
I've edited it and put _CO and _NOHQ file directories there
it still looks like this
(can't really post a picture here)
it's just semi-transparent
like inside-out
the textures are on the wrong side of the faces
and recalculating normals in Object Builder doesn't work too
full quarry
and your faces are facing outwards right?
could you pastebin your rvmat?
use pastebin.com please
leaden fox
full quarry
ty 😄
ok the top most TI texture isnt supposed to be your _CO texture
its the thermal image texture the engine uses for simulating heat
but that should not be the issue here
does your texture have alpha transparency?
 nocturne lake
again, did you rename the original source texture to add the _co and then reconvert to .paa, or did you just rename the file as _co.paa?
leaden fox
nah, I redid it via texview
full quarry
pls follow given instructions to the letter 😛
and use imageToPaa from tools to convert them
leaden fox
I mean
I opened them in texview and saved as .paa after renaming
I didn't use the _co texture in Object Builder tho, lemme reload it now
full quarry
you did not apply the new texture to the object?
full quarry
also you can preview the model in buldozer
full quarry
your faces are upside down
select all in OB and hit W
what program do you model with?
full quarry
I would recommend you turn backface culling on in Blender so you see when faces are in the right direction
leaden fox
It looke alright in blender
full quarry
you may have at some point scaled the whole thing negativley so everything is upside down
leaden fox
I was able to texture and render it properly
full quarry
do you have backface culling on or off?
its off by default
and with it it will show alright
also is your objects scale 1,1,1
leaden fox
yes, I scaled it properly after model was finished
full quarry
how about the backface culling?
because if you apply negative scale
it will flip faces
and you will need to flip them back
full quarry
it should
full quarry
do you export with FHQ toolbox?
leaden fox
It works with Armatools one
I've used one from Mikero
but didn't have much time to download it to my new pc
full quarry
no i meant from blender
leaden fox
the Arma toolbox for blender?
full quarry
yes
leaden fox
ye, i have it
full quarry
k was just wondering if something wonky happens on your export
but toolbox should export fine
as long as object scale is 1,1,1
full quarry
there probably are non for arma but the procedure should be simple enough to find tutorials for
 lunar nexus
Hey guys, quick question
I'm having an issue where when I upload a mod to steam workshop the textures are stripped from it
But when I load the mod locally it has full textures
Any advice?
ancient smelt
@devout cedar what is your source data for the environment map?
lunar nexus
.paa
 devout cedar
alright, just checking
ancient smelt
If you can set up a textured sphere in a modelling app then the environment map can be projected onto a flat texture from it.
Arma uses an orthographic projection from the sky sphere to a single flat texture; which means you can only have one hemisphere from your sky sphere mapped to a texture.
Also the edges (near the edge of the circle that you get from orthographically projecting a sphere) get distorted so it's best to pick them so that there isn't much detail near them.
And due to mip maps you'll want to fill outside of the projected circle loo.
devout cedar
Thats good information, thank you
ancient smelt
This is a good visualisation of what it does (except, Arma only allows you to map one hemisphere, and the other hemipshere is just a mirror):
http://www.progonos.com/furuti/MapProj/Normal/CartHow/HowOrtho/Img/im_orthoRays.png
Also if this is for a map environment map (instead of for a specific object) you will definitely want to match the histogram of the sky and ground (as separate areas) of the default environment map. If your new environment map is significantly brighter or darker than the standard map you'll change how BIS/community objects look substantially (the environment map contributes quite a bit of light to many objects, even if they don't look very reflective).
 silver gull
it's unfortunate that envi maps are hard-defined inside object's rvmats, instead of beeing dynamic based on the map
 white cargo
wouldn't that cost a lot of performance?
lunar nexus
So I think I figured out why the textures I have are not loading when I put it on the workshop
I guess I'm loading the textures directly to the .p3d file
What I don't know is how to fix it
I repurposed my config off the tutorial config here
And instead of fully building a config it has me inheriting config aspects from an existing helicopter. Does anyone know if I could still apply textures to something like this?
 dense peak
@silver gull they can be, there is a flag you can set in the rvmats env stage
useWorldEnv=true; iirc
unreal magnet
yep
frigid escarp
@[IMP]AHomelessWalrus#7053 make sure to use pboproject
 odd crane
@[IMP]AHomelessWalrus#7053 Make sure in object builder the texture paths do not start with P:. If they do they will look in the P:\ for the textures when instead it should be looking in the addon folder
silver gull
@Lappihuan#7809 nice. I admit i havent looked too much into env maps yet. However, you wouldn't be able to distinguish certain types: e.g. one env map for "general" stuff and one for plastic for example (per terrain). When using useWorldEnv=true, what does the texture do that you set? Is it used for fallback cases or simply ignored?
 dry quartz
@silver gull it's the world environment/reflection map set by the terrain being active
frigid escarp
envTexture = "A3\Map_VR\data\env_land_ClearSky_ca.paa";
this?
or
        class EnvMaps
        {
            class EnvMap1
            {
                texture = "A3\Map_Stratis\data\env_land_ClearSky_ca.paa";
                overcast = 0;
            };
            class EnvMap2
            {
                texture = "A3\Map_Stratis\data\env_land_SemiCloudySky_ca.paa";
                overcast = 0.3;
            };
            class EnvMap3
            {
                texture = "A3\Map_Stratis\data\env_land_OvercastSky_ca.paa";
                overcast = 0.6;
            };
};```yes
frigid escarp
which one now, or both? 😄
unreal magnet
yours I think
leaden fox
Does every LOD has it's own texture?
I don't quite get the idea of LODs only as simplier models. Does the .paa format understand how to lower the texture's detail?
frozen blade
yes ^, it is called mipmapping - google it
leaden fox
to which question did you answer "yes"? 😄
full quarry
paa uses mipmapping and lowers the texture detail
 edgy grail
How do I set a Back texture and a body texture on a hunter?
I have this: json this setObjectTexture [0, "hunter_back.paa"]; this setObjectTexture [0, "hunter_body.paa"];
@polar rock Maybe you can help me here?
You helped me in the past
 polar rock
What is a "back texture"?
polar rock
That 0, that is the index of the texture. You probably should use a different one, not twice the same.
 odd cape
Hi everyone, I'm trying to understand what my best bet would be to retexture this model:
https://cldup.com/X-f8BPOCk5.png
https://cldup.com/TxAr0xmMdl.png
https://cldup.com/ziXWlvqWOC.png
it's a large building (20m or so), at first there won't be any interiors so just outside
i'm thinking all old concrete, black plexiglass in the windows around the structure
in the front not sure
also, practically I don't know what is the best way to approach this
doing UV obviously results in textures being very low quality due to size of building, so I guess using a seamless texture as old concrete
or maybe this is a good use case for multi? Never did one though
full quarry
mutlimaterial would be best for it
odd cape
so I'd have a 2048x2048 UV texture for it?
and then do the face separately?
I'll probably need at least 2 multis (1 above, 1 under)
and then the face
does this make sense?
full quarry
no you can use 1 mulitmaterial for all of it if 4 different materials is enough
odd cape
yes but a single UV of all the structure results in a very weird and badly optimized resolution
it's not like a square house
it's all rounded
so a lot of empty spaces
sure, I can overlap, doing that already
full quarry
multimaterial uses 2 UVset 1 normal single uvtile sized and one scaled for the tiling textures
simple material surfaces dont need much mask space
I got 60x60x260 meter rocks that use multimaterial just fine
full quarry
you read the multimaterial tutorial?
odd cape
yes
but why not specify the tile size of textures inside of the rvmat?
because anyways i’ll need more than 1 UV
and exporting from blender requires you to export a single mesh per lod
full quarry
yes but it can have 2 uvsets
the scaled uv can also be different from the not scaled one
so you can align the uv islands according to your tiling texture
for example if you use tiling brick texture
you may want to make it start from specific part of the texture
you can scale the texture in rvmat too but thats for the whole material
with uv scaling you can control how much each surfaces uses the texture and how the pattern fits them
notice how the islands are spread around
different mask colors use different repeating textures and the uvs are positioned and scaled to get the best use of the assigned textures
odd cape
ok but if I export already 4 UV sets from blender, they all mash up into a single one in OB
I have no way of separating them there
so, I'd need to have a single UV when I export from blender
full quarry
I think youre understanding the uv set wrong
Im thinking you have 4 materials
and they all share uvset0
because thats normal
in OB the UV editor by default shows all uvs of all materials
which makes them overlay
you need to use the filters to show only specifix materials/textures uvs
odd cape
filters in OB?
full quarry
oh ok
odd cape
but when I open UV in OB they're all one on top of each other
full quarry
but there are many uvsets?
full quarry
have you unwrapped different parts separately?
odd cape
yes I have
full quarry
then that is why they are ovelapping
odd cape
but then I have to merge everything into a single mesh to export a LOD with the toolset
hence why I get that
full quarry
if you intend to use 1 material you need to spread all faces into single uvmap
odd cape
that's what I do
but they all are in a single UV
then, in OB I select the parts that relate to a specific UV prior the merge and on those part, apply the proper co and rvmat
and it works like that
let's put it this way
when I design my object I have for instance two parts: top & bottom
I UV the top, then I UV the bottom
so now I have two meshes, each with their proper UV
full quarry
ok i get it
odd cape
THEN, in OB I select top and apply top.rvmat and same for bottom
full quarry
to
in Blender prior to joining them assign each object unique material and assign the material paths to them in Toolboxes material tab
so you dont have to do it in OB
but if you want to use 1 multimaterial
you will need to unwrap the whole model into 1 uvmap
odd cape
got that
but all of that weird shaped structure in 1 uv i doubt it can make any sense
btw thanks for the tip
i need to try it out
full quarry
all of the object will work fine on 1 uv
and it is what you need if you want to use multimaterial
odd cape
i don’t “want to”
trying to understand my options and best way to go
for instance some of these will be windows, at first just black non-seethrough plexiglass
so maybe better keep the separat
ok anyway, thank you
full quarry
well you can have the plexiglass as one of the multimaterial materials
if its just black shiny texture its simple
or you can have it separate and have the rest of it on single multimaterial
odd cape
right
except that they unwrap like this here: https://cldup.com/pvNQ7s16-H.jpg
hence i’m afraid the whole structure will be a nightmare
full quarry
as I said last night you can straighten that manually if it bothers you
but if those are going to have shiny black texture it does not matter at all how they unwrap
odd cape
indeed
i can just use “reset” probably
except that for some reason, some of those got rotated 90 deg
(using reset)
oh well
full quarry
reset?
odd cape
U and then reset, in edit mode
full quarry
buut why would you want that?
full quarry
it can still produce weird stuff in the reflections if you do it like that
Id just stick with the properly unwrapped uvs
full quarry
👌
odd cape
so moving manually each vertex......
full quarry
for example selec one curved side and scale X to 0
odd cape
right
full quarry
theres also the weld/align tools in uv editor
odd cape
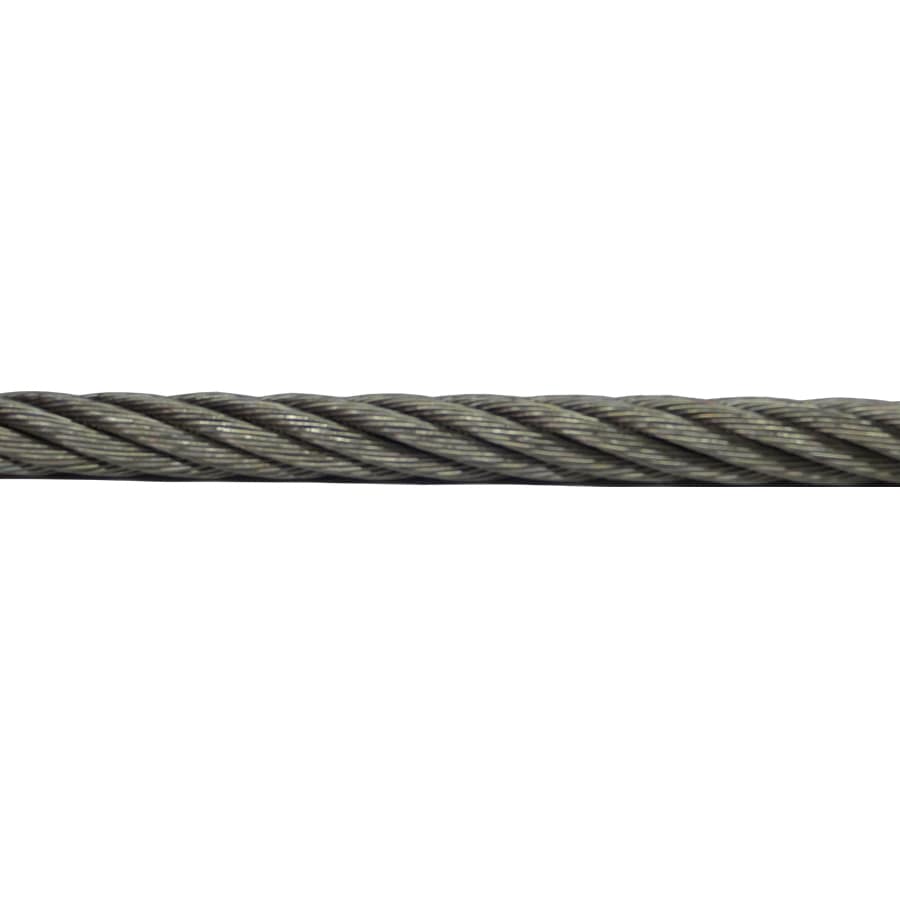
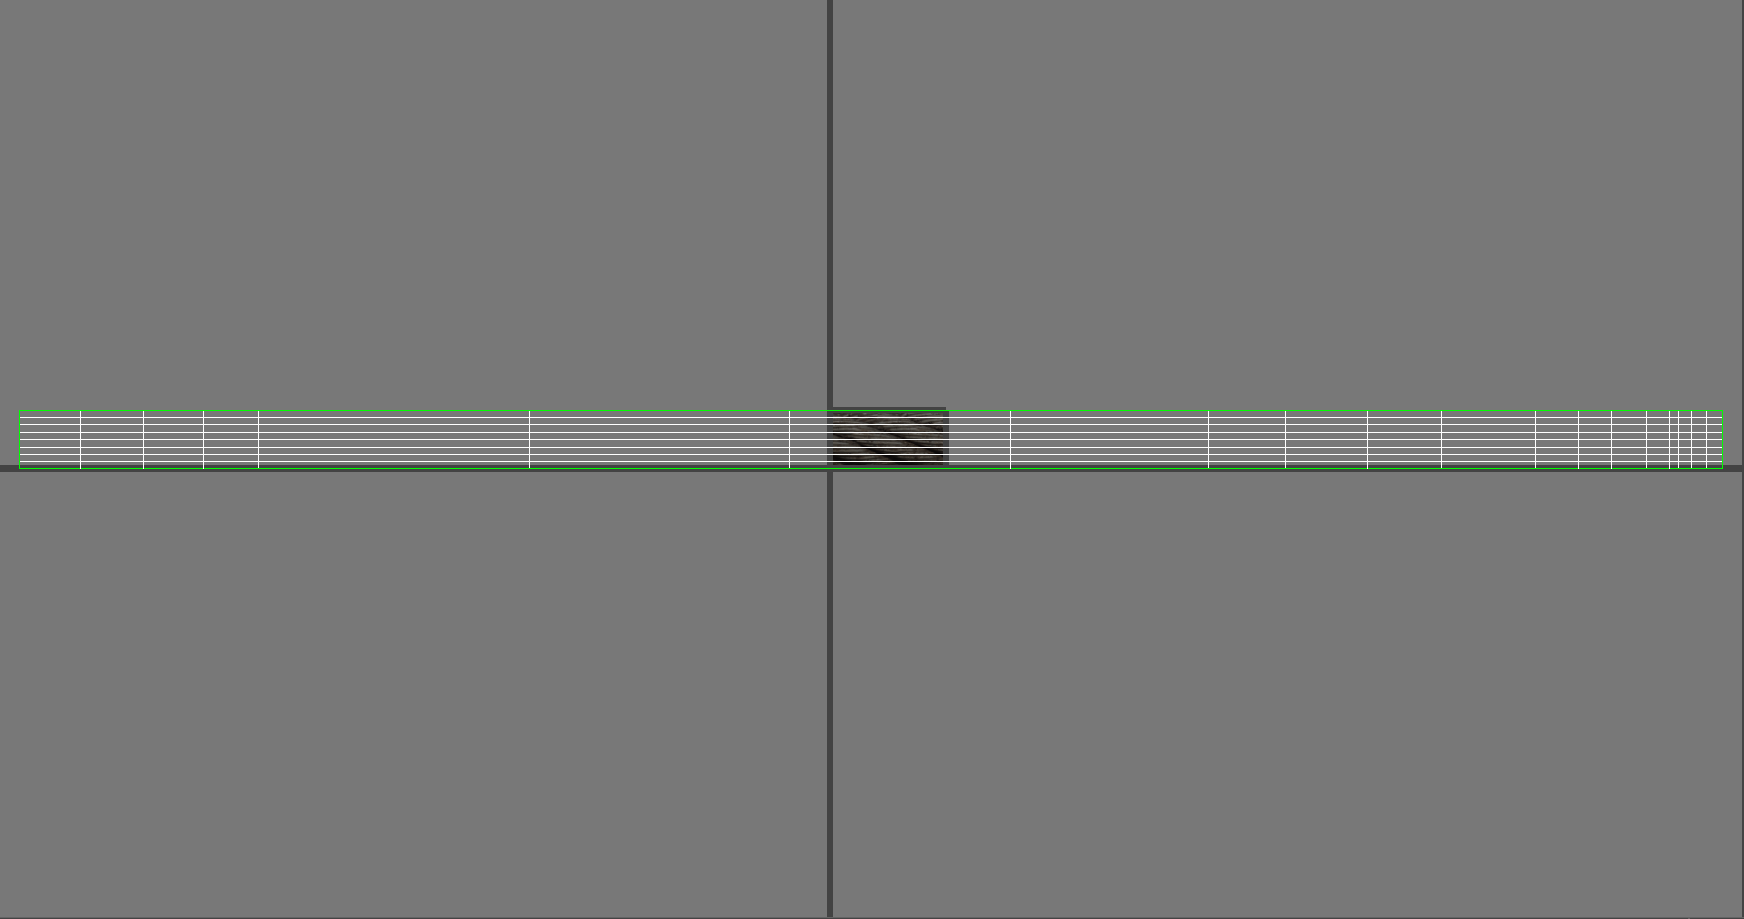
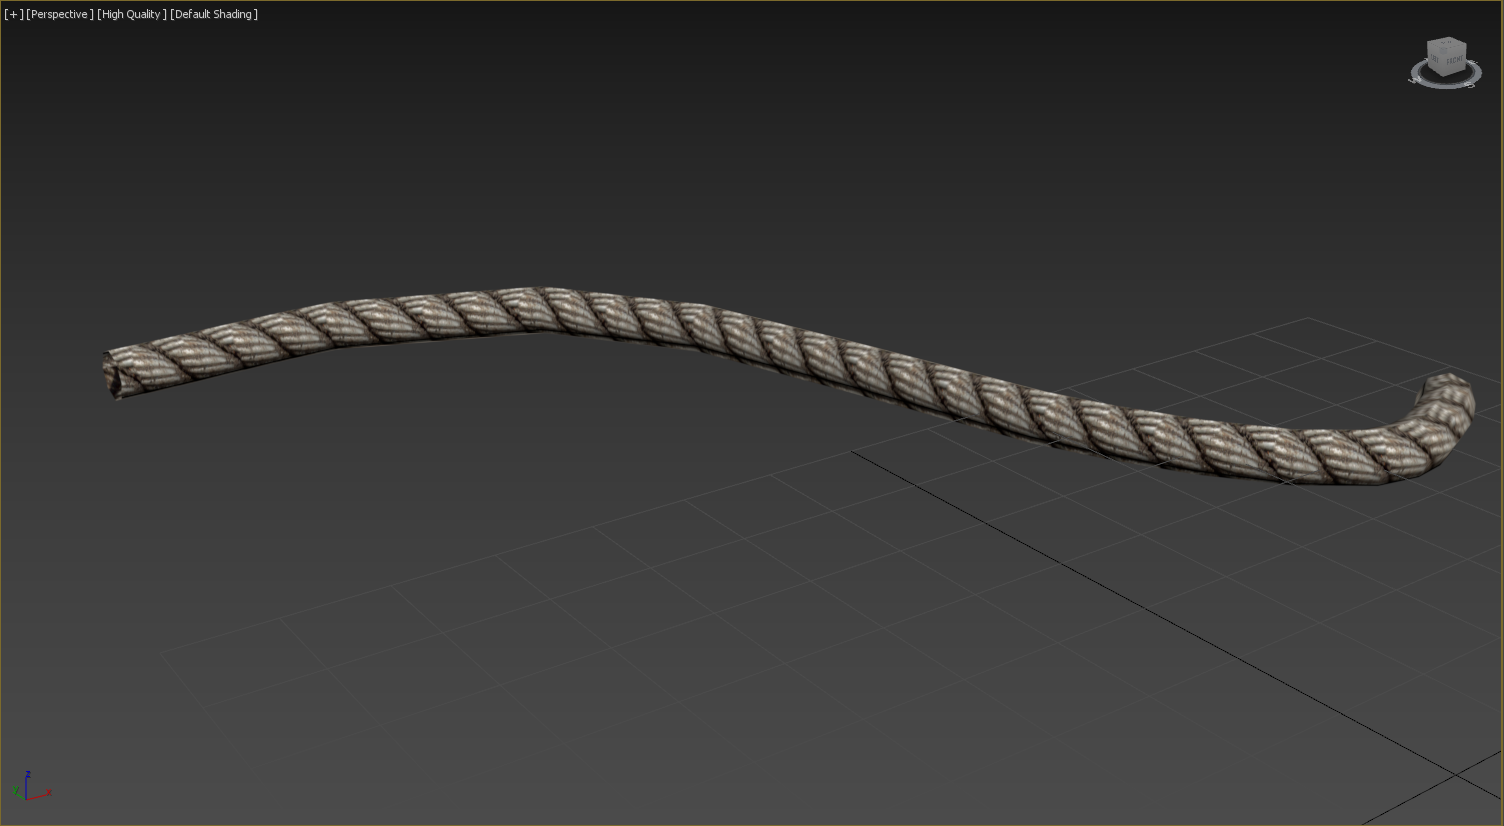
what is the best way to have a seamless texture on a simple cable 100m long and 3cm wide?
ancient smelt
One trick if you want to avoid repetition is to have the long edges of the cable wrap around UV space on an angle.
full quarry
Then again its cable thats not very easily accessible to be observed close range so repeating wont be that big a deal
odd cape
ianbanks not sure I understand
ancient smelt
If you have something long and thin that that runs left to right, for example, you start it in the top left corner of the UV space and then angle it down so that when it wraps at the right edge of the UV square it wraps back below where it started (with no overlap).
It's like using sticky tape to completely cover a cylinder (like a barber's pole), you wrap it around on an angle.
ancient smelt
@odd cape Maybe a picture will help: https://i.imgur.com/7Eoj4dL.png
frozen blade
@ancient smelt wow man, i didn't get that answer of yours, although i know what you wanna say
that being said, i find it easier to have UVs edge paralel to UV axis
and have my seamless texture skewed
ancient smelt
And you atlas the texture to occupy the rest of the space?
frozen blade
we talking seamless textures, yes?
ancient smelt
Yes, but with a very long object that wouldn't fit well into a square texture.
frozen blade
if it is seamless it can also be 2:1 format, and of course that long object will be WAAAY outside the 0.1 UV coordinates
what i don't get from your explanation
si why would you rotate the UV island
as in ever
ancient smelt
So that long thin objects can use more pixels of a 1:1/2:1 format texture.
frozen blade
but if it is seamless, why you don't wanna use the entire 2:1 texture height?
or width
to increase resolution per pixel
ancient smelt
Sticking to a square 1:1 texture and a (for example) 20m by 1m object, how would you do it with axis parallel edges?
frozen blade
don't get that question, sorry
ancient smelt
How do I UV map the trunk of a California Redwood if I want to use a square texture that only has the trunk (and that is seamless)?
😉
frozen blade
using a 2:1 texture, using the height of that UV for the diameter of the trunk
and the lenght, as long as it is
because that is, most likely, how the texture would be
frozen blade

i wonder how you would do it, because i really fail to understand how that texture would look like
ancient smelt
Even in that situation it might be worth tilting the UV, because it means when the texture repeats vertically there will be a slight offset.
Arma 2 trees used to do it, if I recall correctly.
frozen blade
you mean because it tapers, yeah?
ancient smelt
Arma 3 trees don't, but that's probably more due to the greeks cutting down everything over the last few thousand years.
Not just for the taper, on long objects tilting the UV means any noticeable features don't appear in each tiling (or at least, in the same position).
silver gull
tilting means visible seams at the edges
ancient smelt
How so?
silver gull
because standard tiling textures tile at the edges of the texture. If you tilt the UV's on the tiling texture then where the cylinder wrap meet, they will not match
ancient smelt
By definition a tiling texture is one where I could shift the UV square to any position and still get a tiling texture, right?
odd cape
oh ok awesome thank you ian
silver gull
cylinders (and any other convex body) can not tile* if you not put them into the exact 1:1 or 2:1 or whatever format it is your texture is in
*edit: tile seamless is what i meant
odd cape
pufu i’m taking about a cable 100m long, 0.3m wide.
silver gull
if the unwrapped cylinder fills the entire UV space, it will be seamless. If it just uses a portion it will tile, but there will be seams
silver gull
if you can hide the seams - sure, tilting is no problem. If not, its not a good idea
silver gull
- with "can not tile" i meant "can't tile seamless"
frozen blade
@silver gull yeah, so, you put then in 0-1 space from edge to edge
odd cape
odd cape
that’s what i’d like to reproduce... for 100m.
ancient smelt
You can if the texture is intended for it; for cylinders you can't just blend the edges into a seamless.
Will is be connected to pylons?
odd cape
I could use uvTransform and set proportions to 30 or so
i can make the texture seamless
but the current option is to use uvTransform or plain color
ancient smelt
Also, how close will a player typically get to the wire?
silver gull
this photo is not suited for an unwrapped cylinder... this much should be obvious
odd cape
yes x3kj
ancient smelt
How many pixels high would the cable be at 3m distance?
odd cape
lol
again: current option is plain color
but I can tell you that you do see it textured nicely
but right now, all stretched
would Stage0 with a uvTransform be a good option?
(taking about super)
ancient smelt
It it's only ever say 10 pixels high on the screen then just use a 20-30 pixel by 512 or so pixel area of a texture and tile it left and right.
(I assume there's something else related to the cable that could use the rest of the texture)
frozen blade


note that the texture is pretty shitty and i only made it seamless on it's lenght for this purpose, not on its height, so it isn't seamless on that side, nor is it a proper albedo since it contains shading and reflectivity info
@odd cape ^
do you have a 100m cable as a single mesh?
that you cannot break in parts?
because there is a limit to where the farthest vert can be at
before it trows errors
frozen blade
no, it isn't about lenght of the mesh
ancient smelt
100m is too much even if it doesn't throw errors, collisions don't work when an object extends more than one terrain grid cell away from its centre.
frozen blade
you can have 100m cable without pushing outside the 50m boundaries
it is in regards to how far the UV verts can be from UV (0.0) origin
odd cape
ok so 50m it is
frozen blade
what you wanna use this cable for if you don't mind me asking?
ancient smelt
@frozen blade If you mean for the rounding that happens when binarization converts to 16-bit UV coordinates it might not matter for a cable that has every vertex on the corner of the bounding box of the UV space.
odd cape
I've been working on this an am almost done: https://cldup.com/HLZhjkMUOz.jpg
not pictured here: pylons and stations
horrible video and don't mind the commentary: https://cldup.com/G_ulhzWHMe.mp4
frozen blade
ahh ok then, well, make these from 50 to 50m then
odd cape
yes
thank you for the tip
ian, pufu, etc you guys are amazing
really, thank you for your help
frozen blade
@ancient smelt ahh, ok, wasn't sure
it only happens with textools for me, some rogue vert is all the way in the far far away realm
@odd cape no worries
[8:48 PM] _SCAR: ian, pufu, etc you guys are amazing
i am aware of my awesomesouce 😃, but ty for reminding me 😛
ancient smelt
Yeah, it takes the bounding box of your UV area and then quantizes it to 16-bits. So if your UV space had a vertex at U=0 and another at U=65536 it would then round the U's to the nearest 1.
Usually stray vertices are waaaay out in no mans land (beyond the millions), causing every (useful) vertex in the UV map to be rounded to 0.
frozen blade
yeah, but even for 50m, having the a vert @ U=65xxx is most likely out of question
[8:51 PM] ianbanks: Usually stray vertices are waaaay out in no mans land (beyond the millions), causing every (useful) vertex UV map to be rounded to 0.
indeed
but wasn't sure where the limit was
it is 16bit plus minus yes
as in U coords +65536 and -65536, same for V
ancient smelt
Yeah, there shouldn't be a limit, it's just that your resolution is limited to 16-bit on each axis.
frozen blade
ahh ok, ty
ancient smelt
And it doesn't matter how far you are from zero. If your U is between 1000000 and 1000001 you should be fine (it's the same as going from 0 to 1).
frozen blade
ahh ok, so it isn't 65k up and 65k down
it is 65k between these
vert and horiz
ok
ancient smelt
Between your minimum and maximum U (or V) coordinates you get 65536 evenly spaced points that it will round to.
frozen blade
yeah it makes sense due to 16bit thingy
ancient smelt
To actually render your model it converts those 16-bit values back to floating point, so retardedly high values will also suffer from floating point rounding too.
I guess one way to look at it is that if you are using a 1024 x 1024 texture, a span of more than 64 times the width or height of the unit UV square can no longer even be accurate to a particular pixel.
 nova hatch
anyone know what would cause a bad bake on sharp corners like this ? https://i.imgur.com/y1SG1Tx.png
blender->sp2
nocturne lake
did you split the edges in the UV map?
nova hatch
no they are one solid edge in uvmap
nocturne lake
should split along hard edges when baking normal maps
nova hatch
they are marked as sharp edges and I use the edge split modifier in blender which splits them
nocturne lake
and add a gap to pad between the edge
nova hatch
so instead of having the outside one UV I should split on hard corners?
nocturne lake
nova hatch
I think I get it, I didn't have a HP for this model as its just a small object but if I have a hard edge I should also have a uv split for best results
unreal magnet
always
nova hatch
Thanks! 😄 I had known about supporting geometry/loops etc to produce better results but never that part, I suppose it does make sense though
silver gull
i dont get why you bake a normalmap if you dont have any HP detail ? Or is this just part of the model that does not have HP detail?
nova hatch
It doesn't have any HP detail, so I guess that is a good point - but either way I have had this issue before
only issue now is seams are really obvious 😦
 zenith mirage
Does anyone know where can I find the NVG texture inside the pbo?
 placid thicket
How sensitive is arma to bit depth?
frozen blade
?
odd crane
adshq the extra data is in the blue channel, right?
severe rune
G channel contains ambient occlusion, B channel contains diffuse shadow
https://community.bistudio.com/wiki/Texture_Map_Types
dense peak
Anyone have any links to some good texturing tutorials? Or did you just kind of learn by trial/error? I'm getting pretty good at actually making buildings/houses but it all goes out of the window when it comes to textures.
silver gull
PSA: apparently allegorithmic (substance painter) will have a black friday sale up tomorrow (~21h as of now)
hardy basin
Hey guys, I am working on a hat and I'm having a problem with my alpha map... can anyone tell me why this might be happening? is it something with my shader? http://tinypic.com/r/24q5uh1/9
(you can see through parts you're not supposed to like the bill ofthe hat)
I also made the model so maybe it could be a problem with my model?
I am using the super shader
 vestal sundial
Make sure your using a _CA texture would be my guess.
hardy basin
thats not it, but I have had that problem before
I wish I understood alpha maps and occlusion better in this game
nocturne lake
that's just how the game renders 32-bit alpha textures with the alpha below a certain threshold. If your model has only that texture you should use 24-bit _co with a 1-bit alpha. Alpha will be jaggier, but it stops the weird AO shading
otherwise you should only use 32-bit alpha texture on the part of the model that you need to be transparent (the mesh part by the looks). And use _co for the rest of the model
with forcenotalpha = 1 as a named property in the geometry LOD if necessary
hardy basin
ok, thank you for that information @nocturne lake 👌
 quaint shadow
does anyone here have a tutorial on how to bake AO maps in 3DS Max using a high poly mesh? (alternatively using a normal map, but I've been told it's not as good)
I've been trying to somehow figure out how to use the the projection modifier to perhaps project the high poly mesh onto the low poly, but either I've been getting a ton of script errors, or it just ignores the high poly altogether (and just bakes using the low poly mesh)
in fact, the last time I tried, 3DS Max even decided to ignore my smoothing groups, making the individual triangles stick out like a sore thumb: https://cdn.discordapp.com/attachments/293157245682843650/383306654386749441/unknown.png
acoustic dove
try xnormal if you dont have any other program
that does better AO bakes than Max itself
quaint shadow
I'll probaby use it as a last resort, but I was hoping there was a way to do it in 3DS Max (seeing as I've already set up most things in there, and I'm already familiar with it)
nocturne lake
What bit-depth is the image format you're baking as?
using high depth formats like tiff or exr can reduce some banding
but you then need to open them in PS or something and convert to 8 bits/channel mode before you can convert to .paa
quaint shadow
to be fair, I don't think it's the bit depth; the grip (which is fairly low-poly) has even more contrasted triangles
one of the triangles is pure white, while one of the adjacent ones is grey
nocturne lake
I think I used to get similar faceting in Maya when baking AO. Was the reason I started using xNormal
no idea if it's better now though. I only use Maya's transfer maps for colour/selection mask baking
silver gull
i bake all my maps in max...
make a screen of your window with projection modifier and RTT dialog shown
and picture of HP and LP with wireframe
frozen blade
- 34% on all substance indie licenses
silver gull
now i'm wondering... the thing says "more than 12 consequtive months to be eligible to buy standalone version" ... So if you go anually that means you have to buy 2 years?
or can you switch from anual to monthly?
quaint shadow
I should mention that I've never used the projection modifier before, so perhaps that's where I screwed up
silver gull
is the cage proper? Do you have any ray mischecks in the temporary render (red areas)?
you should triangulate your mesh before baking. But this is not the reason for your problem.
you have many ngons - thats not good
quaint shadow
- I'm not sure, I essentially just slapped a projection modifier ontop of the low-poly and didn't change anything besides assigning the high poly model to it
- if I set mental ray to ignore the low-poly mesh, then yes, I get red areas (and a lot of script errors)
and alright, I'll try triangulating the low-poly
silver gull
have you adjusted the cage at all?
quaint shadow
no, I'm really not sure what I'm supposed to do with the projection modifier
silver gull
i suggest to watch a tut on youtube then
there is some fiddling you need to do
without adjusted cage you are not getting anywhere, if you want to do cage based baking...
quaint shadow
that's the thing, I could find a lot of videos on how to bake normal maps, but that's not an issue as I can do those just fine in SP2
silver gull
baking normal maps in max is exactly the same as AO as far as the projection modifier goes
quaint shadow
but from what I could see there weren't any tutorials that deal with baking an AO map using a high poly and a projection modifier - though of course I could be wrong
ah, ok
well that's good to know
I guess the same logic regarding the cage applies here then, right? with the cage having to be slightly bigger so as to encompass the high-poly model?
silver gull
indeed
the only thing that determines what you bake is the chosen output maptype. You can bake normal and AO at once, but most of the time youd want to explode for NOHQ (unless you use material id's)
quaint shadow
yeahhhh that's why I use SP2 for that, since it has the "match by name" feature (though 3DS Max's match by ID feature is essentially the same)
is there anything else I need to know though? I've heard some rumours about having to disable a few settings in the low poly model's object properties, such as "cast shadows" and setting visibility to 0
silver gull
not in my experience. Depending on what material you apply to low poly, sometimes its better to give it material with 0 opacity, but not in every case. Also, depending on the model/what you want it helps giving the HP a complete white material with "double sided" in the material property enabled
quaint shadow
when you say that it helps, do you mean that as in "it doesn't work otherwise?" 😛
oh, and from a test bake I'm currently doing I'm already getting a lot of these errors - any idea what could be causing them?
PHEN 0.12 162 MB error: A ray encountered an invalid color (NaN), using black instead
silver gull
never seen that
silver gull
double sided material is usefull if you have penetrating objects. Otherwise you will have to manually paint the the intersections black. You will see the difference once you make two bakes and compare them
you havent shown your render settings. Are you trying to bake with Mental ray or with scanline +lighttracer?
quaint shadow
mental ray, but I might switch to scanline to see if it works any better
some people have been using it in the YT tutorials I've watched
silver gull
scanline is easier to get going
its also more consistent (because it doesnt give you distance options :P)
But you need to convert your AO renders to grayscale, because they are light blue-tinted by default
unreal magnet
That is because the default skylight is tinted 😉
Just change the color of it to pure white and you're good
quaint shadow
I'll give it a go tonight then, thanks for the help so far
 distant rose
Marmoset has a 30% off discount running on Toolbag3, Hexels 3 and their Pano packs until monday
https://www.marmoset.co/posts/black-friday-deep-discounts/
freelance/academic licence offer only btw ^
 modest ore
I got my Marmoset 3 on last years Black Friday ....such an awesome software! 😉
I might try out the Hexels for kicks thought this year 😄
silver gull
i find marmoset to be very expensive ... for the purpose of modding. If you freelance and have to portfolio and stuff then maybe worth.
distant rose
yeah i like toolbag tho, its pretty useful
quaint shadow
right, so I tried using the scanline renderer to generate the AO from the high poly - it worked, but I ran into a strange issue in that I can't change the resolution of the output image, no matter of what I set it to in the RTT dialog
plus, the results had a lot of noise in them, and I couldn't find a way to change the settings for the bake
so I decided to switch back to mental ray, and suddenly it worked...
I don't know what I've done differently this time, but it's doing its job as expected, and I can now change the settings the way I want them... can't complain 😛
unreal magnet
watch this https://youtu.be/y_1ql8yH2Ow?t=38m27s
dense peak
Anyone knows how to desature a fill layer in SP2?
Just made the switch from Quixel to SP 😛
dense peak
Awesome! Thanks alot
quaint shadow
I'll admit I switched to using the scanline renderer and while I still don't see a way to adjust all the settings I need, it's definitely good enough for me (and it works well too)
silver gull
the only case where it doesnt work is for interiors and tightly enclosed spaces - you will just get super dark or entirely black scenes. You can put lights into the scene but that kinda defeats the purpose. In that case mental ray is the only good option.
unreal magnet
or baking in painter
 upper laurel
Hi, I would like to make a custom optic for the UAV Targeting Pod. I have no idea where to start or what software to use besides photoshop or similar image editing software to create the Texture. Would someone be able to point me in the right direction?
silver gull
Custom optic in which way? Do you want dynamic numbers and so on to be displayed? That's all done in config.
optic backgrounds (and fixed reticles, like sniper rifles) are done as textures and applied to 2D planes in a 3d model.
upper laurel
Ok thank you, I have the draft design but I will need assistance with the dynamic numbers etc. I’ll move to the config help channel
silver gull
so apparently its not possible to switch from yearly to monthly subscription for substance...
hardy basin
Hey @nocturne lake how can I specify a 1 bit alpha channel in a 24 bit png? Is that possible to do with GIMP?
ok I'm reading about something called a tRNS chunk
this is what I need right?
hardy basin
there is an AO gltich with 32 bit textures
nocturne lake
is you save it as _co.tga though, it will only write 1 bit alpha in the .paa
the suffixes on texture names are used by the tools to format the texture
nocturne lake
Not really. Realtime AO shows through most _ca textures since the game came out
problem comes when using _ca on parts that you don't actually want to be mostly transparent
acoustic dove
i know there been an issue with _ca when you use it on whole model which uses a small part of transparency
that issue been fixed?
hardy basin
I think it depends on the pixel shader you're using too. Like, I figured out that if you use the treeAdv instead of super shader it doesn't have the same problem
silver gull
textures with 8bit alpha do not receive shadows - this is the problem.
 molten spire
white cargo
molten spire
white cargo
is it .tga?
nocturne lake
Can be improper file path. e.g if you have it written with an absolute path like P:\folder\file_co.paa instead of just folder\file_co.paa and assigning the Path for Textures option in Object Builder to P:\
If you open mass texture and material renaming tool, it will show the files it can't access, in red
 surreal hatch
Quick texture question: I've got a new box going for an MLRS model and the texture is a bit messed up. It'll load in and at least render something, then quickly turn to invisible:
Ignore the error message and the fact that this was taken on my school potato
nocturne lake
error could be related though since it appears that it's swapping the texture out on your launcher using hiddenselections (which are defined in model.cfg where you have that error)
surreal hatch
I fixed the skeleton issues, still swapping it out. Put all my hidden selections in and they appear to be correct
 soft wind
Hey i'm very new at texturing and everything i make looks very fake can i get some tips from the pros
surreal hatch
Alright, new updates: the RVMAT is loaded and works fine.Texture just appears invisible (think Predator, with a shimmering invisible object.) Fixed the model.cfg so the hiddenselections are working well (at least for camo1 and camo2), but the launcher texture is invisible.
silver gull
@soft wind for example?
soft wind
@silver gull So im making a wild west house and the wood looks very fake
silver gull
pictures?
silver gull
its no wonder it looks fake if you use plain colors...
also, no wood has a color like this when its been subjected to years of sun and dust
silver gull
subtle color variation (together with grain texture) plus weathering is key.
 bronze stone
Still: What X3 said is correct. Just checkout the colors of old Houses
they go from dark to light (depending on where water dropped down for example)
Good example:
https://m5son.files.wordpress.com/2012/06/old-house.jpg

Then add some details like: Each Woodplank got it's own "texture", not every plank 100% straight
somber pier
I've never actually seen any wooden building that has the cliche wood colour
Everything wood is like above ^
dense peak
House attempt #2. https://imgur.com/a/0ow32
My actual construction seems to be improving but I still hit a brickwall when it comes to these flat ass textures. Need to research techniques that can make them look like textures and not just a picture plopped on a plank.
I just started doing this like a week ago at most btw.
Any advice on any blender tools i should look into to manipulate the textures, or any post processing software (PS,Gimp) I should look into?
white cargo
make some normal maps from the diffuse textures
you can use photoshop or some standalone dedicated program like CrazyBump
ancient smelt
TinyRick: Have a look at Substance Painter and Substance Designer.
Substance Designer might be particularly good for you since you could set up procedural wood wall textures and then just change settings to produce variation between buildings.
silver gull
is painter even suited to texturing objects that use tiled textures?
crazy bump and the likes produce very wonky normals in my experience (unless the picture has the heigth basically baked into it - dark values deep, light values high)
 shut sparrow
@soft wind do you know what UV mapping is ? i think that's the next step for you ? 3D pipe in a nutshell : make your model > unwrap it > texture it
plus, in Arma 3 i think most buildings uses multi-material shader (that's an arma's engine specific shader) so you're not limited by texture resolution and can tile them instead, it also makes textures reusable on multiple models
dense peak
Hey! Can anyone see why this camo pattern is not exporting? https://i.imgur.com/UirlZS9.png
Only the base color is exported
Diffuse: https://i.imgur.com/ITlknM2.png
Export settings: https://i.imgur.com/tzocm9O.png
nova hatch
did you add the extra channels?
dense peak
Yeah if you mean, Base Color, Metallic and Roughness
Ah, i got it....
It expected the diffuse from the input maps
Not the Converted maps that i was expecting
soft wind
@shut sparrow Thanks for the help i'll try it out
shut sparrow
@soft wind i would recommand to try to completely import your house in Arma using the common Super shader then quickly take a look to Multi Material Shader since it requires to think your UV map a bit differently :
https://community.bistudio.com/wiki/Multimaterial
https://community.bistudio.com/wiki/Mondkalb's_MultiMaterial_Tutorial
ancient smelt
For any large object you need two UV's regardless of the shader, otherwise your texel density gets too low or you're using too many textures.
The main difference between the two (because you can have 2 or more UV's with super shader and then use low resolution _mco's/_dt's as well) is being able to have multiple _co's and fewer GPU instructions in multimat.
shut sparrow
not sure texel density is a thing with multimaterial since you can set your texture repeating independently from other "layers"
it's not like if you had to deal with UV island sizes on a fixed resolution texture
ancient smelt
You can do the same with super shader.
shut sparrow
yep but not without increasing sections count
ancient smelt
Yeah, that's what I was getting at, as far as doing multiple UV's they're exactly the same, it's more about having multiple _co's.
silver gull
texel density is an issue even with multimate, because AO requires unique texture, as does the color map.
so it makes a difference if your multimat object is 5m³ or 343000m³
color map with low texel density -> blury transitions between mats if you dont divide materials via uv splits
leaden fox
https://imgur.com/a/YoUJA
Any idea why my textures arent applied correctly?
Rvmat seems to glitch out too
I can see the UV in UV editior, it's not bugged or anything
Although I have 2 UV sets (one is hands, other is uniform)
full quarry
@leaden fox 2 UVsets or 2 materials?
full quarry
well usually I think characters use only 1 uvset so I would guess your rvmat is not configured to use the second uvset or it cant use it
all uvmaps can be on 1 UVset and overlap because it does not matter as they dont use same material
there is also filters in OB uvEditor to show only single materials UV
leaden fox
So I guess my rvmat is on the wrong UVset
that might be the case, it used to print the normalmap on the hands
should I merge the two uvsets?
full quarry
that or try pointing the uniform rvmat to the second uvset
leaden fox
I've changed it
but on the other hand, even the texture is wrong
still doesn't work after changing uvset parameter in rvmat troo
OB is doing some very sketchy stuff
It popped out when I pressed "check textures"
Okay. So switching the UVsets between each other worked. But does that mean I have to put hands and uniform on one texture and rvmat files?
nocturne lake
why are you even making a second UV set?
leaden fox
I coppied the hands form other file and it made it just because
nocturne lake
but the hands are by default are on UVSet 0
they have a separate texture and material file to the uniform so there's no point making extra UVSets
hands and uniform can both use UVSet 0 so long as they have separate texture/material sets
nocturne lake
select everything in the UV set you want to move from, ctrl+c to copy, switch to the uv set you want to put it in, ctrl+v to paste
then go and delete the unwanted UV set
second button in the toolbar, the one with the red x
leaden fox
Hmmm, right
coz the uvset can be on another uvset
as long as they are different materials
and use different textures
no idea why, it works
😄
nocturne lake
IIRC texture can only ever use uvSet 0. Materials can be assigned another uvSet through the .rvmat, but not textures assigned in the model
somber pier
Quick question regarding the 'bespring spaced armour' seen here in the following image - https://www.dreamworkshobby.com/hobby/items/1411/15.jpg
Is it possible to get a high enough quality alpha texture to represent the bars/springs through the armour? Or would it be better to have low poly bars instead?
I'm unsure what would be the best method for the best result
 warm stag
For that you'd be using a fairly low res tiling texture so no issues there... but given the vast amount of alpha'd space it might be better to just use geometry. And either way you would LOD them out very soon. The best way would be to try both and profile each and see what performs better, but that also requires the most work.
ancient smelt
Except it'd be 2400 extra polygons to do it with geometry and it wouldn't look as good as a tiled alpha texture.
I'd try like Bek said with a tiling texture (figure out how close the game camera will get to the mesh, then make sure you texels per meter are such that at that distance the resolution is still good) and then use a macro or detail texture to get it so that the large scale colour variations like you see in the screenshot are still there.
warm stag
even if it was shitloads of extra geometry it's probably still cheaper than having that much alpha
Now that I think about it, it wouldn't be much effort to set up a quick comparison between the two and profiling them in game
ancient smelt
Alpha's expensive?
warm stag
very
ancient smelt
How come? Doesn't look too bad in DirectX frame dumps.
(Not that I've ever looked at the timings in them for alpha)
warm stag
iirc alpha essentially requires that pixel to be rendered twice (or more if you run into overdraw)
https://www.gamedev.net/articles/programming/graphics/gpu-performance-for-game-artists-r4632/ has an example of using more geometry to cut down on amount of alpha
though it also points out actual performance can depend on what stage is the slowest, vertex or pixel or rasterisation
ancient smelt
Arma doesn't draw under opaque pixels though, it does a depth only pass with the alpha'ed texture first.
warm stag
in the wire mesh though it's 70% alpha'd space though
ancient smelt
Have a look at that, it's half way through the colour pass. The pixels behind the undrawn trees are masked by the earlier depth pass.
warm stag
generally I get told that with modern gpu's and optimisation geometry is cheap, shader complexity is the more important. whether or not that's true in arma for this case I can't say for sure but I'd either test it or err on the side of geometry being the cheaper way
ancient smelt
Yeap, but for 1-bit alpha correctly set up it might be fine.
(i.e. any pixel that produces a write to the z-buffer should occlude the pixel behind it in exactly the same way opaque polygons occlude behind them)
In a little bit I'll check what happens with the camo netting in the GPU, that's probably be closest example.
warm stag
yeah that should be similar, but from what I remember it doesn't have as much transparent area in comparison to that wire mesh
somber pier
@warm stag Ok so I've made both versions, hard to tell whats better. Having the rods adds like 6000tris or someshit haha
I'm more concerned about the backface culling, as going to look whack seeing mesh from one side but not the other
warm stag
does arma not have a way to enable two sided geo (or rather disable backface culling). Pretty sure it does, not sure if it's defined in rvmat or p3d though
if not you can just duplicate and flip
also did you have the bars joined at the intersection, or offset and overlapping
somber pier
just overlapping. So the rods go through each other, I've neved made a mesh before haha
If I can disable backface culling then I might just go with that
somber pier
I havent even gotten to that stage haha. I'm still making stuff in Blender 😛
Just want to get it right the first time
warm stag
you don't have to worry about that now then
if it turns out you can't do it in arma later, you can just duplicate + flip
ancient smelt
Arma has a flag on polygons to enable double sided drawing; it uses it on tree polyplanes.
I don't know if you can set it explicitly though, it gets set for trees during binarization automatically.
Also I just checked the Arma 3 fences, they don't write to the Z-buffer but the pixel shader does bail out early if it knows the pixels is transparent.
ancient smelt
Ok, that was just one fence. Other Arma 3 fences/nets write to the z-buffer, like this:
So pixels behind opaque pixels will be rejected by the z-buffer, and fully transparent pixels will cause the pixel shader to bail out early.
somber pier
Isnt the Camo net just a single face, yet that seems to be double sided? Theres gotta be a way! haha
ancient smelt
What's the path to the .p3d of the camo net you're talking about?
somber pier
@ancient smelt The one in your image, thats where I got the throught. I've looked at them before ingame and never saw 2 faces. I dont know the path though
ancient smelt
Nope, they just have mirrored polygons.
(a3\structures_f\mil\Shelters\CamoNet_Big_F.p3d at least)
ancient smelt
The points are exactly the same.
somber pier
Interesting. I would have thought that would produce clipping or some sort of dodgy stuff as the cover the exact same space
warm stag
It would if they were facing the same direction
the gpu does a pass where it checks if it's a valid direction before drawing, so if it's not and you therefor wouldn't see anything anyway, it skips it
 raw nimbus
hi ya'll, didnt even know this chan was here until @white cargo just told me 😮
somber pier
@warm stag Cheers for the insight mate thanks 😃 @ancient smelt You too mate
acoustic dove
Can you use hiddenselectionsmaterials on A3 vehicles? isnt there any issue with that?
nocturne lake
IIRC it works well if you do it with class texturesources and bis_fnc_initVehicle instead, since that uses setobjectmaterial command to swap the mats
but it does seem to be working fine with hsmaterials on the RHS MRZR
acoustic dove
with Vhc it seems to be more work involved but i heard there were issues with hit textures if you use hsmaterials
or thats only with uniforms?
nocturne lake
there are issues with uniforms and weapons, certainly
that weird LOD bug we have with the SR25s in RHS is partially to do with hsmats
VHC is pretty easy to implement
acoustic dove
if there arent any issues with vehicles then why bother with VHC heh
nocturne lake
because then you can allow people to select the textures and materials on what vehicle through garage, eden etc. too and have fewer classes
acoustic dove
yes but this is for private use so
nocturne lake
is it an existing BIS vehicle then?
nocturne lake
meh, well the vehicle may already be set up for VhC in that case so it's not all that more difficult to do it
 balmy dawn
Hi all, with the Insignia, what is the best way to cut something out for use if you have shaky hands and are really bad at drawing around with your mouse?
nocturne lake
in what? photoshop?
balmy dawn
I just have paint
 worthy kindle









 balmy dawn
thank you I will give it a try
 torpid imp
Anybody off the top of their head know were the AAF Grenadier vest are? I'm trying to find the texture. I looked at all the charicter_fPBO's but can't seem to find it.
nvm, didn't realize it was part of the Marksman DLC
nocturne lake
there's a .psd file for it in the samples package @torpid imp
\SteamApps\common\Arma 3 Samples\Art\MarksmenDLC_Textures\VEST_IND_GL.7z
balmy dawn
guys I can't get this to work, is there anything else I can use to cut out my insignia?
full quarry
else than what?
 balmy dawn
Huh?
ohhh wait
i did it i think
See, I'm trying to resize it to 400 pixels, but my paint opens it up with white background
how do I resize it to at least 400 pixels and keep the transparent background?
distant rose
I fixed it for him, now go wear it with pride 😃
balmy dawn
*her 😃
balmy dawn
not fixed now, now isignias work in game for me 😦
balmy dawn
fixed, Uro is a legend.
modest ore
Uro IS a legend for sure! He taught me a few things 😄
distant rose
im no legend, just a grunt like everyone else.
torpid imp
Thanks for the info, now I have a new problem
The texture seems to come up invisible, I first converted the texture into a PNG, then used the TextView2 to save it as a paa again.
nvm, file pathing..
😄
leaden fox
Which part of the rvmat describes shadow intesity on a model? My texture seems quite bright in the sunlight, and turns almost black in shadow. Is this a matter of rvmat or color texture?
full quarry
_AS map plays a part and the ambient, diffuce and forced diffuce values can affect it
pics could tell more

 full quarry
wont do
leaden fox
can't really acces it now, it's basic from "clothing.rvmat" in A3 files
I should get it from Substance Painter then
full quarry
if you can then yes
leaden fox
will do, thx
nocturne prairie
can i change the UVsource in the rvmat? I think UVSource ="tex";
Tex is Uv1 and Uv2 is Tex1 or 2? or completely another name ?
balmy dawn
silver gull
there you go https://www.blender.org/
full quarry
👆👌
somber pier
😍 Blender
dense peak
Hey! I´ve hit a snag with SP2 and was hope someone could spot the issue for me? https://imgur.com/a/bDP9Z
The wood part is so damn glossy / shiny but in the specular and gloss its almost black
Still learning SP2, so any tips would be greatly appreciated
quaint shadow
did you perhaps export gloss and spec in the wrong colour channels?
I did this a few times and I got similar results
acoustic dove
i see that grip in that smdi brighter than darker
it should darker in gloss map - meaning the blue channel in smdi
also in green channel specular map as well

 quaint shadow
yeah, there's definitely a problem with the exported maps
dense peak
Cool will check!
quaint shadow
 acoustic dove
you could just export the raw specular and gloss - combine them in PS
quaint shadow
I went from the pics you put up on imgur, I decomposed your exported smdi in gimp to get the green and blue channels
might be something with my method, but I doubt it as your SMDI is waaaay to bright on the grip area
could be due to the colour space of the channels you're using - for example, use specular level instead of specular (as specular is RGB and specular level is greyscale, which ArmA uses)
acoustic dove
also one warning - dont use too much pure black because in arma engine you get the gloss broken in a white pixelated mess when the light show up
dense peak
Yah no worries there, ive tweaked all the settings to the extreme just to find the culprit.
quaint shadow
true, 100% black gloss is usually bad, however 100% black specular is fine (I use the AS map to lower the specular level on areas that have shadows, like inside gun barrels)
acoustic dove
on specular yes , but mainly gloss is doing the issue
quaint shadow
yeah, you're correct
ancient smelt
Using "specular" in SP will definitely give you the wrong result, it sRGB encodes it on export which isn't what you want. "Specular level" is exported linearly and will match what ARMA is expecting.
However, the SP colour pickers numeric values are always linear so they won't match photoshop's colour picker values if you're getting your values that way.
 obsidian nimbus
anyone know the procedural texture for a blank smdi offhand?
"#(argb,8,8,3)color(1,0.5,0.5,1,SMDI)"
I think that is the right one but I am not sure
Actually, this looks more like it: "#(argb,8,8,3)color(1,0,1,1,SMDI)"
silver gull
there is no blank smdi, its either very shiny, barely shiny or the middle ground
nocturne lake
In ways it depends what you input in to SpecularPower and specular[] parameters in the header
silver gull
that too. There just is no "neutral" though.
white cargo
Anyone here know if Substance Painter can bake AO maps on building interiors?
unreal magnet
yep
itll bake fine
@white cargo
It's actually what I would prefer when baking building interiors
white cargo
any recommended tutorials?
warm stag
it's one button and some options; not something you really need a tutorial for
 gusty grail
does anyone have a beginner tutorial to putting textures in game?
full quarry
there should be something on the BI forums
gusty grail
the only one i could find was from 2014 and its outdated on what can be used or not
silver gull
2014 outdated? na. Textures havent changed since then
gusty grail
its not the textures its how to get them into the game. they were using pbo manager to repackage the files but that doent work on windows 10 anymore
silver gull
pboproject (from mikero) is best tool for packing error free. If you just want to get it quickly ingame for testing use addonbuilder
gusty grail
i'll try that thank you
that was probably the biggest hurdle from all the tutorials i found was that they all came out before arma 3 tools so i didnt know how to access half the shit they were talking abuot or what it was
dense peak
Any tips to not make a building look like absoulute shit? https://gyazo.com/b0dbeb64758fded9064c8b5af3b2102e
It's worse inside...
full quarry
use multimaterials
white cargo
are you using really low res textures? if not I think you're having some mipmap issues
severe rune
Tweaked: The "hiddenSelectionsTextures" now works on magazines (only if weapon supports the magazine as proxy) !!!!
full quarry
uuu
severe rune
I thought they never did that because not possible
 cursive zealot
Can we have doritos magazines now?
nocturne lake
or is it??? 🤔
acoustic dove
i would be the first to be happy to see magazine proxy in handheld guns but i think thats too wishful
balmy dawn
Hey pros, is it easy to re texture vanilla skins?
silver gull
wrong color, wrong letter orientation
white cargo
substance painter can't import 3ds?
quaint shadow
the green is a little too blue and maybe a hint too dark
should be more yellow-ish: http://i.auto-bild.de/ir_img/1/1/3/2/6/6/1/BMW-X3-Polizei-1200x800-e7c255135f8ff407.jpg

though I'm not sure what @silver gull means with the orientation, it looks correct to me: http://i.auto-bild.de/ir_img/1/1/3/2/6/6/1/BMW-X3-Polizei-1200x800-82e77e6df87e84ee.jpg
 silver gull
quaint shadow
silver gull
quaint shadow
maybe he prefers the old colour scheme? 😛
silver gull
its the future
quaint shadow
true, and with Germany's bureaucracy it'll take another 30 years for us to actually put this law into practice
 bold kayak
im doing a few different varieties for people to choose from
frigid escarp
BI seems to have added mca.paa to rocks, trees and bushes with recent patches. any idea why?
and mc.paa to some buildings
nocturne lake
is it in a second uv set? maybe they're just adding some colour variation up close
frigid escarp
didnt check the models myself - just going from the file list of extracted pbos
nocturne lake
could save file size I guess. If you have several rocks or buildings that are fundamentally the same, just different colours.
if the diffuse detail all comes from one common overlay and the colours are just simple colour maps that don't have all the diffuse detail
can't find the image where they demonstrated that for DayZ
 bright current
hi all, i have a little prblem and i was wondering if someone here knows about this. i was trying to export AS.paa and NOHQ.paa to layers that i can use in photoshop for easy retexture (white an transparent). Does anybody knows if ther is any ".atn" file for photoshop with the steps or any guide?
bright current
i know
but i m talking abou to export the layer with correct color an tranparence
bright current
yes i want to take that layer and transorm it to a layer that i can use in photosop
full quarry
save it as png and open that into photoshop
silver gull
there are no layers in those files...
bright current
i m not explaining it correctly i think
silver gull
yes
bright current
i ll just 5 mins
ok so the thing is, AS thexture is in pink, and NOHQ is in bue and more colors, how do i transform those textures to layers that i can use for reteture a vehicle or whatever?
transparence, etc..
nocturne lake
_as has the shadow information in the green channel
just take that paste it on your texture and apply multiply layer blend
full quarry
are you suppose tho have much shadows on the diffuse tho
full quarry
is what I meant
nocturne lake
some cases, 100% looks fine though
depends on the texture
as for the normal map, it should be that colour. Need to convert it to a cavity map if you want to use it for diffuse shading.
bright current
to be more specific, the templates of this guy "ChernarusLife" has those layer without color and ready to aply
so
y just have to save them as png and set them as multiply?
the result is not the same
nocturne lake
no, you need to take the green channel from the _as and multiply only that
then for the normal map you can probably google how to convert it to curvature
there are tools around that automate it
bright current
ok so many thanks for the help 😉
nocturne lake
but you'll probably want to invert the green channel in the normal map first, because Arma uses inverted Y swizzle
bright current
but once i select the green channel and transforms to black and white, how do i save it on thi color range?
nocturne lake
just ctrl+a, ctrl+x when in the green channel, and then paste it to a new layer in rgb, or something
or paste the green in to r and b channels as well
obsidian nimbus
So how do y'all make specular maps? I can never seem to get mine to look right