#arma3_model
1 messages · Page 157 of 1
 stuck oyster
if youre not familiar with it, it wont help you at all before you learn how to do it
 wraith nebula
If you are talking about traditional box/edge modeling then a tablet wont help much in my opinion, you can be more accurate with a mouse. If you are looking to get into sculpting then yes it can be helpful since pen pressure adds alot to the ability to sculp. If you are new to modeling i'd say hold off until you are more familiar with the workflow. Regarding the tablet itself if you want to start scupting then the more levels of pressure sensitivity the better. I find 512 levels to be not sensitive enough so id shoot for 1024 or higher.
 stoic blaze
I got a H640P for a great price off Amazon. I'm looking to do a lot of sculpting creating creatures in the future.
Thank you for your help.
 ivory grove
I've been making a bt5 model for arma and when i import it into arma parts of it are missing/inverted, but i can see them when i look from the opposite side. These missing parts also dont show in bulldozer.
I'm very new to 3d modelling so it might be some basic mistake
View in blender: https://imgur.com/a/2MhLtpV
View in game: https://imgur.com/a/H5gW543
Any help would be appreciated
 quick terrace
pretty sure the same parts are inverted in blender as well
google backface culling for blender
 formal peak
in Blender - Viewport Overlays - check Face Orientation.
Red = inwards - Blue = outward facing.
ivory grove
Yep, i checked the face orientation and they are inverted in blender, thanks for the help.
quick terrace
it is ideal to work with backface culling on when possible too
for anything game related
 muted prairie
is it possible to specify an exact coordinate to move a vertex to for LandContact LODs in OB? or am I doomed to move my vertices by eye using 3D transform?
stuck oyster
you can use the 3D pin
 polar fiber
If you want specific coordinates you can select the vert, Shift+E and enter new X, Y, Z coords
stuck oyster
oh true theres that xD
polar fiber
If you want to move them by a discrete amount, there's a Move Points tool to enter X, Y, Z offset in the toolball (looks like a yellow cube)
polar fiber
If you want to snap align verts you can lock movement in a current viewport to X or Y axis and R-click drag a vert while the pin tool is selects, it will snap to the vertex you drag it to
Or place a pin with C, activate with Shift+C and scale 0 in the Scale Points tool (also a yellow cube in the toolbar)
muted prairie
useful stuff, thanks. will make my OCD easier to make sure those vertices are perfectly placed 😛
stuck oyster
also there is snap to plane tool on P
 cerulean lake
non
 split lotus
Kind of a basic question:
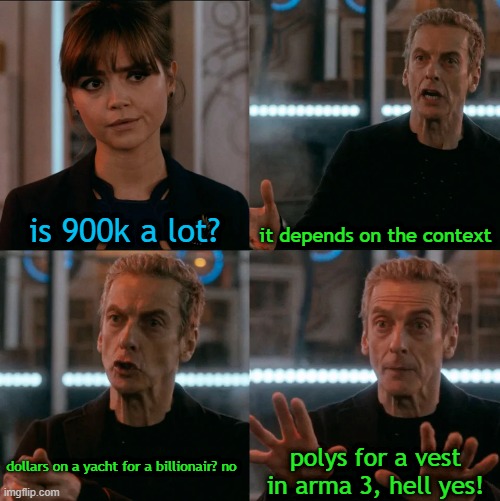
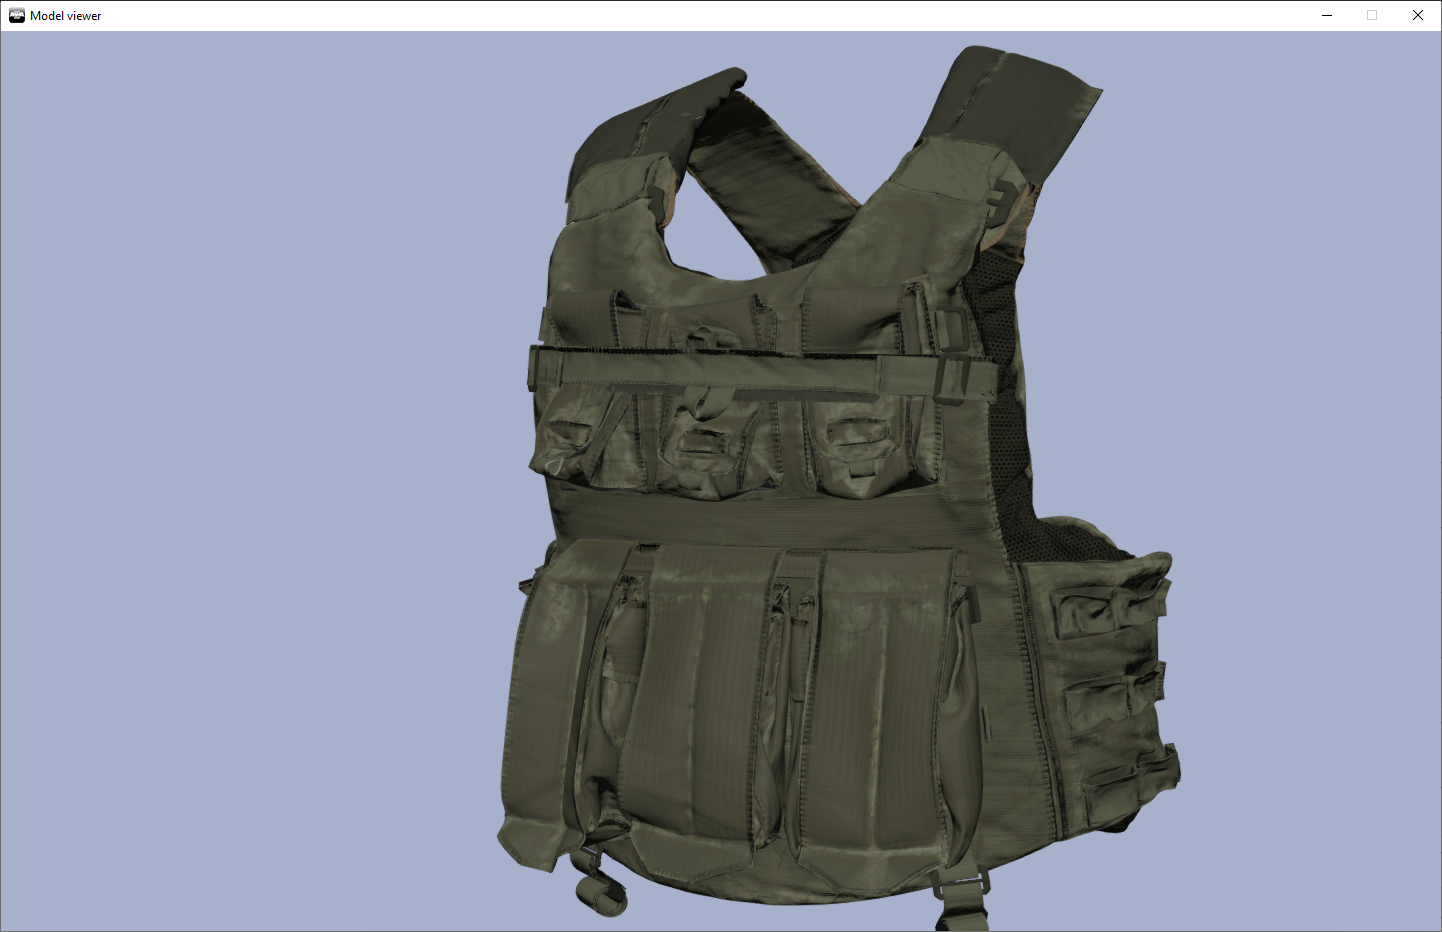
is 900k polys a lot for a vest?
 median bough
 quick terrace
Kind of a basic question:
is 900k polys a lot for a vest?
@split lotus you serious though?
median bough
i'm not quite in the loop, but i think 8-12k seams reasonable, right?
split lotus
@split lotus you serious though?
@quick terrace Yeah, someone in our local forum made a mod and he actually just bought a high poly vest model and put that in the game
I was facepalming so hard
My friend did an engineering model of a tank that was 1.5mil polys (CATIA) my PC almost burned trying to render it in Cinema 4D
quick terrace
weird, most of my work scenes are well in excess of 20mil polies, and usually some 100mil proxies
in any case he can use that hp model he bought to bake
so not all went out the window
split lotus
Yeah I know of that from some vids I watched on how game devs make the models (I think it was Tarkov)
quick terrace
but i don’t even think 900k is possible to import in ob anyways
split lotus
It's in game
quick terrace
can i get a screen?
quick terrace
weird, you sure is 900k?
split lotus
That's what the model page says
quick terrace
ok fair enough
quick terrace
yeah, seen
split lotus
I can't stand it that people waste their money instead of their time on models but whatever
quick terrace
most vest in a3 are around 3-7k verts irc
split lotus
makes sense, I can imagine the fps tax from that
quick terrace
it’s fine, i don’t mind it, but usually it’s not worth the extra time you need to spend to get that game ready
i hate working on other people’s stuff most times
poligons are easiest to render these days
engine agnostic
split lotus
True, but Arma is still pretty old imo
quick terrace
that said, 90k is the most detailed vanilla model
which is afaik the stealth uh60
900k verts is not game ready
maybe for unreal5, but even so, that’s a year away
anyways, i didn’t think that would be possible for a3, i just been proved wrong
split lotus
I think they still use some form of optimization or a "magic trick"
quick terrace
yeah, that happens at engine level
split lotus
anyways, i didn’t think that would be possible for a3, i just been proved wrong
There's no limits to stupidity
or ignorance, in that case
anyway thx for the info
maybe one day I'll import my friend's tank into Arma 🙂
quick terrace
if that is a cad model
quick terrace
so nurbs sort of model
split lotus
Probably
split lotus
It's 531MB when exporting to 3ds
quick terrace
and the higher level export can be used as hp mesh
split lotus
even has highly detailed A/C
and all the bolts and nuts
everything is models so no wonder it's 1.5mil polys
quick terrace
yeah haven’t used catia as in never, bit did use both solidworks and fusion
1.5mil is not even that large for a hp model
split lotus
Now he's actually using Alias because he's a automotive designer
split lotus
1.5mil is not even that large for a hp model
yeah but it's so poorly optimized it can't even load it in 3ds max or cinema 4D (well you can but you'll have to wait for like 10 minutes for it to load)
Maybe I'll go back to it and try using blender or something
I just wanted to do ray tracing render (where tank is black)
split lotus
what's tb4?
Rendering was the easy part, manipulate the model in Cinema4D was the issue, I probably did something wrong 😛
quick terrace
most likely. marmoset toolbag 4
split lotus
@quick terrace turns out I was wrong he did optimize it and it's on 60k polys
quick terrace
still a lot
quick terrace
far from it
polar fiber
Character models are rarely over 20k. Equipment less so
split lotus
¯_(ツ)_/¯
 short plinth
hi all, coming to you guys for some help .. does anyone has ever used the Quixel Mixer tool to create and export the textures for any 3d model?
if so .. does anyone knows which of the 9 possible export options on this tool (Albedo, Difuse, Specular, Gloss, Roughness, Normal, Displacement, AO, Metalness) are supposed to go on the .rvmat file of a gun mod?
stuck oyster
@short plinth keep to 1 channel as per #rules
we have basically same people on these channels
short plinth
my bad ! ...sure np buddy
 lavish jay
 runic plover
hi all, coming to you guys for some help .. does anyone has ever used the Quixel Mixer tool to create and export the textures for any 3d model?
if so .. does anyone knows which of the 9 possible export options on this tool (Albedo, Difuse, Specular, Gloss, Roughness, Normal, Displacement, AO, Metalness) are supposed to go on the .rvmat file of a gun mod?
@short plinth if im rightAlbedo = _CODiffuse = _SMDISpecular = _ASNormal = _NOHQ
polar fiber
From past experience of Quixel suite, Albedo will need tweaking for Arma. Any base metal layers in your materials will need their brightness bringing up to make them grey rather than black. And I highly recommend you use the "base definition" smart material or what ever it might be called in Mixer nowadays, as a top layer in your materials stack in order to turn it from an albedo to more of a diffuse map
Specular and gloss will need tweaking, usually with a levels or brightness/contrast fill/adjustment layer. Then you combine the specular and gloss as a _smdi map with the spec in the green channel and gloss in the blue
Metalness+Roughness are not needed
short plinth
@polar fiber @quick terrace @runic plover hey guys.. Then would u recomend to keep working with this quixel sw?.. Or what program do u guys use which fits more to the arma 3 texture needs?
quick terrace
the go to software for the past years have been substance painter. that being said, the outputs from all 3d painting/texturing that are pbr (as in all available ) would need minor adjustments
so considering mixer is free, as long as you can use effectively
median bough
there are shaders available for SP to match arma
quick terrace
and they come with pretty hefty downsides, as being unable to properly use smart materials
so you can get pbr textures and have assets ready for the future, but have to manually adjust these for non pbr specific a3 shaders or have specific a3 textures done (and still have to do minor adjustments), yet have no future proof textures in place
i’ll always take the first option
you can even have said adjustments ready in a ps template
sort of automated
short plinth
@quick terrace thanks for the help... So I Will look for more info about how to do those adjustments vía quixel.. As im kinda New on this 😋
quick terrace
you need to understand the difference between albedo (pbr) workflow, no matter if it is spec-gloss or roughness + metal versus diffuse (non prb ) workflow
stoic blaze
If I make a new character model, what would be a good polycount?
stuck oyster
rule of thumb is as low as you can make it
stoic blaze
Okay... What about maximum then?
stuck oyster
and then with new character do you mean an uniform or completely custom character?
stoic blaze
Not completely sure. It's gotta be 3 meters tall tho...
I'm just doing some research on how to do everything rn and making sure I remember it all haha
stuck oyster
then its pretty much your choice
stoic blaze
Does a uniform allow for the hitbox and damage to be modifed?
stuck oyster
as it does not really fit standards
what do you mean?
I assume you have played Arma 😄
stoic blaze
If the character is 3 meters tall, can I use a uniform but still have a hitbox for the face haha
stuck oyster
characters behave pretty much same
the uniform would not have a face?
I mean it is what you make it to be
stoic blaze
Not sure if you've seen any of the star wars mods?
They have droids, that are full-body with just a uniform.
stuck oyster
Sure, but that topic is not good here
but custom character should be able to have custom damage model too
stoic blaze
Okay, that's most likely what I'm looking to do then. Is this at all documented in videos or similar?
stuck oyster
but just so you know you are walking into very uncharted territory where there is very l ittle documentation or expertise to help you
so you will need to steel yourself to have to learn a lot by yourself
stoic blaze
Ah that's the issue then haha
I guess I'll have to power through haha. Thank you though, I'll probably send an update in the coming weeks as to how it's gone so far.
stuck oyster
👍
stoic blaze
Ah, you were the one who made the robo dog. Looks very nice.
stuck oyster
yeh
its pretty fun

Long time no news!
Well here's some!! Little teaser of things we've combined from various tests! Still a bit raw here and there.. But you can see where this is going!
The legs are still the old version but new ones are on the assembly line waiting to get stomping!!
Music b...
working on some bigger things too
So I do know what its like to make the custom chars and how hard it is to figure it out. Im still learning myself too. Been 5-6 years since I started
so dont get down if by next week you are still clueless xD
@stoic blaze
stoic blaze
holy fucking hell
i just realized i have to do mechs too -.-
Are you sure that's arma?
stuck oyster
Its about as far as it can be taken
 woeful viper
if you plan on starting a total conversion NOW (at end of lifecycle for arma) ... dont bother with arma and focus on assetts for a future yet to exist game (A4 or whatever comes along)...
 jolly ermine
So, im a virgin when it come to modeling and modding overall, what i want to do is increase the armour value of a APC (CV90) and rework the model since its very subpar both texture vise aswell as the model itself... anyone help? :( @ me if you could <3 Also I need to add a specific type of shell :)
 neon drum
Hello, is there a reasonable amount of polygons amount we should have in vest and backpack models?
polar fiber
@jolly ermine you can't rework models without the original author giving you access to the source file
jolly ermine
@polar fiber I see.
stoic blaze
@woeful viper Honestly just gonna keep all of the base models etc. I do, so I can always use it somewhere else.
Doing this to get better at modeling and sculpting, along with some config and texturing experience.
woeful viper
then i wouldnt do stuff that requires more work than necessary. 3m infantry and mechs do require a lot more work than just regular size, weapons etc to implement
Configs will not be transferrable to new games... models are
short plinth
Hi A3 comunity,
QQ! .. im planning to go ahead and create several "paint" options for my gun 3d model .. so wondering whether anyone knows whether i need to create a separate p3d file per model per camo? or .. if there is any option to use same p3d model and kinda code the camo options via model.cfg? 🤔
 rich bluff
that last bit is exactly how it is handled
in your model.cfg you just need to add a couple selections that include all the faces used on each UV sheet
and you need to make sure those selections also are on your model in your .p3d
from there, you can configure your CfgWeapons class to have hiddenSelections
short plinth
hi @rich bluff ... oh ok then same p3d can work .. only thing i need to do several "camo" selections with different rvmat ?
rich bluff
the standard convention for naming those selections is camo, camo1, camo2, etc
yep
you don't need a new rvmat if it's just the diffuse changing
you can do this in ObjBuiler rather easily by pressing Ctrl+A to select all pieces
and then E to open the Face Properties window
then just select all the vertices that use the same texture and "create selection"
then name the selection "camo" and make sure to add it in your model.cfg
short plinth
by any chance .. do u have a sample for model cfg .. which contains several camos? . just to see how the code structure and declaration shall be done there
short plinth
yeah
rich bluff
A3 Samples has an example of a weapon with a singular hiddenSelection camo
all that would differ is that instead of line 206 being sections[] = {"muzzleFlash","Camo"}; it would be sections[] = {"muzzleFlash","Camo","Camo1","Camo2"};
and you would have those sections defined in your model
each of those sections, though, represent their own UV sheets
camo = uv1, camo1 = uv2, camo2 = uv3
I recommend Atom for configuration, as it has a package you can install for the Arma 3 Scripting/Config Languages written by ACE
short plinth
im checking into Addons\Test_Weapon_01 \model.cfg .. but still not able to find it
rich bluff
line 206
short plinth
is that the sample model u are referring to ?
rich bluff
yes
the config.cpp doesn't cover hiddenSelections, but they're relatively straightforward as far as retextures go
https://community.bistudio.com/wiki/Quick_camo_selection_definition_guide this covers some of it, but the process is a little different when including outside tools
short plinth
excellent ! 😎 .. ok lemme take a look at that file .. if that sample is ther .. it shall be easy ... appreciate all the support buddy
rich bluff
no problem
I don't check this discord often, but if you need help, this is a great place to be
feel free to ping if you need something
I'll try to answer to the best of my ability
short plinth
cool ! .. will do for sure ... thanks again man 👍
 agile bison
hey guys! does anyone now a good tutorial for adding gear to arma 3, like helmets and vests?
i haven't done anything related but I would love to, I just don't know how
 steel vector
https://community.bistudio.com/wiki/Arma_3_Characters_And_Gear_Encoding_Guide is probably the most extensive guide I know of
and although it's mostly about retextures, with a few modifications it also works with custom gear (wiki has config examples for custom models as well)
median bough
well, first you need a 3d software and know how to use it... this can take quite some time before you even reach the level of understanding how to make an asset. the arma modding itself coms way after that...
 uneven vigil
https://prnt.sc/uqomna
I am developing a weapon. I am in the modeling phase. I need a document on Sights. About the drop of the bullet or the distances etc.
lavish jay
Hi, I'm watched the article that said UnrealEngine can generate resolution LODs automatically.
Is it useful for OB? And how?
median bough
not very useful imo.
you have to create the model, export it, import it top UE, apply auto LOD generator.
i don't think you then can export the new model and import it to OB.
better way would be doing that all in the 3d software. most have some sort of tool to achieve the exact same with a few clicks.
lavish jay
fmm...
short plinth
Hi all, by any chance, would anyone know about how the animation code for the fire mode selector shall be configured on the model.cfg if my gun has 3 fire modes? (semi,auto,burst) ... and also if there is any way to set up the fire mode priority while switching on arma 3?
 rough idol
@short plinth set up the fire mode priority it's using same order as modes[].
animation code for the fire mode selector shall be configured
weaponMode is your friend. It outputs current fire mode in range 0 to 1 where 1 is last fire mode and 0 is first one. Keep in mind its calculating that value from modes[] array, so it includes ALL modes - those hidden AI ones too
modes[] = {"FullAuto","Burst","Single","Burst_medium","single_medium_optics1","single_medium_optics2"};
Above are AK12 firemodes - there are 6 in total where 3 ones are available to player & 3 are AI specific. weaponMode will return 0 for **Full Auto **& 1 for single_medium_optics2
for Single it will return 2/5 = 0.4. Why 2 and why 5? Array starts from 0, so "Single" mode has index 0 and 5 is last index number
 main jasper
Is there a maximum size of objects before the Fire Geo starts acting funky? I have a building that is 30x20x15 and the top floor's fire geo doesn't work but geo does
stuck oyster
that size should still work
 strong plaza
there is no height limit to object size from my understanding
main jasper
hmmm
Will go over the fire geo and check again
Also it is baked into the terrain
Shouldn't make a difference right?
main jasper
Is there a component limit for geometry?
stuck oyster
2048 I'd suppose
short plinth
@white jay .. thanks for the info man .. it was very handy
 subtle bison
a soldier carries one of my weapons. if i kill that soldier, the weapon will disappear - but i can pick it up from his inventory. anyone knows what's up here?
ok i think i know why
there are no components in the geo. let's see what happens once i run that through
yup, that did it. thanks guys :>
hmm but actually now i have another issue... bullets are blocked by the rifle
ok, fixed it :>
 vapid nexus
bullets blocked by rifle is usally that the memory points is pointing the wrong direction
oh nvm you already fixed it
subtle bison
yeah, it was missing materials in the geo
 shell coral
okay so ive tried everything i can possibly think of
 orchid spruce
what do people usually do to line up vehicle seat proxies in p3ds? is it just trial and error - adjust position, load model, check in-game, adjust again?
or is there some other way
 marsh canyon
Use Buldozer
orchid spruce
how do I get it to display seat proxies?
polar fiber
Do you have custom crew anims?
orchid spruce
no I wanna use vanilla seat animations
polar fiber
With BI anims it can be a bit of trial and error, yes. Unless there's one of the proxies in the folder using that anim
I can't remember if you can apply binarised .rtm to a character model in OB. But if you can, you load the .rtm you want on to a character model select the keyframe where the character is posed how you want and then delete the rest (r-click delete all animations), and save it as e.g. cargo.p3d (you only need the first res LOD) then you can load that as your proxy and view it in buldozer
marsh canyon
It's impossible to load binarized RTM
polar fiber
Well I dunno if there's a tool to unbin them (which is probably fine since they're useless outside of Arma). I seem to remember there being one
marsh canyon
Mikero's paid one had one, IIRC. I think putting the vehicle and try to search the positions in Eden Editor is a way in this case, though
polar fiber
Diagnostic .exe, unpacked data and diag_resetShape is probably the fastest way to do the trial and error approach
rough idol
There is also free variant of dertm - although it's not the latest version
subtle bison
out of curiosity - rtm files unbinarized this way, is it possible to load them up into a 3d software and edit them?
polar fiber
Can edit them individual keyframes in OB with the skeleton, but AFAIK the Blender rig etc. don't support imported poses properly
subtle bison
why not import the p3d directly into blender
shell coral
which .py do i use?
subtle bison
the whole thing
orchid spruce
I'm trying to put the BTR-40 from the arma 2 samples into A3 and I'm having an issue where if I have the wheel damper animations in the model.cfg, this happens with the wheels https://i.imgur.com/zrqyb7M.png
could this be because of model.cfg or config issues?
 vestal kindle
Hello guys !
Small issue with glass (buildings). One out of two windows works and I don't know why. Everything is setup the same way, selections, model cfg, config cfg.
For example in the model cfg tool : https://imgur.com/jHsn1lG
You can see, there's no "glass_26/28/30/32/34" but when I switch to classes, controllers, class hierarchy there here.
They are missing in Selections and Sel. Hierarchy BUT in my lods, I have the selection for those as you can see : https://imgur.com/udu3tbX & https://imgur.com/zsw1dqp
stuck oyster
@subtle bison the animations can be imported properly only if all animation helping constraints are disabled and each frame of rtm is imported as keyframe. This makes editing RTMs very tedious and basically it is faster to make new animations with properly set up animation rig.
stuck oyster
👍
vestal kindle
Any idea for my glass problem guys ? :(
stuck oyster
How many bones do you have in the building?
Might be best to do the model.Cfg in text editor
rough idol
@orchid spruce model.cfg issue - you need to adjust damper values
https://community.bistudio.com/wiki/Arma_3_Cars_Config_Guidelines#Suspension_parameters
If your model have already Basic_Damper_Destruct_Axis, then use something like that
            class Wheel_1_1_Damper
            {
                type        = translation;
                source        = damper;
                selection    = wheel_1_1_damper_land;
                axis        = Basic_Damper_Destruct_Axis;
                animPeriod    = 1;
                minValue    = 0;
                maxValue    = 1;
                offset0        = -0.1; // maxDroop = 0.1;
                offset1        = 0.2; // maxCompression = 0.2;
                memory        = 1;
};``` offset0 needs to match maxDroop from your physx config & offset1 should be same as maxCompressionBasic_Damper_Destruct_Axis is an axis in Y axis which is exactly 1 meter long
orchid spruce
yeah I've seen that, the config has both maxDroop and maxCompression set to 0.15 and my offsets are set to match that
wait, the config property is maxDroop, right?
I think I might have a spelling mistake in my config
mMaxDroop=0.15;
or is mMaxDroop something else?
rough idol
mMaxDroop does nothing
orchid spruce
where does mMaxDroop come from, I can find a bunch of google results of that property being a thing
is it an arma 2 thing?
rough idol
it comes from PhysX documentation
it was quite common typo during early days of A3 modding - probably because it was also present in some A3 samples/documentation or vehicle. I remember I had that typo too in RHS vehicles
rough idol
@vestal kindle share your model.cfg perhaps?
 charred bolt
Is there a minimum thickness for a vehicle Fire Geometry object below which passthrough of damage from the hitpoint (eg "HitBody") to total health stops working (seems so from experiment)? FG is not armour or designed to prevent penetration, so simple case (eg wood) https://imgur.com/BX5hSfD
rough idol
@charred bolt there is "minTotalDamageThreshold" property
so I guess bullet is losing not enough speed which ends up with little damage
orchid spruce
is it possible in object builder to move a certain selection the same way between all lods?
like for example with a seat proxy
vestal kindle
@stuck oyster @rough idol Here you go: https://pastebin.com/SnCZh6sV Sry for the delay, was at work ^^
rough idol
@vestal kindle omg, what a messy way to write skeleton cfg
vestal kindle
¯_(ツ)_/¯
rough idol
write it in pairs
"glass_12", "door_1",
 "glass_12_hide", "door_1",
  "glass_12_unhide", "door_1",
"glass_12_effects", "door_1", ``` like thatand you will see why some of the bones are not working for you
stuck oyster
Yeh that's too hard to read for debugging
rough idol
since it's utter mess, my bet is that glass_25_unhide is attached to glass_26_hide
"glass_25_unhide", "glass_26_hide" & there is no glass_26_hide bone definition
@orchid spruce yes, you could probably do something like that with o2script but without basic scripting knowledge it might be faster do it manually
vestal kindle
alright doing some cleanup, sry ^^"
thanks!
cleaned up and fixed! thanks again, dumb enough to not check that 😫 
woeful viper
@charred bolt FireGeo physical thickness below 10mm may not work properly - projectiles can end up ignoring it in some cases (not always)
charred bolt
Thanks reyhard and X3KJ, your knowledge is invaluable as always.
vestal kindle
any good tuts for garage doors ? 🤔
Basic doors and custom doors animation ?
 dusk frost
so when I started doing terrain work, folks in that channel pointed me to two authoritative tutorials for terrain making and told me to ignore the rest. is this the case for model importing too? is there a tutorial or two that are the first and foremost resource for making models?
woeful viper
No, not really. If you want to learn how to model, arma tutorials are not what you are looking for. Look for general modelling tutorials
dusk frost
no, I know how to model, I'm talking about getting the things I've modelled in-game
 clever solar
Ye I was looking for such a thing and got pointed to several different things.
Guess it depends on what type of model you are working with though.
And like 99% of what people have worked on for arma over the years has been mostly guns and rigs etc.
dusk frost
hmm
mostly what I'm after right now is making some objects for terrain, as well as some wearable things
I imagine those are two very different things to set up
stuck oyster
Basics are the same with all objects. The wiki explains how configs work and how animations work, the samples on steam have all basic examples. Tutorials that are around are only useful if you got the basics down.
dusk frost
samples, as in, "open samples" in the arma 3 tools on steam?
shell coral
is there anyone that can make the uniform arms on a model T-POSE
median bough
quite some are on here. but the question is: do they want to...?
shell coral
is it a necessity to have the arms tpose?
shell coral
because whenever i load into game
the arms literally look like hes handcuffed
and the head is missing. no vests or helmets show up
shell coral
because i just did a weight transfer
median bough
and btw: my answer reads like this because your question sounded like that you want somebody to do it for you...
shell coral
yeah i was asking if anyone can do it now im just asking personal questions
median bough
i'm not experienced enough to answer / help in detail
best to wait until the geeks wake up 😄
shell coral
ok if anyone can do that for me we can discuss something for return
 blissful spire
proper section now : ok, been awhile since ive asked a question here. So i have a weapon rack model with weapon proxies on it. in object builder, it hides the weapon like it should. but doesn't in game. any ideas?
blissful spire
nvm, it just started working again
dusk frost
just wanted to check, but you can have transparent textures on character equipment, right? like if I wanted to make, for example, a beard made out of cards with an alpha texture applied for the hair
and can equipment like facewear have looping idle/ambient animations?
quick terrace
is it a necessity to have the arms tpose?
@shell coral if wanna do vertex weights transfer, yes, the meshes needs to overlap
just wanted to check, but you can have transparent textures on character equipment, right? like if I wanted to make, for example, a beard made out of cards with an alpha texture applied for the hair
@dusk frost you can, yes
and can equipment like facewear have looping idle/ambient animations?
@dusk frost nope
dusk frost
alright, thank you
 chilly pagoda
Hi, I'm not a 100% sure it's the channel for my problem but I'll try anyway. I've never done anything related to model creation (or just content creation), I just need help on one thing. How can I visualize the content inside à pbo file ? I don't need to edit the files or anything, just see what content is in it (for uniforms, guns, etc). I want to create a modpack for a friend of mine because the mods we are using are too big for his HDD (only 250 GB, and we use more than 100 Go of mods, but we don't actually use at least half of it so I want to keep only the stuff we actually need, and I want to do it without starting my game every time), how can I do that ?
woeful viper
repackaging mods is not permitted, unless you have permission from each and every author...
chilly pagoda
Most mods we use authorize that for private use (I'm not putting anything on the workshop or anything else, it's really just for this friend in particular for this particular use)
woeful viper
most is not all. There is no "visualize content" method anyway other than going in the game and looking.
chilly pagoda
(I've asked the authors before, those who do not authorize that like CUP, I just don't touch their mods)
But okay, I'll do it the manual way then, thanks ^^
(I'm not doing it for a server either, juste private games with a friend that we occasionnally host on our own computers)
vestal kindle
Hi,
What's the lod who manage the height of the objects you place in your building (roadway, geo, geo phys) ? Thanks
quick terrace
(I'm not doing it for a server either, juste private games with a friend that we occasionnally host on our own computers)
@chilly pagoda that is not private use. private use = just your own self btw
 turbid cove
@vestal kindle it has been brought to our attention that you are editing and publishing Vanilla models; as you can guess, this is a big no. Take it down.
I believe my message answers yours, PuFu
quick terrace
ninjaed
turbid cove
@vestal kindle?
vestal kindle
I'm editing yes but not publishing.
stuck oyster
its just as no no..
vanilla A3 objects are not to be touched.
no matter the intentions
chilly pagoda
@quick terrace oh okay my bad (I tend to mix the meaning in english and in french. Where I live "private use"(usage privé in french) = use in a private "setting" if it means something => Use in a way that is not "for the masses", meaning the product is not publicly available, but only for a limited group of people (of small size of course, "male people" or "people over 18" for example is not limited enough, nor "the inhabitants of city X") that's why I was wrong)
And since the only way the mods will be distributed is through a USB drive (the friend who I'm making this for lives in my neighborhood) and not publicly available, it falls under this "usage privé"
turbid cove
still ripping stuff (BOHEMIA stuff), and advocating for it in public @vestal kindle.
afair these buildings are not in the Arma free data pack.
sooo…?
quick terrace
@Napsius#2008 no worries, but what i said stands - in this particular case (license exempt, goes under fair use) if you keep it to yourself. as soon as you distribute that further (no matter of the means of distribution) it isn't private anymore. By your definition, it can be private to 20.000 people, because without a link/invite/usb drive, you have no external party has access to that. And that is not how licenses and ip rights for digital content works
woeful viper
i think id rather spend 50-80 bucks to buy another hard drive vs. sifting through 100 mods manually anyway...
clever solar
um.. yeeeaaaaah
 thorny coral
Yo boi's, I got my model and I got my textures. I just need someone to put it into object builder add a pistol proxi and then get it ready so it can be put into arma 3 can anyone help if u can message me
median bough
@thorny coral
this someone could be you 😉
Bohemia Interactive Forums
Hello, As I had many requests, I did this all-in-one tutorial I am sharing today. I hope it will be helpful to you. All important stages are available in videos description. I will try to make more tutorials in the future, so dont hesitate to guide me to parts of the videos th...
thorny coral
I'm willing to pay because I cba to learn just for this one thing
 silver zenith
sorry bud can't pay people for that
steel vector
Because Arma Tools EULA forbids people to make money with the tools, and since you need those tools it's not allowed




 dull lagoon
Does anyone know how to bake multiple textures into one in Blender?
quick terrace
pretty sure google does
clever solar
Hey.. why isn't arma toolbox for blender pinned? =_=
assuming it's still good for new blender.. I've never used it
clever solar
o7
dusk frost
it's still good, I'm using it in 2.9 without issue so far
though I've only used the p3d import part, so take it with a grain of salt I guess
 icy condor
Which proxy is responsible for displaying the head?
quick terrace
head
icy condor
Can I have a way?
dusk frost
when making LODs, I see the wiki lists a number of different types, though when I import a sample P3D (the standard baseball cap) it only comes with 3 res lods and a shadow lod; do I not need things like collision geo or fire geo for simple headgear?
stuck oyster
depends on what kind of properties you want for it
dusk frost
I'm not making anything fancy, just like cowboy hats and baseball caps and such
I assume if I was making a proper helmet I'd need fire geo
stuck oyster
they probably work with the basic setup just fine
dusk frost
alright, thanks
rough idol
character gear need only resolution LOD + shadow LOD
Empty Geometry LOD can be added as convenient method to set autocenter = 0
 cerulean compass
hey, i want to create an FFV vehicle (no model required). just for one player, in prone position. could someone point me in the right direction? assuming i need to use object builder
the point is to lock a player in prone position on top of an existing vehicle
rough idol
in samples there is FFV template
you would basically try to reduce available actions in your own variant of class Actions
Test_FFV_Poses_F
cerulean compass
will look into it, thanks!
 junior saddle
Does anybody know why certain materials aren't loading on vehicles? To elaborate, I have a jet plane with six different colors/material combinations on two camo selections. Camo 1 is the main color, and Camo2 are the leading edges of the wings. The player can choose whichever color combo he/she wants, and the color part works fine. The materials don't always work, though.
The four materials I've made are glossy, matte, chrome, and a tinted red satin metallic. Strangely, the matte finish is the one that has the most problems, but I think because it has more detail in the SMDI image, possibly? It also seems to have much different fresnel values than the other materials.
stuck oyster
are all of the materials present on the p3d?
junior saddle
Something has changed in Arma 3, though, and I know this because I have another vehicle, a LM002, with 8 different color choices which didn't suffer this problem years ago. Revisiting it to see how I made that happen, I discovered the chrome materials were not loading, and then the glossy ones weren't loading. It was inconsistent.
stuck oyster
material changing is a bit buggy and I think for it to work properly all the materials have to be present in the p3d
stuck oyster
it might work if you put different materials for different lods for example
or even on 1 lod you could have different parts of camo1 to have different material for that selection
junior saddle
So as you get further away it changes color?
stuck oyster
no no those would be replaced by whatever you hiddenselection config puts on them
junior saddle
color material
stuck oyster
but they would be initially present in the p3d
and thus "register" with it
at least that is how I've understood it works. no promises that Im right
junior saddle
Ok, so the key is to have it "registered." I like this idea
I think it might work to do your different parts of Camo1 have each material on them, especially since the base color/material combination is in scope=0;
stuck oyster
if you have hiddenSelection config then in game it does not matter at all what the Camo selections have on them in the p3d
as only the hiddenselections texture/material should be shown
junior saddle
I'm not sure what that means. LOL
a pot of gold (golden fried potatoes) at the end of a rainbow?
stuck oyster
I guess its how I feel rightnow. xD Been a long day
potato at the end of the rainbow
junior saddle
Well, I have good news!
- Your idea worked, and all colors are selectable.
- There'll be no floods to wipe out all humanity today.
stuck oyster
- is still negotiable
junior saddle
Well, thanks again. It was a simple fix, but I'm glad I asked and got your expert advice.
stuck oyster
youre welcome
woeful viper
🤬 this bloody stupid bipod deployment detection algorithm is driving me nuts! On some geometries/constellations it simply refuses to work
already deleted everything but 1 box and the roadway plane and still nothing... (whereas another building with same height and depth dimensions is no problem)
 stuck oyster
likely missing autocenter 0 named property. or wrong bone definition. or not correct animation type. or no correct memorypoint axis defined
dusk frost
the wiki says shadow lods must be smaller than the res lod so they don't shade it in-game. how critical is it that they be 100% inside the res lod, and do I absolutely need shadow lods for things like headwear, or will it be fine without them if it comes down to that?
I have a couple models with thin or complicated geometry which don't shrink well
woeful viper
how critical is it that they be 100% inside the res lod
@dusk frost if parts stick out, those areas will be always shaded on the model... which looks bad. You dont need shadow lod per se... if you are fine with not having shadow for a certain piece (like wires or whatever) then leave them out. It should be as simple as possible anyway (below 1000 tris for small stuff)
dusk frost
oh cool, that's good to hear
and for some things is it fine to just omit a shadow lod altogether?
quick terrace
shadowvolume lod should be around 1500vertices
tops
small bolts etc can have no shadows yes, not the entire thing
stuck oyster
For example what kind of a thing do you feel like not making a shadow for?
icy condor
which proxy is responsible for the "face protection" slot
shell coral
anyone know what could be the cause of my muzzle flash sometimes appearing below the barrel when shooting
 keen prism
Anyone got a creative Idea to not render an object from a certain distance ? Without scripting that is. Or if anyone has ever used the named property "drawimportance"
strong plaza
any downsides to using sbsource = visualex?
 cyan heart
You can’t use it on vehicles etc
It’s great for buildings, static objects and vegetation
For small object you can get better quality with regular shadow lods, at least from my experience
dusk frost
The thing I didn’t want to bother with a shadow lod for was a large mustache
rough idol
you can use it on vehicles
dusk frost
What is the difference between the view geometry and the res LOD you see when you're closest to the model in-game?
is the view geo functionally just the first LOD?
woeful viper
no it isnt. quite the opposite. Its extremely simple blocks, like geo lod to block vision - and only necessary if it needs 2 b different from geo lod
 foggy finch
All is explained on the biki: https://community.bistudio.com/wiki/LOD#ViewGeometry
dusk frost
I've been reading the wiki, I came here because I was confused about what I was reading
foggy finch
you need one if you want AI to behave correctly around your object, for example in buildings with windows, you would have view-geo mesh for the walls but not covering the window parts
otherwise they will see right through your object
because there is no geo blocking 🙂
dusk frost
ok, thank you
foggy finch
the same with tanks, you would have a view-geo mesh of the hull/turret
its very simple mesh
dusk frost
I'm just making some hats right now, that sounds like it's unnecessary for what I'm doing
foggy finch
yeah it probably is just for hats 🙂
orchid spruce
I need some help with model.cfg logic, I have a few parts that are separately being rotated in such ways that they stay mostly connected together, but at some point during the middle of the rotation they get slightly misaligned, I'm trying to fix that by splitting the rotation into 2 but it's not quite working ```sqf
class scope_beam_elevation
{
type="rotationx";
source="maingun";
selection="turret_beam";
sourceAddress="clamp";
axis="turret_beam_axis";
minPhase="rad -5";
maxPhase="rad 37.5";
minValue="rad -5";
maxValue="rad 37.5";
memory=0;
angle0="rad 4.973";
angle1="rad -38.701";
};
class scope_beam_elevation2
{
type="rotationx";
source="maingun";
selection="turret_beam";
sourceAddress="clamp";
axis="turret_beam_axis";
minPhase="rad 37.5";
maxPhase="rad 80";
minValue="rad 37.5";
maxValue="rad 80";
memory=0;
angle0="rad -38.701";
angle1="rad -86.375";
};
now it seems like it's applying them both at once or something so the selection defaults to being rotated much furtherI want it so when maingun goes from -5 to 37.5 degrees, that selection rotates from 4.973 to -38.701 degrees and then when maingun goes from 37.5 to 80 degrees, the selection rotates from -38.701 to -86.375
figured it out just now, second one needed to start its rotation at 0 instead of that -37.701
rich bluff
I have a set of alphas being displayed on the model via a proxy. They display just fine when using the camera, but when viewing the asset as a player, the alphas are no longer visible.
When adding forceNotAlpha = 1 to the model, they display to both, but when the value is included, I get a visual glitch that looks rather obnoxious.
(This visual glitch does not appear from the camera's view when not using forceNotAlpha)
I think I put 2 and 2 together... looks like it might be a shadow generating based on the visual LOD
rich bluff
fixed by adding renderFlag NoZWrite to the rvmat
 spare nexus
Anyone here interested in a little job? I am looking for someone that would be interested in making some WW2 houses. I pay 50 to 150$ for each, depending on the amount of work.
 hollow vale
cyan heart
hollow vale
cyan heart
you can use it on vehicles
@rough idol you can?
I had some issues with the shadows turning off sometimes, like flickering on and off when the vehicle was moving.
Haven’t investigated any further though
rough idol
@cyan heart never seen something like this before. Maybe some settings were influencing it?
dusk frost
is there some kind of ideal folder hierarchy or organization method for assets (namely models and textures) prior to packing them into a pbo, or does it not matter as long as all the file paths are correct in whatever folder gets turned into the pbo
stuck oyster
preferably everything you do is prefixed with your mod "tag_"
dusk frost
right now I'm transferring files from their original working location to the P drive and I'm unsure of how they'll need to be organized, because I'm going to end up with a lot of files in this mod's folder
right, everything is in there already
and within my tag folder, there goes the folder for this project, and within that, can the files all just be lumped in together or do they need further differentiation
so like tag > hat mod > [all the files]
or do they need more like tag > hat mod > textures, and tag > hat mod > models > hat_brown etc. for example
I've peeked inside some PBOs of mods I'm subscribed to in order to get a feel for how they're organized but it didn't really help
stuck oyster
many mods are not very well organized imo
I tag all my folders and files with my tag
except the techincal files like config.cpp and model.cfg etc
dusk frost
you prefix all files with your tag?
stuck oyster
yes
dusk frost
fair enough then
stuck oyster
no chance of confusion for where they belong to
dusk frost
I've opened one of my hats in object builder and the mesh is appearing fine, but for some reason it's not loading the designated texture even though the path should be correct
when I go into the UV editor and go into View, then click the name of the texture, it says it cannot find the bitmap
stuck oyster
well your path is not correct
dusk frost
the path I see when I open the path browser to check is letter for letter the same as the path I see in windows explorer when I view the folder I'm keeping the textures in
stuck oyster
paste that path
 stuck oyster
no I meant what path do you have in the p3d?
dusk frost
I thought I set it to be the same but I'll check
stuck oyster
copy paste the path here
dusk frost
this is what was set in blender P:\JSM\headgear\textures\stetson_brwns_co.tga
I'm using the arma 3 toolbox plugin, it had that path in the material tab under "Arma Toolbox Material Settings"
stuck oyster
I just wanted to know what path it has in the p3d
pls when asked provide what is asked
cant help you if you keep dodging the question
dusk frost
I don't know where else I'd find the path
stuck oyster
in Object Builder
dusk frost
in the pane on the left-hand side?
stuck oyster
select your mesh and hit E
or in the top bar tools theres soemwhere mass texture and material rename tool
thats a good one to tell if your paths are right
as if they are wrong they show up red
dusk frost
https://cdn.discordapp.com/attachments/194331573003223041/764998054859374592/unknown.png this looks to be the same path to me

could it be an issue with the rvmat?
stuck oyster
what does the "mass texture/material replace tool say?
stuck oyster
then possibly there is something wrong with your tools and/or P drive setup
the path does look correct but the path being red in the tool dialog means OB can not read it
dusk frost
weird
stuck oyster
one thing to check would be OB settings and the path to textures variable
it should be P:\
dusk frost
oh cool that fixed it
although it looks a little weird, it's dark from above and light from below
stuck oyster
you may not have set up the toolbox with the O2Script path and the model exports wrong
or normalmaps are not right
or rvmat in general is not right
many options
 atomic path
Okay so this is probably the most cliche thing you can ask about here but:
my custom vehicle get's launched on the orbit as soon as it spawns
I have copied weight, memoryLOD, geometry and geometryphysX from another of my working vehicles
what am I missing?
stuck oyster
memorypoint axis may have changed on the copypaste
model.cfg connection might not be working either if therse typo somewhere
and configs may have bug in physx
 remote cedar
Hey guys, quick question. I'm making a custom mission and I know I can have custom audio / images without the players having to download any mods but can I also have custom 3D models just contained within the mission or is that beyond the scope of what is possible without mods?
clever solar
I can't figure out how to get this arma toolbox addon installed in Blender. I installed it under addons, it pops up on the bottom saying modules installed, but I can't find anything to activate...
clever solar
I tried adding the zip file first, says it is installed but can't find it, so unpacked zip and tried installing them individually, still says it's installed but doesn't show up
quick terrace
Hey guys, quick question. I'm making a custom mission and I know I can have custom audio / images without the players having to download any mods but can I also have custom 3D models
@Dr.Tyler O.#8992 nope
I can’t figure out how to get this arma toolbox addon installed in Blender. I installed it under addons, it pops up on the bottom saying modules installed, but I can’t find anything to activate...
@clever solar from the same place you got that installed
stuck oyster
@crangu,depending on what button its downloaded from the zip might have one extra folder in it. So you may need to unzip it and rezip it from one folder up.
rough idol
@remote cedar you could try createSimpleObject - getting path to local p3d might be quite tricky though
silver zenith
Anyone knows why my model looks like its made of ice unless I remove the shadow Lod?
rough idol
open or non triangulated shadow lod?
silver zenith
nope, its pretty much a box and its smaller than the resolution lod
rough idol
pic
silver zenith
quick terrace
@remote cedar you could try createSimpleObject - getting path to local p3d might be quite tricky though
@rough idol last i checked, that doesn’t actually works - getting path from the mission file
@silver zenith ingame pic is what he means, not blender
silver zenith
sure give me a few minutes to re-add the shadow lod
silver zenith
@rough idol
https://imgur.com/a/NdZrZK4
also there is not a proper shadow but a very vague one as you can see from the 3rd pic
the model is perfectly fine if I remove the shadowlod so that's the problem, not sure how
I'll try to simplify it furter, maybe one of those edges have some cavity
rough idol
are you sure it's not some SMDI/ ASDHQ?
how does it look when its fully in shadow (casted by building)?
silver zenith
basically like in the 3rd pic
completely grey
also that blue-ish tint on the 2nd pic moves along with the camera
but could you specify what you mean with SMDI/ ASDHQ?
rough idol
it's not problem with shadow LOD then but with your materials
could be fresnel, could be SMDI or it could ASDHQ/AO
silver zenith
basically like in the 3rd pic
completely grey
scratch that, being in a building makes no difference
{
texture = "coffin\data\transport_casket_smdi.paa";
uvSource = "tex";
class uvTransform
{
aside[] = {1,0,0};
up[] = {0,1,0};
dir[] = {0,0,0};
pos[] = {0,0,0};
};
};
class Stage6
{
texture="#(ai,64,64,1)fresnel(3.21,4.01)";
uvSource="none";
};```
this is my fresnel and SMDI
might have done some crime here I'm not too sure hot hornet
Can you share the whole rvmat?
silver zenith
only if you promise not to beat me up for how bad it is
surfaceInfo = "A3\data_f\Penetration\metal.bisurf";
ambient[] = {1,1,1,1};
diffuse[] = {1,1,1,1};
forcedDiffuse[] = {0,0,0,0};
emmisive[] = {0,0,0,1};
specular[] = {1,1,1,1};
specularPower = 110;
PixelShaderID = "Super";
VertexShaderID = "Super";
class Stage1
{
    texture = "coffin\data\transport_casket_NOHQ.paa";
    uvSource = "tex";
    class uvTransform
    {
        aside[] = {1,0,0};
        up[] = {0,1,0};
        dir[] = {0,0,0};
        pos[] = {0,0,0};
    };
};
class Stage2
{
    texture="#(argb,8,8,3)color(0.5,0.5,0.5,1,DT)";
    uvSource="tex";
    class uvTransform
    {
        aside[]={8,0,0};
        up[]={0,8,0};
        dir[]={0,0,0};
        pos[]={0,0,0};
    };
};
class Stage3
{
    texture="#(argb,8,8,3)color(0,0,0,0,MC)";
    uvSource = "tex";
    class uvTransform
    {
        aside[] = {1,0,0};
        up[] = {0,1,0};
        dir[] = {0,0,0};
        pos[] = {0,0,0};
    };
};
class Stage4
{
    texture = "coffin\data\transport_casket_AS.paa";
    uvSource = "tex";
    class uvTransform
    {
        aside[] = {1,0,0};
        up[] = {0,1,0};
        dir[] = {0,0,0};
        pos[] = {0,0,0};
    };
};
class Stage5
{
    texture = "coffin\data\transport_casket_smdi.paa";
    uvSource = "tex";
    class uvTransform
    {
        aside[] = {1,0,0};
        up[] = {0,1,0};
        dir[] = {0,0,0};
        pos[] = {0,0,0};
    };
};
class Stage6
{
    texture="#(ai,64,64,1)fresnel(3.21,4.01)";
    uvSource="none";
};
class Stage7
{
    texture="a3\data_f\env_land_co.paa";
    uvSource="none";
};```also @rough idol if it wasn't a shadow lod problem then why is there no shadow?
stuck oyster
Probs way too much specularity. Also the fresnel values seem odd.
clever solar
@crangu,depending on what button its downloaded from the zip might have one extra folder in it. So you may need to unzip it and rezip it from one folder up.
@stuck oyster Oooh I think I understand. I'll try that tonight.
 white jay
Hello is there any model makers that are interested into become a model dev on my arma 3 Rp server we have 60 people in are discord Rn if you interested are dm me
junior saddle
What determines the size of bullet holes, like on a vehicle surface? Some are way oversized, and some are unperceivable. I've tried making uniform UVs for the Fire Geometry, but that didn't seem to work.
 cunning temple
Is there much difference between dayz/ arma modelling? I mean terrain stuff buildings etc not weapons or cars. Or do you have to jump through loads of hoops to get it to work for dayz
clever solar
I would assume mostly configs.. oh wait theres that special lighting system Arma has =p
cunning temple
yeah doubt its worth the hassle
clever solar
I mean if theres someone over there you could trust to dayz-ify it.. but I dont know who that would be.
stuck oyster
I dont think theres such people over the fence unfortunately. The people who had more knowhow seem to have quieted down quite a bit.
blissful spire
so, would anyone have an idea for why when i fire my tank, it crashes my game? Model.cfg, config and the actual model.p3d seems to be setup correctly. firing the MG works fine, its just firing a tank shell that causes the crash
blissful spire
nvm on my question. i solved it
stuck oyster
what was the solution?
median bough
@stuck oyster
pretty solid description of "solution"
https://en.wikipedia.org/wiki/Solution

In chemistry, a solution is a special type of homogeneous mixture composed of two or more substances. In such a mixture, a solute is a substance dissolved in another substance, known as a solvent. The mixing process of a solution happens at a scale where the effects of chemica...
😛
stuck oyster
not sure if that was the solution used though
median bough
that's up for debate 😄
blissful spire
@stuck oyster, i forgot to do a geo lod. so everytime i fired off a tank round, it would send me 400k+ MPH and crash my game
stuck oyster
👍
silver zenith
is it possible to create an old school 2d model that rotates along the camera?
thinking about it it would need to be MP compatible
trying to make a candle light
maybe I could make it like with arma grass
any tips?
quick terrace
you mean camera facing 2d sprite? unlikely, but don’t quote me on that
you could have a couple of rotates sprites, having the same sort of end result
silver zenith
yeah thats what I meant with arma grass
quick terrace
does a3 grass works like that?
silver zenith
I think so
at least the a2 one was a 2-3 2d images rotated together
would be weird if they modeled individual grass blades
strong plaza
at least the a2 one was a 2-3 2d images rotated together
this has never been the case
not in any arma game
silver zenith
oh my b then
strong plaza
wait
what do you mean by rotated?
that the plane tracks the camera like foliage in Oblivion?
silver zenith
oh no without tracking
just a bunch of 2d images rotated in various directions so that wherever you look at them it looks like there is something
clever solar
Grass/clutter are objects, usually patches, you can pull up clutter objects in the editor I believe.. but terrain sets clutter via config, mixes the set models and theyre drawn a specified distance from player on client side.
quick terrace
what do you mean by rotated?
@strong plaza camera facing sprites is what he means
silver zenith
thats what I was hoping to have, not what the a2 grass does
you can do that in the object inits with relative ease but I'm not sure how impactful that would be for performance and not sure how I could make it MP compatible
guess I could do something like this?
silver zenith
you mean particle system or a gif?
stuck oyster
Neither.
On the model
If you want more coverage use 3 crossed planes
2 crossing should suffice though
rough idol
- use basicFade as shader
runic plover
Grass are crossed planes and defined as something in the model geometry like trees are
clever solar
Oh I misunderstood what he meant =x
orchid spruce
is it possible for a model.cfg animation use multiple sources? like source1 * source2 or something? or is there no possibilities for any kind of math or any kind of logic?
 neat yacht
does anyone have an IZLID model they’re willing to share, it’s like a handheld laser pointer
keen prism
How does Arma decice that Bridges are connected ? They are connected if I use the new roadsConnectedTo with extended=true but not without. Since the performance difference is quite heavy, I'd like to fix that issue.
I've tried moving around memory Points to no avail
(The Bridge is not a TRAIL) ["MAIN ROAD",0,false,"a3\data_f\surfaces\betonout.paa","","",[6842.82,5043.32,11.8631],[6871.56,5069.26,11.8619],true]
foggy finch
it uses the roadway lod in the model
keen prism
So extend that a little bit for more intersection ?
foggy finch
in TB/buldozer using lappihuans script you can enable the road tool part to check connections
either extend the roadway lod, or the shapefile spline end iirc
keen prism
Explains the visual issue on the map aswell I suppose: https://i.imgur.com/Fai1dKn.png

Thanks!
foggy finch
np, good luck 🙂
stuck oyster
There are also memorypoints that define the driveway
Roadway lod defines only the surface where you can walk
Afaik.
blissful spire
ok im back again. any idea on what would cause a failure to swap to driver seat for a vehicle?
stuck oyster
wrong compartment setup perhaps
blissful spire
no compartment has been set in the configs. although i cant actually get in to the tank from the exterior either. so its probably just something else
stuck oyster
missing actions?
blissful spire
thats a possibility actually
although im using the tank from the A3 samples, and im pretty sure they dont have the driver actions selected. edit, yeah it doenst have them in the tank sample config
blissful spire
ok, so i added the driveraction from the car sample, and it didnt work
very strange. even though for the car getInAction works, i had to make it driverInAction and now it works
stuck oyster
you need both
getin/outActions ar for the get in and out fucntions
the driver/gunner/cargo actions for the passenger poses
keen prism
I was able to fix it @foggy finch by repacking the map with the memory points mentioned by @stuck oyster Thanks a lot! Looks so much better now. https://i.imgur.com/rC79dZu.png And is fully connected in the road network.
 junior saddle
Ok... Skipping the bullet hole question and moving on to another hit-related modeling subtopic, possibly. How do I make a car sit on its bare rims after the tires are destroyed? I have one car where the rims are sunk in the ground, and another where they are hovering above it.
rough idol
There are config params for damages and destroyed wheels
junior saddle
ok. sorry for wrong channel
 cyan wagon
So i am new to importing models into arma, i just created a pair of defcon vans (pair of shoes) from scratch and id like to import them into game. Can anyone walk me through in DMs or link me somewhere that can explain the process?
 bold flare
basically (my way) export as fbx, then import fbx in object Builder from arma 3 Tools
cyan wagon
Hmm and How can i go about getting a character model to correctly size and place these onto?
stuck oyster
you cant have shoes only
you would need whole character
Arma gear consists of full body "uniform", vest, headgear, eyewear, backpack and, nvg and guns
and there are no source uniforms to use
only a "naked" underwear example character
junior saddle
Basically, that means you'd have to create the whole basic outfit to go with those Vans. There may be a work-around, though. If the Vans are big enough to cover over sandals or other shoes, there may be the option to put them in one of the sub-categories, like vests. I've seen this be done with leg straps on vests and/or backpacks, so why not shoes? I may be wrong, but there may even be some vanilla combinations already dressed, but with no shoes on. As long as the shoes are assigned to the proper feet vertices, then a shoe-vest on the feet is still possible.
cyan wagon
So could I theoretically use the underwear model character to at least get the sizing and have everything properly set up to get into game? Then eventually if i can get some creators to collaborate move onto full uniform stuff?
My biggest concern right now is just getting the sizing and placement correct to even be used as a shoes asset
blissful spire
there a better tutorial on doing hit geos? ive made sure my fire geo lod was closed/convex but i still get the dirt pen effect when i fire at my model (just copied my geo lod which works).
ok. i convexed via component convex hull and now its making my geos non-closed. any help?
stuck oyster
sometimes reducing points in the components helps
or wiggling some of the non closed ones around
especially multiple points on flat plane are problematic
blissful spire
its just weird that when i use the component convex hull it makes my faces open
ill just delete the components and let obj build them
stuck oyster
the automatio can not process all shapes/pointclouds they produce
que?
that wont work
obj buidler does not automatically build geometry components
blissful spire
ah
stuck oyster
you are responsible for all lods
blissful spire
this is confusing lol
i jiggled the face that kept being opened when i convexed things and now everything is working again.
although i have a Cannot generate ST coordinates in my selections now though in my fire geo
stuck oyster
remove UVs from it
blissful spire
is there some reason why my selections woudnt remain in the list?
nvm/.
that worked
thanks goat
stuck oyster
👌
blissful spire
i still gotta tweak everything, but im pretty stoked about it
orchid spruce
I've been looking at the BI wiki on vehicle armor and I was wondering, is there any real difference between having just one fire geometry component for like the hull of a vehicle and then just applying different thickness armor materials to different polygons and having actual separate components that are modeled in the correct thickness?
assuming the thickness would be represented the same in both ways
quick terrace
if thickness would be represented the same way no
but you won’t be able to that with a single geo mesh anyways
orchid spruce
why not? couldn't I just have different thickness materials applied to different polygons?
like for example the polygons on the front would have a 40mm material and polygons on the sides would have a 20mm material
stuck oyster
about the same amount of work
orchid spruce
doesn't seem like the same amount of work to me, making components means you have to make a bunch of different pieces, make sure they are all the correct thickness and are lined up properly
as opposed to a single component that's just made generally in the same shape as the vehicle and then it's just the case of clicking on polygons in object builder and applying materials
stuck oyster
well you have to make a blob and select each face and set different material on them
or you make a blob and make duplicate and scale it down for the inner faces and split and convex them as needed
Id wager amount of clicks stays very similar
rough idol
@orchid spruce you can only assign one material per component - multiple ones are not working
orchid spruce
oh really? so if a single component has multiple materials, will the game just pick one and use that one for the whole component?
rough idol
Yeah, at least that's what I've observed when trying to do reflectors with one glass face
quick terrace
why not? couldn't I just have different thickness materials applied to different polygons?
@orchid spruce how are you gonna keep convexity for one
orchid spruce
well the whole component would still be convex
quick terrace
it’s much more complicated that way
silver zenith
hey guys got a question
I accidentally overwritten a p3d onto another p3d
is there a way to restore the lost model?
polar fiber
@orchid spruce the component needs to be closed and convex. Components with different sections assigned to different faces are not closed. If you apply a texture (or apply a retexture selection like "camo" and apply hiddenSelectionsTexture) to parts of a shadow LOD you will likewise see that the geometry is no longer treated as closed and you get all the weird shadow artefacts ingame
orchid spruce
so arma treats each polygon with a different material as a separate component?
foggy finch
it treats each mesh in a LOD as a component.
orchid spruce
I'm talking about if it's a single closed convex component that has different materials applied to different polygons
quick terrace
hey guys got a question
I accidentally overwritten a p3d onto another p3d
is there a way to restore the lost model?
@silver zenith nope
orchid spruce
since it is possible to apply materials to single polygons in object builder
foggy finch
just because its possible doesnt mean it works 🙂
silver zenith
@quick terrace thanks😭
orchid spruce
I know I'm just trying to understand how arma might behave if it was done like that
quick terrace
single polygons = i assume you mean single face
orchid spruce
yes
orchid spruce
https://prnt.sc/v0h3e2 here's an example of what I'm talking about, this is a single component and I could theoretically select just this one polygon of that component and apply a material only to this polygon
quick terrace
in this case fire lod yes?
quick terrace
as in bisurfs
as reyhard said, engine will not know
which material to use
for that single component
orchid spruce
so then how might it behave? just pick one of the materials and use it for the whole component?
quick terrace
if it has multiple rvmats assigned
one separate bisurf per component
so then how might it behave? just pick one of the materials and use it for the whole component?
@orchid spruce no idea, you can test it out obviously
orchid spruce
on a similar note, how does arma treat the materials that aren't those specific width armor plates in fire geometry? like if something just has a cast iron material, will it then assume that the whole component is just a cast iron block? or will it act as if the surface is cast iron but the inside is hollow?
foggy finch
it depends on how the bisurf the material uses is set up.
there's a few snippets on the biki regarding bisurfs:
https://community.bistudio.com/wiki/RVMAT_basics#Physical_properties
https://community.bistudio.com/wiki/Config_Properties_Megalist#BISURF_properties
https://community.bistudio.com/wiki/Bullet_penetrability
orchid spruce
so if a bisurf has no thickness specificed, will arma treat any component using that bisurf as just a solid block made from that material?
foggy finch
depends on density and bulletPenetrability/bulletPenetrabilityWithThickness and if Thickness is defined or not.
orchid spruce
I'm talking about if thickness is not defined
I mainly don't understand if it treats that component as having a surface made out of that material with the inside being hollow
or as just a block of that material that isn't hollow
foggy finch
If the fire geometry is thinner than the Thickness value, the actual geometry thickness is used instead. If the fire geometry is thicker, the Thickness value overrides it and is used. The game does take into account LOS thickness by evaluating an incoming projectile's angle-of-incidence (relative to the geometry normal).
From 3rd link ^^
it treats the whole component as that material with its bisurf properties taken into account.
orchid spruce
as if it's not hollow?
foggy finch
engine will see entire component as the material applied to it, with the conditions in the mat+bisruf attached
orchid spruce
that would explain why some A2 ported vehicles have odd damage behaviour since those have fire geometry with the entire hull with just a single bisurf assigned that usually does not have a thickness specified
foggy finch
so if your component is thinner than the thickness value the geo thickness will be used, if it is thicker the Thickness value is used.
orchid spruce
if it treats the entire hull as just a block of steel
ok but for the third time, I'm talking about if thickness isn't specified
foggy finch
iirc if no thickness in bisurf it will use the geometry thickness against some math with the material density
polar fiber
If the thickness is not specified in the bisurf, it uses the physical thickness of the component
orchid spruce
so I imagine if the hull of a tank was just a single component with an iron material that has no specified thickness applied, that might be a bit hard to penetrate
polar fiber
orchid spruce
if the game then assumes that shots are hitting a giant solid block of iron that's like 6 meters thick
stuck oyster
That would be the case yes. Best to put in the effort of making good firegeometry
As with anything else Arma modding related, there are no good shortcuts
 idle umbra
Hello, i do weight paint on this model using blender. then when i export to p3d, all name selection will select vertices on the circles in picture. how do i fix it?
https://imgur.com/tdt5Fti
stuck oyster
Make better weightpainting in blender
idle umbra
i double check all group, it is 0 weight on that area except pelvis, spine, and right/leg up.
stuck oyster
The export does not add weights,it just exports what you have.
Maybe you have some modifier that messes it up
idle umbra
Maybe you have some modifier that messes it up
@stuck oyster already remove armature modifier before export. hurmm
btw, im using fhq arma toolbox and macser arma rig
stuck oyster
Yeah those should work
 blazing berry
My first underwear test for women... https://i.imgur.com/kpuSNxv.jpg
For now several things to correct, but it looks good.
 idle umbra
Hello, i do weight paint on this model using blender. then when i export to p3d, all name selection will select vertices on the circles in picture. how do i fix it?
https://imgur.com/tdt5Fti
or is it because max bone for arma is 4?
silver zenith
any reason why my model that has no shadowVolume is casting a smooth shadow?
I though you needed a named property for that, which it hasn't
stuck oyster
does it have shadow lods?
silver zenith
no
stuck oyster
thats probably it then
model debug can properly start only after it has all necessary parts
silver zenith
doesn't it usually just not cast a shadow when there is no shadow lod?
silver zenith
oh I see thanks
stuck oyster
at least thats my recollection
silver zenith
speaking of which
what could be the reason my shadowVolume, which is a simple closed, triangulated and sharpened box that is smaller than the res lod, doesn't cast a shadow but darkens the model?
stuck oyster
you sure it darkens the model?
silver zenith
yeah its like its completely under shadow
silver zenith
yeah making them as we speak
stuck oyster
as what you see might not be what you think it is
 gray bronze
doesn't it cast shadow if there are low enough polys?
gray bronze
no idea then, I'm just a newbie to all this, it's taken me weeks of wrangling to get my weapon model working mostly
woeful viper
your shading is wrong
silver zenith
no worries thanks anyway
woeful viper
thats not a shadow from shadowlod
 sage stag
i have an unbinarised model at P:\ca\foo\bar.p3d but oxygen refuses to show it when proxied. what might i be missing?
silver zenith
@woeful viper you mean its rvmat related?
stuck oyster
possibly exported without O2script in place so vertex normals are all wonky
and yeah may need some hard edges on it
silver zenith
but the edges are curved
stuck oyster
so you want it to be smooth?
silver zenith
yeah its pretty much entirely smooth
also if I remove the shadowlod and it uses the smooth shadow the shading looks fine
stuck oyster
show what it looks like in OB viewport with texture enabled
stuck oyster
these are same pics as last time?
silver zenith
on the bottom
stuck oyster
have 2 pics
stuck oyster
alright so you will still want hard edges on the flat surfaces
but also
this should not have 1000k tris
stuck oyster
so what lods does the problematic pic have?
how have you not heard OB uses buldozer to preview models?
silver zenith
huh
that
would be useful
quick terrace
...
gray bronze
To be fair bulldozer is not easy to setup, I tried and failed twice. Easier to test in game than it is to get bulldozer running.
quick terrace
there is a minimum requirement for testing all meshes
res lod
svlod
geo lod
quick terrace
To be fair bulldozer is not easy to setup, I tried and failed twice. Easier to test in game than it is to get bulldozer running.
@gray bronze it is really straightforward if your p drive is also set correctly
stuck oyster
👆
gray bronze
Good guides are hard to come by, I'm amazed I've gotten as far as I have lol. I do have mikeros tools though, haven't tried his P drive setup utility yet.
stuck oyster
you should start with that
if you have not it means 98% certainty that your development environment has problems in it
silver zenith
ok so I've just installed it
silver zenith
bulldozer
is it located in the p drive?
silver zenith
uhm
don't think so?
stuck oyster
🙈
I mean this starts to get to me
I mention setting up the tools with Arma3P every week
many times
silver zenith
oh wait I did setup the p with arma3p
but I used armatools for buldozer
stuck oyster
dont do that
arma3p sets that up for you so buldozer is run from the actual arma exe
buldozer exe is basically just a copy of the game exe
that is run with certain launch parameters
but its simpler to run it from the games own files instead of copied files that may or may not be same version as your game
silver zenith
oh so I messed up
any way to revert back to the arma3p version that I didn't know I had?
silver zenith
is it called external viwer in OB?
stuck oyster
yes
silver zenith
oh does it apply istantly?
didn't even restart OB
https://imgur.com/a/2FIjVIN
yeah now its shaded weirdly in OB
stuck oyster
ok so this is when it exports wrong from blender
and the vertex normals get pooped
do you have O2Script.exe path set in Blender Toolbox
silver zenith
I'm not too sure
silver zenith
mhmm
I've had exports that worked though
gray bronze
I don't have anything set, pretty sure and never had problems exporting.
stuck oyster
fine dont believe me and dont fix that 😛
gray bronze
Lol
I have had flipped normals, but that was because the model in blender also had flipped normals
stuck oyster
people are constantly fighting me with all these basic stuffs because "it works"
silver zenith
its not that I don't believe you
but maybe it only breaks on certain conditions
or maybe I did installed it and don't remember
I can't really ignore the fact that it did work at least once
stuck oyster
yeah there are conditions
but right now it breaks because your models is like it is
and it would work if setup was right
silver zenith
yeah I'm looking up how to set this exe correctly
silver zenith
don't see it
gray bronze
Thing I've had most issue with are weapon animations, arma is a fickle beast.
stuck oyster
silver zenith
oh I'm dumb, tghough it was an extra plugin
that fixed the shadow problem @stuck oyster
I just realized I had this same problem with a lot of other models and I though I was just bad at making simple sharp boxes until now
runic plover
oh does it apply istantly?
didn't even restart OB
https://imgur.com/a/2FIjVIN
yeah now its shaded weirdly in OB
@silver zenithF5
clever solar
https://imgur.com/a/46pABkc fixed it(btw if you put a link within brackets, it doesn't embed.. that's helpful)
my house so far.. have to break link because stupid discords imbedding
nice, and if you copy it it adds a timestamp... I give up lol
idle umbra
hello, did u guys rig soldier for shadow lod?
i mean weight painting again for shadow lod? or just transfer weight?
 snow crag
I've noticed an issue recently where if I slightly alter a buildings geometry, its placement on the map changes. Is there any fix to that?
stuck oyster
@idle umbra depends what you are doing. Using the default characters shadow can be quite useful if your mesh is fits with it.
If you do custom shadow mesh then yeah it will need to move exactly with the rest of your mesh so it will need exactly same weighting
@snow crag you can add fake centering points that keep the dimension of a building the same. Or use autocenter 0 named property to disable that behaviour.
What building are you editing? If there are already many placed down then pretty much anything you do will mess them up
snow crag
One of the buildings we were working on fixing some missing geometry on the chimney and roof so people can't walk or fall thru anymore and we added distance lods. Seems like some of the buildings have moved a few feet and some changed height slightly
stuck oyster
Are these custom buildings?
snow crag
Yes
stuck oyster
And the auto entering reads all lods and centers the object accordingly. Basically models should be fully ready before they are placed on map
Or designed with autocenter off
snow crag
Good to know for the future. These buildings have been on the map for over a year but I wanted to optimize them with distance lods, fix the geometry and fire geometry etc
stuck oyster
Expect pain and misery.
snow crag
Almost feels not worth it 😂
idle umbra
@stuck oyster tq dude
stuck oyster
well broken badly made object is worse
snow crag
This is true
snow crag
@stuck oyster Sorry to bother you, what was the option to disable auto centering?
I have found that the boundingCenter is different for the two models, trying to see if there's a way I can set the bounding center based on the old array pos
stuck oyster
only if you create fake points around the model so that its bound center gets altered
there is wiki page for named properties
snow crag
Ok I will definitely look more into this before we decide to just move hundreds of buildings
Thank you for your help
ivory grove
How necessary are lower poly resolution LODS?
stuck oyster
very
woeful viper
4 on a scale of 0 to 6
jolly ermine
on a scale of 1-10 what would u rate this vehicle interms of difficulty to model
ah kinda hard to showcase it when u cant post pics
anyway, its the CV9040C
stuck oyster
its not really any more difficult than modeling anything else
just time consuming to make all small details in right scale
jolly ermine
how much time would it take for a experienced modeller?
stuck oyster
hard to say. its very broad subject
but also does it matter?
if you need internals then you make internals
quick terrace
@stuck oyster because he wants someone else to do that for him - https://discordapp.com/channels/105462288051380224/292271129303842817/766347414760063047
@jolly ermine my dude, ask you a3 modelling question if you want to, but again this channel is called #arma3_model for a reason - it is for people actually making stuff
silver zenith
I'd worry less about time and more about how much it would cost, wich would be a lot
jolly ermine
I see, thank you guys
quick terrace
at proper market level, somewhere inbetween 2000-3000 US, EU or UK monetary units
clever solar
@snow crag honestly I would just fix what you need to fix with your buildings, once you are done, get the location of one of them, move it where you need to, get the difference, then you can just run a script to move all of those objects where you need to move them.
All it is is numbers
Ive done something similar-ish. I expanded a terrain I was working on, and wanted to place what I already started at the north-east corner of the map, so I just figured the difference and adjusted all the object locations via script. I think Adanteh has something available for that.
Appologies if Im misunderstanding and spamming btw
keen prism
I gotta ask since documentation about creating bridges is pretty sparse. I have a bridge which consists of 2 different roads. Do I have to make the bridge an intersection or can a bridge contain 2 different roads ? the whole (LB, PB, LE, PE) thing seems pretty undocumented
stuck oyster
it cannot contain 2 different roads
keen prism
Thanks I'll make it an intersection then :)
jolly ermine
@quick terrace as in usd euro and pounds???????????????????????? thats actually insane
median bough
it is not.
the average hourly wage of a 3D artist (freelancer) is €60,- and a model, depending on the detail level, can easily consume +60h of work
most people seem to forget some basic variable in those calculations:
you are not paying somebody because he/she can do it in (fictional) 20h, you are paying the persons years to learn the skills to do it in 20h
silver zenith
stupid question
but when people say 60 an hour
you're paying them 60 for an hour of work right?
and not just let them make it and pay them on how much it took
silver zenith
yeah that makes sense
because without an estimate someone could take 3h of work for something that took 1
but I guess freelancers are a very varied group
quick terrace
@quick terrace as in usd euro and pounds???????????????????????? thats actually insane
@jolly ermine lol dude...50h min work multiplied by a min of 50/h
woeful viper
maybe we can settle for 50€/m ? 😄
quick terrace
maybe we can settle for 50€/m ? 😄
@woeful viper mm
woeful viper
no problem 0,05€/mm sounds good 😄
clever solar
Ill make incomplete models for 45/hr hmu
subtle bison
can anyone tell me how exactly the beacons work on vanilla vehicles? UserAction will enable it and trigger the light on/off, that part is easy. my problem is that i have no idea how to enable/disable the light from the Reflectors class
like, right now, if i don't enable the beacon and just enable the vehicle light .. my reflector class will also be enabled by default
while in vanilla vehicles, the beacons will not be on unless you actually use the useraction
ok, i have an idea now... let's try
ok, got it ... thanks folks :>
clever solar
np
silver zenith
you're welcome
subtle bison
CUP has a truck with a zu23 on the back. i noticed that its up/down angle is limited as soon as you point the barrel in direction of the driver cabin (can't shoot through it). can anyone tell me how that was done?
polar fiber
Same way it's done for FFV, limitsArray
polar fiber
should be in class Turrets>>class ####>>class TurnIn etc.
subtle bison
yeah, for some reason i couldnt find it in the ingame config browser. but after checking the unpacked config file directly i saw it right away
is there a way to get the current angle via script?
subtle bison
thanks
thorny coral
Yo I've got a model made but I need someone to add a pistol proxy to it and help me put it into arma, if you've got experience in this could you shoot me a DM and I'll get back to you 🙂
median bough
@thorny coral
yo, this will help you
https://forums.bohemia.net/forums/topic/207631-from-blender-to-arma-3-complete-process-tutorial/
Bohemia Interactive Forums
Hello, As I had many requests, I did this all-in-one tutorial I am sharing today. I hope it will be helpful to you. All important stages are available in videos description. I will try to make more tutorials in the future, so dont hesitate to guide me to parts of the videos th...
thorny coral
Yeah I'm looking to hire someone that already knows how to do it because I don't understand at all whats going on in that video, I've watched it but idk. Is is the same thing for a vest model? you do the same things?
and still doesn't help me know how to place and sort out the proxy's that I need
thorny coral
Anyone know what this means? Happens when I try to export the file as a .p3d file
  File "C:\Users\Jonat\AppData\Roaming\Blender Foundation\Blender\2.90\scripts\addons\ArmaToolbox\__init__.py", line 223, in execute
    exportMDL(self, filePtr, self.selectionOnly);
  File "C:\Users\Jonat\AppData\Roaming\Blender Foundation\Blender\2.90\scripts\addons\ArmaToolbox\..\ArmaToolbox\MDLexporter.py", line 511, in exportMDL
    export_lod(filePtr, obj, wm, idx)
  File "C:\Users\Jonat\AppData\Roaming\Blender Foundation\Blender\2.90\scripts\addons\ArmaToolbox\..\ArmaToolbox\MDLexporter.py", line 423, in export_lod
    writeFaces(filePtr, obj, mesh)
  File "C:\Users\Jonat\AppData\Roaming\Blender Foundation\Blender\2.90\scripts\addons\ArmaToolbox\..\ArmaToolbox\MDLexporter.py", line 111, in writeFaces
    raise RuntimeError("Model " + obj.name + " contains n-gons and cannot be exported")
RuntimeError: Model 0 contains n-gons and cannot be exported

location: <unknown location>:-1```Need to triangulate the model ctr-t in edit mode
median bough
contains n-gons and cannot be exported
google might have tuts on how to convert n-gons to tris
foggy finch
ngons are made of tris, just triangulate asset on/before exporting.
thorny coral
thx guys, also I've got it into object builder now but it's gone wonky does that matter? like it's not flat to the grid
thorny coral
foggy finch
wierd, did you apply scaling/transforms before you exported out of blender?
your vest is huge in scale in OB, each grid square in OB is 1m.
thorny coral
idk I've never worked with blender or anything I got the model made for me and I've just kept it now it came
median bough
this vest looks familiar....
foggy finch
might need to wait til someone who uses blender comes online, I use 3dsmax so cant help you with blender issues, but the non-application of scale prior to export seems to be a recurring thing when people new to modelling export to arma for the first time.
gray bronze
Ctrl-A to apply transforms (location, rotation etc) before export
thorny coral
anyone know how to get a character model in blender so I can scale it to the right size?
foggy finch
download the Arma 3 Samples sample data on steam, there is test_character folder in there.
gray bronze
That too
foggy finch
it also includes sample configs, which you will need to reference to get your asset in game.