#Vampire: The Masquerade - Bloodlines (DX9)
1 messages · Page 7 of 1
and that would literally be NONE of the remix stuff, just the actual playable they load over their VTMB
yeah im saying that as an example
you could keep the repo open, but have the OUTPUT be on moddb
yeah that's fair
because oh they only way to play the remaster mod is to download Remix and go on github?
yeah, it's more like your average person will go to the moddb and just play that
yes
someone else may want to look at the source and tinker with it a bit
yeah definitely agree
the other question is moddb release cadence, do we release after every map we remaster/retexture, or only towards the end?
not sure, i did create a moddb page, right now it's set up as solo, but i'd like to change it up to be open/reference back to everyone
or, multiple mods can also be started up depending on how people want to approach the remastering etc
Okay now I'm not sure what you're talking about, this is already how things work. What we have on our repo is a raw project essentially. Remix has an export function that will package everything for an end user that we would be distributing on ModDB.
Yeah, I'm saying a moddb page hosts the mod/structure that is required to install to be a CONSUMER of the product
That product is a branch that inherits from the base, the base being something anyone can clone down and build their own project from
OR
They can contribute to the branch which is taking the remaster further
I believe your haven one should be a standalone completely
as a POC
and then we can make a shared one, with the same assets if you want to
and use that as a this is the mod for the full game, that we will be building over time
this pretty much
I just think Safemilk deserves all the credit for the safehouse one

Sorry, again I'm confused by what you're saying. I feel like you're conflating two different things here.
An end user will get an exported version. Someone who wants to make their own VTMB Remix will need raw project files. These are not the same.
im making a diagram
yeah but I believe safemilk also means a more raw version in case someone else wants that
just as a baseline
Yeah, I got that. But then they started talking about end-users
this feels a lot more charged than i thought it was going to be
let me plot this out and maybe it will make more sense, me typing it isn't doing me any favors
ok ok sure

at that middle layer, technically there is nothing different between those two branches or clones of the base
the orange one is for example, THIS group's remaster
any of these things can but don't have to produce a playable
so the community uses catto's framework on their own, or contributes to the ongoing remaster branch that's built from it
So the problem I see with this model is that the base branch isn't a playable project suitable for an end user. I think there's value in having a raw source branch that's just texture flagging and basic settings so people can make their own projects, but I don't think it's something that should be distributed to the end user on its own.
jsut a bit - phone call
you dont NEED to output something
so like, this model still works if you remove the bottom middle block and say, ok there is no base version people can download and play

But yes, that fundamental thing I do agree with.
i mean the thing i see is, person A clones SOURCE, then changes nothing, puts up moddb page of remaster
so like... why not just fill that gap?
I'm not sure how much mileage it will get, but it requires very little work to set up a base source branch people can use so we might as well.
yeah if the mileage vs the effort ratio is way off then its not worth it
but basically at that point we are not filling a gap where users will now, if they just want to see the project as close to original as is with RTX lighting and nothing else, they cannot do that easily, maybe that's ok?
but it does seem like a use case that could be up and running sooner than the potentially multi year project to remaster all assets too
if its open source and someone can do it anyway, we should just do it and represent the use cases for the community and help them do that
i think?
i dont know
just some thoughts/feelings i've been having about it
Personally I'd like to limit splintering just because of the scope of the project.
Branches. At least initially. Like if we have a dozen different VTMB Remix projects with different teams that will have a lower chance of any of them making it to completion than a single centralized project.
I think remaining open source is important so people can make their own project or split off if we fail etc. But I feel that for now we would be better served trying to grow a single large team rather than enabling a bunch of a little ones to emerge.
IMO a Remix project is fundamentally different from, say, a texture pack, because it's a holistic overhaul of the game. You're not just swapping out individual models or textures, you're compiling a complete new look by adjusting lighting with asset replacement.
Yeah those are definitely valid points.
I guess to kind of summarize:
My vision is to make a cohesive overhaul that covers all of VTMB, made by a team who are coordinating to realize a collaborative aesthetic.
This is as opposed to having, say, "Safemilk's SM Haven" and "FF's Confession" etc.
The only real inflection point in the end I guess is if that middle bottom box exists or not which is where I think yours and my thinking diverges a bit.
Also yeah I don't envision a world in which there's a mod that's like... Safemilks haven etc
But I also didn't think anything I was saying was advocating for that amount of granularity in active projects
More advocating for community flexibility
Prior to the recent DXVK developments I would have been more open to the bottom middle existing, but since the recent updates have made every texture with an emissive map becomes primarily transparent by default I don't see a value in distributing that.
The point where we agree is on the root of the tree existing: a raw source project repo with textures flagged and basic settings for anyone who wants to start their own project from scratch.
I think that's another super valid point it definitely creates a lot of work. I guess the question is will that work need to get done regardless? Not if we assume we are remastering every texture. Which is the plan of course.
But I guess if we provide a cloneable framework where 90 percent of textures are broken as is then is it viable for other hobbyists? Definitely a lot of moving parts to the decision...
haven't fully read everything, but I do agree we shouldn't really be saying X's this map or Y's this map. I do believe we should have a credits bit tho, thanking everyone who did help in any way
Yeah, the sheer amount of work to make a Remix project is kinda why I just am not sure anyone other than our team (however many people it eventually expands to) will be making one.
I'm thinking of our project's scale on the megamod/TC side. Black Mesa/Skyblivion/Fallout: New California.
it is a joint effort to get the E2E game remix remastered
i guess there is the point you made earlier about mileage, vampire is more of a niche game, so the subsection of contributors is an even smaller slice of that smaller slice, so finding quality contribution for the project may be difficult to do at meaningful scale at any consistent level
I think the one advantage we have is that people who will be into VTM are more likely to be artsy types, haha. Similar to how many physics/math/computer nerds HL attracts in its modding community.
Oh, something else I remembered! In the Remix Toolkit you can set existing mods as dependencies if you want to make an override. So someone could just do that with our mod.
Like if they wanted to make Vampire: Toon Masquerade where everything has cel-shaded textures they could easily do that.


Can someone pin that video so we don't lose it?
anyone know what sort of noise patterns this would be? (using InstaMat)

I will make that ceiling 
In my defense it did look a lot better on InstaMat 

You know that part in the tutorial where he makes the weird brain texture on accident? Copy that and then invert the mask.
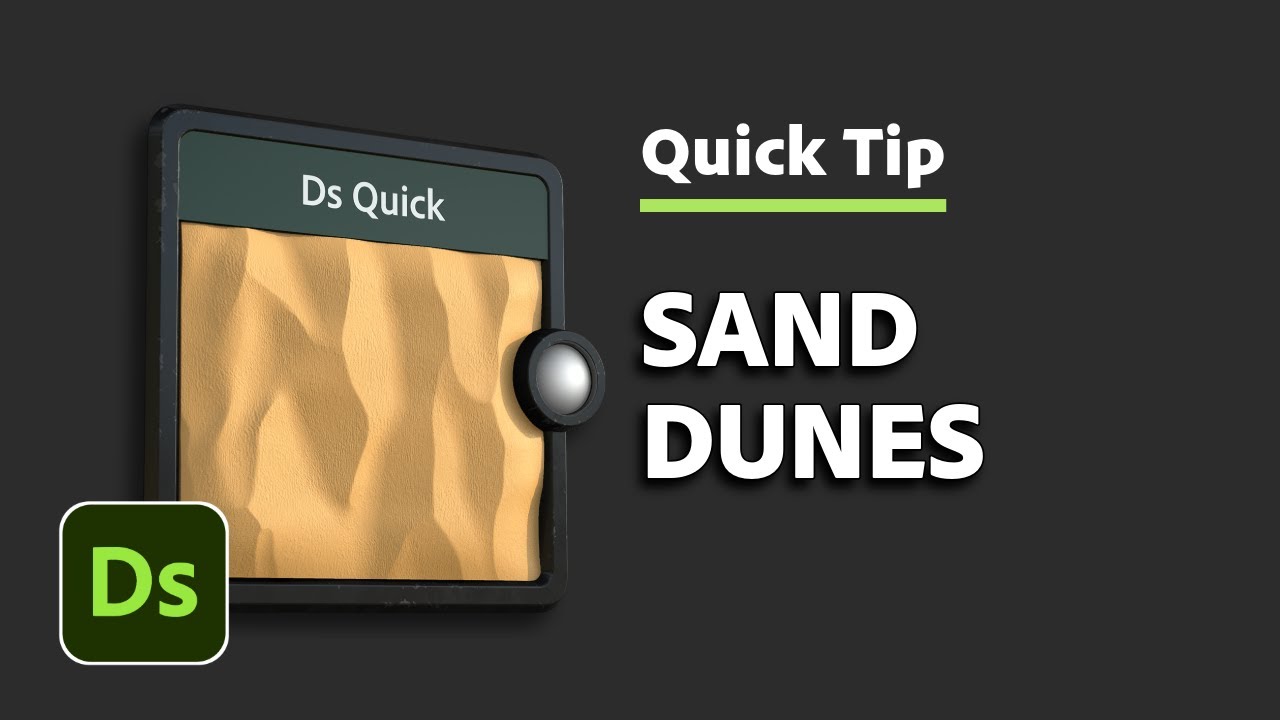
In this video we're using Substance 3D Designer to make sand and dunes heightmaps.
You can download the result files here: https://substance3d.adobe.com/tutorials/courses/Designer-Quicktips
Voice and video by Martin Schmitter.
Subscribe to Adobe Substance 3D: https://adobe.ly/3Um7q3t
Learn more Adobe Substance 3D: https://adobe.ly/3NW3...
this is for substance designer
i dont know what nodes you have access to in there
but i bet you could use some of the same principles
and get some sharper peaks etc
though this does rely on a node i haven't seen in previous versions of substance d, but maybe theres a noise generator in there than can get similar results?
I think so the tutorial guy was mentioning it a lot
and the process boils down to blending a bunch of stuff together (for my simple brain )
Not to butt in but is there any additional issues you guys are seeing as a general source engine thing other than the sudden jitter when the sky disappars / reappars on the vis?
I think the closest starting point is Voronoi Noise, maybe Slope Blur it or blend it with a cloud noise texture.
Just want to see wher to focus the last of my efforts
All of the door frames don't render properly, can't remember the term for what those are.
Brushes, that's the term
the disappearing camera, and some of the doorframes conistently rendering poorly are the biggest open item that seems to be plaguing our version of source, other than studiomdl compiler just not working anymore which is a WHOLE different issue outside of remix issues
Get me a pic of the doorframe issue
as for the disappearing camera and the vis
I can look into it
but this is more likely a surce engine patch needed
fingers crossed tho
Oh, and the portal thing for the TVs.
TV portals work, right?
Oh, is that fixed now?
I had footage of them working did it get broken?
I can check quickly
the TV works
but I loaded a save while next to it and it has no audio 😂
works fine


Oh yeah, we still need to figure whatever that bug is that causes assets to not load properly when you load a save in a map.
@broken scaffold Brush issue, plus a new oddity.


Are those things in the skybox?
check the scale when you arei nthose positions

Yeah and the skybox looks corre4ct
Also it's an interior location
I was just thinking maybe the skybox like
mesh is seeping in
and it's causing a Z issue
but that doesnt' make sense here
especially not with a body like that
any cutscenes
is there a TV screen that leads here?
There's a CCTV system on the second floor
do those monitors point to that room at any point?
Depends on how you define "point to". The CCTV camera position is in a room on the second floor.
Well basically is that room visible from the CCTV
Then no
I don't know if this helps, but if I go back out of the hallway area the objects stop showing through the walls. That might just be object culling, though.
inital test for the ceiling texture

looked a bit better on instamat

tbf this one is for skyline appartments it should look nice, not scuffed
nice start! I can't help but feel like it might not be 'tiling' enough? like the pattern is very large, i would increase the tiling amount and make those details more numerous and smaller, also it kind of looks... inside out in vampire, from what your albedo map is showing there, or maybe it's just an odd angle?
I believe I haven't gotten the height right either
I am aiming for this type of texture, but maybe that's the wrong ceiling, since I don't know what american ceiling are like
maybe I need some research. but any feedback is good!
may be the angle yes
yeah on the albedo it looks like the they are divots going in, but in game it looks like they are popping out toward me
could be just flipping the green channel in the normal map
so maybe a directx vs opengl normal map value thing?
I did set it to directX even on instaMat
I am just curious as to what maps to what
1 sec
so after ingestion I got the Basecolor.a.rtex.dds, height.h.rtex.dds and Normal.n.rtex.dds
Basecolor.a.rtex.dds -> Base Material / Albedo
Normal.n.rtex.dds -> Base Material / Normal map
height.h.rtex.dds -> Displacement / Height Map
this is a question ⬆️
to be fair also, the way remix does heightmaps is through recession, so white is your highest point and anything after that goes INWARD
so its possible that could also be affecting it
some rendering engines do gray as the middle point and do inset and outset
but remix does inward only currently
oh I see
oh my inwards displacement is set to 0.01 because 1 was too much and that seemed best
should I minus it?
i think that's probably a fine value!
but im saying the map itself might be pushing things in you don't expect them too, it might not be
would you mind putting your non ingested normal map in here real quick?
i want to see where the green is at 😄
ah sure
my bad, I went for a huge break and got side tracked
I have changed things up now tho, this is what I got
It looks like a hive pattern now 


these look inset to me in an opengl way
in open gl green is the 'top' of a surface
in directx green is the bottom
so if you ingest as opengl it should look the same here, or you could flip the green channel and ingest as directx
oh I see
i just work in opengl, since it's the more common format and remix processes it
so probably something I need to figure out
when you ingest you could just set it to normal map in the top section and try it out and see if it looks more correct
if you ingest this as directx those little dots will be popping out, maybe thats what you are going for though?

ahh, i feel like you have your surfaces inverted
I am aiming for something like this
yeah, I mean I have got it quite wrong atm
I am trying to figure out whether I should make it taller per say and then remove a bunch so it only has tiny bits popping out
or if I should just add bits to pop out, except I haven't figured out how to do the latter
bear with me
to me its almost the same as making little mountain ranges
yes... except I have no clue how to make little mountain ranges
i don't see it as bearing with you lol, i feel like its just, giving each other feedback etc!
I am guessing adding some pattern that looks like it as multiply or maybe adding
thanks 
I mean I knew nothing yesterday and look at me making textures
yeah you are picking this up super quick its nuts
I didn't realize OpenGL was the norm, I wonder if that's what InstaMAT exports Normals as by default.
I might have to re-export some textures when I get home.
thanks! @neat spindle picked it up super quick I aim to be as good as he is
I did set my height map on InstaMat to DirectX

yeah you guys just suddenly are making textures out of nowhere its wild
im not sure as far as instamat goes i haven't used it so im not certain on output
freedoms flame knows better there
also

i think this is more of what you are looking for?
Free software tends to have that effect, haha.
woah that's beautiful
my old version of substance designer doesn't have voronoi so i mixed some stuff to make something similar

just a cells noise blurred at different amounts and blended back together and then a little black and white spots noise
i think this will get you a shape closer to that reference you posted
i think you're super super close with what you have
Using a Levels node to crush out the lower values should help achieve the effect of just having peaks too.
yeah! levels nodes are... the best
you can also blur results too, so you can really get in there and add or remove detail when needed etc
procedural workflows are funnn
thanks, just trying to process what I am reading here and trying to replicate what's above
I used chells and blended with clouds
I think the step you were missing was the Invert.
oh invert


going to try this, see if I can get these little pertruding things
but it does look funky
Like Safemilk said, levels nodes are your friend. You can adjust where your midpoints and peaks are if it's too harsh.

yes, basically this is just mixing more things in
same base
so im just pushing values up and down
on top of the base that i have
if i wanted to take it further, i might mask out the higher frequency noise from the peaks to smooth them out
i also use some of this + other grunge maps to do roughness variation
and i convert the height map to a normal map and adjust it's values as well
i think the new version of substance designer just comes with voronoi noise which would make my life easier, but the same effects can be built!
damn that looks amzing
just a few nodes! you got this!
can you screenshot the diagam closer please?
sure!
thanks!
but the fact you made that in like no time
amazing, I am always amazed by people that have mastered a skill


oh dude i'm DOGWATER at material making, the stuff they are doing on the half life 2 team is the REAL stuff, can't wait for everyone else to see what the material makes have done, they are dang heroes
U ARE
also, to loop everything around to the discussion freedom and i were having the other day
wait decent sounds like an insult in this case
you are great at this don't undersell yourself

this is the 2 worflows coming together!

blender model to texture bake
then pulled it into substance designer
and im combining it with the wallpaper texture you've already seen from earlier

woah, amazing

so id have to build the wood material and then mix it in using that color mask i made
this way, we don't have to spend hours trying to recereate complex shapes in the procedural tool
i dont know if you can do it in your guys tool you've been using, but any graph i make can be used as it's own node, so if i make a wood graph, i can bring it in wholesale as it's own node to add into this one
so you can essentially build a library of nodes that make variations
like how freedom has the stone texture, if he makes the lower wood texture, he could keep them separate and combine them as he sees fit
Yeah, you can add materials to a package and use them as nodes.
Different lightings, look at what I have got 😎 and criticise my diagram


going to import to game now
still pretty crappy compared to yours @amber atlas
but getting there
oh you're almost there!
just going to see how it looks in game before I make any more changes
at that point i think you're just using levels nodes to dial it in
I just plopped them in, I am pretty sure I am barely using them
the process is just slow, takes a good 3 minutes or so to export the pngs, ingest them and then add them on the remix editor
"slow"
yeah is rough, since its not whole engine like unity or what have you, i wouldn't mind if they had some kind of automation, where you could export over your files and it would auto reingest, but it can't ingest if the folder is the same as the destination etc
So if you leave the Remix Toolkit open it'll keep your textures in the ingestion queue. Since they get exported with the same file name(s) from InstaMAT you can quickly iterate just by clicking "Add to Queue" again.
ah I see that is helpful tbf
welp, it's a little crappy atm
I am going to have food, I'll brb
nice, yeah i think it's just a matter of using your levels nodes and you should be good
is that so?
ah still looks awful, I am not sure what I am meant to do with the levels, tried to dial it in, but I honestly don't know what I am trying to go towards
I would shift your midpoints and peaks down.
So take the white and gray and slide them toward the black.
oh
that worked
a bit
but it's still getting overly softened
I wonder if I need more colour towards the top
either that or ray tracing is oversoftening it
Try the opposite then. Reset your gray and white and then slide your black slider toward white. That will crush out the lows into a flat surface while preserving the geometry of your peaks.
Oh, I think I know what you mean, actually. I ran into this with my brick texture too. Old-school textures have ambient occlusion maps that fake shadows in the recesses, but with RT lighting you don't have that. You're used to textures essentially being oversharpened.
oh
You'll notice that at more oblique angles (further from the light, basically) you'll see more of the shadows popping up.
#1095817237631348736 message
You can see it here, compare the top left to the right side closer to the light.
hum I see
Are you just using a solid colour to make your Base Color?
No worries. If you're using a Gradient Map, maybe darken your low points a bit more to add contrast.
@left grove @neat spindle I think I just got the view model guns working
a couple of setttings, I'll post them here so you can update them on the github!
or at least test them


testing it with all the guns
but i think it's working
only problem though...
wait, might not be a problem... might work just fine haha
yeah i think it might be ok, please test as well
that just means the muzzle flash lights are the last real problem with the combat i think? other than maybe some particle texture tagging i'm guessing?
The feed animation effects are important too. The ultra cheese strategy is to crank Brawling and then drain everyone dry.
yeah that light on feeding!
yeah
freenzy is kind of weird too I believe
but feeding lighting is deffo off (overly bright)
aug scope might be an issue too
the graphic isn't there but the zoom works
no 😦 i was about to hop into a meeting for work work
I was almost ready to go tackle the texture again, but I may go and make those rtx.config changes and get those commited
no worries!
I'll have a test
the aug looks kind of funky when moving though haha
I may also document the process of adding textures and stuff
When did viewmodels get broken? The only issue with guns I remember was the muzzle flash thing.
can't detail much the material/texture creating side of things but I can definitely link the video
There's already full documentation on that in Nvidia's pages
oh maybe you had them fixed and i missed that?
Or they were never working and I just forgot about it, haha. It's been a long time since I've done anything other than mess with lighting and textures.


left is how they have been
with those settings they are now rendering in the correct FOV on the other rendering plane in front of everything
so no clipping through walls and no elongation
due to high fov of regular gameplay camera compared to low fov of weapon space camera from source
Ah, okay, I guess I just never noticed that.
sick
Oh I was wondering what those blobs on the normal map were for. It looks incredible 🙌🏻💙
Thanks! I'm not quite happy with them just yet, but I'm glad it was clear what they were, I wasn't sure if they looked like what I wanted them too haha! Lots left to do on this, the wood needs A LOT of work...
They look perfect to me. The screenshot you posted looked so realistic it's crazy

Deciphering the geometry on the interior pillars was a massive pain in the ass, but it's done!
sorry to disturb y'all , i was wondering if someone could help me set up the rtx remix , i followed the instructions on git hub but nothing work
I can try to help you
forgot to update: But Galaad was under the assumption that it was fully working and wanted to do a playthrough with RTX. Also I can update the repo to include some instructions on how to add the launch args when using GOG
That reminds me @left grove , @neat spindle and @amber atlas I'm gonna send you the last build of the Path Traced Skybox stuff. It includes config options for each different variation. I think for VTMB you guys can get away with using the source engine algorithm but with a fixed scale of 16, since that's what most of your maps seemed to be, and that'll improve the performance a little. The algo isn't SO costly but it's also good to make sure we're running our best!
awesome sounds good
also, sorry i've been awol
im in a weird... like... i guess a race against the rest of my company?
im trying to do a bunch of content before they outsource it to students lol
im like no no dont worry we dont need to do that
see its already done!?!
so i've been getting slammed
That sounds very unsustainable
yeah, i get where they are coming from, they want to accelerate and intern some students who are about to graduate
not a bad idea one one hand
but the amount of training and catchup they'd need is... not negligible
i do have a vtmb asset in the works
but hl2 needs a turn i have to finish up an asset for that project
As someone trying to self-train and catch up for this project I feel that, haha.
ive got a lot of plates spinnin'
This wood texture for the paneling has been giving me hell for the last week
yeah, but you are learning so fast and are already kicking ass, honestly i'd rather outsource to you than college students haha
oh dude wood paneling is insane, its one of the hardest imo
getting the grain patterns right?!
ugh
Unintentionally picked like the hardest textures to make first, lol.
haha its all ez pz after these ones then
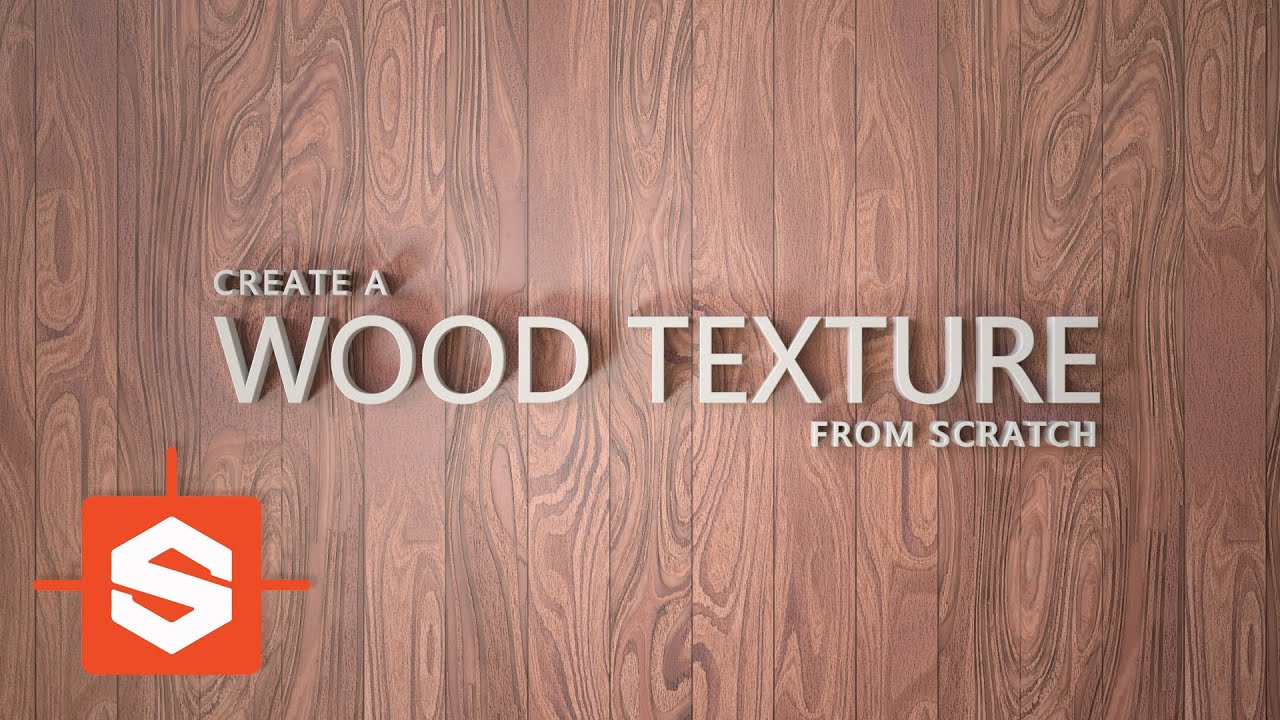
Learn one of the many techniques used to create wood patterns in Substance Designer. We'll work on creating that swirly knotted pattern commonly found in wooden materials.
Get the finished graph here: https://gumroad.com/l/yuypk
Chapters
0:00 - Introduction
1:44 - Creating the iconic wooden knots
10:38 - Adding natural distortion
16:25 - Add f...
i like this one a lot
Should probably take a break and do some floors or something so I don't feel like I'm just slamming against a brick wall
im sure it can be adapted to the program you have been using
haha or you could make a brick wall!
dont slam into it though
Oh, actually, while I have you here what is your process for baking displacement maps from Blender? I followed some tutorial but it's blurred everything and came out all melty, as well as having a bevel along the outside edge.
hmm i usually bake them in toolbag 4
i find blenders baking to be kind of limiting
another tool you might try is handplane

Gumroad
Handplane is now a full baking tool. Check out our website at www.handplane3d.com 2/5/2017 - v 0.9.4*Fixed curvature maps not using smooth high res normals.*Added an option to automatically normalize curvature maps by computing the max curvature generated.*Added hotkeys: ctrl+o, ctrl-s, ctrl-shift-s, ctrl-n, alt-f4, ctrl-b (bake)*Added Thickness...
you can set up multiple meshes and groups and bake multiple mesh types including material id maps
this was ALL i used until substance painter and toolbag4 came out
before that it was xNormal, but I wasn't as big of a fan of the interface
this is abandonware unfortunately, but it got to a pretty solid place
I wonder if there's maybe some sort of Mesh baking tools in InstaMAT itself. It's such a new program that there's hardly any documentation on it online.
I know it has some mesh-based texturing stuff.
that would be nice, i dont think designer has that at all, only painter
so instaMAT would have a leg up
Settings for the new 3D Skybox DLL

Figured out what was causing the weird rasterized surfaces! In interiors with no skybox the Sky Auto-Detect was taking the first textures that got loaded and treating them like sky. Switching to "By Camera Position and Depth Flags" fixes that.
You've just reminded me I need to put the sky validity checks I had before for VTMB as well
No problem
I am also away on a work trip but haven't gotten much further with making textures myself. I still intend to push some updates to the repo, just have those changes locally for now
hello hello, I am starting my weekend in about 1 hour. I intend to work more on this this weekend. I shall add the latest finds both from @amber atlas that help with the guns and @neat spindle's find for the popping out of textures.
I wanted to give a nod to @neat spindle's find because it was something that was plaguing me for a while and I cannot stress how big of a find and fix this is 
not sure if anyone wants to pair on trying to get some more textures working, I still have a lot to learn and I still haven't been able to get that test ceiling texture to work 
Noice! I might have some time tomorrow to chill in a call and troubleshoot the ceiling texture working with you, but freedom knows that program wayyt better than me haha
that would be great! I'll also update our docs to include guides on how to make textures and some resources
I've been getting slammed by work lately so it has been hard to get to this and hl2 stuff 😦
I have a few things halfway done and they are just floating around in my brain haha
This game runs on one of the oldest versions of source engine
A pre hl2 release version no less!
Pretty crazy: https://developer.valvesoftware.com/wiki/Source_2004
Half of our discussions in here are how to figure out wtf to do about model compiling limitations 😦
Any animated props and characters
Bug limitation we aren't sure how to handle yet
RTX Remix would probably work alot better if someone ported it to Source 2013 MP: https://developer.valvesoftware.com/wiki/Source_2013 or Strata Source (Pipe Dream) : https://developer.valvesoftware.com/wiki/Strata_Source
I believe the game is completly closed source and that would mean we couldn't port it
I'd like to be wrong here, but I think that's the truth sadly
yeah that's a bummer

ModDB
This is an unofficial SDK for Vampire: The Masquerade - Bloodlines by Psycho-A (and Fire64 and Behar and Wesp5).
we do have this, you can optionally install it with the unofficial patch
oh sorry I didn't look at the pins thank you
no all good
we have the repo, it should help you get it up and running, it's still far from perfect
I also have come across someone else that had it on GOG and I should update the repo to cater for those people. We all just happened to have it on steam
and feel free to contribute however you can
Oh that's nice to know that there are differences between versions since I do have the gog version myself
I think the only difference is that the GOG version comes with the Unofficial Patch already installed
I understood that to be the case as well
Not only that but Activision still holds the rights to bl1 and they go after people who do anything related to it other than modding, I could see them classifying an engine port and outside the bounds as it is technically modifying the binary itself etc. they love doing that.
I don't believe there are big differences, it's just how to get the launch args working
and well it comes with unofficial patch preinstalled
As much as I'd love to chat to Activision about Bloodlines, I'd rather it not be some legal battle
Yeah I think it's worth sticking to the modding path, it's the most open and safe vector
Plus the amount of time and resources needed to port forward would be years of dev time and people with know how we simply don't have access to
Project Vaulderie flashbacks
😦 yeah, heartbreaking, the work was amazing
I am getting this for some reason, trying to figure out why
unless this is intended and we just need to replace the textures here or set things as decals
it seems to only render the skybox for me
I am using the "latest" d3d9.dll that King David sent me a few days ago
Don't set things as decals unless they're actually decals, that's a bandaid fix that will cause more issues down the line.
The apartment is an interior that has a skybox, so that might be part of the problem.
yeah I don't want to just set random stuff as decals, was just a question rather than a "I am about to do it"
it seems so, I am just curious as to what is different between us if it fixed your issues on yours
it is possible I have other changes I am not aware of right now
I'll have to check that specific map, it just fixed the issue in interiors that didn't have skyboxes for me.
got any example of where, I might be able to go quickly check it out
will try the skyline appartments
Confession is still my test map, but I checked the Empire Arms too and didn't see any issues.
I'll give that a test
skyline was pretty much fine too
Confession seems fine too, from walking around
but any other map with skybox suffers a lot
Hmm, maybe @broken scaffold will have some insight on what Source quirks might be causing this.
perhaps
Thanks, I'll have to sleep for a bit soon, but I'll be here all weekend so ping me if needed
Downtown LA appears fine too, it's just Santa Monica that goes a bit funky with only rendering the skybox
hello
basically this
Changing Sky tunning > Sky Auto-Detect from By Camera Position to By Camera Position and Depth seems to cause that, when using just By Camera Position We get that funky bit where it changes to rasterization
We've been having issues with some textures being defaulted to rasterization in interiors with no skybox, and setting the auto-detect to By Camera and Depth Flags fixed it (presumably they were being flagged as sky textures because they loaded earliest), but now there are issues in interiors that actually have skyboxes.
Have you tried messing around with the minimum z to see if it goes away
Really just an exploratory suggestion, not home yet
I can test that
now I am getting different behaviour, because I teleported in with the console it was like normal, only with the bit on the steps where it changes back to rasterization
going to load back the save from when I boot the game
Interesting
So only when you pass the area portal in there does it actually break?
from my understanding it's the transition to showing the skybox
I got video evidence
the view model also shows up and disappears but the transition is what causes that weird texture pop out and in
it's almost as if as soon as it starts rendering the skybox it stops rendering everything else and then resumes rendering everything else, doesn't happen when we leave a sky box area however
that's the intriguing part
only when moving to a place in the map that has a skybox
The camera is definitely locking your sky cam as the main cam
I don't know why it'd make that mistake only when it re-enables
The sky usually always renders first
It's possible the DRAW SKY bool that it would usually return needs to consistently return true to prevent it from crying
Interesting, I'll be back in 8 hours. I can try to do some more investigation
yo @left grove sry toping i see u typed opengoal
does RTX or will RTX support any Jak series?
LMAO
no I was referencing their way of tracking things done in an easy to diggest way
you really dug that one up, that was only for how they do the whole lines decompiled vs lines to decompile. We have textures we need to redo by hand here
I have no idea to that question, I'd guess not if it's not using an older version of DirectX. Probably one for their discord
nah i didnt rly dig anything up i just searched in discord for OpenGOAL
that is fair
ye i heard any openGL is no go but i thought they updated something recently
but word
ty
No problem
Well the Jak ports are later OpenGL so the odds go from slim to completely nonexistent.
I replied to a few of the github issues since they all seemed to have a follow up question to check with the latest remix runtime
I saw the same thing. Thankfully two of the three issues that got said reply were actually fixed. The other, well, fixed in one case and not the other 💀
I only got them for very specific issues so I'm assuming they only asked if they actually attempted to resolve said issue.
reminded me I gotta make the PR finally
I'll review it if you'd like even if I have no idea what I am reading
I do have a commit ready for the vtmb remix repo, but with testing that stuff I ended up jumbling some of my installs a bit
If anyone would have a moment to double check the delta mode to see if it's still flickering I'd appreciate it
I think I reincorporated the fix I did specifically for VTMB in a much broader way
just send me a DM
@oak forge and @left grove https://github.com/NVIDIAGameWorks/dxvk-remix/pull/73
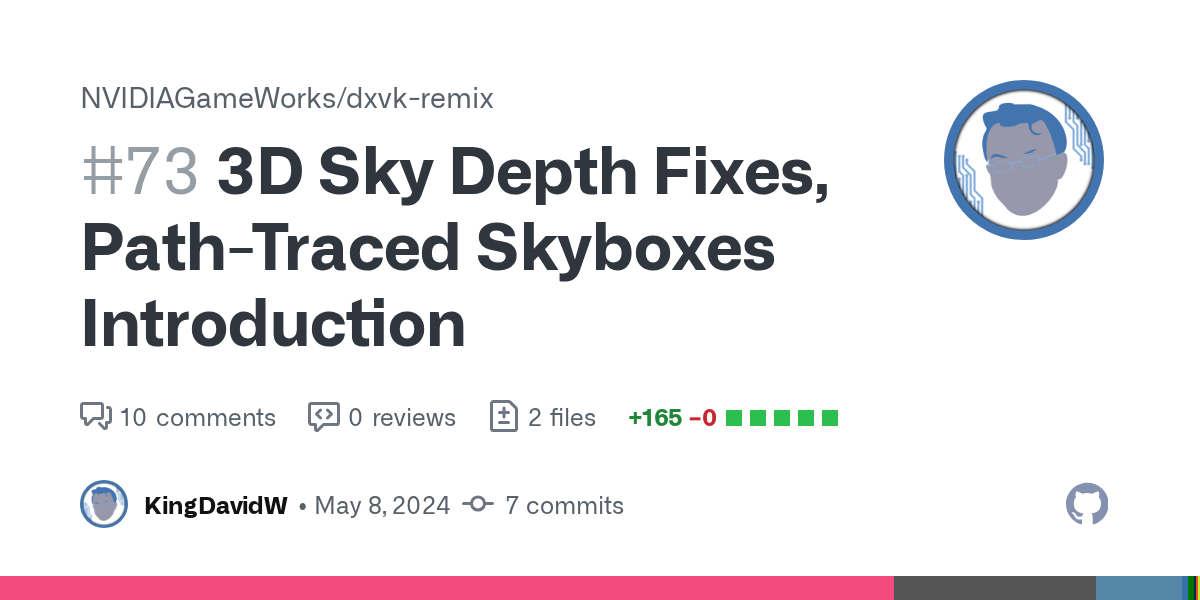
GitHub
I am finally creating this PR so I can have people take a look and see if I'm screwing up the general implementation.
Basics
The goal was firstly to fix depth not being shared for Skyboxes in ...
i'll keep chugging away at stuff but at least got the PR up for feedback
Ooh nice hope that goes through, that will be big for all source games


Hello LA, you're up way past your bedtime.
been getting slammed at work with all kinds of weird stuff + hl2 remix work as well 😄
but trying to catch up a bit here!
Very nice! it's looking real good
On good news for me maybe, I got a new motherboard and it came with 1 month of creative cloud, so I may carry on with making textures
hey, do you guys have a list of models that need doing or access to any of your files available, or is all of that closed access atm?
So far I'm the only one doing the model replacement, and I have an internal list and folder structure I'm filling out. But all that is just me on my local hard drive (backed up on Gdrive)
I can try to help on having a publicly visible list that tracks what has been worked on and what can/should be worked on
Why what's up?
There should be spreadsheets for tracking models and textures linked in our documentation on GitHub.
was just curious honestly, big fan of this game in particular and wanted to see how it was coming along 🙂
very slowly 😅
Right now I'm just working through the Santa Monica safe house map and doing all of the prop model replacements first
Then after that I'm going to do the materials and textures for that same map
And that'll be sort of a proof of concept of a small section of the game
I've got almost all the props replaced in that map currently and a few textures as well
Characters are still the big limiting factor. I have a Jeanette remodel that I've made but I can't inject it because of the way remix doesn't pull entire bone hierarchies
I honestly may need someone to guide me a bit through the entire process of changing a texture so it works well when replacing it in game, my ceiling still looks awful 😂
we could feature request 
I've been doing something similar with Confession, albeit in reverse order. Lighting and textures first, then I'll figure out models. I don't have much experience so I'm having to learn as I go, so it's been extremely slow progress.
yeah, I am stuck at a single texture replacement, still haven't fully cracked that...
would be good if we did like a workshop or something to get us all some experience with the bits we are struggling with
but feel bad as it'd mostly be us pestering @amber atlas
I think I'm going to have to redo that paneling model... again. Apparently you can't have sharp edges in heightmaps because how it works is by checking for changes in edge slope, that's why it came out all melty.
Also been spending a lot of time helping King David test out his skybox fixes. He's done great work on that front.
I guess for me, I'm just like... goin'... haha, so we are all interested in the same stuff, and I'm always happy to drop tutorials and talk shop and game dev/art
I just need to streamline a workflow, once that is done I can regularly work on things, but in the mean time I am still slowly learning and I can't seem to even get a simple texture replacement in
I thought I saw you had some shots with the ceiling replaced?
Or am I mis remembering?
the stucco/popcorn ceiling
I did, but I wasn't happy with the result
ohhhh I thought you meant the ingestion process
you mean the overall process
gothcha
yeah... at least how to polish it and all
im sure most of it transfers to the program you are using

Part2: https://youtu.be/kbDwucgHdsg
Learn how to create material renders: https://youtu.be/T_jIQwPSP40
Follow us to stay up-to-date:
https://linktr.ee/fasttrackstudio
Make sure to join our discord!
https://discord.gg/kAsVU4e47h
2 parter i think
I mean I do have 1 month of free creative cloud
he has a version without vertical leaks
thanks Asus
lol
last I remember I was tweaking my levels, but no clue how to do that properly
@amber atlas Any chance you'd be willing to have a call at some point to work through these heightmap issues I've been having? I keep trying to search for how to do it and I feel like I just don't know the right words to get the info I need, it's very frustrating.
I'd love to sit in and listen tbf
I've hit a brick wall here (pun intended)
I should be around all of this weekend, it's just timezones for us
yeah i should be good tomorrow in the morning/mid morning on my end, AZ time (11:02) am right now for ref
the height mapping stuff is pretty interesting, each engine/shader approach has some key differences
it's 7 pm for the UK 
the major one i think is throwing you off is 'mid point'
that's where it calculates from, so if your mid point is gray, white comes UP and out, and black goes down and in
from what i can tell, rtx remix is a white mid point
meaning it only goes down/in
so white would be your highest point and gray down to black would be how stuff divots inward
i also think they are calculating it in like a very small measurement space so often times you'll want to put in values like .002 etc
I've got all that figured out, it's just that these points where I have sharp edges in my heightmap end up looking all melted when I import it.

It happens anywhere there's a sharp line between two heights, say a box of black next to white
hmm yeah im not getting those results on my end... at least as far as i remember
let me look real close at my hallway wall and see
could be down to a remix setting

these small ridges i expect
because i have heightmap in the wood grain
when i do the final pass, the wood grain will be directional to the planks and be less ridgelike
but it looks correct to me i think
mind posting your height map here?

the bake at least is clean AF
definitely no ridges on this
have you tried just slotting this in and seeing the result?
I can give it a shot, one sec. The snip above is from the preview window of InstaMAT
But it also shows up like that in-game
oh in instamat are you importing it and setting it as a non sRGB texture?
not sure if instamat cares
I drop it in and then have a conversion node to grayscale.
@broken scaffold After messing with some settings on your sky features, I've also noticed that all the flickering during cutscenes seems to be just gone...
That's great
Still having crazy issues with my setup whenever I try to upgrade my remix toolkit, king_david was trying to help me but we dead-ended, so I'm asking in general.
If the answer is that I have to remake the project from scratch, I guess that's not so bad because I'm still off in my own little world, and I should get on the Catto framework.
So all the hashes are the same etc.

strauss note replaced
doing a test with the pad, would retexture from scratch
but for now i just did a screengrab of the pad ui and modeled it out from that
to see what it would feel like
i dont know if this sheet model shows up anywhere else in the game off the top of my head
if it does... i could just make it a blank pad the way the sheet was
Ah I see, I could do captures
And have them catalogued. if you still have all your source textures you should be able to add them to the repo
And reproduce the changes
Yeah I'm mostly just wanting to align hashes in general
If you provide that definitive framework anyone in the future could decide to remaster a mod for vtmb and they could fit it together with the vase remaster hashes
Which would be sick
Ok I'll work on that
I was looking at the repo but I don't recall if you had captures up yet!
Would be cool to be able to push captures back and just build up a good catalogue of universal captures etc
no I don't, I was thinking of a good way to do them
I have a naming scheme and everything, it's a shame they all have to sit on the same folder, or has that changed?
just finishing up some tidying up, I can get started on something like that
the only "issue" we have here is we'll have captures for just Vanilla Unnoficial patch, for the plus patch we'd need to recapture, but that's an issue for later
Well that was my whole thing from earlier
The test I want to do is capture from plus patch, put out a test mod with asset replacements. Load it into a non plus patch and see if it works.
Then add plus patch back in and see if that inherits any plus patch changes as well
Plus patch changes will probably be compatible I think, since the plus patch mostly changes brush work and then only model positions and texture changes. New models and maps would be their own hashes
That's my theory
If that holds true it would be double the work to remaster separately.
But there's a chance that it could actually cut down on work and we'd get plus patch setup to remaster for the future
Interesting
That's a good theory, I could help test that but for now I may just start all the captures
at least get most captures done for Santa Monica
the rest I can do a bit later
is it a lot of work to port your haven work onto the new captures?
I'll probably have to do it either way
Since all that is done on my crappy old first test project
So I def want to do it maximum after haven proof of concept
sure
I have looked at it and we do have a few captures on there already, mostly for the tutorial. I can try to do all of the ones that are relevant for now, and maybe even a bit around Santa Monica
I think the patch plus test is probably step one. Before doing a bunch of captures etc
ok
Trying to strategize how to approach that
yeah, I can deffinitely capture both, so do a vanilla capture and a plus patch capture
Could be a throwaway project that changes 2 things and just confirms what happens on vanilla vs patch plus
Well my concern is that the hashes will be different, but I guess it's totally possible they'd stay the same
I need to take another look at patch plus folder and see what's actually replaced
Vs what's new
I believe what's the same will remain the same
but if they change then they hashes will be different
Aren't captures pretty large? I'm not sure of the practicality of uploading all the captures needed to cover the entire game. I'm pretty sure hashes don't change with different captures, that's why when you take different captures that overlap objects still have the same ID.
at least that's the logical way I can see it work. With the captures then it'd just link the correct texture files
Captures themselves aren't very large couple hundres maybe thousands of KB
it's the assets that get large
these guys here

Yeah, I was including the assets since captures are unusable without assets.
Yeah if hashes are project set regardless of captures then no need to upload any to the repo
they are all only a few KB each, the only thing is there thousands of them
Hmm
I have a few captures and it's 380MB
as it needs a lot of data to go along with those captures
ah a chunk of that is the thumbnails for each capture
and the remaining stuff is the Textures folder
Yeah, it's essentially decompiling everything in the scene out of the efficient compressed packs the game normally uses. Bloats up fast.
yeah, I do hope it's efficient in the sense that the more captures we have the more will share the same textures, and won't resave the same ones
When does it calculate the hashes for everything?
Since everything is hashed I'm pretty sure it doesn't duplicate.
Just on first launch? Or on mod file creation?
If I had to guess it's probably generated based on file structure in the game? The asset gets pulled the same way every time.
I don't know how else you would get a consistent hash.
well, I wouldn't mind to capture everything in the game myself
for the sake of consistency
since I still need to learn a lot about material creation
(definitely not me procrastinating it even more)
Just from my experience with Confession, I think it's best to create captures as you're actively working on a scene, so that way you know what angles you need. Something that came up a lot for me was that the game has really aggressive distance culling for detail objects so I had to take more captures than I expected.
yeah that's what I am wondering, I took what one of the tutorial videos said and just ran with it, which is to take a few from a few angles and use that
and one from out of bounds (in case it's needed)
it would be cool if we could merge these captures, like have 3 or 4 and that way you could see the entire area in one go
but I believe if I do a first pass a lot of the hashes will be assigned, that should help with consistency at least, if you need a different angle that should retain the same hashes
or so I'd hope
Yeah, I followed the tutorial initially and then realized all my captures were unusable because of distance culling, haha
yhup... that's what screwed me over in mutiple occasions
is that an option?

oh its a map i made to start putting all assets in it
amazing
the option seems to help with the muzzleflash actual light, but there is still some ghosting on the volumetric effects
its not perfect, but its much more bearable
not sure what other knock on effects that might have though, so it will be good to test
I still need to do a lot of stuff, I have been busy with life stuff. As well as a family member not doing so well, so apologies for being less active
oh no worries at all, i just leave this stuff here for you!
thanks
anytime i find some other weird thing or option out 😄
other than getting captures of Santa Monica for now, is there anything else you'd need from me?
you have been doing great lately, you keep finding all of these obscure options that actually do a lot
no, im just trucking along, more stuff on the way, but its slow going because of work etc
haha im doing that thing i should have been doing where i read the options tooltips D:
hey that's fine, you are doing plenty, and this is slow burner project, sadly everything else takes priority


Gorgeous stuff! I feel like you could step up the weathering on it a fair bit to stay in tune with the original
And maybe consider tinting the metal just slightly blue? Just to retain the original feel

maybe that's what this guy meant?
haha
definitely does feel different than the OG!
i did toy with making it more blue, but it felt strange since i added the missing components
still worth experimenting with im sure
I think with the blued steel of the original texture it makes the edge weathering show up better, adds more contrast.
That said, I don't think Micro Uzis typically have a blued finish, although yours is maybe a bit too flat.
yeah ive been looking for blue finish stuff, and i do see lots of cod camos
i also figured the 'isn't blue' aspect would cause some issues
its interesting too because i see many of their guns are just direct recreations
like... uzi is just straight up an uzi super accruate, same with steyr aug, all the pistols except the deagle
i think the mac10 and deagle were made by a different artist, and i dont think they were necessarily concious choices, at least when i look deeply at the files themselves
like the changes i plan for the revolvers are next to MINIMAl, same with the uzi and aug, they were so dead on, but the mac10 looks to me like someone said, quick, we need a mac10, just get something together before the next build
this and the deagle are probably the ones that will change the most, because im trying to make them actually look like their real life counter parts like the rest of the guns in the game
though i do understand i do that with risk 😄
also that flamethrower is something i think they kit bashed so i'll probably have to stick pretty close to what they had since it doesn't really exist in real life
I think IMI is probably busy right now, lol, doubt they have the bandwidth to go after random modders (/spicy chat)
there are no markings so i think i'll be ok
im very interested to see how some of the guns and the characters play out... i think that will be the are that has the biggest friction with observers
i already have seen someone say this is not going to be a good project because the lighting is more contrasted in the early shots
so im definitely going to be watching how reactions are to changes in general, people are going to very much have some reactions as i get into the props that were built weird or phoned in so to speak
Fuck 'em, lol. For my sanity, I made the decision to mostly ignore feedback from people unless they've directly contributed to the project.
Opinions, assholes, etc
Haha yeah I definitely love all the perspectives though, you guys have already steered some of my pieces for the better and given me great feedback in here.
Hopefully the world can heal from the mac 10 maybe being blue... maybe being gray in the release
Something I'd pay attention to as you're updating models is to keep track of the timeline. A lot of the weapons hitting the streets are going to be coming from police armouries, so when looking at references you'll mostly want to look at specific police variants of the guns.
yeah! i was looking at the 38 special and trying to match it with what model it probably was
and it seems like it's a detective/police variant of it, but sometimes it also looks like a long barreled version of a navy variant
also that aug model is definitely the older version so i have to make sure to stick to that
less rails, no MLOK systems etc, gotta go for the classic models
Another common thing is to have civilian variants that are converted to full auto. That's why the TEC-9 became so iconic, it was easy to convert.
So legal purchases get converted to illegal firearms with auto sears and high capacity magazines. If you want to add extra detail you can add some subtle material differences between parts that are aftermarket and parts that are stock.
interesting, i think the mac10 in this case is mainly used by the mafia guys... i don't even remember where you get the aug or the uzi for instance...
The Aug is used by the Society of Leopold, and I think the Uzi is late game too.
flying around SOL, they have augs, mac10s and hunting rifles
gotta stop myself from modeling an aug right now

I just realized I was calling the MAC-10 an Uzi, lol. That's what I get for trying to talk about things while at work. That said, there is an Uzi in the game, the Lassiter Killmatic, and you could probably tell a fun story with ita design by explicitly making it a converted model.
Oh, minor detail, but I think you're missing the button on the bottom rear of the receiver that extends the stock. Also the fire selector switch should have some bumps to catch the switch.

Did a little more reading on the MAC-10 and I was right, the one in the game is a converted civilian model, which is why it didn't have the stock and grip. It's also missing some other important surface details, but the lack of stock and grip are actually correct for what kind of weapon would be on the streets of LA at the time.
Funny story that's in the high poly. I just forgot to export the low poly.
Also today I took some more time and did some masks for imprints like the words and such on the side
said what i was thinking out loud
Case in point
I guess I'd encourage you to think of how to transform that into something that's more akin to feedback, something that's more actionable? I think you'll find there are a million ways to interpret something being "soulless", so maybe you could provide better context to how your feeling about the remastered piece?
give the old model a trigger
then leave it be
the #1 problem i have with vtm weapons isn't how they look
- the model on the left was clearly made in house with some sort of intended creative decision
curious about the phrase 'in house' here, does it feel like my version is not made by me when you view it?
100%
where... do you think it came from?
im a bit confused sorry

i def modeled it by hand using reference
csgo or some 3d modeller stock asset site was my assumption
ouch
well to be clear, i refuse to use stock assets, and ai stuff
i like to make things by hand
it's why i went to school for game dev and its why i got into games
They're both replicas of real life objects. What you see as "in-house decisions" are just replicating a real life gun.
The one in-game is based on a civilian semi-auto variant, the one Safemilk made is an older full-auto one.
kk but if i had the choice between the two i'd go with the old one still
the shitbox aesthetic i like more
I actually also agree for the reasons here
left looks like it was a shitty first smg which it is + brutal metal design making it looks awkard and violent to shoot
i guess im seeing a disconnect here, because i could just turn off the stock and fore attachment section and turn it blue, but i think you'd still dislike it for other various reasons

guessing this still doesn't fit what you are wanting

copying and flipping the front of the trigger guardto make a trigger on the old model
i guess this comes back to the 2 stages of remastering i'm talking about
-
is, bring int remix and lighting, relight and fix up some textures for it and tag things
this gets it running, looks pretty much identical it just has good lighting -
remaster individual assets, rebuild them (from scratch in my case) and replace them overall in the game
this is more of like... a remastrering of the actual full game and it's assets
version one we basically have the framework for it right now
like that's pretty much blocked in, and it would just be a matter of going through every scene and tagging textures
then fixing all albedos with emissive to not have the emissive in the alpha channel
like thats pretty much it
game is bare minimum remastered at that point
which is cool!
and catto basically has that up and running so if literally anyone wanted to contribute and push changes back and pull request them, that whole portion of the work could actually be open source crowd built

i think if its set up in those two stages then it kind of keeps it in like a sort of...
inoffensive
and more offensive
2 stages of work
it's also why i was advocating for having the framework be a separate moddb page that is like "Catto's Remaster Framework" and then other modders base it off of that
Maybe adding a little more surface wear to make it look less new? The lack of fire selector switch on this is interesting, too.
I was talking about the converted one in the picture I linked.
right but if your goal was to match with whats in the game, then techincally it does have a fire selector switch
just not on the w model
For sure. I think deviations from the exact model in game are fine, I just personally think it should still be a converted civilian model (no stock/grip, maybe a lack of fire selector) to fit that black market aesthetic and make it look less military FPS.
Not that the MAC-10 is a serious military weapon in any capacity, haha
well thats a mac11 as well
you can tell because the receiver is vertically shorter

just for posterity, here's the V model
Ah, true. Was looking more at the surface wear than the shape.
i grabbed the W model since it wasn't attached to a hand bone and floating at an odd angle the way the v models do
I do like the deviation from the blued steel, though, I think it was an odd choice in the original.
I very acutely remembering as a kid in highschool playing this and wondering why the mac10 and deagle looked so off, and how all the other guns look much closer, but at the time i was using all these same techniques and was still learning using a... 'student copy' of 3dsmax 7

like the uzi... i mean they just did actual photo collage with the actual uzi
all the other guns for the most part exluding the mac10 and the deagle do this, those two are built very differently, and not using photo collage techniques
it has been a mystery to me for many years
guessing a couple different artists did various guns
I think if you wanted to lean more into the shitbox aesthetic you could maybe add some spots of surface rust and a slight patina to it? Could also have some fun with modeling a homebrew foregrip that someone added to manage the recoil.

https://encrypted-tbn0.gstatic.com/images?q=tbn:ANd9GcTQdvmneaSoANP21doR_kWSGb6kz3dsXxJQtgdeQ9VEkA&s

i guess thats the friction point, i'm personally liking what i built, but i can see it's not going over well in general so im trying to figure out how to reconcile that
the other thing to is, it's used across the game for multiple groups, so it's doing double duty for well armed mobsters, society of leopold, and gang members
so getting something that is flexible enough to kind of reach to all those use cases was something i was trying to accomplish as well
Ah, that's true. Maybe the cleaner look is the call, then.
if mod layering works well or it gets a bit more functionality
i'd love to lean into doing like... replacements or variations
like imagine if you could say:
I want the original mac10, the clean one, or the dirty one, or the one with or without a stock
and you can kind of customize it a bit
so you load up the mod with the stuff you like and skip the stuff you dont
man im going to get executed in the street when we get to the characters though omg
im going to have to do some like.... pre therapy to prep for that
Apologies if I'm contributing to the problem here, haha. I'm just having fun nerding out about what guns would be in the setting.
haha no no it's all a discussion!
but i definitely am curious about how things will go when i get to the assets people care more and more about
like i have an in progress jeanette and i feel like im going to get lit up for it
so how do i navigate all that
an interesting question i dont have an answer to
I stand by this, tbh. Make what you want to make, and if people can provide actually constructive feedback that's great, otherwise ignore the hate.
Tried working more on that wood texture last night and I think I'm making some progress. Converting SD tutorials to InstaMAT is a process, since every single node works slightly differently.
oooh you have any progress shots?
Also figured out that issue with my bake, turns out it's just an inaccuracy in the preview renderer and it looks fine in-game. My bake did have an edge bevel around the outside for some reason so I had to fix that, but other than that it's looking a lot better.
I can drop some tonight when I'm back at my computer. Feels bad struggling with literally one texture for weeks and you're knocking out entire fully-textured models, lol.
dude dont even sweat that, i've been doing this since i was like 13, ive got a process
you have been kicking ass
like how fast you've been picking this up is insane
im pretty envious of how quickly you are learning 😄
Oh, question: I feel like the displacement in the paneling comes out looking too shallow in the final product, would passing the heightmap through a node that increases the contrast make it look deeper? I'm happy with my original model.
Since it functions by recessing, I have the highest points on the paneling as white, with the recesses somewhere in the gray.
yeah if you push those grays down darker it should give you a wider range of depth
but you could also just increase the inset value of the material in remix too first and test it that way
I can't do that because the bricks have a value that makes them look good. I'm starting with my existing brick material and then overriding part of it with the paneling.
gotcha, then yes, push the dark values darker to deepen the inset
Would a Levels node be the best tool for that?
yeah you could do a levels node
histogram scan might also work
but thats more for sampling values that already exist
so if you dont have darker darks you cant really sample them i think
so histogram scan might not actually be that good for it

yeah!
if i were to think about where i'd take it, i'd say, just very faintly add in the wood grain to the roughness map and get some nice variation in there, and add the board separations into the height and the normal (if they are, punch that up way more)
then i'd layer on some slight VERY slight staining variations and grunge on the roughness as well
so shallow angles and lighting makes some nice shapes on it and nice variations
overall the boards look great and the color varation in the albedo looks real nice too
I left out the board gaps and grain intentionally on this one, I was referencing some images of wainscoting where multiple boards were combined together to form larger panels and it looked like they gap filled with the laminate and smoothed it. I'll see what I can do about adding random variation with grunge, though, that sounds good to me.

Here's where I'm at on the final with edge wear added
Left out board lines entirely since it looked weird on the paneling
@amber atlas How's this look?

oh yeah that makes sense on leaving the board gaps out, in that case, im not sure how much the boards themselves should be visible overal, like the wood panels should probably be single sheets?
not sure on that though
i'd push the contrast on the roughness pretty hard actually
overall that's looking nice
Whoops, actually forgot to plug it in to the roughness

There

Here's one of the images I was referencing, you can see there are boards in the larger panel but it's been made into one large smooth surface
ok yeah that makes sense then, i was picturing them as one piece, good ref!
Alright, final step was to use an Ambient Occlusion map to add some dust to the recesses, I think it's pretty much done! This texture covers like 50% of the map, so it feels good to have it done.

Very nice I think you sold the surfaces of that panels really well
Would love to see it in the map!
@amber atlas


I wasn't kidding when I said it's used on like half of the scene, haha. The paneling from the wall gets used on the bar and booths. Pretty clever texture optimization, honestly.
nice, really catches the light in that second shot
wainscoting
Yup
Floor tiles done

I've been wanting to contribute some models and when time allows I'll hopefully be able to work with your idea of individually remastering assets.
But to add my own two cents as someone who never really played the game initially.
I personally really liked the initial approach you had to the weapon design.
Not sure how the first one has more "soul" as that twitter post put it
Woah some really good progress, I was away for a few days, I am back now
Not me getting annoyed over a 20 year old misplaced texture

This was just a basic test to see if my shapes matched the geometry. Turns out the devs screwed up and parts of it are put in the wrong place.
they are EVERYWHERE
With the flat textures it's not very noticable, but holy hell it really shows once you add in displacement
yeah :/
I wonder how much of this we could fix in the level editor? That would be a whole additional pass after we've finished, though.
should be super doable in theory, BUT
how will that interact with all the changes in the UP and UP+
if there are map fixes in there we'd overwrite them wholesale
Yeah, I think how that would work is we would have to rebuild every time UP updates.
which is... not great
I don't think it would be from scratch, you would just have to release a version that incorporates the changes. Relatively normal compatibility patch stuff.
if evey UP map is released with it's actual hammer editor file it wouldn't be too bad, but otherwise you'd have to go in and find source files for each map, then compare with UP, and that's only including visual fixes that might or might not be there, if there are any gameplay fixes we'd have no idea what they were
but then we dont have parity with UP after that point
there is no amount of file diffing at all with source maps so its either one file or the other
I'm not super clear on the specifics, but I think the editor basically decompiles the game however you have it installed? So since the editor comes with UP, the map file you get out has all the UP changes integrated.
I think.
you mean the hammer editor?
Specifically the modified hammer editor that was built for VTMB, yeah
hammer editor doesn't have any decompiling functionality, but i do think there might be a decompiling tool in the sdk alongside it
Yeah, that's what I mean. You don't have anything to edit until you decompile the game.
yeah there is a bsp decompiler in there as well as bsp editor
No clue how versioning would work, though, I know essentially nothing about Hammer other than that I hate using it every time I've had the urge to try and learn.
there is no versioning, and i dont think there is any reasonable way to merge changes using git or anything like that
its just... vmf file is a vmf file
So if you built it for UP 9.X.X then there's basically no way to update it to UP 10.X.X without building from scratch on re decompiled game?
im saying from version to version of an individual map, im not sure about if maps are compatible moving forward to a new compilation of the actual mod binary
but
i dont know what UP changes in terms of the original binary in general
or how large the changes are in between updates
or if wesp has to recompile every map or if it has forward compatibility
mainly im just saying that if you fixed that texture issue and then the next UP patch comes out and fixes a quest or something in there, you'd have no reasonable way to merge those changes
Yeah. wesp has integrated fixes from other people into UP before, but I have no idea what that process looks like.
So if we went through and corrected texture alignment we could maybe get that merged in.
yeah, i think it has to happen up stream there if we want to maintain partiy/compatibility
For now, though, I guess we can just deal with alignment issues
Since it requires level editing to fix
yeah, in the end if we do determine a path, doing those texture fixes is super easy
you just use the little texture alignment controls
set position/rotation etc
i certainly don't miss it 😄
but i can see those controls in my sleep even to this day
the latest build of dxvk-remix allows us to run in fullscreen I tested it from a build, it should make it onto the next release of the rtx remix runtime
nice
small caviat is that you need to add -fullscreen as a launch argument if you ever ran it with -window previously, no clue why
hi guys
Sup duuudee
hello 
thanks for this project ❤️ i love u guys ❤️
past on youtube, guys masterpice of vampire game coming thanks for great job (i from brazil sorry for limited inglish
I am European Portuguese, if you want to talk in Portuguese feel free to Direct message me, I understand it 👍
and progress has been slow, I can do some more soon, but I have been busy lately
I have a TON of stuff I've been putting in the game... I just haven't been posting
but I'm almost done with all the models in the actual apartments
Monitor, PC Tower, Mouse, Keyboard, Both Letters on the desk, folding table, orange chair, mailboxes etc.
others
finishing the hallway plant now
Also snuck in a few texture tests as well
like the threshold metal barrier
Hell yeah, nice. I finished the catwalks and have a good sense of how to make metal materials now (the way they interact with RT looks very different from the rasterized previews in my program). Currently working on some glass and that's a whole mess since Remix expects transparent materials to be discrete from opaque ones and that obviously isn't how any old games did anything.
yeah the glass setup is... tough
i have a plan for windows for the most part i think?
but the specific glass on the confession floor presents a pretty big issue
i have SOME early thoughts on how to tackle, but i'm not sure how that would work until i did some tests myself
as far as santamonica goes, as well as the apartments, most of the glass is inset into windows, so i may actually be able to include it as a discrete model as part of the frame, then put the 'interior' behind it on the texture
but im not sure yet
trying not to let myself get distracted by that 😄
When I get home I can send some screenshots of the progress I've made. I think I can get away with treating it like an opaque texture with alpha masking, but I need to do more testing on what opacity looks good.
there are some oddities with some settings i found in the actual remix toolpanel in game that really changes the way that particular technique displays, in one case it looked okay but broke other cases, but it could be cases that are fixed by other means
Hello, sorry for the tactless question, do you manually create 3D models yourself?
its a weird ecosystem
yeah
everything i do i do from scratch
using the original models as guides
so i set the old low poly models in blender and then get ref of objects in the world that represent what the low res textures were sort of trying to communicate and use that to sort of reason about what i could do to remodel them
so then i do a hi poly, and a low poly, then bake and texture in toolbag 4
the plant is a PAIN because foliage is hard as hell but i think im getting an ok result
I think the issue with using alpha settings is that it won't have proper reflections/diffraction/etc. the way glass should, but I'm going to see if I can get something approximate to start. It gets used on the booth at the entrance too so I'd like to avoid creating a model and stick to material replacement.
i thought the hl2 group had a custom shader for transparency, so it might be possible to write our own
however difficult
How cool, This is incredible, After working with a blender, I feel killed and you are doing an even more difficult job than me, my respect to you 🔥
Just years of practice! Blender is great so if you stick with it, I'm positive you'll kick ass too!
I do appreciate the amount of detail Nvidia's RT simulation has for transparent surfaces. Honestly never thought I'd actually get to apply that optics course I took in uni, lol
haha excellent
i was hoping that we could do some fun stuff with newtons rings but that's not in there D:
Yeah, I think for simplicity (and computation requirements) all of their settings assume parallel planes.
toolbag 4 has a fast aprox fake version of it that lets you change film thikness and line frequency and its so snazzy, but i don't even know how to begin with that in terms of hand writing a shader
Ooh, that sounds way cool.
Bit of a tangent, but I've been thinking about all the windows in the hubs. I think we can get away with faking those using opaque textures and emissives like the original game did, since there's no modelled interiors that will need transparency settings. Thankfully there's very little actually transparent glass in the game.
One issue I have run into is that I'm pretty sure the Source engine broken glass uses a shader.
yeah that's part of what i was saying, BUT I have a test I want to do where I actually add a pane of glass and whatever bars etc to the frame model, then use the texture underneath to simulate inside the window
also yeah i think you're right on the broken glass part
Hmm, yeah, that could be cool, but is also significantly more work than just basic material replacement. It's adding an additional step of creating a model to every single building texture in the game.
only for the ones that already have frames that are models, and its just adding one or two extra details to those, then removing those details on the corresponding surface textures for underneath
since the underneath is a brush

